一、自定义状态栏
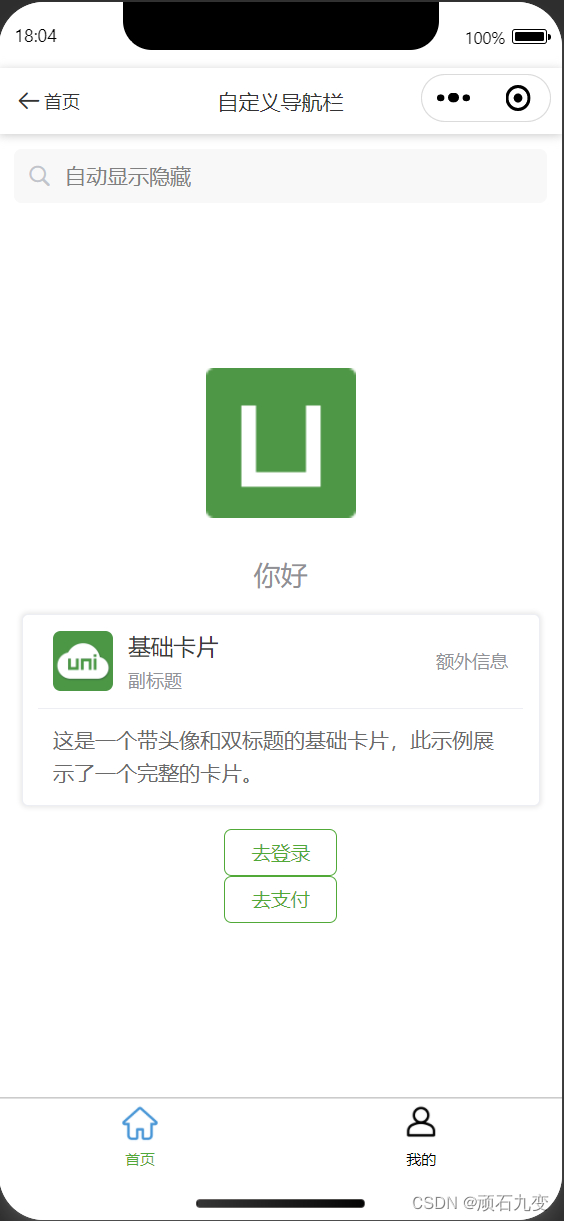
可以设置某个页面的状态栏自定义或者全局状态栏自定义。
这里以首页状态栏为例。
1)pages.json 中配置"navigationStyle": "custom",代码如下:
{
	"pages": [
		{
			"path": "pages/index/index",
			"style": {
				"navigationStyle": "custom",
				"navigationBarTitleText": "首页"
			}
		}
	],

	"globalStyle": {
		// 如果要配置全局自定义状态就是下面这行代码
		// "navigationStyle": "custom"
		//...
	}
}
2)增加自定义状态栏组件CustomNavbar.vue
因每台手机的顶部预留高度不一样,需要通过方法uni.getSystemInfoSync() 获取顶部安全区域高度,然后通过样式预留出来。
下面代码通过设置样式 paddingTop: safeAreaInsets?.top + 'px'预留顶部安全高度
<template>
	<view :style="{ paddingTop: safeAreaInsets?.top + 'px' }">
		<uni-nav-bar shadow :border="false" title="自定义导航栏" leftIcon="arrow-left" leftText="首页">
		</uni-nav-bar>
	</view>
	<uni-search-bar radius="5" placeholder="自动显示隐藏" clearButton="auto" cancelButton="none" @confirm="search" />
</template>

<script setup lang="ts">
const { safeAreaInsets } = uni.getSystemInfoSync()
console.log('safeAreaInsets', safeAreaInsets);

const search = (res: any) => {
	uni.showToast({
		title: '搜索:' + res.value,
		icon: 'none'
	});

}
</script>

<style scoped>
</style>
3)在首页vue页面中使用组件CustomNavbar.vue
<template>
  <custom-navbar/>
  <view class="content">
    <!-- 其他内容 -->
  </view>
</template>

<script setup lang="ts">
import { ref } from 'vue'
import CustomNavbar from '../components/CustomNavbar.vue';
// ...... //
</script>

![解决Error in rawToChar(block[seq_len(ns)]) :](https://img-blog.csdnimg.cn/e3d61a20f58b4f07990207af4f6b683a.png)

![红队专题-从零开始VC++远程控制软件RAT-C/S-[2]界面编写及上线](https://img-blog.csdnimg.cn/dadfc297ab734c58959e6c6676e61948.png)
