简单封装高德amap
只要涉及到地图开发,我们都需要依赖地图工具,常见的有谷歌地图、百度地图、高德地图。我们的项目里依赖高德地图JS API 2.0。
npm i @amap/amap-jsapi-loader -s 在项目里,我们需要一个预加载好的地图loader方便我们随调随用。这里简单封装一下。
// amap.js

import AMapLoader from '@amap/amap-jsapi-loader';
import { promiseLock } from '@triascloud/utils';
/**
 * 高德地图初始化工具
 */
class AMapHelper {
  static getAMap = window.AMap
    ? window.AMap
    : promiseLock(AMapHelper.setLoader, {
        keyGenerator: () => 'AMapHelper',
        forever: true,
        global: true,
      });
  static async setLoader() {
    return await AMapLoader.load({
      key: process.env.VUE_APP_AMAP_API_KEY,
      version: '2.0',
      plugins: [
        'AMap.Geocoder',
        'AMap.Geolocation',
        'AMap.PlaceSearch',
        'AMap.CitySearch',
        'AMap.AutoComplete',
        'AMap.Scale',
        'AMap.ToolBar',
        'AMap.MapType',
        'AMap.DistrictSearch',
      ],
      AMapUI: {
        plugins: ['misc/PositionPicker'],
      },
    });
  }
}
export default AMapHelper;
这里用class并不是让我们去生成AMapHelper实例,就算你生成实例,你也无法调用里面的static方法(静态方法无法被实例调用)。只能通过AMapHelper .getAMap 直接调用。为什么这么写呢?一是无需要实例化即可调用方法,节约了内存空间。二是无法被实例继承,也不会收到实例数据影响。保证了隐秘和私密性。
当你定义的方法不需要通过 this 访问实例,换句话说并不依赖于具体的实例,并且和类强相关时,可以封装成类的静态方法。当然这个方法可以直接定义在类外面,只不过封装到类里面更符合开闭原则,直接点的好处就是通过类名访问静态方法不会污染外层环境
像Math.max Date.now
如果想深入了解,请看我这篇推文
ES6 class类的静态方法static有什么用_AI3D_WebEngineer的博客-CSDN博客![]() https://blog.csdn.net/weixin_42274805/article/details/133636906?csdn_share_tail=%7B%22type%22%3A%22blog%22%2C%22rType%22%3A%22article%22%2C%22rId%22%3A%22133636906%22%2C%22source%22%3A%22weixin_42274805%22%7D
https://blog.csdn.net/weixin_42274805/article/details/133636906?csdn_share_tail=%7B%22type%22%3A%22blog%22%2C%22rType%22%3A%22article%22%2C%22rId%22%3A%22133636906%22%2C%22source%22%3A%22weixin_42274805%22%7D
这里的promiseLock是一个缓存promise结果的方法,我会在另外一篇推文里讲。这里知道是什么意思就行了。
这里产出一个预加载了秘钥、版本、插件等信息的loader对象,并下放到全局window里方便调取。
调用示例:
// xxx.vue

import AMapHelper from '@/utils/amap';

...

created() {
  if (!window.AMap) {
      await AMapHelper.getAMap();
  }
  this.aMapGeocoder = new window.AMap.Geocoder({
      // 批量查询
      batch: true,
  });
}

getCity() {
     const citySearch = new window.AMap.CitySearch();
     citySearch.getLocalCity((status, result) => {
        if (status === 'complete' && result.info === 'OK') {
          // 查询成功,result即为当前所在城市信息
          resolve(result);
        }
    });
}
方案一:echarts-extension-amap
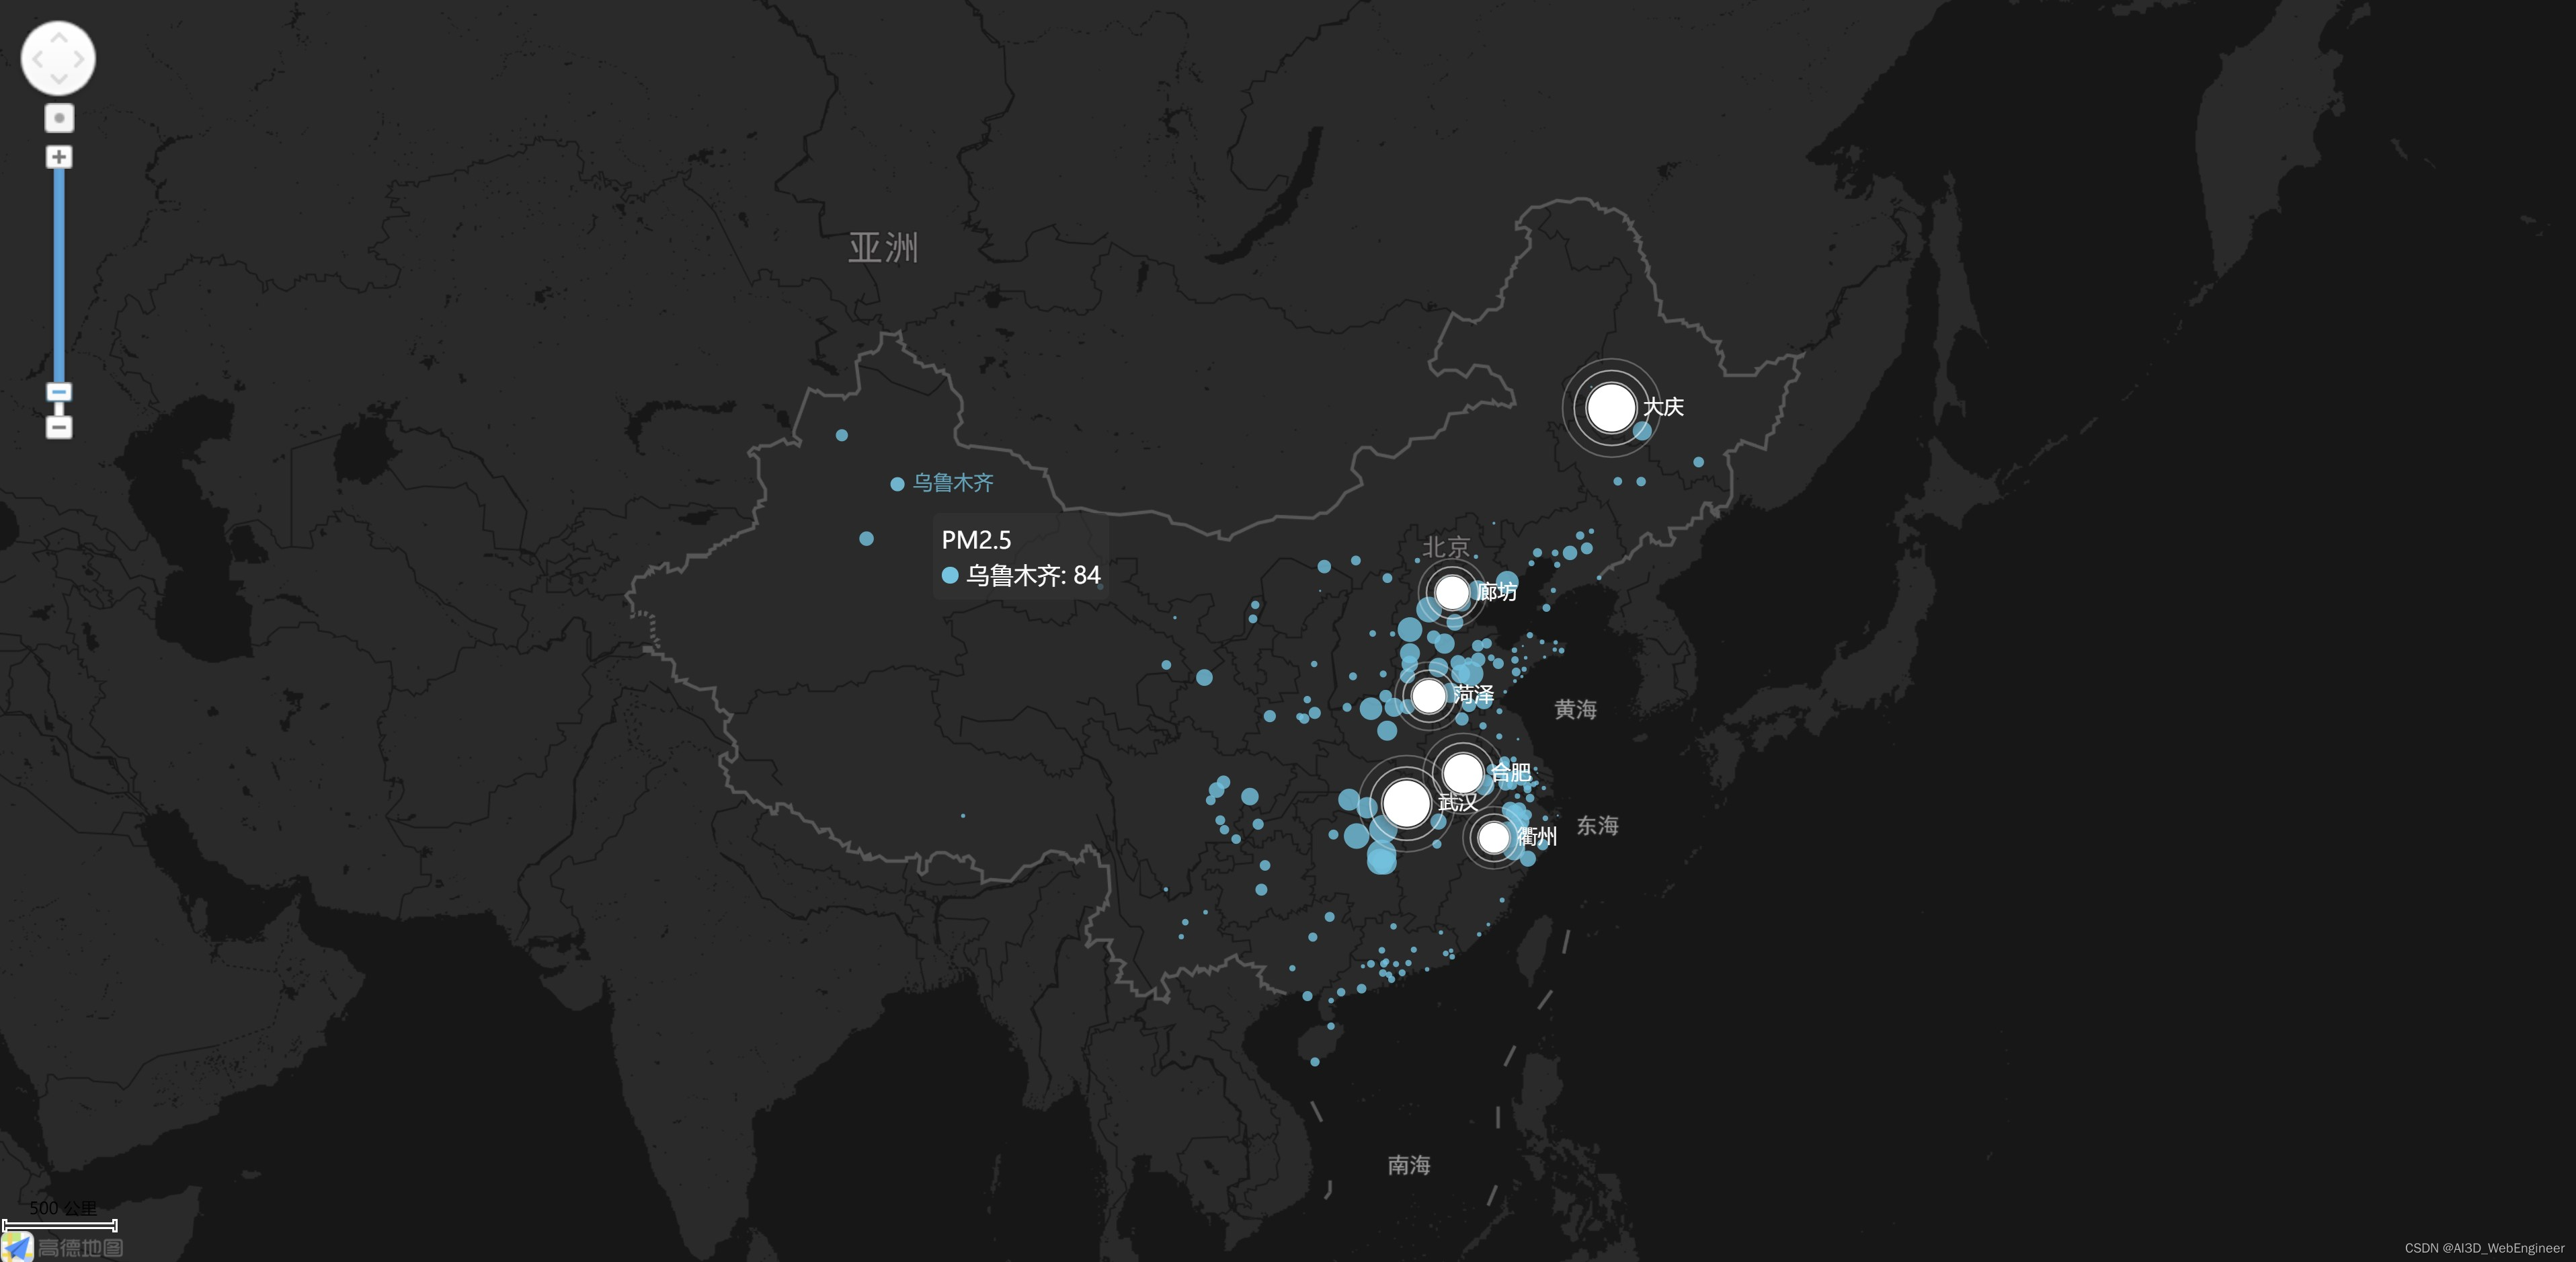
这是一个Apache ECharts 高德地图扩展。能够抓取高德地图作为echarts的画布。
npm install echarts-extension-amap –save有了这个扩展之后,我们可以建立高德地图作为坐标系
  series:[
    {
      name: "PM2.5",
      type: "scatter",
      coordinateSystem: "amap",
      ...
    }
]
引用:
import * as echarts from "echarts";
import "echarts-extension-amap";
引入后就可以直接使用:
var chart = echarts.init(document.getElementById("echarts-amap"));
chart.setOption(option);
// 从ECharts实例中取到高德地图组件实例
var amap = chart.getModel().getComponent('amap').getAMap();
// 下边就可以按照高德官方API随意调用了
amap.addControl(new AMap.Scale());
amap.addControl(new AMap.ToolBar());
剩下的工作就是echarts的这个option该怎么写了,具体可以看插件文档。
echarts-extension-amap/README.zh-CN.md at master · plainheart/echarts-extension-amap · GitHub![]() https://github.com/plainheart/echarts-extension-amap/blob/master/README.zh-CN.md 缺点:
https://github.com/plainheart/echarts-extension-amap/blob/master/README.zh-CN.md 缺点:
依赖第三方插件
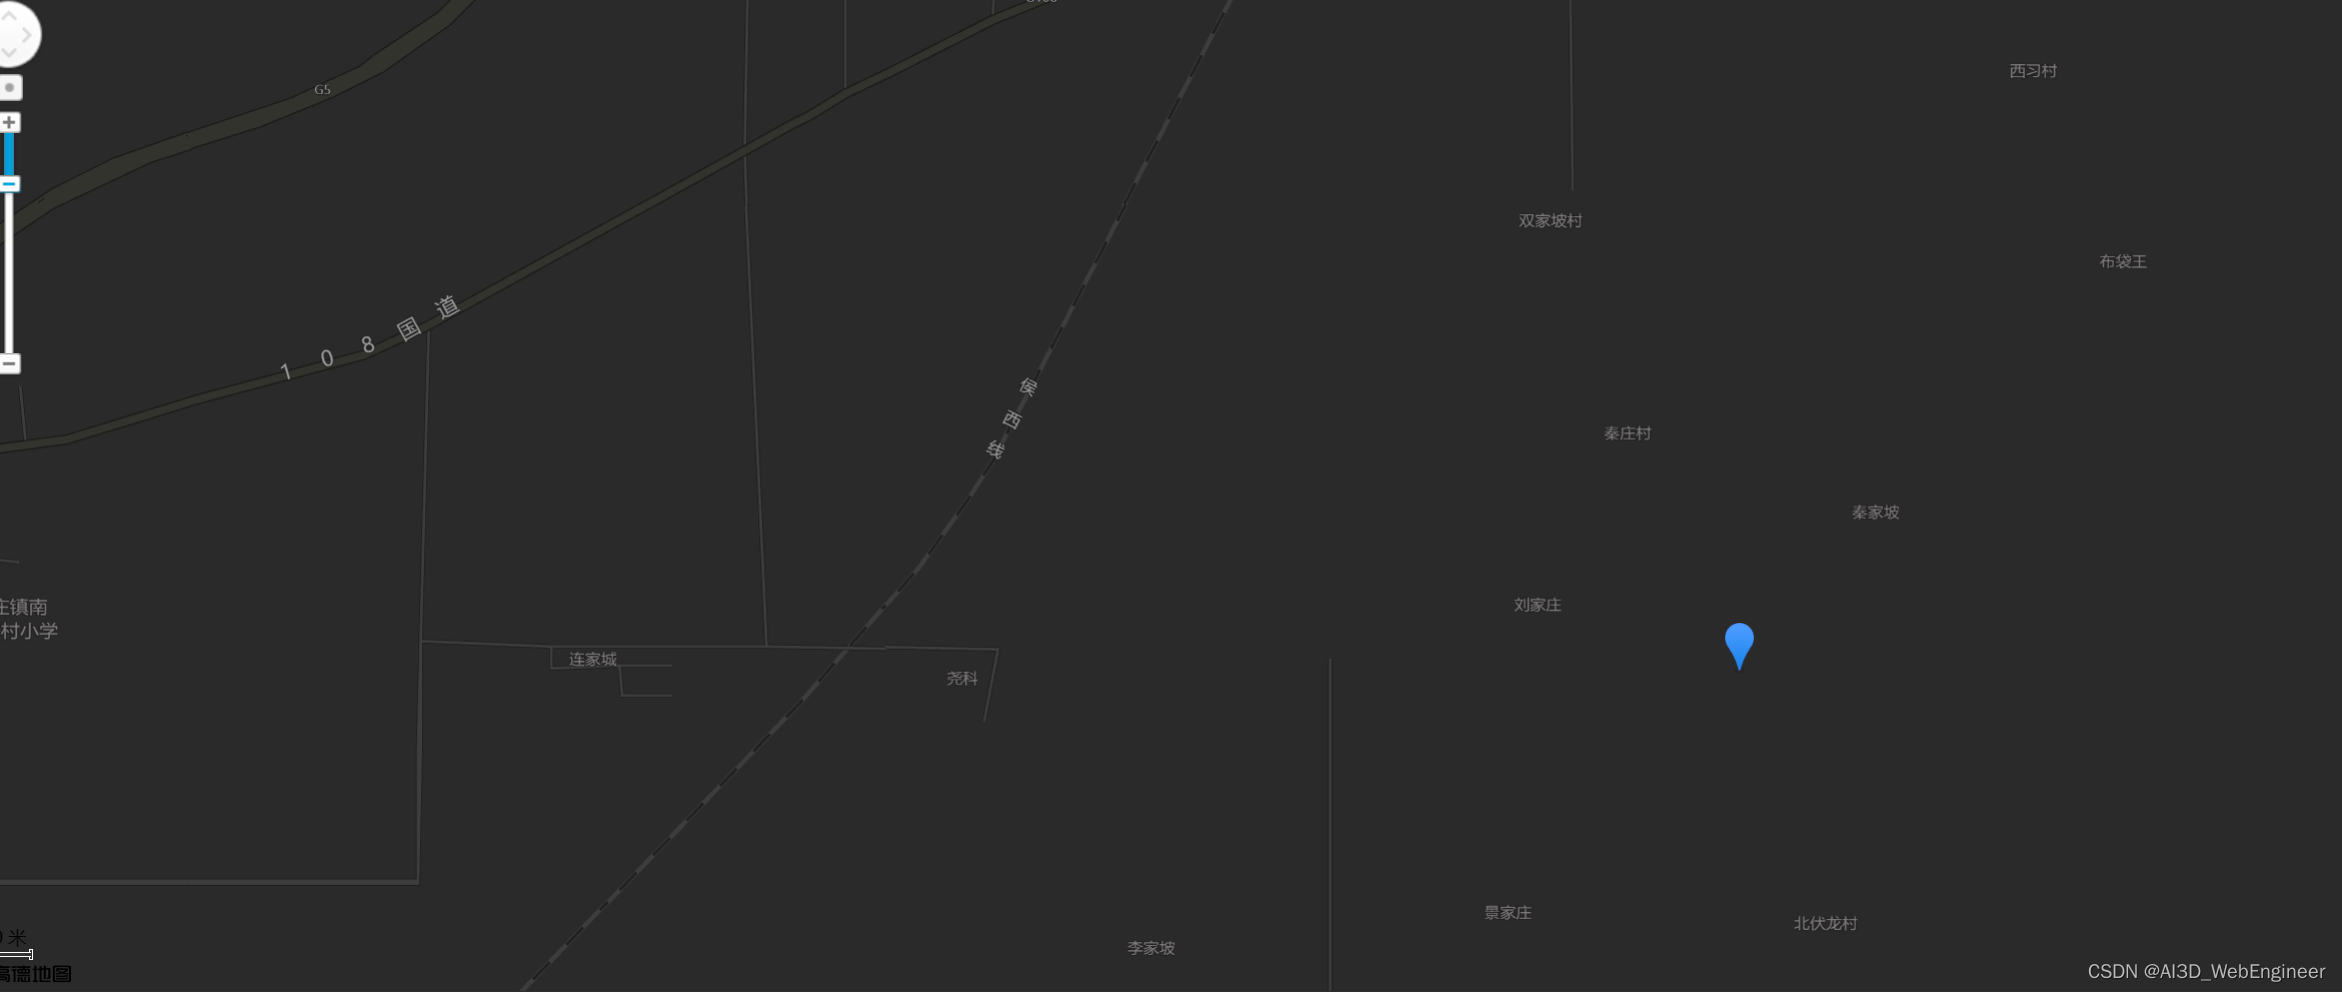
放大/下钻后整个画布冗余信息很多,比如街道、地标、高架、地貌等等,如果我们业务场景不需要关注这些信息,只需要大概到区级的统计。那么我们最好还是用第二种方法:
方案二:GEO绘图
介绍
Echarts本身自带地理坐标系组件。并且支持geoJSON和SVG引入第三方资源。
GeoJSON 是一种数据格式。它被用来描述地理数据。
GeoJSON是一种对各种地理数据结构进行编码的格式。
GeoJSON对象可以表示几何(Geometry)、特征(Feature)或者特征集合
GeoJSON支持下面几何类型:点、线、面、多点、多线、多面和几何集合。
GeoJSON里的特征包含一个几何对象和其他属性,特征集合表示一系列特征。
一个完整的GeoJSON数据结构可以称为一个对象。在GeoJSON里,对象由名/值对–也称作成员的集合组成。
总而言之,GeoJSON是图形和描述的集合。
就算是中国地图并不是一成不变的。行政区域时有改变,所以我推荐用geoJSON。
如果预算不足,我们也可以直接白嫖阿里的GEO数据
DataV.GeoAtlas地理小工具系列 (aliyun.com)![]() http://datav.aliyun.com/portal/school/atlas/area_selector 缺点是需要定期维护更新。
http://datav.aliyun.com/portal/school/atlas/area_selector 缺点是需要定期维护更新。
下面讲讲我在项目中怎么用geoJSON去实现需求
项目准备
我把抓取下来的GEO数据(包括了中国、各省、各市、各区),生成以adCode命名的JSON保存下来。高德地图的adcode就是区域编号。
类似于这样

写个调取接口方便调取
// chart.js

export const getMapGeo = promiseLock(
  mapSrc =>
    uploadService.getHost().then(ossHost =>
      request(`${ossHost}/common/map/${mapSrc}.json`, {
        method: 'GET',
      }),
    ),
  {
    keyGenerator: mapSrc => mapSrc,
    forever: true,
  },
);
需求简述
以中国地图展示数据分布,同时支持下钻到省、市,并有按钮可以返回。
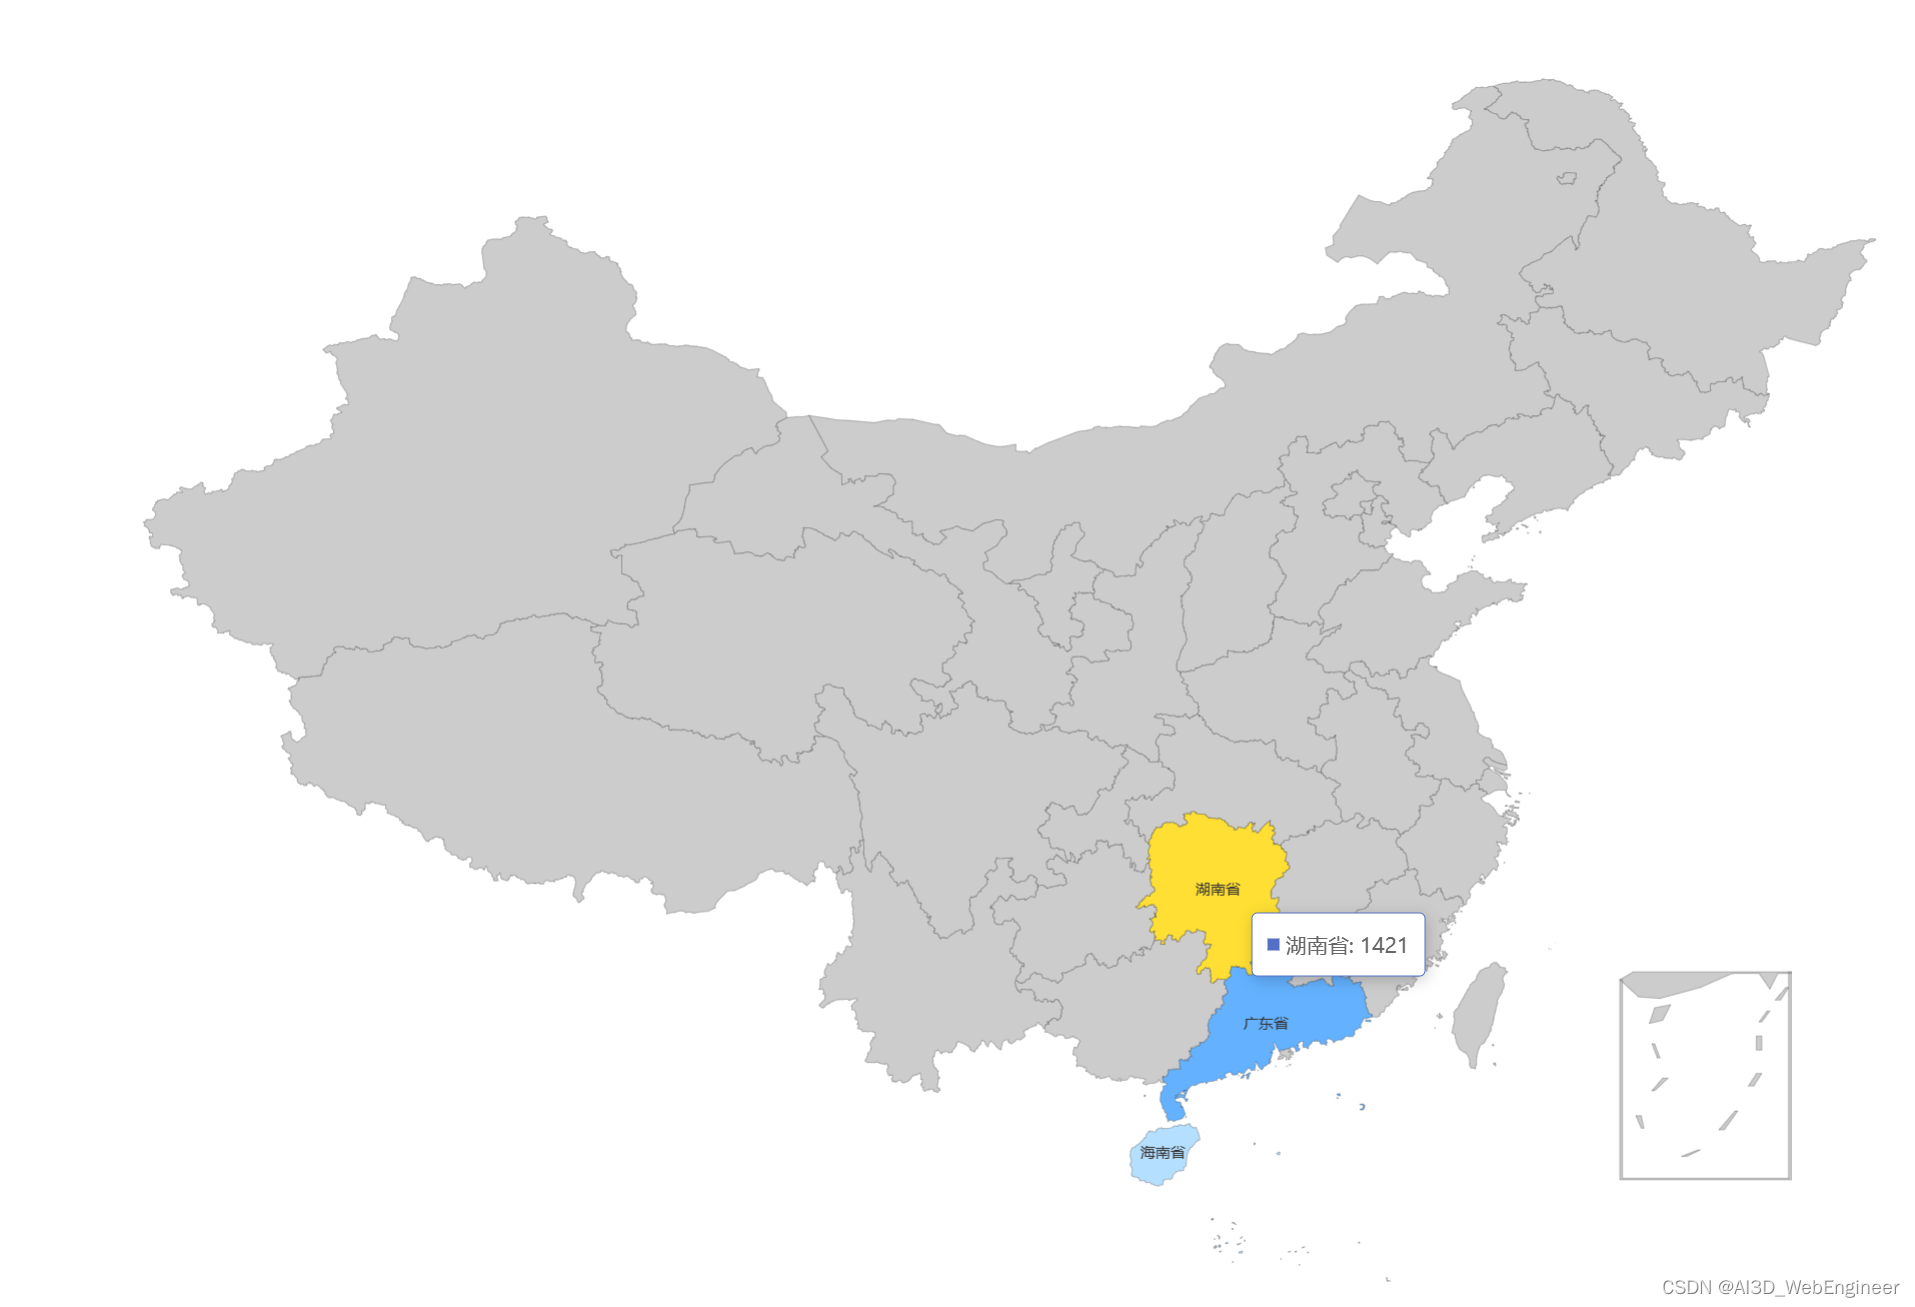
下钻:
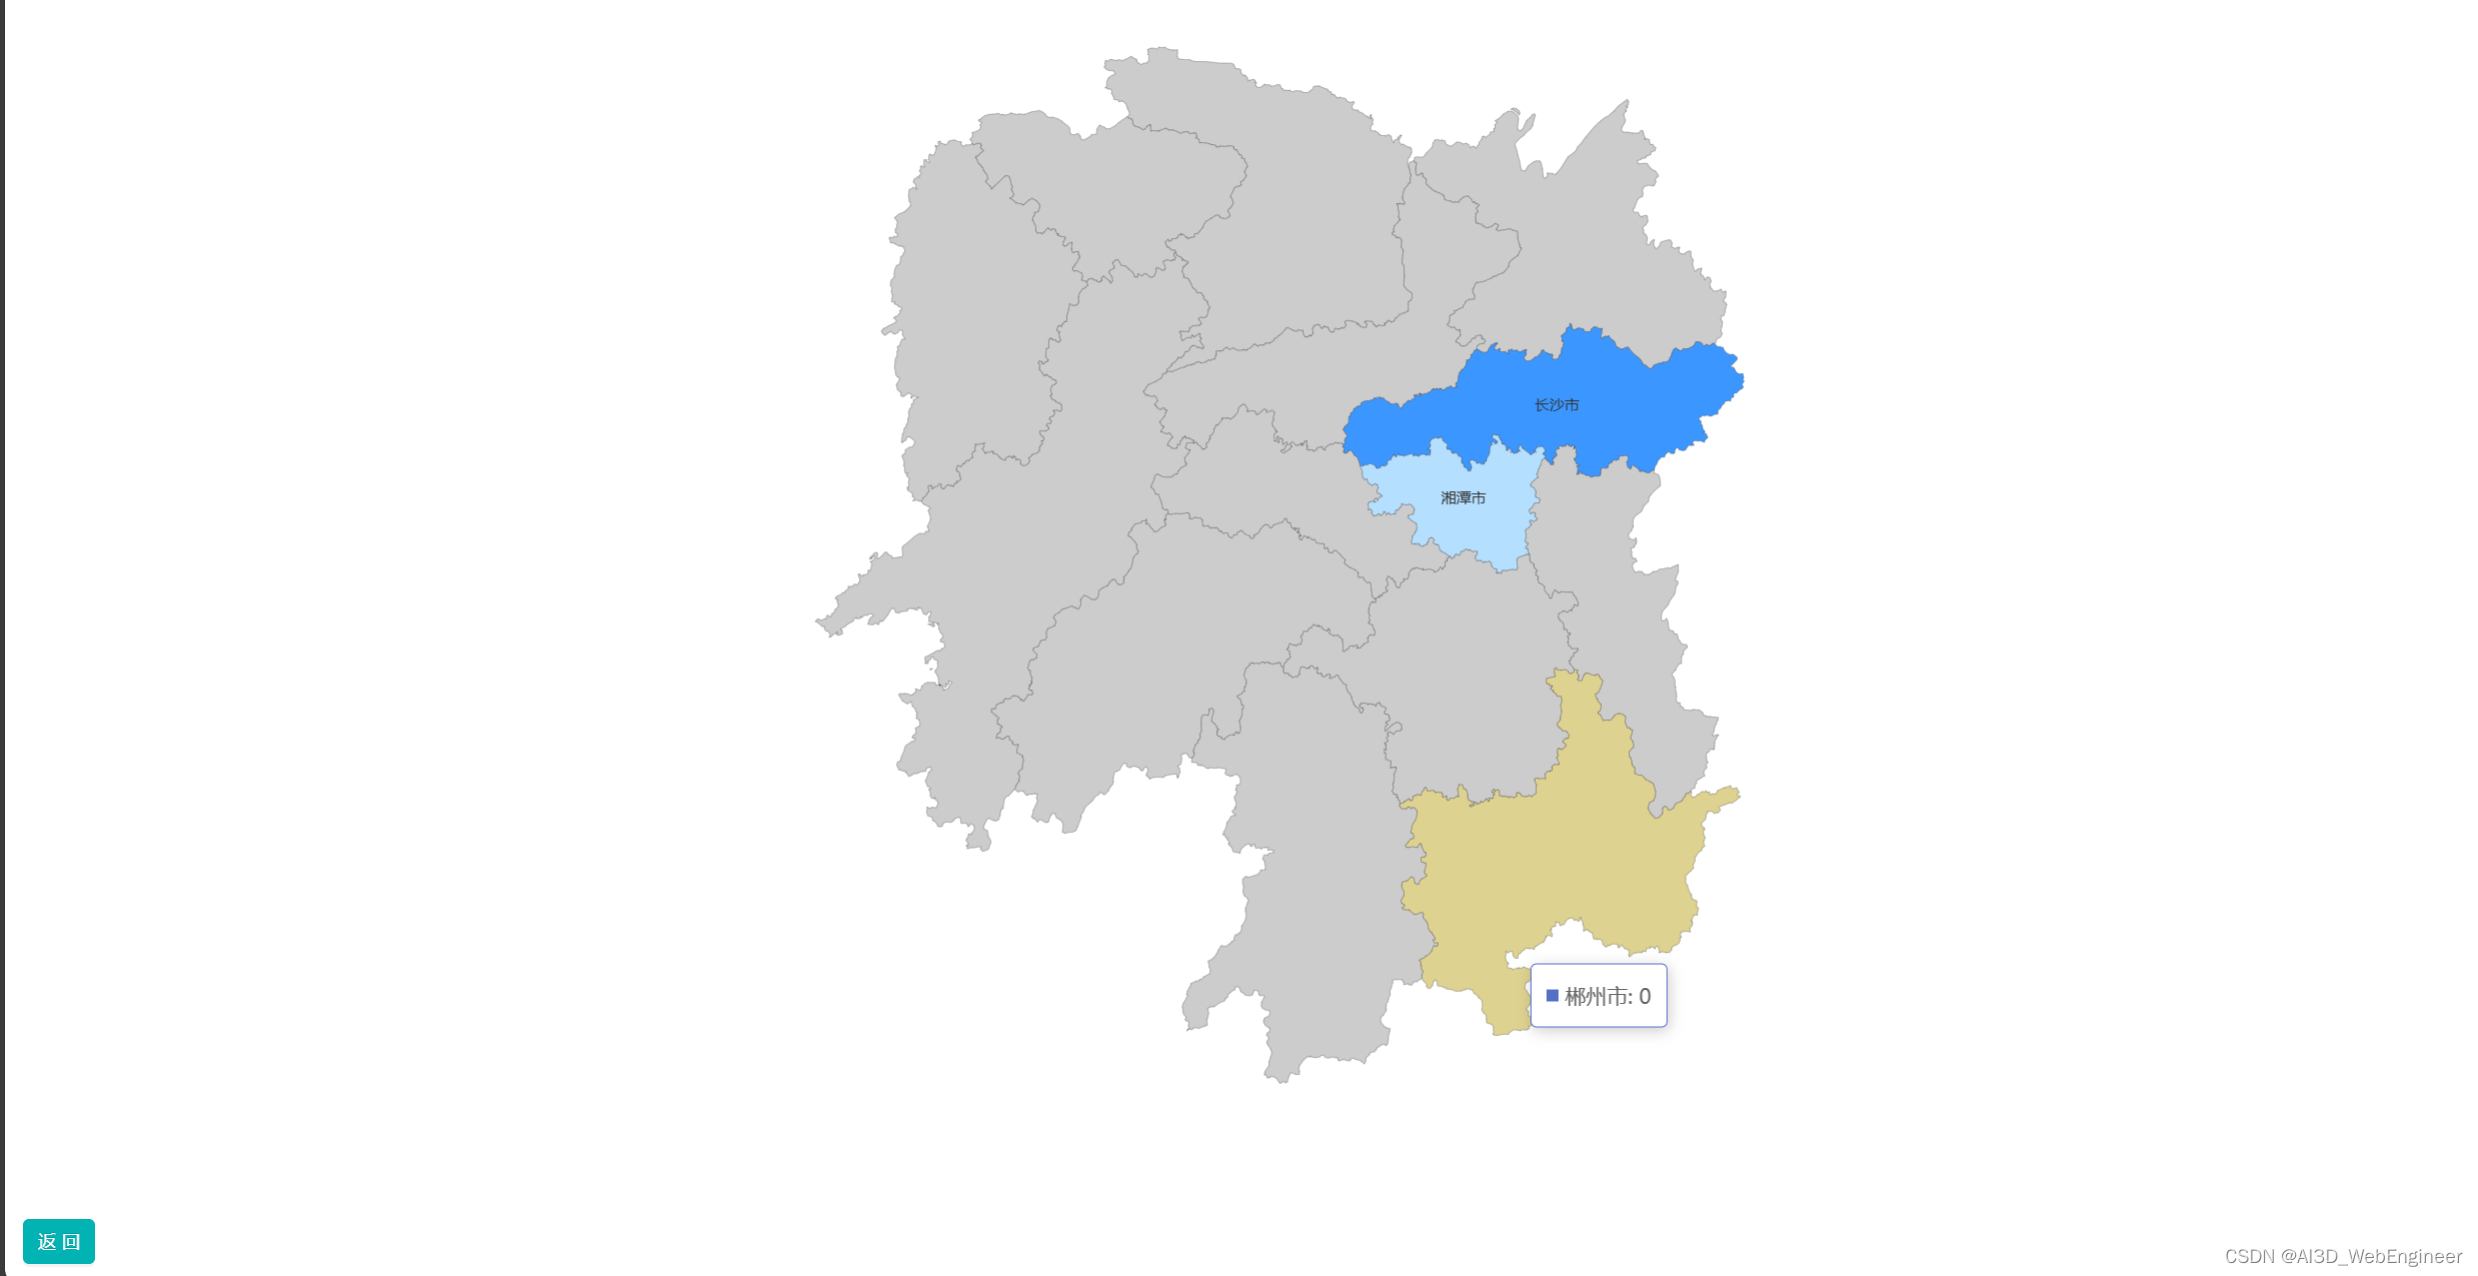
初始化
import * as echarts from 'echarts';

...

  mounted() {
    const chartDom = this.$refs.chartDom;
    this.myChart = echarts.init(chartDom);
    this.initMap();
  }

  async initMap() {
    // 先调用封装的高德JS API loader
    await AMapHelper.getAMap();
    // 赋予组件内查询地理编码能力
    this.aMapGeocoder = new window.AMap.Geocoder({
      // 支持批量查询
      batch: true,
    });
    // 注册中国地图
    await echarts.registerMap('china', {
      name: 'china',
      level: 'country',
      // 从接口抓取china的GEOJSON
      geo: await getMapGeo('china'),
    });
  }
因为业务需求需要下钻跟返回,所以我们需要像导航栏一样记录用户前进的路径。
 async initMap() {
    // 获取中国GEO
    this.mapHistory.push({
      name: 'china',
      level: 'country',
      geo: await getMapGeo('china'),
    });
    ...
    await echarts.registerMap('china', this.currentMap.geo);
 }
这样初始化就完成了。此时echarts已经加载了第三方的China.json。"导航栏"已经记录了第一个全国地图的锚点。
紧接着我们去调取数据。也就是地图上那些一个个点(这里以散点地图为例)的数据。拿到数据后,我们需要生成一张数据映射表。
处理数据
把数据的地理信息萃取出来,生成这么一个数组
[
    ['广东省','江西省'...],
    ['广东省广州市','江西省南昌市'...],
    ['广东省广州市天河区','江西省南昌市东湖区'...]
]
这里可以看到下标0都是省级单位,下标1是市级单位,下标2是区级单位。
紧接着我们逐级去查询它们的地理编码数据。因为上面我们已经开启了batch批量查询,所以我们直接调用getLocationAPI(mapRecord[0])、getLocationAPI(mapRecord[1])、getLocationAPI(mapRecord[2])...
 // 调取高德API查询批量地理编码
  getLocationAPI(dataArr) {
    if (dataArr.length <= 10) {
      return new Promise((resolve, reject) => {
        this.aMapGeocoder.getLocation(dataArr, (status, result) => {
          if (status === 'error') {
            reject();
          } else {
            resolve(result);
          }
        });
      });
    }
}
虽然是批量查询,但是当数量超过10,高德的接口就限制了(要收费才支持更多每次查询量)。那么我的方法是:
...
else {
      const promiseArr = [];
      // 当前指针
      let getIndex = 0;
      // 终点指针
      const finalIndex = dataArr.length - 1;
      dataArr.forEach((item, index) => {
        if (index > 1 && index % 10 === 0) {
          const searchArr = dataArr.filter(
            (t, i) => getIndex <= i && i < index,
          );
          promiseArr.push(
            new Promise((resolve, reject) => {
              this.aMapGeocoder.getLocation(searchArr, (status, result) => {
                if (status === 'error') {
                  reject();
                } else {
                  resolve(result);
                }
              });
            }),
          );
          getIndex = index;
        } else if (index === finalIndex) {
          const searchArr = dataArr.filter(
            (t, i) => getIndex <= i && i <= index,
          );
          promiseArr.push(
            new Promise((resolve, reject) => {
              this.aMapGeocoder.getLocation(searchArr, (status, result) => {
                if (status === 'error') {
                  reject();
                } else {
                  resolve(result);
                }
              });
            }),
          );
        }
      });
      return Promise.all(promiseArr).then(result => {
        let geocodes = [];
        result.forEach(item => (geocodes = geocodes.concat(item.geocodes)));
        return { geocodes };
      });
    }
把查询数据切割成每十个一组,然后用promise.all来获取全部结果。
获得结果后我用递归生成树状的映射表如下:
this.mapTable = {
    广东省: {
         name: '广东省',
         children: {
             广州市: {
                name: '广州市',
                value:20,
                location: {xx,xx}
                children: {
                    '天河区': {
                         name: '广州市',
                         value:10,
                         location: {xx,xx},
                         children: {}
                    }
                }
            }
         },
         value: 10,
         location: { 30, l10 }, // 高德地图返回的经纬度
    },
    江西省: {
        ...
    }

}
生成这张映射表是为了方便我们快速定位到锚点的层级数据和自身数据。
看一下散点地图echarts的配置
{
...,
series: [
       {
            name: '数据',
            type: 'scatter',
            coordinateSystem: 'geo',
            data: []
            },
          },
        ],

],
geo: {
          map: 'china',
          show: true,
          roam: true,
          aspectScale: 1,
          zoom: 1.5,
          center: [106.230909, 38.487193],
}
}
地图组件加载完成后是以中国地图为版图的
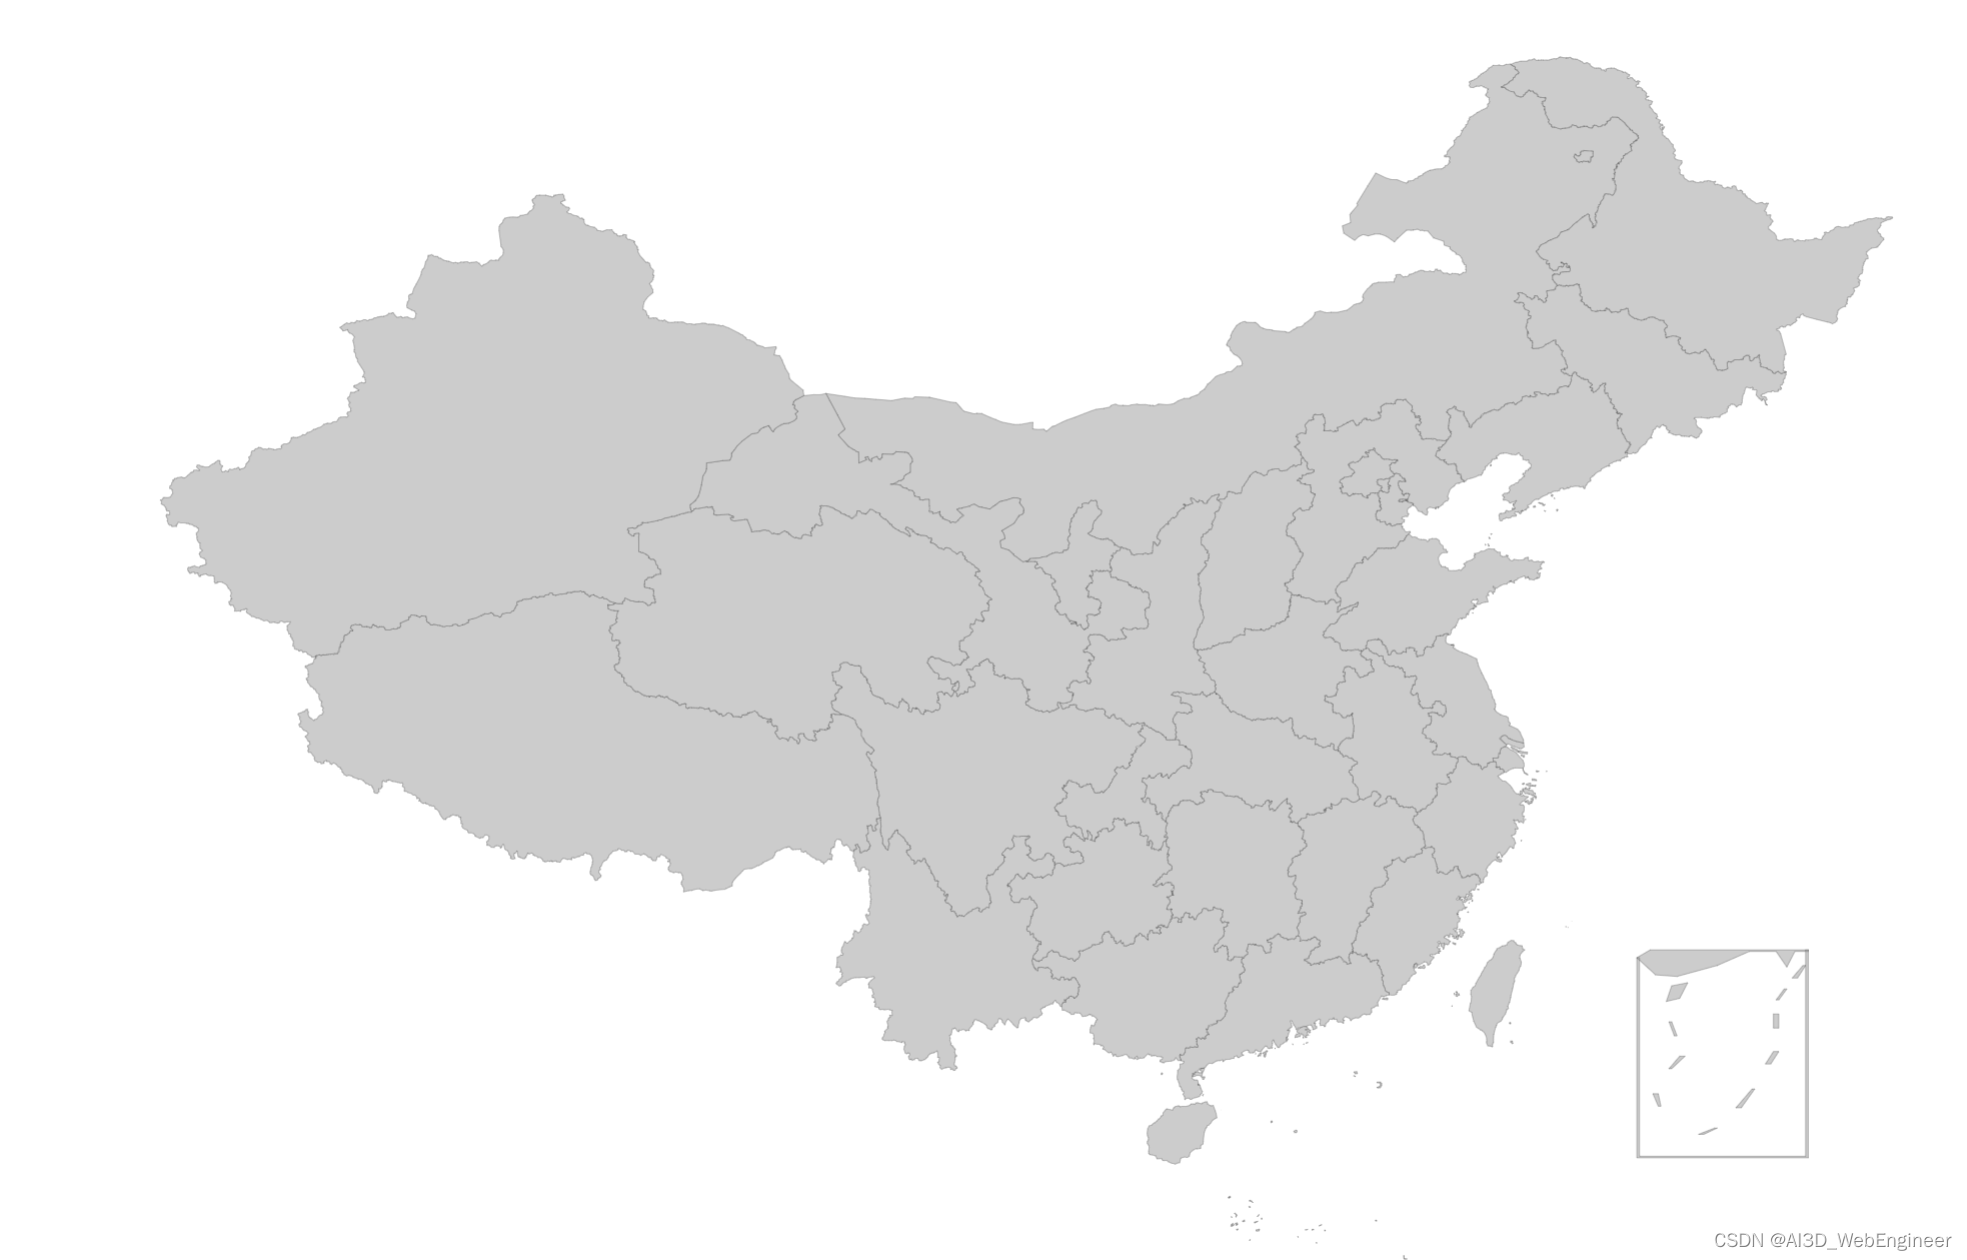
而series里type为scatter就是绘画地图上的散点,这样子散点图就完成了
现在需要把省级的数据转成data
// 把省份信息都拿出来
Object.values(this.mapTable).map(item => ({
          name: item.name,
          value: item.value,
          selected: true,
          location: item.location,
}));
function formatterData(data, colorArr) {
return data.map(item => ({
name: item.name,
value: [item.location.lng, item.location.lat, item.value],
itemStyle: {
color: colorArr[item.cLevel],
},
}));
}生成类似这样的data数组:
[
    {name:'广东省',value:[lng,lat,value]},
    {name:'江西省',value:[lng,lat,value]},
    ...
]
传入series.data就行了
如果要热力图或面积图,则:
// 热力图
series: [
     {
            name: '',
            type: 'heatmap',
            coordinateSystem: 'geo',
            data: [],
            roam: true,
      }
],
// 视觉映射控件
visualMap: {
          min: 0,
          max: 500,
          calculable: true,
          realtime: true,
},
面积图不需要经度 维度 也不用配置geo
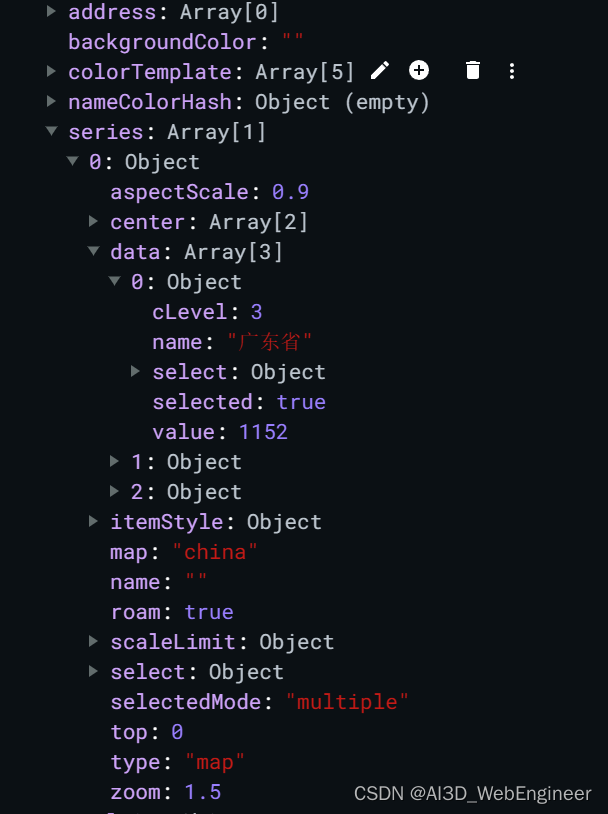
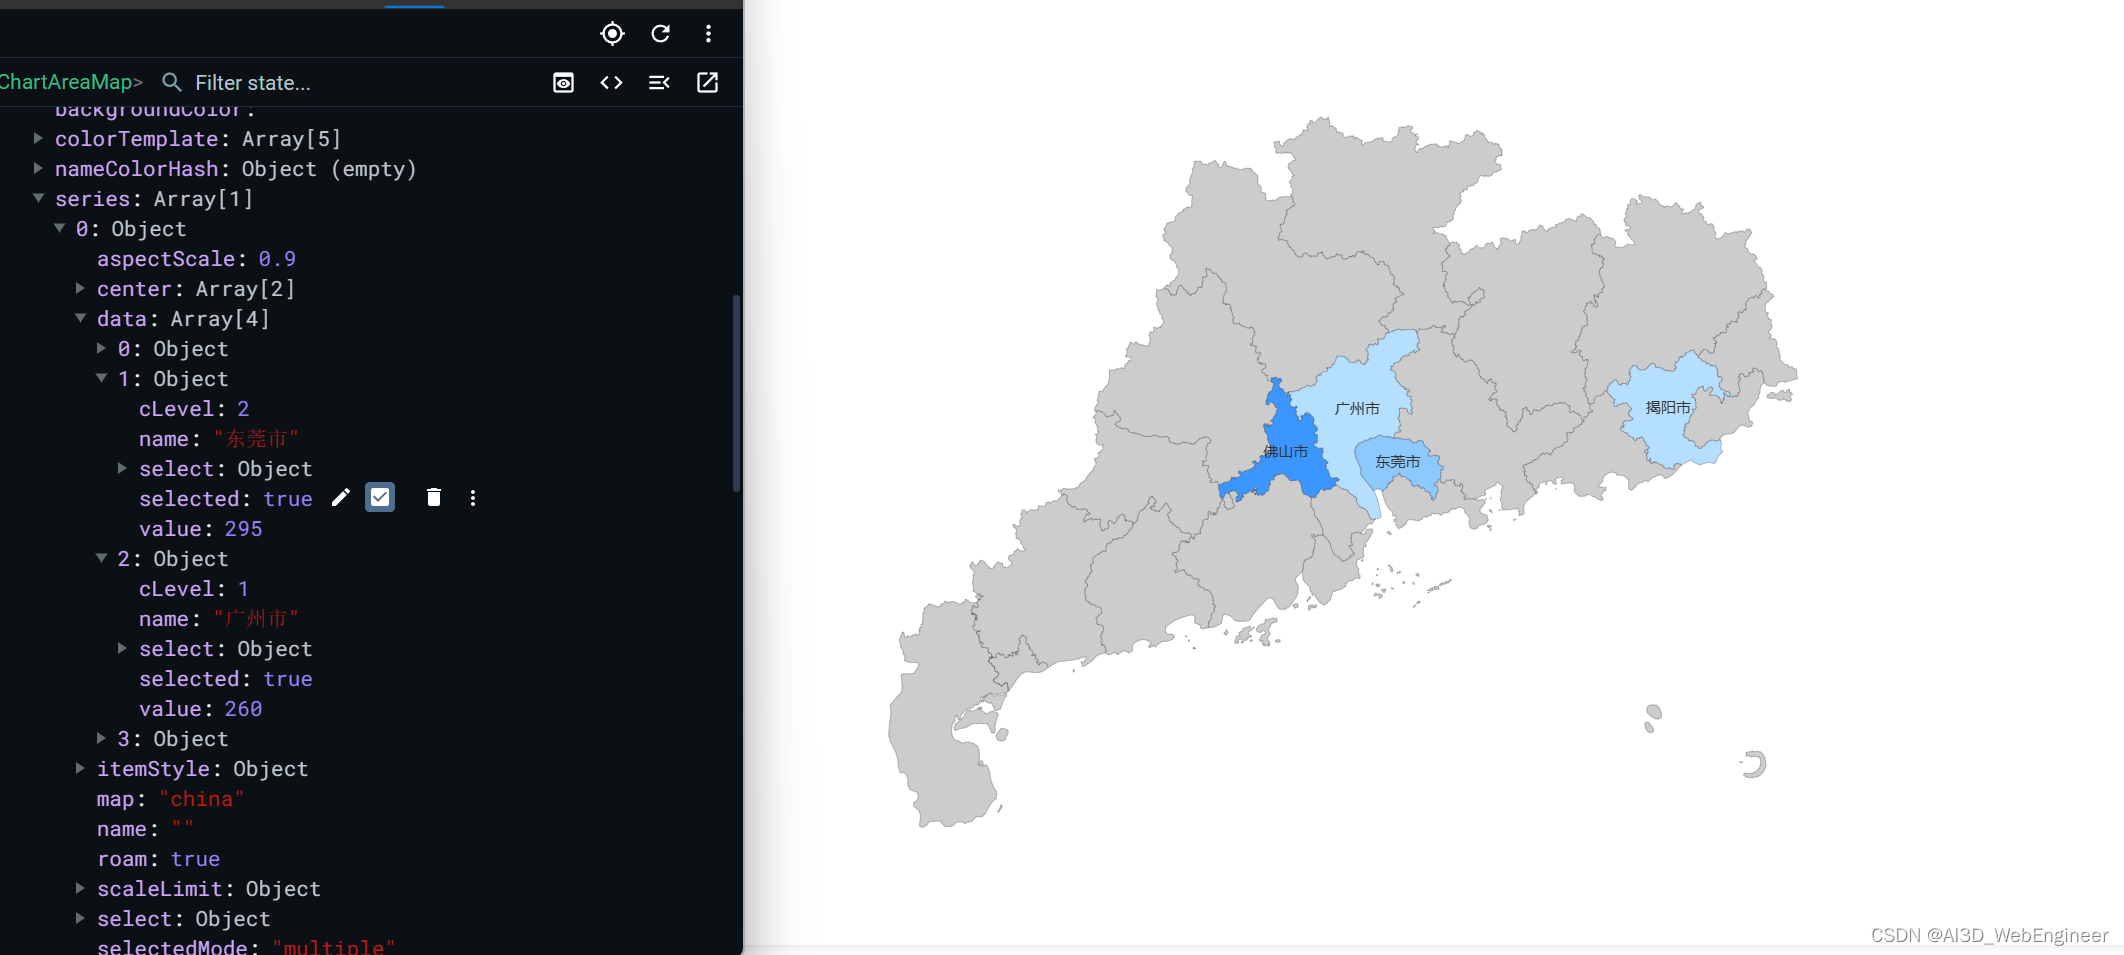
地区钻取
先响应echarts地图组件的双击事件
this.myChart.on('dblclick', params => {
   this.gotoMapLevel(params);
}
从中国地图点击省份。这个params包括了:

我们定义一个data属性来声明当前地图的层级,默认是country,下钻到省份是province,下钻到市区是city
mapLevel = 'country'; async gotoMapLevel(params) {
// 区不展开详细地图
if (this.mapLevel === 'city') return;
// 双击事件被触发,必定是进入下一级地图
const searchRes = this.searchInitNext(params.name)[0];
// 这里是通过this.mapHistory最后一个元素的geo.features里面记录获取下一级信息
this.mapLevel = searchRes.properties.level;
this.mapHistory.push({
name: searchRes.properties.name,
level: this.mapLevel,
geo: await getMapGeo(this.mapSourceUrl(searchRes.properties.adcode)),
});
this.rePaintMap();
}mapSourceUrl我们前面已经讲过了,接口根据adcode拿到对应地区的geo数据。并把它存储到mapHistory里。那么在this.mapHistory既有层级level,也有geo数据。那么repaintMap就很简单了
  // 重绘地图
  async rePaintMap() {
    const nowArea = this.mapHistory[this.mapHistory.length - 1];
    this.mapLevel = nowArea.level;
    await echarts.registerMap(nowArea.name, nowArea.geo);
    ....
  }
注册完geo,紧接着就是根据this,mapLevel找到映射数据去组装serise.data了 。之前那张数据映射表一下子就能帮忙了。
 get mapLevelGather() {
    switch (this.mapLevel) {
      case 'country':
      default:
        return Object.values(this.mapTable).map(item => ({
          name: item.name,
          value: item.value,
          selected: true,
          location: item.location,
        }));
      case 'province': {
        const nowArea = this.mapHistory[this.mapHistory.length - 1];
        if (!this.mapTable[nowArea.name]?.children) return [];
        return Object.values(this.mapTable[nowArea.name].children).map(
          item => ({
            name: item.name,
            value: item.value,
            location: item.location,
          }),
        );
      }
      case 'city': {
        const province = this.mapHistory[this.mapHistory.length - 2];
        const city = this.mapHistory[this.mapHistory.length - 1];
        if (!this.mapTable[province.name]?.children[city.name].children)
          return [];
        return Object.values(
          this.mapTable[province.name].children[city.name].children,
        ).map(item => ({
          name: item.name,
          value: item.value,
          location: item.location,
        }));
      }
    }
  }
这不数据一下子就被筛选出来了,其他的和初始渲染一样啦
返回上一级
  // 按钮
  returnBackMap() {
    if (this.mapLevel === 'province') {
      this.mapHistory.push(this.mapHistory[0]);
    } else {
      // 指针回到最后一级
      this.mapHistory.push(
        ...this.mapHistory.splice(this.mapHistory.length - 2, 1),
      );
    }
    this.rePaintMap();
  }
有了this.mapHistory的geo和maplevel信息,就可以愉快的repaintMap了
方案三:高德JS API绘制
地图 JS API 2.0 是高德开放平台免费提供的第四代 Web 地图渲染引擎。本身便具有图层。
  var map = new AMap.Map('container', {
        center: [116.397428, 39.90923],
        layers: [//只显示默认图层的时候,layers可以缺省
            new AMap.TileLayer()//高德默认标准图层
        ],
        zoom: 13
    });
只要调用API,就可以产出一个图层。
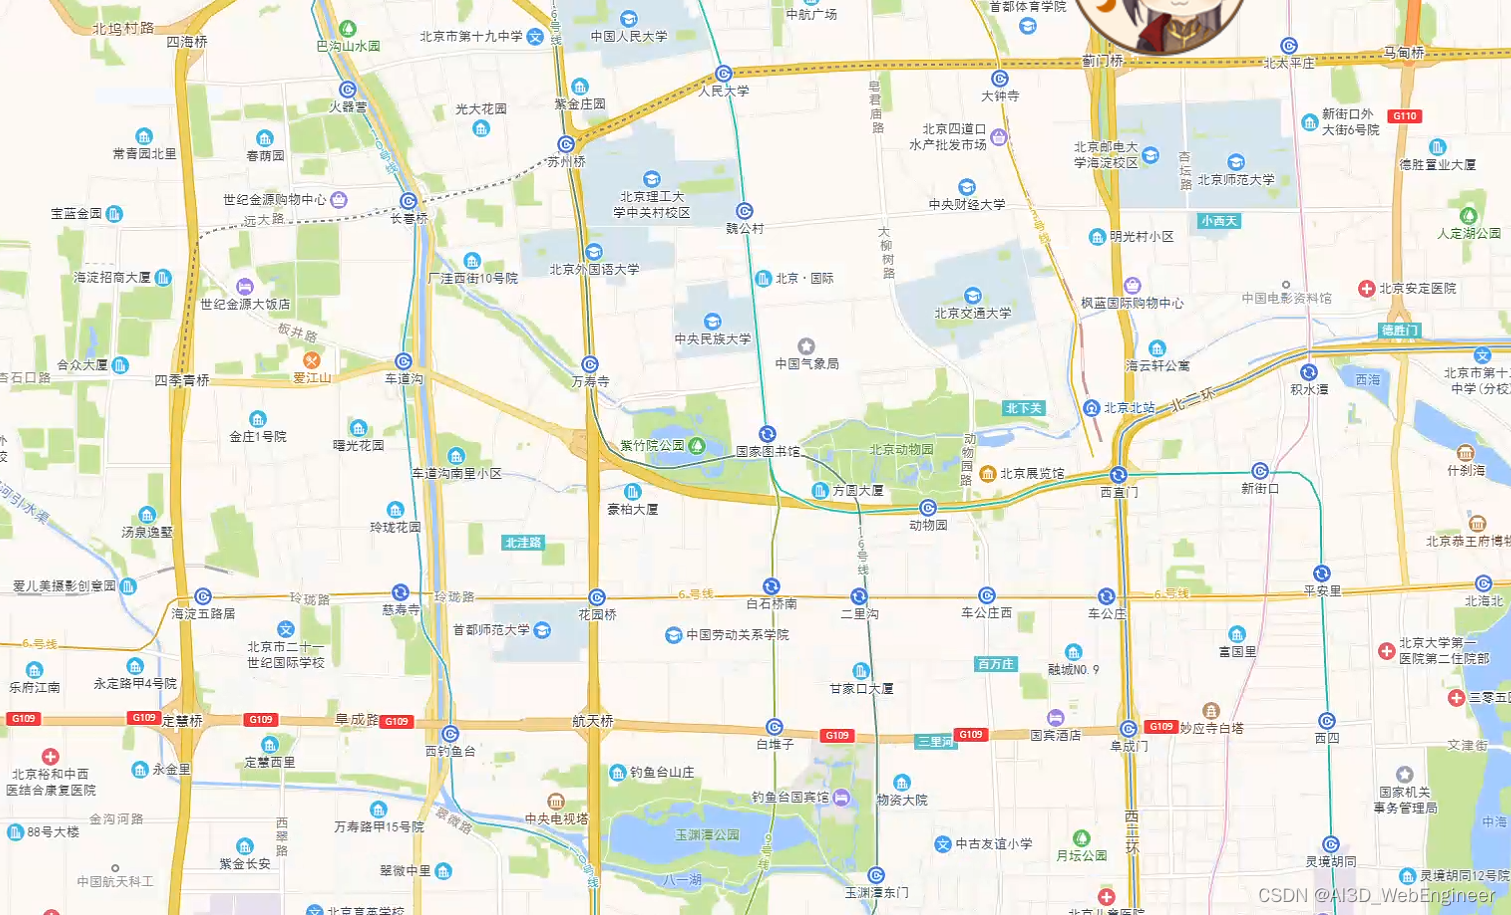
高德地图还有多种图层可以使用,比如热力图层、视频图层(台风)。
视频图层-自有数据图层-示例中心-JS API 示例 | 高德地图API (amap.com)![]() https://lbs.amap.com/demo/javascript-api/example/selflayer/videolayer 怎么用自己去看文档吧。
https://lbs.amap.com/demo/javascript-api/example/selflayer/videolayer 怎么用自己去看文档吧。
