本文所有代码均存放于https://github.com/MADMAX110/BitsandPizzas
回收视图是列表视图的一个更高级也更灵活的版本。
回收视图比列表视图更加灵活,所以需要更多设置,回收视图使用一个适配器访问它的数据,不过与列表视图不同,回收视图不使用数组适配器之类的内置Android适配器。你必须编写你自己的适配器,要根据数据适当裁剪。这包括指定的数据的类型,创建视图并把视图绑定到视图。
另外要使用一个布局管理器将数据项放置在回收视图中,有很多内置的布局管理器可以使用,可以把数据项放在一个线性列表或网格中。
回到之前的披萨应用,使用回收视图共需要五个步骤:
1、为工程增加披萨数据
2、为披萨数据创建一个卡片视图
3、创建一个回收视图适配器
4、向PizzaFragment增加一个回收视图
5、让回收视图响应单击
一、增加披萨数据
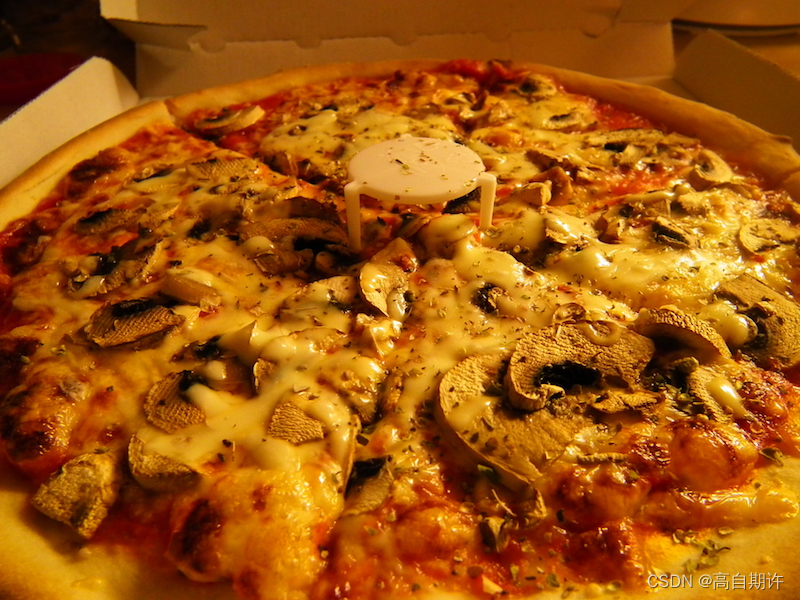
将以下图片加入工程的drawable文件夹,分别命名为funghi和diavolo。

在com.hfad.bitsandpizzas包中新建Pizza类:
package com.hfad.bitsandpizzas;

public class Pizza {
    private String name;
    private int imageResourceId;

    public static final Pizza[] pizzas = {
            new Pizza("Diavolo", R.drawable.diavolo),
            new Pizza("Funghi", R.drawable.funghi)
    };

    private Pizza(String name, int imageResourceId) {
        this.name = name;
        this.imageResourceId = imageResourceId;
    }

    public String getName() {
        return name;
    }

    public int getImageResourceId() {
        return imageResourceId;
    }
}
二、创建卡片视图
卡片视图是一种帧布局,允许在虚拟卡片上显示信息。卡片视图有圆角和阴影,使它看上去就像放在背景之上。如果为我们的披萨数据使用卡片视图,每个披萨看上去就像显示在回收视图中的一个单独的卡片中。
要创建一个卡片视图,需要向布局增加一个< CardView >元素。如果想在回收视图中使用卡片视图。需要为卡片视图创建一个新的布局文件,在layout文件夹中新建一个名为card_captioned_image的视图。
<?xml version="1.0" encoding="utf-8"?>
<androidx.cardview.widget.CardView
    xmlns:android="http://schemas.android.com/apk/res/android"
    xmlns:card_view="http://schemas.android.com/apk/res-auto"
    xmlns:tools="http://schemas.android.com/tools"
    android:id="@+id/card_view"
    android:layout_width="match_parent"
    android:layout_height="200dp"
    android:layout_margin="4dp"
    card_view:cardElevation="2dp"
    card_view:cardCornerRadius="4dp">

    <LinearLayout
        android:layout_width="match_parent"
        android:layout_height="match_parent"
        android:orientation="vertical">

        <ImageView
            android:id = "@+id/info_image"
            android:layout_width="match_parent"
            android:layout_height="0dp"
            android:layout_weight="1.0"
            android:scaleType="centerCrop"/>

        <TextView
            android:id="@+id/info_text"
            android:layout_marginBottom="4dp"
            android:layout_marginLeft="4dp"
            android:layout_width="match_parent"
            android:layout_height="wrap_content"/>

    </LinearLayout>

</androidx.cardview.widget.CardView>
三、创建回收视图适配器
使用回收视图时,需要创建一个回收视图适配器,与列表视图不同,回收视图不使用Android自带的内置适配器。
适配器有两个主要任务:在回收视图中创建各个可见的视图,并把各个视图绑定到一个数据。
在com.hfad.bitsandpizzas包中新建一个名为CaptionedImagesAdapter的Java类。
package com.hfad.bitsandpizzas;

import android.content.Context;
import android.graphics.drawable.Drawable;
import android.view.LayoutInflater;
import android.view.ViewGroup;
import android.widget.ImageView;
import android.widget.TextView;

import androidx.annotation.NonNull;
import androidx.cardview.widget.CardView;
import androidx.core.content.ContextCompat;
import androidx.recyclerview.widget.RecyclerView;

public class CaptionedImagesAdapter extends RecyclerView.Adapter<CaptionedImagesAdapter.ViewHolder> {

    private String[] captions;
    private int[] imageIds;
    public static class ViewHolder extends RecyclerView.ViewHolder{
        //每个ViewHolder包含一个CardView
        private CardView cardView;
        public ViewHolder(CardView v) {
            super(v);
            cardView = v;
        }
    }

    //使用适配器的构造方法向它传递数据
    public CaptionedImagesAdapter(String[] captions, int[] imageIds){
        this.captions = captions;
        this.imageIds = imageIds;
    }

    //告诉适配器有多少个数据项
    public int getItemCount() {
        return captions.length;
    }

    CaptionedImagesAdapter.ViewHolder onCreateViewHo;

    @NonNull
    @Override
    //为CardViews使用前面创建的布局
    //回收视图需要新的视图持有者时就会调用该方法
    //首次构造回收视图时,回收视图会反复调用这个方法来构造将在屏幕上显示的一组持有者
    public ViewHolder onCreateViewHolder(@NonNull ViewGroup parent, int viewType) {
        CardView cv = (CardView) LayoutInflater.from(parent.getContext()).inflate(R.layout.card_captioned_image, parent, false);
        return new ViewHolder(cv);
    }

    //用数据填充CardView的ImageView和TextView
    public void onBindViewHolder(ViewHolder holder, int position){
        CardView cardView = holder.cardView;
        ImageView imageView = (ImageView) cardView.findViewById(R.id.info_image);
        Drawable drawable = ContextCompat.getDrawable(cardView.getContext(), imageIds[position]);
        imageView.setImageDrawable(drawable);
        imageView.setContentDescription(captions[position]);
        TextView textView = (TextView) cardView.findViewById(R.id.info_text);
        textView.setText(captions[position]);
    }
}
四、创建回收视图
创建回收视图,会把披萨数据传递给适配器,使适配器能够用披萨图像和图像填充卡片,然后这个回收视图再显示这个卡片,还要把这个回收视图增加到PizzaFragment中。只要用户单击了MainActivity中的Pizzas标签页,就会显示披萨。
新增一个fragment_pizza.xml布局,只需要显示一个回收视图即可。
<?xml version="1.0" encoding="utf-8"?>
<androidx.recyclerview.widget.RecyclerView
    xmlns:android="http://schemas.android.com/apk/res/android"
    android:id="@+id/pizza_recycle"
    android:layout_width="match_parent"
    android:layout_height="match_parent"
    android:scrollbars="vertical">
</androidx.recyclerview.widget.RecyclerView>
更新PizzaFragment让回收视图使用适配器。
回收视图使用一个布局管理器排列视图,可以选择使用线性列表、网格和不规则网格显示视图。
package com.hfad.bitsandpizzas;

import android.os.Bundle;
import androidx.fragment.app.Fragment;
import androidx.recyclerview.widget.GridLayoutManager;
import androidx.recyclerview.widget.RecyclerView;
import android.view.LayoutInflater;
import android.view.View;
import android.view.ViewGroup;

public class PizzaFragment extends Fragment {
    @Override
    public View onCreateView(LayoutInflater inflater, ViewGroup container,
                             Bundle savedInstanceState) {
        RecyclerView pizzaRecycle = (RecyclerView) inflater.inflate(
                R.layout.fragment_pizza, container, false);
        String[] pizzaNames = new String[Pizza.pizzas.length];
        for (int i = 0; i < pizzaNames.length; i++){
            pizzaNames[i] = Pizza.pizzas[i].getName();
        }
        int[] pizzasImages = new int[Pizza.pizzas.length];
        for (int i = 0; i < pizzaNames.length; i++){
            pizzasImages[i] = Pizza.pizzas[i].getImageResourceId();
        }
        CaptionedImagesAdapter adapter = new CaptionedImagesAdapter(pizzaNames, pizzasImages);
        pizzaRecycle.setAdapter(adapter);
        //在一个两列的网格中显示卡片视图
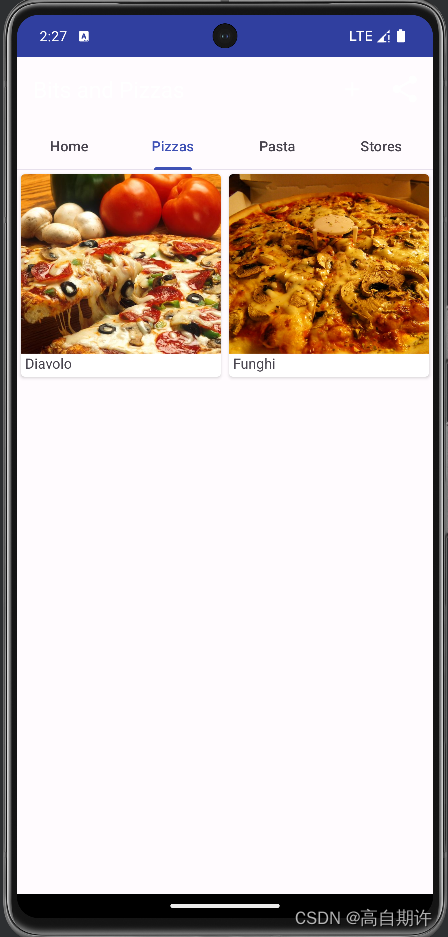
        GridLayoutManager layoutManager = new GridLayoutManager(getActivity(), 2);
        pizzaRecycle.setLayoutManager(layoutManager);
        return pizzaRecycle;
    }
}
试一试应用效果如图:
五、让回收视图响应单击
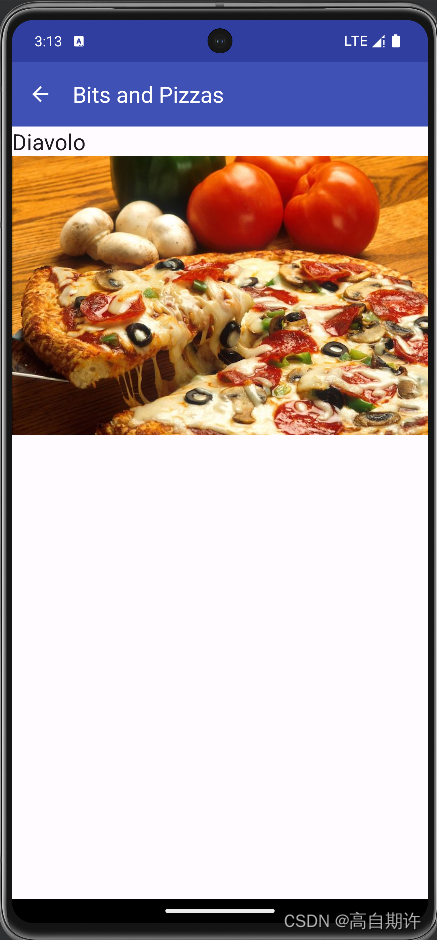
创建一个新活动PizzaDetailActivity,用户单击某个披萨时就会启动这个活动。其布局名为activity_pizza_detail。
<?xml version="1.0" encoding="utf-8"?>
<LinearLayout xmlns:android="http://schemas.android.com/apk/res/android"
    xmlns:tools="http://schemas.android.com/tools"
    android:layout_width="match_parent"
    android:layout_height="match_parent"
    android:orientation="vertical"
    tools:context=".PizzaDetailActivity">

    <include
        layout="@layout/toolbar_main"
        android:id="@+id/toolbar" />

    <TextView
        android:id="@+id/pizza_text"
        android:layout_width="wrap_content"
        android:layout_height="wrap_content"
        android:textAppearance="?android:attr/textAppearanceLarge"/>

    <ImageView
        android:id="@+id/pizza_image"
        android:layout_width="match_parent"
        android:layout_height="wrap_content"
        android:adjustViewBounds="true"/>

</LinearLayout>
更新AndroidManifest.xml为PizzaDetailActivity指定一个父活动。
<?xml version="1.0" encoding="utf-8"?>
<manifest xmlns:android="http://schemas.android.com/apk/res/android"
    xmlns:tools="http://schemas.android.com/tools">

    <application
        android:allowBackup="true"
        android:dataExtractionRules="@xml/data_extraction_rules"
        android:fullBackupContent="@xml/backup_rules"
        android:icon="@mipmap/ic_launcher"
        android:label="@string/app_name"
        android:roundIcon="@mipmap/ic_launcher_round"
        android:supportsRtl="true"
        android:theme="@style/Theme.BitsAndPizzas"
        tools:targetApi="31">

        <meta-data
            android:name="com.google.android.actions"
            android:resource="@menu/menu_main" />

        <activity
            android:name=".MainActivity"
            android:exported="true">
            <intent-filter>
                <action android:name="android.intent.action.MAIN" />

                <category android:name="android.intent.category.LAUNCHER" />
            </intent-filter>
        </activity>
        <activity
            android:name=".OrderActivity"
            android:label="@string/create_order"
            android:parentActivityName=".MainActivity">
            <meta-data
                android:name="android.support.PARENT_ACTIVITY"
                android:value=".MainActivity" />
        </activity>
        <activity android:name=".PizzaDetailActivity"
            android:parentActivityName=".MainActivity">
        </activity>
    </application>

</manifest>
更新PizzaDetailActivity.java代码
package com.hfad.bitsandpizzas;

import android.os.Bundle;
import android.widget.ImageView;
import android.widget.TextView;
import androidx.appcompat.app.ActionBar;
import androidx.appcompat.app.AppCompatActivity;
import androidx.appcompat.widget.Toolbar;
import androidx.core.content.ContextCompat;

public class PizzaDetailActivity extends AppCompatActivity {
    public static final String EXTRA_PIZZA_ID = "pizzaId";

    @Override
    protected void onCreate(Bundle savedInstanceState) {
        super.onCreate(savedInstanceState);
        setContentView(R.layout.activity_pizza_detail);

        //Set the toolbar as the activity's app bar
        Toolbar toolbar = (Toolbar) findViewById(R.id.toolbar);
        setSupportActionBar(toolbar);
        ActionBar actionBar = getSupportActionBar();
        actionBar.setDisplayHomeAsUpEnabled(true);

        //Display details of the pizza
        int pizzaId = (Integer)getIntent().getExtras().get(EXTRA_PIZZA_ID);
        String pizzaName = Pizza.pizzas[pizzaId].getName();
        TextView textView = (TextView)findViewById(R.id.pizza_text);
        textView.setText(pizzaName);
        int pizzaImage = Pizza.pizzas[pizzaId].getImageResourceId();
        ImageView imageView = (ImageView)findViewById(R.id.pizza_image);
        imageView.setImageDrawable(ContextCompat.getDrawable(this, pizzaImage));
        imageView.setContentDescription(pizzaName);
    }
}
更新PizzaFragment.java
package com.hfad.bitsandpizzas;

import android.content.Intent;
import android.os.Bundle;
import androidx.fragment.app.Fragment;
import androidx.recyclerview.widget.GridLayoutManager;
import androidx.recyclerview.widget.RecyclerView;
import android.view.LayoutInflater;
import android.view.View;
import android.view.ViewGroup;

public class PizzaFragment extends Fragment {
    @Override
    public View onCreateView(LayoutInflater inflater, ViewGroup container,
                             Bundle savedInstanceState) {
        RecyclerView pizzaRecycle = (RecyclerView) inflater.inflate(
                R.layout.fragment_pizza, container, false);
        String[] pizzaNames = new String[Pizza.pizzas.length];
        for (int i = 0; i < pizzaNames.length; i++){
            pizzaNames[i] = Pizza.pizzas[i].getName();
        }
        int[] pizzasImages = new int[Pizza.pizzas.length];
        for (int i = 0; i < pizzaNames.length; i++){
            pizzasImages[i] = Pizza.pizzas[i].getImageResourceId();
        }
        CaptionedImagesAdapter adapter = new CaptionedImagesAdapter(pizzaNames, pizzasImages);
        pizzaRecycle.setAdapter(adapter);
        //在一个两列的网格中显示卡片视图
        GridLayoutManager layoutManager = new GridLayoutManager(getActivity(), 2);
        pizzaRecycle.setLayoutManager(layoutManager);

        adapter.setListener(new CaptionedImagesAdapter.Listener() {
            @Override
            public void onCLick(int position) {
                Intent intent = new Intent(getActivity(), PizzaDetailActivity.class);
                intent.putExtra(PizzaDetailActivity.EXTRA_PIZZA_ID, position);
                getActivity().startActivity(intent);
            }
        });

        return pizzaRecycle;
    }
}
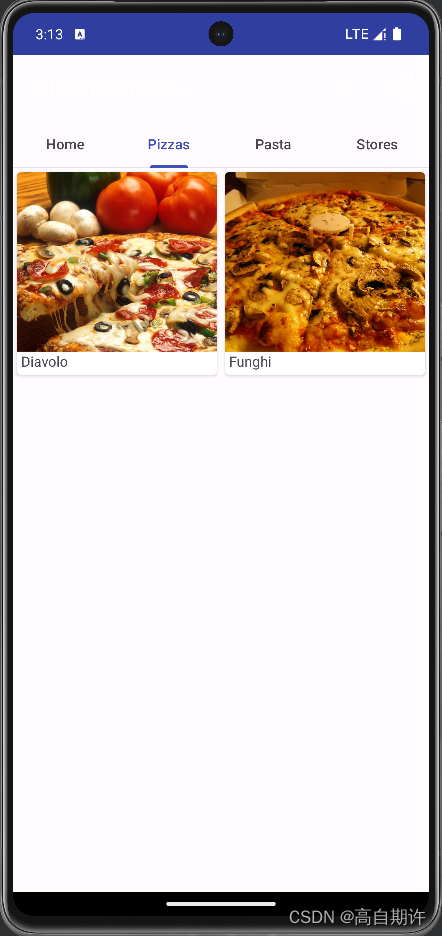
试一试
单击其中的选项后:
![[RCTF2015]EasySQL 二次注入 regexp指定字段 reverse逆序输出](https://img-blog.csdnimg.cn/ca94ca45f8ab42d9a462c2af77dc0ecd.png)
