目录
前言
一、动态树的实现
1.数据表
2.编写后端controller层
3.定义前端发送请求路径
4.前端左侧动态树的编写
4.1.发送请求获取数据
4.2.遍历左侧菜单
5.实现左侧菜单点击展示右边内容
5.1.定义组件
5.2.定义组件与路由的对应关系
5.3.渲染组件内容
5.4.通过动态路由跳转为当前项内容
二、表格分页模糊查询的实现
1.数据表
2.后端分页模糊查询的实现
3.编写书籍管理请求路径
4.编写书籍管理前端
前言
在Element UI搭建首页导航和左侧菜单以及Mock.js和(组件通信)总线的运用博文中讲解了首页导航和左侧树形菜单的搭建,今天我们将通过前后端结合将左侧菜单数据变活,以及实现点击动态树右边展示相应内容。并实现对表格的分页模糊查询。
一、动态树的实现
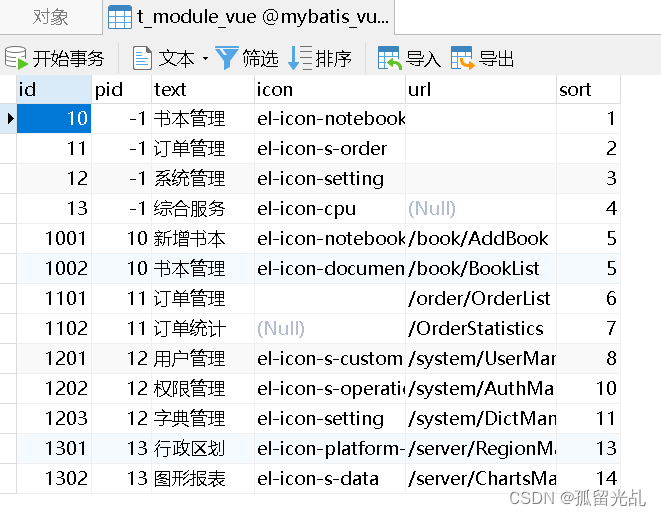
后端mapper.xml,以及biz层都比较简单,这里就不过多讲解了
1.数据表
2.编写后端controller层
package com.ctb.ssm.controller;

import com.ctb.ssm.model.Module;
import com.ctb.ssm.model.RoleModule;
import com.ctb.ssm.model.TreeNode;
import com.ctb.ssm.service.IModuleService;
import com.ctb.ssm.util.JsonResponseBody;
import org.springframework.beans.factory.annotation.Autowired;
import org.springframework.stereotype.Controller;
import org.springframework.web.bind.annotation.RequestMapping;
import org.springframework.web.bind.annotation.ResponseBody;

import java.util.List;

@Controller
@RequestMapping("/module")
public class ModuleController {

    @Autowired
    private IModuleService moduleService;

    @RequestMapping("/queryRootNode")
    @ResponseBody
    public JsonResponseBody<List<Module>> queryRootNode(){
        try {
            List<Module> modules = moduleService.queryRootNode(-1);
            return new JsonResponseBody<>("OK",true,0,modules);
        } catch (Exception e) {
            e.printStackTrace();
            return new JsonResponseBody<>("初始化首页菜单错误",false,0,null);
        }
    }


}
3.定义前端发送请求路径
api/action.js
'SYSTEM_MENUS': '/module/queryRootNode', //左侧菜单4.前端左侧动态树的编写
4.1.发送请求获取数据
let url = this.axios.urls.SYSTEM_MENUS;
      this.axios.get(url, {}).then(r => {
        console.log(r);
        this.menus = r.data.rows;
      }).catch(e => {

      })
4.2.遍历左侧菜单
<el-submenu v-for="m in menus" :index="'idx_'+m.id" :key="'key_'+m.id">
      <template slot="title">
        <i class="m.icon"></i>
        <span>{{m.text}}</span>
      </template>
      <el-menu-item v-for="m2 in m.modules" :index="m2.url" :key="'key_'+m2.id">
        <i class="m2.icon"></i>
        <span>{{m2.text}}</span>
      </el-menu-item>
    </el-submenu>
效果展示

5.实现左侧菜单点击展示右边内容
先编写两个组件测试效果,也为下面内容进行铺垫
5.1.定义组件
AddBook
<template>
  <h1>书籍新增</h1>
</template>

<script>
</script>

<style>
</style>
BookList
<template>
  <h1>书籍管理</h1>
</template>

<script>
</script>

<style>
</style>
5.2.定义组件与路由的对应关系
import Vue from 'vue'
import Router from 'vue-router'
import HelloWorld from '@/components/HelloWorld'

import AppMain from '@/components/AppMain'
import LeftNav from '@/components/LeftNav'
import TopNav from '@/components/TopNav'

import Login from '@/views/Login'
import Register from '@/views/Register'
import AddBook from '@/views/book/AddBook'
import BookList from '@/views//book/BookList'

Vue.use(Router)

export default new Router({
  routes: [{
      path: '/',
      name: 'Login',
      component: Login
    },
    {
      path: '/Register',
      name: 'Register',
      component: Register
    }, {
      path: '/AppMain',
      name: 'AppMain',
      component: AppMain,
      children: [{
        path: '/LeftNav',
        name: 'LeftNav',
        component: LeftNav
      }, {
        path: '/TopNav',
        name: 'TopNav',
        component: TopNav
      },{
        path: '/book/AddBook',
        name: 'AddBook',
        component: AddBook
      }, {
        path: '/book/BookList',
        name: 'BookList',
        component: BookList
      }]
    }
  ]
})
5.3.渲染组件内容
在AppMain.vue中心区域显示内容处改为以下内容:
<router-view></router-view>5.4.通过动态路由跳转为当前项内容
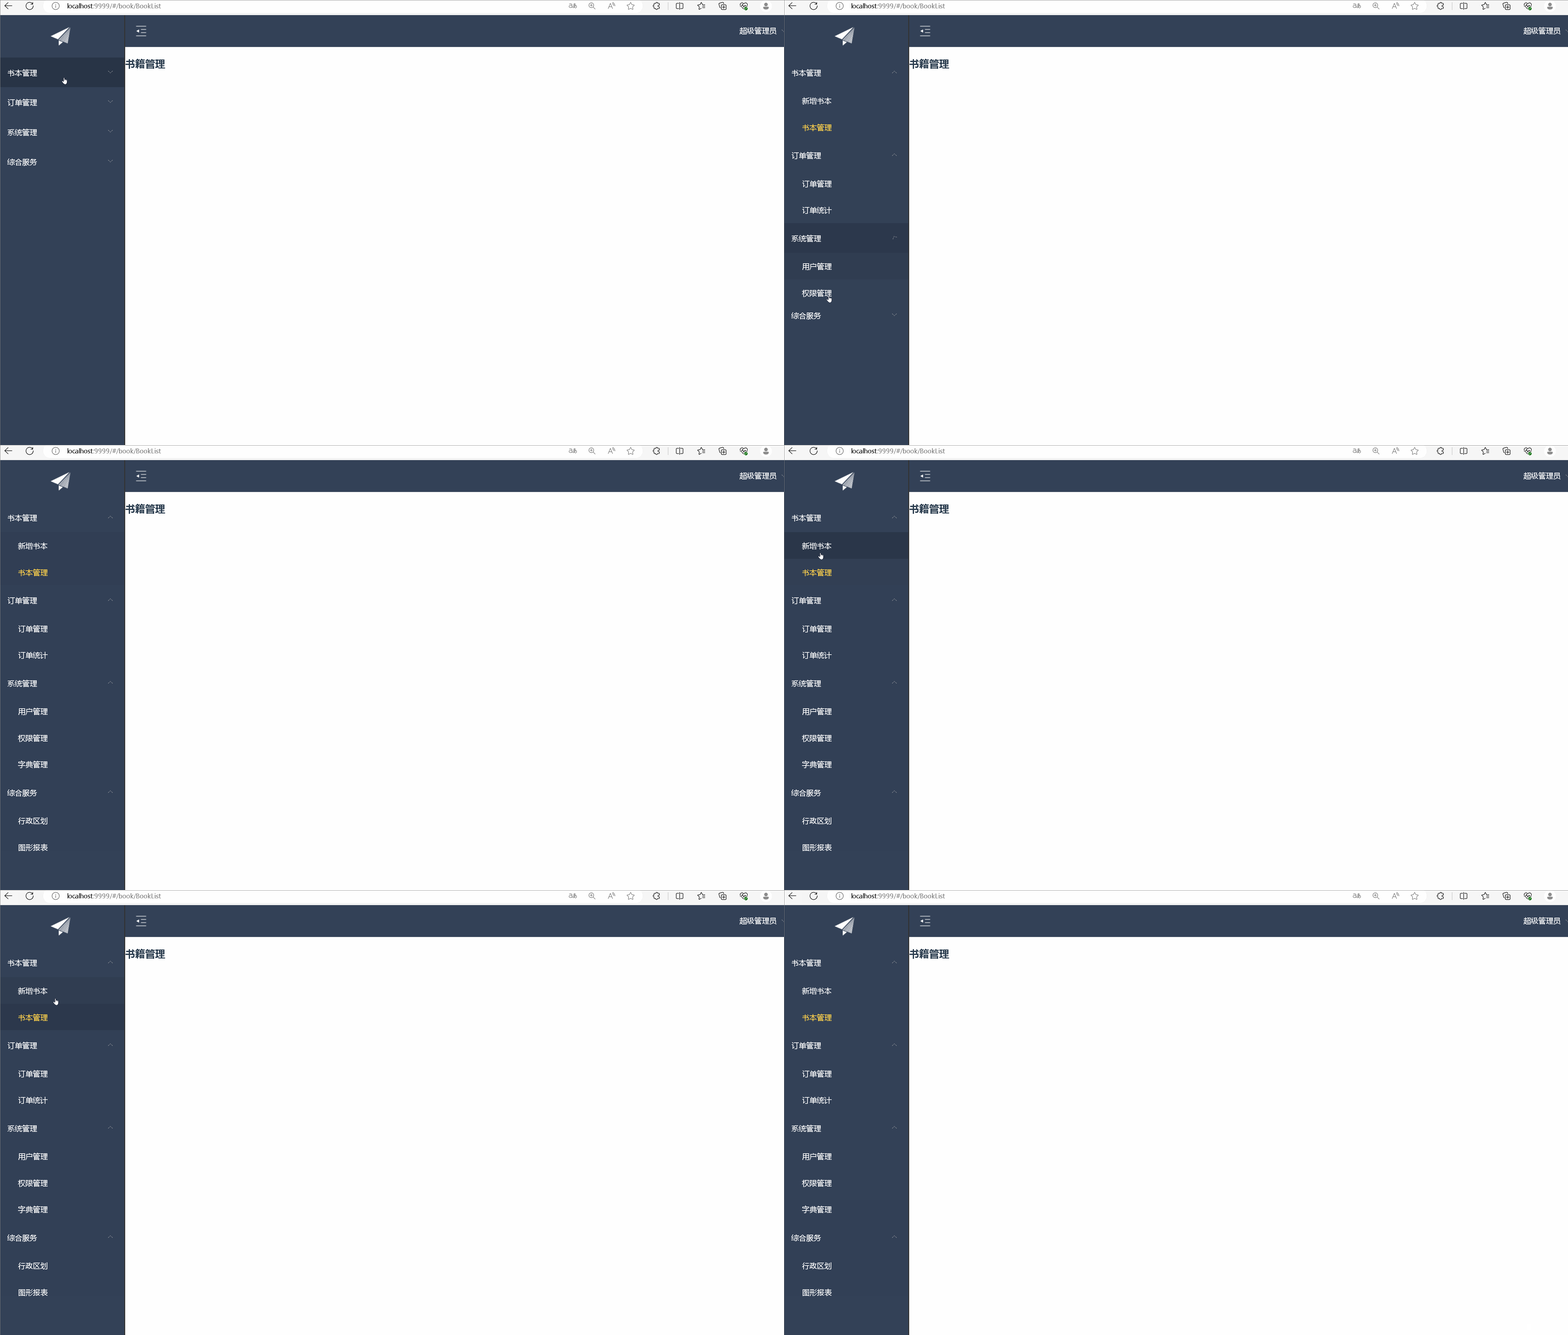
router :default-active="$route.path"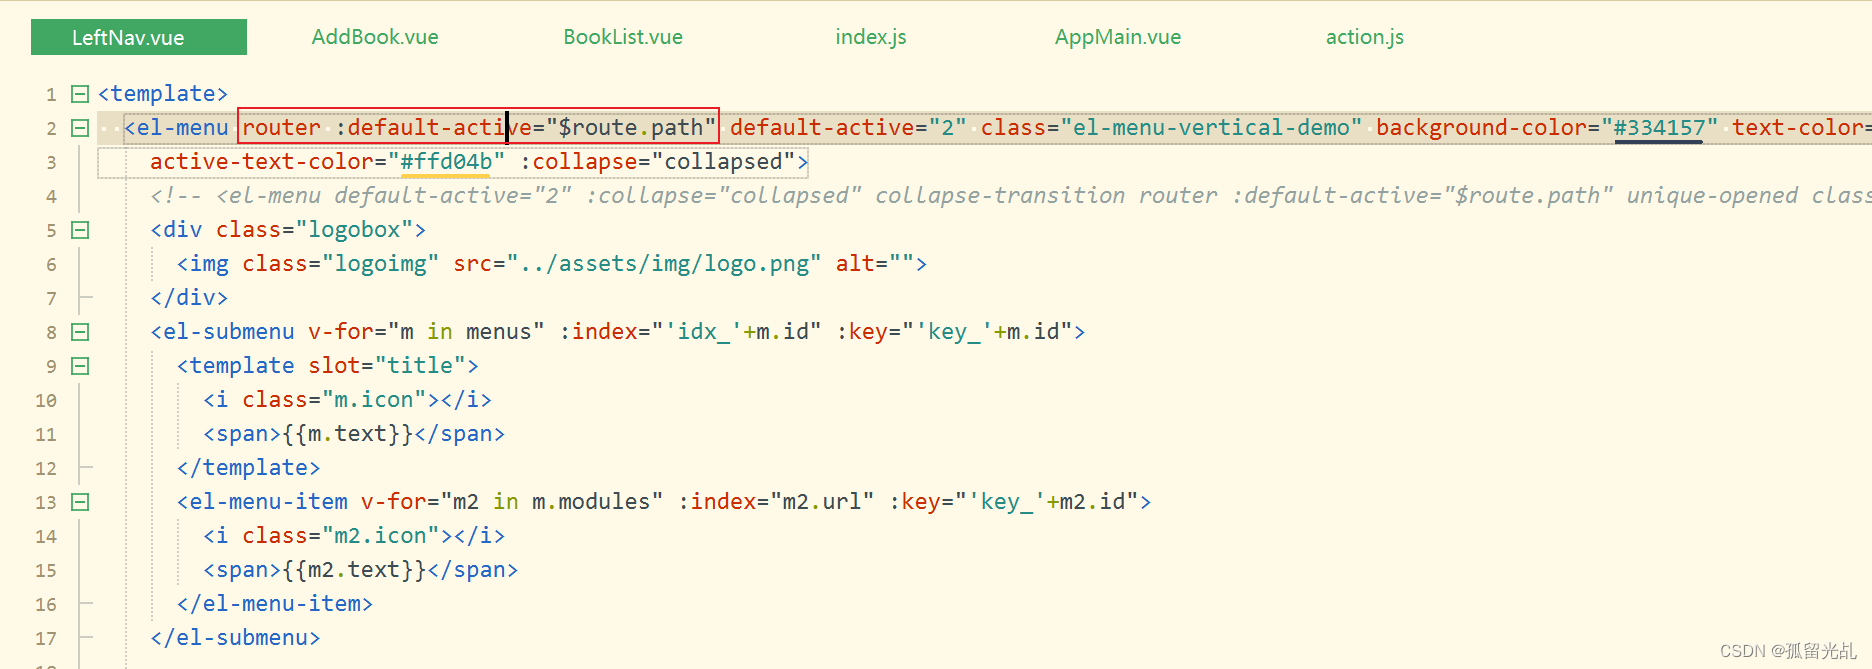 效果展示:
效果展示:
二、表格分页模糊查询的实现
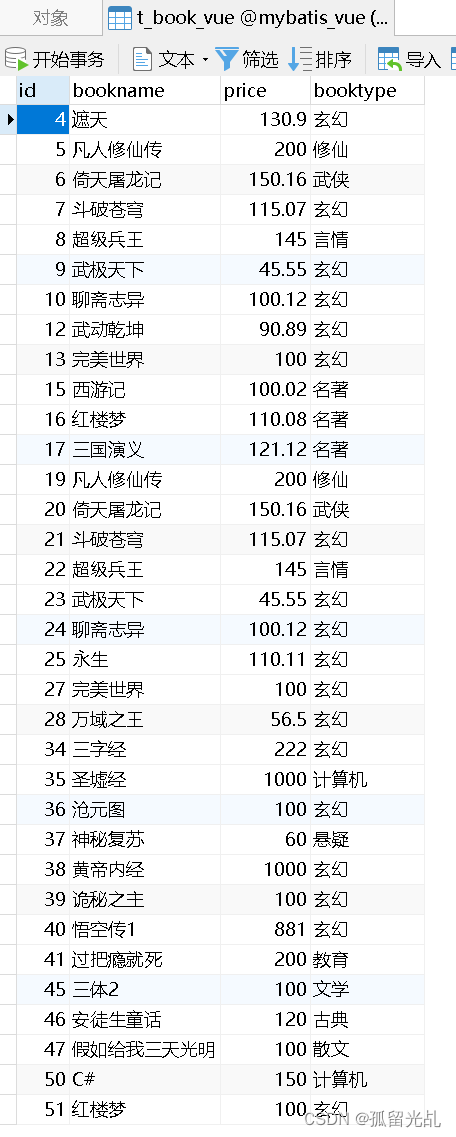
1.数据表
2.后端分页模糊查询的实现
这里也就只展示controller层了,有需要的评论区留言或私聊
@RequestMapping("/queryBookPager")
    @ResponseBody
    public JsonResponseBody<List<Book>> queryBookPager(Book book, HttpServletRequest req){
        try {
            PageBean pageBean=new PageBean();
            pageBean.setRequest(req);
            List<Book> books = bookService.queryBookPager(book, pageBean);
            return new JsonResponseBody<>("OK",true,pageBean.getTotal(),books);
        } catch (Exception e) {
            e.printStackTrace();
            return new JsonResponseBody<>("分页查询书本失败",false,0,null);
        }
    }
3.编写书籍管理请求路径
'SYSTEM_BookList': '/book/queryBookPager', //书籍管理---分页模糊查询4.编写书籍管理前端
BookList.vue
<template>
  <div class="books" style="padding: 20px;">
    <!-- 1.搜索框 -->
    <el-form :inline="true" class="demo-form-inline">
      <el-form-item label="书籍名称">
        <el-input v-model="bookname" placeholder="书籍名称"></el-input>
      </el-form-item>
      <el-form-item>
        <el-button type="primary" @click="onSubmit">搜索</el-button>
      </el-form-item>
    </el-form>
    <!-- 2.数据表格 -->
    <el-table :data="tableData" stripe style="width: 100%">
      <el-table-column prop="id" label="书籍编号" width="180">
      </el-table-column>
      <el-table-column prop="bookname" label="书籍名称" width="180">
      </el-table-column>
      <el-table-column prop="price" label="书籍价格">
      </el-table-column>
      <el-table-column prop="booktype" label="书籍类型">
      </el-table-column>
    </el-table>
    <!-- 3.分页条 -->
    <div class="block" style="padding: 20px;">
      <el-pagination @size-change="handleSizeChange" @current-change="handleCurrentChange" :current-page="page"
        :page-sizes="[10, 20, 30, 40]" :page-size="rows" layout="total, sizes, prev, pager, next, jumper"
        :total="total">
      </el-pagination>
    </div>
  </div>


</template>

<script>
  export default {
    data() {
      return {
        bookname: '',
        tableData: [],
        rows:10,
        page:1,
        total:0

      }

    },
    methods: {
      // 定义一个查询的方法,方便调用减少代码冗余
      query(params) {
        // 向后台请求数据的访问路径
        let url = this.axios.urls.SYSTEM_BookList;
        this.axios.get(url, {
          params: params
        }).then(r => {
          console.log(r);
          this.tableData = r.data.rows;
          this.total = r.data.total;
        }).catch(e => {

        })
      },
      onSubmit() {
        let params = {
          bookname: this.bookname,
        }
        // 调用查询方法
        this.query(params);
      },
      handleSizeChange(r) { //当页大小发生变化
        // 输出查看
        console.log("当前页大小:"+r);
        let params = {
          bookname: this.bookname,
          rows:r,
          page:this.page
        }
        // 调用查询方法
        this.query(params);
      },
      handleCurrentChange(p) { //当前页页码发生变化
        // 输出查看
        console.log("当前页码:"+p);
        let params = {
          bookname: this.bookname,
          page:p,
          rows:this.rows
        }
        // 调用查询方法
        this.query(params);
      }
    },
    created() {

      // 调用查询方法
      this.query({});
    }
  }
</script>

<style>
</style>
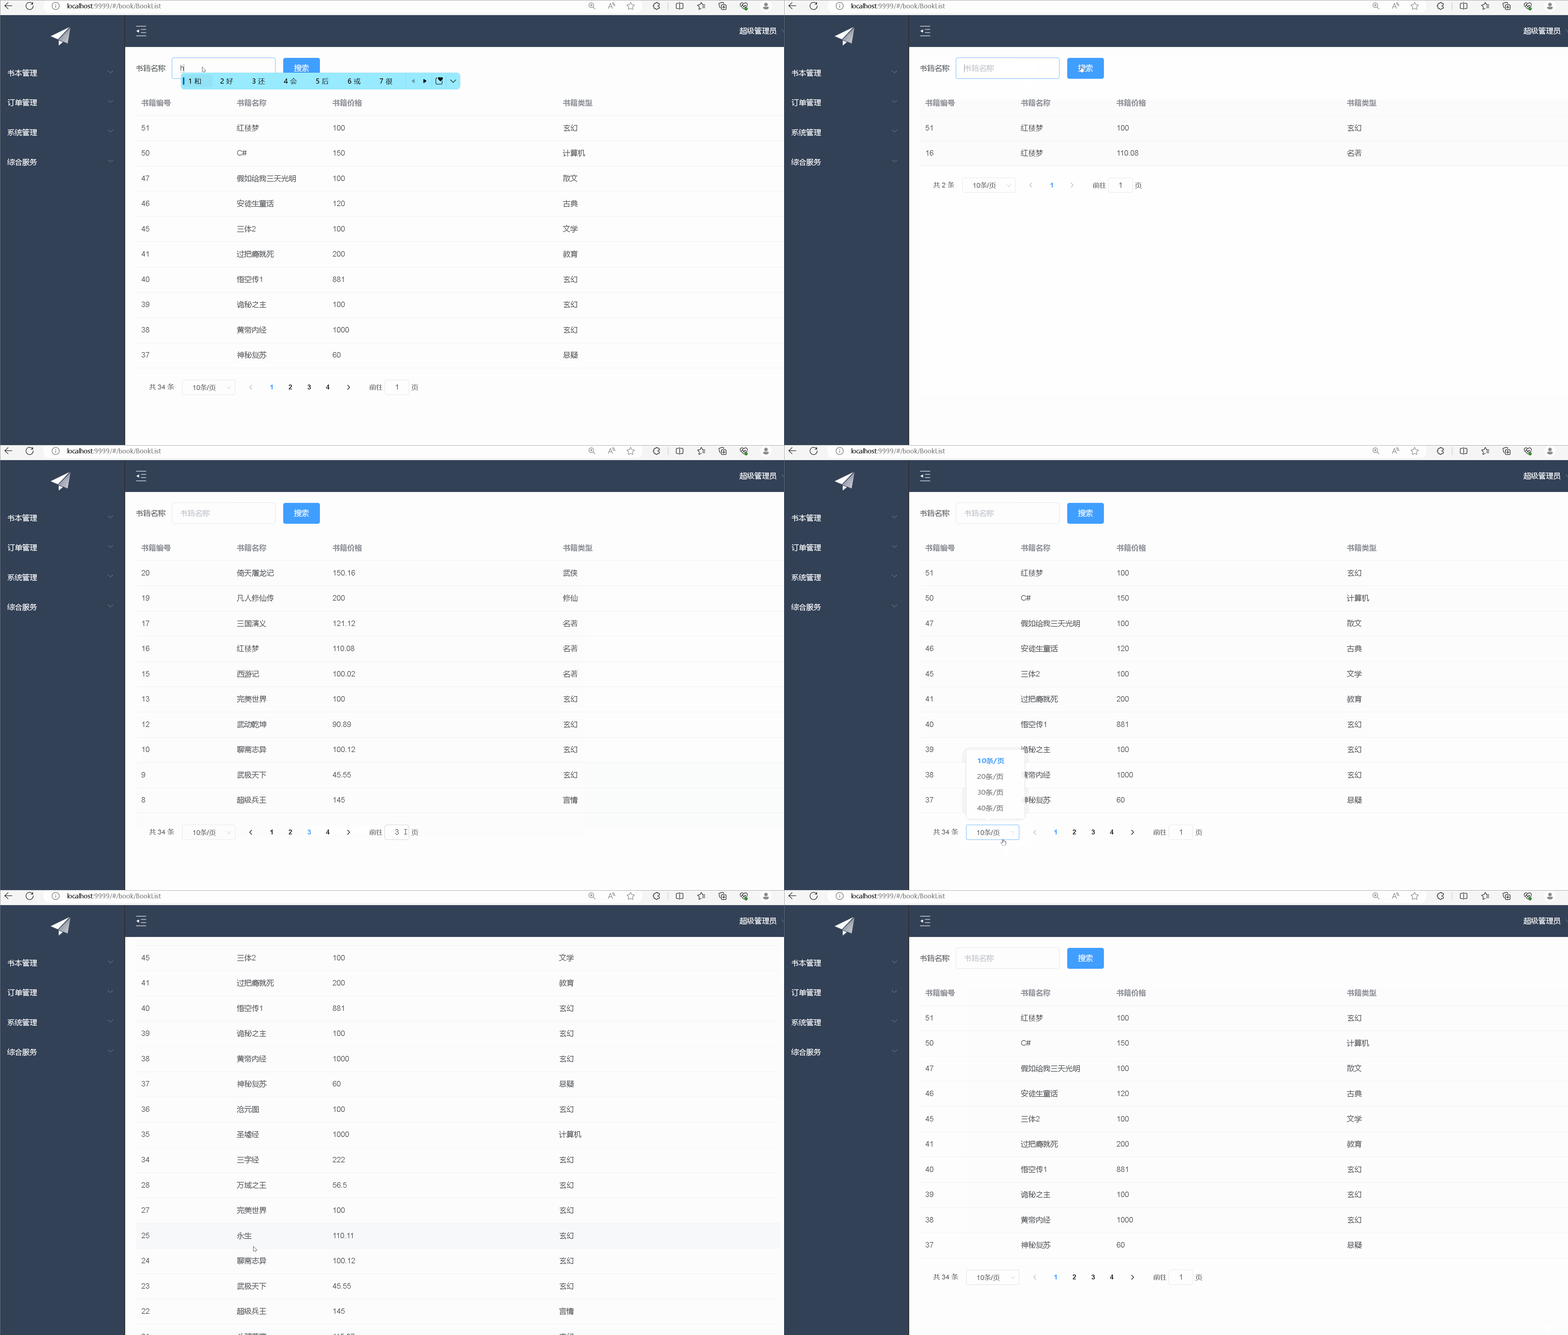
效果展示
