92 # express 中的中间件的实现

news2024/11/19 15:34:38

上一节实现 express 的优化处理,这一节来实现 express 的中间件

中间件的特点:

  • 可以决定是否向下执行
  • 可以拓展属性和方法
  • 可以权限校验
  • 中间件的放置顺序在路由之前

中间件基于路由,只针对路径拦截,下面是中间件的匹配规则:

  1. 路径为 / 表示任何路径都能匹配到
  2. 如果以这个路径开头,则匹配
  3. 和路由的路径一样,也可以匹配

先看 express 的中间件 demo

const express = require("express");
const app = express();

app.use("/", (req, res, next) => {
    if (req.query.kaimo == "313") {
        next();
    } else {
        res.send("没有权限访问");
    }
});

app.get("/", (req, res, next) => {
    res.end("get okk end");
});
app.post("/", (req, res, next) => {
    res.end("post okk end");
});

app.listen(3000, () => {
    console.log(`server start 3000`);
    console.log(`在线访问地址:http://localhost:3000/`);
});

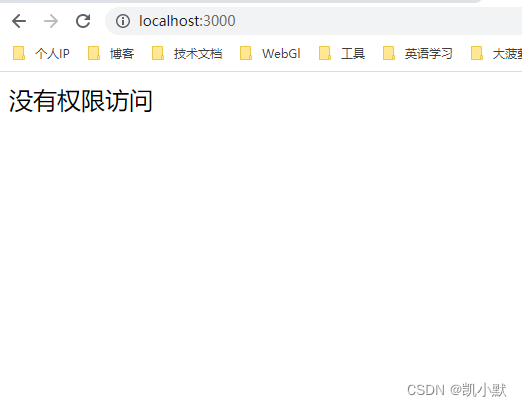
控制台执行下面命令:

curl -v -X POST http://localhost:3000/

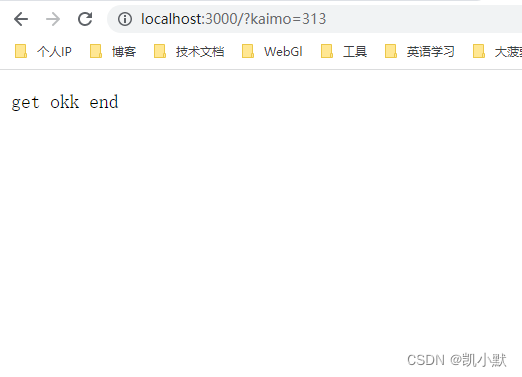
然后去访问:http://localhost:3000/
在这里插入图片描述
在这里插入图片描述
下面实现 express 中间件如图:我们需要在 Router 的前面添加中间件,它没有 route 属性,有路径跟 handler
在这里插入图片描述
application.js

const http = require("http");
const Router = require("./router");
const methods = require("methods");
console.log("methods----->", methods);

function Application() {}

// 调用此方法才开始创建,不是创建应用时直接装载路由
Application.prototype.lazy_route = function () {
    if (!this._router) {
        this._router = new Router();
    }
};

methods.forEach((method) => {
    Application.prototype[method] = function (path, ...handlers) {
        this.lazy_route();
        this._router[method](path, handlers);
    };
});

Application.prototype.use = function () {
    this.lazy_route();
    this._router.use(...arguments);
};

Application.prototype.listen = function () {
    const server = http.createServer((req, res) => {
        function done() {
            res.end(`kaimo-express Cannot ${req.method} ${req.url}`);
        }
        this.lazy_route();
        this._router.handle(req, res, done);
    });
    server.listen(...arguments);
};

module.exports = Application;

router/index.js

const url = require("url");
const Route = require("./route");
const Layer = require("./layer");
const methods = require("methods");

function Router() {
    // 维护所有的路由
    this.stack = [];
}

Router.prototype.route = function (path) {
    // 产生 route
    let route = new Route();
    // 产生 layer 让 layer 跟 route 进行关联
    let layer = new Layer(path, route.dispatch.bind(route));
    // 每个路由都具备一个 route 属性,稍后路径匹配到后会调用 route 中的每一层
    layer.route = route;
    // 把 layer 放到路由的栈中
    this.stack.push(layer);
    return route;
};

methods.forEach((method) => {
    Router.prototype[method] = function (path, handlers) {
        // 1.用户调用 method 时,需要保存成一个 layer 当道栈中
        // 2.产生一个 Route 实例和当前的 layer 创造关系
        // 3.要将 route 的 dispatch 方法存到 layer 上
        let route = this.route(path);
        // 让 route 记录用户传入的 handler 并且标记这个 handler 是什么方法
        route[method](handlers);
    };
});

Router.prototype.use = function (path, ...handlers) {
    // 默认第一个是路径,后面是一个个的方法,路径可以不传
    if (typeof path === "function") {
        handlers.unshift(path);
        path = "/";
    }
    // 如果是多个函数需要循环添加层
    for (let i = 0; i < handlers.length; i++) {
        let layer = new Layer(path, handlers[i]);
        // 中间件不需要 route 属性
        layer.route = undefined;
        this.stack.push(layer);
    }
};

Router.prototype.handle = function (req, res, out) {
    console.log("请求到了");
    // 需要取出路由系统中 Router 存放的 layer 依次执行
    const { pathname } = url.parse(req.url);
    let idx = 0;
    let next = () => {
        // 遍历完后没有找到就直接走出路由系统
        if (idx >= this.stack.length) return out();
        let layer = this.stack[idx++];
        // 需要判断 layer 上的 path 和当前请求路由是否一致,一致就执行 dispatch 方法
        if (layer.match(pathname)) {
            // 中间件没有方法可以匹配
            if (!layer.route) {
                layer.handle_request(req, res, next);
            } else {
                // 将遍历路由系统中下一层的方法传入
                // 加速匹配,如果用户注册过这个类型的方法在去执行
                if (layer.route.methods[req.method.toLowerCase()]) {
                    layer.handle_request(req, res, next);
                } else {
                    next();
                }
            }
        } else {
            next();
        }
    };
    next();
};

module.exports = Router;

layer.js

function Layer(path, handler) {
    this.path = path;
    this.handler = handler;
}

Layer.prototype.match = function (pathname) {
    if (this.path === pathname) {
        return true;
    }
    // 如果是中间件,进行中间件的匹配规则
    if (!this.route) {
        if (this.path == "/") {
            return true;
        }
        // /aaaa/b 需要 /aaaa/ 才能匹配上
        return pathname.startsWith(this.path + "/");
    }
    return false;
};
Layer.prototype.handle_request = function (req, res, next) {
    this.handler(req, res, next);
};
module.exports = Layer;

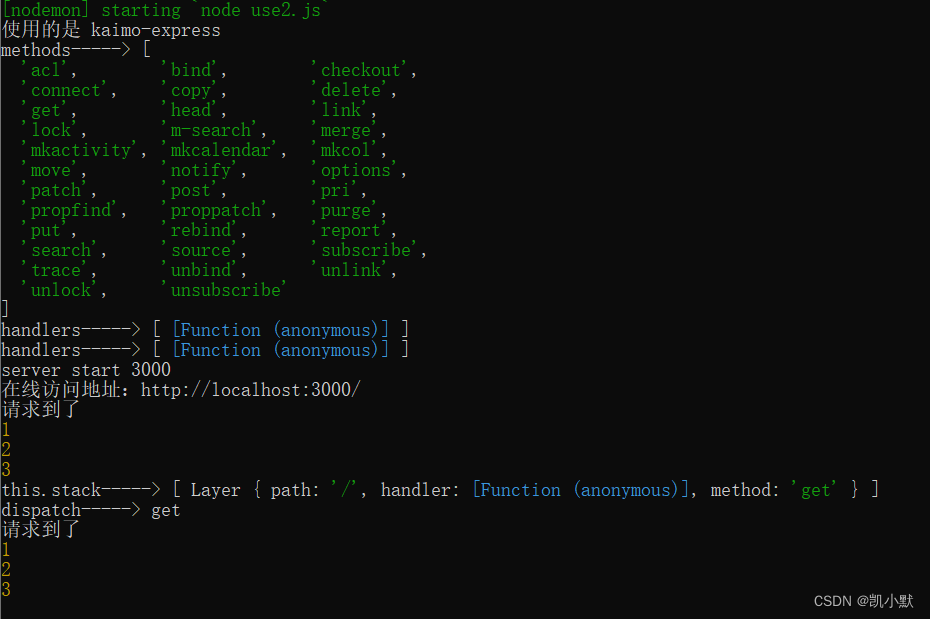
测试demo

const express = require("./kaimo-express");
const app = express();

app.use((req, res, next) => {
    console.log(1);
    next();
});
app.use((req, res, next) => {
    console.log(2);
    next();
});
app.use((req, res, next) => {
    console.log(3);
    next();
});

app.get("/", (req, res, next) => {
    res.end("get okk end");
});
app.post("/", (req, res, next) => {
    res.end("post okk end");
});

app.listen(3000, () => {
    console.log(`server start 3000`);
    console.log(`在线访问地址:http://localhost:3000/`);
});
在这里插入图片描述

本文来自互联网用户投稿,该文观点仅代表作者本人,不代表本站立场。本站仅提供信息存储空间服务,不拥有所有权,不承担相关法律责任。如若转载,请注明出处:http://www.coloradmin.cn/o/1035641.html

如若内容造成侵权/违法违规/事实不符,请联系多彩编程网进行投诉反馈,一经查实,立即删除!

相关文章

HTTP、TCP、SOCKET三者之间区别和原理

7层网络模型 网络在世界范围内实现互联的标准框架 7层为理想模型&#xff0c;一般实际运用没有7层 详细内容 HTTP属于7层应用层 BSD socket属于5层会话层 TCP/IP属于4成传输层 TCP/IP协议 三次握手 笔者解析&#xff1a; 第一次握手&#xff1a;实现第一步需要客户端主动…

【WSL】下载appx包将WSL装在非系统盘

装系统软件这事&#xff0c;主打一个小强精神 首先&#xff0c;准备好一个微软官方提供的安装包。下载链接&#xff1a;https://learn.microsoft.com/en-us/windows/wsl/install-manual#downloading-distributions 然后&#xff0c;剩下步骤在这个问题讨论中已经说明了&#xf…

【苹果】SpringBoot监听Iphone15邮件提醒,Selenium+Python自动化抢购脚本

前言 &#x1f34a;缘由 Iphone15来了&#xff0c;两年之约你还记得吗&#xff1f; 两年前&#xff0c;与特别的人有一个特别的约定。虽物是人非&#xff0c;但思念仍在。 遂整合之前iphone13及iphone14的相关抢购代码&#xff0c;完成一个SpringBoot监听Iphone15有货邮件提…

PHP后台实现微信小程序登录

微信小程序官方给了十分详细的登陆时序图&#xff0c;当然为了安全着想&#xff0c;应该加上签名加密。 微信小程序端 1).调用wx.login获取 code 。 2).调用wx.getUserInfo获取签名所需的 rawData , signatrue , encryptData 。 3).发起请求将获取的数据发送的后台。 login: …

Nginx 解决内容安全策略CSP(Content-Security-Policy)配置方式

1、修改 nginx 配置文件 在nginx.conf 配置文件中&#xff0c;增加如下配置内容&#xff1a; add_header Content-Security-Policy "default-src self localhost:8080 unsafe-inline unsafe-eval blob: data: ;";修改后效果如下&#xff1a; 2、重启 nginx 服务 …

【CFD小工坊】模型网格(三角形网格)

【CFD小工坊】模型网格&#xff08;三角形网格&#xff09; 前言网格几何网格编号编程实现数据读入网格数据构建 本系列博文的是我学习二维浅水方程理论&#xff0c;直至编译一个实用的二维浅水流动模型的过程。&#xff08;上一篇Blog回顾&#xff09; 前言 本二维浅水模型将…

Docker部署Nginx+FastDFS插件

文章目录 一、部署FastDFS二、部署Nginx(带FastDFS插件)三、FastDFS上传文件Nginx访问验证 一、部署FastDFS 1、准备工作 docker pull qinziteng/fastdfs:5.05 Pwd"/data/software/fastdfs" mkdir ${Pwd}/{storage,tracker} -p2、创建TEST容器&#xff0c;将fastdf…

uniapp中vue3使用uni.createSelectorQuery().in(this)报错

因为VUE3中使用setup没有this作用域&#xff0c;所以报错 解决办法&#xff1a;使用getCurrentInstance()方法获取组件实例 import { getCurrentInstance } from vue;const instance getCurrentInstance(); // 获取组件实例 const DOMArr uni.createSelectorQuery().in(ins…

【C#】.Net基础语法二

目录 一、字符串(String) 【1.1】字符串创建和使用 【1.2】字符串其他方法 【1.3】字符串格式化的扩展方法 【1.4】字符串空值和空对象比较 【1.5】字符串中的转移字符 【1.6】大写的String和小写的string 【1.7】StringBuilder类的重要性 二、数组(Array) 【2.1】声…

大数据的崭露头角:数据湖与数据仓库的融合之道

文章目录 数据湖与数据仓库的基本概念数据湖&#xff08;Data Lake&#xff09;数据仓库&#xff08;Data Warehouse&#xff09; 数据湖和数据仓库的优势和劣势数据湖的优势数据湖的劣势数据仓库的优势数据仓库的劣势 数据湖与数据仓库的融合之道1. 数据分类和标记2. 元数据管…

RabbitMQ快速入门——消费者

public class Consumer_HelloWorld {public static void main(String[] args) throws IOException, TimeoutException {//1.创建连接工厂ConnectionFactory factory new ConnectionFactory();//2.设置参数factory.setHost("172.16.98.133"); ip 默认值 localhostfac…

Vue3-Vue3生命周期、自定义hook函数、toRef与toRefs、其他组合式API、组合式API的优势、Vue3新的组件和功能

Vue3&#xff08;2&#xff09; 更多Vue.js知识请点击——Vue.js &#x1f954;&#xff1a;有的山长满荆棘&#xff0c;有的山全是野兽&#xff0c;所以你应该是自己的那座山 文章目录 Vue3&#xff08;2&#xff09;一、Vue3生命周期二、自定义hook函数三、toRef与toRefs四、…

Ctfshow web入门 phpCVE篇 web311-web315 详细题解 全

CTFshow phpCVE web311 CVE-2019-11043 PHP远程代码执行漏洞复现&#xff08;CVE-2019-11043&#xff09;【反弹shell成功】-腾讯云开发者社区-腾讯云 (tencent.com) 漏洞描述 CVE-2019-11043 是一个远程代码执行漏洞&#xff0c;使用某些特定配置的 Nginx PHP-FPM 的服务…

RabbitMQ的工作模式——WorkQueues

1.工作队列模式 生产者代码 public class Producer_WorkQueues1 {public static void main(String[] args) throws IOException, TimeoutException {//1.创建连接工厂ConnectionFactory factory new ConnectionFactory();//2.设置参数factory.setHost("172.16.98.133&qu…

基于Android+OpenCV+CNN+Keras的智能手语数字实时翻译——深度学习算法应用(含Python、ipynb工程源码)+数据集(一)

目录 前言总体设计系统整体结构图系统流程图 运行环境Python环境TensorFlow环境Keras环境Android环境1. 安装AndroidStudio2. 导入TensorFlow的jar包和so库3. 导入OpenCV库 相关其它博客工程源代码下载其它资料下载 前言 本项目依赖于Keras深度学习模型&#xff0c;旨在对手语…

idea更改java项目名

做了一个普通的java项目&#xff08;使用socket进行网络通信的练手项目&#xff09;&#xff0c;需要更改项目名&#xff0c;更改过程记录在这里。 修改项目名可能会出现很多错误&#xff0c;建议先备份当前项目 1.在idea里&#xff0c;右键项目名——》选择Refactor——》选择…

服务注册发现_搭建单机Eureka注册中心

创建cloud-eureka-server7001模块 pom添加依赖 <?xml version"1.0" encoding"UTF-8"?> <project xmlns"http://maven.apache.org/POM/4.0.0"xmlns:xsi"http://www.w3.org/2001/XMLSchema-instance"xsi:schemaLocation&quo…

Xshell工具连接本地虚拟机Linux系统

你知道的越多&#xff0c;你不知道的越多&#xff1b;本文仅做记录&#xff0c;方便以后备阅。希望也能帮到正在看这篇文章的你。 使用Xshell工具连接Linux系统具有方便&#xff0c;易于操作等诸多特点。对于Xshell的介绍&#xff0c;我就不详细说了。我相信百度百科上的介绍更…

RabbitMQ工作模式——PubSub生产者及消费者

PubSub模式生产者代码 public class Producer_PubSub {public static void main(String[] args) throws IOException, TimeoutException {//1.创建连接工厂ConnectionFactory factory new ConnectionFactory();//2.设置参数factory.setHost("172.16.98.133"); ip 默…