【python】ray库使用
- 安装
- 案例运行
- 案例代码(torch)
- 运行输出
- 解释
- 案例代码(tensorflow)
- 运行结果
安装
注意事项:
在windows下,需要python版本3.7以上,详见https://docs.ray.io/en/latest/ray-overview/installation.html
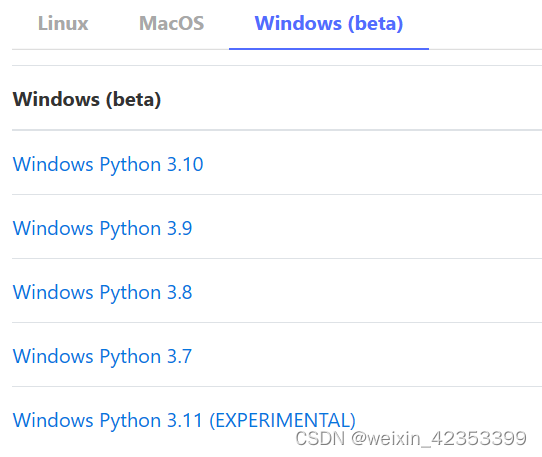
本人python版本3.9
直接pip install ray进行安装;
需要的库:
pyarrow;
torch;
tensorflow;
案例运行
案例代码(torch)
import torch
import torch.nn as nn

import ray
from ray import train
from ray.air import session, Checkpoint
from ray.train.torch import TorchTrainer
from ray.air.config import ScalingConfig


# If using GPUs, set this to True.
use_gpu = False


input_size = 1
layer_size = 15
output_size = 1
num_epochs = 3


class NeuralNetwork(nn.Module):
    def __init__(self):
        super(NeuralNetwork, self).__init__()
        self.layer1 = nn.Linear(input_size, layer_size) #输入层到隐含层
        self.relu = nn.ReLU()                           #激活函数
        self.layer2 = nn.Linear(layer_size, output_size)#隐含层到输出层

    def forward(self, input):
        return self.layer2(self.relu(self.layer1(input))) #前向传播


def train_loop_per_worker():
    dataset_shard = session.get_dataset_shard("train")
    model = NeuralNetwork()
    loss_fn = nn.MSELoss()
    optimizer = torch.optim.SGD(model.parameters(), lr=0.1)

    model = train.torch.prepare_model(model)

    for epoch in range(num_epochs):
        for batches in dataset_shard.iter_torch_batches(
            batch_size=32, dtypes=torch.float
        ):
            inputs, labels = torch.unsqueeze(batches["x"], 1), batches["y"]
            output = model(inputs)
            loss = loss_fn(output, labels)
            optimizer.zero_grad()
            loss.backward()
            optimizer.step()
            print(f"epoch: {epoch}, loss: {loss.item()}")

        session.report(
            {},
            checkpoint=Checkpoint.from_dict(
                dict(epoch=epoch, model=model.state_dict())
            ),
        )


train_dataset = ray.data.from_items([{"x": x, "y": 2 * x + 1} for x in range(200)])
scaling_config = ScalingConfig(num_workers=3, use_gpu=use_gpu)
trainer = TorchTrainer(
    train_loop_per_worker=train_loop_per_worker,
    scaling_config=scaling_config,
    datasets={"train": train_dataset},
)
result = trainer.fit()
运行输出
2023-09-06 09:56:24,749	INFO worker.py:1621 -- Started a local Ray instance.
##启动本地Ray实例

2023-09-06 09:56:34,561	INFO tune.py:666 -- [output] This will use the new output engine with verbosity 1. To disable the new output and use the legacy output engine, set the environment variable RAY_AIR_NEW_OUTPUT=0. For more information, please see https://github.com/ray-project/ray/issues/36949
这将使用冗长度为1的新输出引擎。要禁用新的输出并使用旧的输出引擎,可以设置环境变量RAY_AIR_NEW_OUTPUT=0。欲了解更多信息,请访问https://github.com/ray-project/ray/issues/36949

2023-09-06 09:56:34,571	INFO tensorboardx.py:178 -- pip install "ray[tune]" to see TensorBoard files.
pip安装“ray[tune]”来查看TensorBoard文件。

2023-09-06 09:56:34,572	WARNING callback.py:144 -- The TensorboardX logger cannot be instantiated because either TensorboardX or one of it's dependencies is not installed. Please make sure you have the latest version of TensorboardX installed: `pip install -U tensorboardx`
TensorboardX记录器不能被实例化,因为TensorboardX或它的一个依赖项没有安装。请确保你已经安装了最新版本的TensorboardX: ' pip install -U TensorboardX

2023-09-06 09:56:34,614	INFO data_parallel_trainer.py:404 -- GPUs are detected in your Ray cluster, but GPU training is not enabled for this trainer. To enable GPU training, make sure to set `use_gpu` to True in your scaling config.
在你的Ray集群中检测到GPU,但是GPU训练没有为这个训练器启用。要启用GPU训练,请确保在缩放配置中将' use_gpu '设置为True。
View detailed results here: c://\Users\lucia\ray_results\TorchTrainer_2023-09-06_09-56-34

Training started without custom configuration.
没有特定配置的训练开始。

(TrainTrainable pid=21644) GPUs are detected in your Ray cluster, but GPU training is not enabled for this trainer. To enable GPU training, make sure to set `use_gpu` to True in your scaling config.
在你的Ray集群中检测到GPU,但是GPU训练没有为这个训练器启用。要启用GPU训练,请确保在scaling配置中将' use_gpu '设置为True。
(TorchTrainer pid=21644) GPUs are detected in your Ray cluster, but GPU training is not enabled for this trainer. To enable GPU training, make sure to set `use_gpu` to True in your scaling config.
(TorchTrainer pid=21644) Starting distributed worker processes: ['6896 (127.0.0.1)', '15156 (127.0.0.1)', '18360 (127.0.0.1)']
启动分布式工作进程
(RayTrainWorker pid=6896) Setting up process group for: env:// [rank=0, world_size=3]   建立进程组
(RayTrainWorker pid=6896) Moving model to device: cuda:0   将模型移动到设备
(SplitCoordinator pid=18160) Auto configuring locality_with_output=['675a449d1eb8045a8c0e594f8eb41650ad4aba5b5270a544e0616bd5', '675a449d1eb8045a8c0e594f8eb41650ad4aba5b5270a544e0616bd5', '675a449d1eb8045a8c0e594f8eb41650ad4aba5b5270a544e0616bd5']
自动配置locality_with_output
(RayTrainWorker pid=6896) Wrapping provided model in DistributedDataParallel.   在distributeddataparliel中包装提供的模型
(SplitCoordinator pid=18160) Executing DAG InputDataBuffer[Input] -> OutputSplitter[split(3, equal=True)]
执行DAG InputDataBuffer[Input] ->OutputSplitter(分裂(3 = = True))
(SplitCoordinator pid=18160) Execution config: ExecutionOptions(resource_limits=ExecutionResources(cpu=None, gpu=None, object_store_memory=2000000000.0), locality_with_output=['675a449d1eb8045a8c0e594f8eb41650ad4aba5b5270a544e0616bd5', '675a449d1eb8045a8c0e594f8eb41650ad4aba5b5270a544e0616bd5', '675a449d1eb8045a8c0e594f8eb41650ad4aba5b5270a544e0616bd5'], preserve_order=False, actor_locality_enabled=True, verbose_progress=False)
(SplitCoordinator pid=18160) Tip: For detailed progress reporting, run `ray.data.DataContext.get_current().execution_options.verbose_progress = True`
要查看详细的进度报告,请运行ray.data.DataContext.get_current().execution_options。verbose_progress = True '

(pid=18160) Running 0:   0%|          | 0/200 [00:00<?, ?it/s] 这是运行的进度
(RayTrainWorker pid=15156) D:\ANACONDA\anaconda3\lib\site-packages\torch\nn\modules\loss.py:528: UserWarning: Using a target size (torch.Size([32])) that is different to the input size (torch.Size([32, 1])). This will likely lead to incorrect results due to broadcasting. Please ensure they have the same size.
目标大小(torch. size([32]))与输入大小(torch. size)不同。大小([32岁,1]))。这很可能会因为广播而导致错误的结果。请确保它们的尺寸相同。
(RayTrainWorker pid=15156)   return F.mse_loss(input, target, reduction=self.reduction)
(RayTrainWorker pid=15156) epoch: 0, loss: 13041.18359375  第0个epoch,计算的损失是13041.18359375
(RayTrainWorker pid=15156) D:\ANACONDA\anaconda3\lib\site-packages\torch\nn\modules\loss.py:528: UserWarning: Using a target size (torch.Size([2])) that is different to the input size (torch.Size([2, 1])). This will likely lead to incorrect results due to broadcasting. Please ensure they have the same size. [repeated 3x across cluster] (Ray deduplicates logs by default. Set RAY_DEDUP_LOGS=0 to disable log deduplication, or see https://docs.ray.io/en/master/ray-observability/ray-logging.html#log-deduplication for more options.)
(RayTrainWorker pid=15156)   return F.mse_loss(input, target, reduction=self.reduction) [repeated 3x across cluster]
Training finished iteration 1 at 2023-09-06 09:58:54. Total running time: 2min 20s
训练在2023-09-06 09:58:54完成迭代1。总时长:2分20秒
+------------------------------+
| Training result              |
+------------------------------+
| time_this_iter_s     130.029 |
| time_total_s         130.029 |
| training_iteration         1 |
+------------------------------+
(TorchTrainer pid=21644) Could not upload checkpoint to c://\Users\lucia\ray_results\TorchTrainer_2023-09-06_09-56-34\TorchTrainer_9b8e5_00000_0_2023-09-06_09-56-34 even after 3 retries.Please check if the credentials expired and that the remote filesystem is supported. For large checkpoints or artifacts, consider increasing `SyncConfig(sync_timeout)` (current value: 1800 seconds).
无法上传检查点到c://\Users\lucia\ray_results\TorchTrainer_2023-09-06_09-56-34\TorchTrainer_9b8e5_00000_0_2023-09-06_09-56-34即使重试3次。请检查凭据是否过期以及是否支持远程文件系统。对于大型检查点或工件,考虑增加' SyncConfig(sync_timeout) '(当前值:1800秒)。
(TorchTrainer pid=21644) Last sync command failed: Sync process failed: [WinError 32] Failed copying 'C:/Users/lucia/ray_results/TorchTrainer_2023-09-06_09-56-34/TorchTrainer_9b8e5_00000_0_2023-09-06_09-56-34/checkpoint_000000/.is_checkpoint' to '/Users/lucia/ray_results/TorchTrainer_2023-09-06_09-56-34/TorchTrainer_9b8e5_00000_0_2023-09-06_09-56-34/checkpoint_000000/.is_checkpoint'. Detail: [Windows error 32] 另一个程序正在使用此文件,进程无法访问。
复制失败:因为另一个程序正在使用此文件,进程无法访问。
(TorchTrainer pid=21644)
(TorchTrainer pid=21644) Could not upload checkpoint to c://\Users\lucia\ray_results\TorchTrainer_2023-09-06_09-56-34\TorchTrainer_9b8e5_00000_0_2023-09-06_09-56-34 even after 3 retries.Please check if the credentials expired and that the remote filesystem is supported. For large checkpoints or artifacts, consider increasing `SyncConfig(sync_timeout)` (current value: 1800 seconds).
无法上传检查点到c://\Users\lucia\ray_results\TorchTrainer_2023-09-06_09-56-34\TorchTrainer_9b8e5_00000_0_2023-09-06_09-56-34即使重试3次。请检查凭据是否过期以及是否支持远程文件系统。对于大型检查点或工件,考虑增加' SyncConfig(sync_timeout) '(当前值:1800秒)。

2023-09-06 09:59:20,462	WARNING tune.py:1122 -- Trial Runner checkpointing failed: Sync process failed: GetFileInfo() yielded path 'C:/Users/lucia/ray_results/TorchTrainer_2023-09-06_09-56-34/TorchTrainer_9b8e5_00000_0_2023-09-06_09-56-34', which is outside base dir 'C:\Users\lucia\ray_results\TorchTrainer_2023-09-06_09-56-34'
GetFileInfo()生成路径'C:/Users/lucia/ray_results/TorchTrainer_2023-09-06_09-56-34/TorchTrainer_9b8e5_00000_0_2023-09-06_09-56-34',这是在基础目录'C:\Users\lucia\ray_results\TorchTrainer_2023-09-06_09-56-34'之外

Training completed after 3 iterations at 2023-09-06 09:59:20. Total running time: 2min 45s
训练在3次迭代后于2023-09-06 09:59:20完成。总时长:2分45秒
解释
1、想查看TensorBoard文件可以安装:
pip install ray[tune]
错误:Could not install packages due to an OSError: [WinError 5] 拒绝访问。: ‘D:\ANACONDA\anaconda3\Lib\site-packages\google\~rotobuf\internal\_api_implementation.cp39-win_amd64.pyd’
Consider using the --user option or check the permissions.
解决:用pip install --user ray[tune]
结果:
WARNING: Ignoring invalid distribution -rotobuf (d:\anaconda\anaconda3\lib\site-packages)
Installing collected packages: tensorboardX, pyarrow
  WARNING: The script plasma_store.exe is installed in 'C:\Users\lucia\AppData\Roaming\Python\Python39\Scripts' which is not on PATH.
  Consider adding this directory to PATH or, if you prefer to suppress this warning, use --no-warn-script-location.
Successfully installed pyarrow-6.0.1 tensorboardX-2.6.2.2
WARNING: Ignoring invalid distribution -rotobuf (d:\anaconda\anaconda3\lib\site-packages)
WARNING: Ignoring invalid distribution -rotobuf (d:\anaconda\anaconda3\lib\site-packages)
WARNING: Ignoring invalid distribution -rotobuf (d:\anaconda\anaconda3\lib\site-packages)
2、谷歌的tensorflow的tensorboard是一个web服务器,用于可视化神经网络的训练过程,它可视化标量值、图像、文本等,主要用于保存tensorflow中的事件,比如学习率、loss等。遗憾的是,其他深度学习框架缺少这样的工具,因此,tensorboardX就出现了,这个软件包的目的是让研究人员使用一个简单的界面来记录PyTorch中的事件(然后在tensorboard中显示可视化)。tensorboardX软件包目前支持记录标量、图像、音频、直方图、文本、嵌入和反向传播路径
3、
案例代码(tensorflow)
# -*- coding: utf-8 -*-
"""
Created on Wed Sep  6 11:50:48 2023

@author: lucia
"""
import ray
import tensorflow as tf

from ray.air import session
from ray.air.integrations.keras import ReportCheckpointCallback
from ray.train.tensorflow import TensorflowTrainer
from ray.air.config import ScalingConfig


# If using GPUs, set this to True.
use_gpu = False

a = 5
b = 10
size = 100


def build_model() -> tf.keras.Model:
    model = tf.keras.Sequential(
        [
            tf.keras.layers.InputLayer(input_shape=()),
            # Add feature dimension, expanding (batch_size,) to (batch_size, 1).
            tf.keras.layers.Flatten(),
            tf.keras.layers.Dense(10),
            tf.keras.layers.Dense(1),
        ]
    )
    return model


def train_func(config: dict):
    batch_size = config.get("batch_size", 64)
    epochs = config.get("epochs", 3)

    strategy = tf.distribute.MultiWorkerMirroredStrategy()
    with strategy.scope():
        # Model building/compiling need to be within `strategy.scope()`.
        multi_worker_model = build_model()
        multi_worker_model.compile(
            optimizer=tf.keras.optimizers.SGD(learning_rate=config.get("lr", 1e-3)),
            loss=tf.keras.losses.mean_squared_error,
            metrics=[tf.keras.metrics.mean_squared_error],
        )

    dataset = session.get_dataset_shard("train")

    results = []
    for _ in range(epochs):
        tf_dataset = dataset.to_tf(
            feature_columns="x", label_columns="y", batch_size=batch_size
        )
        history = multi_worker_model.fit(
            tf_dataset, callbacks=[ReportCheckpointCallback()]
        )
        results.append(history.history)
    return results


config = {"lr": 1e-3, "batch_size": 32, "epochs": 4}

train_dataset = ray.data.from_items(
    [{"x": x / 200, "y": 2 * x / 200} for x in range(200)]
)
scaling_config = ScalingConfig(num_workers=2, use_gpu=use_gpu)
trainer = TensorflowTrainer(
    train_loop_per_worker=train_func,
    train_loop_config=config,
    scaling_config=scaling_config,
    datasets={"train": train_dataset},
)
result = trainer.fit()
print(result.metrics)
运行结果
1、报错:A Message class can only inherit from Message
解决:
在spyder中将 Tools->preferences -> python interpreter中的User Module Reloader关掉。
将Enable UMR、Show reloaded modules list 选项取消!!!
然后restart kernel即可!
2、
TypeError: Descriptors cannot not be created directly.
If this call came from a _pb2.py file, your generated code is out of date and must be regenerated with protoc >= 3.19.0.
If you cannot immediately regenerate your protos, some other possible workarounds are:
 1. Downgrade the protobuf package to 3.20.x or lower.
 2. Set PROTOCOL_BUFFERS_PYTHON_IMPLEMENTATION=python (but this will use pure-Python parsing and will be much slower).

More information: https://developers.google.com/protocol-buffers/docs/news/2022-05-06#python-updates
解决方案:
卸载protobuf 已经安装的版本
pip uninstall protobuf
安装3.19.0版本
pip install protobuf==3.19.0
3、重启内核,重新运行,如果再失败,再重新运行