React(react18)中组件通信05——react-redux
- 1. 前言
- 1.1 React中组件通信的其他方式
- 1.2 介绍React-Redux
- 1.2.1 简单介绍React-Redux
- 1.2.2 官网
- 1.3 安装react-redux
- 2. 简单改写redux的例子
- 2.1 提供store
- 2.2 连接 Components + UI组件修改
- 2.2.1 连接 Components
- 2.2.2 修改UI组件
- 2.2.3 看效果
- 2.3 连接 Components——优化(优化容器组件)
- 2.4 优化容器组件(可怕的精简)
- 2.5 附代码
- 3. 附项目
1. 前言
1.1 React中组件通信的其他方式
- React(react18)中组件通信01——props.
- React(react18)中组件通信02——消息订阅与发布、取消订阅以及卸载组件时取消订阅.
- React(react18)中组件通信03——简单使用 Context 深层传递参数.
- React(react18)中组件通信04——redux入门.
1.2 介绍React-Redux
1.2.1 简单介绍React-Redux
- React-Redux是Redux 官方提供的 React 绑定库。 具有高效且灵活的特性。
- react-redux 是一个专为 React 应用开发而设计的基于 Redux 的库,提供了一些特定于 React 的功能和组件。
- 它提供了一系列的 API 和组件,方便在 React 组件中使用 Redux 进行状态管理。
- React-Redux 在概念上非常简单。它订阅 Redux 存储,检查组件所需的数据是否已更改,并重新渲染组件。
- react-redux 提供了一些特定于 React 的功能,如 connect 函数和 Provider 组件,用于连接 Redux 的 store,并将状态传递给 React 组件。
- React Redux 提供的
<Provider /> 组件,这使得 Redux store 能够在应用的其他地方使用(即:store只需在入口文件传递一次,其他需要store的容器组件中都可以获取)。
- React Redux 提供的
1.2.2 官网
- 参考官网:
- 官网地址:https://react-redux.js.org/.
- gitHub上:https://github.com/reduxjs/react-redux.
- Redux 中文官网.
- React Redux 中文文档.
- 了解react-redux的其他博客:
- React-Redux 的历史和实现.
- 关于下面用到的
connect API,去官网去官网:
https://cn.react-redux.js.org/tutorials/connect.
1.3 安装react-redux
- 安装命令如下:
# If you use npm:
npm install react-redux

# Or if you use Yarn:
yarn add react-redux
2. 简单改写redux的例子
- 注意,这个改写是在redux项目版本的基础上改写的,关于redux版本的,看下面的:
React(react18)中组件通信04——redux入门.
2.1 提供store
- 第一步我们需要使得 store 对于我们的应用是可见的。为了做到这个,我们使用 React Redux 提供的 API
<Provider />去包裹我们的应用。:- 首先先给改写后的目录结构

- 然后再看app.js 和 index.js

- 首先先给改写后的目录结构
2.2 连接 Components + UI组件修改
2.2.1 连接 Components
-
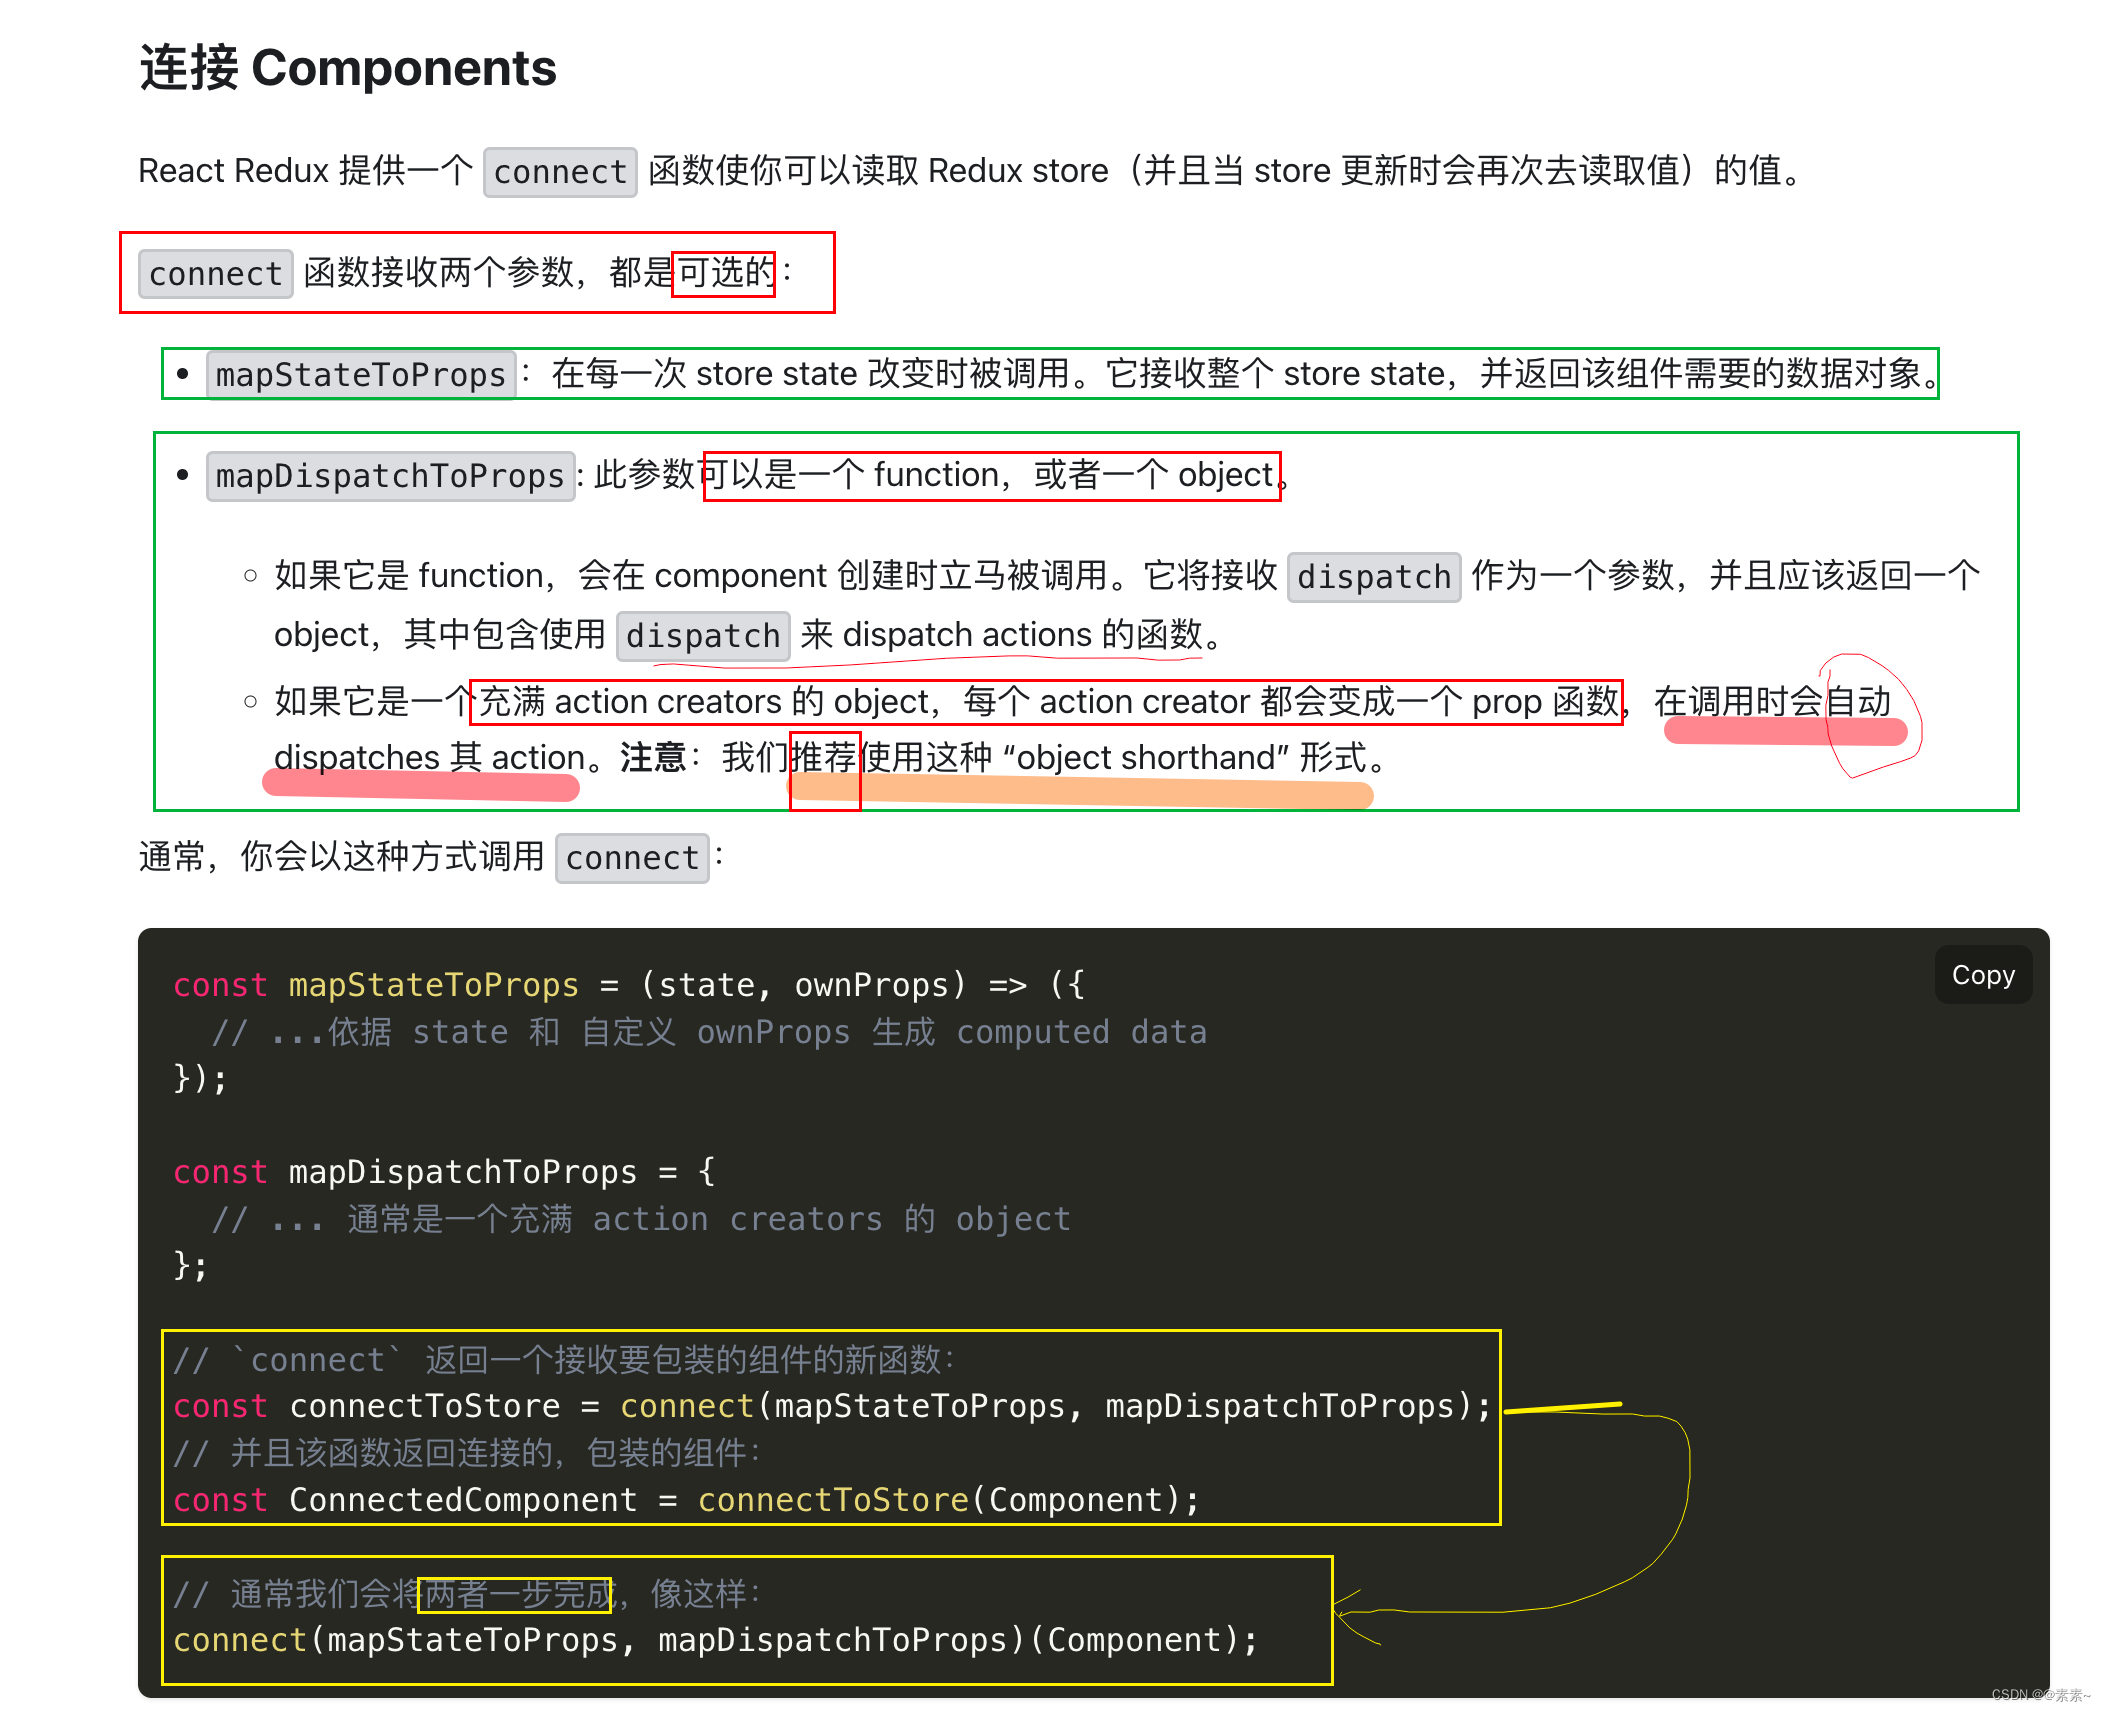
先看官网怎么讲解的
-
先简单写写实现效果,后续再优化,如下:
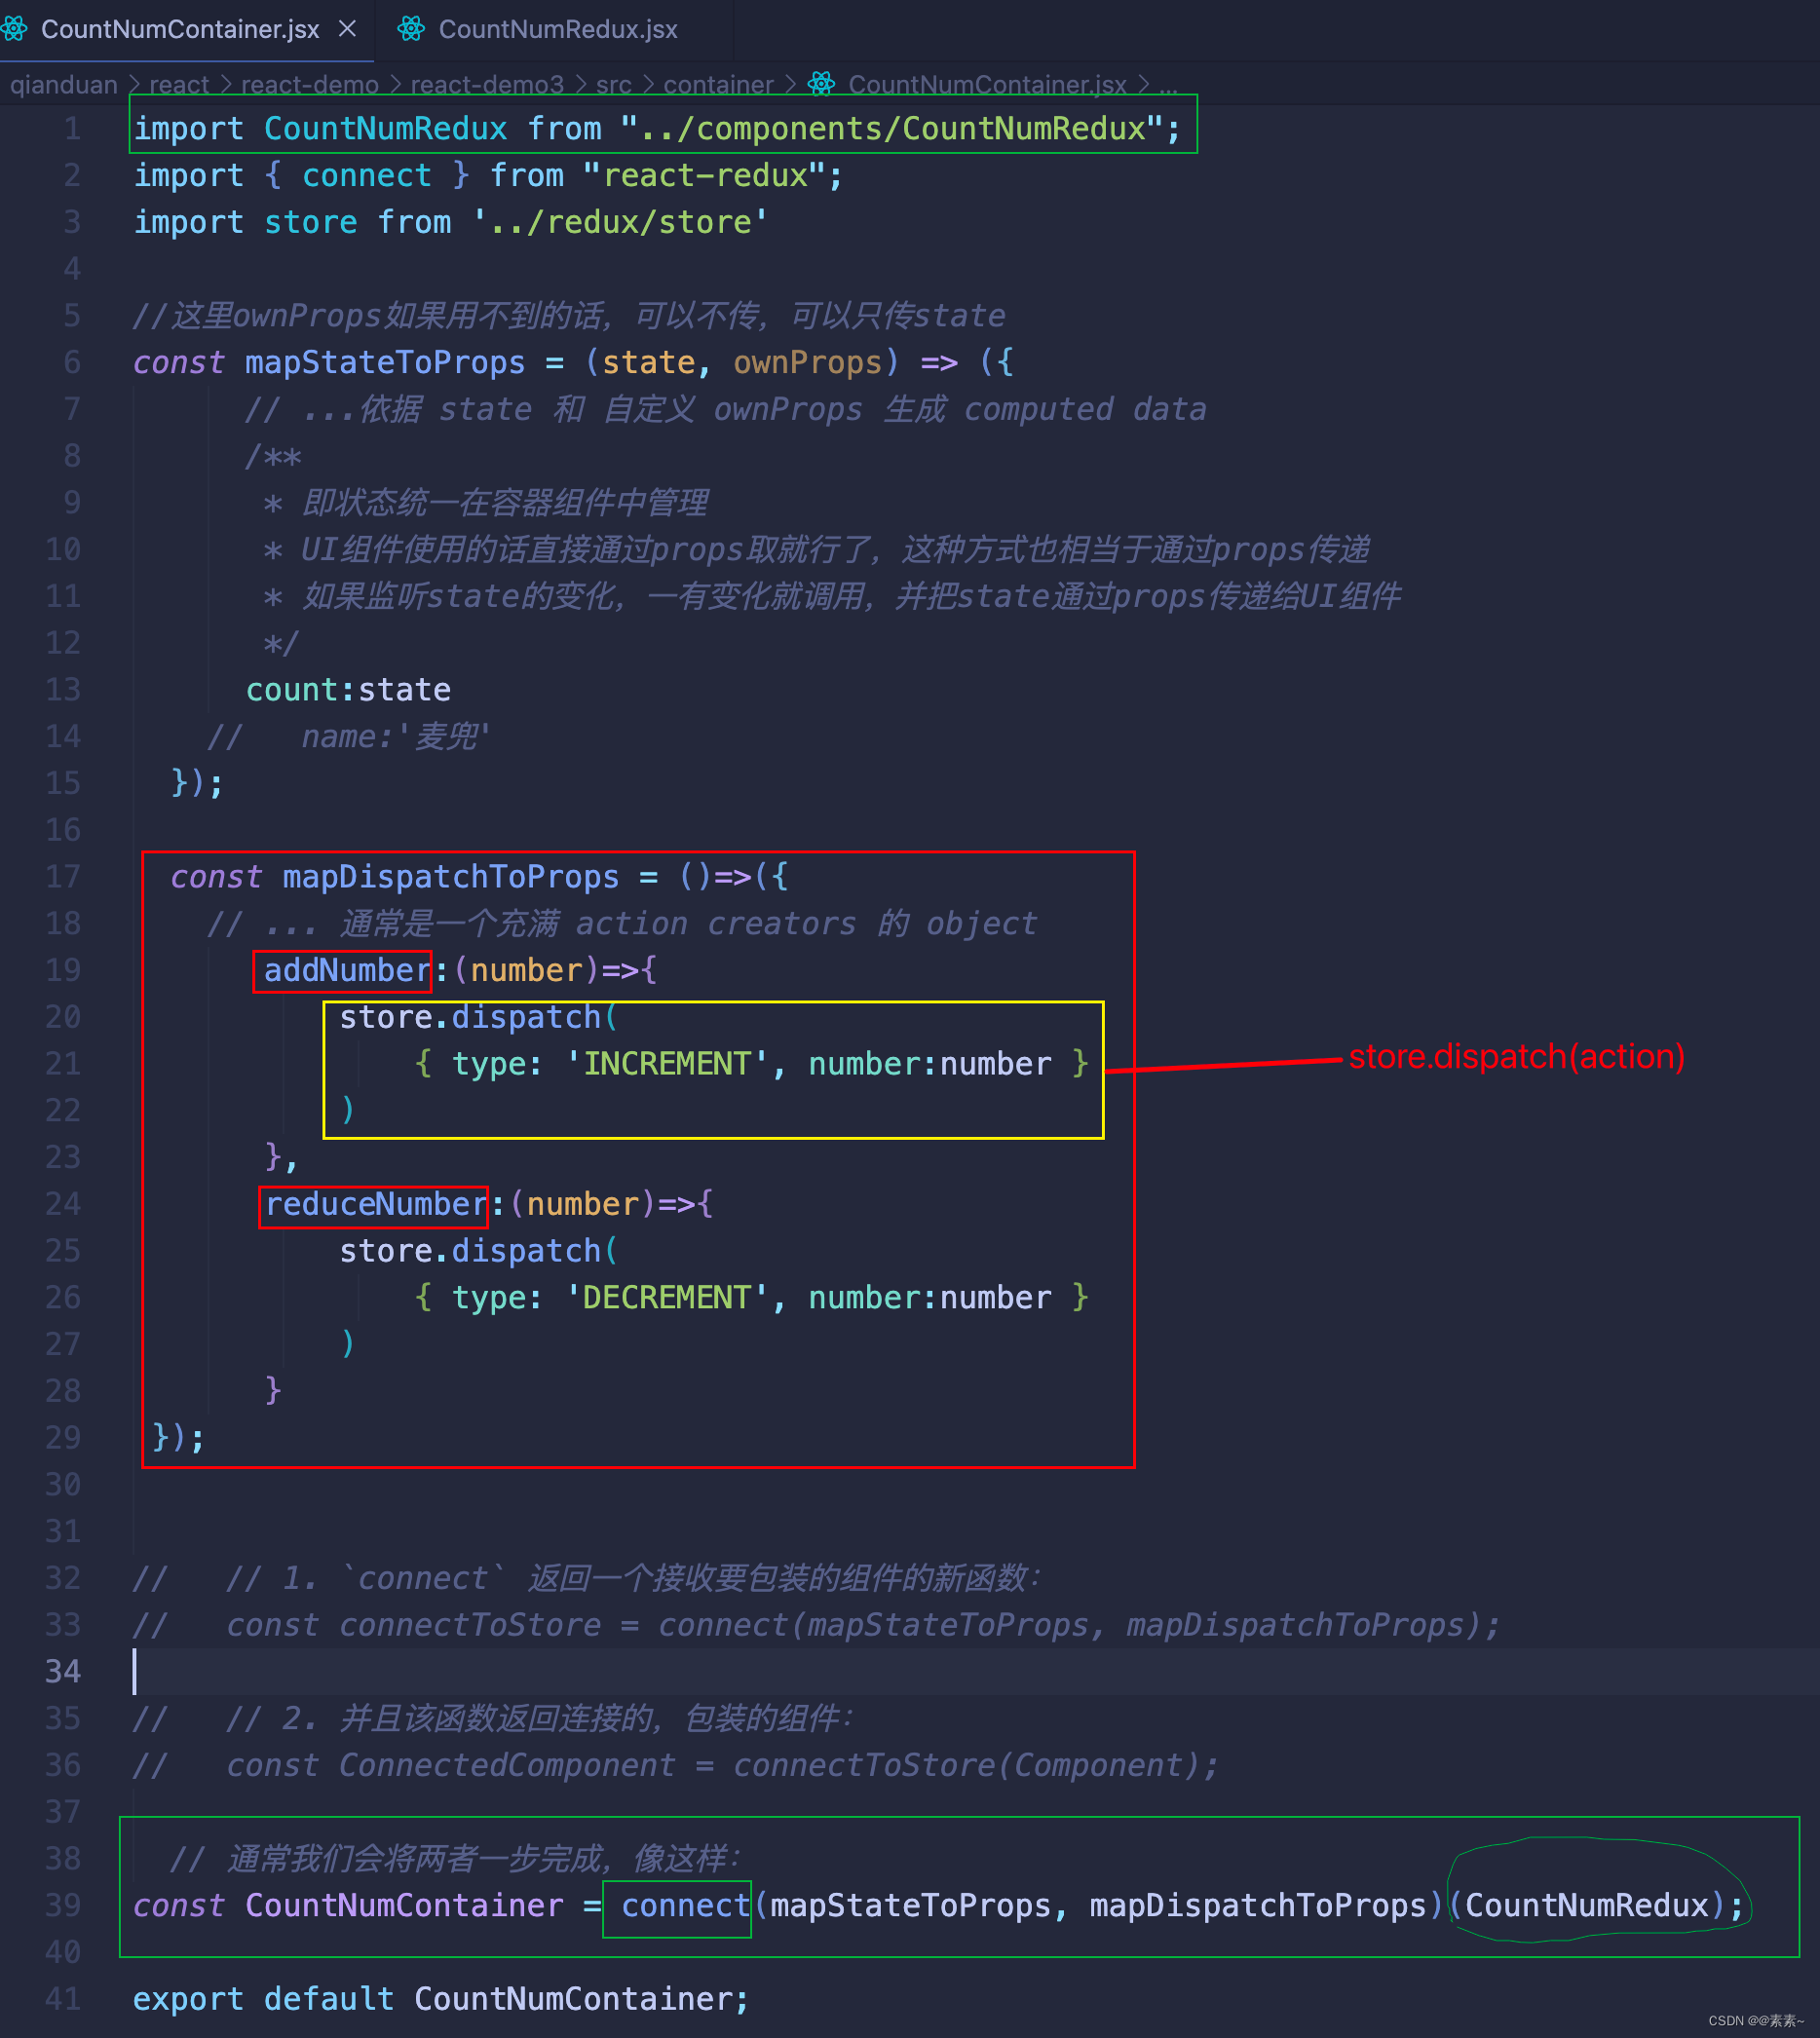
import CountNumRedux from "../components/CountNumRedux";
import { connect } from "react-redux";
import store from '../redux/store'

//这里ownProps如果用不到的话,可以不传,可以只传state
const mapStateToProps = (state, ownProps) => ({
      // ...依据 state 和 自定义 ownProps 生成 computed data
      /**
       * 即状态统一在容器组件中管理
       * UI组件使用的话直接通过props取就行了,这种方式也相当于通过props传递
       * 如果监听state的变化,一有变化就调用,并把state通过props传递给UI组件
       */
      count:state
    //   name:'麦兜'
  });

  const mapDispatchToProps = ()=>({
    // ... 通常是一个充满 action creators 的 object
       addNumber:(number)=>{
           store.dispatch(
               { type: 'INCREMENT', number:number }
           )
       },
       reduceNumber:(number)=>{
           store.dispatch(
               { type: 'DECREMENT', number:number }
           )
       }
 });


//   // 1. `connect` 返回一个接收要包装的组件的新函数:
//   const connectToStore = connect(mapStateToProps, mapDispatchToProps);

//   // 2. 并且该函数返回连接的,包装的组件:
//   const ConnectedComponent = connectToStore(Component);

  // 通常我们会将两者一步完成,像这样:
const CountNumContainer = connect(mapStateToProps, mapDispatchToProps)(CountNumRedux);

export default CountNumContainer;
2.2.2 修改UI组件
-
如下:
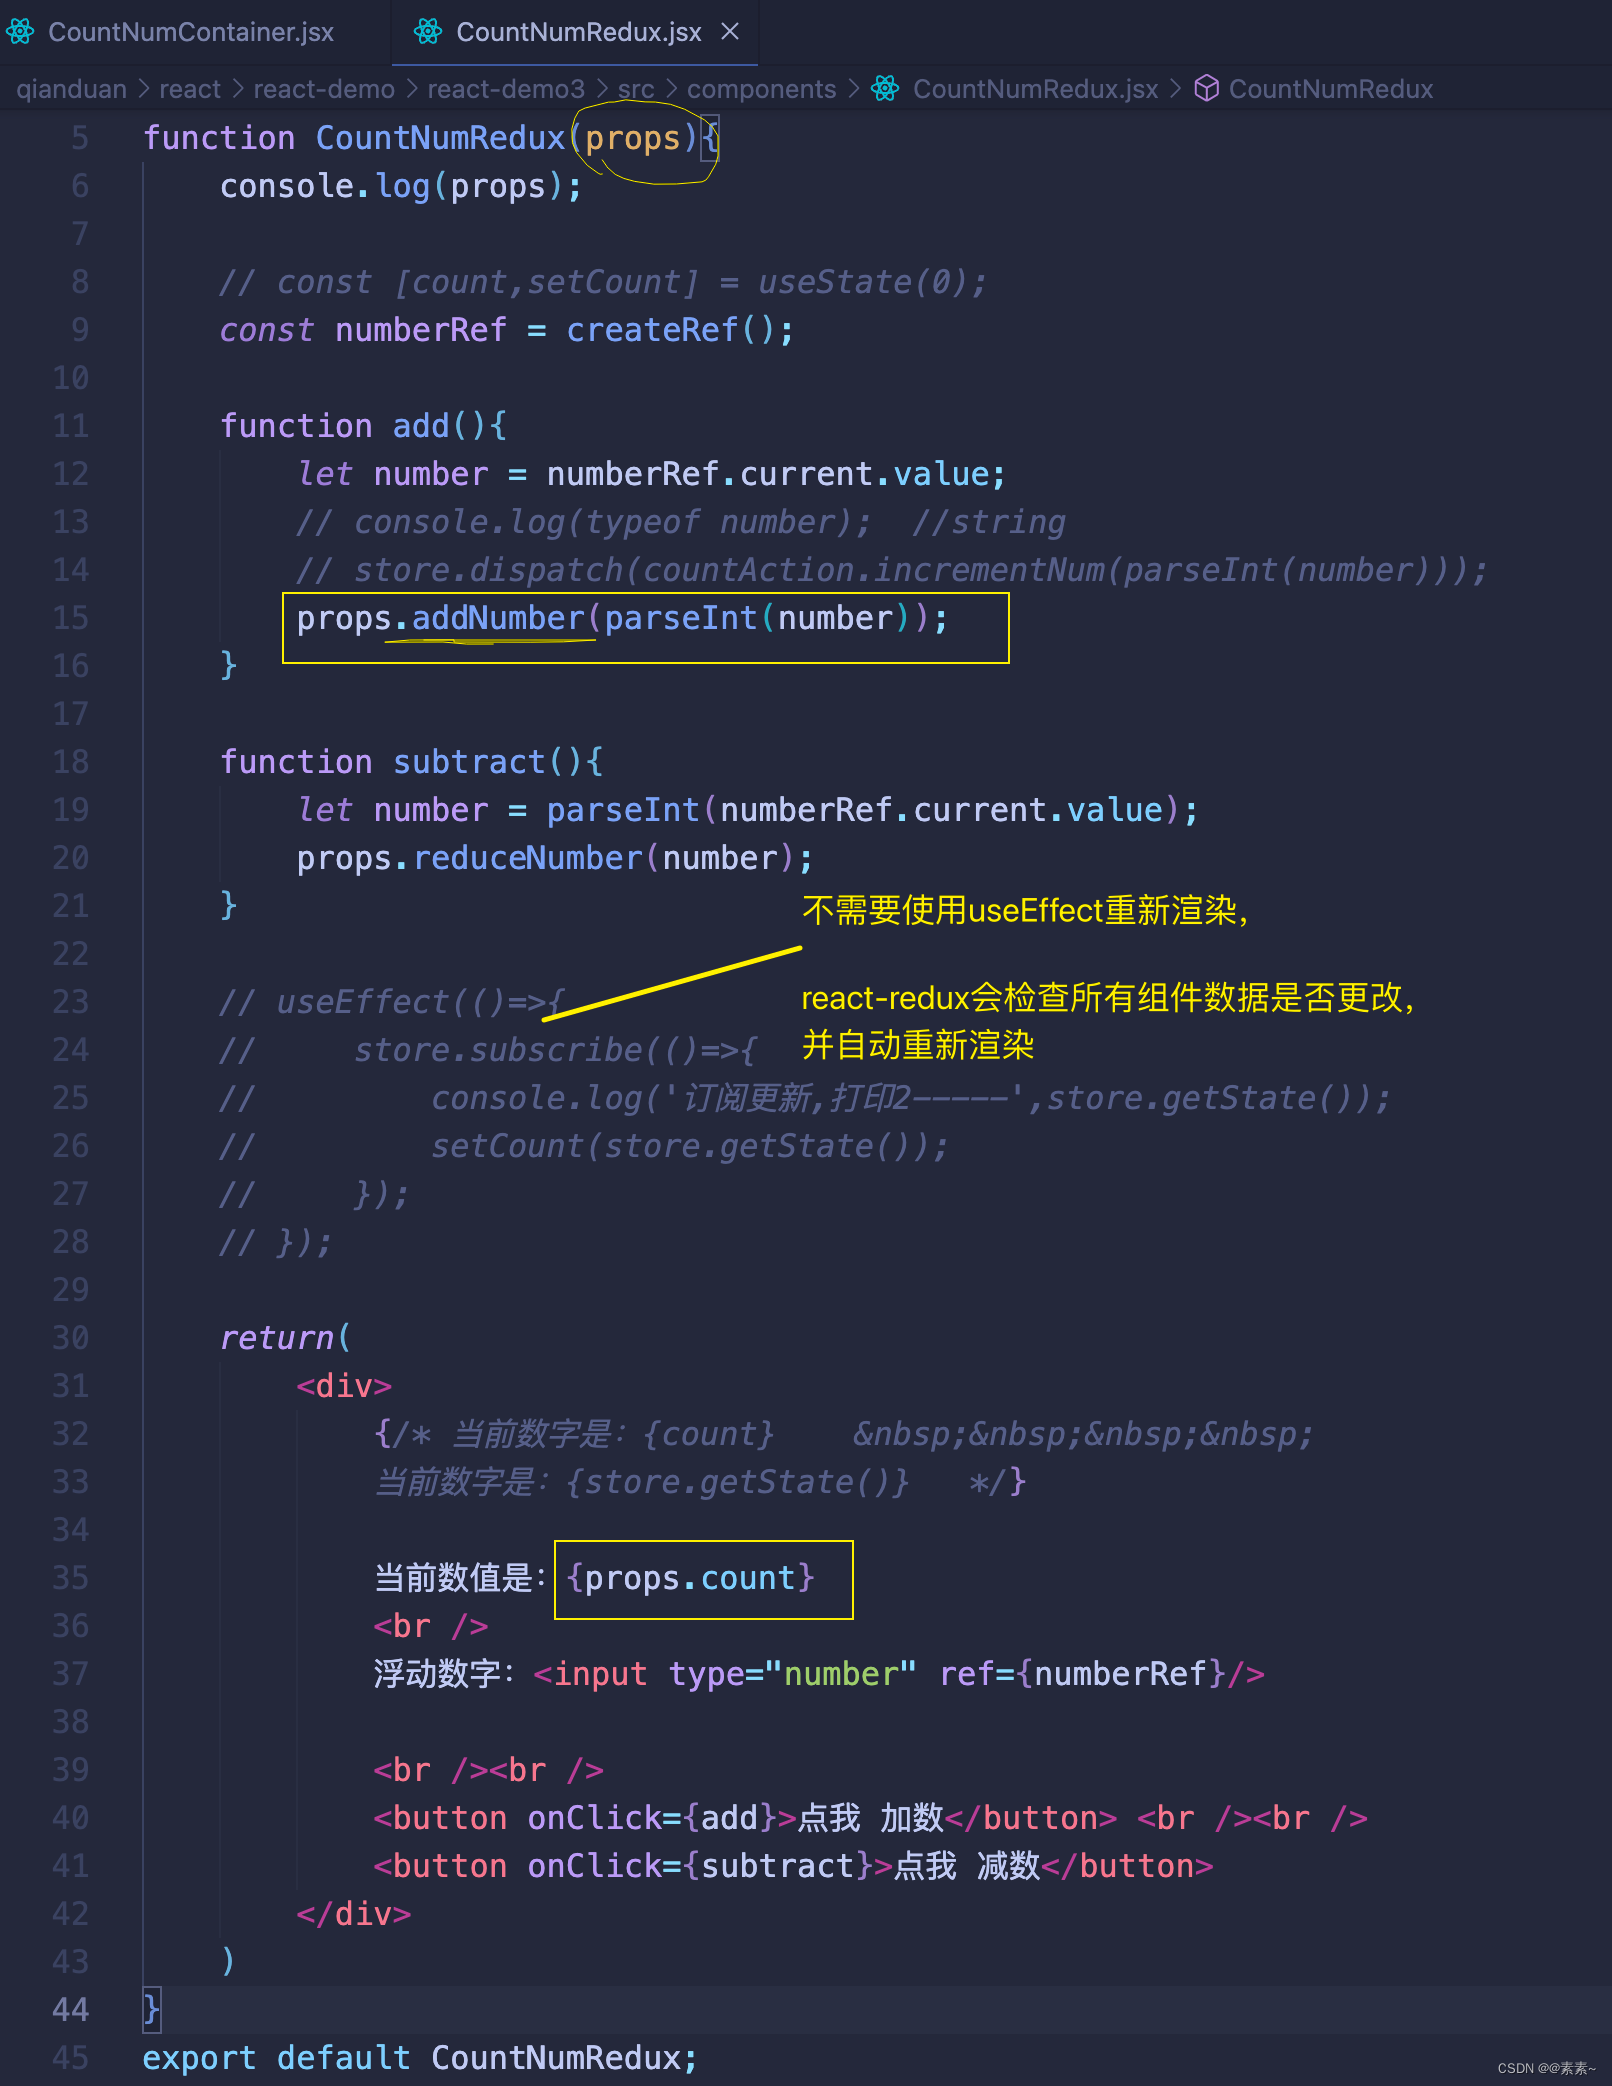
import { createRef } from "react"; // import store from '../redux/store' // import countAction from '../redux/countAction' function CountNumRedux(props){ console.log(props); // const [count,setCount] = useState(0); const numberRef = createRef(); function add(){ let number = numberRef.current.value; // console.log(typeof number); //string // store.dispatch(countAction.incrementNum(parseInt(number))); props.addNumber(parseInt(number)); } function subtract(){ let number = parseInt(numberRef.current.value); props.reduceNumber(number); } // useEffect(()=>{ // store.subscribe(()=>{ // console.log('订阅更新,打印2-----',store.getState()); // setCount(store.getState()); // }); // }); return( <div> {/* 当前数字是:{count} 当前数字是:{store.getState()} */} 当前数值是:{props.count} <br /> 浮动数字:<input type="number" ref={numberRef}/> <br /><br /> <button onClick={add}>点我 加数</button> <br /><br /> <button onClick={subtract}>点我 减数</button> </div> ) } export default CountNumRedux;
2.2.3 看效果
- 如下:
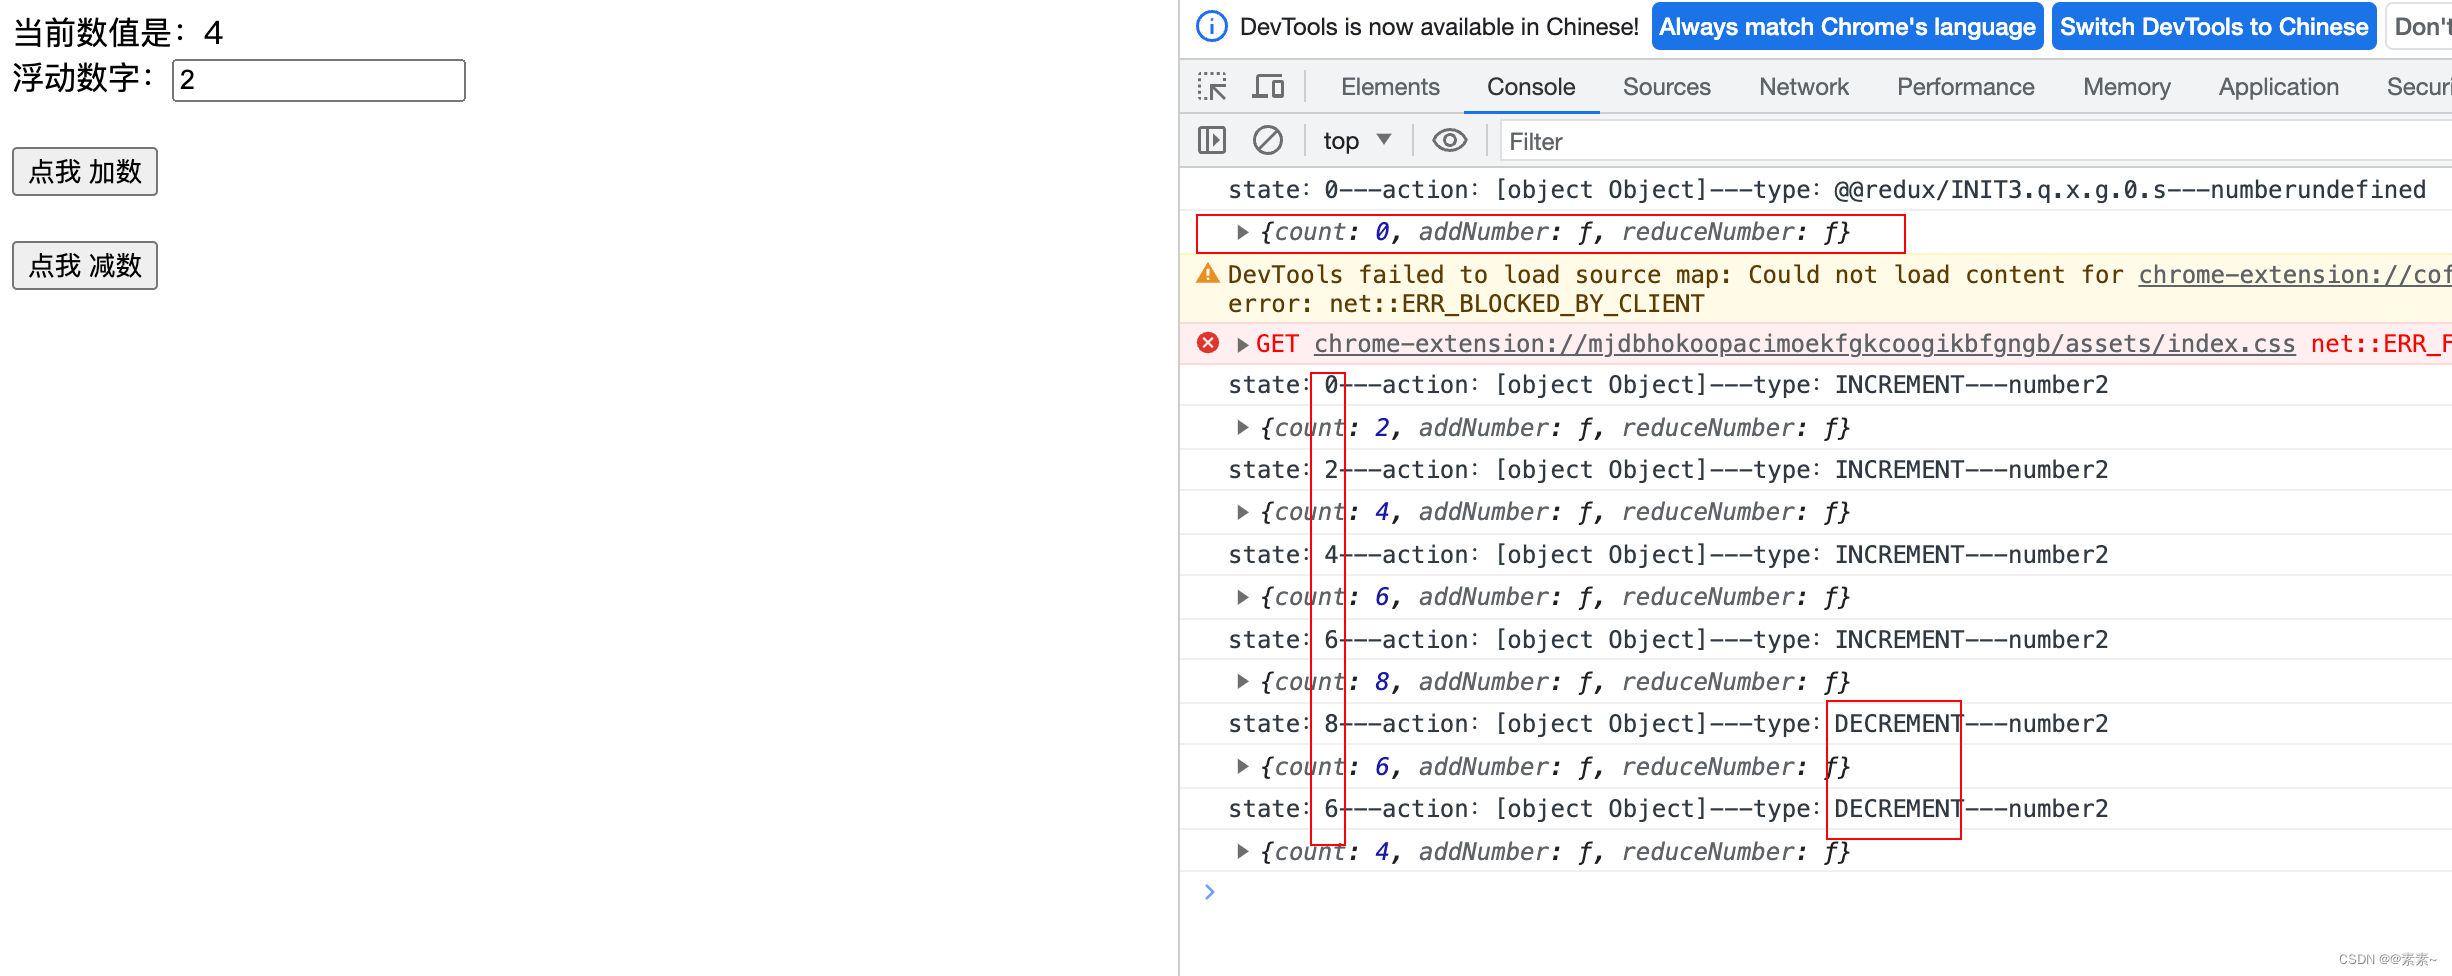
2.3 连接 Components——优化(优化容器组件)
-
主要优化 mapDispatchToProps,用封装好的action,如下:
import CountNumRedux from "../components/CountNumRedux";
import { connect } from "react-redux";
// import store from '../redux/store'
import {incrementNum,decrementNum} from "../redux/countAction";


const mapStateToProps = (state) => ({
      count:state
  });


//   const mapDispatchToProps = ()=>({
//        addNumber:(number)=>{
//            store.dispatch(
//                { type: 'INCREMENT', number:number }
//            )
//        },
//        reduceNumber:(number)=>{
//            store.dispatch(
//                { type: 'DECREMENT', number:number }
//            )
//        }
//  });

/**
 * 1. dispatch:react-redux 会将dispatch传入,所以不用引入store来调了
 * 2. 引入已经封装好的action:countAction
 */
 const mapDispatchToProps = (dispatch)=>({
    addNumber:(number)=>{
        dispatch( incrementNum(number) )
    },
    reduceNumber:(number)=>{
        dispatch( decrementNum(number) )
    }
});

const CountNumContainer = connect(mapStateToProps, mapDispatchToProps)(CountNumRedux);

export default CountNumContainer;
2.4 优化容器组件(可怕的精简)
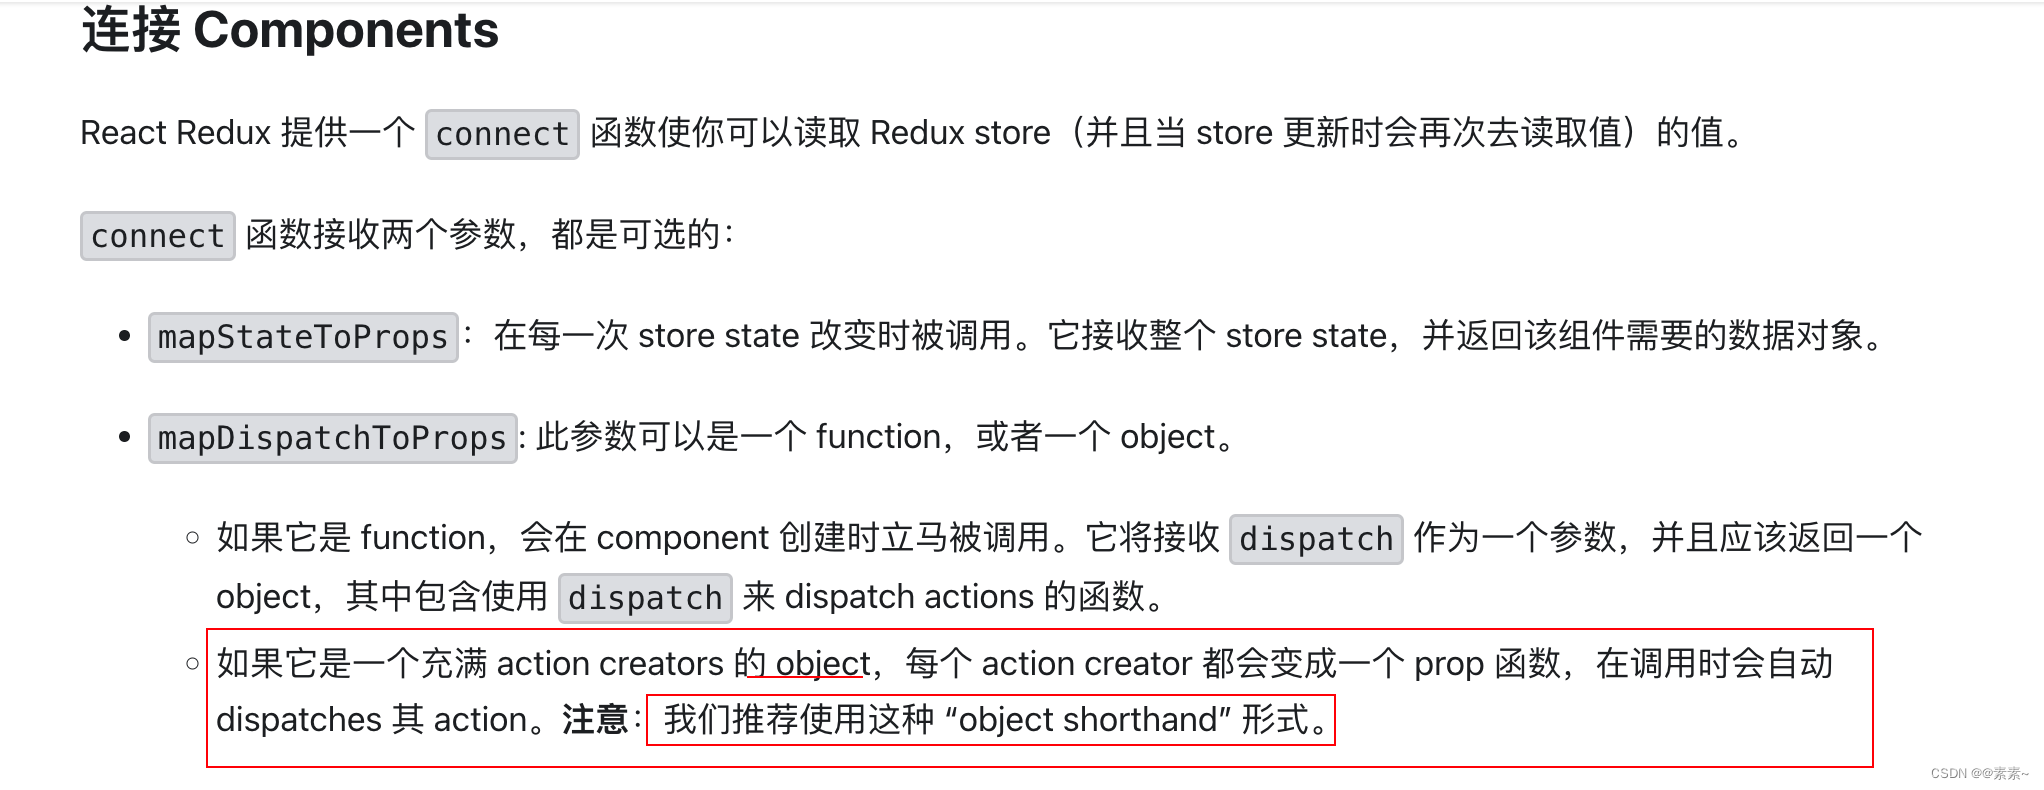
- mapDispatchToProps: 此参数可以是一个 function,或者一个 object。
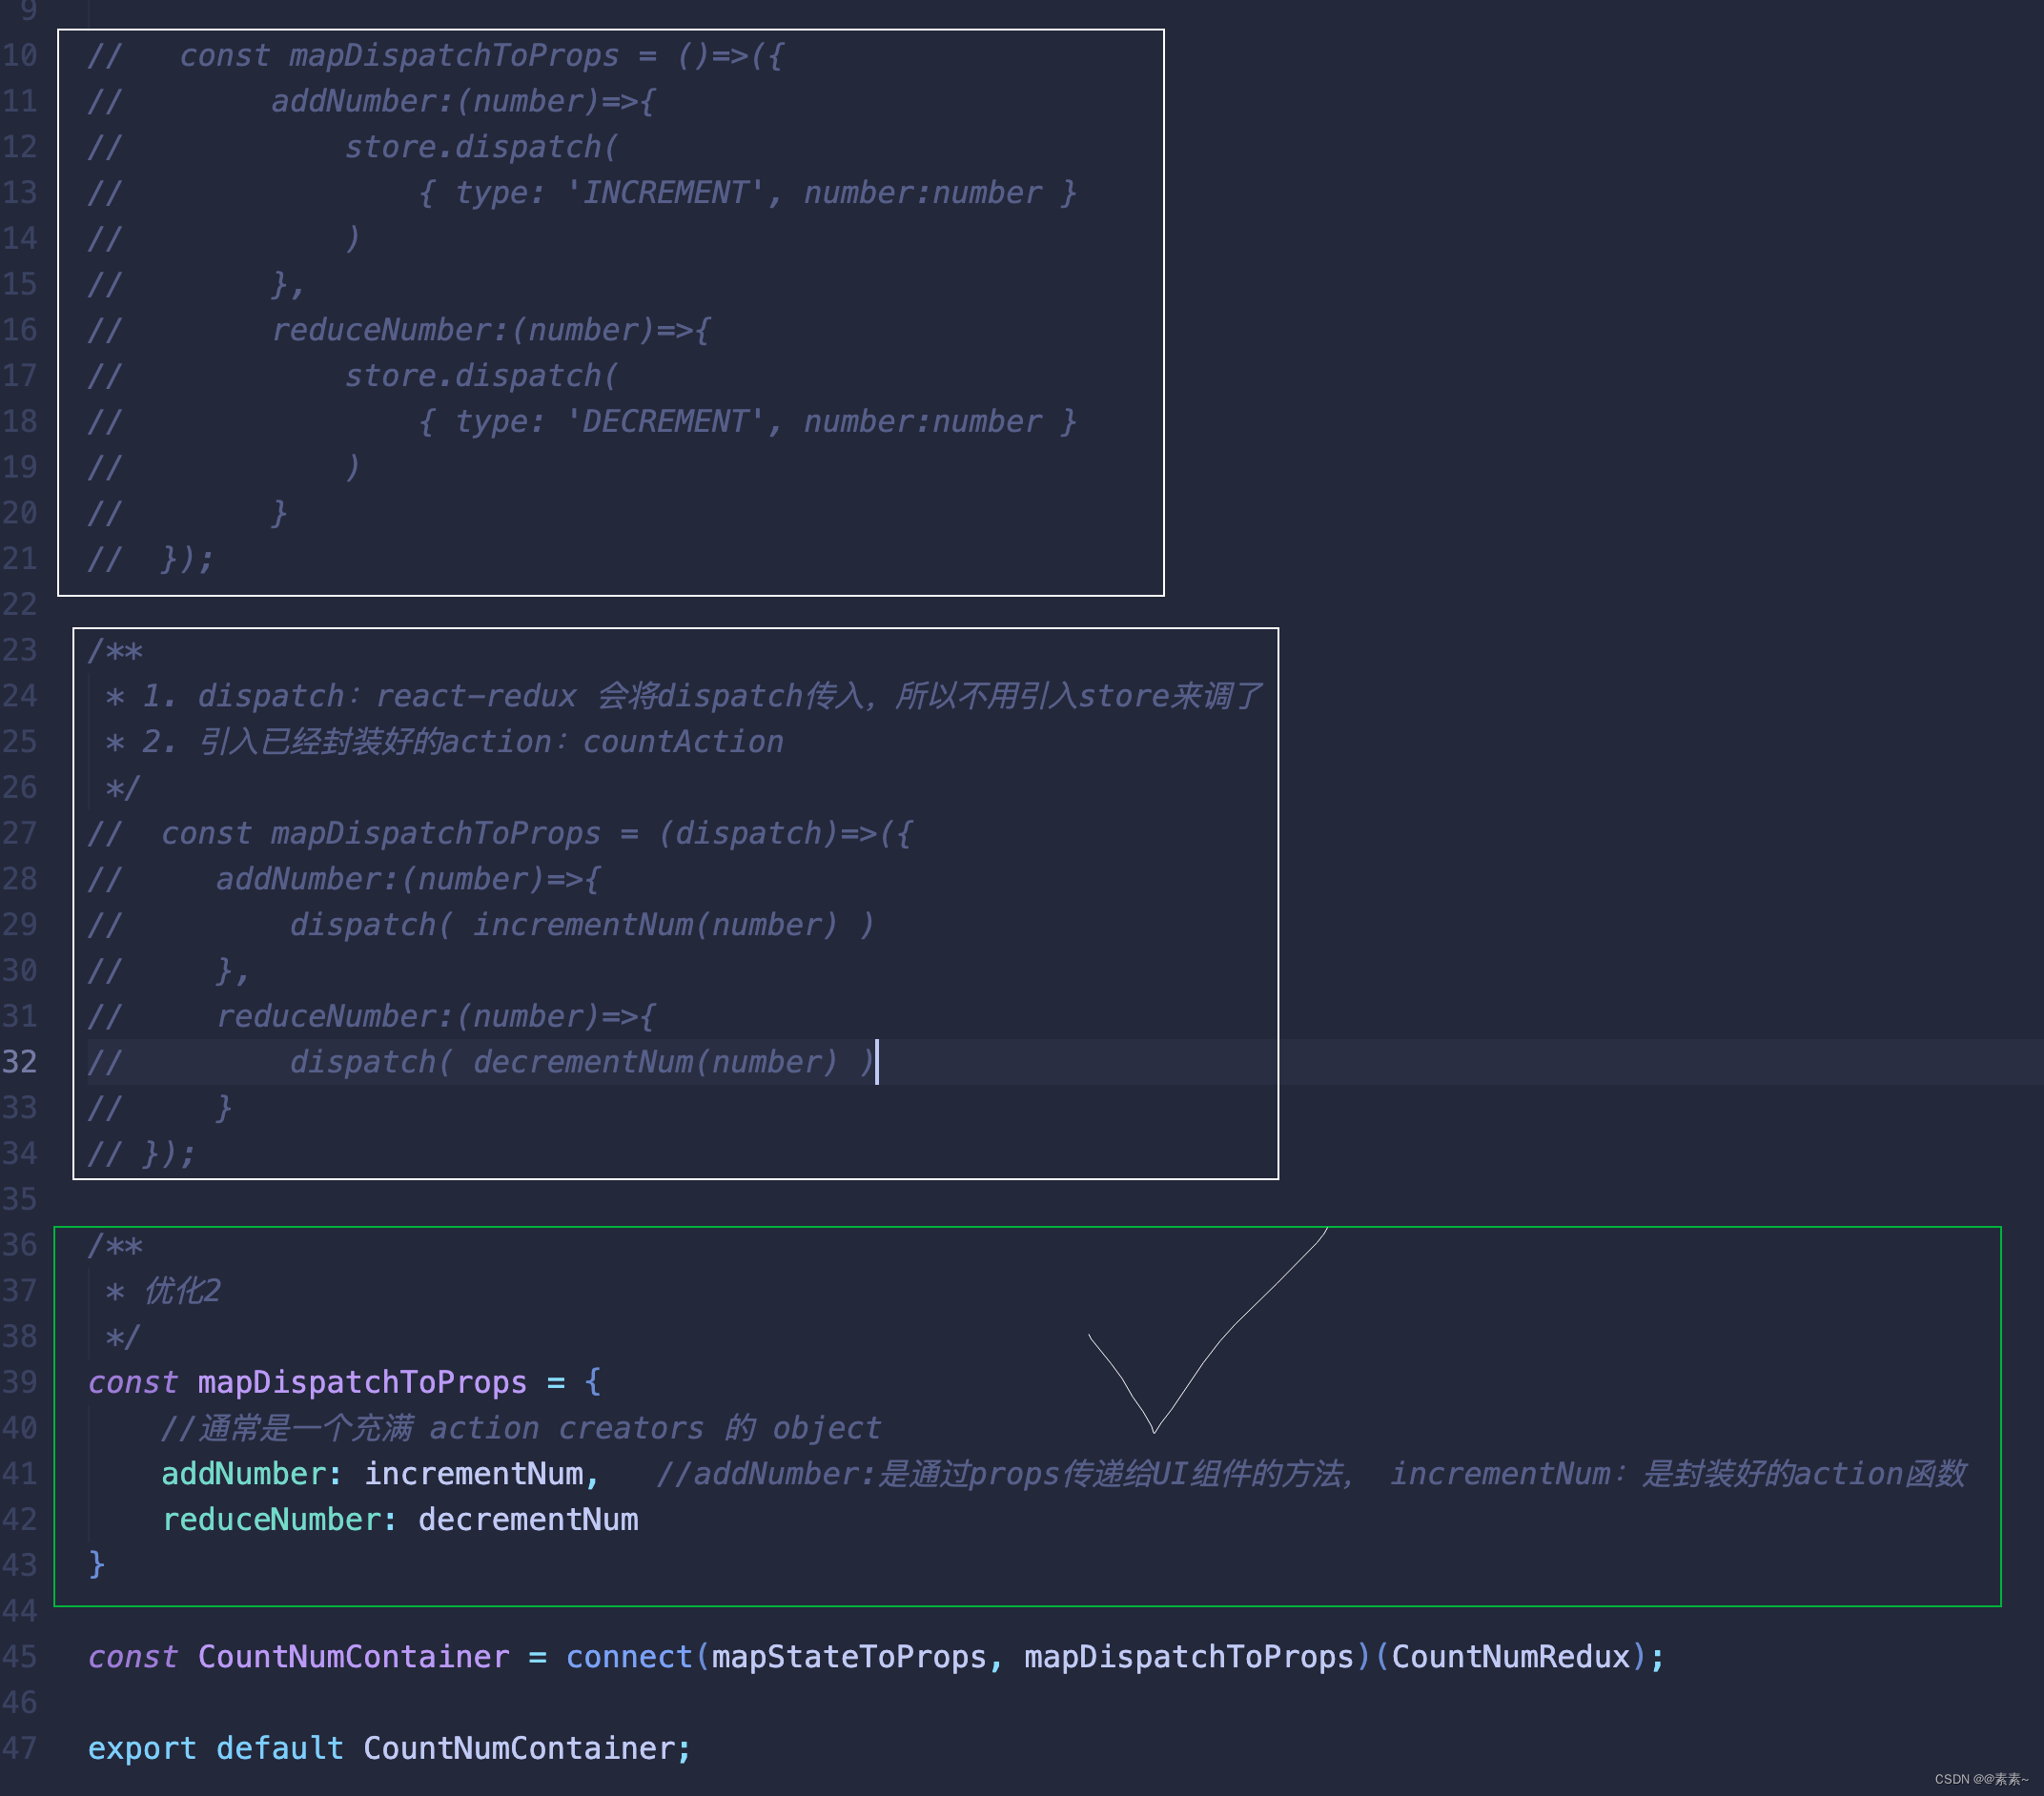
- 上面都是用function写的,接下来换成object之后,代码真的太少了!
- 不妨再看一下官方强调的:
- 精简代码如下:
对比一下:/** * 优化2 */ const mapDispatchToProps = { //通常是一个充满 action creators 的 object addNumber: incrementNum, //addNumber:是通过props传递给UI组件的方法, incrementNum:是封装好的action函数 reduceNumber: decrementNum }
2.5 附代码
- 关于redux文件下的代码就不贴了,因为没改动,需要的直接上篇文章就行,其他如下:
- CountNumContainer.jsx
import CountNumRedux from "../components/CountNumRedux"; import { connect } from "react-redux"; import {incrementNum,decrementNum} from "../redux/countAction"; const mapStateToProps = (state) => ({ count:state }); const mapDispatchToProps = { //通常是一个充满 action creators 的 object addNumber: incrementNum, //addNumber:是通过props传递给UI组件的方法, incrementNum:是封装好的action函数 reduceNumber: decrementNum } const CountNumContainer = connect(mapStateToProps, mapDispatchToProps)(CountNumRedux); export default CountNumContainer; - CountNumRedux.jsx
import { createRef } from "react"; function CountNumRedux(props){ console.log(props); const numberRef = createRef(); function add(){ let number = numberRef.current.value; props.addNumber(parseInt(number)); } function subtract(){ let number = parseInt(numberRef.current.value); props.reduceNumber(number); } return( <div> {/* 当前数字是:{count} 当前数字是:{store.getState()} */} 当前数值是:{props.count} <br /> 浮动数字:<input type="number" ref={numberRef}/> <br /><br /> <button onClick={add}>点我 加数</button> <br /><br /> <button onClick={subtract}>点我 减数</button> </div> ) } export default CountNumRedux; - App.js
import CountNumContainer from './container/CountNumContainer.jsx' function App() { return ( <div> {/* <CountNumRedux/> */} <CountNumContainer/> </div> ); } export default App; - index.js
import React from 'react';
import ReactDOM from 'react-dom/client';
import App from './App';

import store from './redux/store';
import { Provider } from 'react-redux';


const root = ReactDOM.createRoot(document.getElementById('root'));
root.render(
    <Provider store={store}>
        <App />
    </Provider>
);

export default root;
- CountNumContainer.jsx
