一看官网一个上传插件60大洋,对我这个穷鬼来说还是太贵了,于是乎自己写一个,后面随时用
直接开干
创建插件
php think addon -a aliupload -c create
创建配置
<?php

return [
    [
        'name' => 'region',
        'title' => '获取存储区域',
        'type' => 'select',
        'group' => '七牛',
        'content' => [
            'up.qiniup.com' => '华东-浙江-up.qiniup.com',
            'up-cn-east-2.qiniup.com' => '华东-浙江2-up-cn-east-2.qiniup.com',
            'up-z1.qiniup.com' => '华北-河北-up-z1.qiniup.com',
            'up-z2.qiniup.com' => '华南-广东-up-z2.qiniup.com',
            'up-na0.qiniup.com' => '北美-洛杉矶-up-na0.qiniup.com',
            'up-as0.qiniup.com' => '亚太-新加坡-up-as0.qiniup.com',
            'up-ap-northeast-1.qiniup.com' => '亚太-首尔-up-ap-northeast-1.qiniup.com',
        ],
        'value' => 'up.qiniup.com',
        'rule' => 'required',
        'msg' => '验证失败提示文字',
        'tip' => '字段填写帮助',
        'ok' => '验证成功提示文字',
        'extend' => '',
    ],
    [
        'name' => 'Bucket',
        'title' => '空间名称Bucket',
        'type' => 'string',
        'group' => '七牛',
        'content' => [],
        'value' => 'xxxxx',
        'rule' => '',
        'msg' => '',
        'tip' => '默认选用的Bucket名称',
        'ok' => '',
        'extend' => '',
    ],
    [
        'name' => 'AccessKey',
        'title' => 'AccessKey',
        'type' => 'string',
        'content' => [],
        'group' => '七牛',
        'value' => 'x6V-Q1zYjCxxxxxQ2douc-7',
        'rule' => 'required',
        'msg' => '',
        'tip' => '',
        'ok' => '',
        'extend' => '',
    ],
    [
        'name' => 'SecretKey',
        'title' => 'SecretKey',
        'type' => 'string',
        'content' => [],
        'group' => '七牛',
        'value' => 'WLGw7v6xxxxFJoh-UoTsVn7W2HiC',
        'rule' => 'required',
        'msg' => '',
        'tip' => '',
        'ok' => '',
        'extend' => '',
    ],
    [
        'name' => 'Domain',
        'title' => '访问域名',
        'type' => 'string',
        'content' => [],
        'group' => '七牛',
        'value' => 's0vixxxxx-bkt.clouddn.com',
        'rule' => 'required',
        'msg' => '',
        'tip' => '访问域名',
        'ok' => '',
        'extend' => '',
    ],
];
下载七牛云的包
https://developer.qiniu.com/kodo/1241/php#4
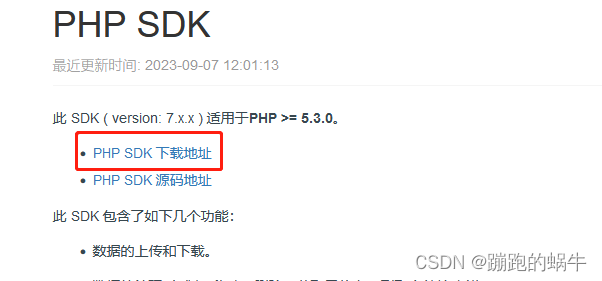
下载解压后只要Qiniu
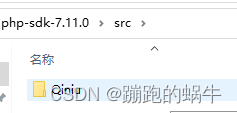
放在这个文件
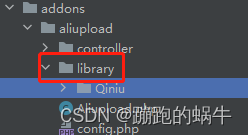
添加hook方法
修改Aliupload.php,需要了解TP的钩子或者叫事件,多看看手册
<?php

namespace addons\aliupload;

use app\common\library\Menu;
use Qiniu\Auth;
use Qiniu\Storage\UploadManager;
use think\Addons;

use think\Log;

/**
 * 插件
 */
class Aliupload extends Addons
{

    public function appInit(){
        \think\Loader::addNamespace('Qiniu',ADDON_PATH.'aliupload'.DS.'library'.DS.'Qiniu'.DS);
    }


    public function uploadAfter(&$params){
//        Log::error($params);
        //获取配置
        $config = get_addon_config('aliupload');
        $accessKey =$config['AccessKey'];
        $secretKey = $config['SecretKey'];
        $bucket = $config['Bucket'];

        $auth = new Auth($accessKey, $secretKey);
        $returnBody = '{"key":"$(key)","hash":"$(etag)","fsize":$(fsize),"bucket":"$(bucket)","name":"$(x:name)"}';
        $policy = array(
            'returnBody' => $returnBody
        );
//        // 生成上传Token
        $token = $auth->uploadToken($bucket, null, 7200, $policy, true);
//        // 构建 UploadManager 对象
        $uploadMgr = new UploadManager();
        $files = $params->getData();
        $key = ltrim($files['url'],'/');
        //window  测试需要在入口文件加入:define('UPLOAD_PATH', __DIR__ . '/');
        $filePath = UPLOAD_PATH.'/'.$files['url'];
        list($ret, $err) = $uploadMgr->putFile($token, $key, $filePath, null, 'application/octet-stream', true, null, 'v2');
        if ($err !== null) {
            var_dump($err);
            Log::error("上传失败");
            Log::error($err);
        }


    }


    /**
     * 插件安装方法
     * @return bool
     */
    public function install()
    {

        return true;
    }

    /**
     * 插件卸载方法
     * @return bool
     */
    public function uninstall()
    {

        return true;
    }

    /**
     * 插件启用方法
     * @return bool
     */
    public function enable()
    {

        return true;
    }

    /**
     * 插件禁用方法
     * @return bool
     */
    public function disable()
    {

        return true;
    }


}
好了,现在上传你就可以看见你上传到服务器的文件,在七牛上面也有了。剩下的一些细节就需要自己去操作,比如说删除本地的文件,获取的时候,获取到的连接是七牛的,这个加一个钩子就搞定。


