文章目录
- 前言
- 一、starter的作用和意义
- 二、自定义一个starter并使用
- 1.starter本体
- 问题:
- 2.创建另外一个项目,引入自定义的starter
- 总结
- spring-configuration-metadata.json
前言
你一定用过很多starter , 例如 spring-boot-starter,spring-boot-starter-test等等,那么如何实现一个自定义的starter,以及自定义starter的意义和作用;
一、starter的作用和意义
作用: starter可以非常方便的引入到springboot项目中,有利于项目的统一管理,例如: 项目中一般会有字符集过滤,会有时间格式统一转换,可以选择通过拦截器实现,但是starter也可以实现,而且也更加统一,灵活,更加方便统一管理;
意义: 可以更好的了解spi机制,更好的对于springboot 自动配置有深入了解;
想要了解spi机制,可以访问我的另一篇文章: SPI机制
二、自定义一个starter并使用
总体思路:
- 创建一个项目作为starter本体,这里做一些事情,例如: 拦截所有路径,然后打印一下
- 创建另外一个项目,引入之前创建的starter,然后使用,看是否能够拦截路径,并打印
- starter本体打包后,需要发布到maven仓库中,然后另外一个项目通过maven引入
- maven仓库可以是私服,也可以是本地maven仓库
1.starter本体
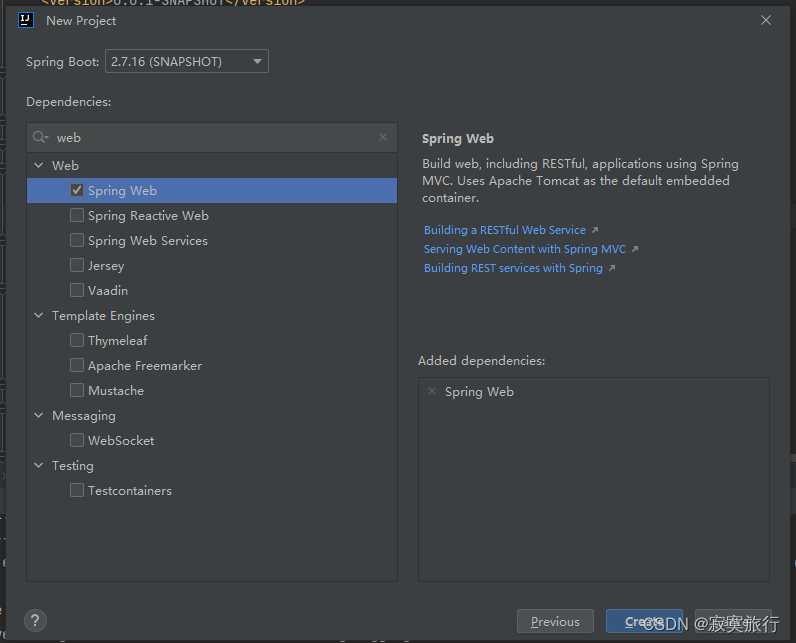
- 在IDEA中创建项目,选择2.7版本,jdk 1.8,选择 spring web模块依赖
- pom修改, 在打包插件中加入 configuration skip true 标签
   <plugins>
           <plugin>
               <groupId>org.springframework.boot</groupId>
               <artifactId>spring-boot-maven-plugin</artifactId>
               <configuration>
                   <skip>true</skip>
               </configuration>
           </plugin>
       </plugins>
- 创建过滤器
public class CustomFilter implements Filter {

    @Override
    public void doFilter(ServletRequest request, ServletResponse response, FilterChain chain) throws IOException, ServletException {
        HttpServletRequest httpRequest = (HttpServletRequest) request;
        System.out.println("Custom filter processing request for " + httpRequest.getRequestURI());
        chain.doFilter(request, response);
    }
}
- 创建一个配置类,CustomStarter ,将CustomFilter注入spring中
@Configuration
public class CustomStarter {

    @Bean
    public CustomFilter customFilter() {
        return new CustomFilter();
    }
}
- 在resources文件下创建META-INF文件夹,在文件夹下创建spring.factories文件,内容:
org.springframework.boot.autoconfigure.EnableAutoConfiguration=\
  com.example.custom.CustomStarter
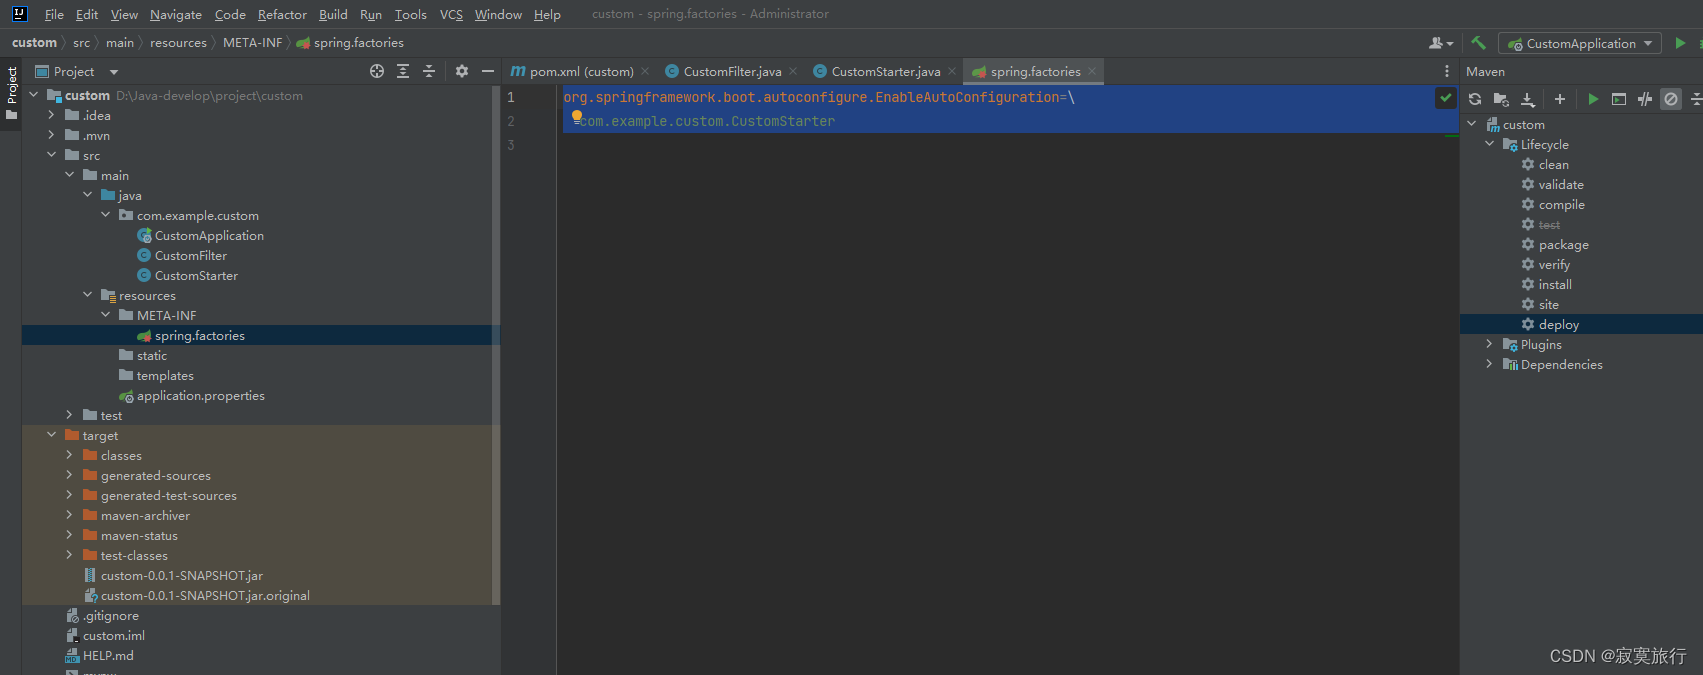
6. 运行manve 命令, install,package
运行后,再次运行deploy ,将jar包推送至本地maven库中

问题:
已经在第4步中利用@Configuration 和 @Bean将 CustomFilter注入到了其中,为什么还用spi机制在META-INF文件夹下创建spring.factories,再次设置一遍自动配置呢?
因为: springboot启动正常扫描,只会扫描启动类包下的自动配置注解,这里的starter是要放到其他项目中的,根本不在使用项目的包下,所以要用spi机制,注入进去;
2.创建另外一个项目,引入自定义的starter
创建项目略过,仅仅说下pom文件

- 在pom中加入如下依赖
       <dependency>
            <groupId>com.example</groupId>
            <artifactId>custom</artifactId>
            <version>0.0.1-SNAPSHOT</version>
        </dependency>
其中 com.example 为所在路径
custom 打包后的名字
0.0.1-SNAPSHOT为包的版本号
与上一个步骤中的 步骤6 图片完全一致,一一对应
- 在项目中随便搞一个接口
访问接口
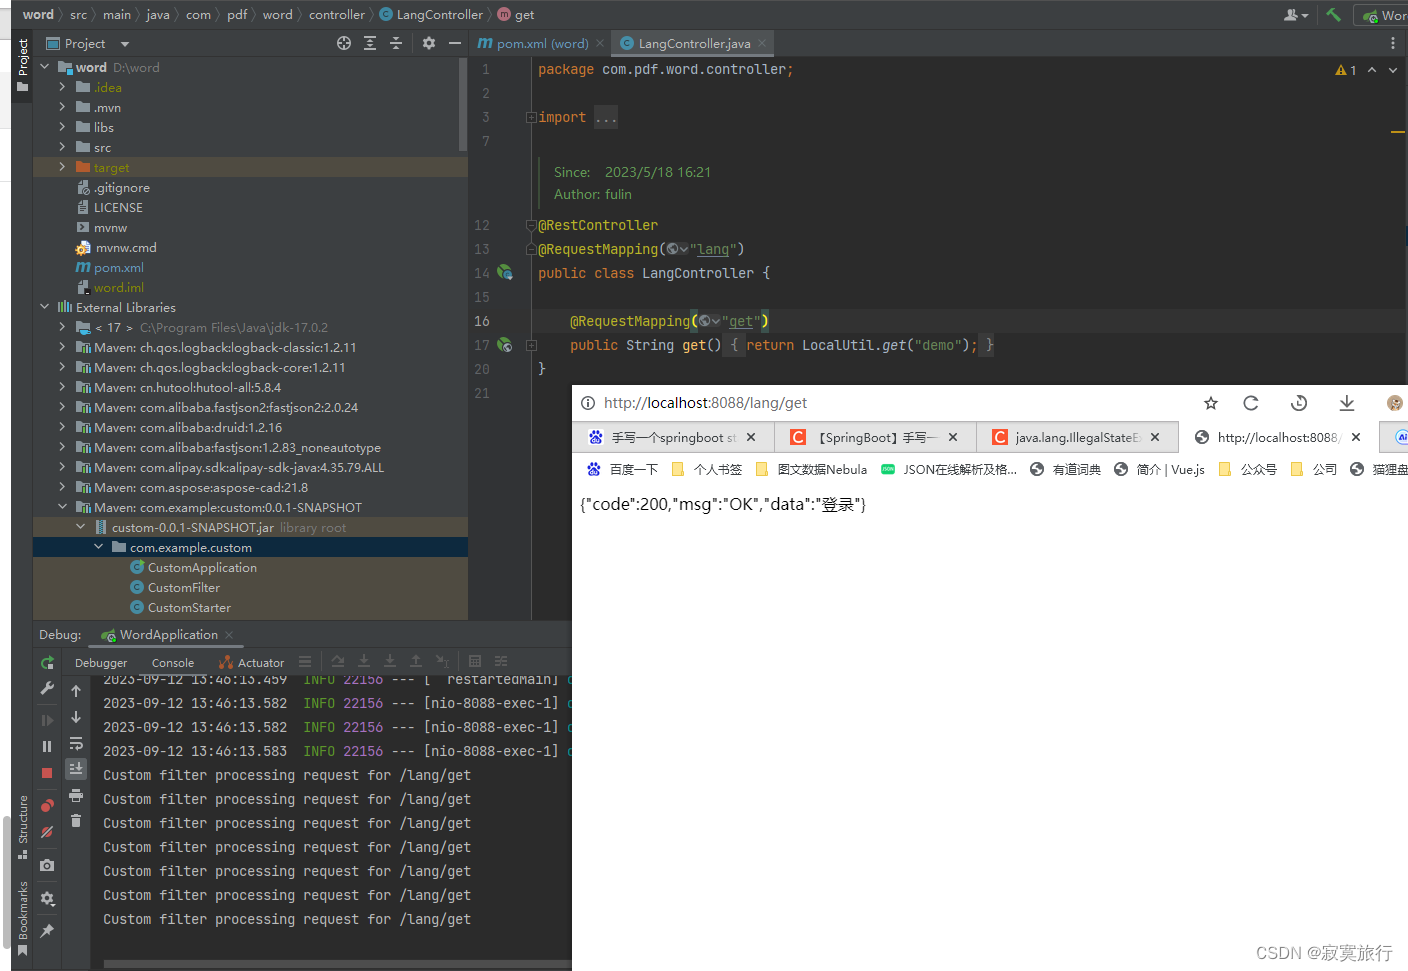
控制台一直打印 Custom filter processing request for /lang/get
说明我们自定的starter过滤器生效了,而且打印出了访问路径
总结
自定义一个starter并不是很难吧?我们需要了解starter的本质是什么,然后通过maven本地仓库实现了starter包的共享,然后就可以正常使用了;
本文仅仅是抛砖引玉,简单的starter示例;其中整合过程中,在引入starter之后,一直报错:
java.lang.IllegalStateException:Unable to read meta-data class *******
这个class 就是 spring.factories文件内容中的class
这个错误的原因是starter打包之后的jar包中,并没有相应类,导致项目启动的时候,在spring.factories中读取到了这个类名,但是加载不到,是由于starter本地打包问题导致的,解决办法就是 starter本地步骤6,
在maven打包插件中加入skip标签
此时错误的starter jar包内容为(可运行包 java -jar 可以直接启动):

而加入了skip 后打包,包中的内容为(依赖包):

如果是gradle工具,同样也要区分出这两种包,不要用错!!
spring-configuration-metadata.json
这个文件也是自定义starter中常用的一个文件,可以理解为,正常这些配置应该放在项目的yml文件中的,但是由于自定义了starter,所以可以把这些配置文件转移到这个文件中,然后更便于统一管理;
下面是一些 spring-configuration-metadata.json 文件的属性详解:
“groups”:配置属性的分组信息。每个分组都是一个数组,数组中的每个元素都是一个对象,包含该分组的名称和描述信息。
例如:
"groups": [
  {
    "name": "database",
    "description": "Database configuration"
  },
  {
    "name": "logging",
    "description": "Logging configuration"
  }
]
“properties”:配置属性信息。每个属性都是一个对象,包含该属性的名称、类型、默认值、描述等信息。
例如:
"properties": [
  {
    "name": "database.url",
    "type": "java.lang.String",
    "defaultValue": "jdbc:mysql://localhost:3306/mydb",
    "description": "Database connection URL"
  },
  {
    "name": "logging.level",
    "type": "java.lang.String",
    "defaultValue": "INFO",
    "description": "Logging level"
  }
]
