[maven] 创建 spring boot 项目及使用 Jenkins 运行 maven
本篇笔记走一下用 maven 创建 spring boot 项目和利用 Jenkins 管理 maven 流程
使用 maven 创建 spring boot 项目
根据官方文档说,现在使用 boot 需要 java 17+,Gradle 7.5+/Maven 3.5+
spring boot 和传统 spring mvc 比起来的优势很多,我觉得最显著的就是自动配置和依赖管理,前者可以不需要编写大量的 xml 去进行关系映射,后者不需要手动管理海量的 dependency (包括内置 tomcat 服务器,解决配置问题)。
准备工作 & 创建新项目
主要就是一些下载配置,然后新建项目
使用 initializer
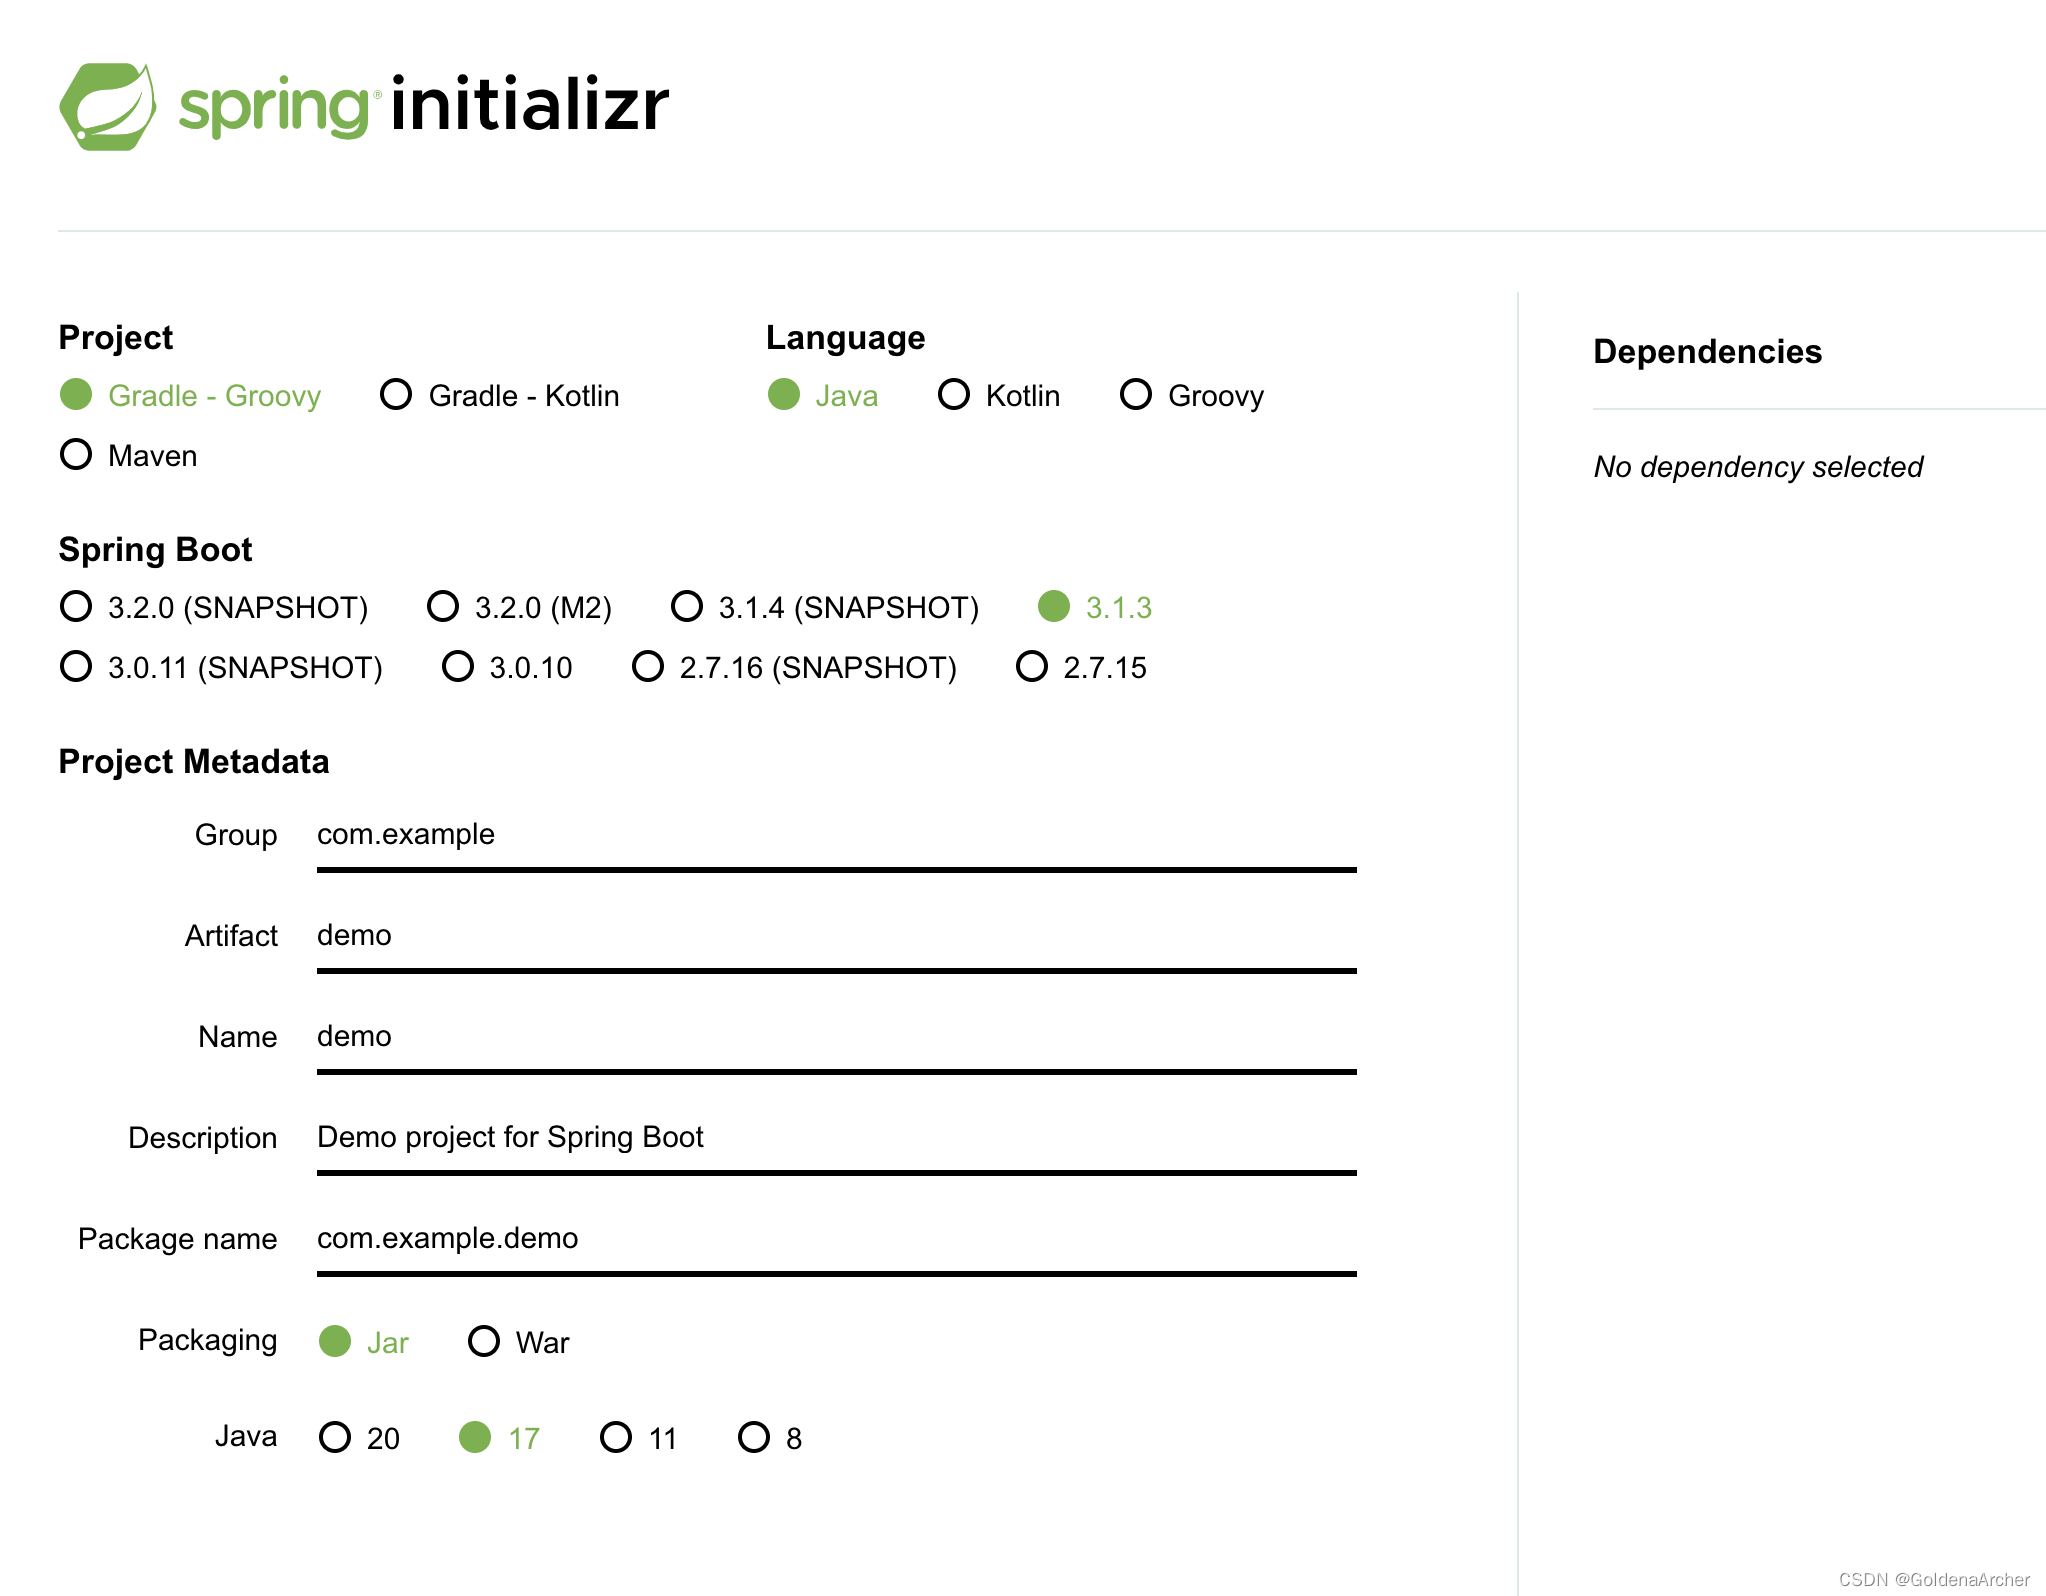
如果不想做其他的修改,只是想下载一个 spring boot 的项目,可以到 https://start.spring.io/ 下载一个初始化好的包,随后导入到 IDE 即可:
下载 Spring Tool Suite
下载地址在:https://spring.io/tools,直接点点点安装就好了
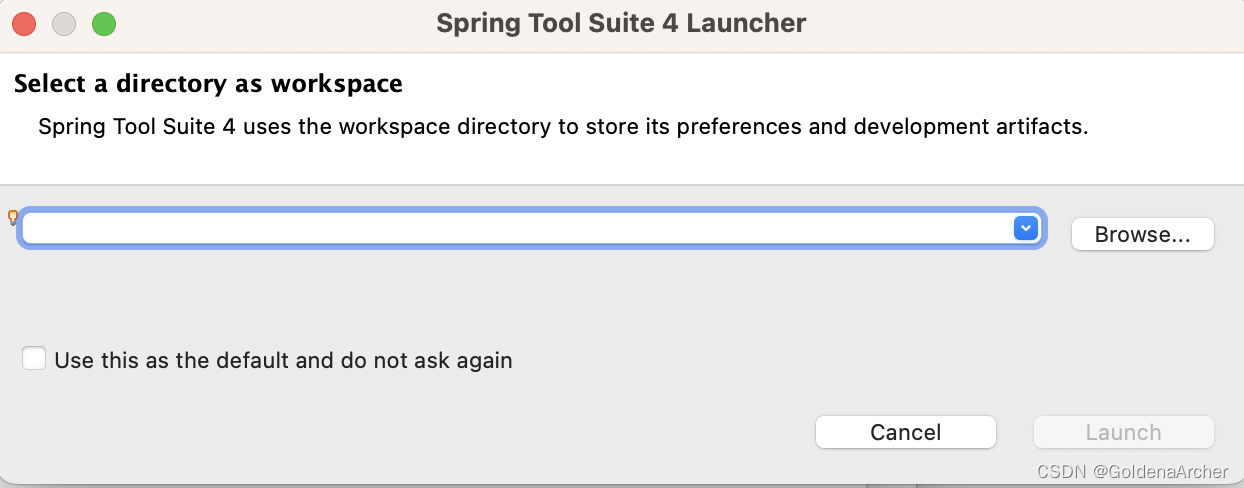
指定 workspace:
布局:
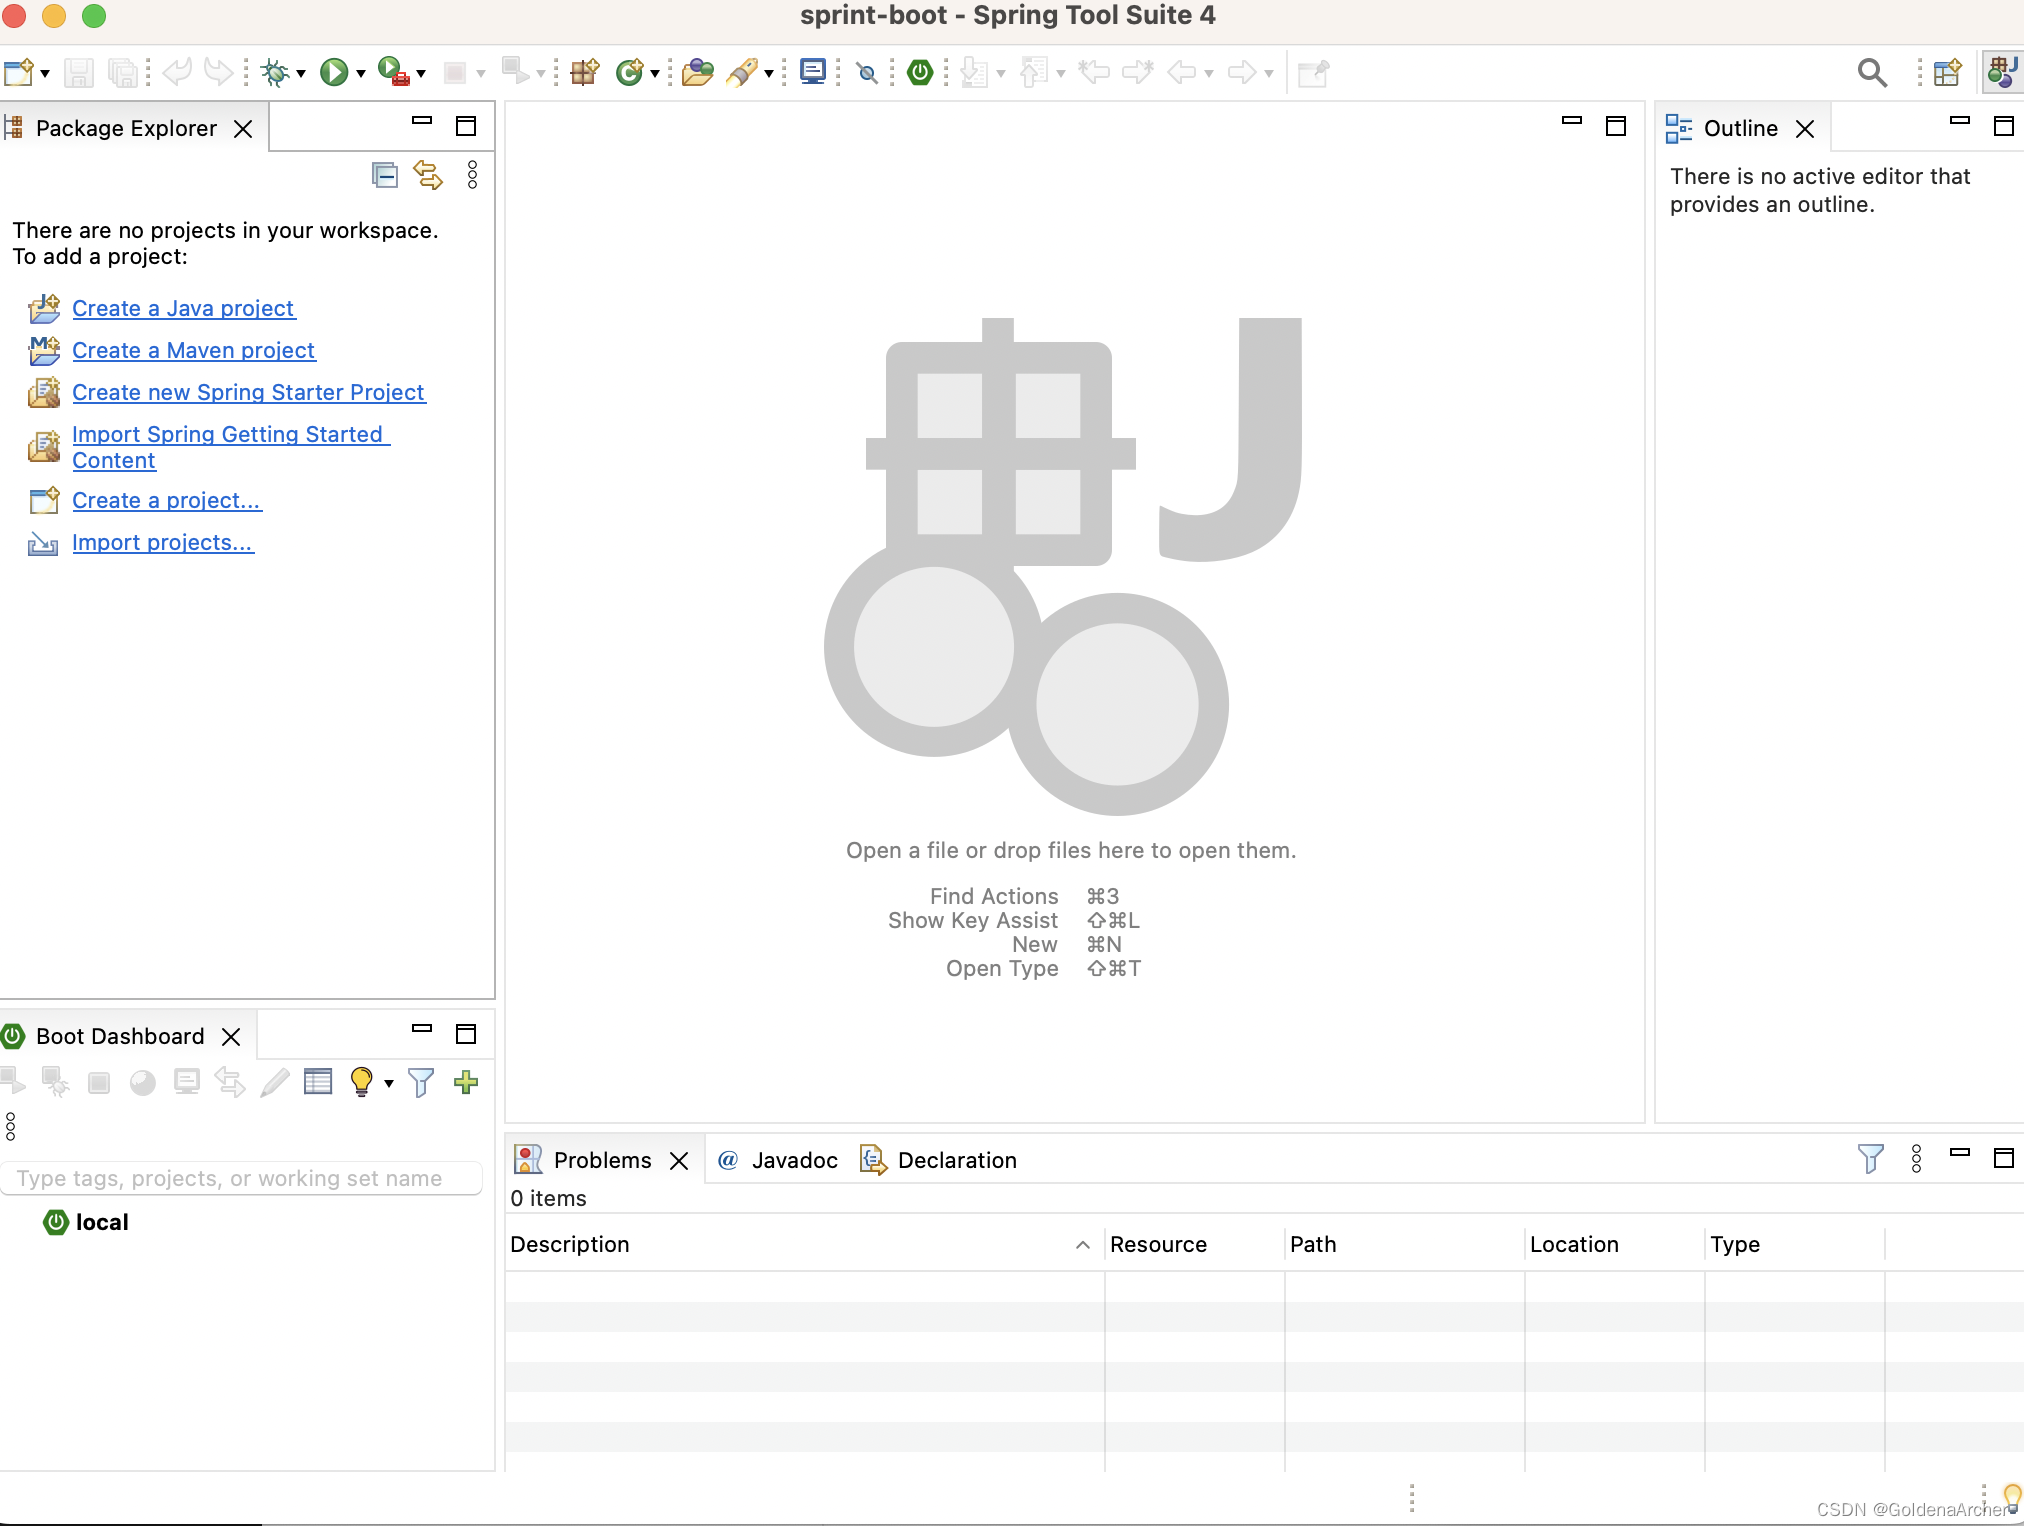
它这个布局和 eclipse 好像是一样的……我猜估计用了 eclipse 的源码封装的吧……
eclipse 中下载 marketplace plugin
如果不想再下一个 ide,也可以直接从 eclipse 的 marketplace 中选择插件进行下载:
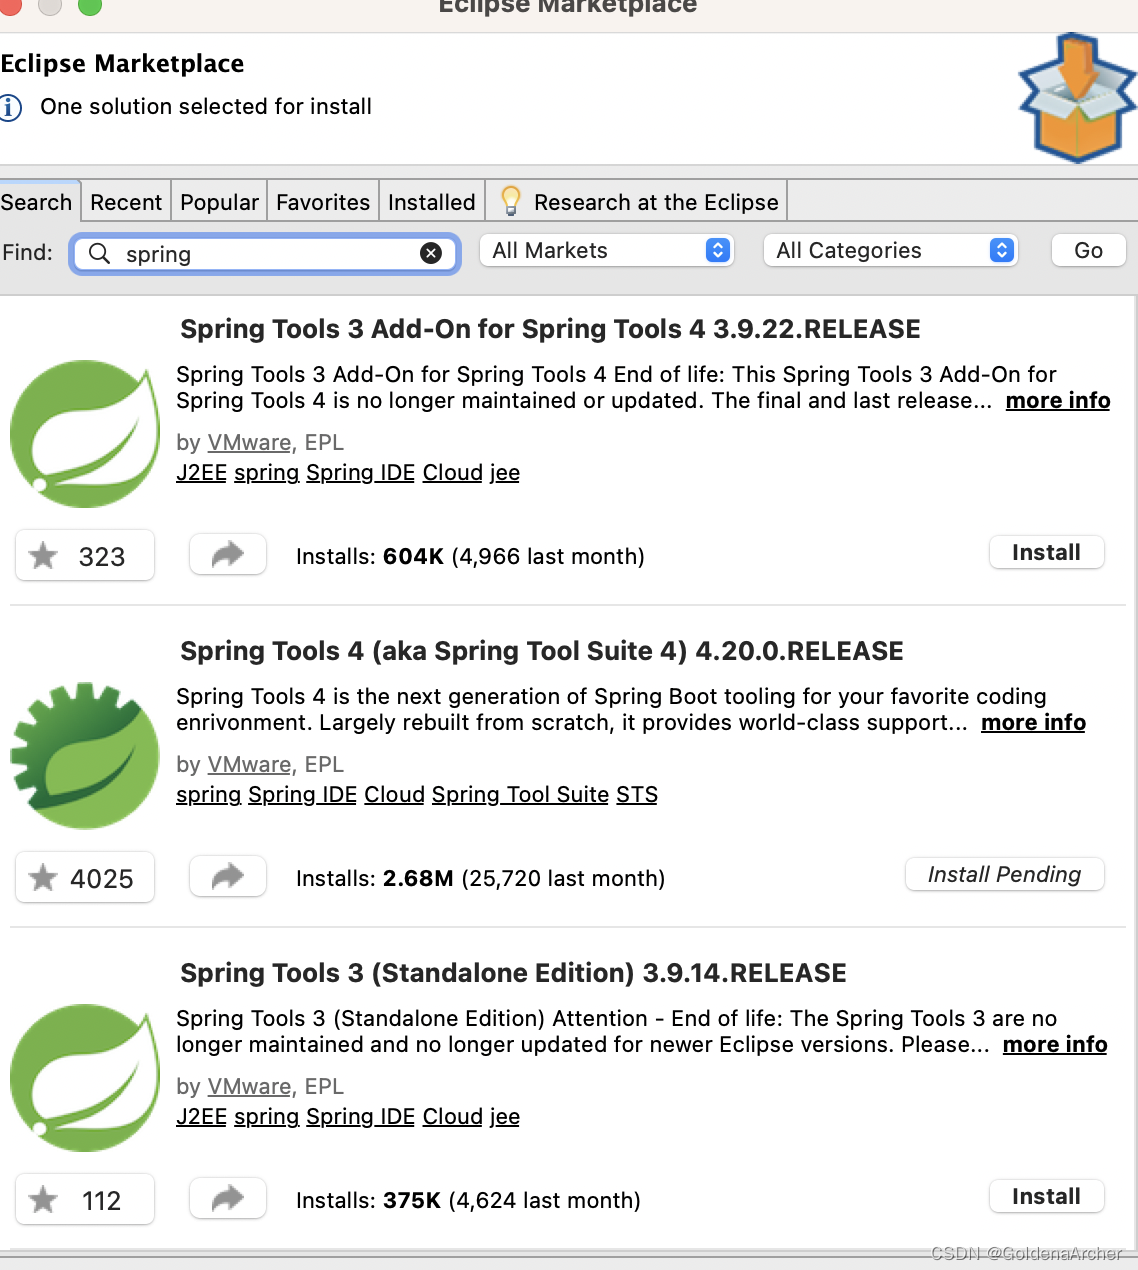
不会改变 eclipse 的布局,没有 spring 的 logo,但是实现功能是一样的
新建 spring boot 项目
不管使用 STS 还是插件,安装完成后可以在新建项目中寻找 spring boot:
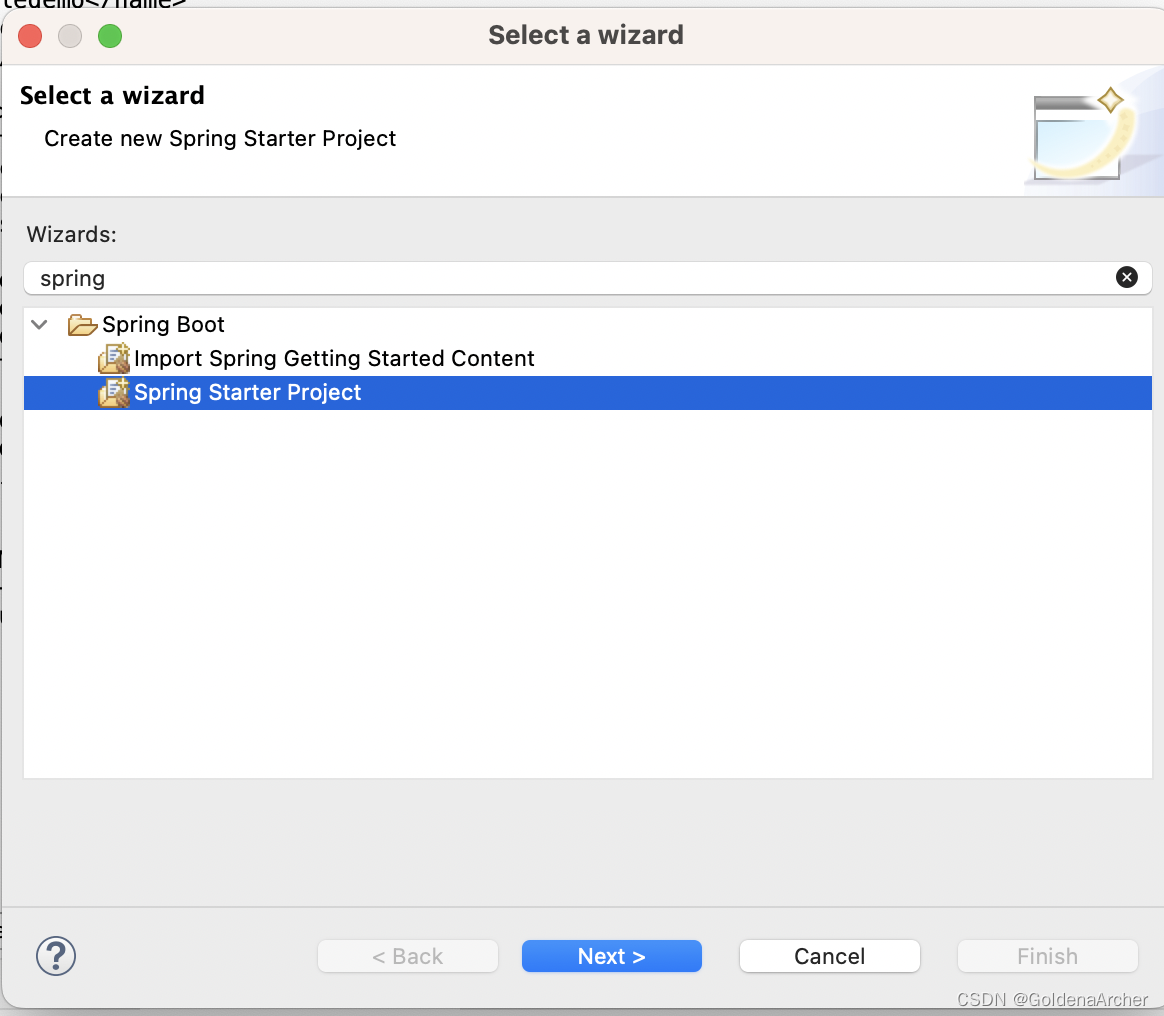
然后提供必要数据:
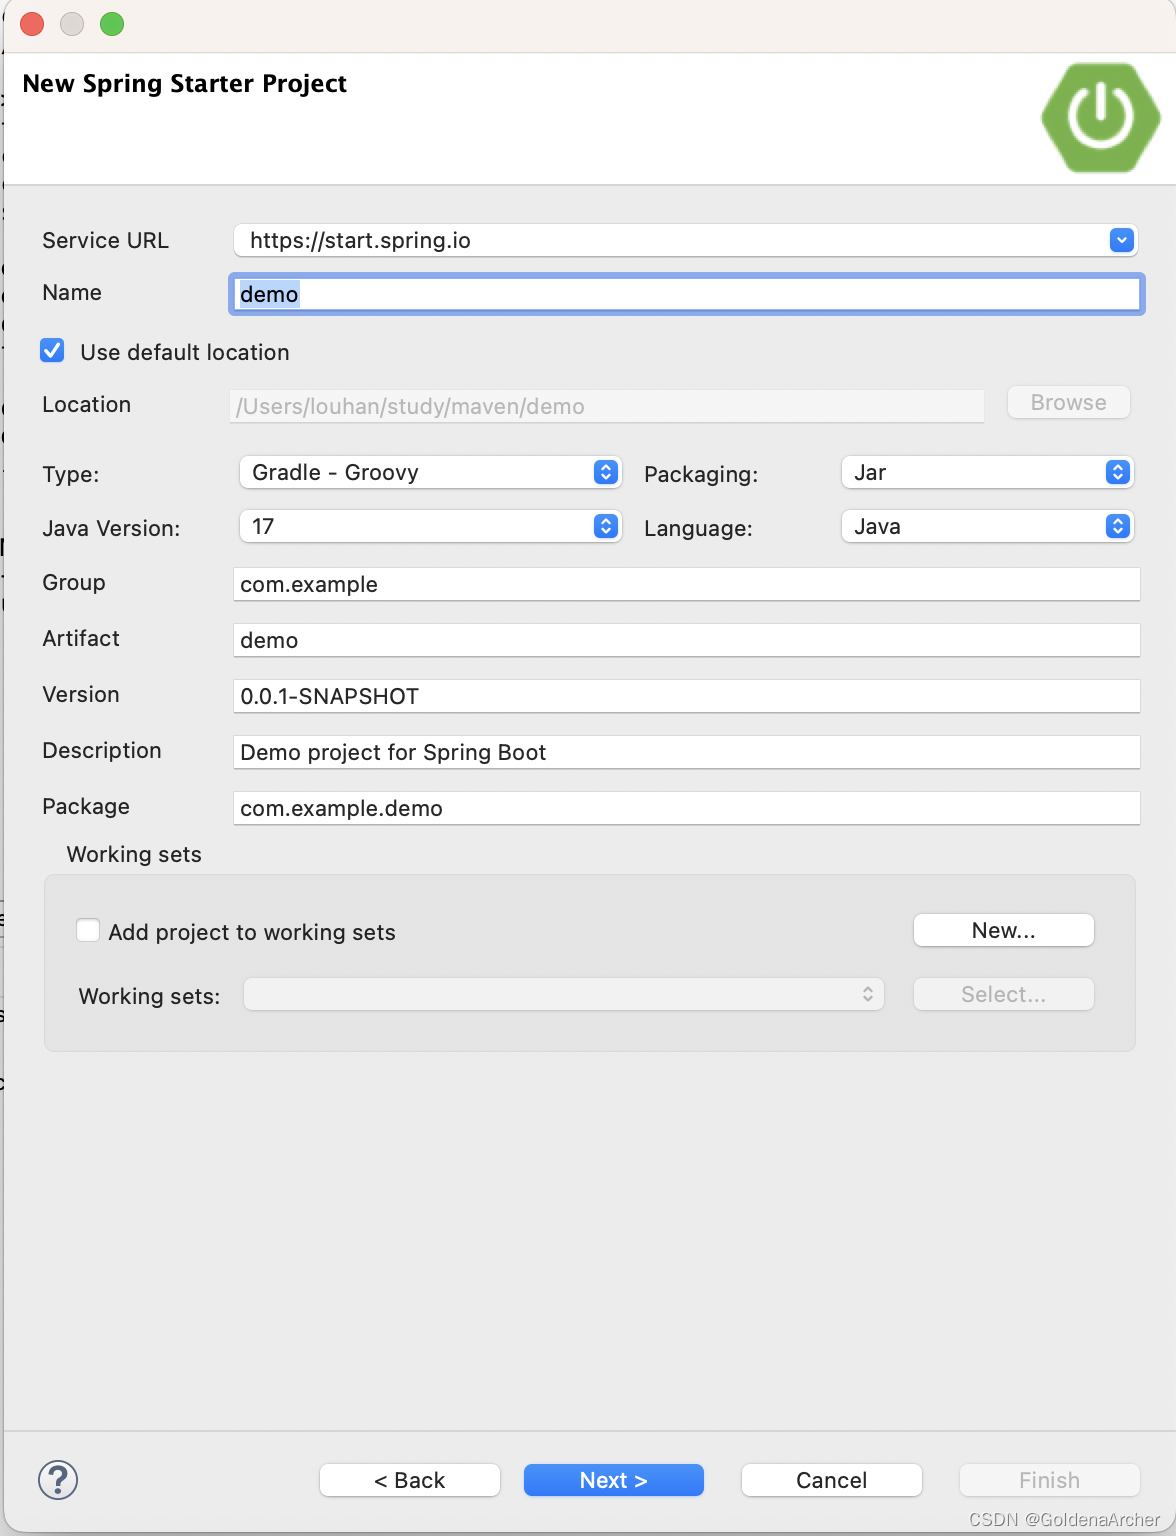
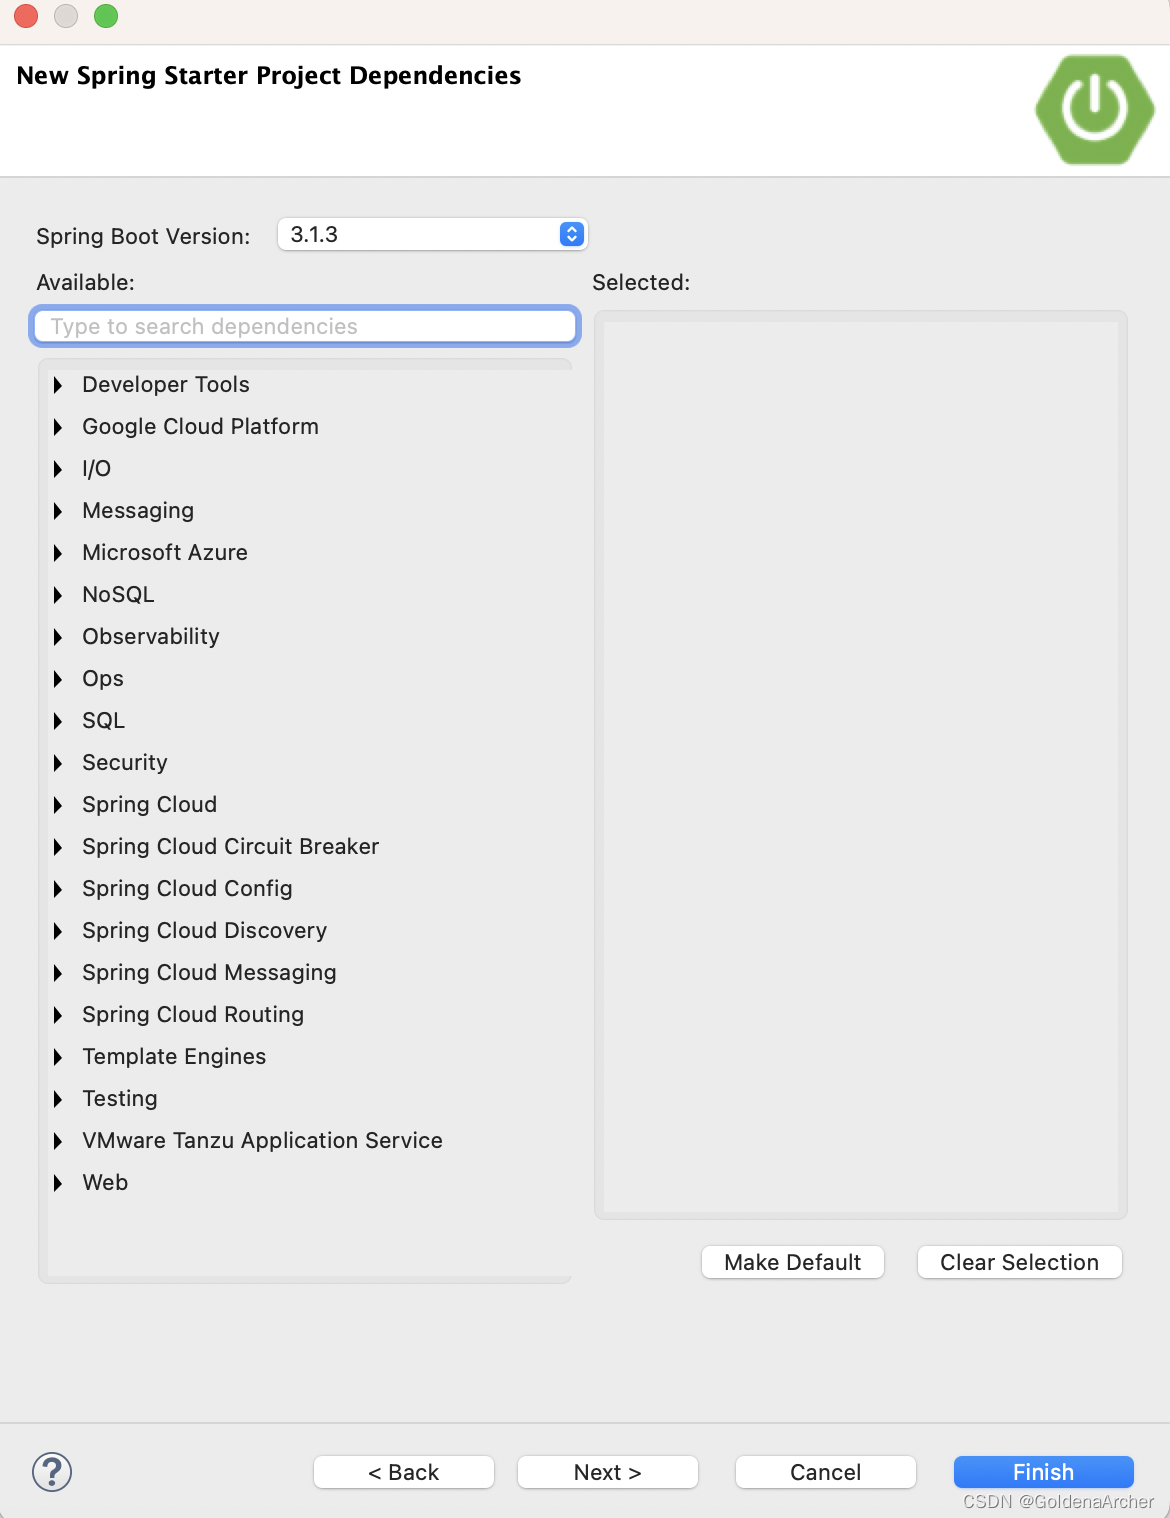
到这一步其实就和网页上修改名称以及修改需要的组件是一样的,点完之后一个新的项目就完成了。
刚新建完的项目会有报错:

说找不到 parent 项目,这个解决方法可以通过 mvn clean install 去获取必须的依赖,让其能够成功 map 到 parent 里的项目即可:

解析 parent
spring boot 自动管理依赖的方式是通过 BOM 实现的:
<parent>
		<groupId>org.springframework.boot</groupId>
		<artifactId>spring-boot-starter-parent</artifactId>
		<version>3.1.3</version>
		<relativePath/> <!-- lookup parent from repository -->
	</parent>
这个 BOM 中提供了已经预设好版本的 dependency,这也可以通过 effective POM 中查看:
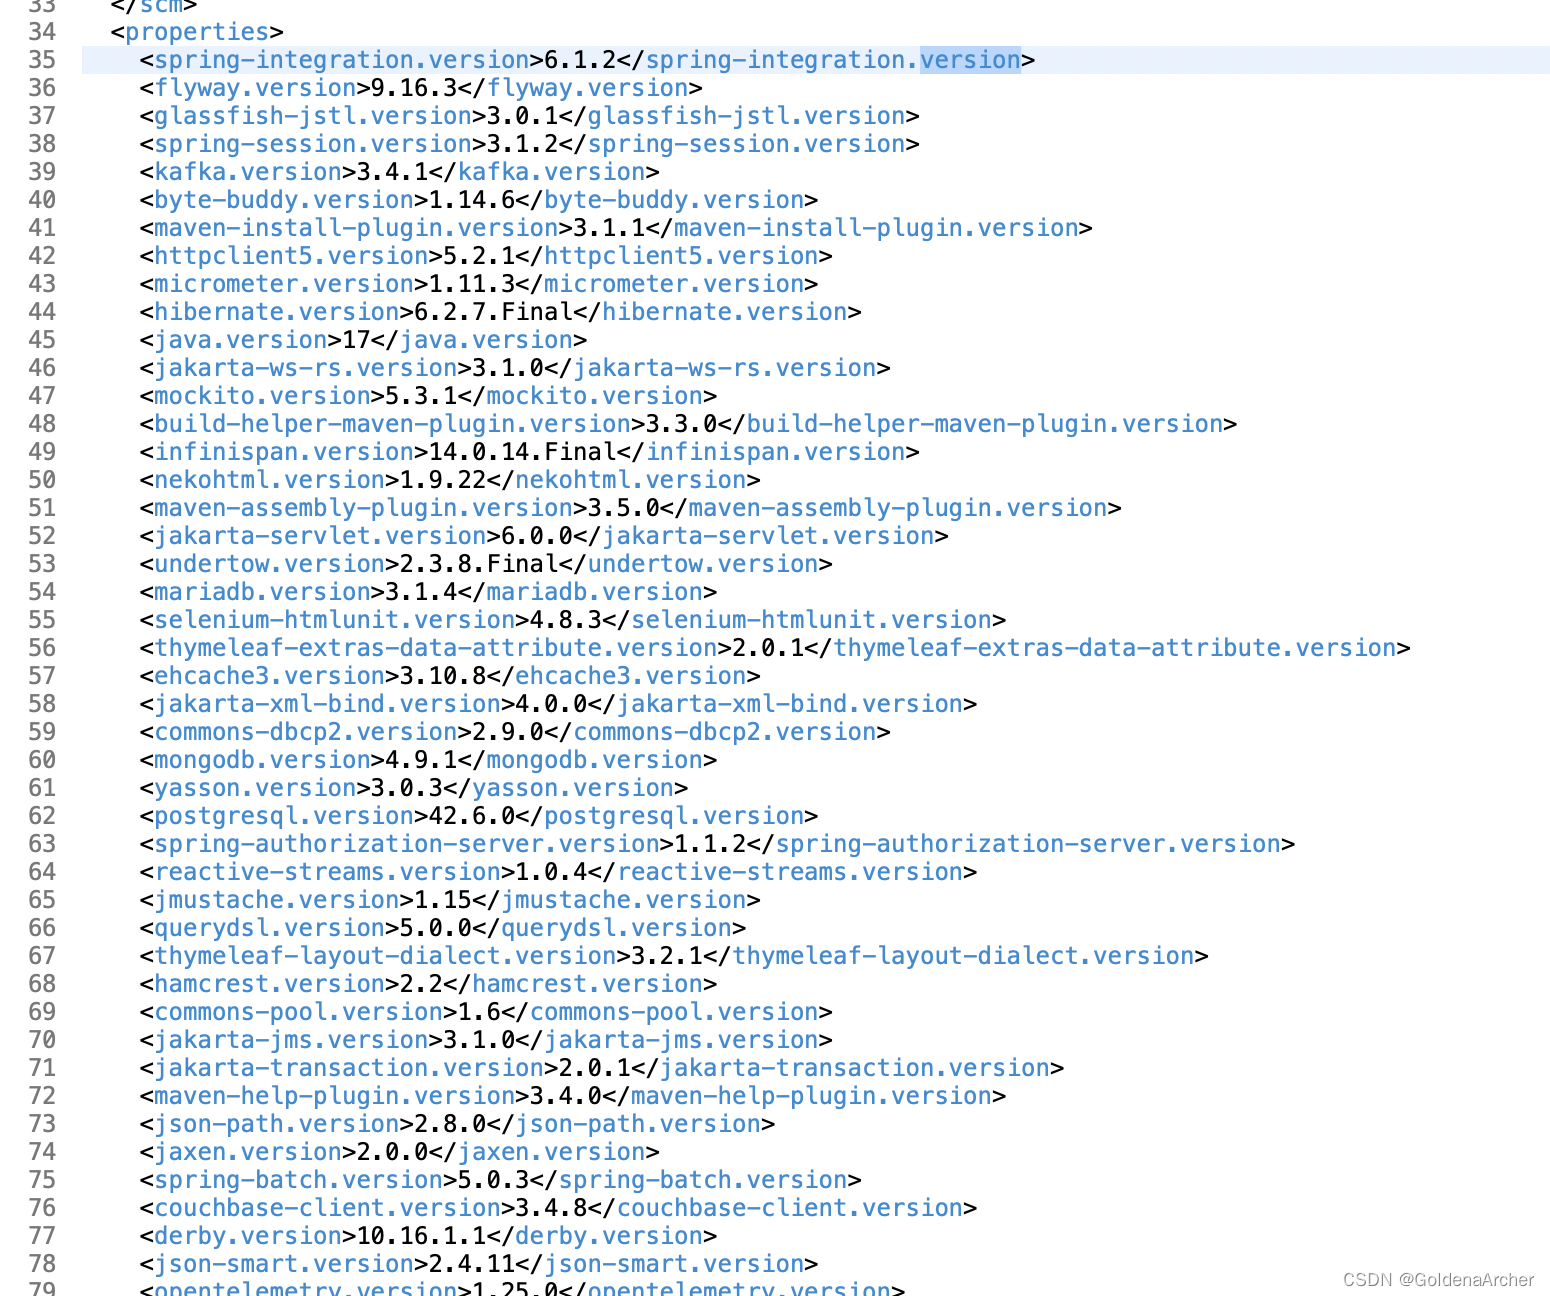
想要将这些依赖包拉到项目中去使用,还需要定义下面这个 dependency:
		<dependency>
			<groupId>org.springframework.boot</groupId>
			<artifactId>spring-boot-starter</artifactId>
		</dependency>
定义完了后,这些 dependency 就可以直接在 boot 项目中使用了。
执行点
执行点在 main java 里:
package com.example.demo;

import org.springframework.boot.SpringApplication;
import org.springframework.boot.autoconfigure.SpringBootApplication;

@SpringBootApplication
public class DemoApplication {

	public static void main(String[] args) {
		SpringApplication.run(DemoApplication.class, args);
	}

}

这里 @SpringBootApplication 是一个最高层的注解,内部执行了挺多事情的,它内部又实现了不少的注解:
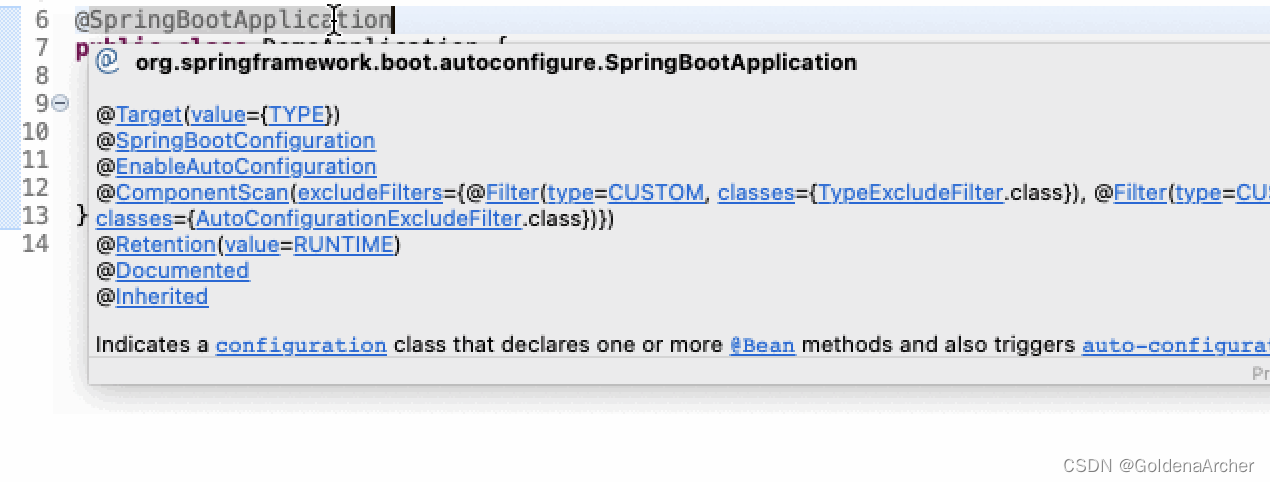
最主要的几个实现为:
-
@SpringBootConfiguration也是集成实现了@Configuration,这个主要管理 Bean 相关的内容 -
@EnableAutoConfiguration就如其名一样,实现了一些自动配置 -
@ComponentScan会扫描整个 spring boot 项目去寻找@component,@service,@repository,@controller这些注解,并且进行注册
测试
其注解为 @SpringBootTest,它也 bootstrap 了整个 spring boot 的 context,它会寻找 @@SpringBootApplication 的注解去运行测试类的 contxt
案例代码:
package com.example.demo;

import org.junit.jupiter.api.Test;
import org.springframework.boot.test.context.SpringBootTest;

@SpringBootTest
class DemoApplicationTests {

	@Test
	void contextLoads() {
	}

}
简单的案例
这里主要就是体会一下 spring boot 的便利性,目前的项目结构如下:
❯ tree
.
├── HELP.md
├── error.png
├── mvnw
├── mvnw.cmd
├── pom.xml
├── src
│   ├── main
│   │   ├── java
│   │   │   └── com
│   │   │       └── example
│   │   │           └── demo
│   │   │               ├── DemoApplication.java
│   │   │               ├── dao
│   │   │               │   ├── PaymentDAO.java
│   │   │               │   └── PaymentDAOImpl.java
│   │   │               └── services
│   │   │                   ├── PaymentService.java
│   │   │                   └── PaymentServiceImpl.java
│   │   └── resources
│   │       └── application.properties
│   └── test
│       └── java
│           └── com
│               └── example
│                   └── demo
│                       └── DemoApplicationTests.java
└── target
    ├── classes
    │   ├── META-INF
    │   │   ├── MANIFEST.MF
    │   │   └── maven
    │   │       └── com.example
    │   │           └── demo
    │   │               ├── pom.properties
    │   │               └── pom.xml
    │   ├── application.properties
    │   └── com
    │       └── example
    │           └── demo
    │               ├── DemoApplication.class
    │               ├── dao
    │               │   ├── PaymentDAO.class
    │               │   └── PaymentDAOImpl.class
    │               └── services
    │                   ├── PaymentService.class
    │                   └── PaymentServiceImpl.class
    ├── demo-0.0.1-SNAPSHOT.jar
    ├── demo-0.0.1-SNAPSHOT.jar.original
    ├── generated-sources
    │   └── annotations
    ├── generated-test-sources


42 directories, 31 files
几个 java 文件的内容分别为:
-
PaymentDAO.java
package com.example.demo.dao; public interface PaymentDAO { } -
PaymentDAOImpl.java
这里可以使用
@Component或@Repository,这里假设该实现会与 DB 交互,因此使用 repopackage com.example.demo.dao; import org.springframework.stereotype.Repository; //@Component tells spring this is a spring bean, object should be created whenever it's required // repo is used to handle db calls @Repository public class PaymentDAOImpl implements PaymentDAO { } -
PaymentService.java
package com.example.demo.services; public interface PaymentService { } -
PaymentServiceImpl.java
这里有一个
@Service和@Autowired的注解package com.example.demo.services; import org.springframework.beans.factory.annotation.Autowired; import org.springframework.stereotype.Service; import com.example.demo.dao.PaymentDAO; @Service public class PaymentServiceImpl implements PaymentService { @Autowired private PaymentDAO dao; public PaymentDAO getDao() { return dao; } public void setDao(PaymentDAO dao) { this.dao = dao; } } -
DemoApplicationTests.java
注意这里
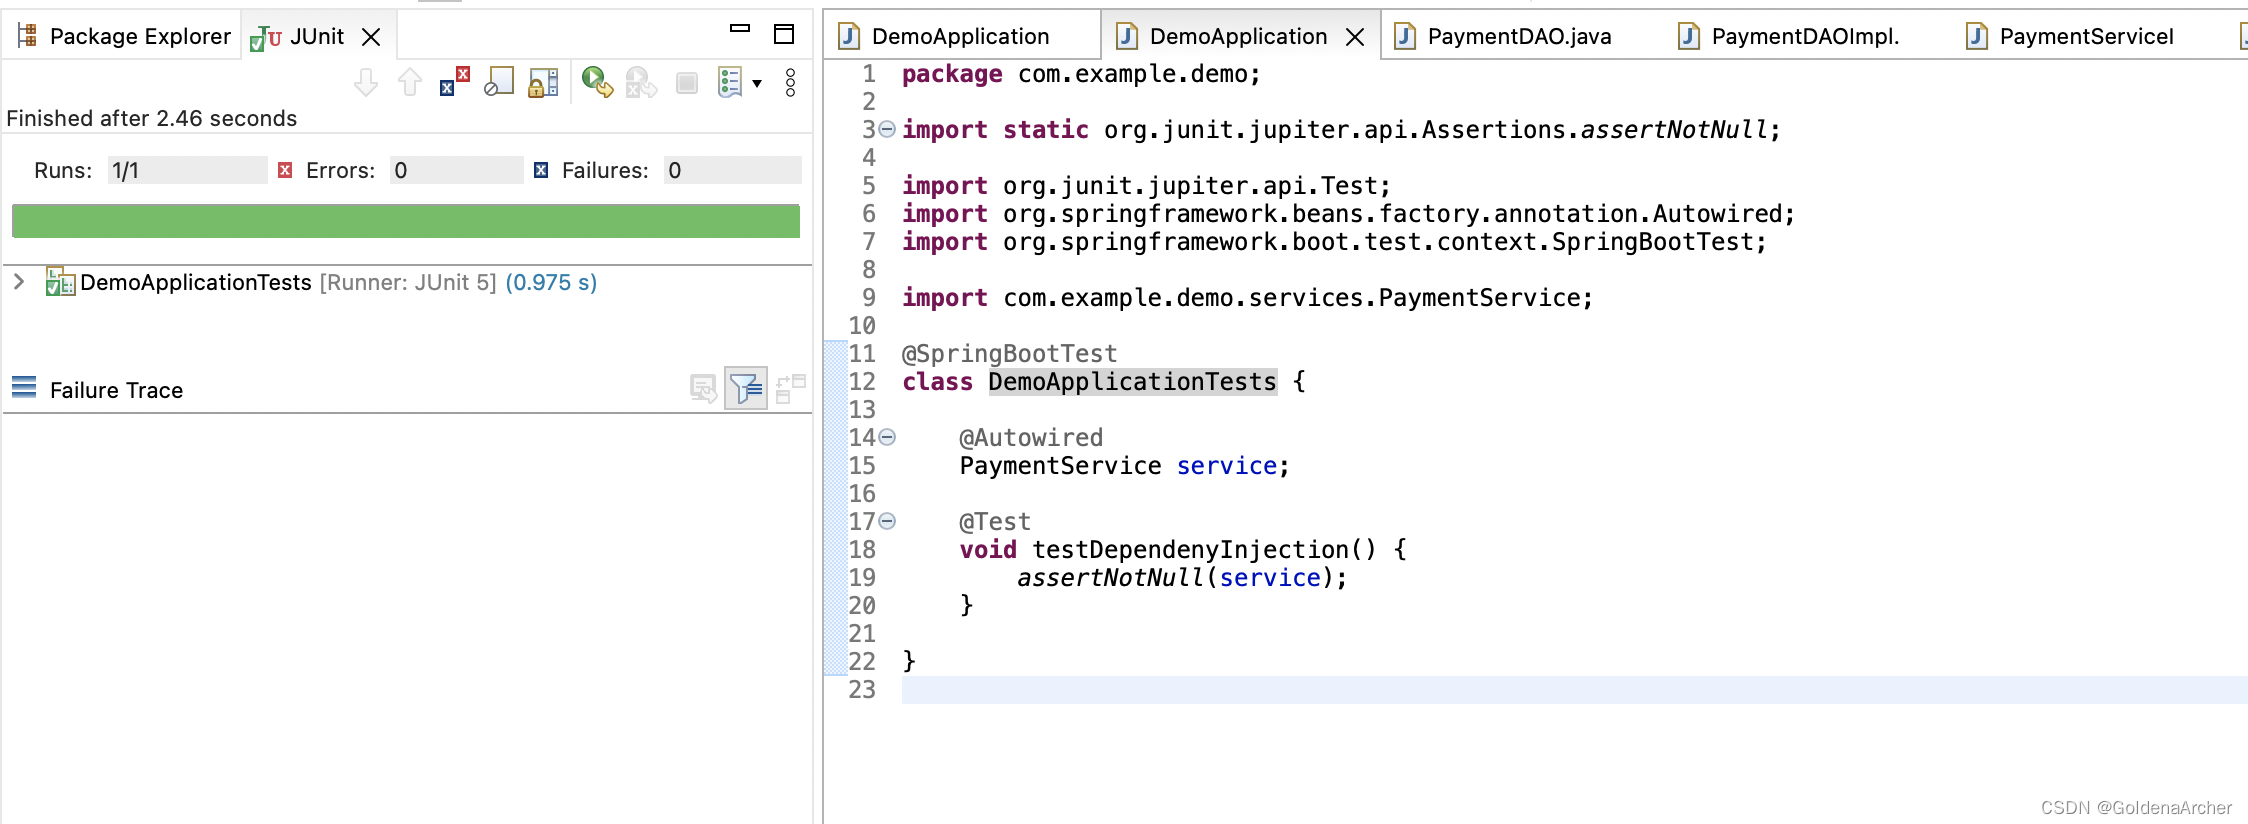
@Autowired的注释package com.example.demo; import static org.junit.jupiter.api.Assertions.assertNotNull; import org.junit.jupiter.api.Test; import org.springframework.beans.factory.annotation.Autowired; import org.springframework.boot.test.context.SpringBootTest; import com.example.demo.services.PaymentService; @SpringBootTest class DemoApplicationTests { @Autowired PaymentService service; @Test void testDependenyInjection() { assertNotNull(service); } }
最后在并没有使用 xml mapping,也没有手动写类,如 PaymentService service = new PaymentServiceImpl(),spring boot 就完成了自动注册、自动配置、自动寻找实现,并且成功的运行了测试:
jenkins
这里会在 AWS 上的 EC2 运行 Jenkins,然后通过 Jenkins 执行 maven 命令。
jenkins 最后一步运行 maven 项目的时候有点问题,Jenkins build Error: [ERROR] Failed to execute goal org.apache.maven.plugins:maven-compiler-plugin:3.8.1:compile 上说配置 java 路径可以解决问题……
嗯,不过没继续折腾,知道可以通过 jenkins 跑 maven 就行了
创建 ec2 instance
直接搜索 EC2:

然后选择登录一个新的 instance 即可:
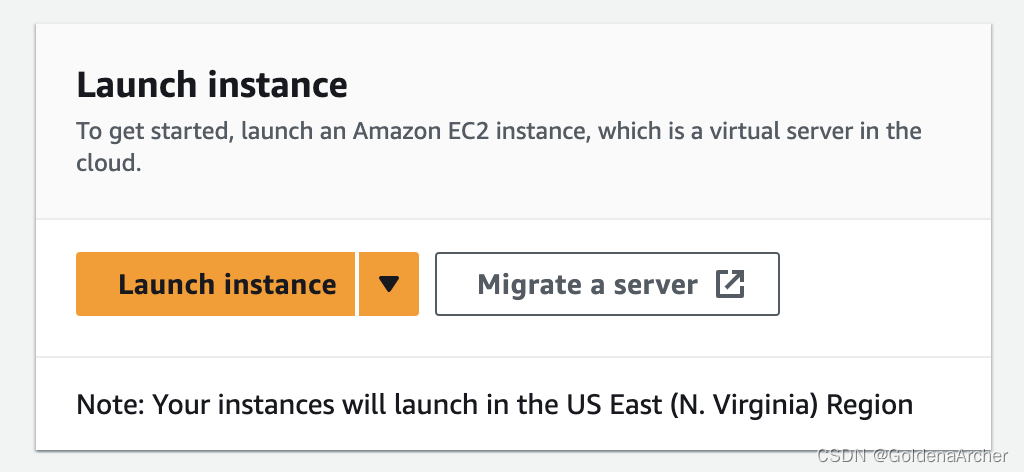
AWS 的 UI 变得还算多吧,主要搜索就好。配置的话也比较简单……免费的也没什么特别多可选的:
选择 Amazon Linux
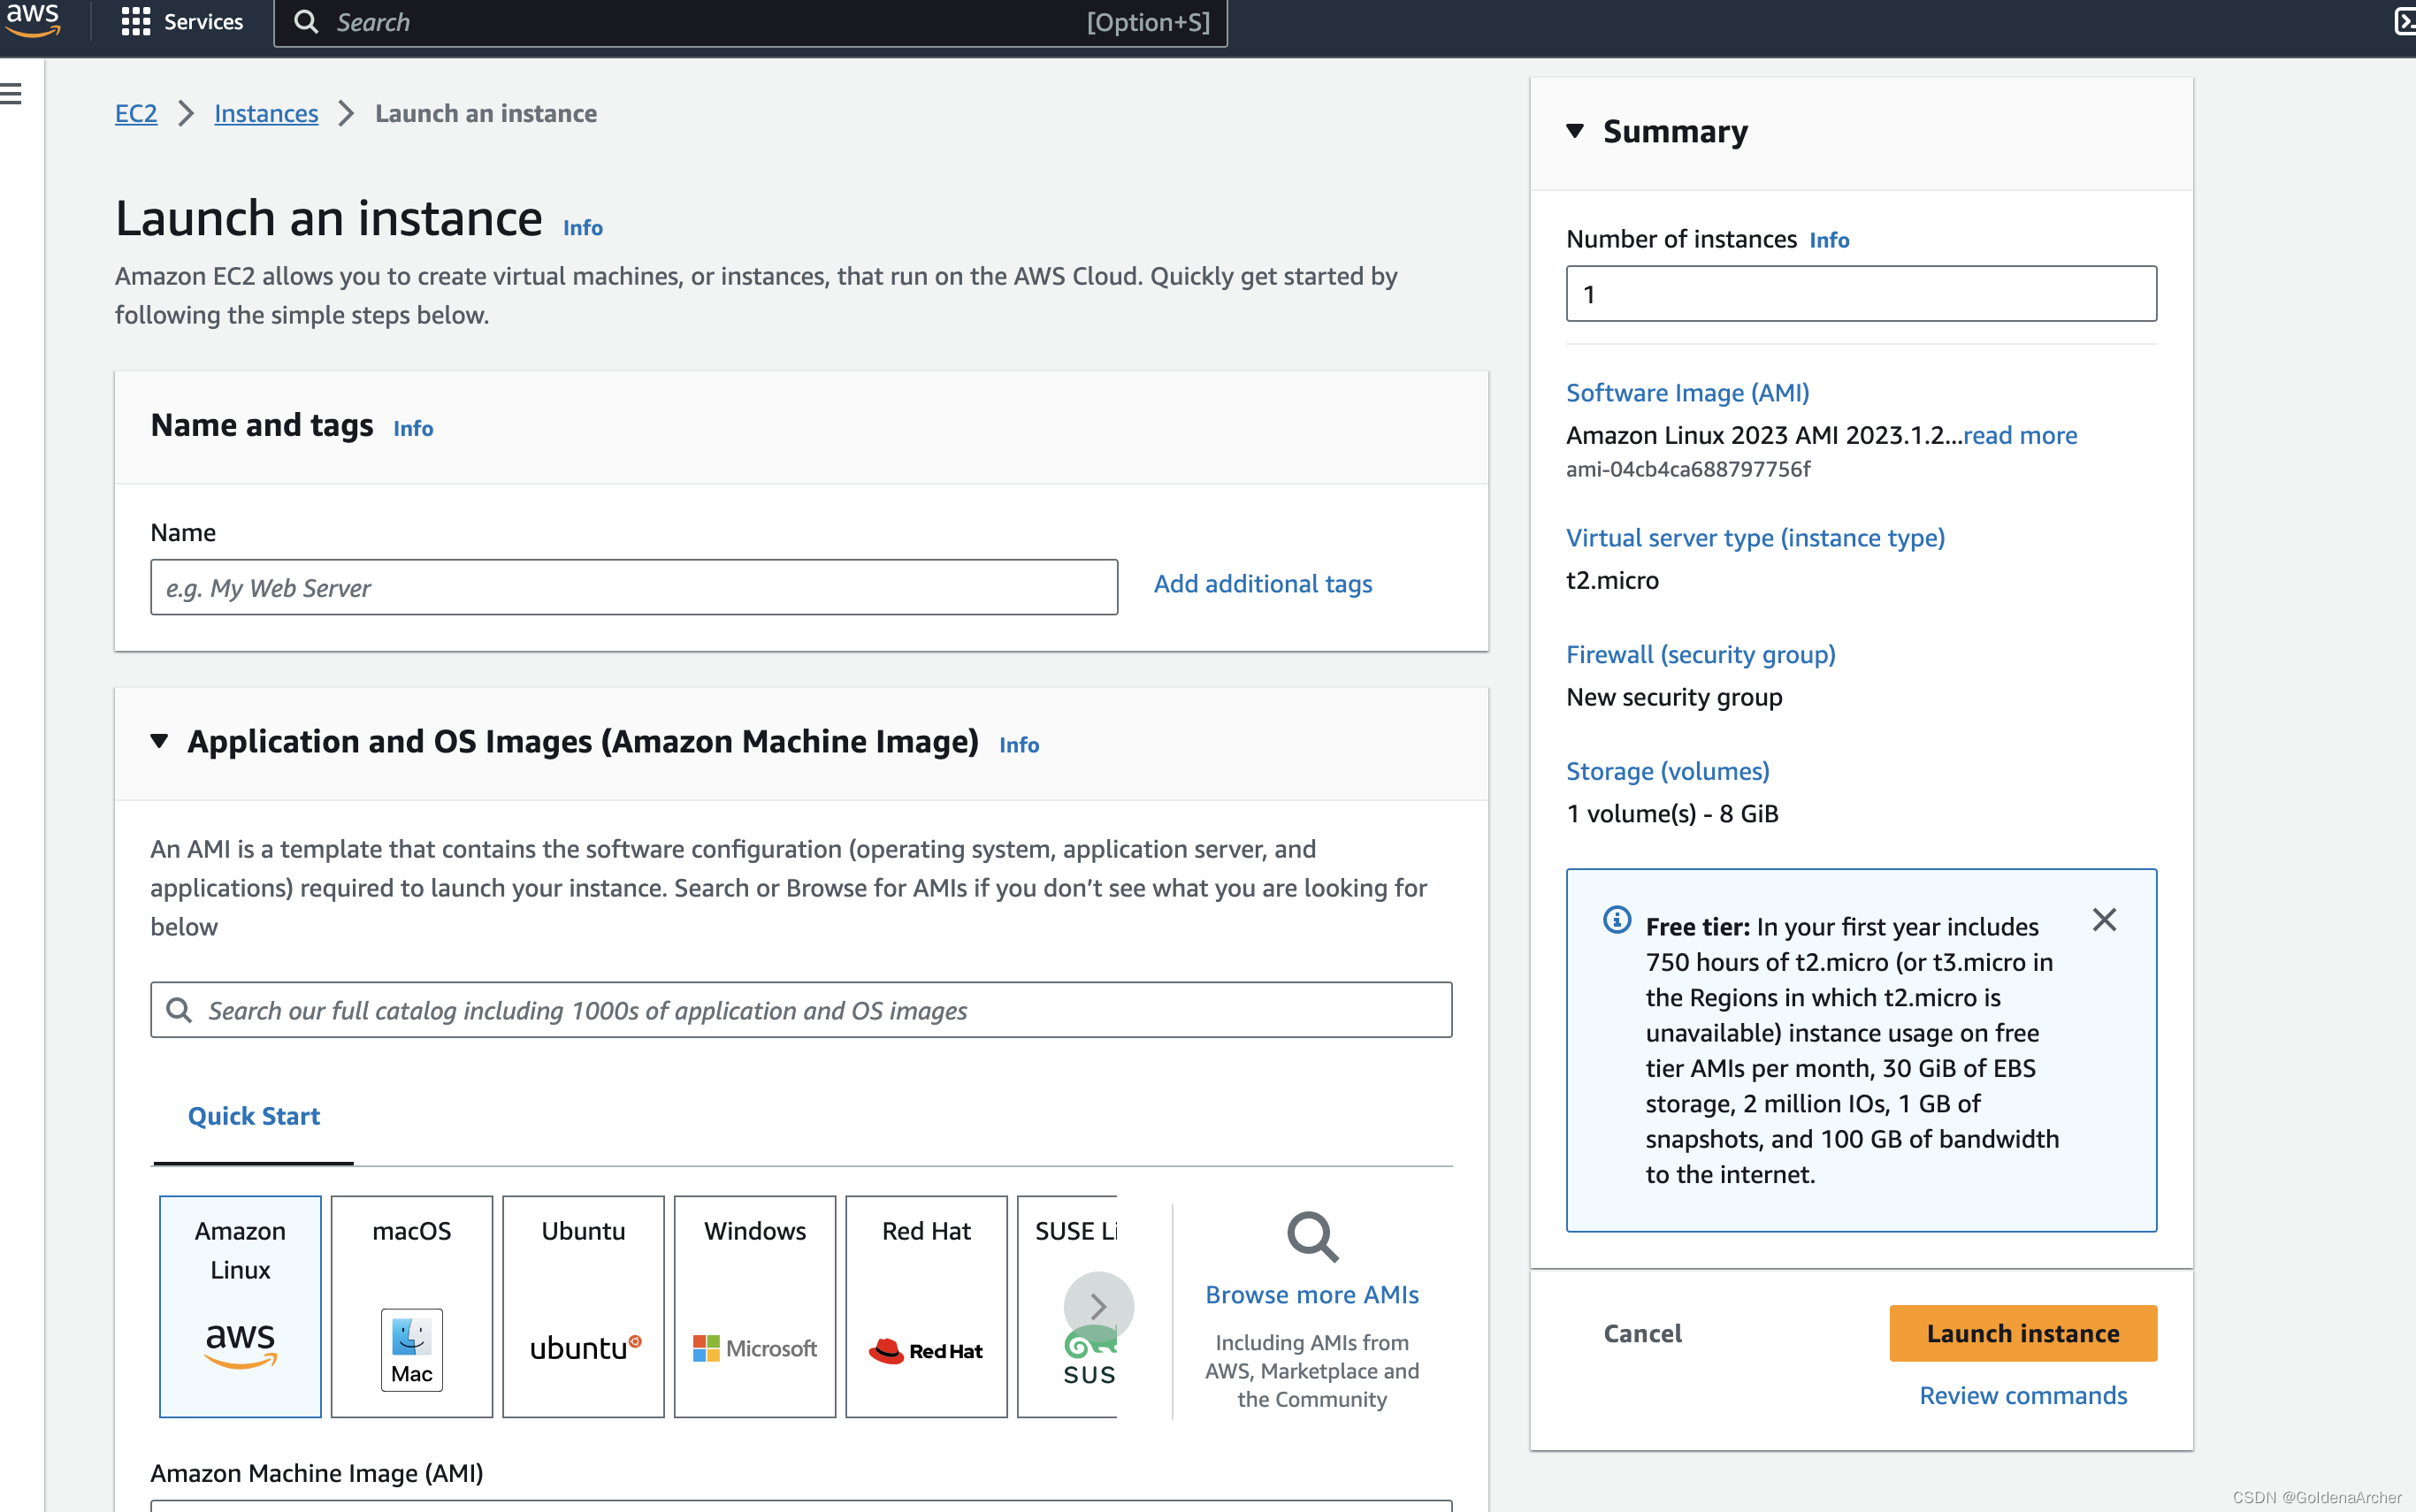
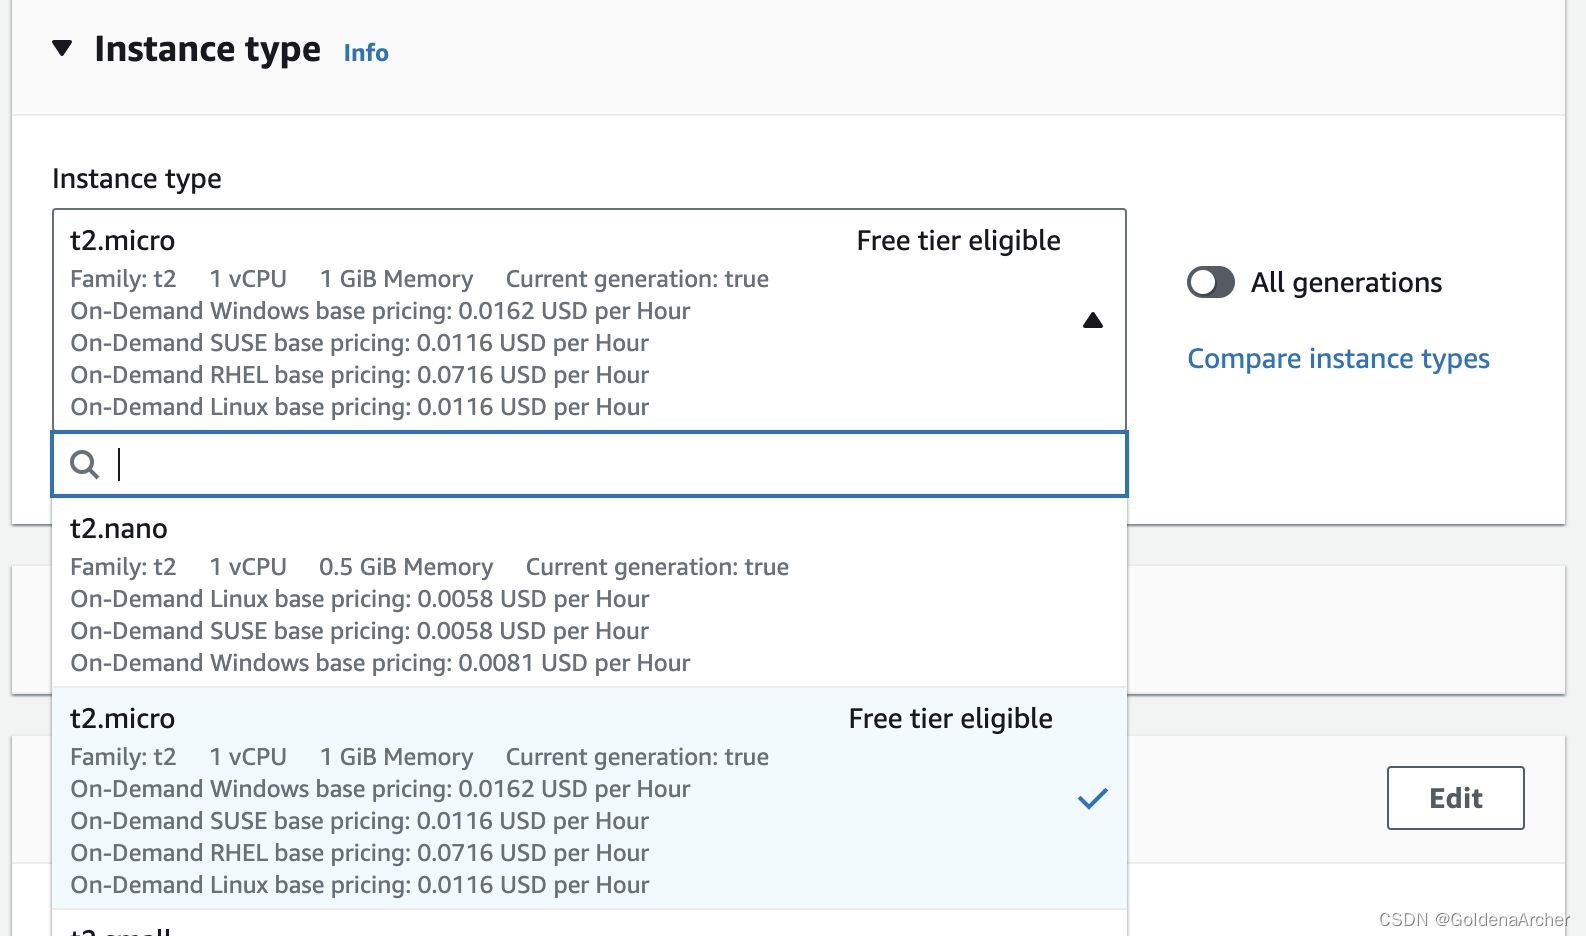
注意要选择有 Free Tier 选项的:

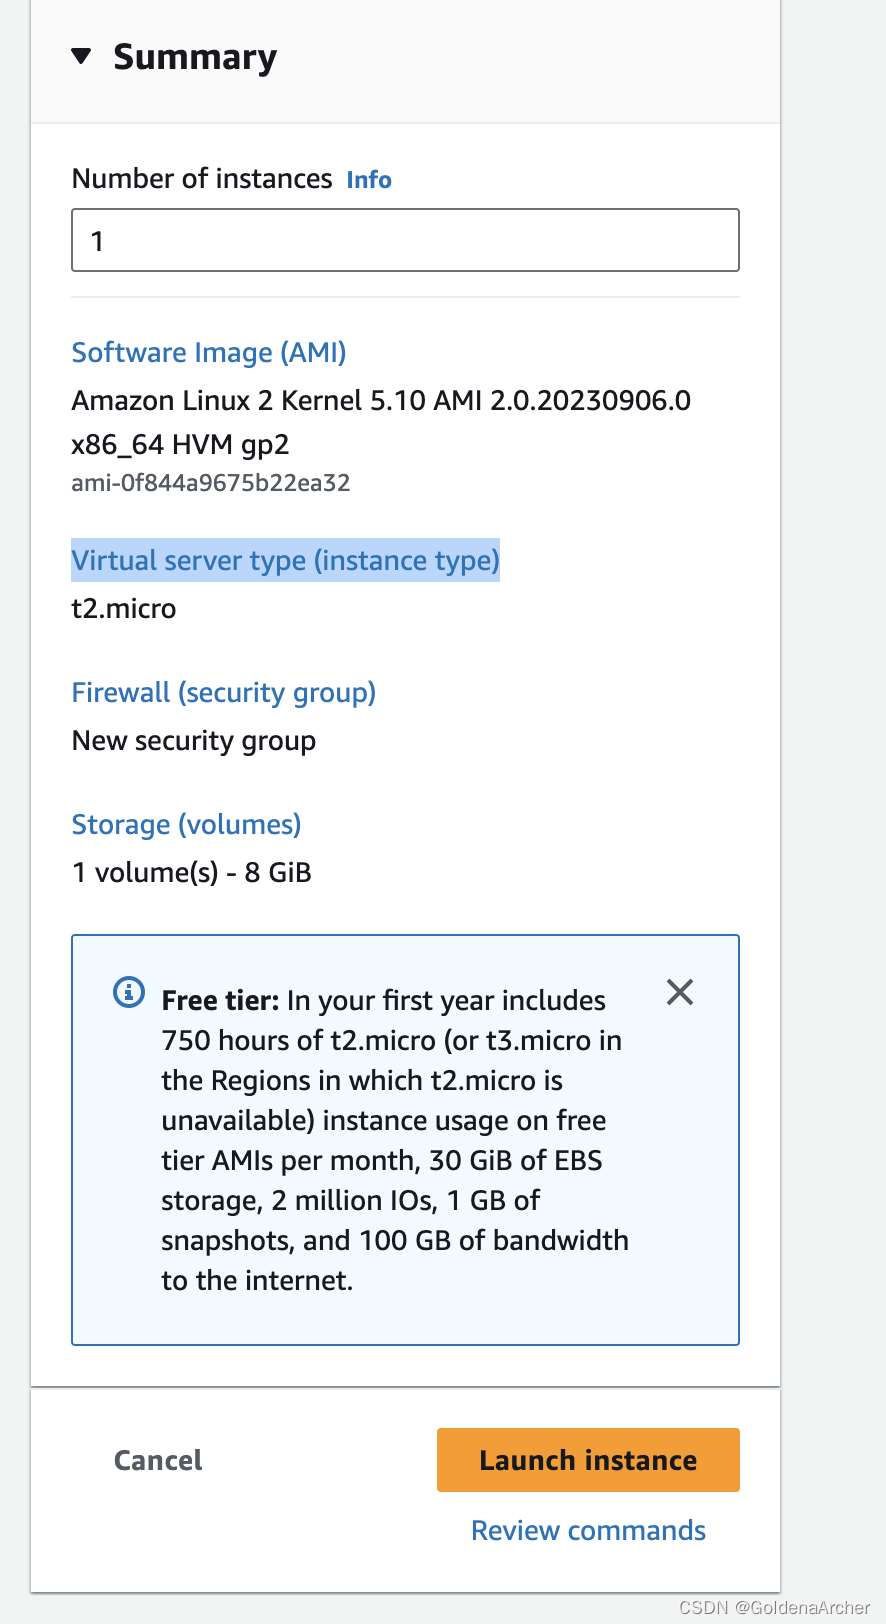
summary 看起来是这样的:
随后选择 launch
等到状态变成 running 就代表创建成功了:
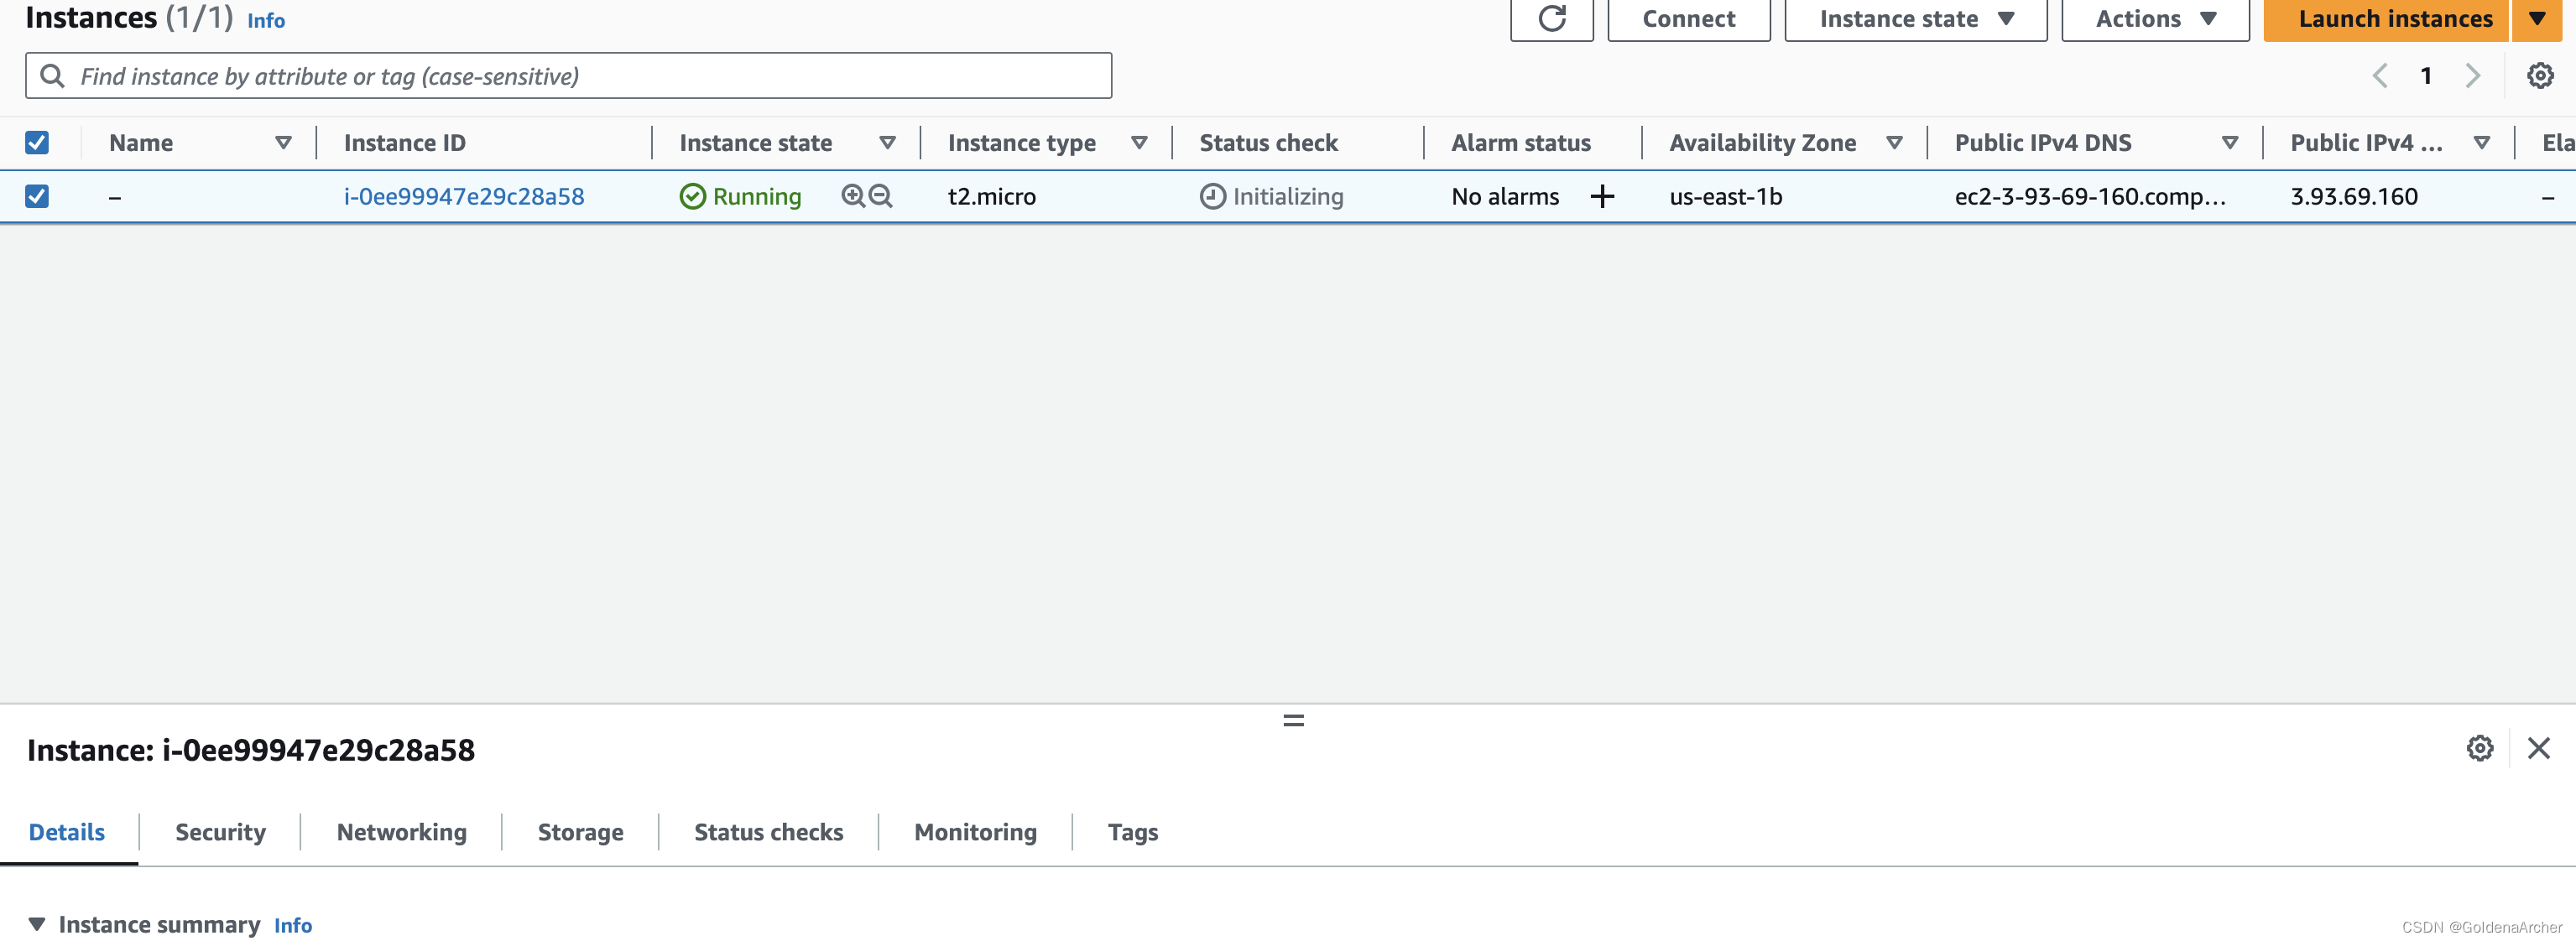
过程中应该还会提醒,说要新建一个 SSH cred 或者用已有的,这里忘截图了
通过 ssh 链接 ec2
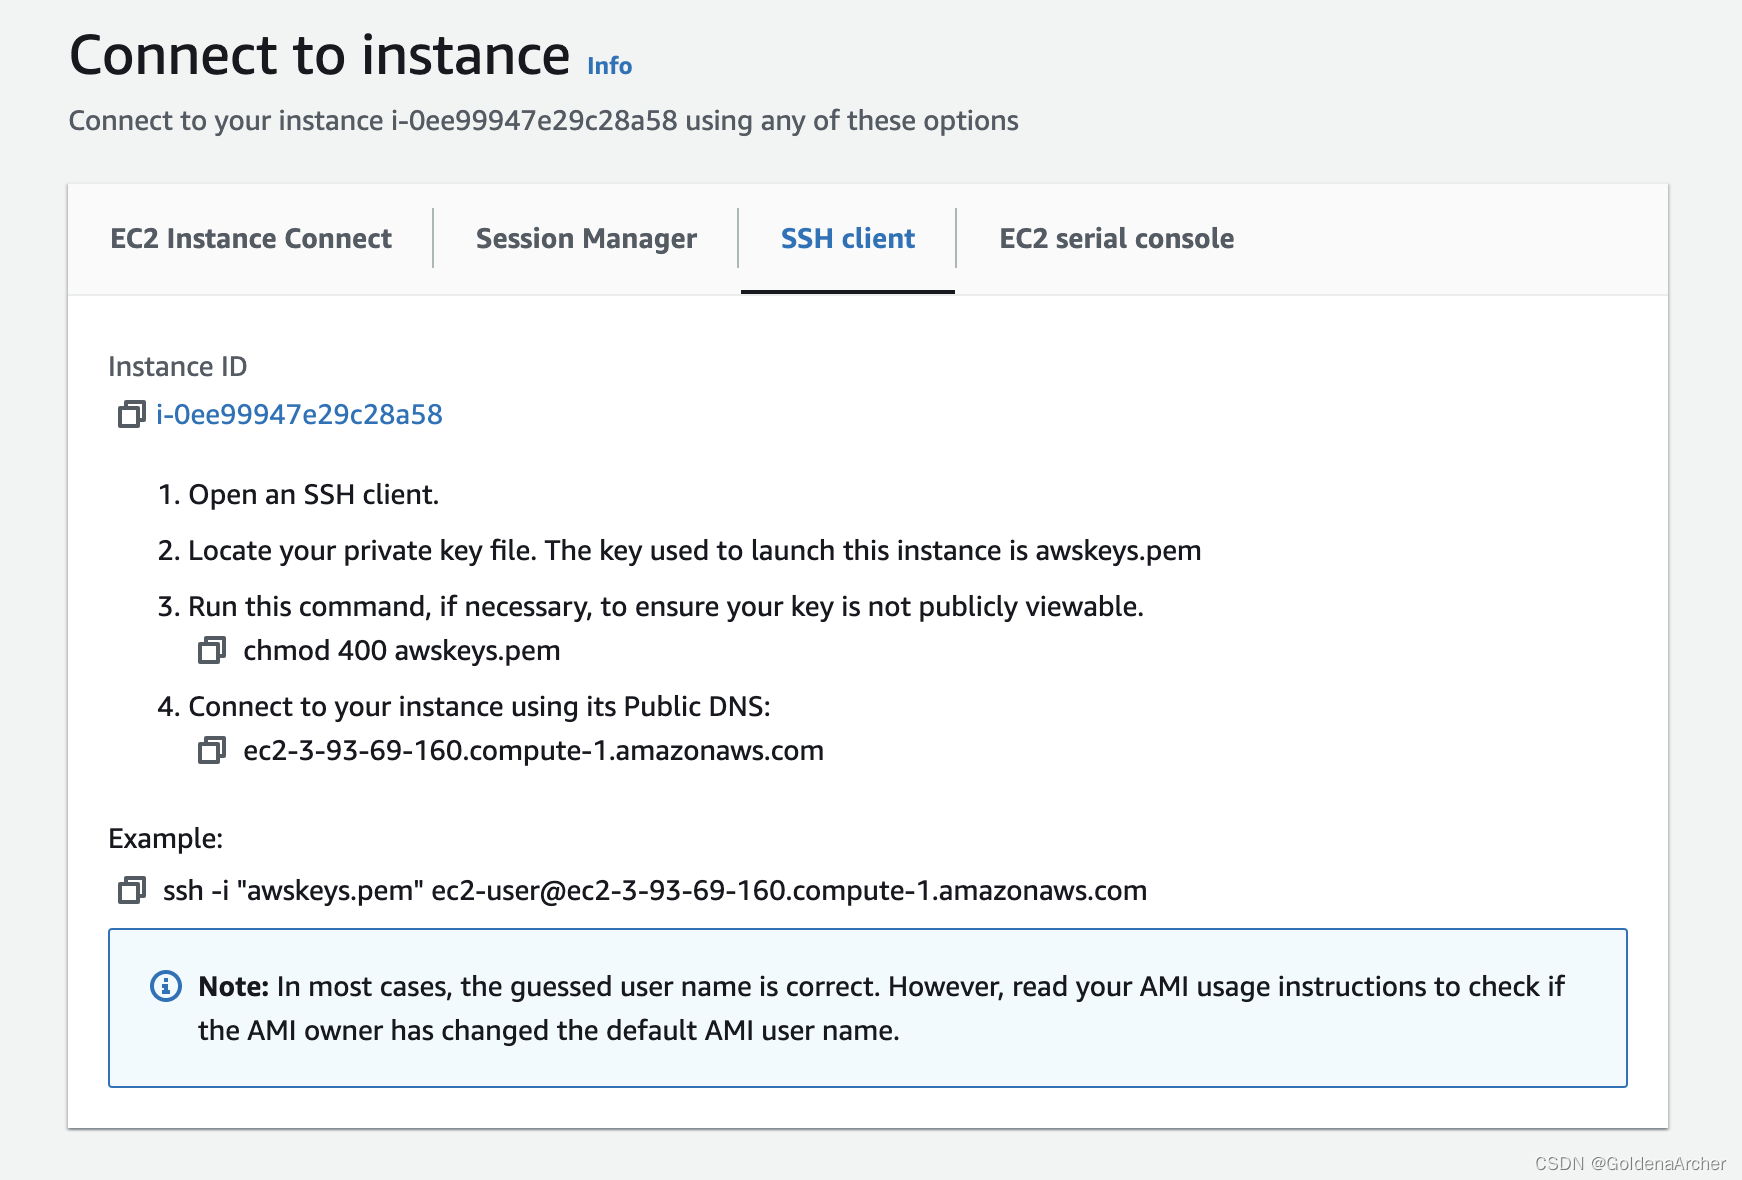
cv 一下提供的指令就行,不过跑之前需要给 awskeys.pem 权限:
❯ chmod 400 awskeys.pem
❯ ssh -i "awskeys.pem" ec2-user@ec2-3-93-69-160.compute-1.amazonaws.com
The authenticity of host 'ec2-3-93-69-160.compute-1.amazonaws.com (3.93.69.160)' can't be established.
ED25519 key fingerprint is SHA256:vxumAy6QBJSv4xiAL9UmxVbjAoVrn9RszOGiHeoFJ5M.
This key is not known by any other names
Are you sure you want to continue connecting (yes/no/[fingerprint])? y
Please type 'yes', 'no' or the fingerprint: y
Please type 'yes', 'no' or the fingerprint: yes
Warning: Permanently added 'ec2-3-93-69-160.compute-1.amazonaws.com' (ED25519) to the list of known hosts.

       __|  __|_  )
       _|  (     /   Amazon Linux 2 AMI
      ___|\___|___|

https://aws.amazon.com/amazon-linux-2/
5 package(s) needed for security, out of 36 available
Run "sudo yum update" to apply all updates.
[ec2-user@ip-172-31-45-71 ~]$

# become psuedo user
[ec2-user@ip-172-31-45-71 ~]$ sudo -i
[root@ip-172-31-45-71 ~]#/
安装 & 运行 maven 项目
我个人建议是安装 package 的时候用 root,新建项目的时候退出 root,用普通用户的权限。跟着教程一直用 root,发现用 root 创建的项目,尽管用了 chmod,公网还是无法访问。
安装 java 和 maven
[root@ip-172-31-45-71 ~]# java -version
-bash: java: command not found
[root@ip-172-31-45-71 ~]# yum install java
Loaded plugins: extras_suggestions, langpacks, priorities, update-motd

[root@ip-172-31-45-71 ~]# java -version
openjdk version "17.0.8.1" 2023-08-22 LTS
OpenJDK Runtime Environment Corretto-17.0.8.8.1 (build 17.0.8.1+8-LTS)
OpenJDK 64-Bit Server VM Corretto-17.0.8.8.1 (build 17.0.8.1+8-LTS, mixed mode, sharing)

[root@ip-172-31-45-71 ~]# yum install maven
Loaded plugins: extras_suggestions, langpacks, priorities, update-motd
Resolving Dependencies
--> Running transaction check

[root@ip-172-31-45-71 ~]# mvn -version
Apache Maven 3.0.5 (Red Hat 3.0.5-17)
Maven home: /usr/share/maven
Java version: 17.0.8.1, vendor: Amazon.com Inc.
Java home: /usr/lib/jvm/java-17-amazon-corretto.x86_64
Default locale: en_US, platform encoding: UTF-8
OS name: "linux", version: "5.10.192-182.736.amzn2.x86_64", arch: "amd64", family: "unix"
创建新的 maven 项目:
[root@ip-172-31-45-71 ~]# mvn archetype:generate -DgroupId=com.goldenaarcher -DartifactId=hellomaven -DarchetypeArtifactId=maven-archetype-quickstart -DinteractiveMode=false

[INFO] ----------------------------------------------------------------------------
[INFO] Using following parameters for creating project from Old (1.x) Archetype: maven-archetype-quickstart:1.0
[INFO] ----------------------------------------------------------------------------
[INFO] Parameter: basedir, Value: /root
[INFO] Parameter: package, Value: com.goldenaarcher
[INFO] Parameter: groupId, Value: com.goldenaarcher
[INFO] Parameter: artifactId, Value: hellomaven
[INFO] Parameter: packageName, Value: com.goldenaarcher
[INFO] Parameter: version, Value: 1.0-SNAPSHOT
[INFO] project created from Old (1.x) Archetype in dir: /root/hellomaven
[INFO] ------------------------------------------------------------------------
[INFO] BUILD SUCCESS
[INFO] ------------------------------------------------------------------------
[INFO] Total time: 8.944s
[INFO] Finished at: Sat Sep 16 15:09:32 UTC 2023
[INFO] Final Memory: 16M/78M
[INFO] ------------------------------------------------------------------------

[root@ip-172-31-45-71 ~]# ls
hellomaven

[root@ip-172-31-45-71 ~]# mvn archetype:generate -DgroupId=com.goldenaarcher -DartifactId=hellomaven-web -DarchetypeArtifactId=maven-archetype-webapp -DinteractiveMode=false
[INFO] ----------------------------------------------------------------------------
[INFO] Using following parameters for creating project from Old (1.x) Archetype: maven-archetype-webapp:1.0
[INFO] ----------------------------------------------------------------------------
[INFO] Parameter: basedir, Value: /root
[INFO] Parameter: package, Value: com.goldenaarcher
[INFO] Parameter: groupId, Value: com.goldenaarcher
[INFO] Parameter: artifactId, Value: hellomaven-web
[INFO] Parameter: packageName, Value: com.goldenaarcher
[INFO] Parameter: version, Value: 1.0-SNAPSHOT
[INFO] project created from Old (1.x) Archetype in dir: /root/hellomaven-web
[INFO] ------------------------------------------------------------------------
[INFO] BUILD SUCCESS
[INFO] ------------------------------------------------------------------------
[INFO] Total time: 4.892s
[INFO] Finished at: Sat Sep 16 16:10:52 UTC 2023
[INFO] Final Memory: 17M/52M
[INFO] ------------------------------------------------------------------------

[root@ip-172-31-45-71 ~]# ls
hellomaven  hellomaven-web
安装 jenkins
首先需要跑两条指令,将 jenkins 指向最新的版本,根据 I’m getting error “Public key for jenkins-2.232-1.1.noarch.rpm is not installed” while installing Jenkins on AWS EC2 [closed] 上说,jenkins 是改过网址的,所以做 rpm 的时候要确认一下网址
# below are 2 commands will let jenkins pointing to the latest version
[root@ip-172-31-45-71 ~]# wget -O /etc/yum.repos.d/jenkins.repo http://pkg.jenkins-ci.org/redhat/jenkins.repo
--2023-09-16 16:14:09--  http://pkg.jenkins-ci.org/redhat/jenkins.repo
Resolving pkg.jenkins-ci.org (pkg.jenkins-ci.org)... 52.202.51.185
Connecting to pkg.jenkins-ci.org (pkg.jenkins-ci.org)|52.202.51.185|:80... connected.
HTTP request sent, awaiting response... 301 Moved Permanently
Location: https://pkg.jenkins.io/redhat/jenkins.repo [following]
--2023-09-16 16:14:09--  https://pkg.jenkins.io/redhat/jenkins.repo
Resolving pkg.jenkins.io (pkg.jenkins.io)... 146.75.38.133, 2a04:4e42:78::645
Connecting to pkg.jenkins.io (pkg.jenkins.io)|146.75.38.133|:443... connected.
HTTP request sent, awaiting response... 200 OK
Length: 71
Saving to: ‘/etc/yum.repos.d/jenkins.repo’

100%[=======================================================================================>] 71          --.-K/s   in 0s

2023-09-16 16:14:09 (2.83 MB/s) - ‘/etc/yum.repos.d/jenkins.repo’ saved [71/71]

[root@ip-172-31-45-71 ~]# rpm --import https://pkg.jenkins.io/redhat/jenkins.io-2023.key
然后通过 yum 安装,如果 rpm 只想的网址不对,就会出现 Public key for jenkins-2.423-1.1.noarch.rpm is not installed 的提示。
# install jenkins
[root@ip-172-31-45-71 ~]# yum install jenkins
Loaded plugins: extras_suggestions, langpacks, priorities, update-motd
amzn2-core                                                                                                | 3.7 kB  00:00:00
jenkins                                                                                                   | 2.9 kB  00:00:00
jenkins/primary_db                                                                                        | 205 kB  00:00:00
Resolving Dependencies
--> Running transaction check
---> Package jenkins.noarch 0:2.423-1.1 will be installed
--> Finished Dependency Resolution

Dependencies Resolved

=================================================================================================================================
 Package                       Arch                         Version                          Repository                     Size
=================================================================================================================================
Installing:
 jenkins                       noarch                       2.423-1.1                        jenkins                        85 M

Transaction Summary
=================================================================================================================================
Install  1 Package

Total download size: 85 M
Installed size: 85 M
Is this ok [y/d/N]: y
Downloading packages:
warning: /var/cache/yum/x86_64/2/jenkins/packages/jenkins-2.423-1.1.noarch.rpm: Header V4 RSA/SHA512 Signature, key ID ef5975ca: NOKEY
Public key for jenkins-2.423-1.1.noarch.rpm is not installed
jenkins-2.423-1.1.noarch.rpm                                                                              |  85 MB  00:00:04


Public key for jenkins-2.423-1.1.noarch.rpm is not installed

# download it again due to public key issue
[root@ip-172-31-45-71 ~]# yum install jenkins
Loaded plugins: extras_suggestions, langpacks, priorities, update-motd
Resolving Dependencies
--> Running transaction check
---> Package jenkins.noarch 0:2.423-1.1 will be installed
--> Finished Dependency Resolution

Dependencies Resolved

=================================================================================================================================
 Package                       Arch                         Version                          Repository                     Size
=================================================================================================================================
Installing:
 jenkins                       noarch                       2.423-1.1                        jenkins                        85 M

Transaction Summary
=================================================================================================================================
Install  1 Package

Total size: 85 M
Installed size: 85 M
Is this ok [y/d/N]: y
Downloading packages:
Running transaction check
Running transaction test
Transaction test succeeded
Running transaction
  Installing : jenkins-2.423-1.1.noarch                                                                                      1/1
  Verifying  : jenkins-2.423-1.1.noarch                                                                                      1/1

Installed:
  jenkins.noarch 0:2.423-1.1

Complete!
开启 jenkins 服务:
# start the service
[root@ip-172-31-45-71 ~]# service jenkins start
Redirecting to /bin/systemctl start jenkins.service
最后可以开启 ec2 的 TCP 到公网去测试一下:
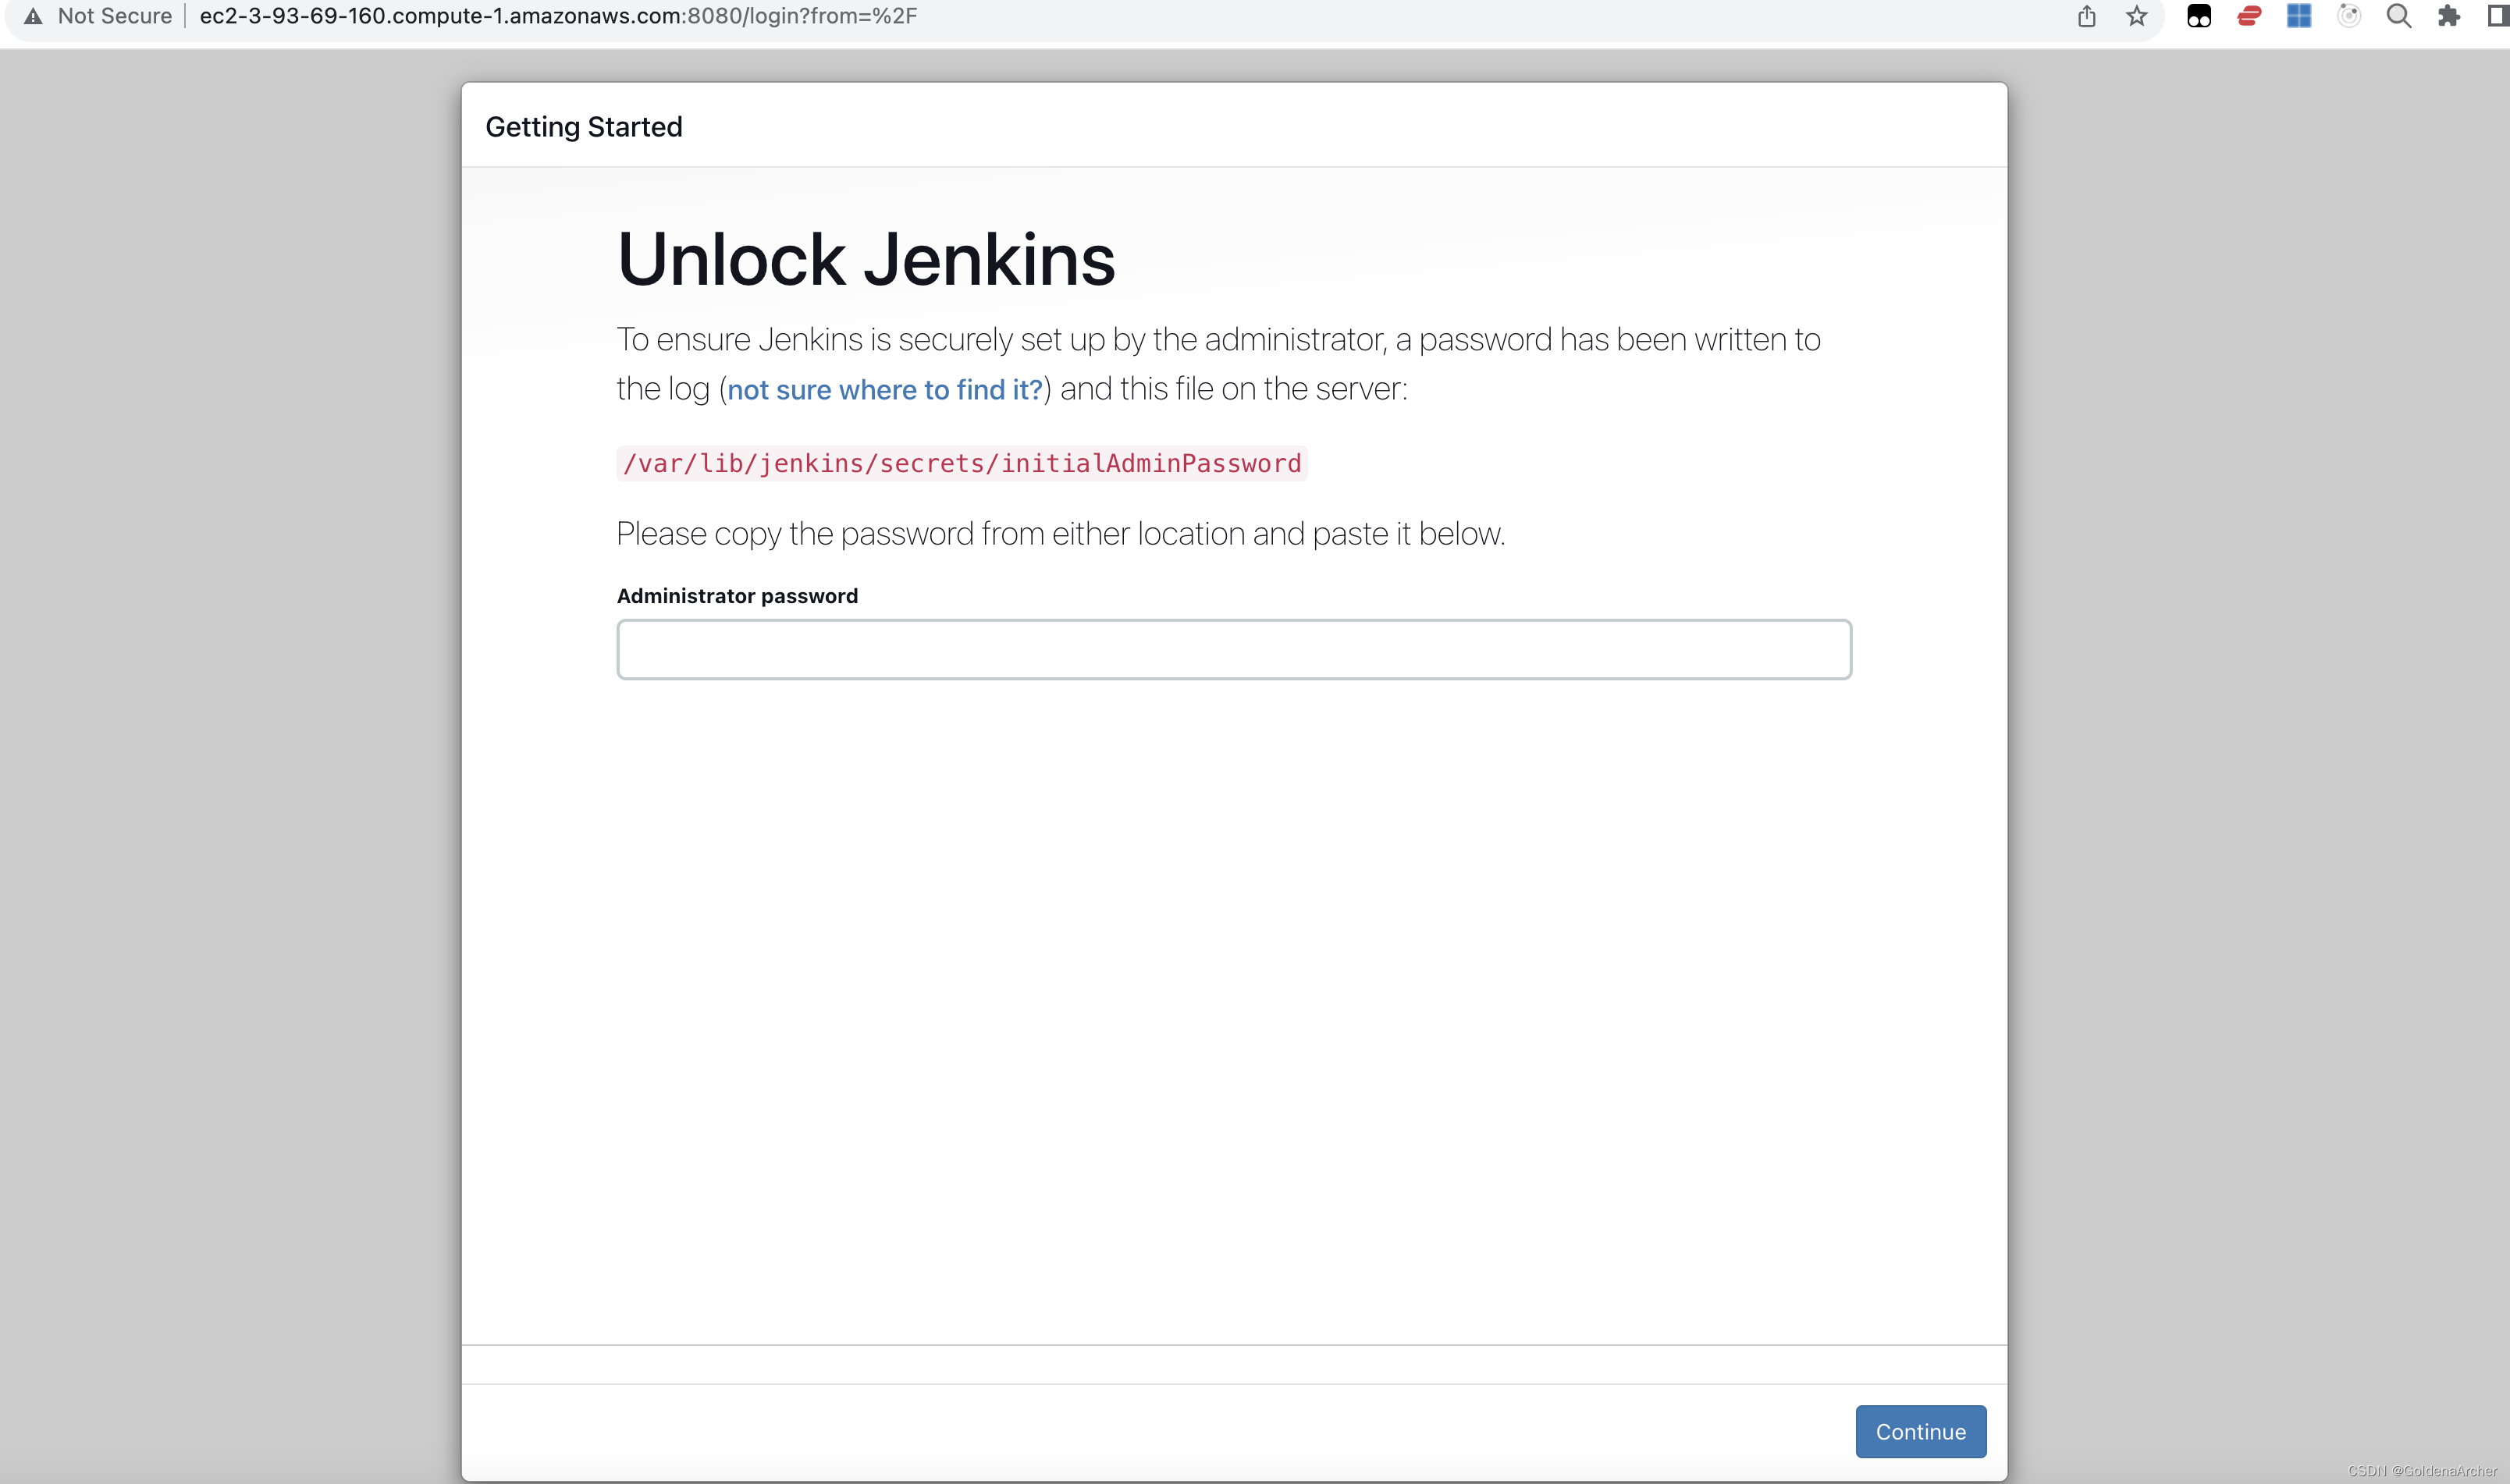
看到这个页面就能确认 Jenkins 配置好,并且在 aws 上运行了
配置 jenkins
首先就是安装建议安装的包:
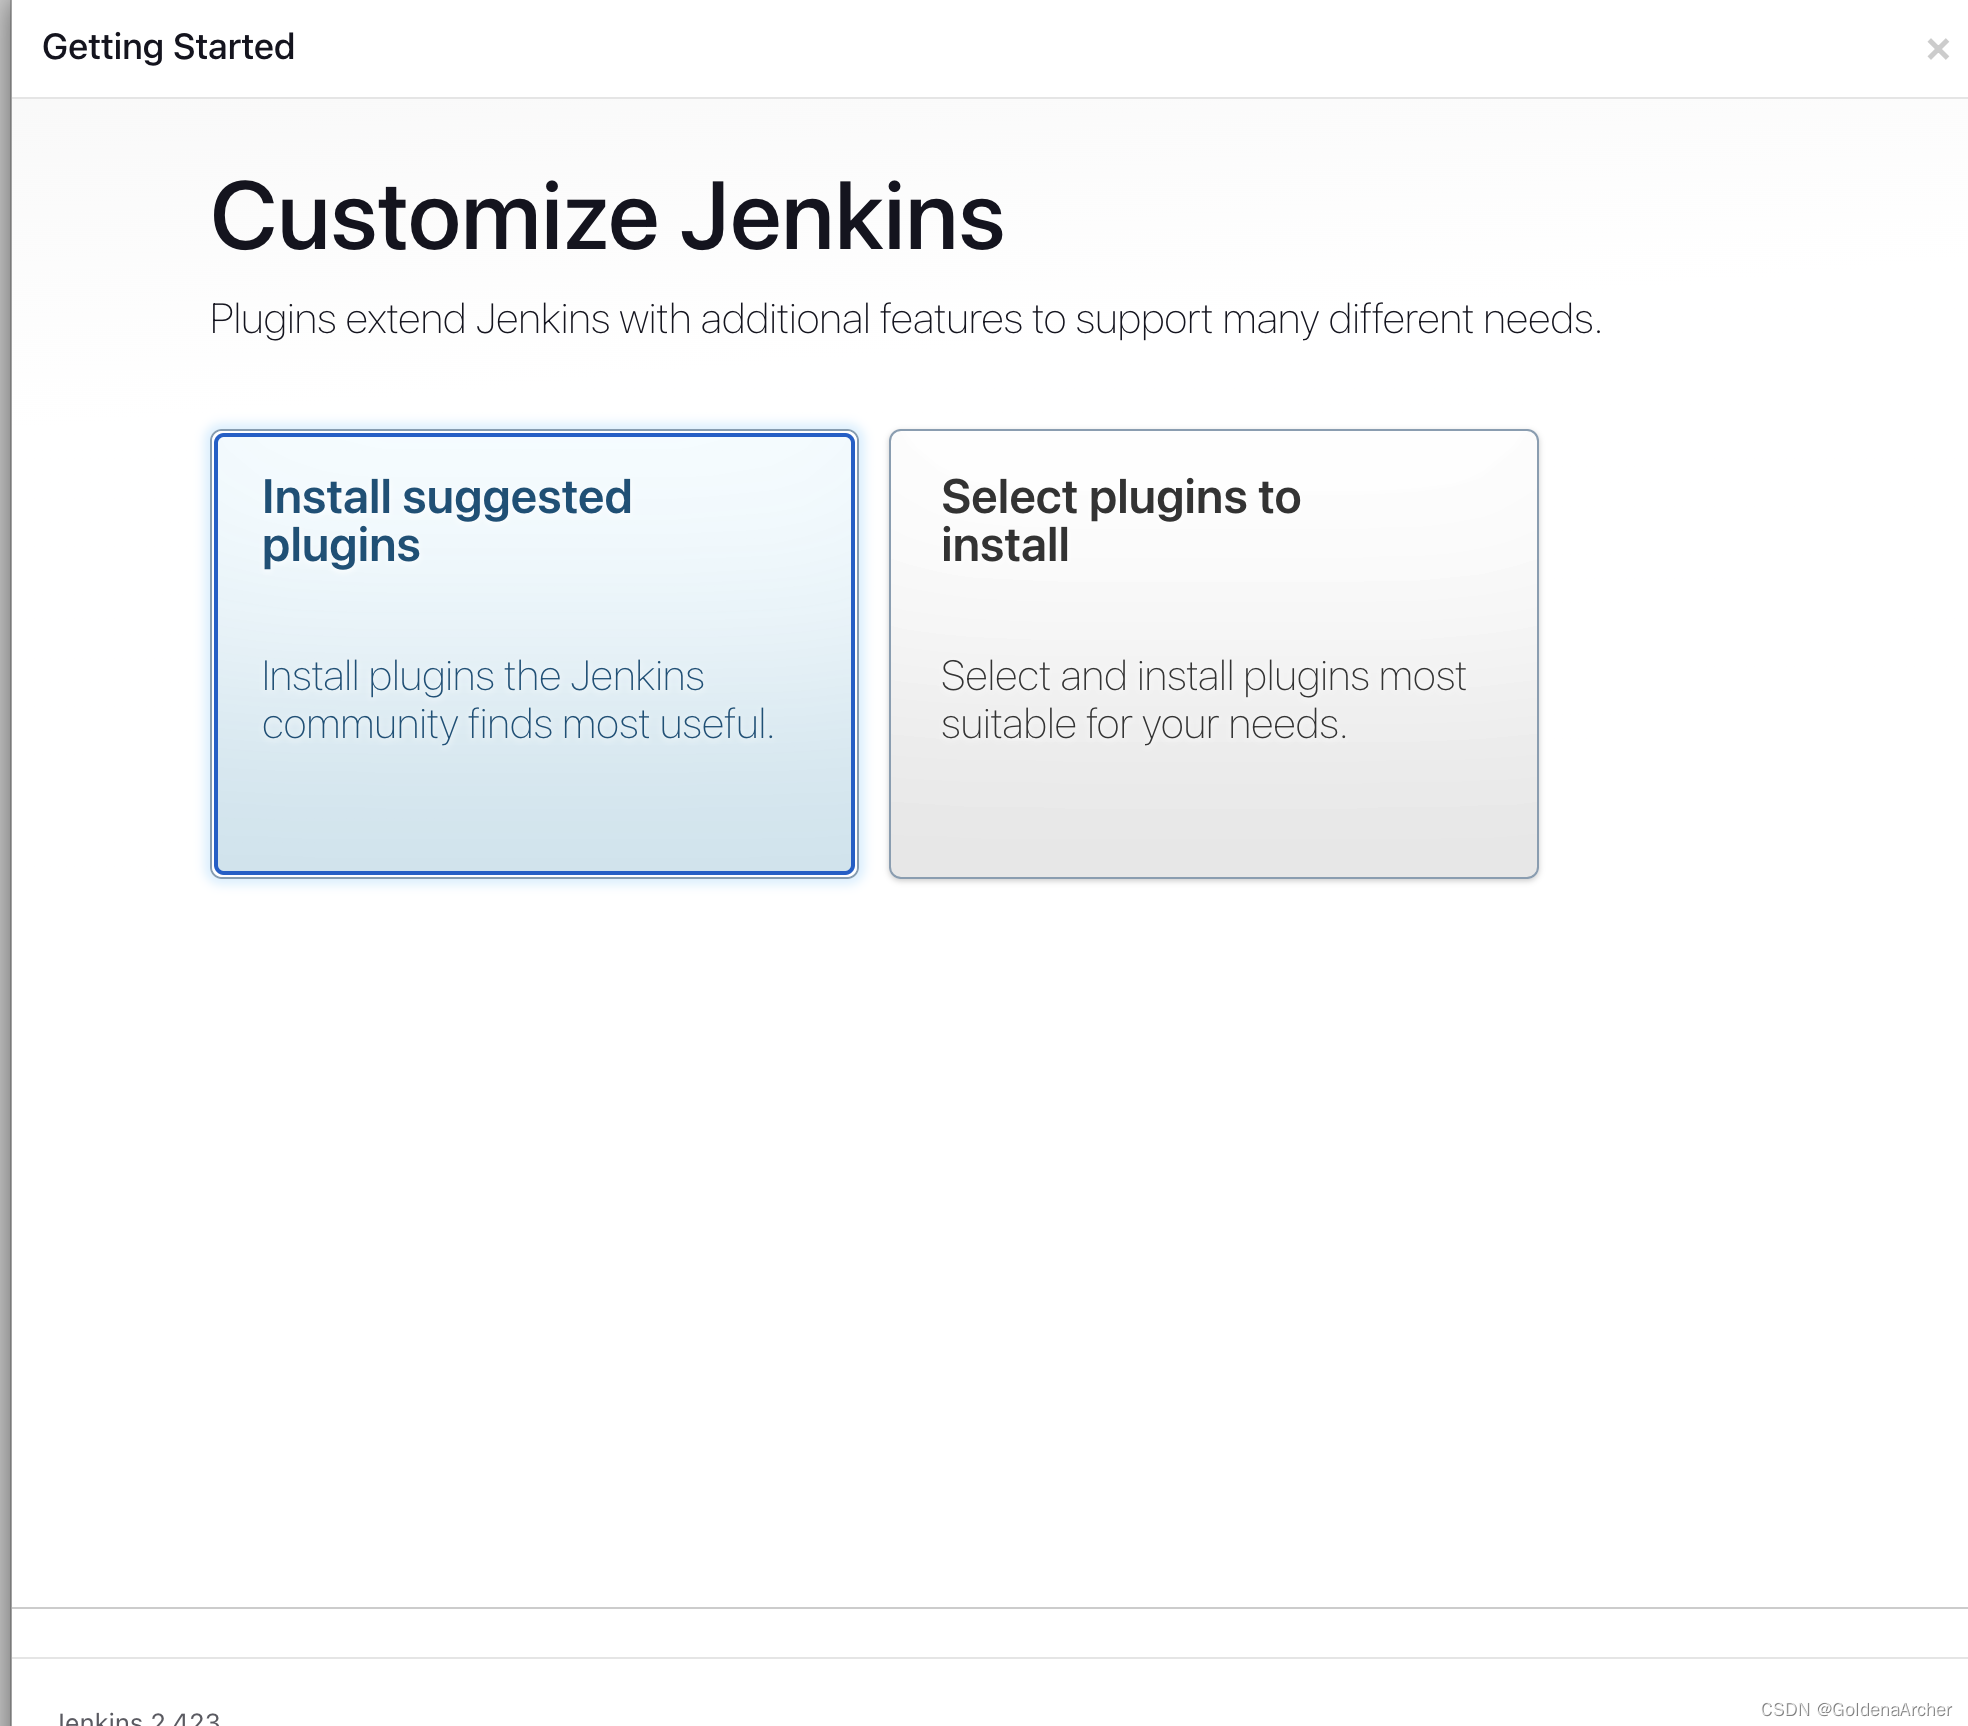
安装列表为:
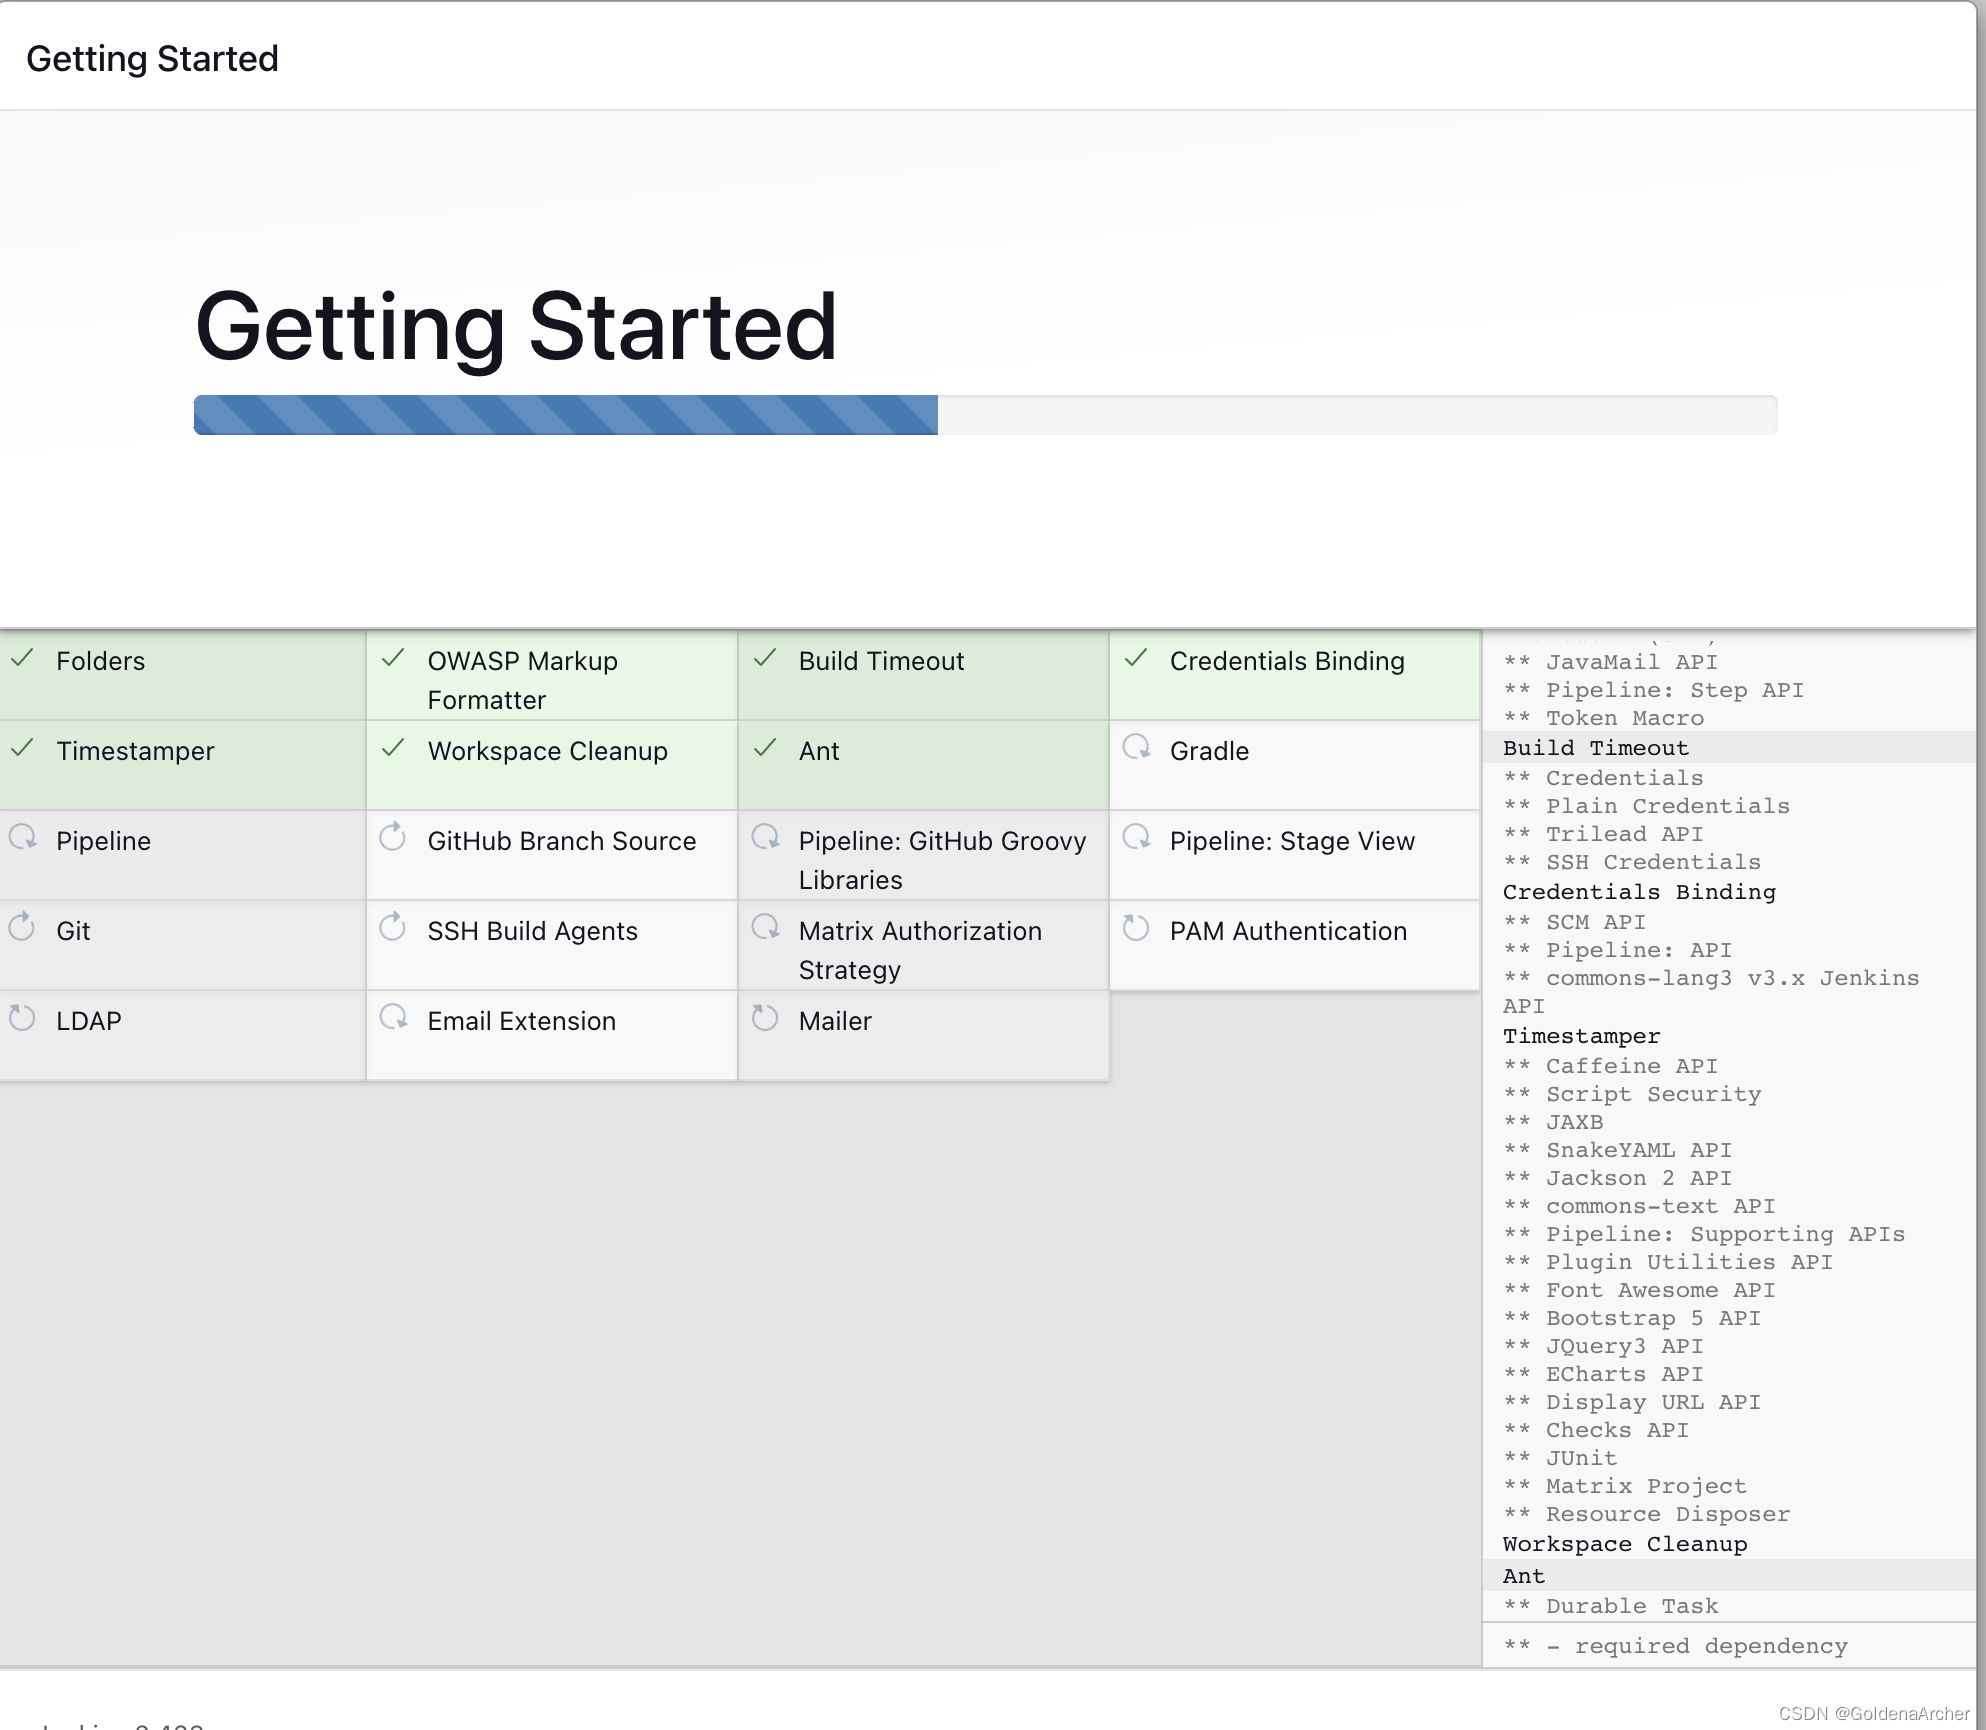
这些也可以手动去装,不过稍微有点麻烦。安装完毕后根据提示创建新用户:
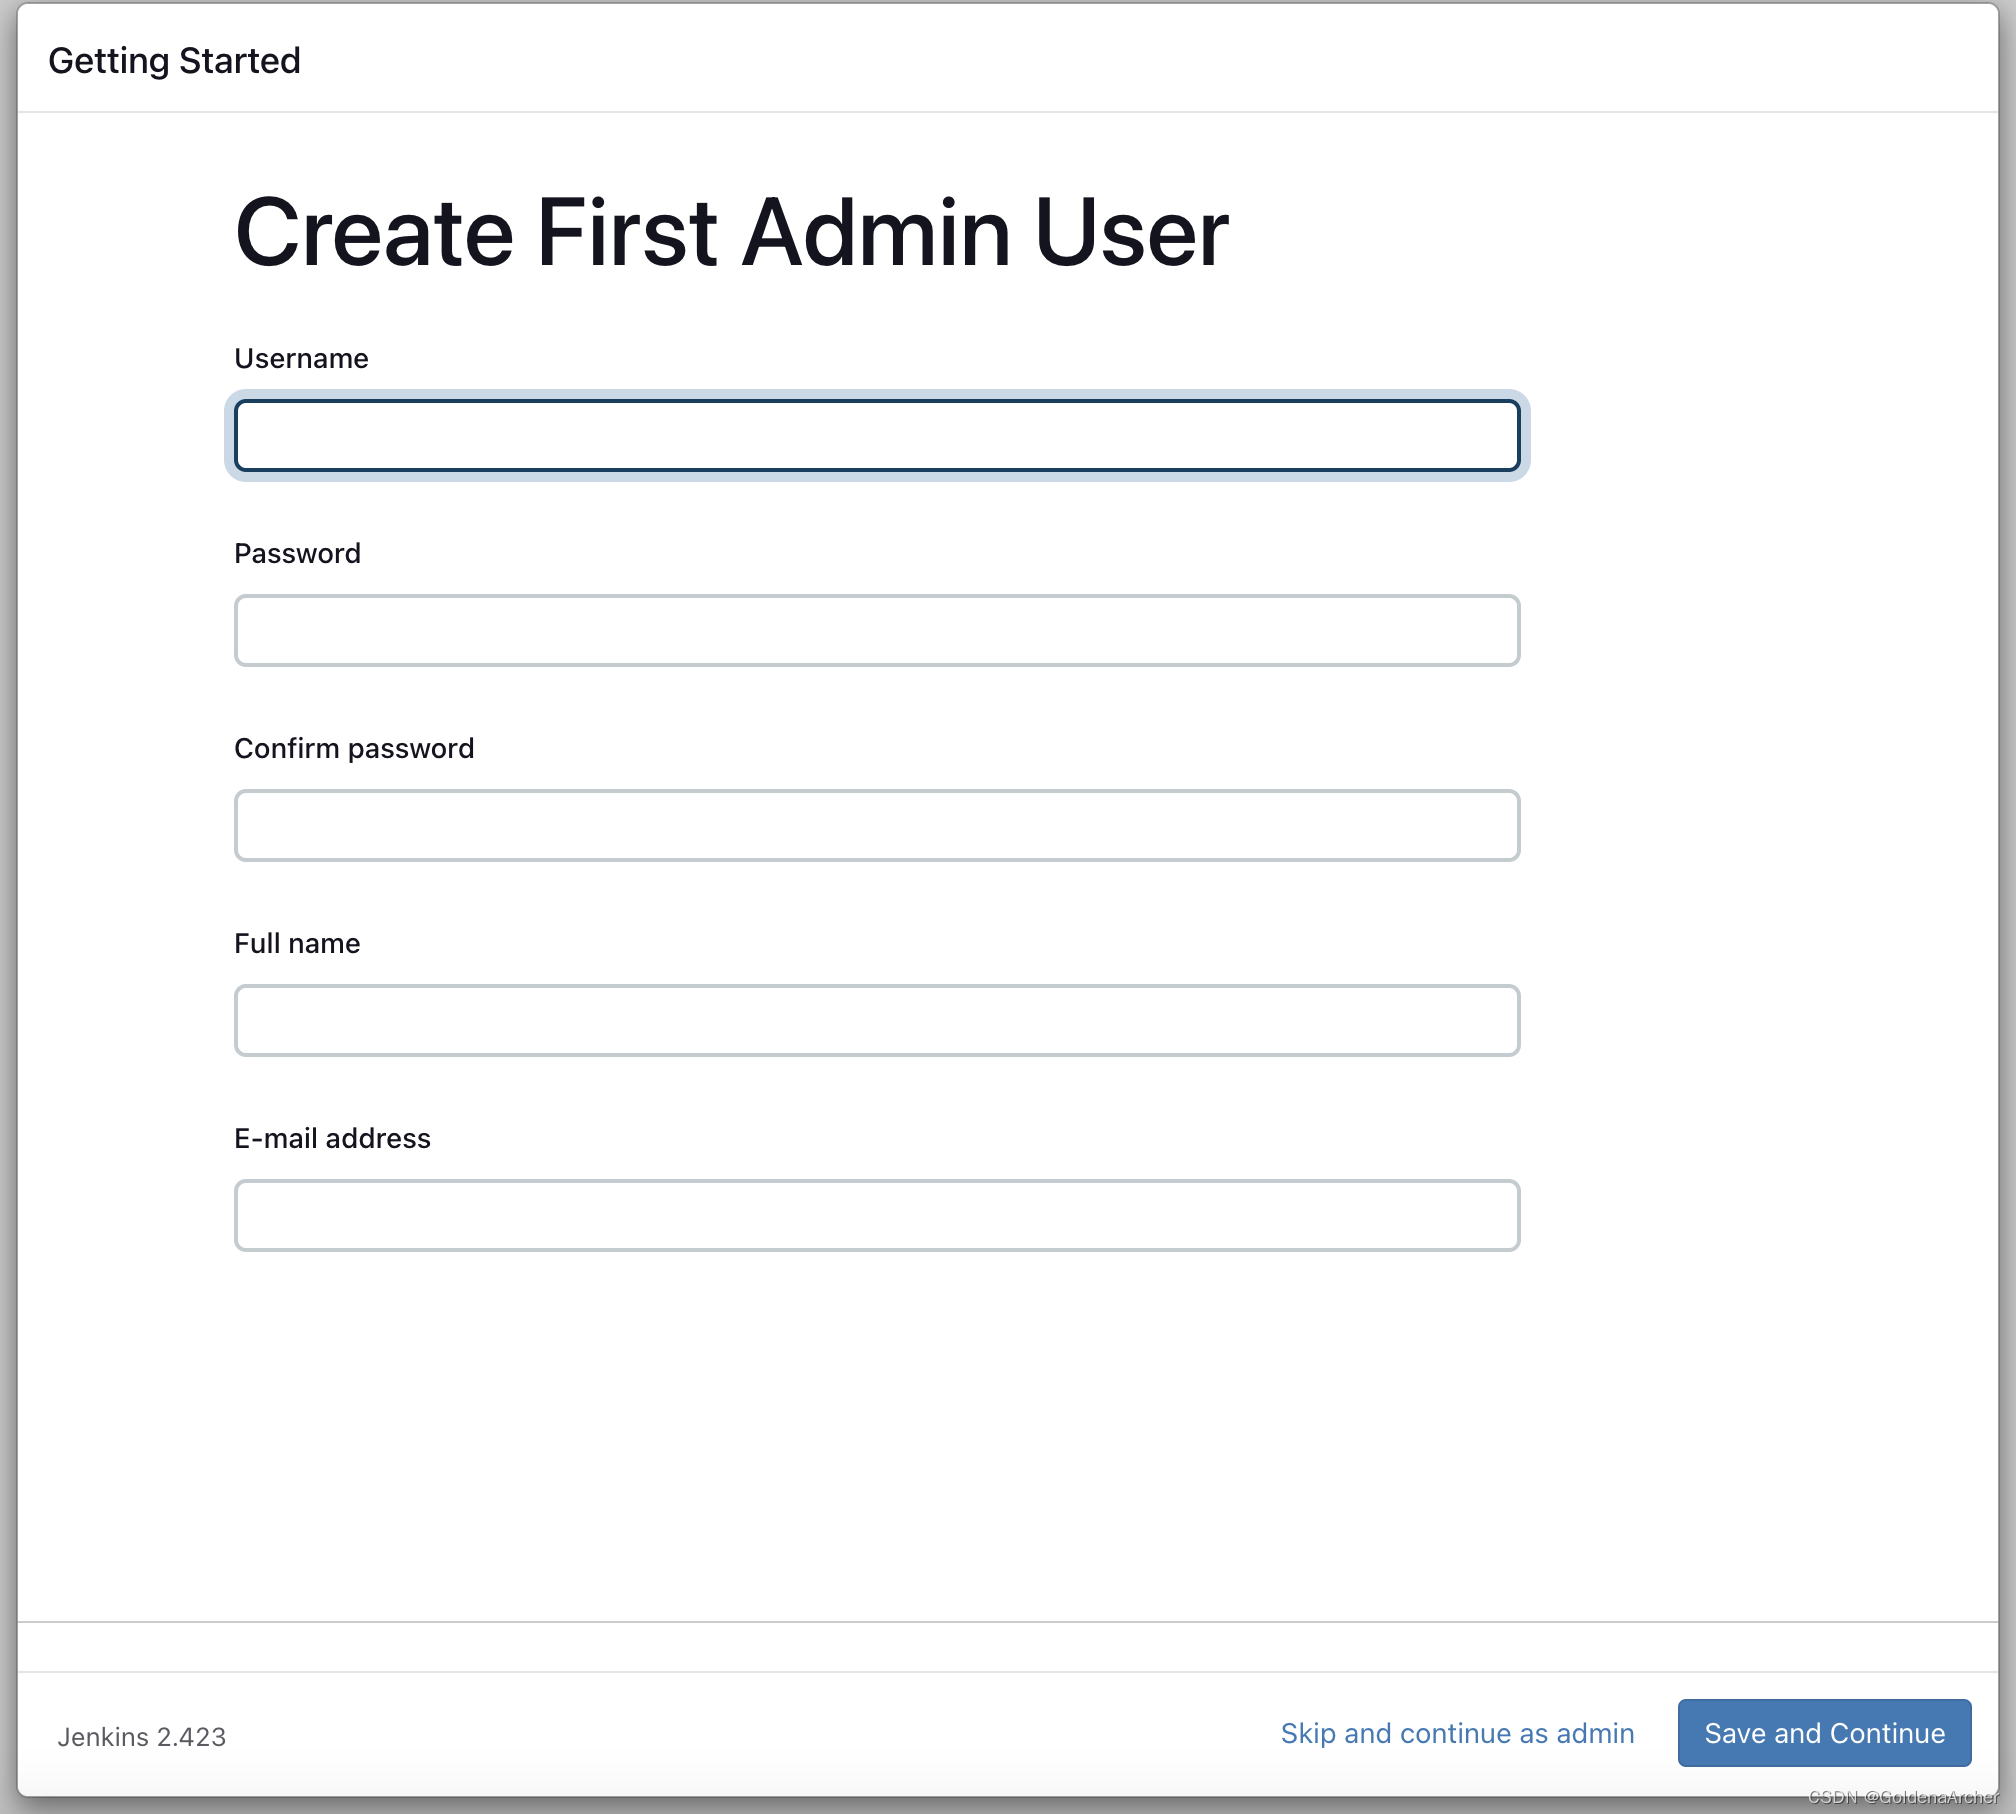
到这一步 dashboard 就可以访问了。
接下来到 tool 的管理:
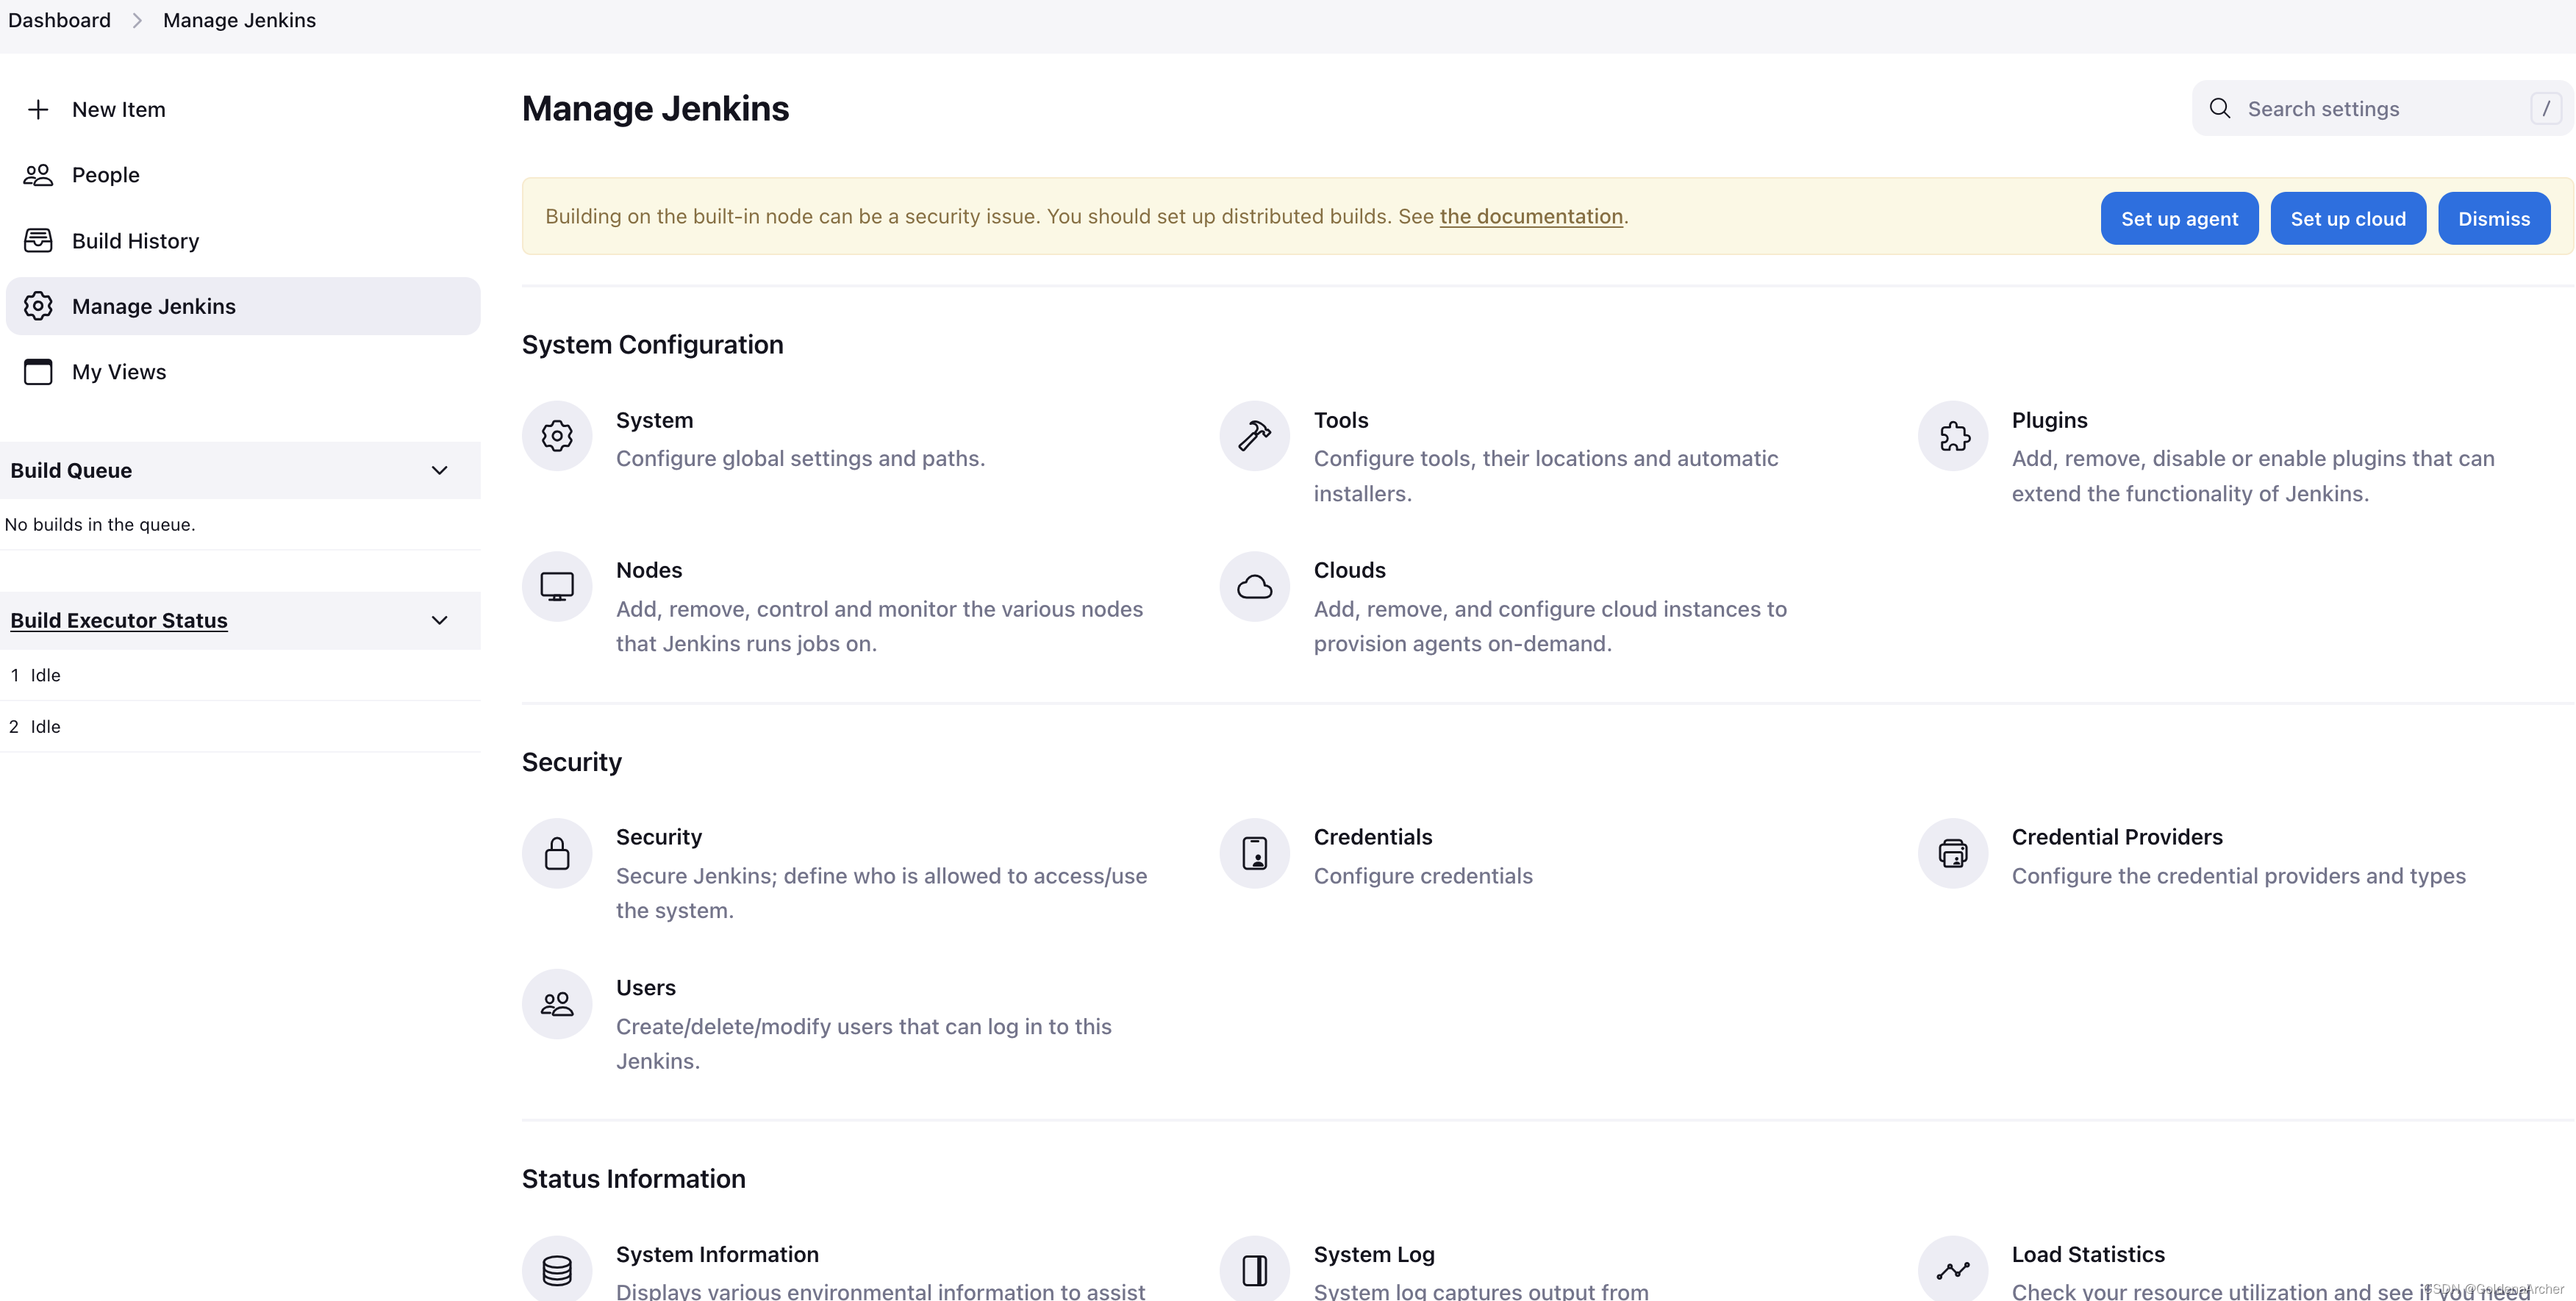
这里需要配的是 aws 上的 maven 和 jdk,免费的 ec2 git 也没有安装,我这里安装完 jenkins 就可以自动找到 git 的路径,还蛮方便的:
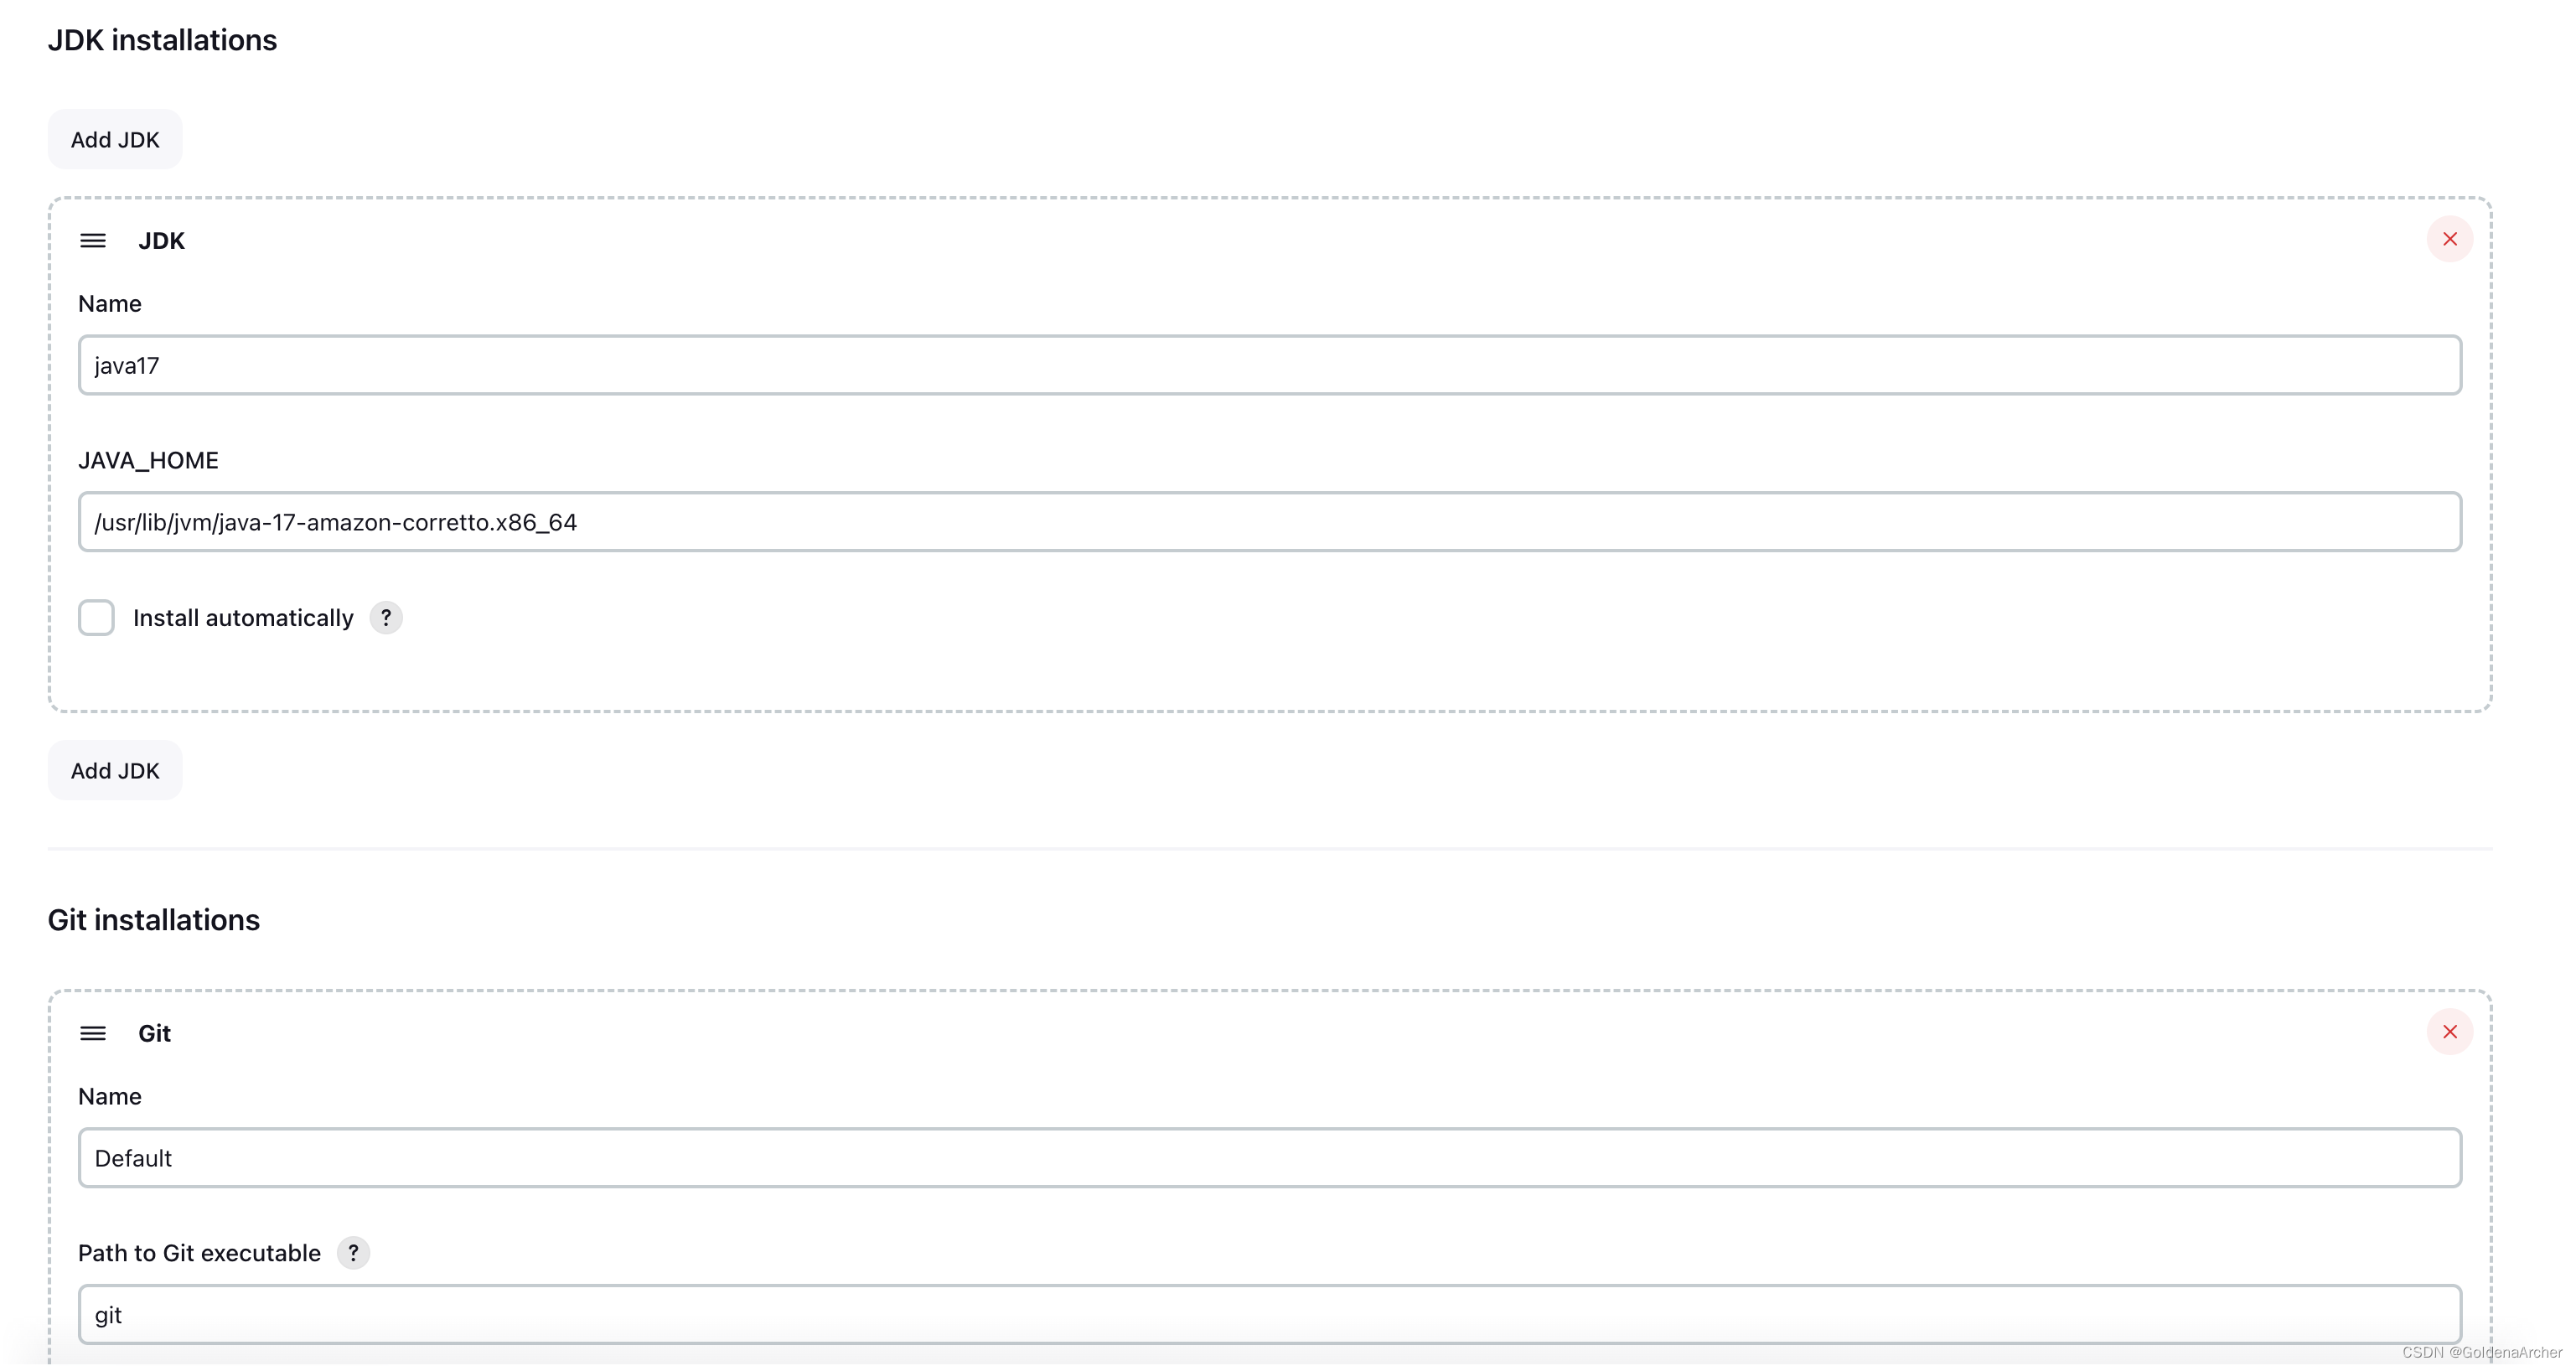
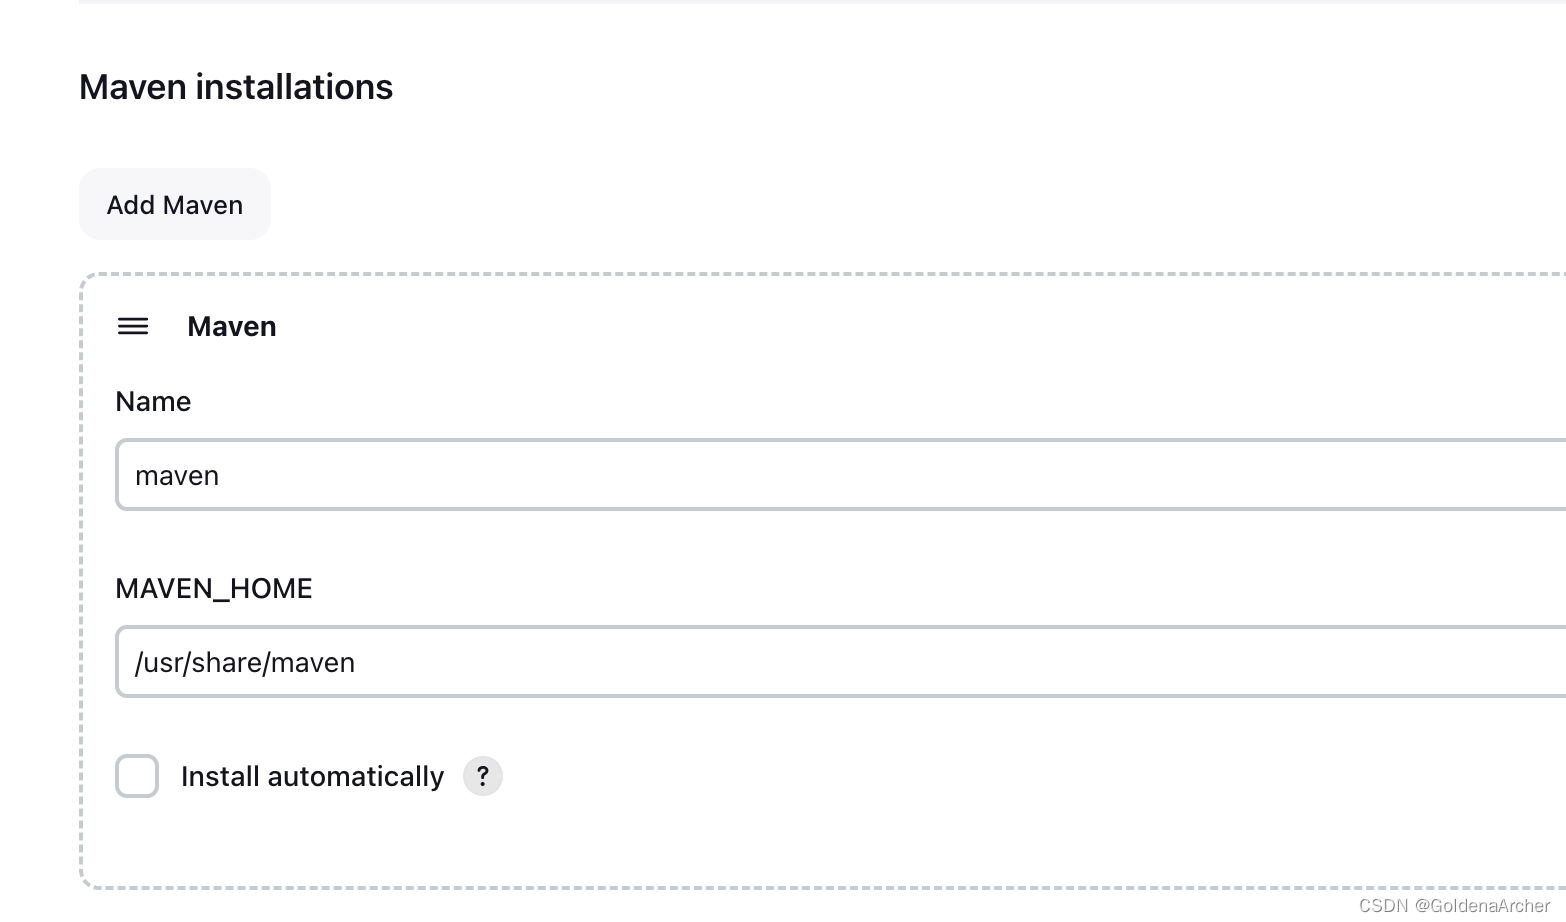
jdk 和 maven 的路径可以通过 mvn -verion 上看到,路径上面也会显示,cv 这个路径就好了
创建第一个 job
这里简单跑一个 sh 脚本,内容就是 echo 一句话,准备脚本的过程如下:
[ec2-user@ip-172-31-45-71 ~]$ vi hello.sh
[ec2-user@ip-172-31-45-71 ~]$ cat hello.sh
echo "Hello Jenkins!"
[ec2-user@ip-172-31-45-71 ~]$ pwd
/home/ec2-user
# 不用 chmod 好像也可以
[ec2-user@ip-172-31-45-71 ~]$ chmod 777 /home/ec2-user
[ec2-user@ip-172-31-45-71 ~]$ chmod 777 hello.sh
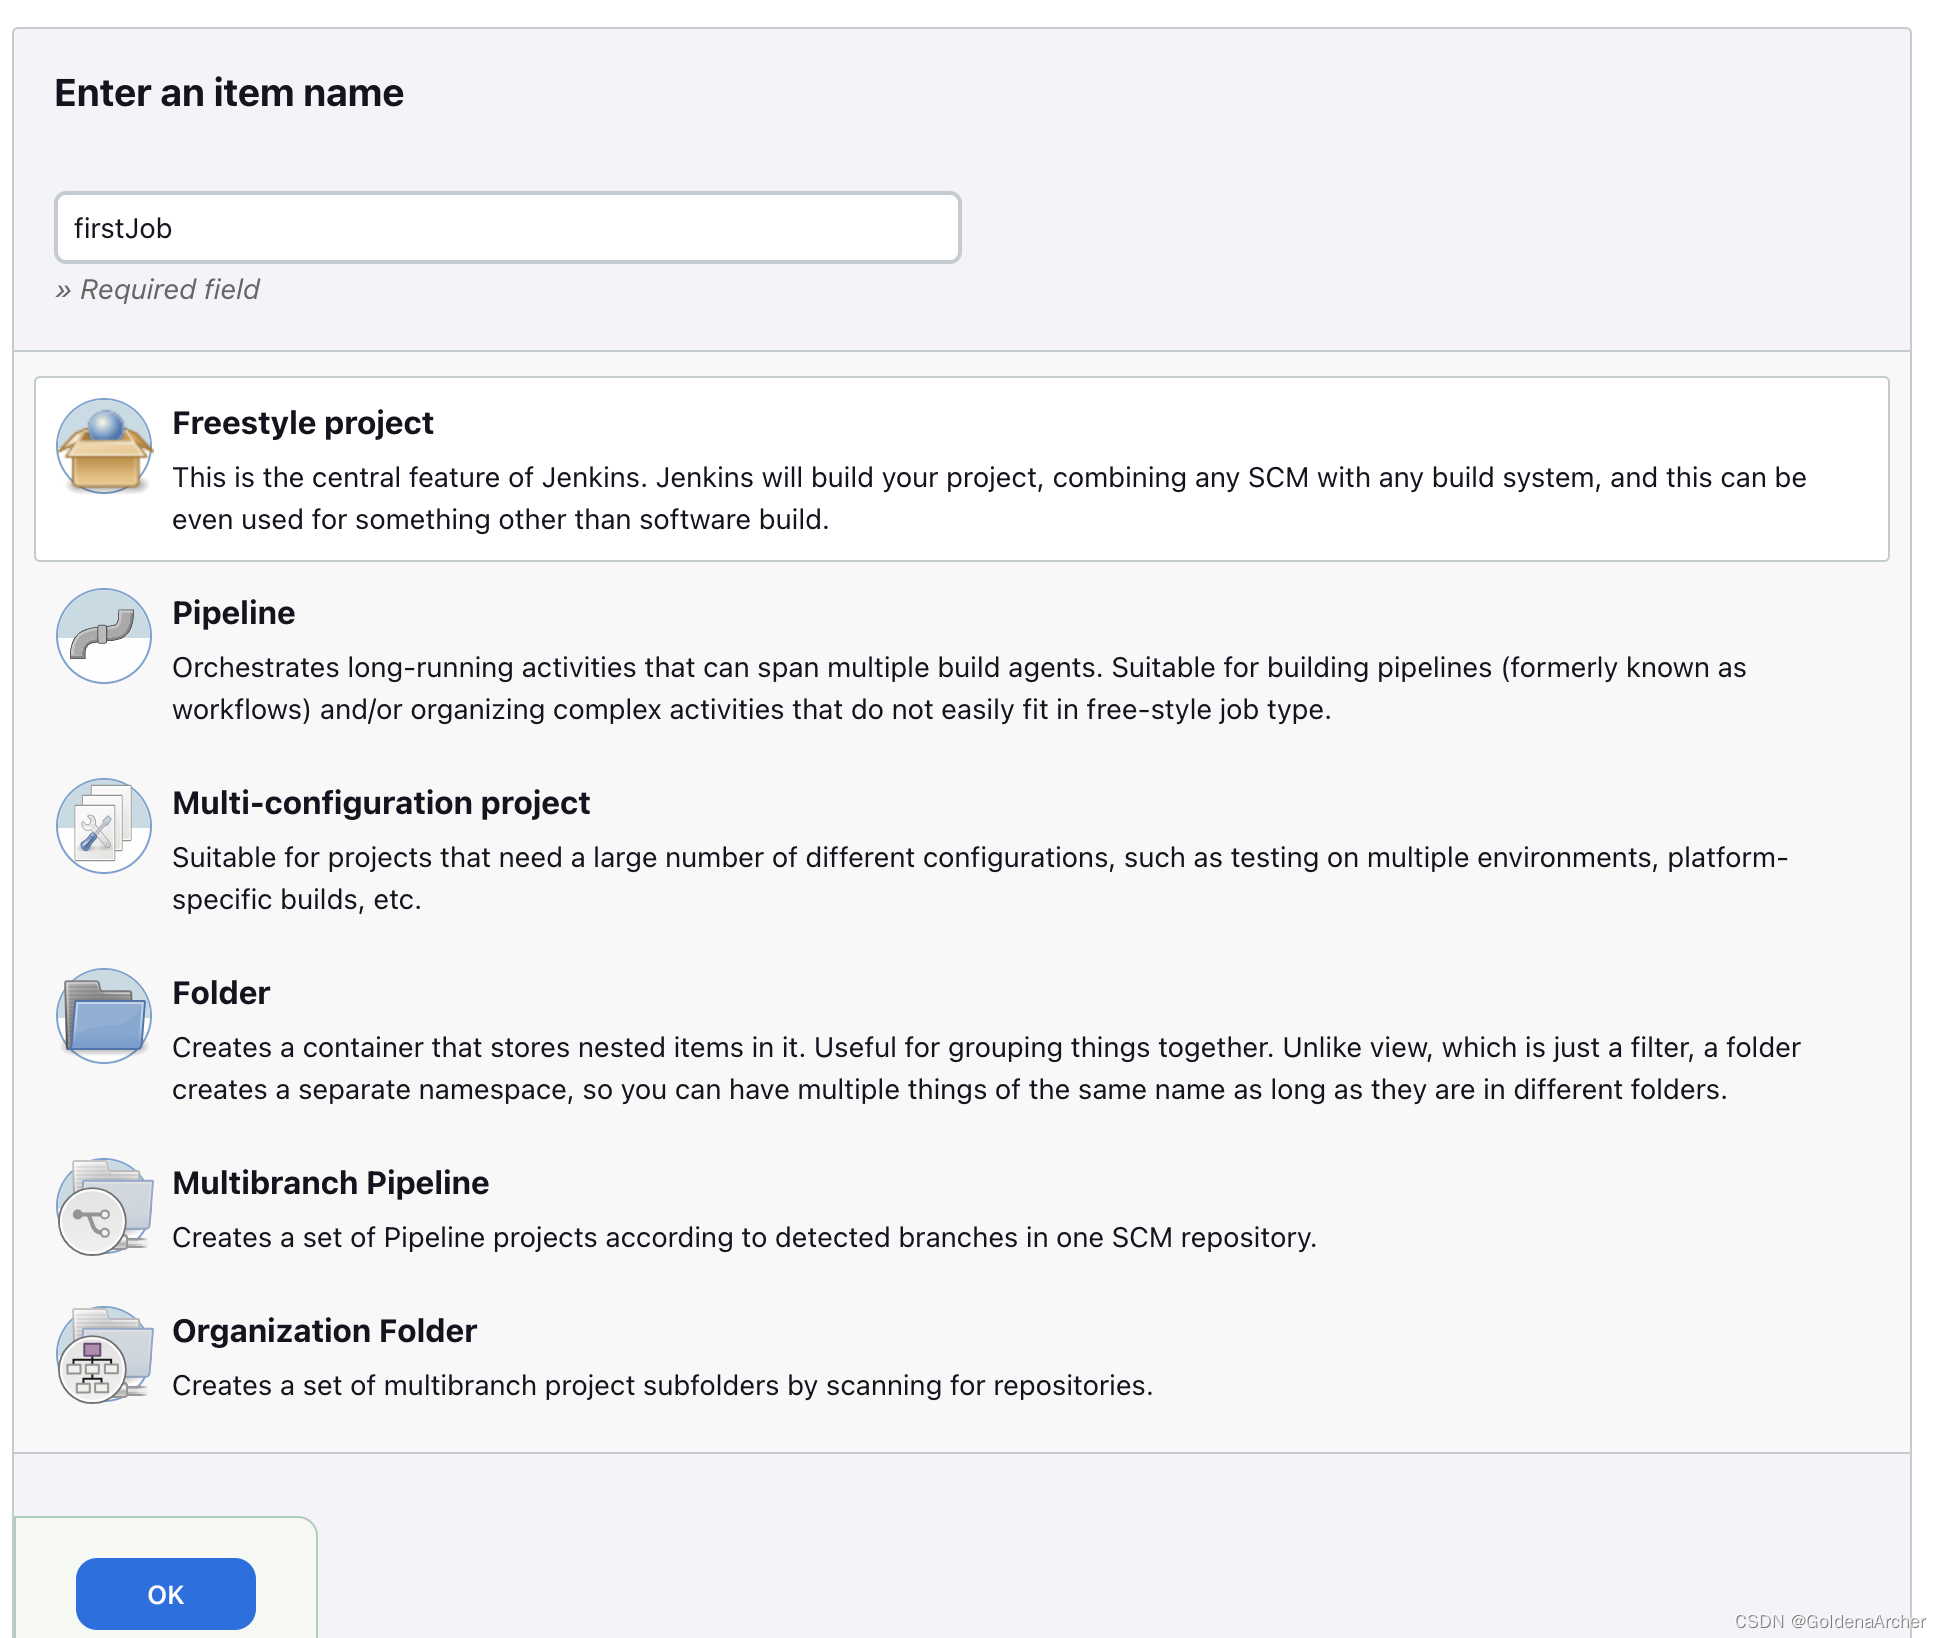
jenkins 的 dashboard 上选择创建一个新的 item,并且提供名称,类型选择 freestyle:
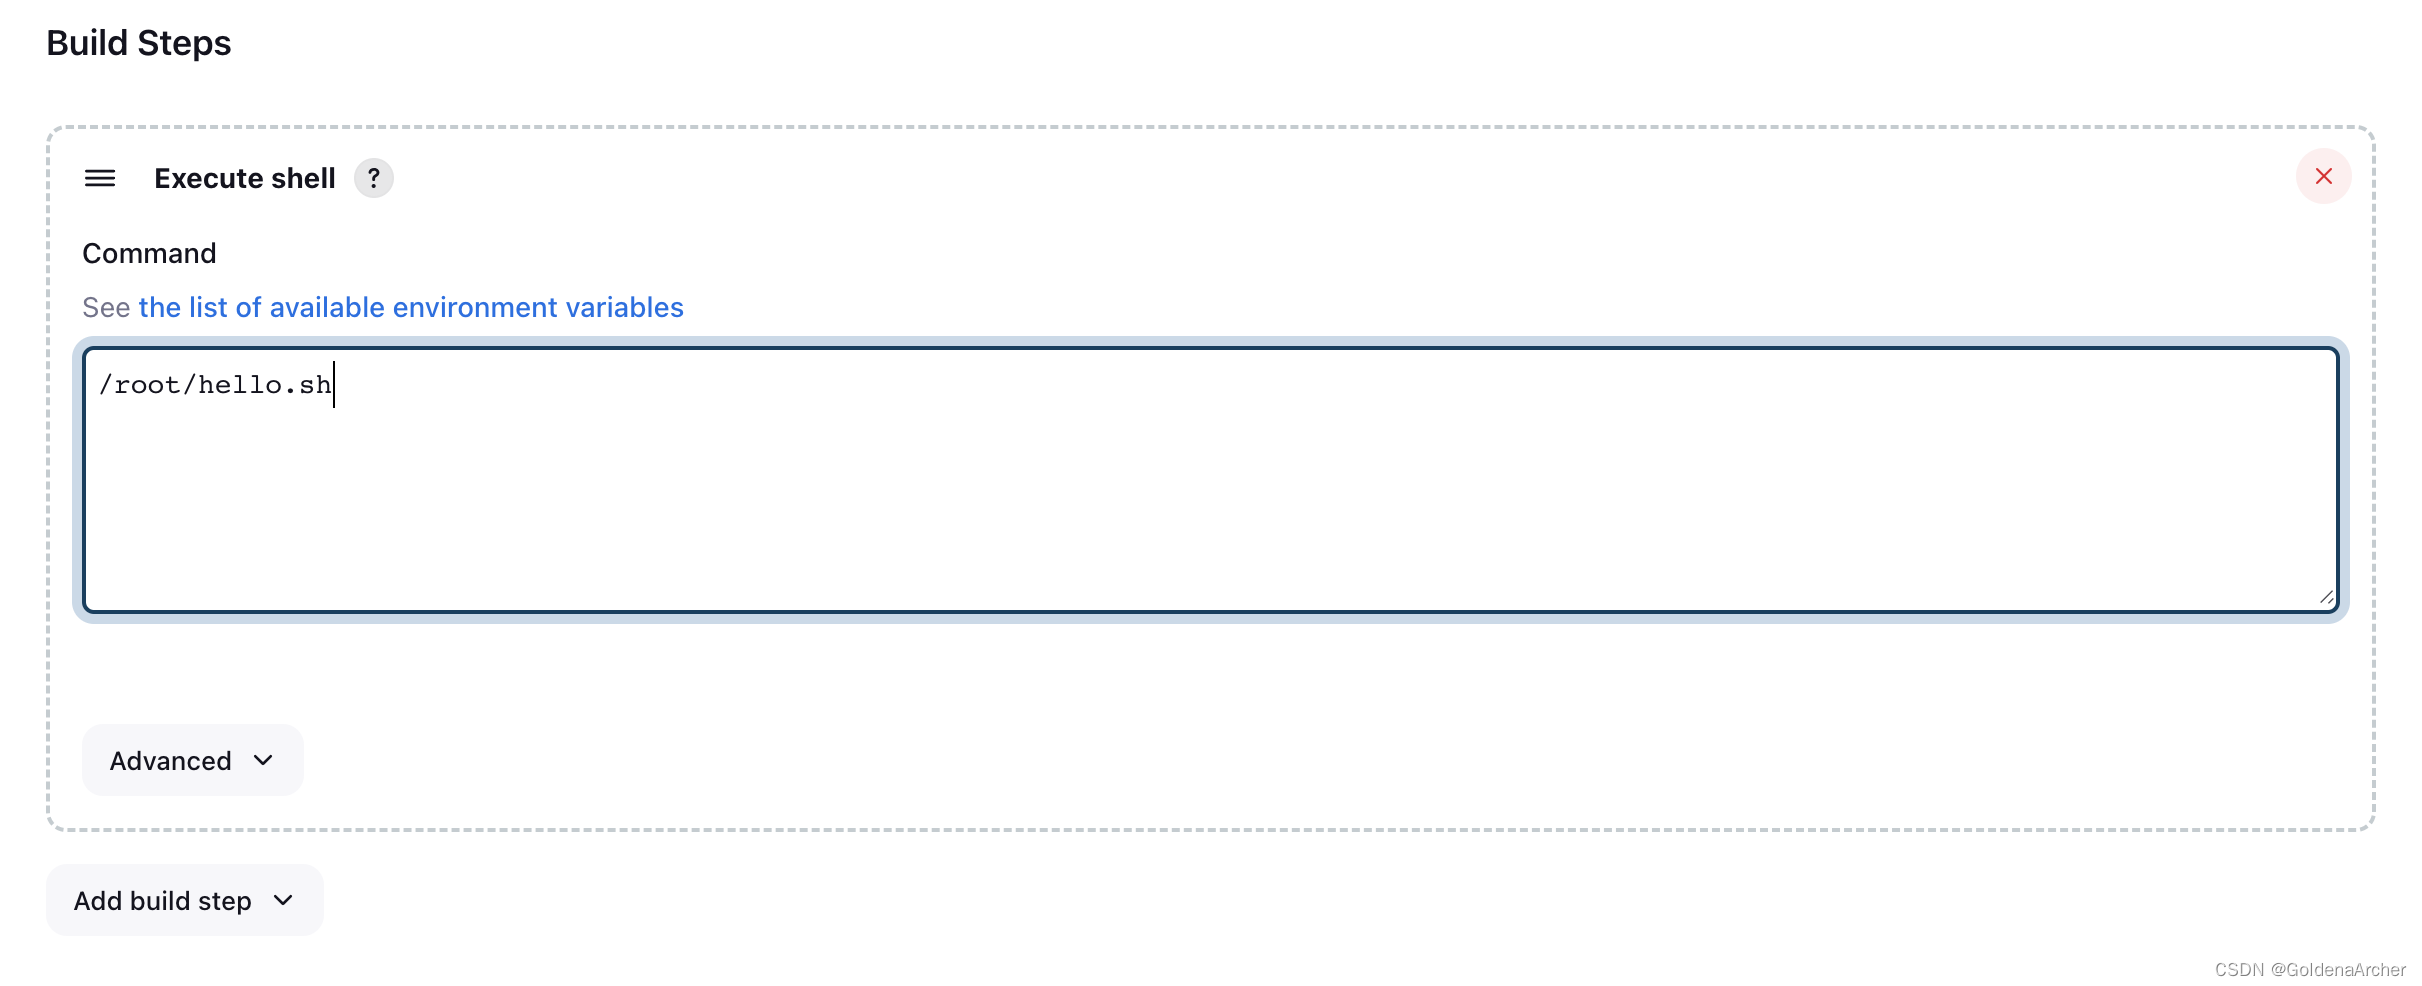
build steps 这里把脚本的路径放进去,jenkins 就会自动执行:
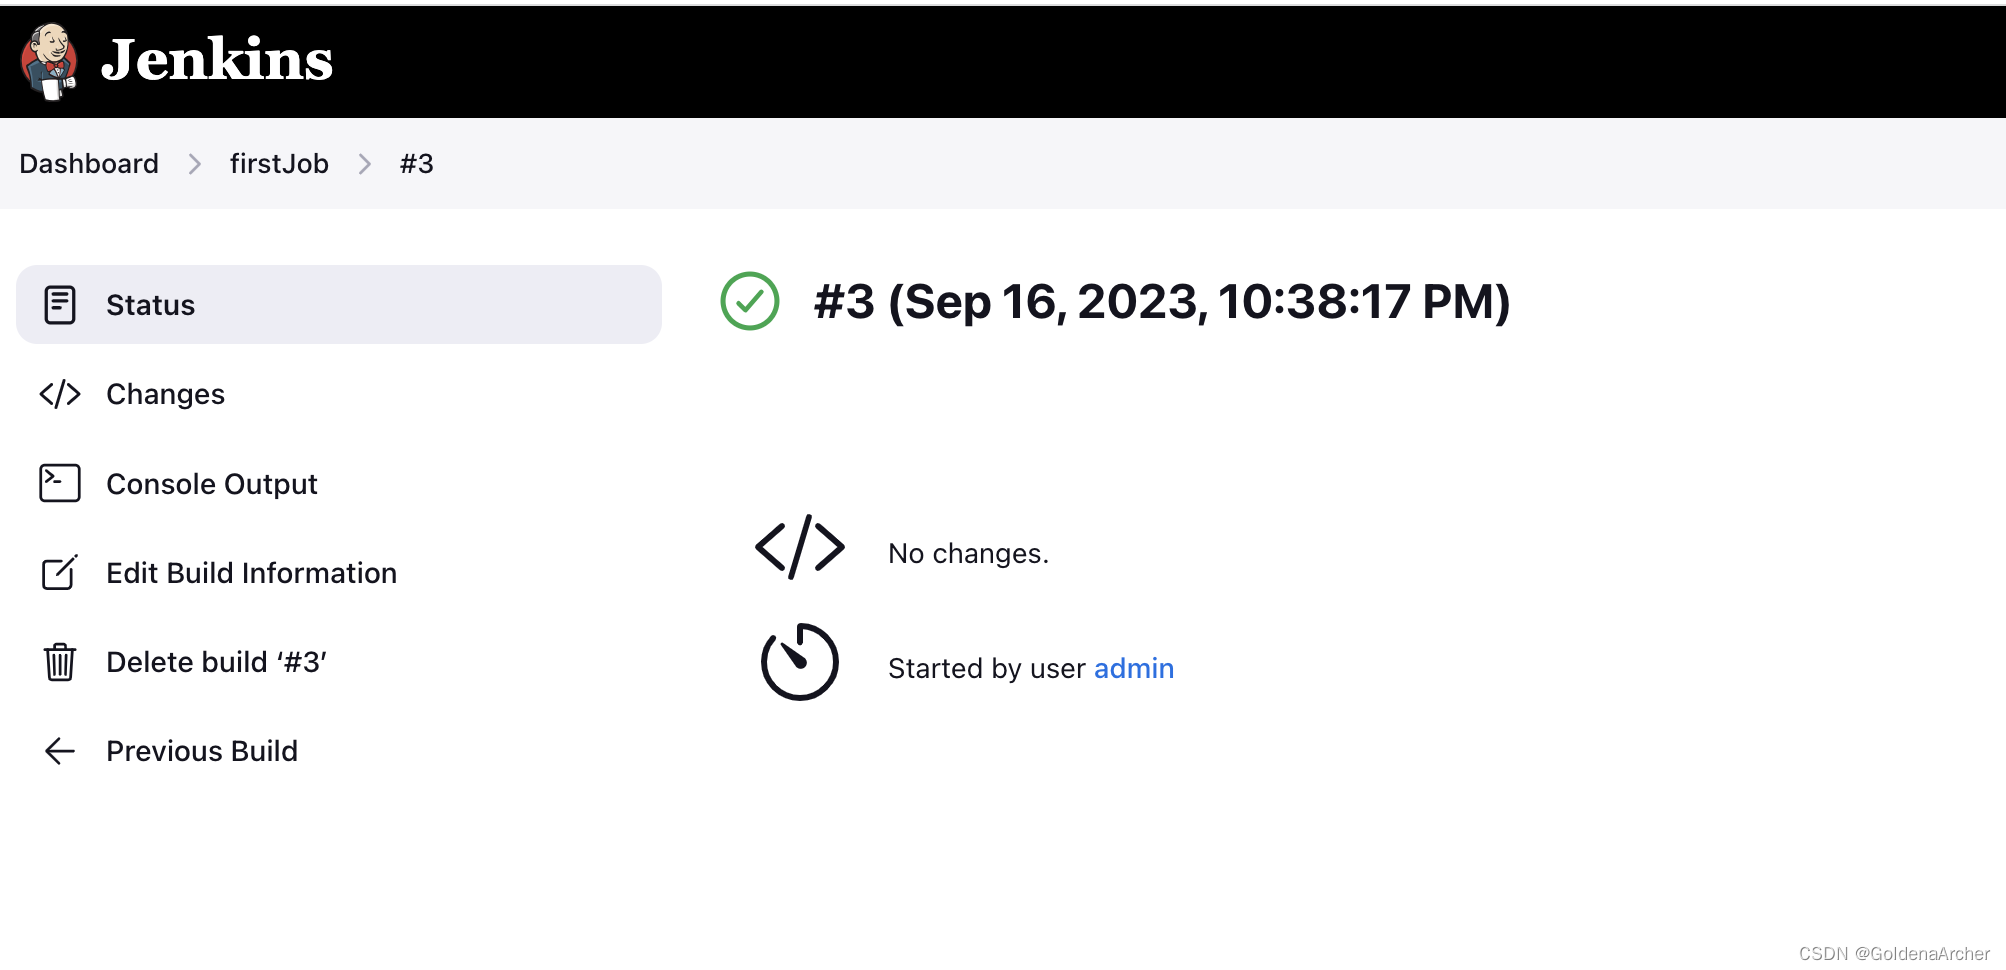
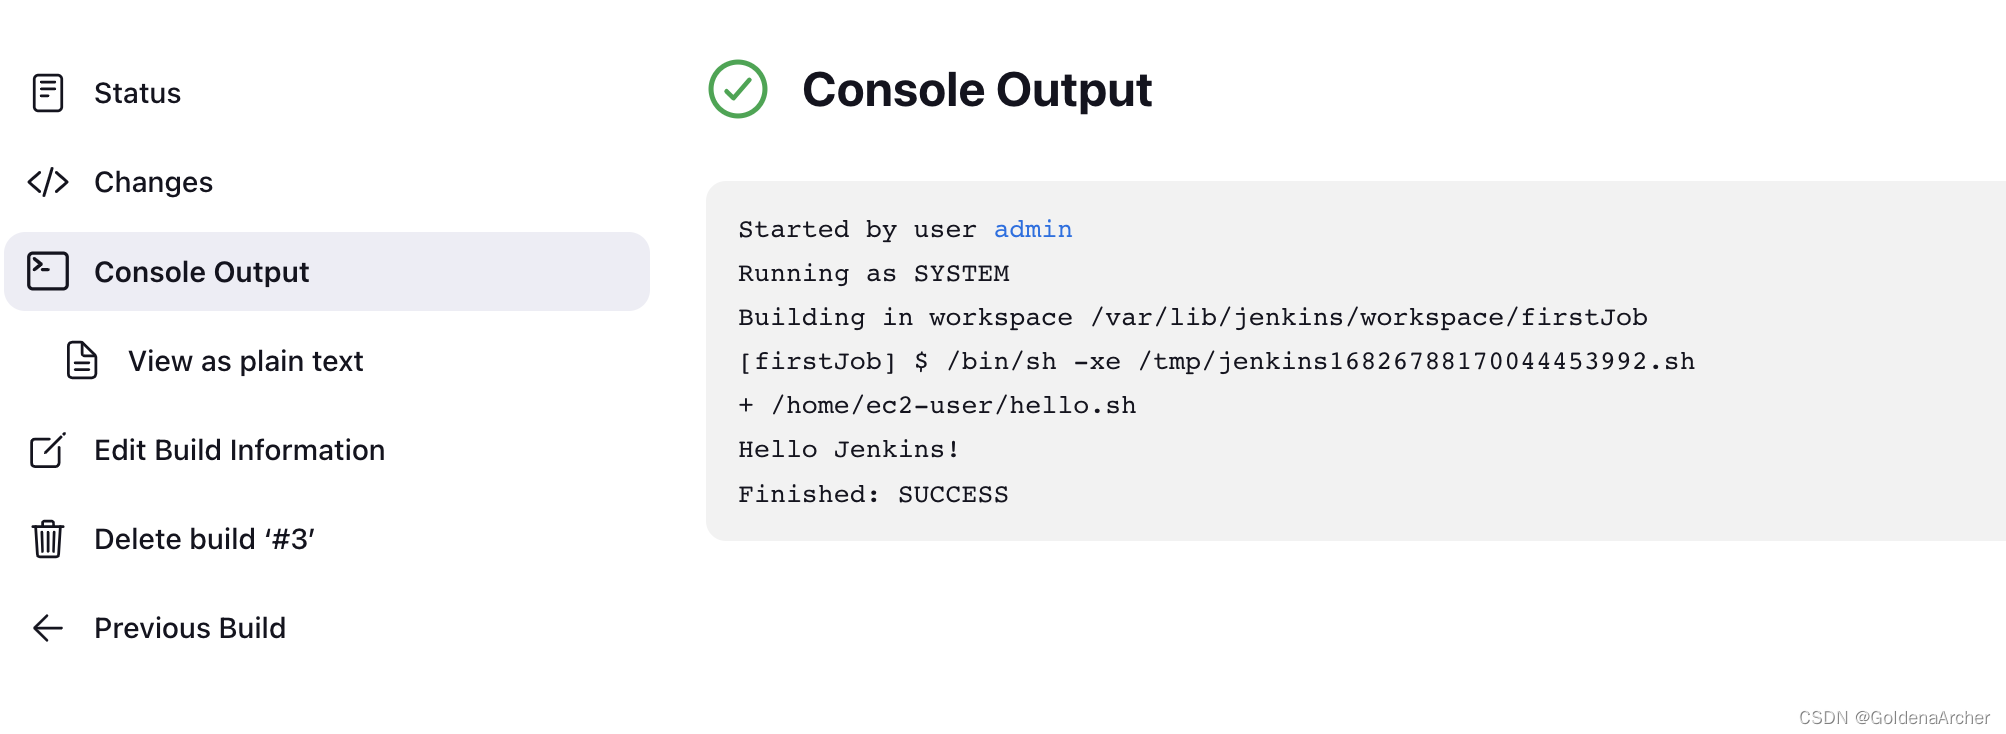
最后运行结果:
‘
运行 maven
新建第二个项目,修改配置如下:
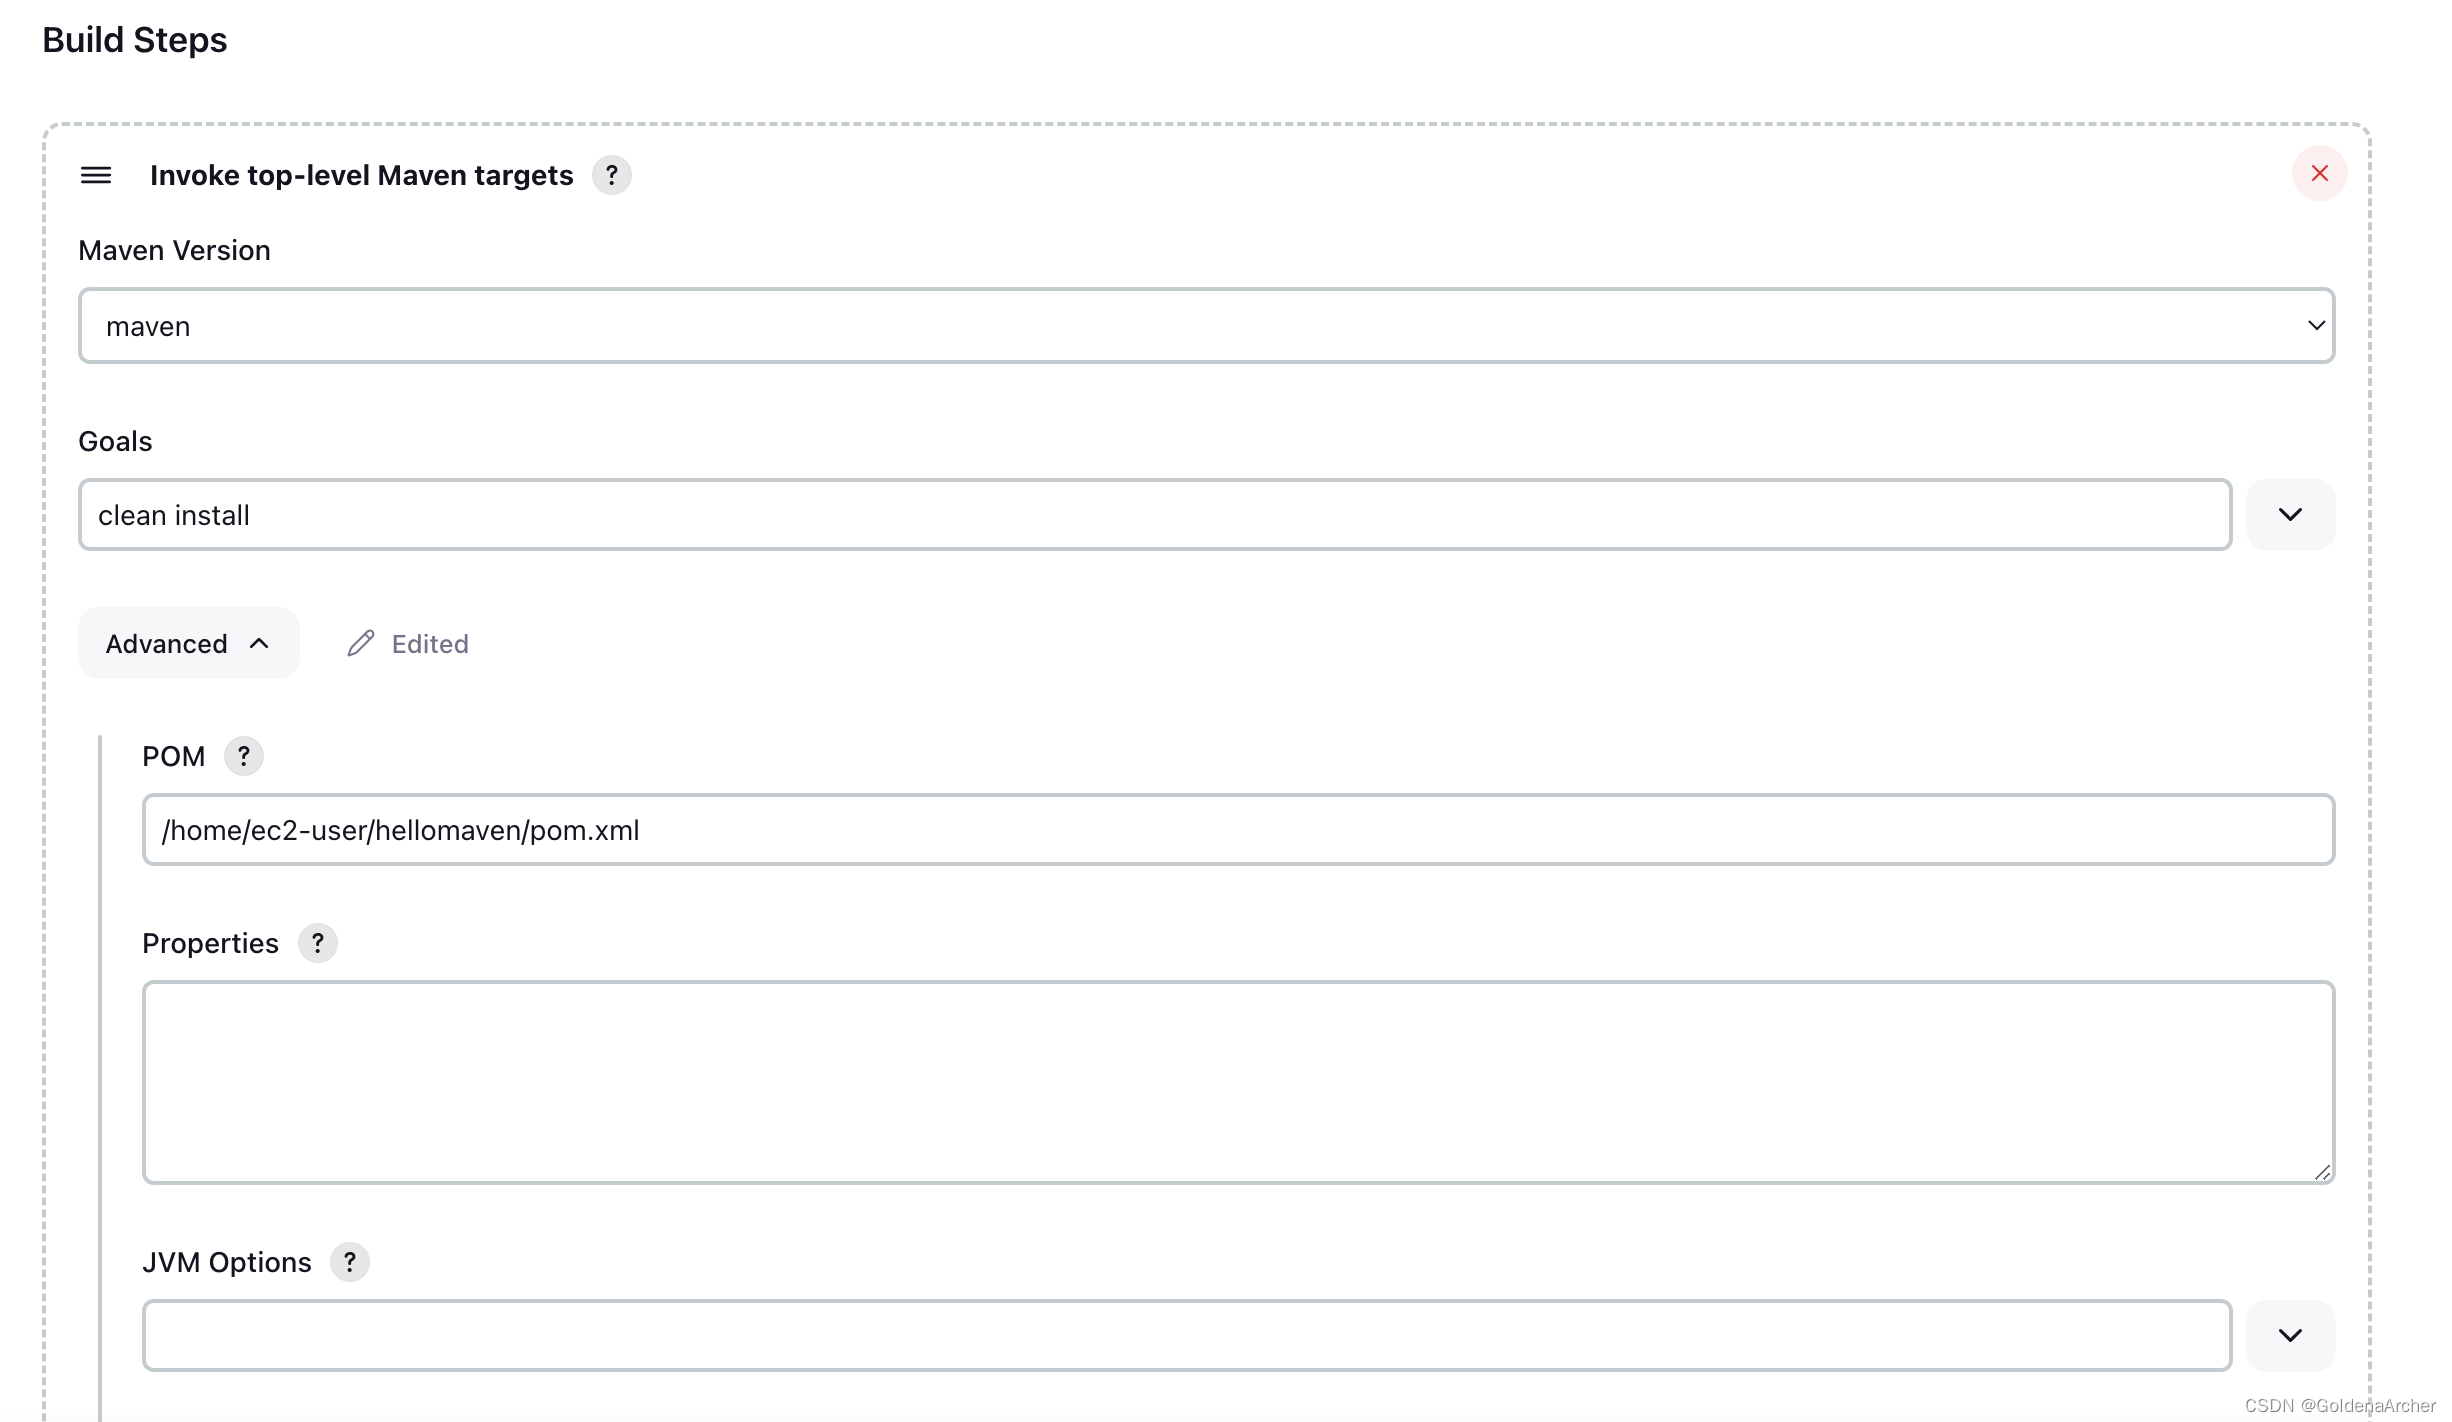
最后跑一下就行了
这里出现两个报错,一个是:
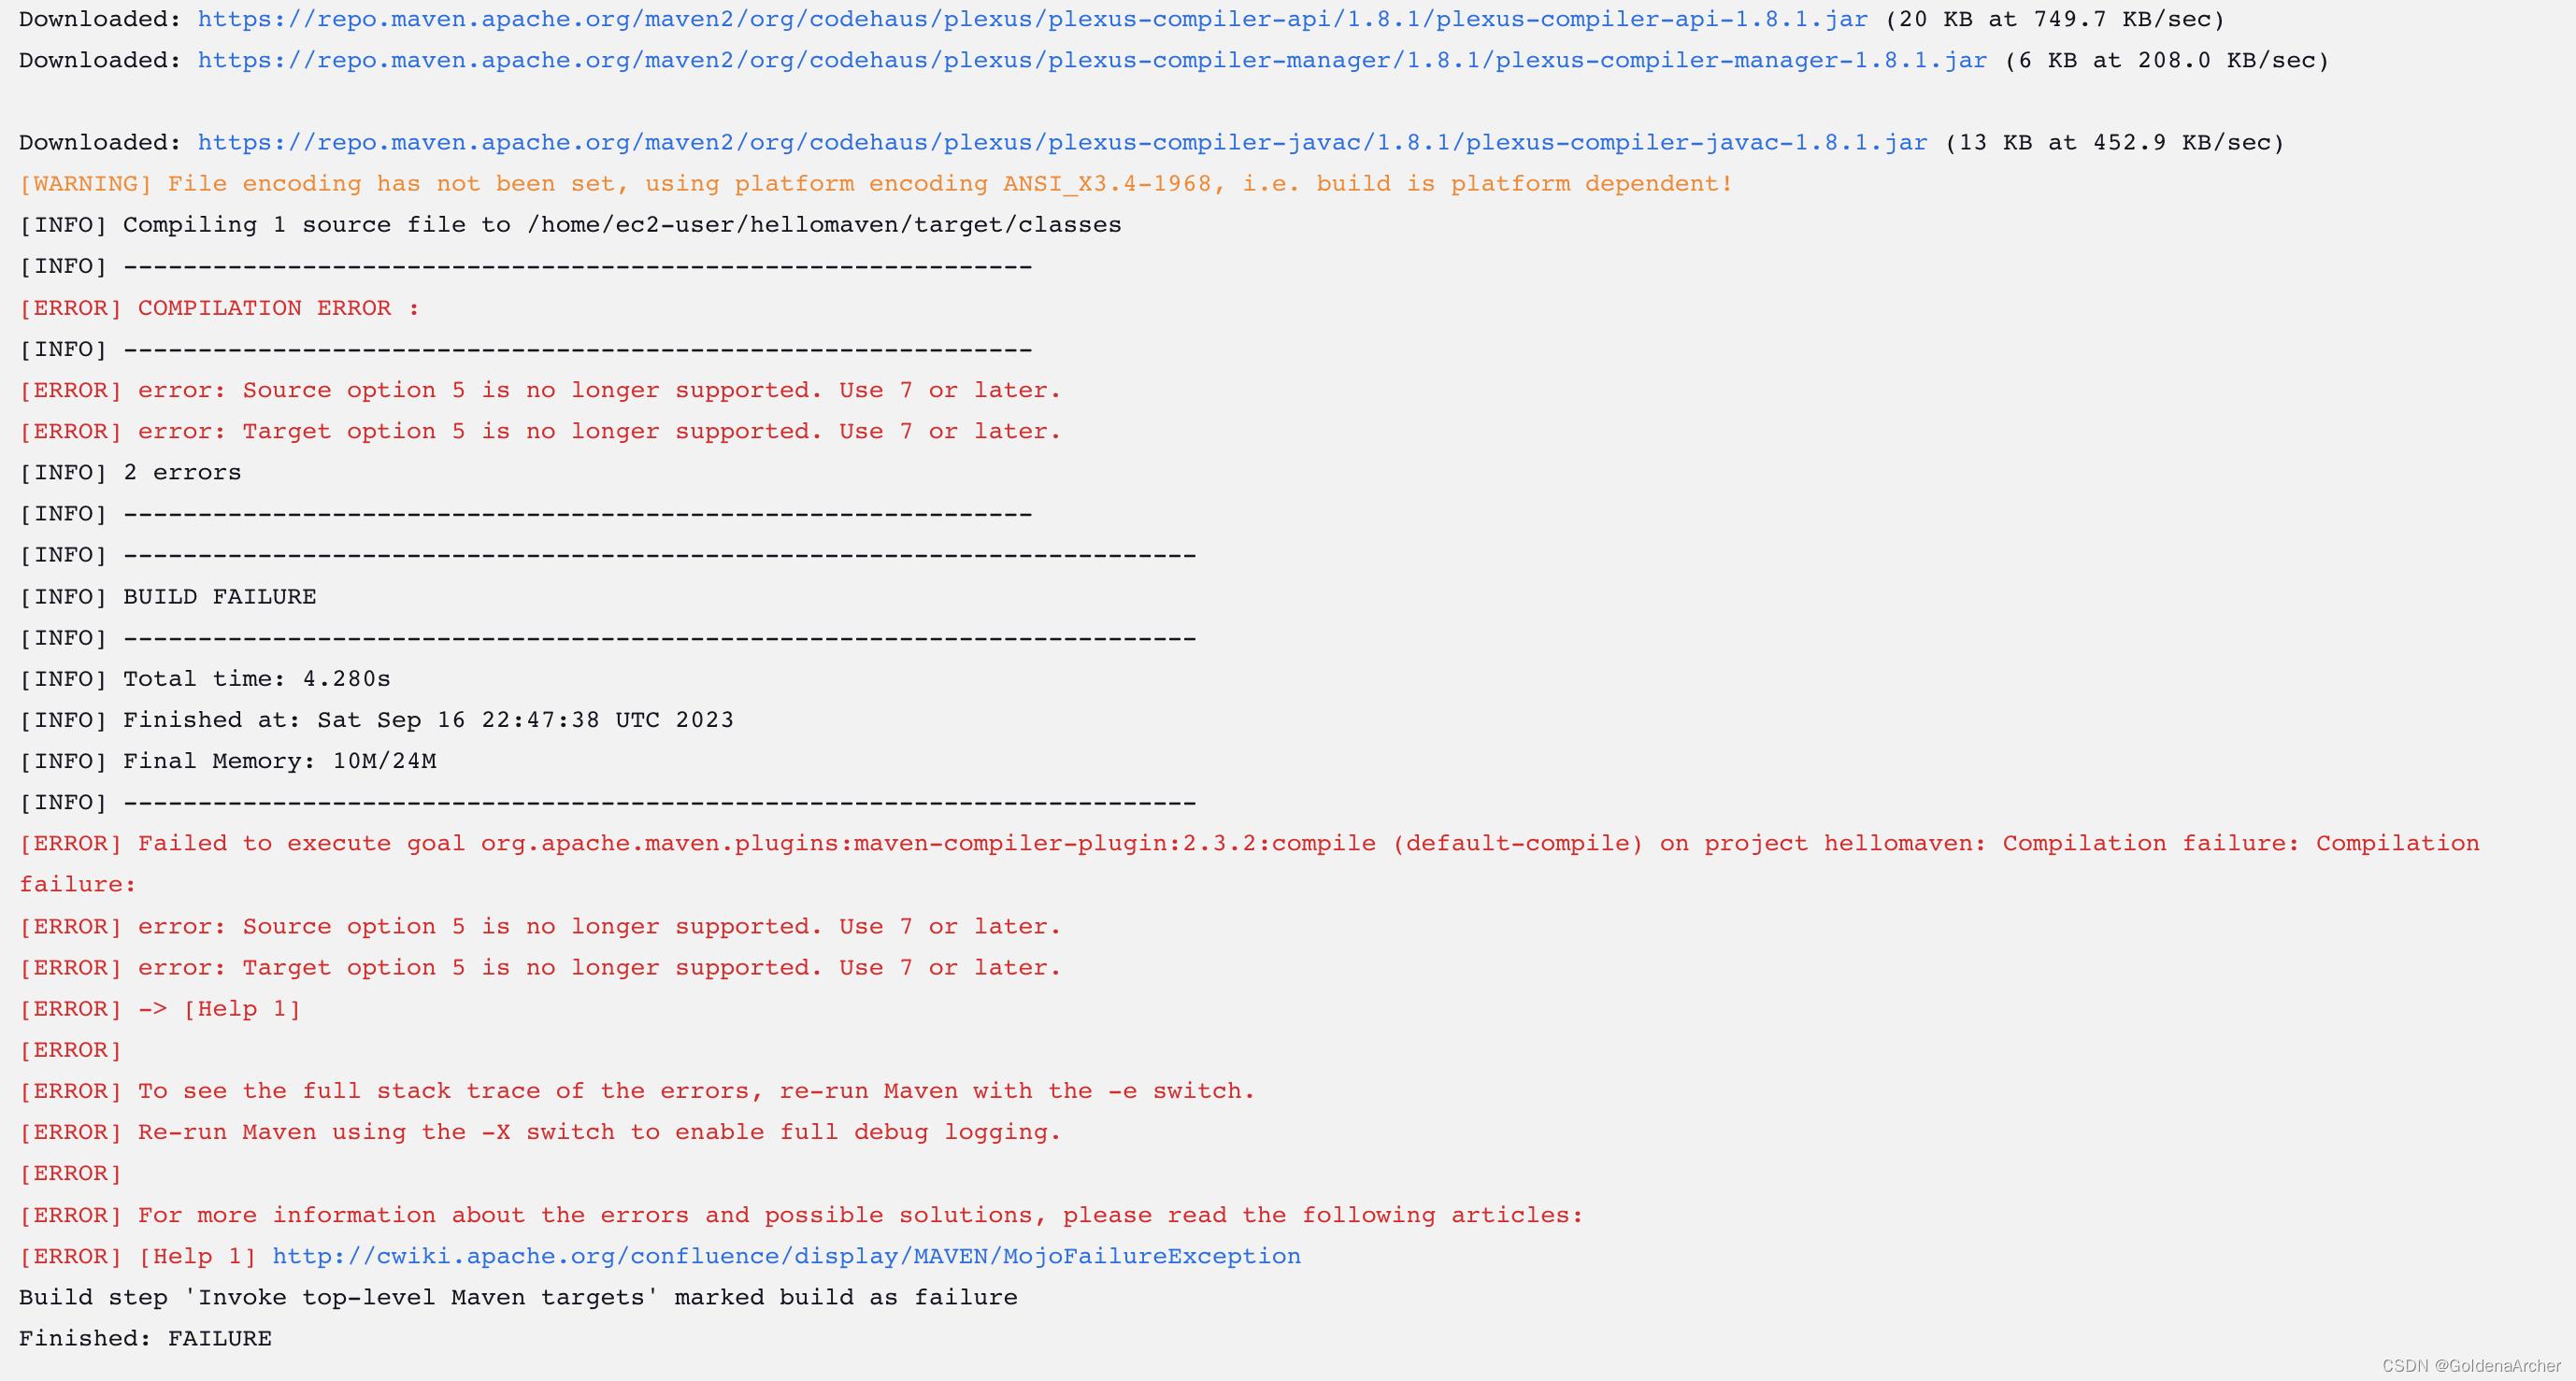
另一个是无法执行,前者是 jre 版本问题,后者似乎是 jenkins 里需要添加 java 的路径。不过我的目的就是走一下流程,这也不是关于 jenkins 的学习,一时半会儿不想花太久到 config 上(这个可以提供 config 文件),所以暂时跳过。
左右通过 Jenkins 确实执行了 mvn clean install 就行




![[ESP32 IDF+Vscode]蓝牙配网后采用上传温湿度数据至阿里云(MQTT协议)](https://img-blog.csdnimg.cn/2ae7c9b958d540068bfd3f74289b988a.png)

