我们通过将 GeoJSON 形状坐标提取到点云中并使用 Open3d 应用泊松重建,从 GeoJSON 数据重建 STL 网格。

推荐:用 NSDT编辑器 快速搭建可编程3D场景
我对打印 GeoJSON 山丘的第一次尝试深感不满,因此想出了一个三步流程,仅使用开源软件即可生成高保真复制品。 这个过程分为三个步骤:
- 使用 Geopandas 对大型 geojson 地图进行切片。
- 创建 geojson 几何体的 XYZ 点云(利用 Shapely 和 Geopandas)。
- 使用 Open3D 为 XYZ 点云构建 TriangleMesh。
- 使用 Blender 从该网格中挤出实体。
对于本次迭代,我们将尝试对包括电报山在内的悬崖边进行建模。 如果你想自己尝试一下,这是我的脚本和 SF GeoJSON 数据。
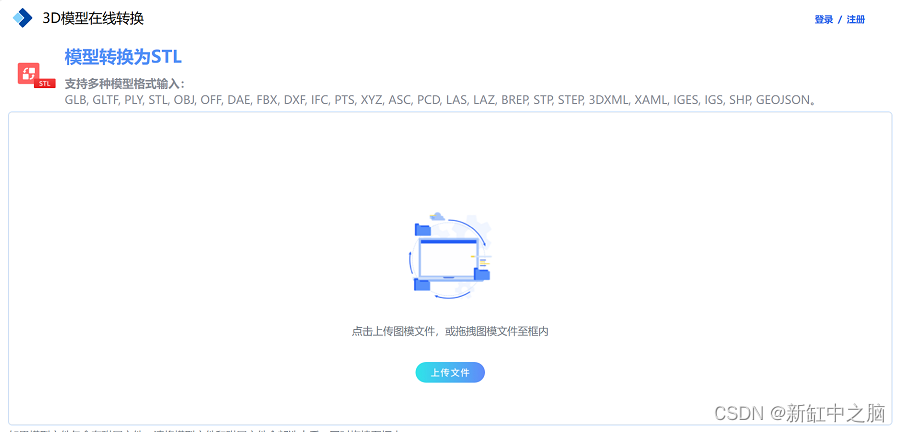
不过我发现了一个更好的方法实现3D地形的打印:你可以用NSDT 3DConvert这个在线工具将GeoJSON转换为STL,不需要本地安装任何软件,只需要把你的GeoJSON文件拖拽到网页的面板里就好了:
1、地球切片
GeoPandas 使用地理数据和空间基元扩展了 Pandas 数据框。 它允许我们将形状剪辑到我们感兴趣的经度、纬度指定窗口,将坐标转换为 UTM X 和 Y 米等等。
首先,我们对 SF geojson 地图进行切片,使其仅包含 Telegraph Hill 坐标内的要素(以及要素的各个方面):
#!/usr/bin/env python3
import geopandas
from shapely.geometry import Polygon

outname = "telegraph_hill"
y1, x1 = (37.8053307084282, -122.40853235179131)
y2, x2 = (37.79953896610929, -122.40128101638189)

gdf = geopandas.read_file('geojson/sf.geojson')
polygon = Polygon([(x1, y1), (x1, y2), (x2, y2), (x2, y1), (x1, y1)])
gdf_clipped = gdf.clip(polygon)
gdf_clipped.to_file(f"geojson/{outname}.geojson", driver='GeoJSON')
gdf_clipped = gdf_clipped.explode(index_parts=True)  #Line Segments only!
2、从 GeoJSON 生成点云
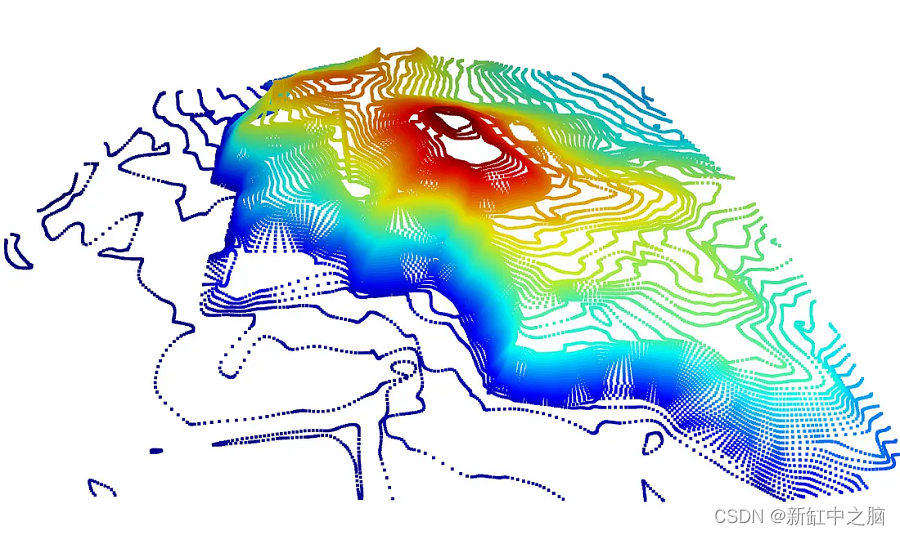
第 1 步为我们提供了所需坐标内形状的“GeoDataFrame”。 我们现在需要将这些相关形状转换为点云,然后转换为三角形网格以进行 3D 打印。
我们将继续使用 geopandas 将坐标从长、纬度转换为距原点的 X、Y 米,并将这些坐标与源数据“高程”属性中的 Z 数据连接起来。 然后,这些数据点会初始化 Open3d 点云。
import open3d as open3d

CONV_FT_TO_M = 0.3048  # SFData provides elevation in feet :(

def compute_gdf_pointcloud(gdf: geopandas.GeoDataFrame, z_scale: float) -> o3d.geometry.PointCloud:
    """Compute the PointCloud of the GeoDataFrame."""
    min_x, min_y = (99999999,99999999)
    min_elevation = min([e for e in gdf['elevation']])

    for f in gdf['geometry']:
        for c in f.coords:
            if c[0] < min_x:
                min_x = c[0]
            if c[1] < min_y:
                min_y = c[1]

    logging.debug(f"min_x={min_x} min_y={min_y} min_elevation={min_elevation}")
    gdf['flat_coordinates'] = gdf['geometry'].combine(
        gdf['elevation'],
        (lambda g, e: [(float(c[0] - min_x),
                        float(c[1] - min_y),
                        float(e) * CONV_FT_TO_M * z_scale) for c in g.coords]))
    # Add these coordinates to an Open3d point cloud.
    pcd = o3d.geometry.PointCloud()
    pcd.points = o3d.utility.Vector3dVector()
    for coordinate_list in gdf['flat_coordinates']:
        pcd.points.extend(o3d.utility.Vector3dVector(coordinate_list))
    # Estimate normals.
    pcd.estimate_normals(search_param=o3d.geometry.KDTreeSearchParamHybrid(radius=0.01, max_nn=30))
    pcd.orient_normals_to_align_with_direction()
    return pcd
3、为 XYZ 点云构建 TriangleMesh
我们现在尝试使用法线从点云重建泊松网格。 泊松网格重建还返回每个推断三角形的密度数据,这使我们能够在必要时修剪无关的推断区域。 这也是我们唯一有趣的颜色。
import open3d as o3d
import numpy as np
import matplotlib.pyplot as plt

def compute_poisson_mesh(pcd: o3d.geometry.PointCloud, depth: int)
   -> o3d.geometry.TriangleMesh:
    """Compute the mesh of the point cloud.
    depth:    The depth of the octree used for the surface reconstruction determines resolution of the resulting triangle mesh.
    """
    poisson_mesh, densities = o3d.geometry.TriangleMesh.create_from_point_cloud_poisson(
        pcd, depth=depth, width=0, scale=1.1, linear_fit=True)
    # Color the supporting point density.
    densities = np.asarray(densities)
    graph_rate = (densities - densities.min()) / (densities.max() - densities.min())
    density_colors = plt.get_cmap('plasma')(graph_rate)
    density_colors = density_colors[:, :3]
    poisson_mesh.vertex_colors = o3d.utility.Vector3dVector(density_colors)
    # Trim any excess surface from the Poisson reconstruction.
    bbox = pcd.get_axis_aligned_bounding_box()
    p_mesh_crop = poisson_mesh.crop(bbox)
    p_mesh_crop.compute_triangle_normals()
    return p_mesh_crop
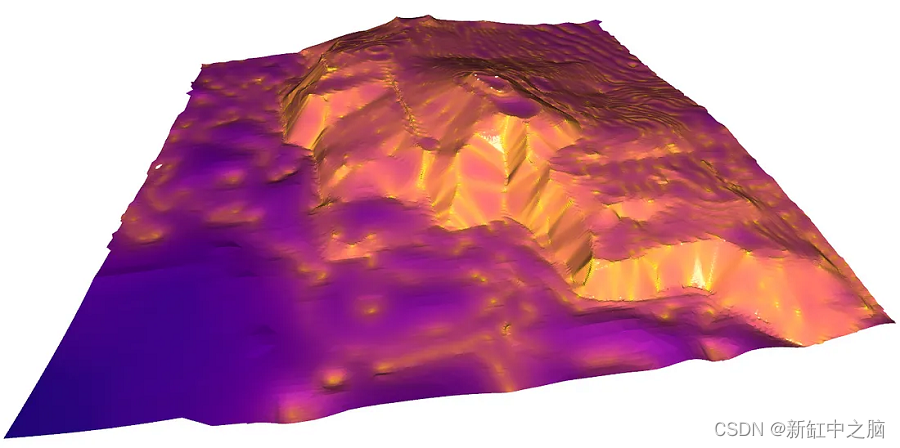
总的来说还不错! 从点密度推断,网格的颜色表示有多少点(来自我们的点云)表示给定多边形的置信度。 由于我们的流程受益于矩形网格(请参阅下一步),因此我们不会修剪任何多余的区域。
4、修复和3D打印
我们需要修复几何体中的一些孔,并可选择创建一个有效的实体(山应该是空心的)。 要修复孔,请将 STL 导入 Blender 并在编辑模式下选择孔周围的顶点,然后按“alt-F”用三角形填充孔。
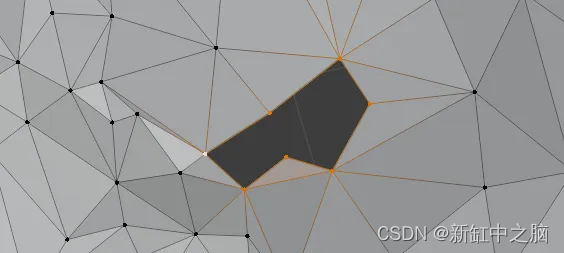
STL 漏洞修补的通用解决方案留给读者作为练习。
我们现在应该能够挤出网格并使用二等分工具保留上部。 沿途检查非流形面,并在导出前重新计算法线。
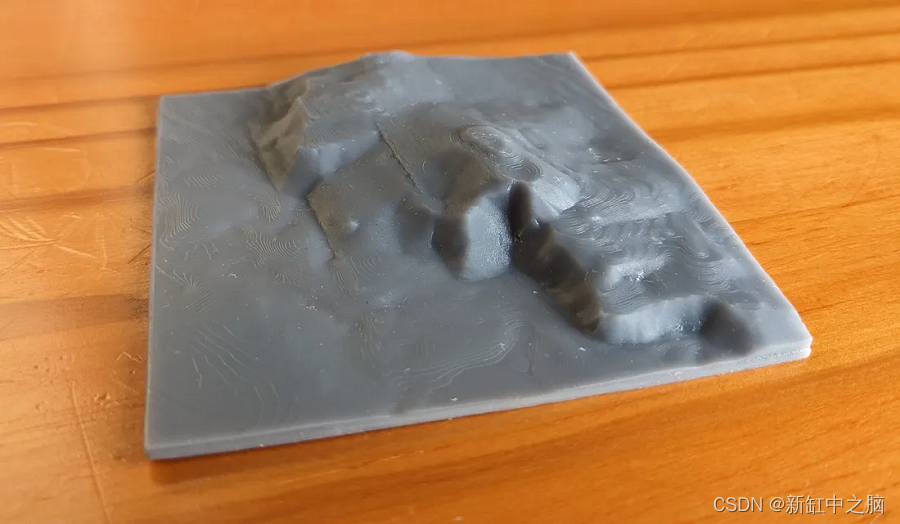
这比我最初的预期要好得多!
原文链接:GeoJSON转STL打印地形 — BimAnt
