传送门
Spring Cloud Alibaba系列之nacos:(1)安装
Spring Cloud Alibaba系列之nacos:(2)单机模式支持mysql
Spring Cloud Alibaba系列之nacos:(3)服务注册发现
Spring Cloud Alibaba系列之nacos:(4)配置管理
为什么要搭建本地Nacos源码环境
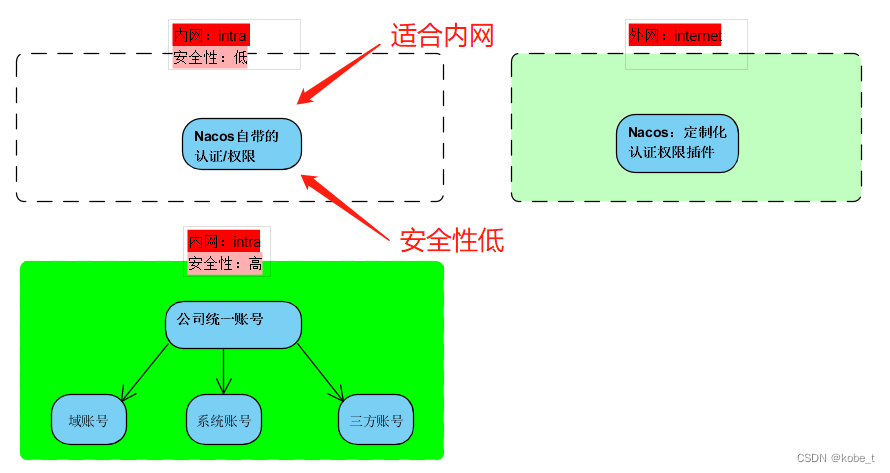
nacos自带了一套简单的认证权限管理体系,在多数情况下已经够用了。不过有少数情况还是不太满足需求:
- 有的公司有统一的账号管理体系,技术选型nacos之后,也要将nacos的账号体系统一纳管起,方便用户登录及运维管理
- 在内网的情况下,对nacos自身提供的认证权限管理体系要求不高;不过如果涉及外网访问,它的安全性不太够,需要安全性更强的登录/权限组件来替代
Nacos架构
上面谈到的nacos认证权限管理体系,在nacos中的所处位置,主要为Nacos Console模块服务:
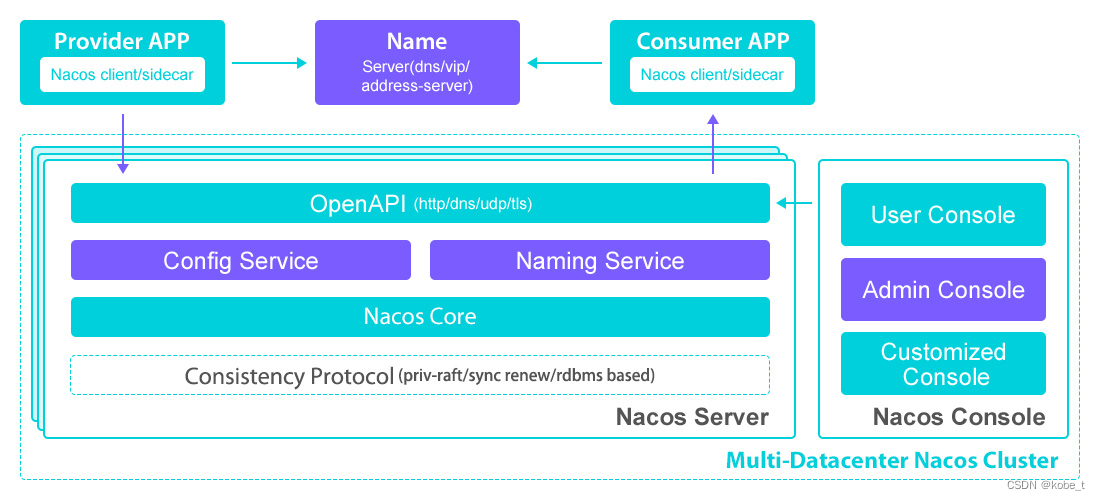
图片来源于nacos官网:基本架构及概念
环境搭建
如果要对nacos作二次开发,必然要下载源码搭建好本地环境调试,下面就介绍一下如何搭建的相关步骤!
源码下载
版本选择
nacos这种新兴的服务注册框架,肯定是在不断更新,所以这里选取最新的版本2.2.3来进行测试:
下载地址

下载地址:Releases · alibaba/nacos · GitHub
编译构建流程
下载完成之后,导入到idea里面,里面有一个BUILDING文件内容如下:
Build Instructions for NACOS
====================================================
(1) Prerequisites
    JDK 1.8+ is required in order to compile and run Nacos.
    nacos utilizes Maven as a distribution management and packaging tool. Version 3.0.3 or later is required.
    Maven installation and configuration instructions can be found here:
    http://maven.apache.org/run-maven/index.html
(2) Run test cases
    Execute the following command in order to compile and run test cases of each components:
    $ mvn test
(3) Import projects to Eclipse IDE
    First, generate eclipse project files:
    $ mvn -U eclipse:eclipse
    Then, import to eclipse by specifying the root directory of the project via:
    [File] > [Import] > [Existing Projects into Workspace].
(4) Build distribution packages
    Execute the following command in order to build the tar.gz packages and install JAR into local repository:
   #build nacos
    $ mvn -Prelease-nacos -Dmaven.test.skip=true clean install -U
环境依赖
从上面的BUILDING文件可以看出:
- JDK1.8以上,配置好环境变量
- maven3.0.3以上,配置好环境变量
编译打包
从上面的BUILDING文件第4步,可以看到编译打包的命令:
mvn -Prelease-nacos -Dmaven.test.skip=true clean install -U那在idea里面进行执行该命令,成功结果如下:
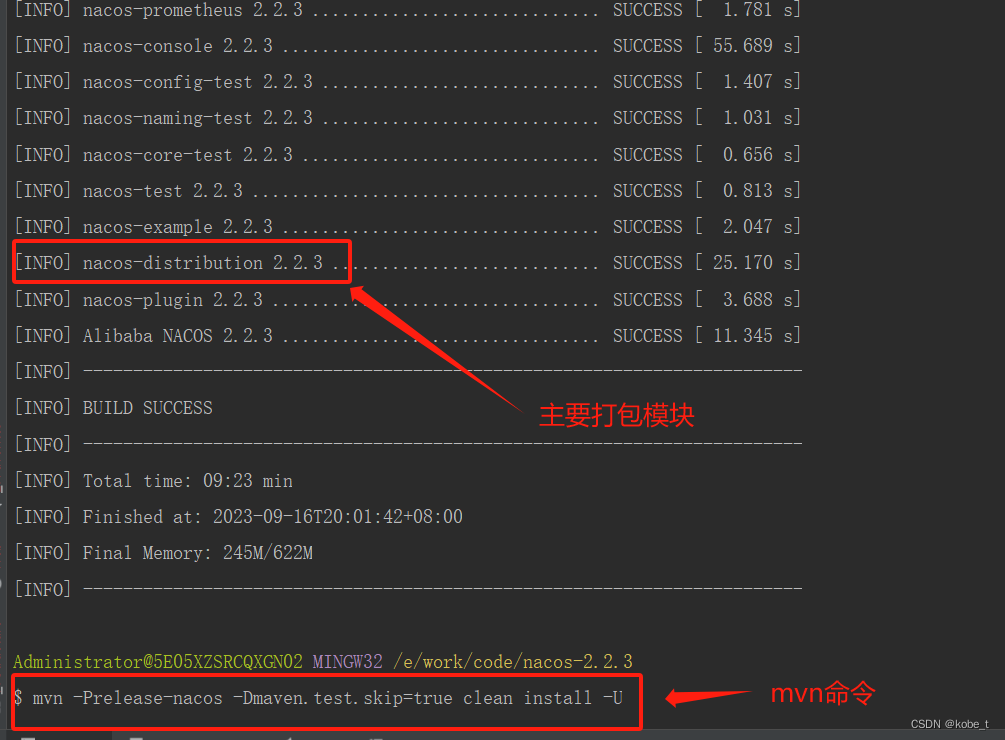
从mvn打包命令来看,执行的release-nacos这个profile,到nacos-distribution模块查看一下:

最后再看下release-nacos.xml,即可定位到打出来包的位置:

运行启动
进入到bin/目录,直接按单机模式,启动nacos-server,执行startup.cmd文件:
startup.cmd -m standalone启动成功,控制台会打印访问地址:

访问nacos地址:http://192.168.1.8:8848/nacos/index.html,启动成功:

