OLED屏幕介绍 & 硬件接线
OLED也是老熟人了,详细的介绍见:
IIC 协议 和 OLED_iic oled-CSDN博客
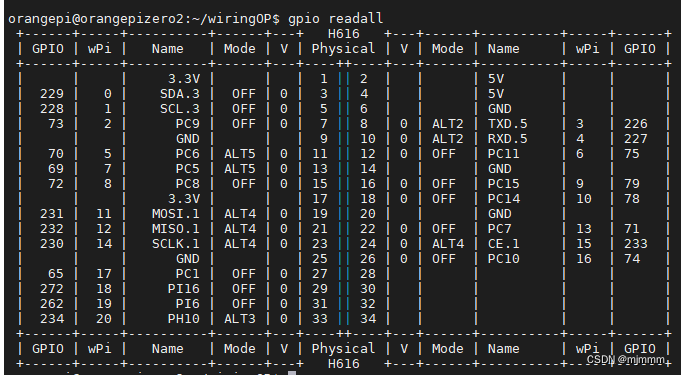
再次回顾香橙派硬件接线:
根据之前的学习了解到,OLED屏幕的驱动是需要IIC协议的,在学习C52时我使用了代码模拟IIC协议,在学习STM32时我使用CubeMX直接可以配置IIC协议,在现在的香橙派上,Linux同样封装了IIC协议,不需要使用代码模拟,具体可以查看Linux系统的dev路径下的文件:

可见,Linux系统自动封装了如GPIO,tty,i2c,等等重要的协议。
且关于i2c有两个文件,i2c-3和i2c-5,根据引脚图,香橙派的SCL和SDA都是.3结尾,所以适用i2c-3:
![]()
根据上图,物理引脚3和5(wPi引脚0和1)就是IIC的SDA和SCL口了, 分别接OLED的SDA和SCL,然后将OLED的VCC和GND分别接到物理引脚2和6:
sudo apt-get install i2c-tools
香橙派Linux IIC的测试
刚刚提到Linux已经封装了IIC的协议,但是要进行测试还需要安装 i2c-tools,执行以下命令进行安装:
sudo apt-get install i2c-tools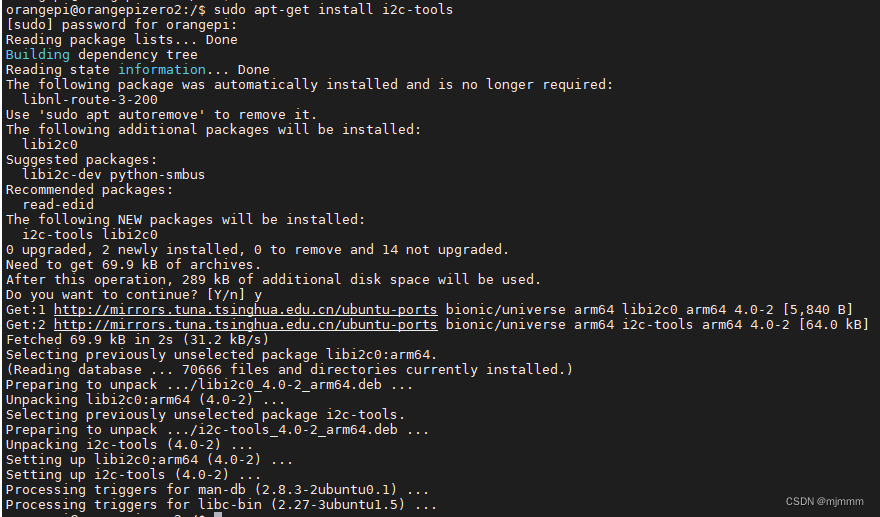
然后执行以下命令测试:
sudo i2cdetect -y 3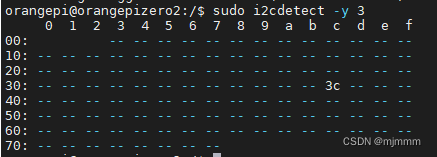
显示3c的地方就是OLED屏幕的地址,说明系统识别到了这个屏幕,至此,IIC测试成功
例程解读
关于OLED的驱动,wiringPI库同样有例程,将其拷贝到当前目录下:

先试运行一下,注意运行的时候第二个参数是/dev路径下的i2c-3驱动:

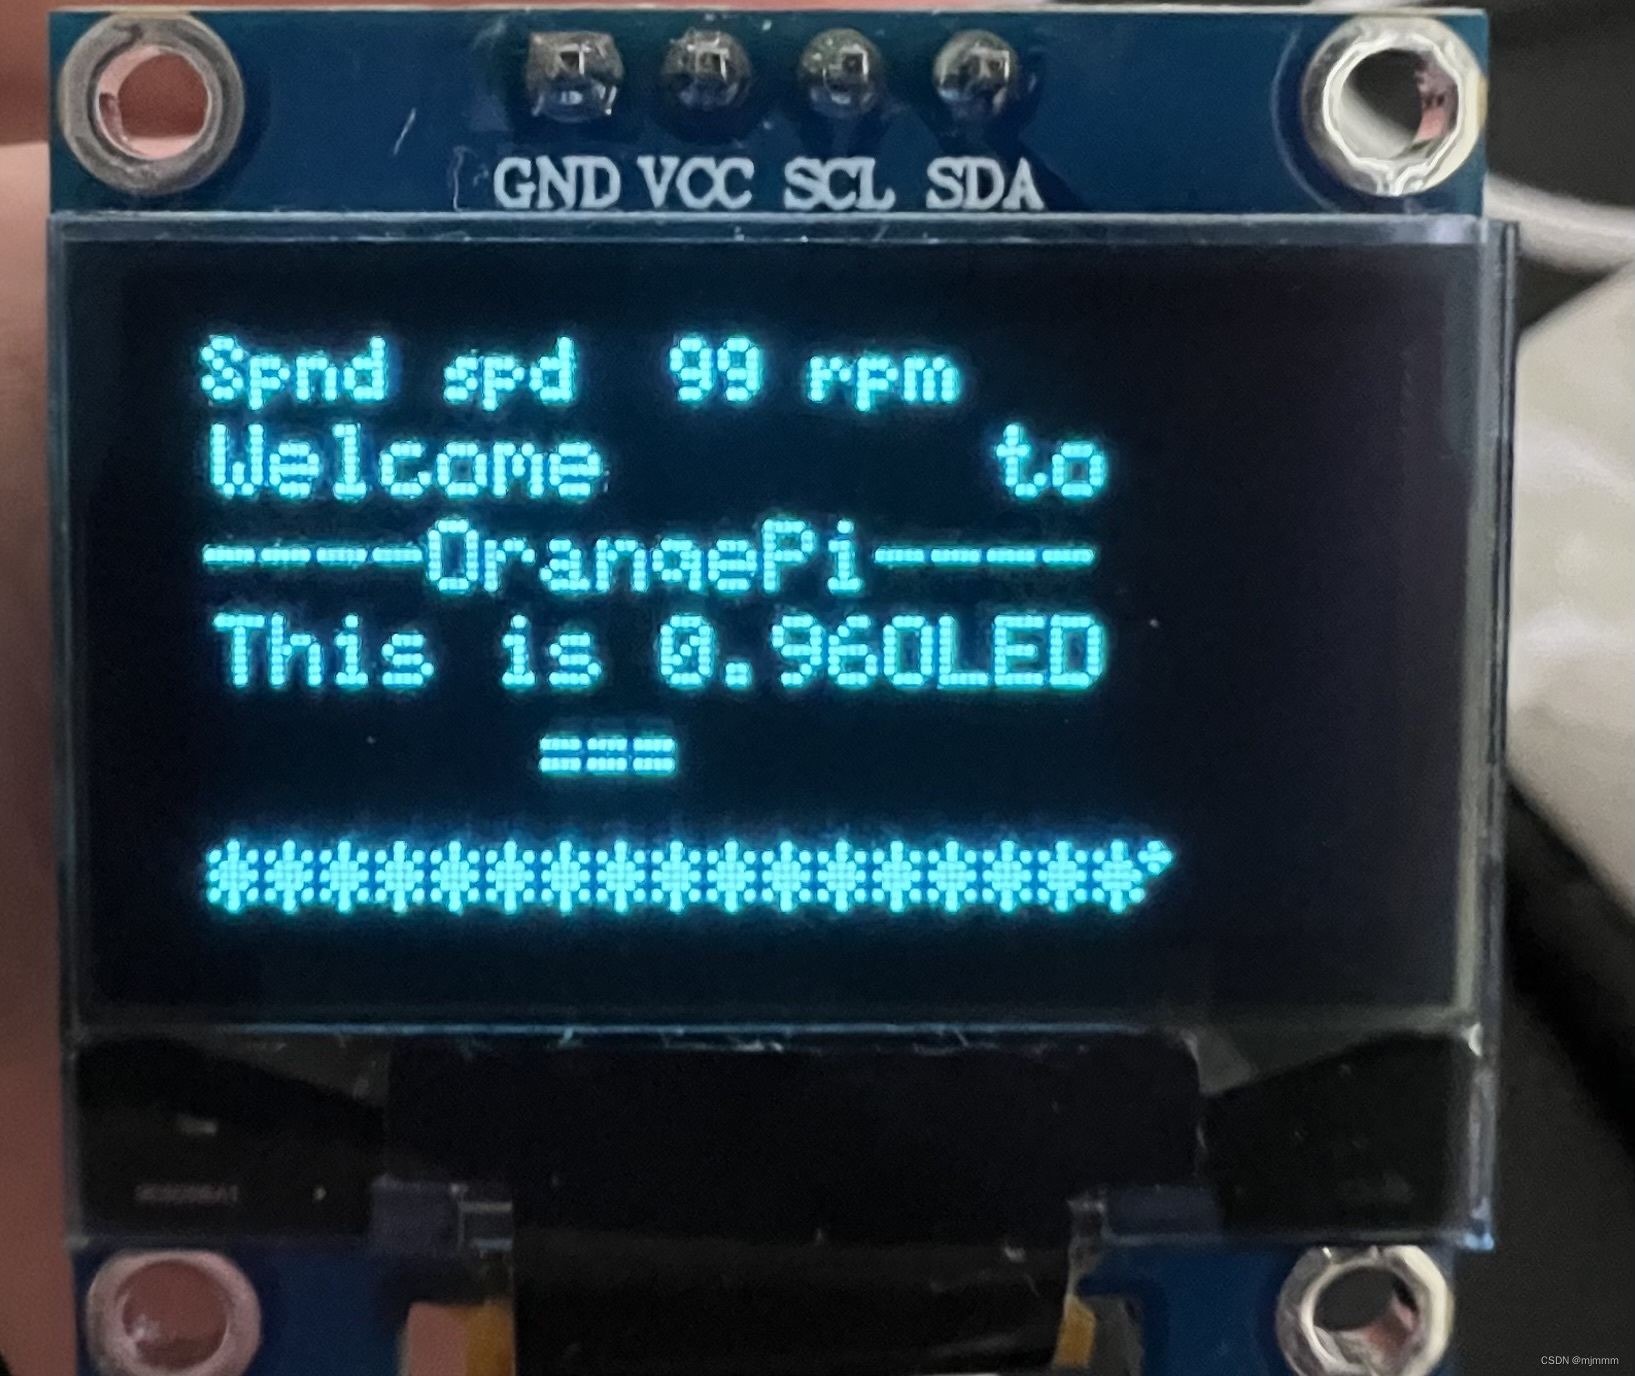
说明代码没什么问题,接下来开始解读代码,使用的工具是"SourceInsight3.5"
SourceInsight3.5的安装和使用
直接点击SourceInsight.exe进行傻瓜式安装:
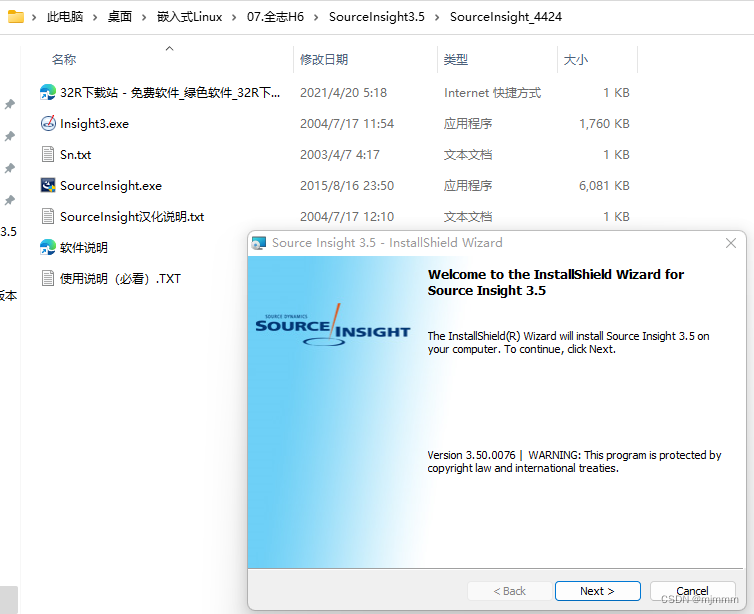
然后使用魔法注册一下,就可以进入了:

然后解压一下wiringOP库的源码:

进入该文件夹,然后新建文件夹“si”用来存放source insight工程:
![]()
然后回到source insight,点击左上方project并创建一个新的项目,存放的地址就在“si”文件夹中:
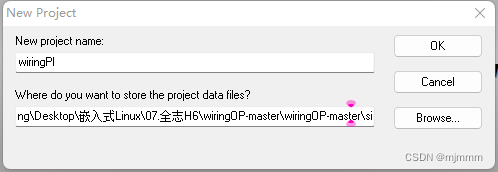
点击左侧的源码文件夹,再点击右侧的"Add Tree",(显示有169个file),添加完成点击close即可:

然后就会在右侧显示所有的源码,想要看哪个直接点击就可以,不需要在linux中一个个 vi 了,大大提升了效率,也可以直接搜索想要看的代码:
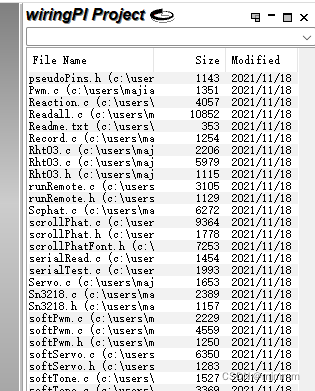

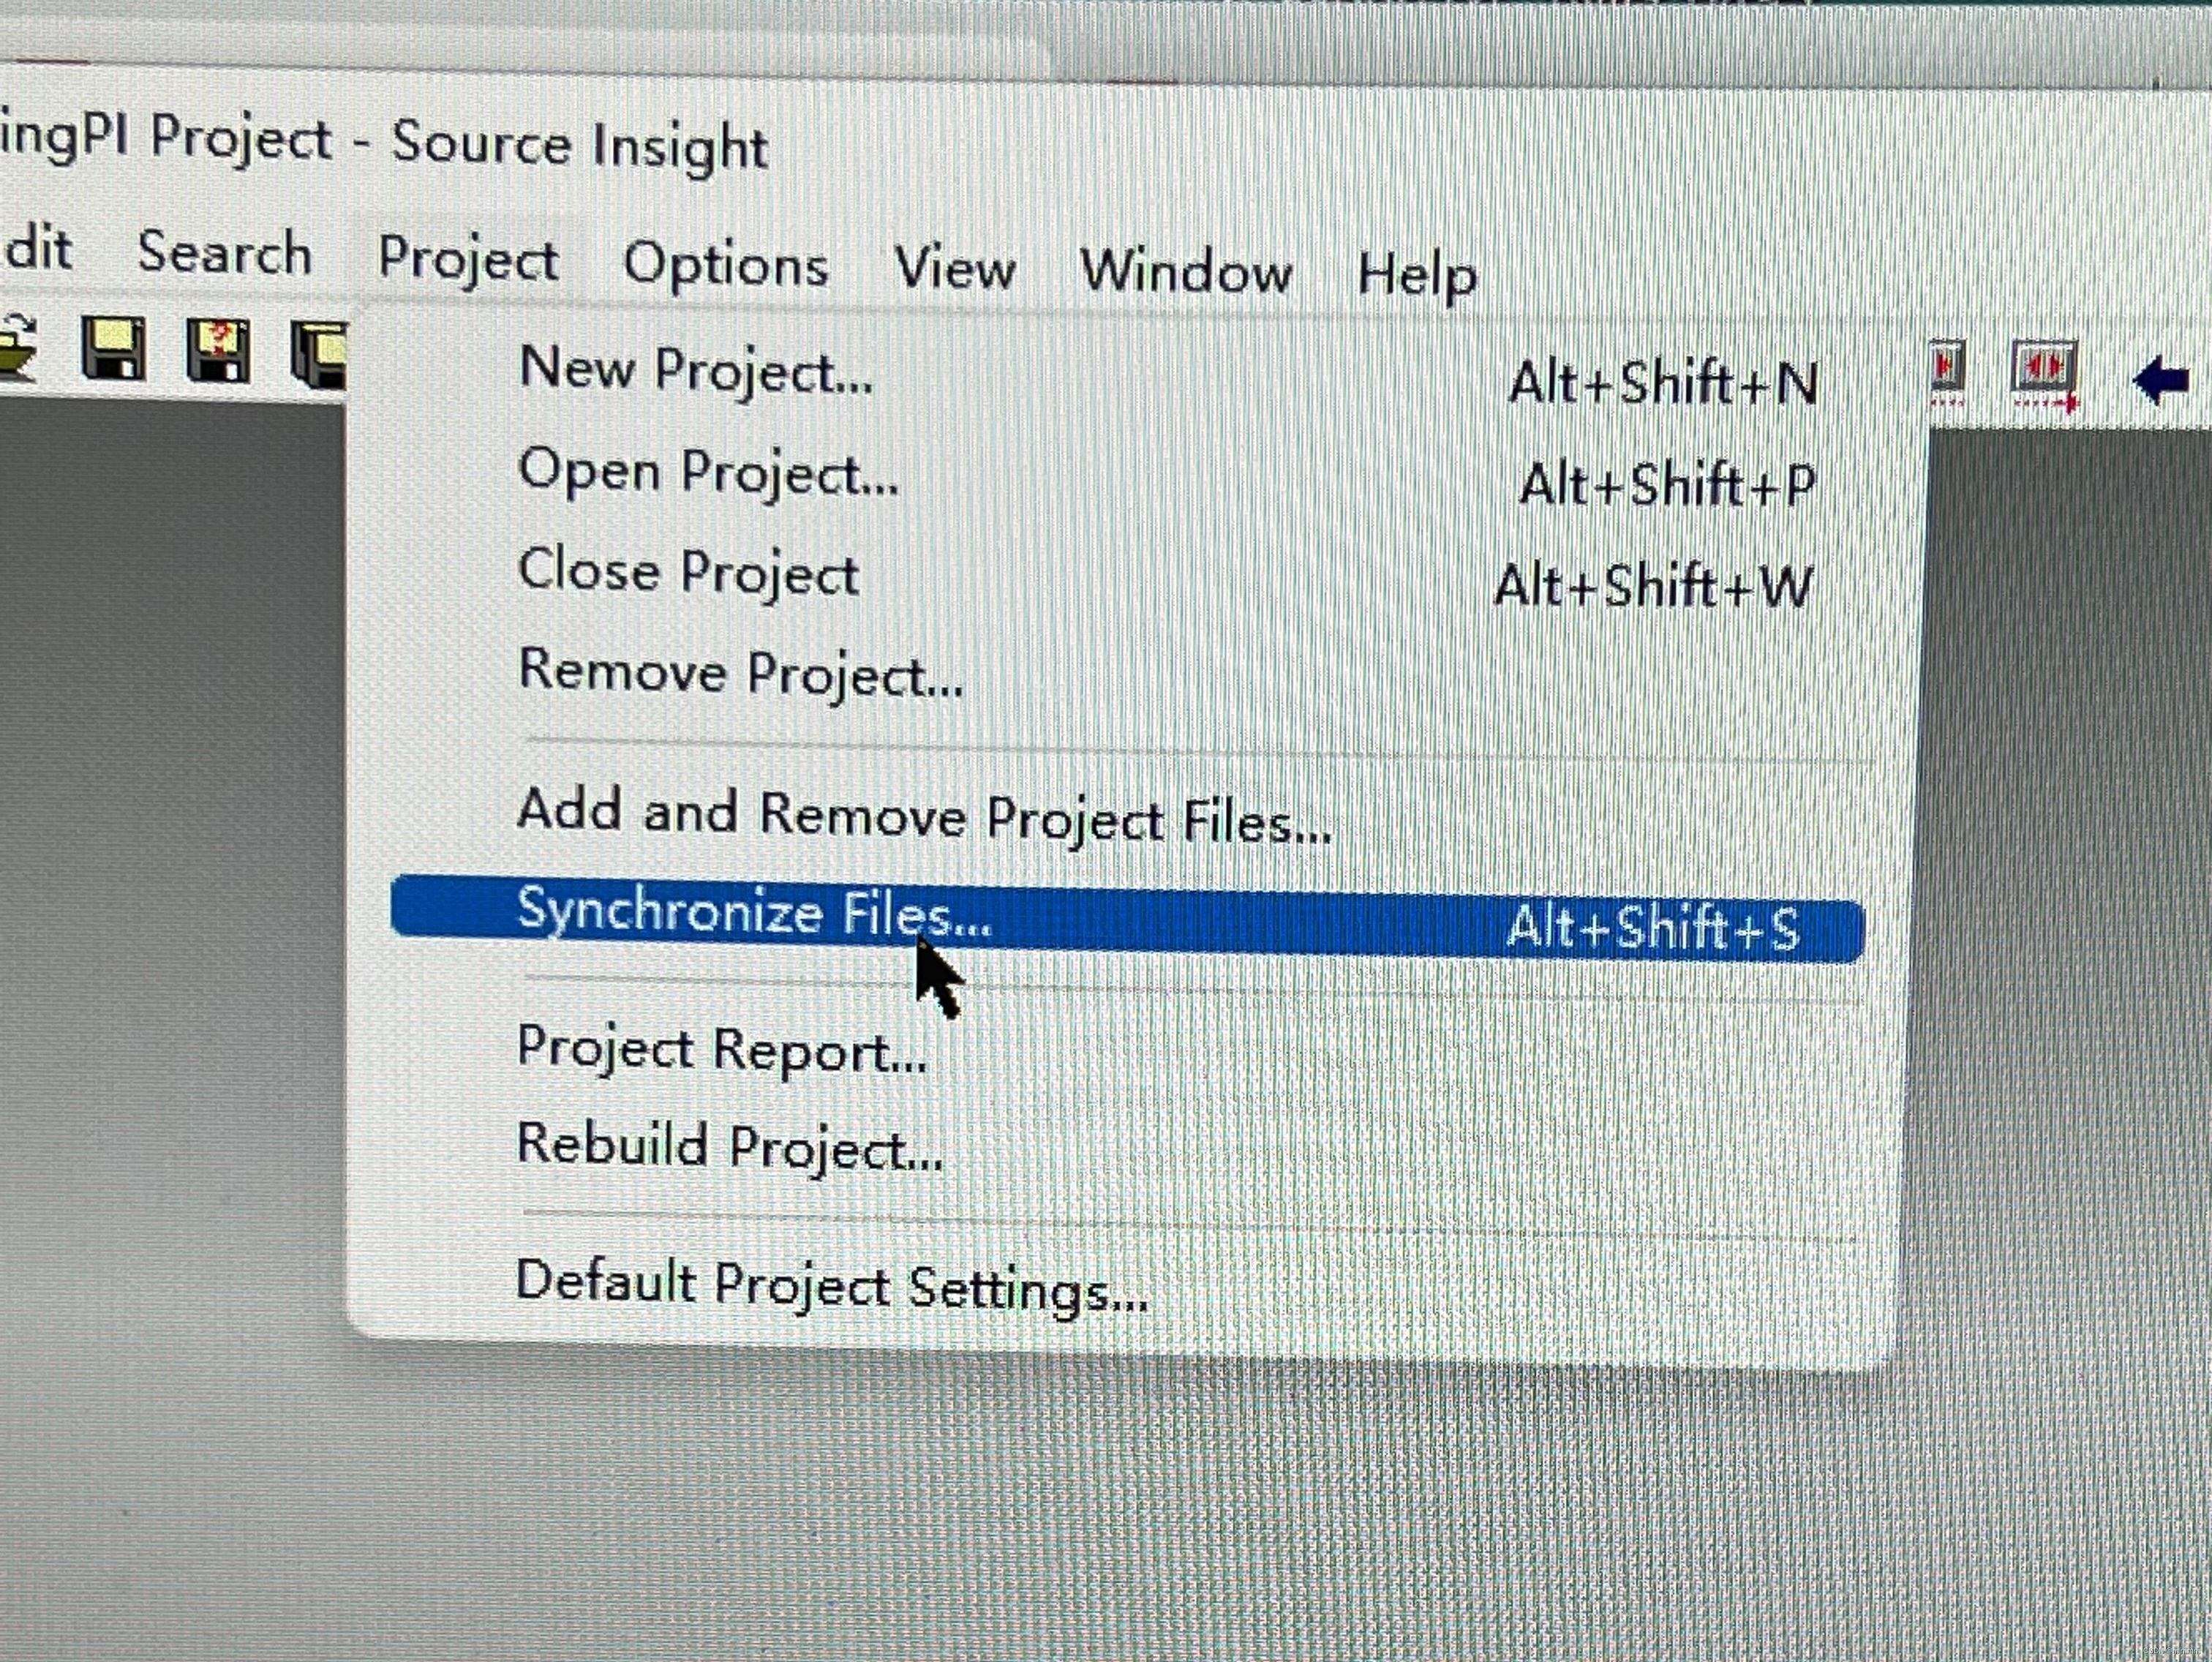
接着点击右上角的“Project” --> 点击“Synchronize Files”来同步所有文件,这样就可以在不同文件中进行跳转:
现在打开oled_demo.c:
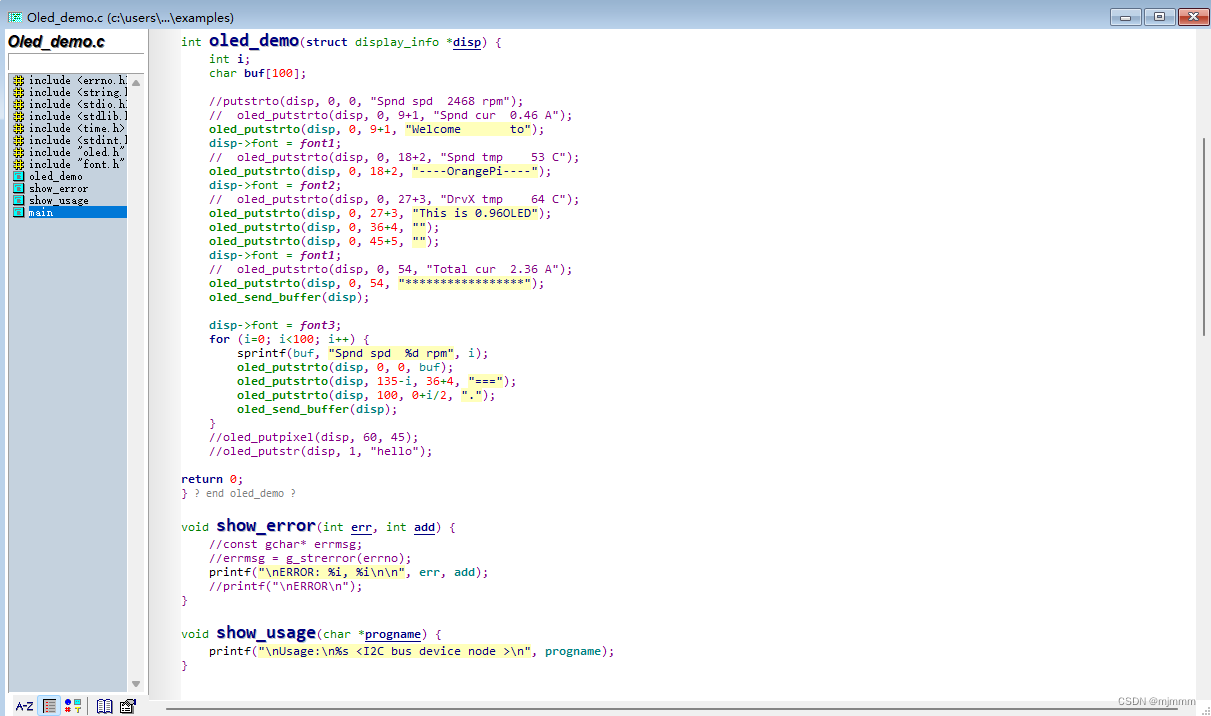
此时,按住“CTRL”再点击“display_info”这个结构体,就可以跳转到这个结构体定义的地方了:

可见,这个结构体其实定义在Oled.h中,并且有4个成员,其中第三个成员字体又是一个结构体,可以再次按住CTRL跳转:
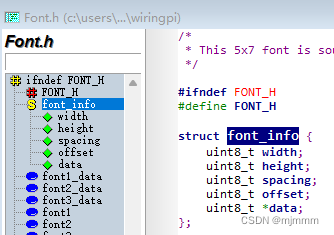
可见,这个结构体定义在Font.h中,有5个成员来描述字体信息。
所以SourceInsight在读取代码,尤其是大工程的代码时,有很大的优势
了解了这个最重要的结构体之后,回到oled_demo.c:
(代码出现的函数只要不懂就去跳转帮助理解)
/*
 * Copyright (c) 2015, Vladimir Komendantskiy
 * MIT License
 *
 * SSD1306 demo of block and font drawing.
 */

//
// fixed for OrangePiZero by HypHop
//

#include <errno.h>
#include <string.h>
#include <stdio.h>
#include <stdlib.h>
#include <time.h>
#include <stdint.h>

#include "oled.h"
#include "font.h"

//该函数会在main中oled_open函数开启成功时被调用
int oled_demo(struct display_info *disp) { //函数参数就是指向display_info结构体的指针
	int i;
	char buf[100];

	//putstrto(disp, 0, 0, "Spnd spd  2468 rpm");
	//	oled_putstrto(disp, 0, 9+1, "Spnd cur  0.46 A");
	oled_putstrto(disp, 0, 9+1, "Welcome       to"); //这个oled_putstrto函数就是最核心的显示函数,实现在x,y坐标显示指定内容
	disp->font = font1; //指定内容的字体
	//	oled_putstrto(disp, 0, 18+2, "Spnd tmp    53 C");
	oled_putstrto(disp, 0, 18+2, "----OrangePi----");
	disp->font = font2;
	//	oled_putstrto(disp, 0, 27+3, "DrvX tmp    64 C");
	oled_putstrto(disp, 0, 27+3, "This is 0.96OLED");
	oled_putstrto(disp, 0, 36+4, "");
	oled_putstrto(disp, 0, 45+5, "");
	disp->font = font1;
	//	oled_putstrto(disp, 0, 54, "Total cur  2.36 A");
	oled_putstrto(disp, 0, 54, "*****************");
	oled_send_buffer(disp); //oled_putstrto()只是将内容写到缓存中,这个函数才真正将缓存中的数据发送到屏幕

	//接下来的代码也是一套显示指令,即核心还是先oled_putstrto() -> oled_send_buffer()
    //只不过这里采用了for循环,不停的更新写入的xy轴位置,所以视觉上这段代码实现的就是一段动画
    disp->font = font3;
	for (i=0; i<100; i++) {
		sprintf(buf, "Spnd spd  %d rpm", i);
		oled_putstrto(disp, 0, 0, buf);
		oled_putstrto(disp, 135-i, 36+4, "===");
		oled_putstrto(disp, 100, 0+i/2, ".");
		oled_send_buffer(disp);
	}
	//oled_putpixel(disp, 60, 45);
	//oled_putstr(disp, 1, "hello");

return 0;
}

void show_error(int err, int add) {
	//const gchar* errmsg;
	//errmsg = g_strerror(errno);
	printf("\nERROR: %i, %i\n\n", err, add);
	//printf("\nERROR\n");
}

void show_usage(char *progname) {
	printf("\nUsage:\n%s <I2C bus device node >\n", progname);
}

int main(int argc, char **argv) {
	int e;
	char filename[32];
	struct display_info disp;

	if (argc < 2) {
		show_usage(argv[0]);

		return -1;
	}

	memset(&disp, 0, sizeof(disp));
	sprintf(filename, "%s", argv[1]);
	disp.address = OLED_I2C_ADDR;
	disp.font = font2;

	e = oled_open(&disp, filename); //通过驱动文件开启屏幕,跳转两次就可以看到open函数,Linux系统一切皆文件,想要打开一个硬件,反映在Linux上层就是打开驱动文件

	if (e < 0) {
		show_error(1, e);
	} else {
		e = oled_init(&disp); //如果oled_open返回0,则调用oled_init进行初始化
	if (e < 0) {
		show_error(2, e);
	} else { //如果开启屏幕成功,就会调用oled_demo()这个函数了!
		printf("---------start--------\n");
		if (oled_demo(&disp) < 0)
			show_error(3, 777);
			printf("----------end---------\n");
		}
	}

	return 0;
}
自己编写代码
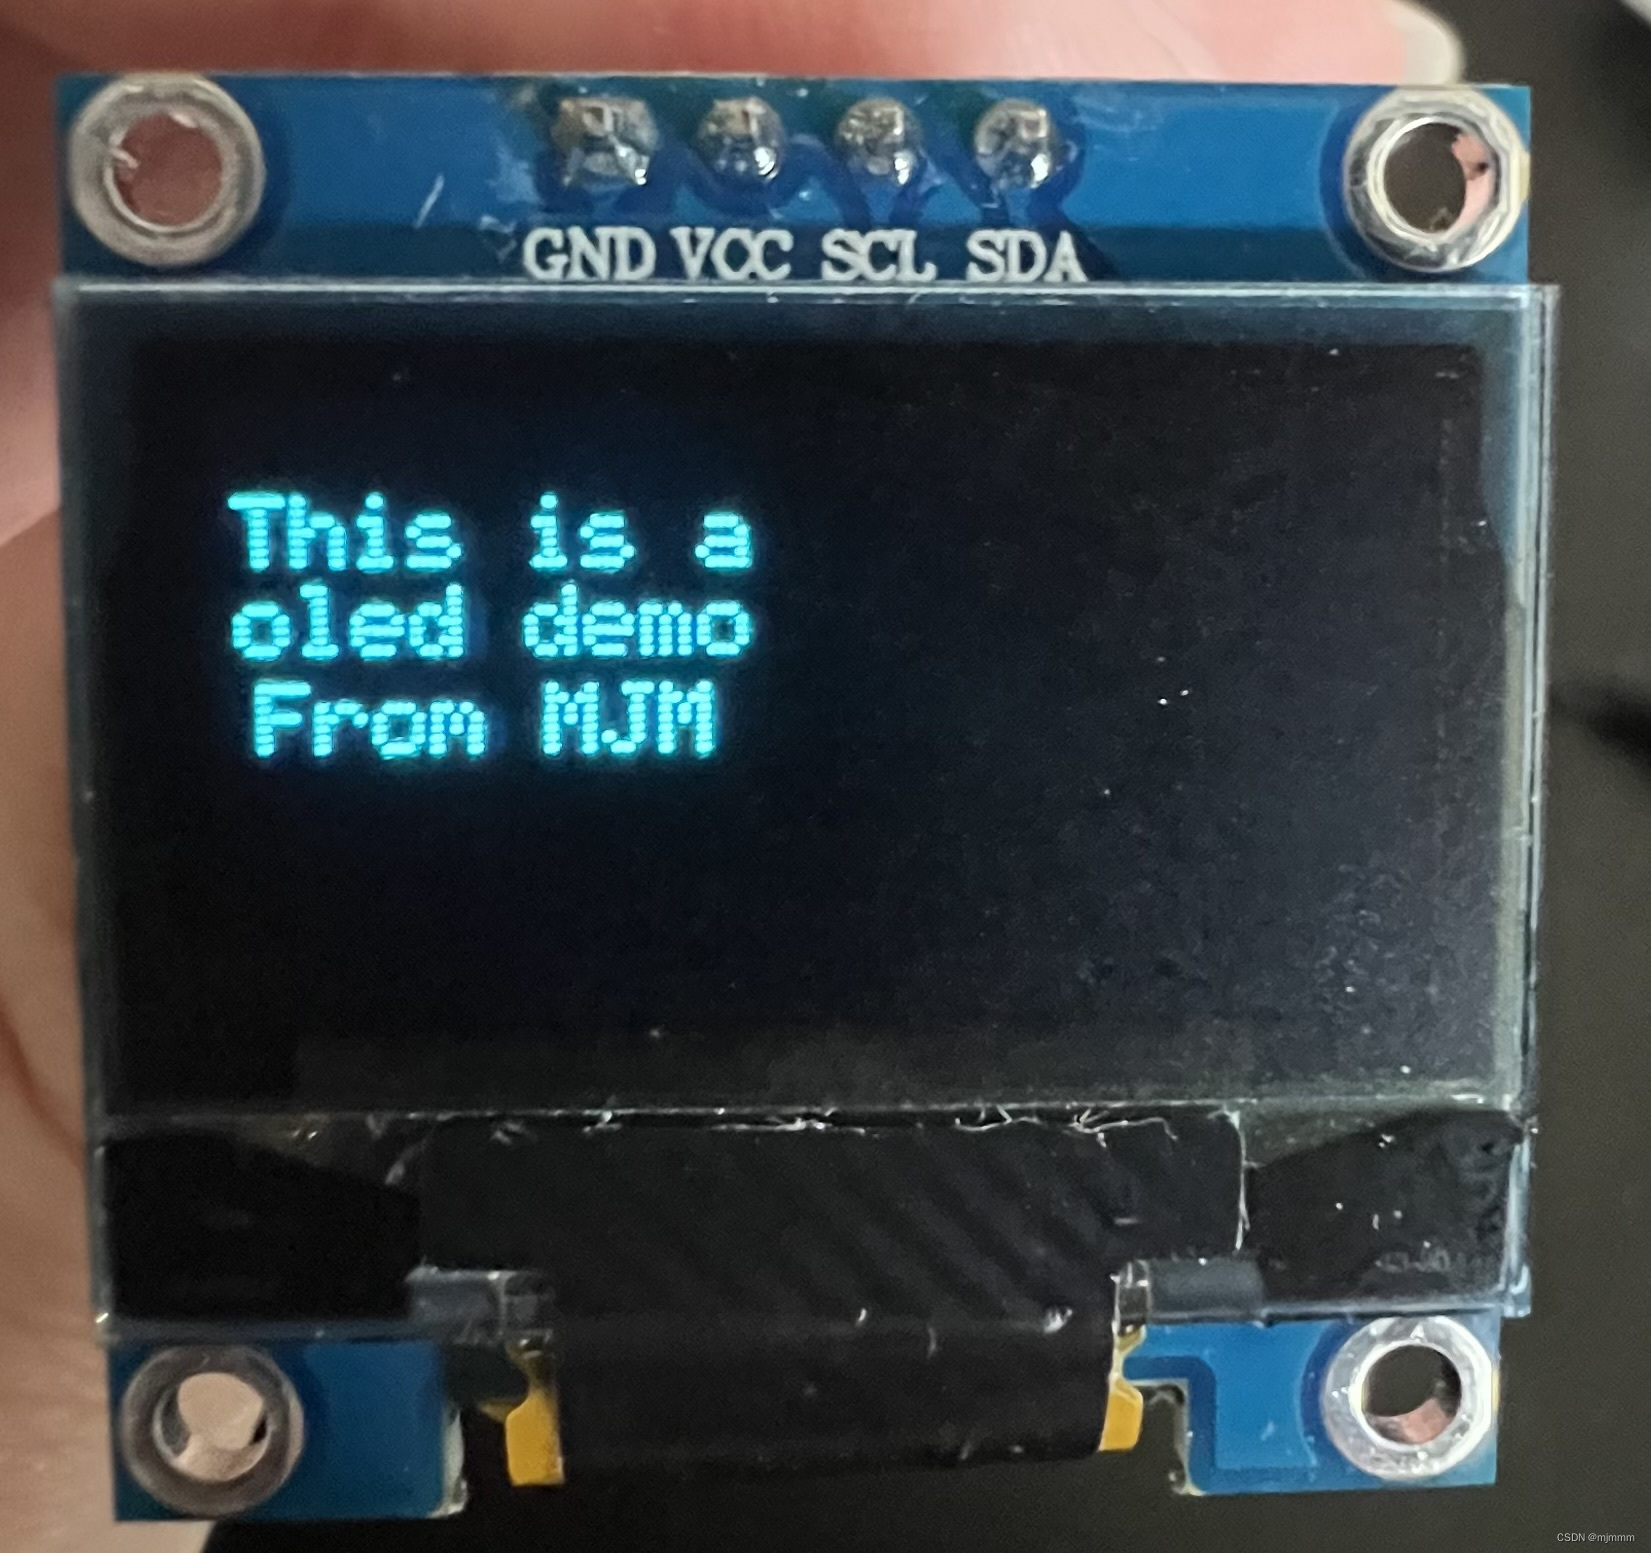
在解读了例程之后,我尝试修改代码显示自己想要的字符:
(其实很简单,就是修改oled_putstrto函数显示的内容和位置就可以了)
oled_test.c:
#include <errno.h>
#include <string.h>
#include <stdio.h>
#include <stdlib.h>
#include <time.h>
#include <stdint.h>

#include "oled.h"
#include "font.h"

int oled_demo(struct display_info *disp) {

	oled_putstrto(disp, 0, 9+1, "This is a ");
	disp->font = font1;

	oled_putstrto(disp, 1, 9+10, "oled demo");
    disp->font = font2;

	oled_putstrto(disp, 2, 9+20, "From MJM");
    disp->font = font3;

	oled_send_buffer(disp);


	return 0;
}

void show_error(int err, int add) {
	//const gchar* errmsg;
	//errmsg = g_strerror(errno);
	printf("\nERROR: %i, %i\n\n", err, add);
	//printf("\nERROR\n");
}

void show_usage(char *progname) {
	printf("\nUsage:\n%s <I2C bus device node >\n", progname);
}

int main(int argc, char **argv) {
	int e;
	char filename[32];
	struct display_info disp; //一个结构体,封装了显示的信息,如屏幕的地址,显示的字体

	if (argc < 2) {
		show_usage(argv[0]);

		return -1;
	}

	memset(&disp, 0, sizeof(disp));
	sprintf(filename, "%s", argv[1]);
	disp.address = OLED_I2C_ADDR; //屏幕设备地址
	disp.font = font2; //显示字体

	e = oled_open(&disp, filename);

	if (e < 0) {
		show_error(1, e);
	} else {
		e = oled_init(&disp);
	if (e < 0) {
		show_error(2, e);
	} else {
		printf("---------start--------\n");
		if (oled_demo(&disp) < 0)
			show_error(3, 777);
			printf("----------end---------\n");
		}
	}

	return 0;
}
实现效果:

