目录
概述
界面展示 & 前端代码(Vue)
后端实现(SpringBoot)
Maven依赖
下单接口(主要功能代码)
支付成功回调接口
测试(后端线上环境)
概述
本篇博文主要演示和说明网页扫码实现微信支付的功能。
Native支付?
Native支付是指商户系统按微信支付协议生成支付二维码,用户再用微信“扫一扫”完成支付的模式。
使用前提?
已注册成为微信商户,在微信商户平台开通"Native支付",获取API证书和API密匙等参数,如果对于注册微信商户有所疑惑,请看博文:http://t.csdn.cn/BCecm,博文有讲解从零到商户的注册过程要求说明。
主要流程概述
Native支付的流程很简单,主要为:
1.前端传入金额等参数。
2.后端拿着参数向微信服务器创建预支付订单,取回一个支付地址,传回前端。
3.前端拿着支付地址生成二维码,微信扫码完成支付。
界面展示 & 前端代码(Vue)
关于支付地址转为二维码
在此使用的是QRCode,使用方式很简单,导入,声明二维码放置节点元素,实例化QRCode生成二维码。具体使用方式看示例代码,或文档地址:
github地址
中文使用说明地址
js文件地址
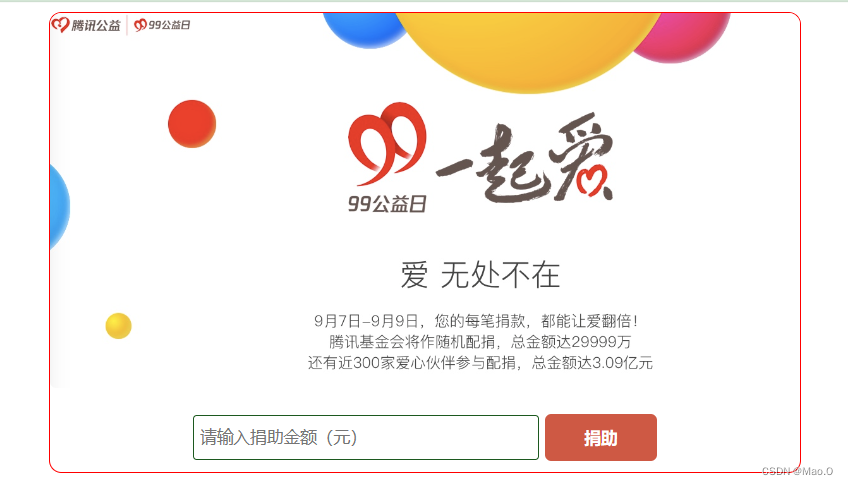
输入金额,点击"捐助",调用后端接口获取支付地址,生成支付二维码。

<template>
  <div id="container">
    <!-- 图片 -->
    <div id="imgJuan"></div>
    <!-- 表单 -->
    <div id="input_box"><input type="text" id="my_input" v-model="total" :placeholder="iptText"><button @click="payHandle">捐助</button></div>
    <!-- 占位 -->
    <div style="height: 10px;"></div>
    <!-- 二维码 -->
    <div id="qrcode" ref="qrCodeBox" v-show="showFlag"></div>
  </div>
</template>

<script setup>
import { ref, onMounted, getCurrentInstance } from "vue"
import axios from "axios";

// 获取二维码盒子节点(如下两种方式均可)
// 方式一、获取当前组件实例,通过实例获取节点
const { proxy } = getCurrentInstance()
// 方式二、通过ref获取节点
const qrCodeBox = ref(null);

// 支付二维码显示控制
let showFlag = ref(false);

// 输入框内容
const iptText = "请输入捐助金额(元)"

// 输入金额
let total = ref('');

// 触发下单支付
async function payHandle(){
  // 将金额单位转为分
  let total_F = parseFloat(total.value) * 100

  // 发送请求,获取支付地址
  const res = await axios.get(`http://后端接口地址/pay/nativePay?total=${total_F}`);
  console.log(res.data);
  // 将支付地址转为二维码,显示(QRCode参数为(二维码展示的盒子节点元素,显示的内容))
  // 这是vue项目,我将QRCode.min.js文件下载并在index.html引入了,因此在此文件看不到引入
  const qrObj = new QRCode(qrCodeBox.value, res.data);
  showFlag.value = true;
}

</script>

<style scoped>
#container {
  border: solid red 1px;
  border-radius: 10px;
  /* width: fit-content; */
  width: 600px;
  margin: 0 auto;
  overflow: hidden;
}

#qrcode{
  display: flex;
  justify-content: center;
  align-items: center;
  padding: 10px 0px;
}

button {
  border: none;
  background-color: #ce5944;
  color: white;
  font-weight: 600;
  height: 37px;
  width: 90px;
  position: relative;
  top: 1px;
  margin-left: 5px;
  border-radius: 5px;
  cursor: pointer;
}

button:hover{
  background-color: #d14e37;

}

#imgJuan {
  /* border: solid red 1px; */
  height: 300px;
  width: 100%;
  background: url("/juan.jpg") no-repeat center center;
  background-size: cover;
  border-radius: 5px;
}

#input_box {
  width: fit-content;
  margin: 0 auto;
  margin-top: 20px;
}

#my_input {
  border-radius: 3px;
  border: solid 1px #1c591f;
  height: 32px;
  width: 268px;
  padding-left: 5px;
}
</style>
后端实现(SpringBoot)
说明:在此,后端仅编写展示两个接口:"下单接口","支付回调接口"
接口皆是根据官方SDK API文档实现,如果想要获取更多接口信息,例如"查单接口",请查看官网文档示例地址:微信Native支付及接口描述 & JavaSDK示例(githup地址)
Maven依赖
<dependency>
	<groupId>com.github.wechatpay-apiv3</groupId>
	<artifactId>wechatpay-java</artifactId>
	<version>0.2.11</version>
</dependency>
使用官方提供的Java SDK,文档地址:微信支付 Java SDK
下单接口(主要功能代码)
/**
     * Native支付下单,获取支付地址
     * @param total 金额
     * @return 支付地址,前端用于生成支付二维码
     */
    public String nativePay(Integer total){
        // 使用自动更新平台证书的RSA配置
        Config config =
                new RSAAutoCertificateConfig.Builder()
                        .merchantId(merchantId) // 商户号
                        .privateKeyFromPath(NativeUtil.getResourcesPath() + "apiclient_key.pem")  // API证书地址(此处的路径自己调试一下,能找到就行)
                        .merchantSerialNumber(merchantSerialNumber) // API证书序列号
                        .apiV3Key(apiV3Key) // API密匙
                        .build();
        // 构建service
        NativePayService service = new NativePayService.Builder().config(config).build();
        // request.setXxx(val)设置所需参数,具体参数可见Request定义
        PrepayRequest request = new PrepayRequest();
        Amount amount = new Amount();
        amount.setTotal(total); // 金额
        request.setAmount(amount);
        request.setAppid(appId); // 应用ID
        request.setMchid(merchantId);  // 商户号
        request.setDescription("Native测试商品标题");  // 商品描述
        request.setNotifyUrl("http://后端地址/pay/notifyNative");  // 支付成功的回调地址
        // 生成模拟系统内部订单号(yyyyMMddHHmmssSSS)
        request.setOutTradeNo(DateUtil.format(new Date(), DatePattern.PURE_DATETIME_MS_PATTERN));  // 自己后端的唯一订单号,此处使用时间模拟
        // 调用下单方法,得到应答
        try {
            // 发送请求
            PrepayResponse response = service.prepay(request);
            // 使用微信扫描 code_url 对应的二维码,即可体验Native支付
            System.out.println(response.getCodeUrl());
            // 将支付地址返回
            return response.getCodeUrl();
        }catch (Exception e){
            System.out.println(e.getMessage());
            return e.getMessage();
        }
    }
支付成功回调接口
回调地址?
回调地址为:当前端生成的二维码被微信扫描并成功支付之后,微信服务器会将支付的信息发送到这个地址上。如有疑惑,文档地址:支付通知
/**
     * 成功支付的回调
     * @param request ·
     * @param response ·
     * @throws IOException ·
     */
    public void notifyNative(HttpServletRequest request, HttpServletResponse response) throws IOException {

        // 获取请求体原内容(此时获取的数据是加密的)
        BufferedReader reader = request.getReader();
        StringBuilder requestBody = new StringBuilder();
        String line;
        while ((line = reader.readLine()) != null) {
            requestBody.append(line);
        }

        // 获取请求携带的数据,构造参数
        RequestParam requestParam = new RequestParam.Builder()
                .serialNumber(request.getHeader("Wechatpay-Serial")) // 微信支付平台证书的序列号
                .nonce(request.getHeader("Wechatpay-Nonce")) // 签名中的随机数
                .signature(request.getHeader("Wechatpay-Signature"))  // 应答的微信支付签名
                .timestamp(request.getHeader("Wechatpay-Timestamp")) // 签名中的时间戳
                .body(requestBody.toString()) // 请求体内容(原始内容,不要解析)
                .build();

        // 初始化RSAAutoCertificateConfig
        NotificationConfig config = new RSAAutoCertificateConfig.Builder()
                .merchantId(merchantId) // 商户号
                // API证书路径,路径自己调试,能找到就行(NativeUtil为自定义工具类)
                .privateKeyFromPath(NativeUtil.getResourcesPath() + "apiclient_key.pem")
                .merchantSerialNumber(merchantSerialNumber) // 证书序列号
                .apiV3Key(apiV3Key) // APIV3密匙
                .build();

        // 初始化 NotificationParser
        NotificationParser parser = new NotificationParser(config);
        // 解析为Transaction对象(解密数据)
        Transaction transaction = parser.parse(requestParam, Transaction.class);
        // 获取支付单号
        log.info("支付成功,回调信息:{}", transaction);
        // 打印其中的"微信支付单号"字段,可用于查单操作
        log.info("微信支付单号:{}", transaction.getTransactionId());
    }
测试(后端线上环境)
测试内容
1.前端输入金额,点击【捐助】按钮,查看是否显示支付二维码。
2.微信扫码支付,查看回到接口是是否被调用,查看控制台输出。
访问
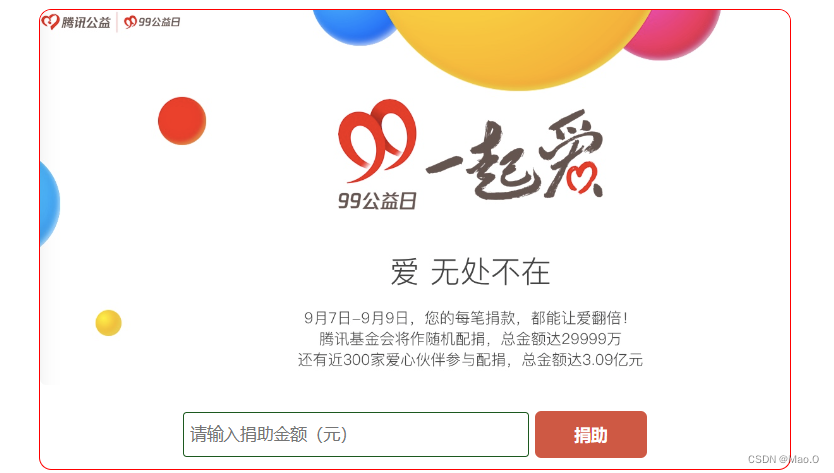
输入金额,点击【捐助】

微信扫码支付
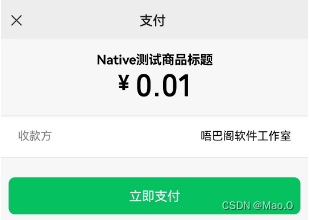
查看控制台

至此,测试完毕。
最后
此博文仅展示了从二维码到支付成功的过程,至于后续处理,如成功支付之后"如何通知前端页面做修改",这类后续处理需要读者根据自己实际情况进行处理,例如使用轮询还是WebSocket这类方式检查支付状态,都是没问题的。
最后,如文章有不足之处请指出,感谢访问。


