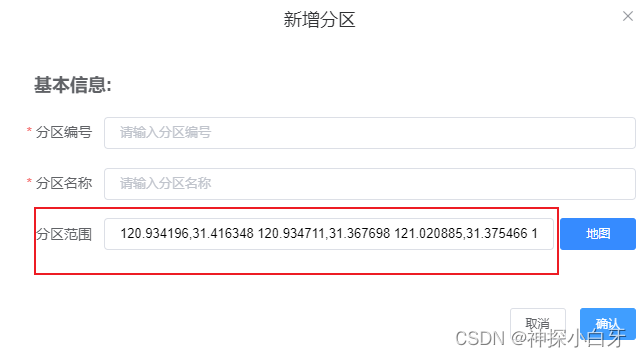
效果如图
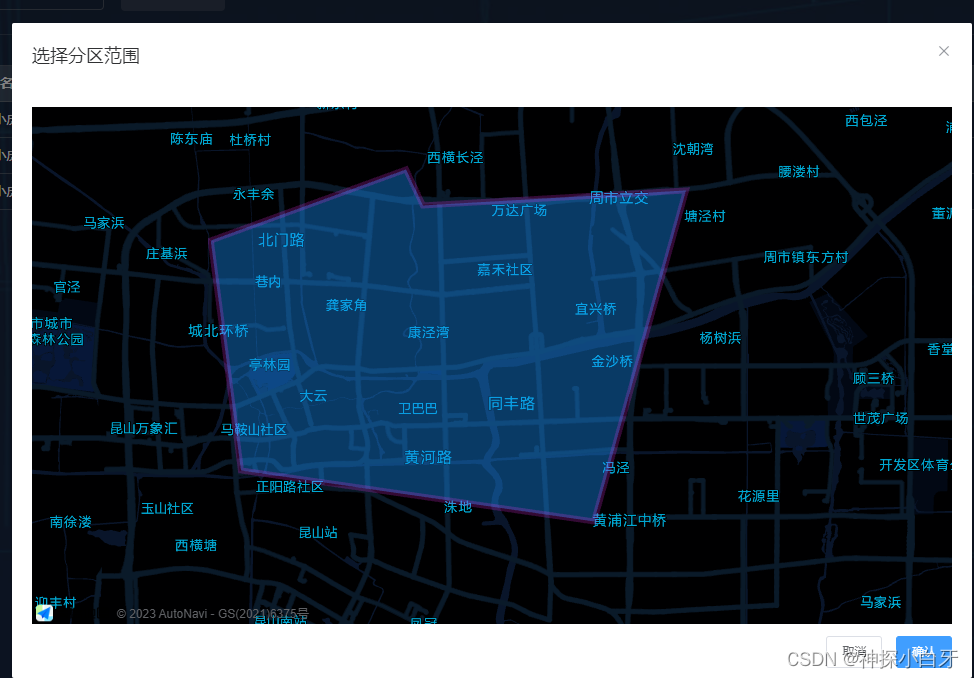
我用的是AMapLoader这个地图插件,会省去很多配置的步骤,非常方便
首先下载插件,然后在局部引入
import AMapLoader from "@amap/amap-jsapi-loader";
然后在methods里面使用
  // 打开地图弹窗
    mapShow() {
      this.innerVisible = true;
      this.$nextTick(() => {
        this.initMap();
      });
    },
    // 初始化高德地图
    initMap() {
      AMapLoader.load({
        key: "你的key", //key值是key值 和安全密钥不同
        version: "2.0", // 指定要加载的 JSAPI 的版本,缺省时默认为 1.4.15
        plugins: ["AMap.GeoJSON", "AMap.MarkerClusterer", "AMap.MouseTool"], // 需要使用的的插件列表,用到的再次注册,如比例尺'AMap.Scale'等
      }).then((AMap) => {

        // 初始化地图
        this.map = new AMap.Map("DMAMap", {
          viewMode: "3D", // 是否为3D地图模式
          zoom: 13, // 初始化地图级别
          center: [120.987239, 31.391653], //中心点坐标
          resizeEnable: true,
        });
        this.map.setMapStyle("amap://styles/darkblue");
        this.drawPolygon();
      });
    },
    // 绘制多边形
    drawPolygon() {
      let mouseTool = new AMap.MouseTool(this.map);
      mouseTool.polygon({
        strokeColor: "#FF33FF",
        strokeOpacity: 1,
        strokeWeight: 6,
        strokeOpacity: 0.2,
        fillColor: "#1791fc",
        fillOpacity: 0.4,
        // 线样式还支持 'dashed'
        strokeStyle: "solid",
        // strokeStyle是dashed时有效
        // strokeDasharray: [30,10],
      });
      mouseTool.on("draw", (event) => {
        // event.obj 为绘制出来的覆盖物对象
        let path = event.obj.getPath(); // 获取多边形的路径
        let str = "";
        let pathArr = [];
        for (let i = 0; i < path.length; i++) {
          pathArr.push([path[i].getLng(), path[i].getLat()]);
          str += path[i].getLng() + "," + path[i].getLat() + " ";
        }
        this.geometryArr = pathArr; // 这个就是绘制的点的坐标数组
        this.addForm.latlng = str;  // 转换为字符串
      });
    },


