本项目基于Emgu.CV(C#下OpenCv的封装)开发的,编译器最新版Vs2022,编译环境x86
直接看效果图
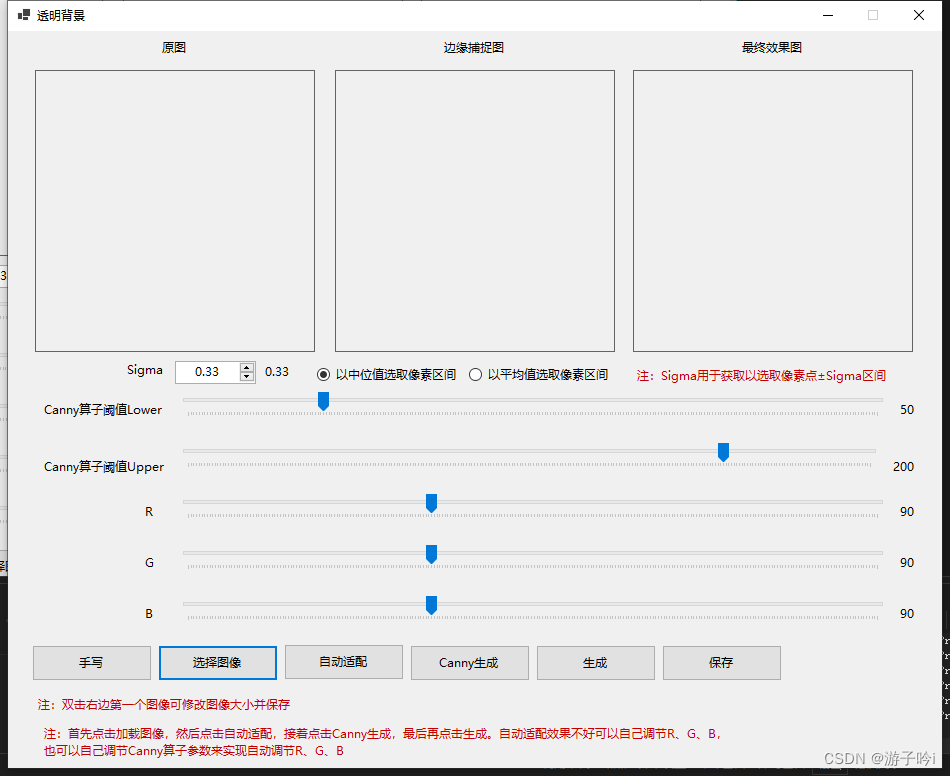
1.主页面
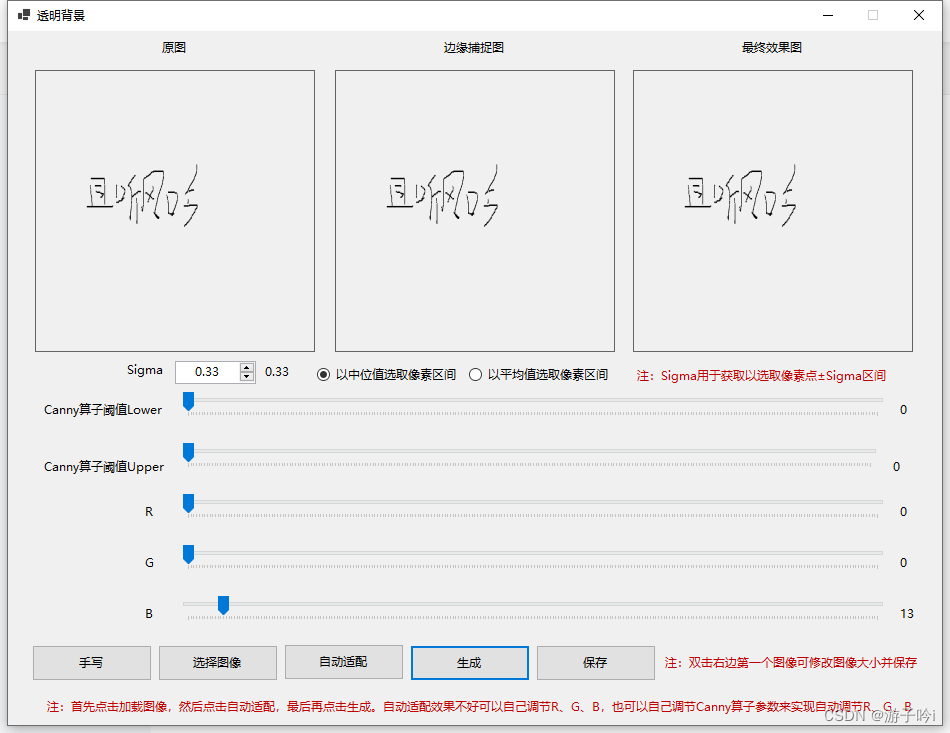
2.我们先看手写的方式:

点击确认就到主界面,如下 :
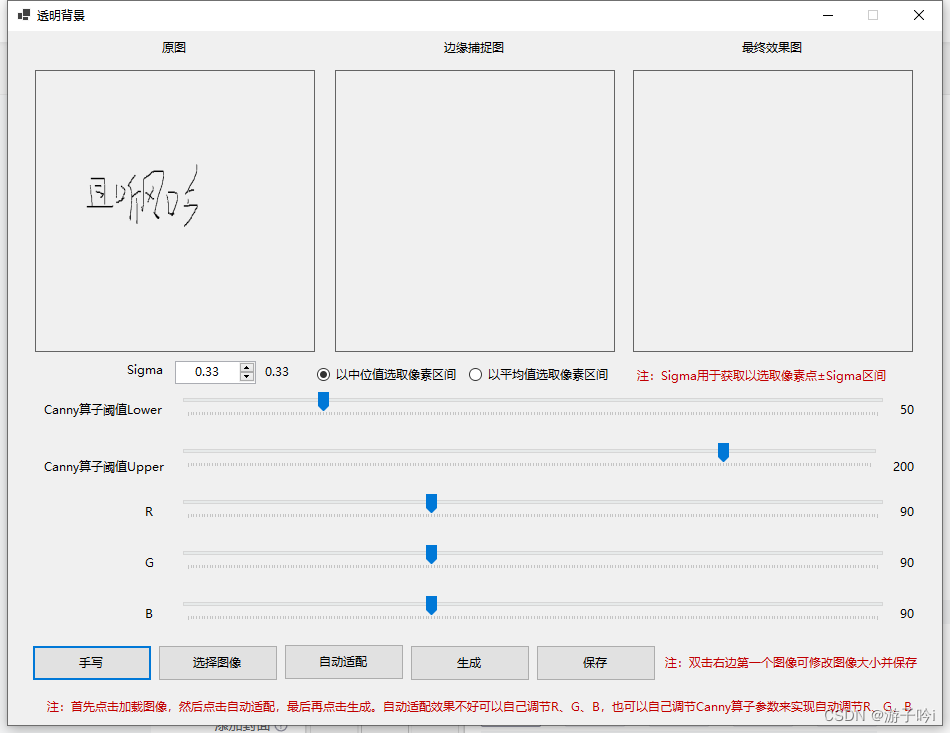
点击自动适配-,再点击生成:
放大看
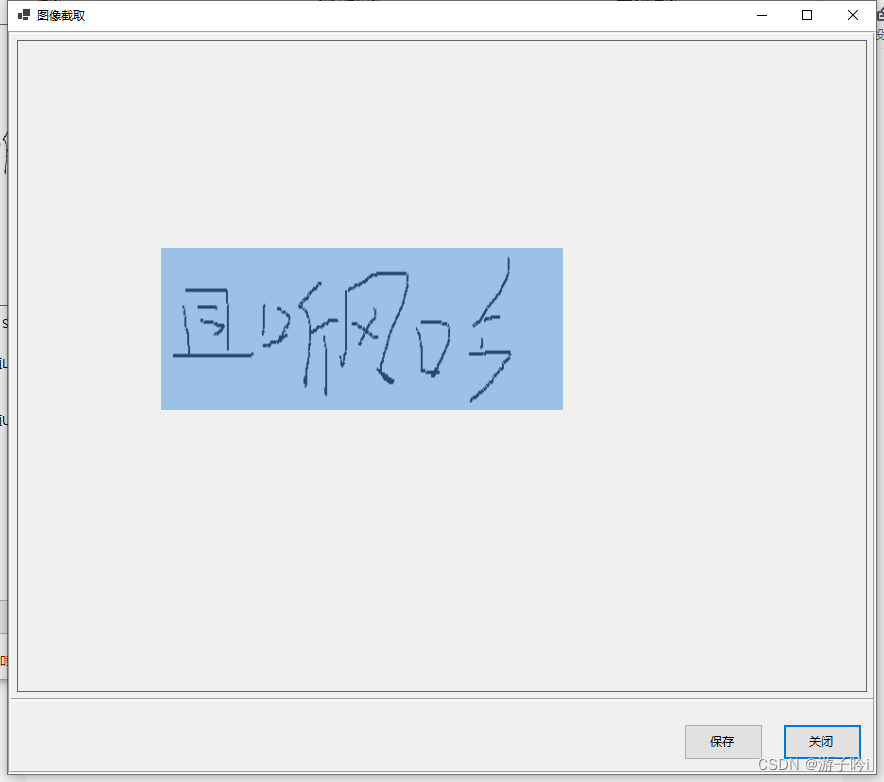
点击保存即可,生成透明电子签名图片。
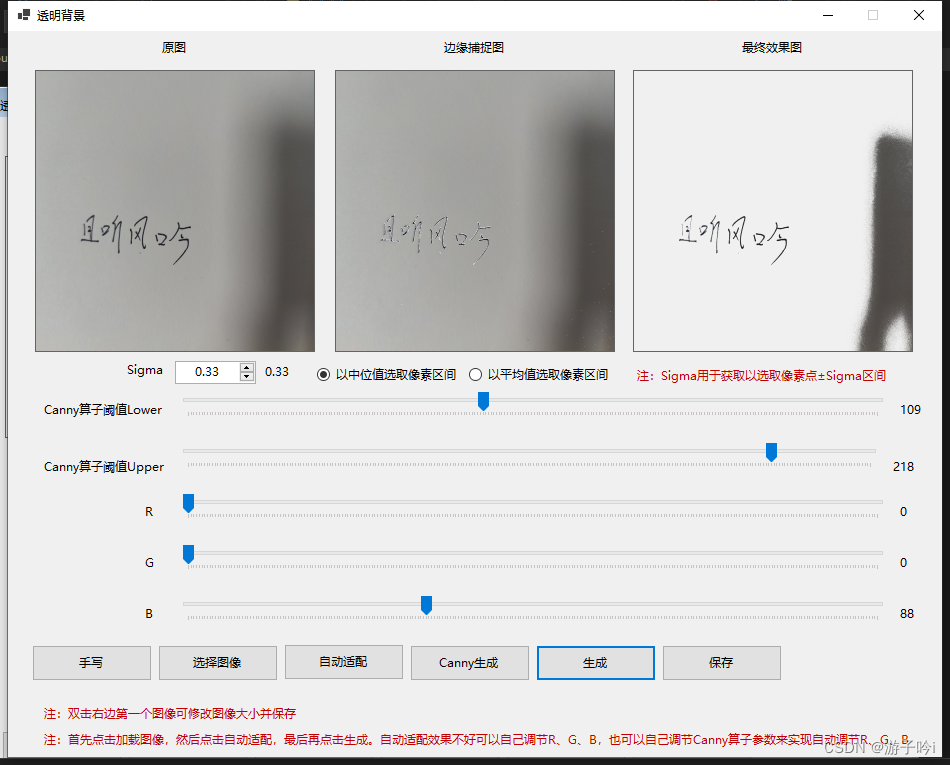
3.在单色背景下手写名字,导入图片生成
先点击 选择图像 按钮,然后选择图像,点击自动适配,点击Canny算法生成,最后点击生成,如下:
双击右边第一张放大:
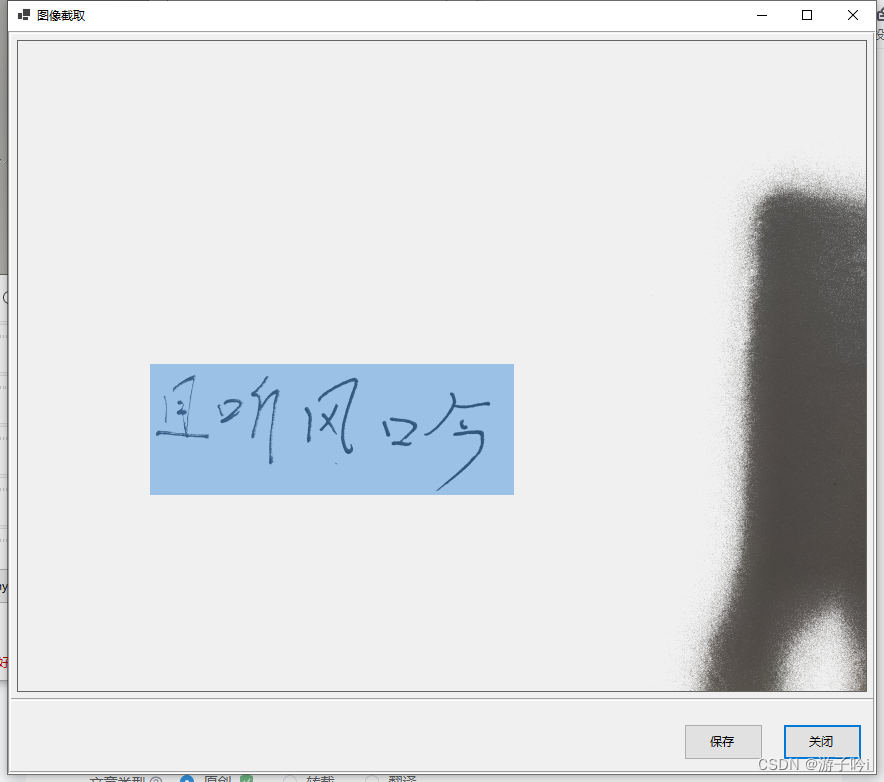
选择需要的区域点击保存即可。
4.算法介绍:
4.1自动适配
自动适配指根据灰度值像素选取Canny算子的上下阈值,主要目的是能快速自动适配Canny上下阈值,这里主要介绍以中位数或者平均值,然后以Sigma为临界值选取一个区间,如下:
        /// <summary>
        /// 自动适配
        /// </summary>
        /// <param name="sender"></param>
        /// <param name="e"></param>
        private void button4_Click(object sender, EventArgs e)
        {
            if (pictureBox1.Image == null)
            {
                MessageBox.Show("请选择图像");
                return;
            }
            imgShow?.Dispose();
            gray?.Dispose();

            imgShow = new Image<Bgra, byte>(new Bitmap(pictureBox1.Image));
            gray = imgShow.Convert<Gray, byte>();

            double median = radioButton1.Checked ? CalculateMedian(gray) : CalculateAvg(gray);

            double sigma = (float)numericUpDown1.Value;
            double lower = Math.Max(0, (1.0 - sigma) * median);
            double upper = Math.Min(255, (1.0 + sigma) * median);
            trackBar1.Value = (int)lower;
            label1.Text = trackBar1.Value.ToString();
            trackBar2.Value = (int)upper;
            label3.Text = trackBar2.Value.ToString();
        }
4.2Canny生成
Canny算子边缘检测具体不多介绍,这里目的是为了找到字体边缘,然后在图像上填充,方便我们能确定这个边缘是否能够准确找到,如果大都填充到字体上,说明边缘检测不错,找到这些边缘,然后计算它们的平均R、G、B:
        /// <summary>
        /// Canny生成
        /// </summary>
        /// <param name="sender"></param>
        /// <param name="e"></param>
        private void button6_Click(object sender, EventArgs e)
        {
            if (gray == null || imgShow == null)
            {
                MessageBox.Show("请先选择自动适配");
                return;
            }
            // Canny算子边缘检测
            using Image<Gray, byte> edges = gray.Canny(trackBar1.Value, trackBar2.Value);
            using VectorOfVectorOfPoint contours = new VectorOfVectorOfPoint();
            using Mat hier = new Mat();

            CvInvoke.FindContours(edges, contours, hier, RetrType.List, ChainApproxMethod.ChainApproxSimple);
            // 掩码
            using Image<Gray, byte> mask = new Image<Gray, byte>(gray.Size);
            if (contours.Size > 10000)
            {
                MessageBox.Show("边缘太多,会非常耗时,请重先调节参数");
                return;
            }
            // 在imgShow图像上填充边缘边框
            for (int i = 0; i < contours.Size; i++)
            {
                var contour = contours[i];
                CvInvoke.DrawContours(imgShow, contours, i, new MCvScalar(0, 0, 255), 2);
                CvInvoke.DrawContours(mask, contours, i, new MCvScalar(255), thickness: -1);
            }
            this.pictureBox3.Image?.Dispose();
            this.pictureBox3.Image = imgShow.Bitmap;

            using Image<Gray, byte> maskedImage = new Image<Gray, byte>(gray.Size);
            CvInvoke.BitwiseAnd(gray, gray, maskedImage, mask);
            MCvScalar average = CvInvoke.Mean(maskedImage, mask);
            double blue = average.V0;
            double green = average.V1;
            double red = average.V2;
            trackBar3.Value = (int)Math.Round(red, 0);
            trackBar4.Value = (int)Math.Round(green, 0);
            trackBar5.Value = (int)Math.Round(blue, 0);
            label9.Text = trackBar3.Value.ToString();
            label10.Text = trackBar4.Value.ToString();
            label12.Text = trackBar5.Value.ToString();
        }
4.3生成
在生成中,我们会根据R、G、B计算出掩码,然后将掩码中选取的颜色的alpha通道设置为0,即为透明。
        /// <summary>
        /// 生成
        /// </summary>
        /// <param name="sender"></param>
        /// <param name="e"></param>
        private void button2_Click(object sender, EventArgs e)
        {
            if (pictureBox1.Image == null)
            {
                MessageBox.Show("请选择图片");
                return;
            }
            img?.Dispose();
            img = new Image<Bgra, byte>(new Bitmap(pictureBox1.Image));

            // 掩码
            using Image<Gray, byte> mask2 = img.InRange(new Bgra(trackBar5.Value, trackBar4.Value, trackBar3.Value, 0), new Bgra(255, 255, 255, 255));
            // 将掩码中选取的颜色的alpha通道设置为0
            img.SetValue(new Bgra(0, 0, 0, 0), mask2);


            this.pictureBox2.Image?.Dispose();
            this.pictureBox2.Image = img.Bitmap;
        }
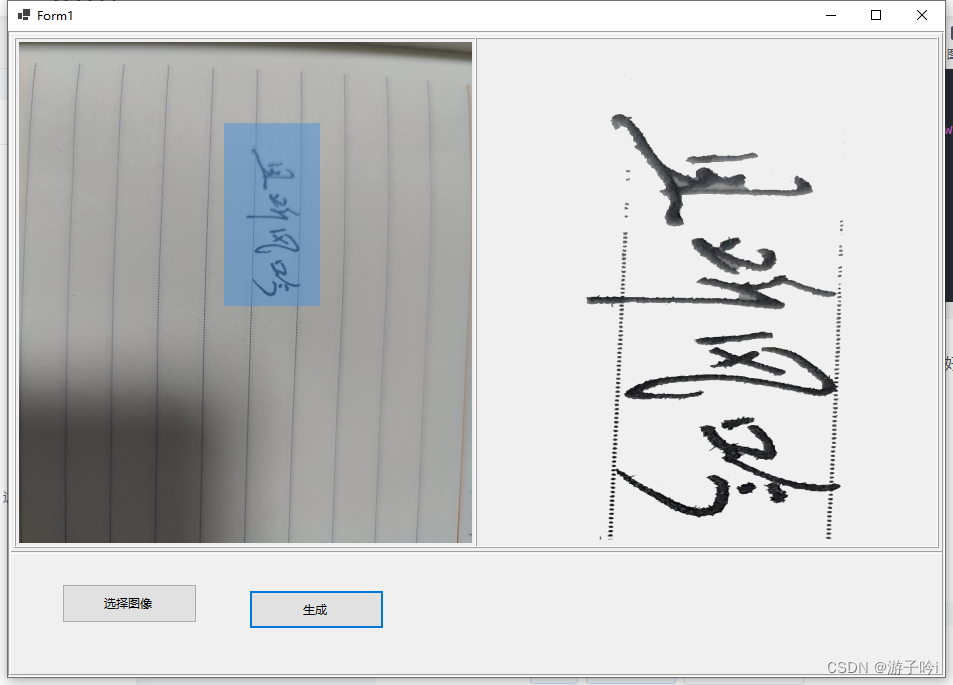
5.也可以直接调用GrabCut方法,多迭代几次就可以,不过效果并不是很好,且效率低
 private void button2_Click(object sender, EventArgs e)
        {
            if(this.pictureBox1.Image==null)
            {
                return;
            }
            float scaleX = (float)this.pictureBox1.Image.Width / pictureBox1.Width;
            float scaleY = (float)this.pictureBox1.Image.Height / pictureBox1.Height;

            Rectangle rect = new Rectangle(
                (int)(Rect.Left * scaleX),
                (int)(Rect.Top * scaleY),
                (int)(Rect.Width * scaleX),
                (int)(Rect.Height * scaleY));
            var rectangle = new OpenCvSharp.Rect(rect.X, rect.Y, rect.Width, rect.Height);

            rect.Intersect(new Rectangle(0, 0, this.pictureBox1.Image.Width, this.pictureBox1.Image.Height));

            using Mat nimage = new Bitmap(this.pictureBox1.Image).ToMat();
            using Mat image = new Mat(nimage, rectangle);
            using Mat convertedImage = new Mat();
            Cv2.CvtColor(image, convertedImage, ColorConversionCodes.BGRA2BGR); // 将图像转换为CV_8UC3类型


            using Mat mask = new Mat(convertedImage.Size(), MatType.CV_8UC1, Scalar.Black);
            using Mat bgdModel = new Mat();
            using Mat fgdModel = new Mat();

            var r = new OpenCvSharp.Rect(0, 0, rectangle.Width-10, rectangle.Height-10);
            Cv2.GrabCut(convertedImage, mask, r, bgdModel, fgdModel, 20, GrabCutModes.InitWithRect);
            Cv2.Threshold(mask, mask, 2, 255, ThresholdTypes.Binary);
            using Mat foreground = new Mat();
            Cv2.BitwiseAnd(convertedImage, convertedImage, foreground, mask);


            // 创建一个具有 alpha 通道的新图像
            using Mat result = new Mat();
            Cv2.CvtColor(image, result, ColorConversionCodes.BGRA2BGR);
            Cv2.Rectangle(result, rectangle, new Scalar(0, 0, 0), 1); // 绘制矩形边界
            Cv2.Multiply(result, new Scalar(1, 1, 1, 0), result); // 将背景部分置为透明

            // 将前景部分复制到结果图像中
            image.CopyTo(result, mask);

            pictureBox2.Image?.Dispose();
            pictureBox2.Image = result.ToBitmap();
            image.Dispose();
        }
注:如果需要其它源码,请留言邮箱,我看到私发。
