Spring Boot 统一功能处理
- 一 . 统一功能的处理
- 1.1 初级阶段 : 不断重复
- 1.2 中级阶段 : 集成方法
- 1.3 高级阶段 : Spring AOP
- 1.4 超高级阶段 : Spring 拦截器
- 准备工作
- 实现拦截器
- 自定义拦截器
- 将自定义拦截器加入到系统配置
- 拦截器实现原理
- 扩展 : 统一访问前缀添加
- 二 . 统一异常的处理
- 2.1 统一异常的处理的实现
- 2.2 细化异常
- 三 . 统一数据返回格式
- 3.1 为什么需要统一数据返回格式?
- 3.2 统一数据返回格式的实现
- 3.3 @ControllerAdvice 源码分析
这个专栏给大家介绍一下 Java 家族的核心产品 - SSM 框架
JavaEE 进阶专栏Java 语言能走到现在 , 仍然屹立不衰的原因 , 有一部分就是因为 SSM 框架的存在
接下来 , 博主会带大家了解一下 Spring、Spring Boot、Spring MVC、MyBatis 相关知识点
并且带领大家进行环境的配置 , 让大家真正用好框架、学懂框架
来上一篇文章复习一下吧
点击即可跳转到前置文章
CSDN 平台观感有限 , 可以私聊作者获取源笔记链接
上一篇文章是 Spring AOP 理论阶段 , 这篇文章就进入了 Spring AOP 实战
我们会讲解这三种功能 :
- 统⼀用户登录权限验证
- 统⼀数据格式返回
- 统⼀异常处理
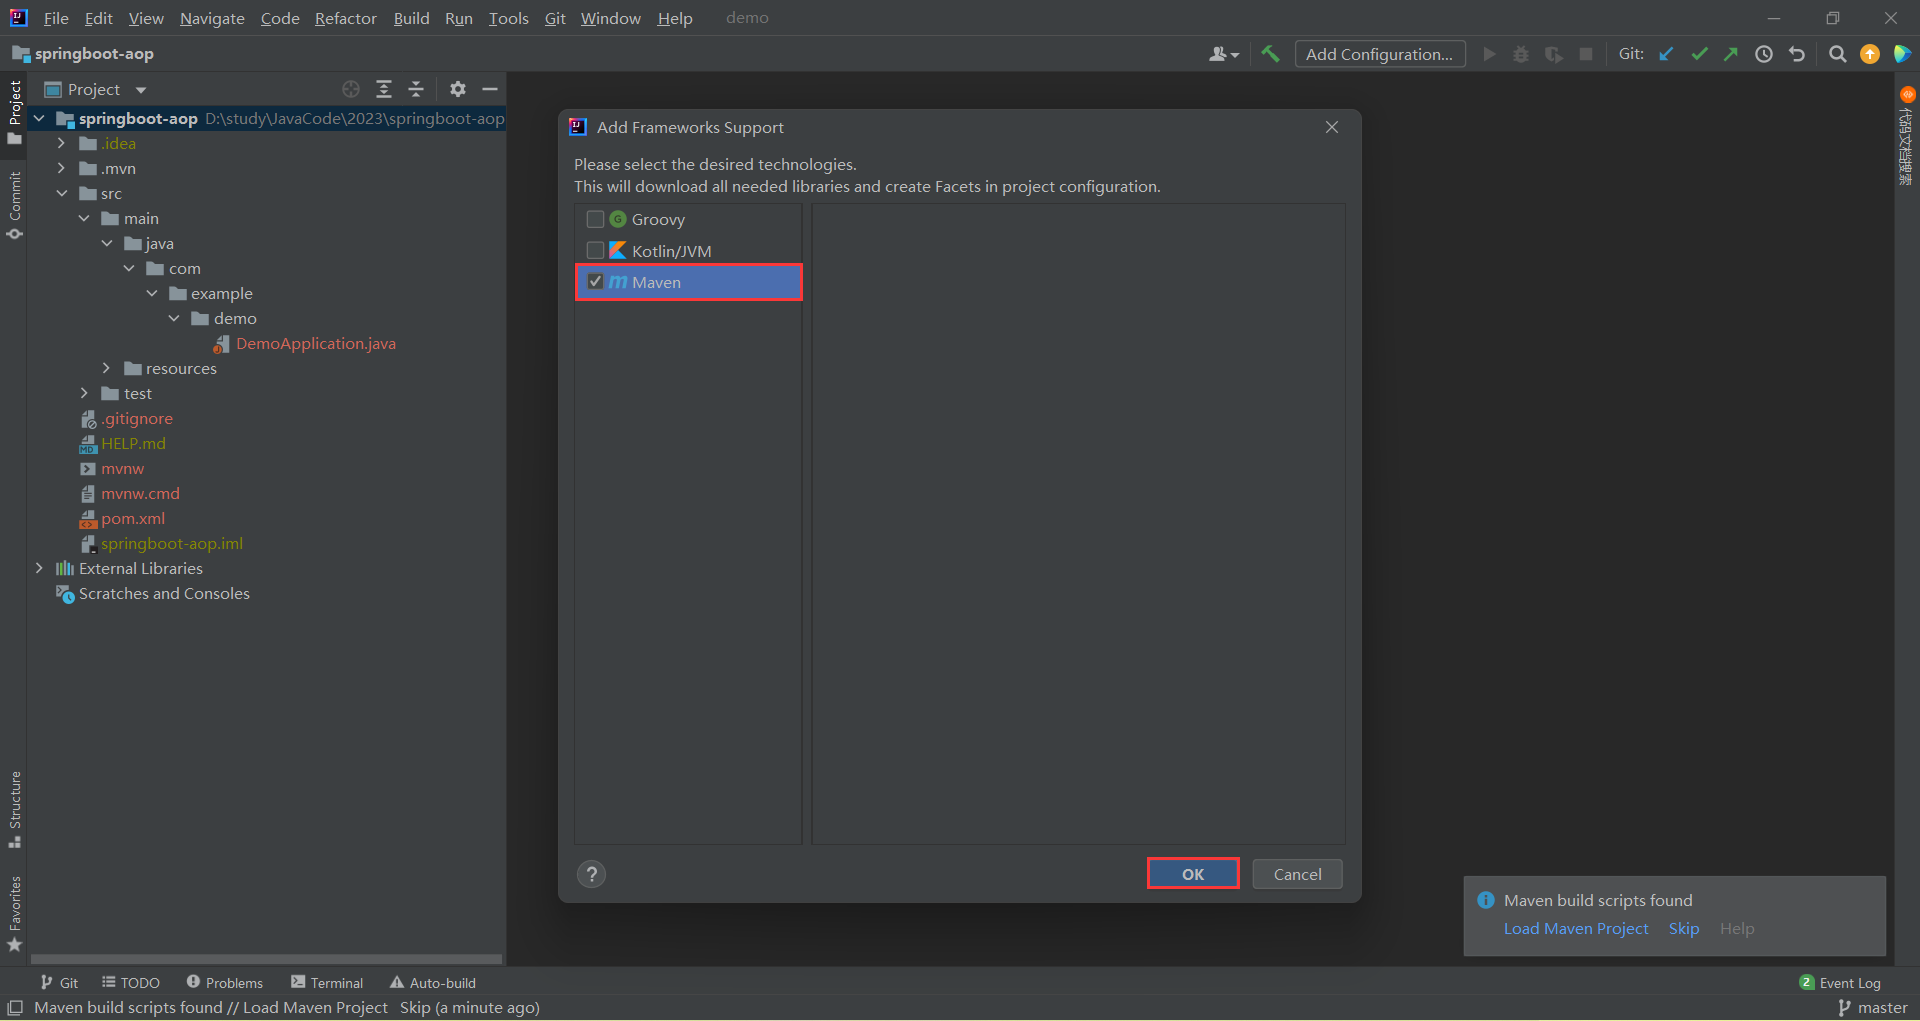
我们新创建一个项目来完成这三项功能
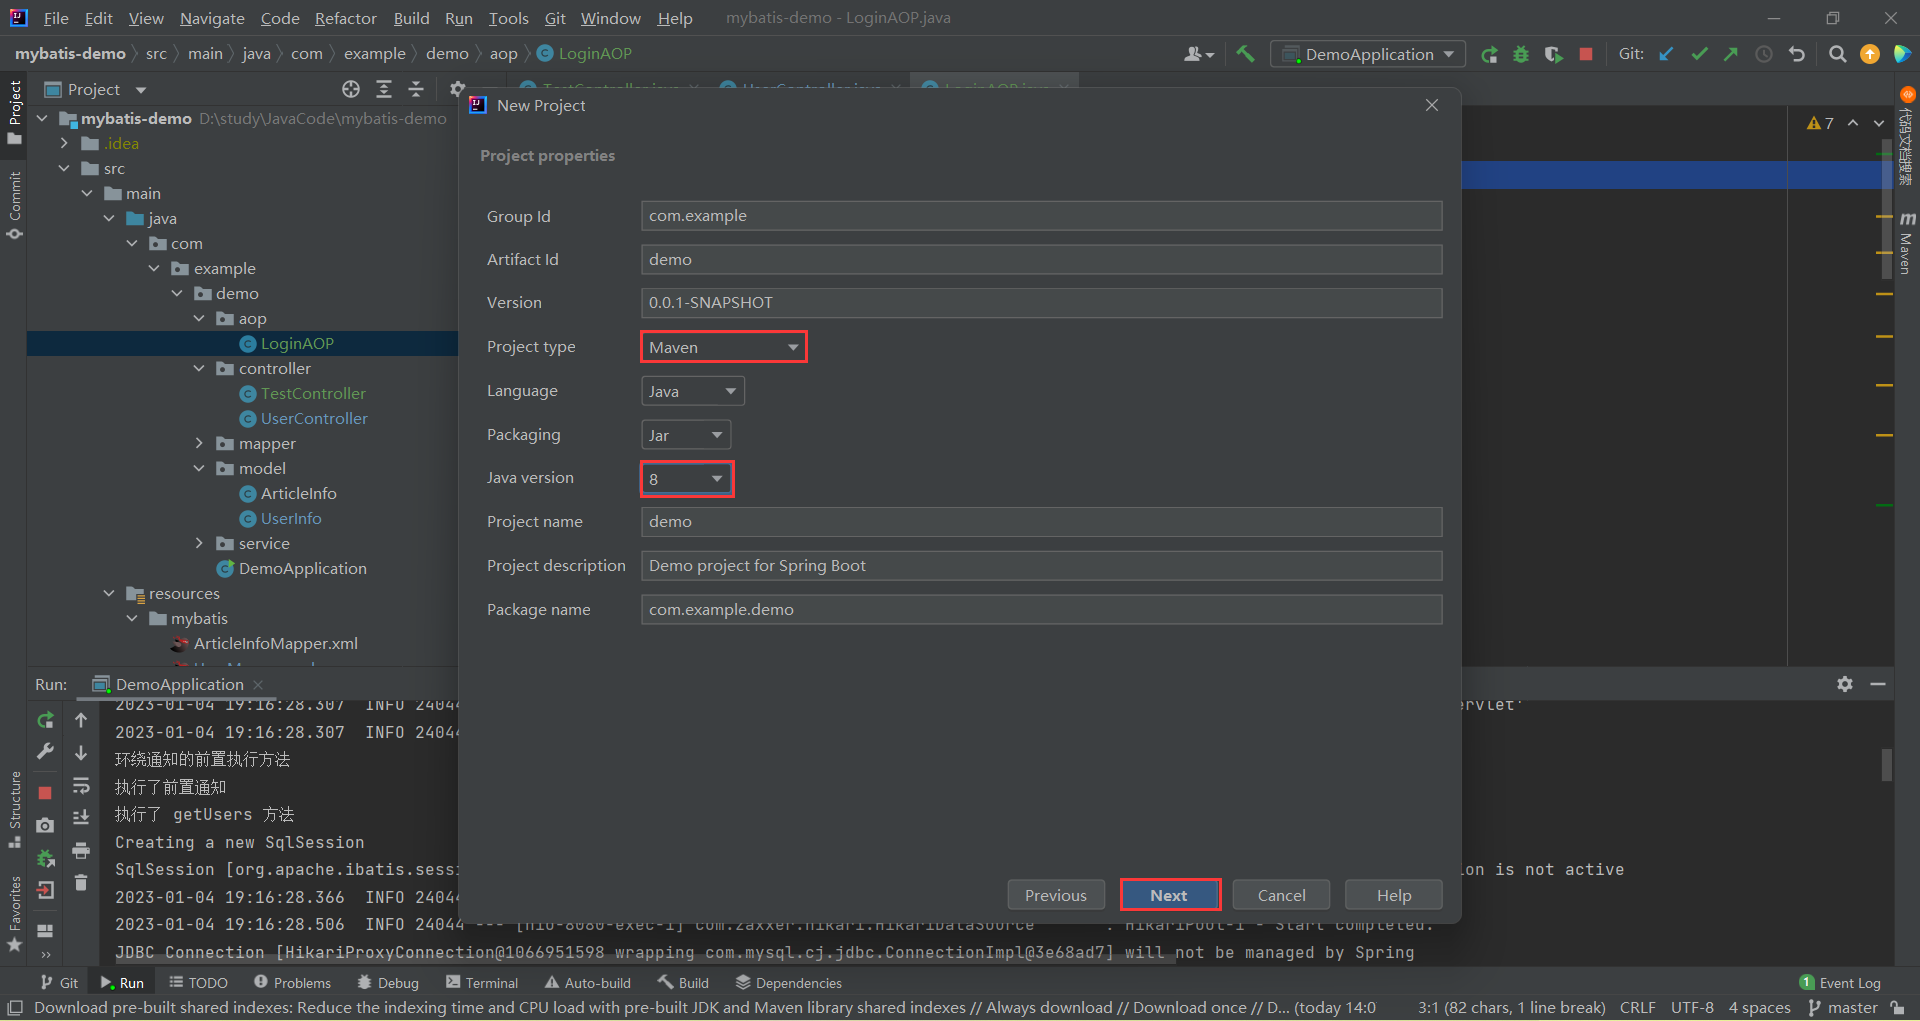
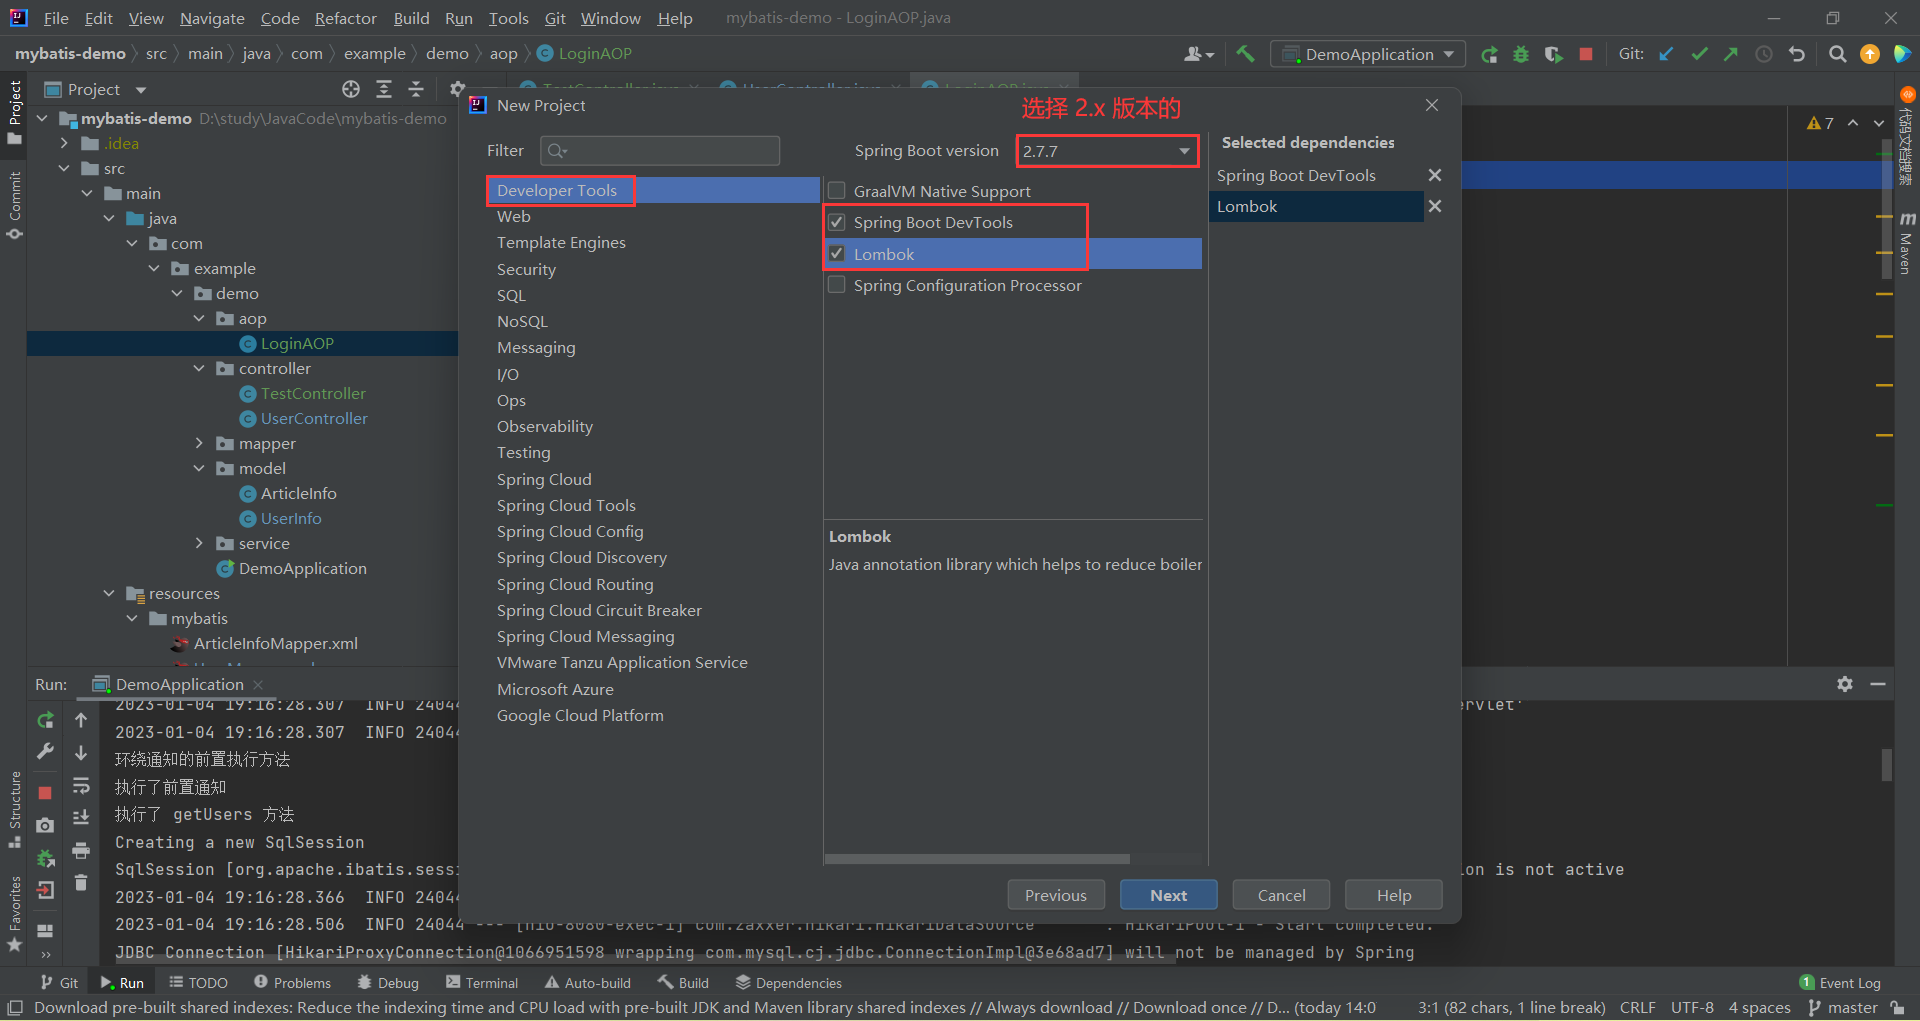
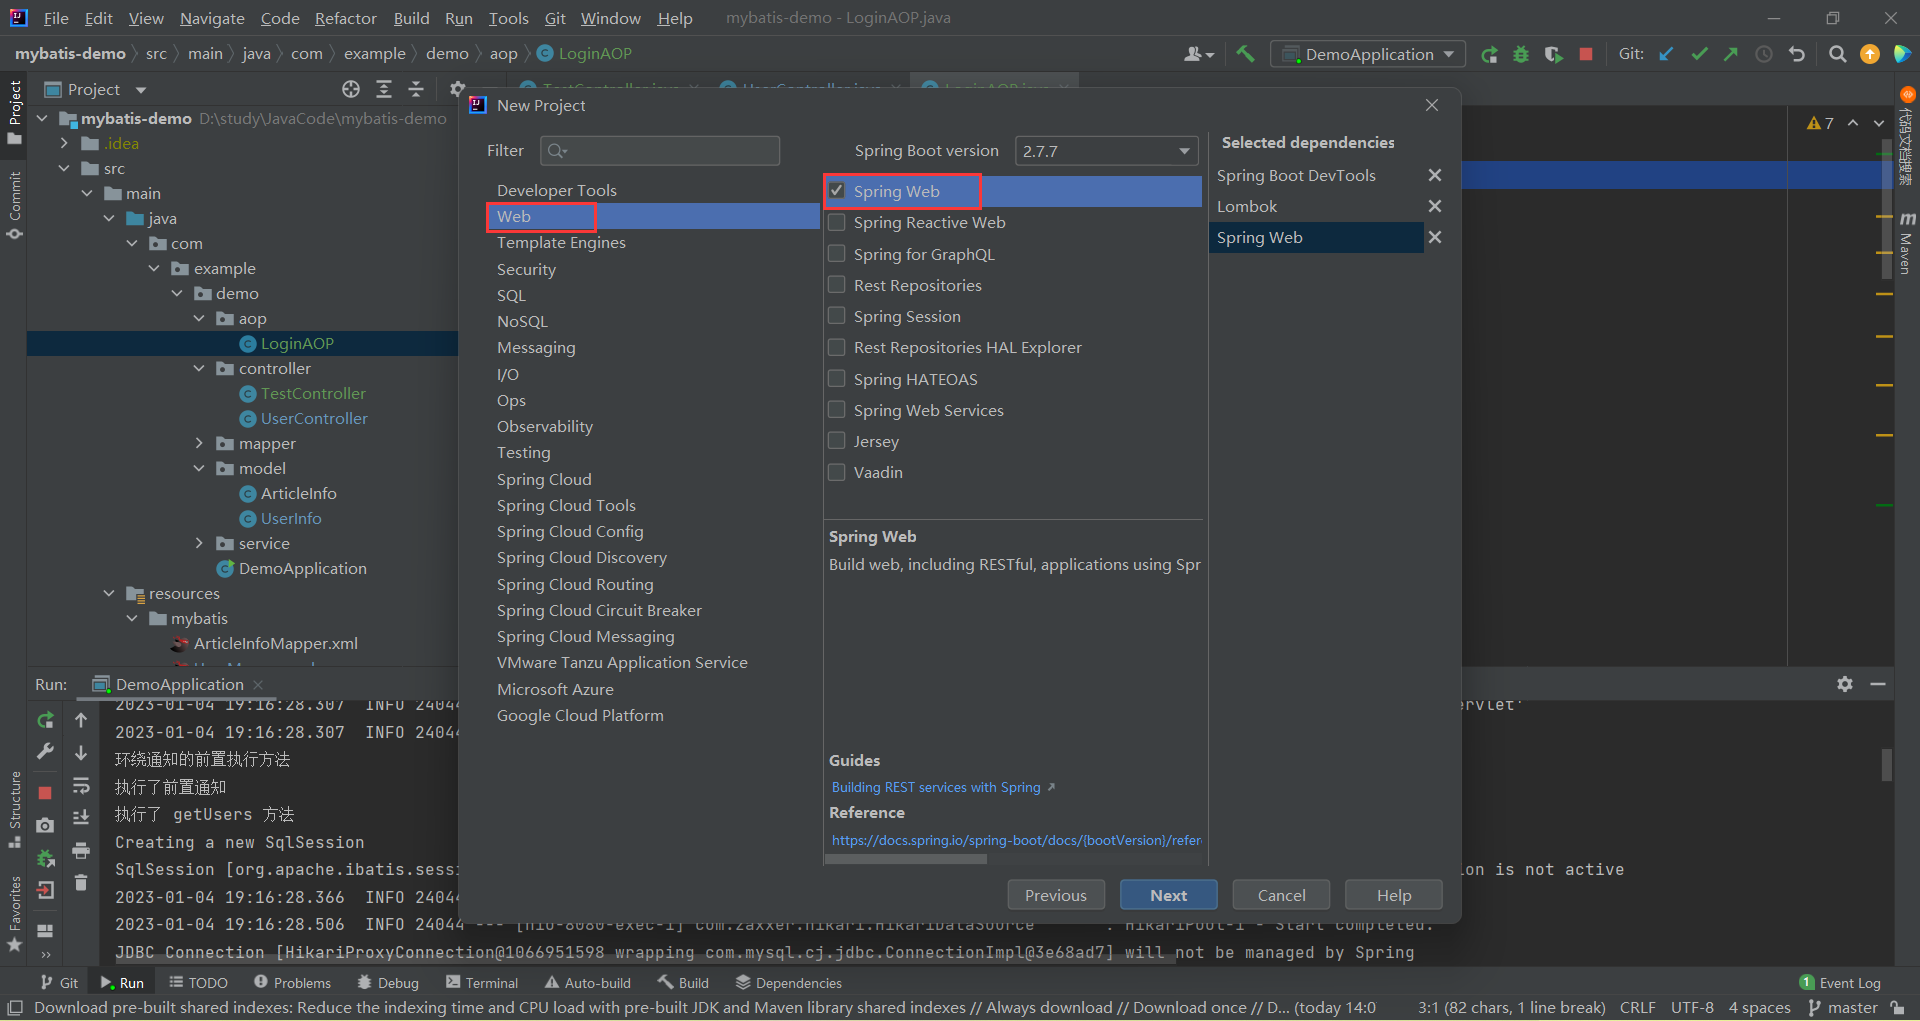
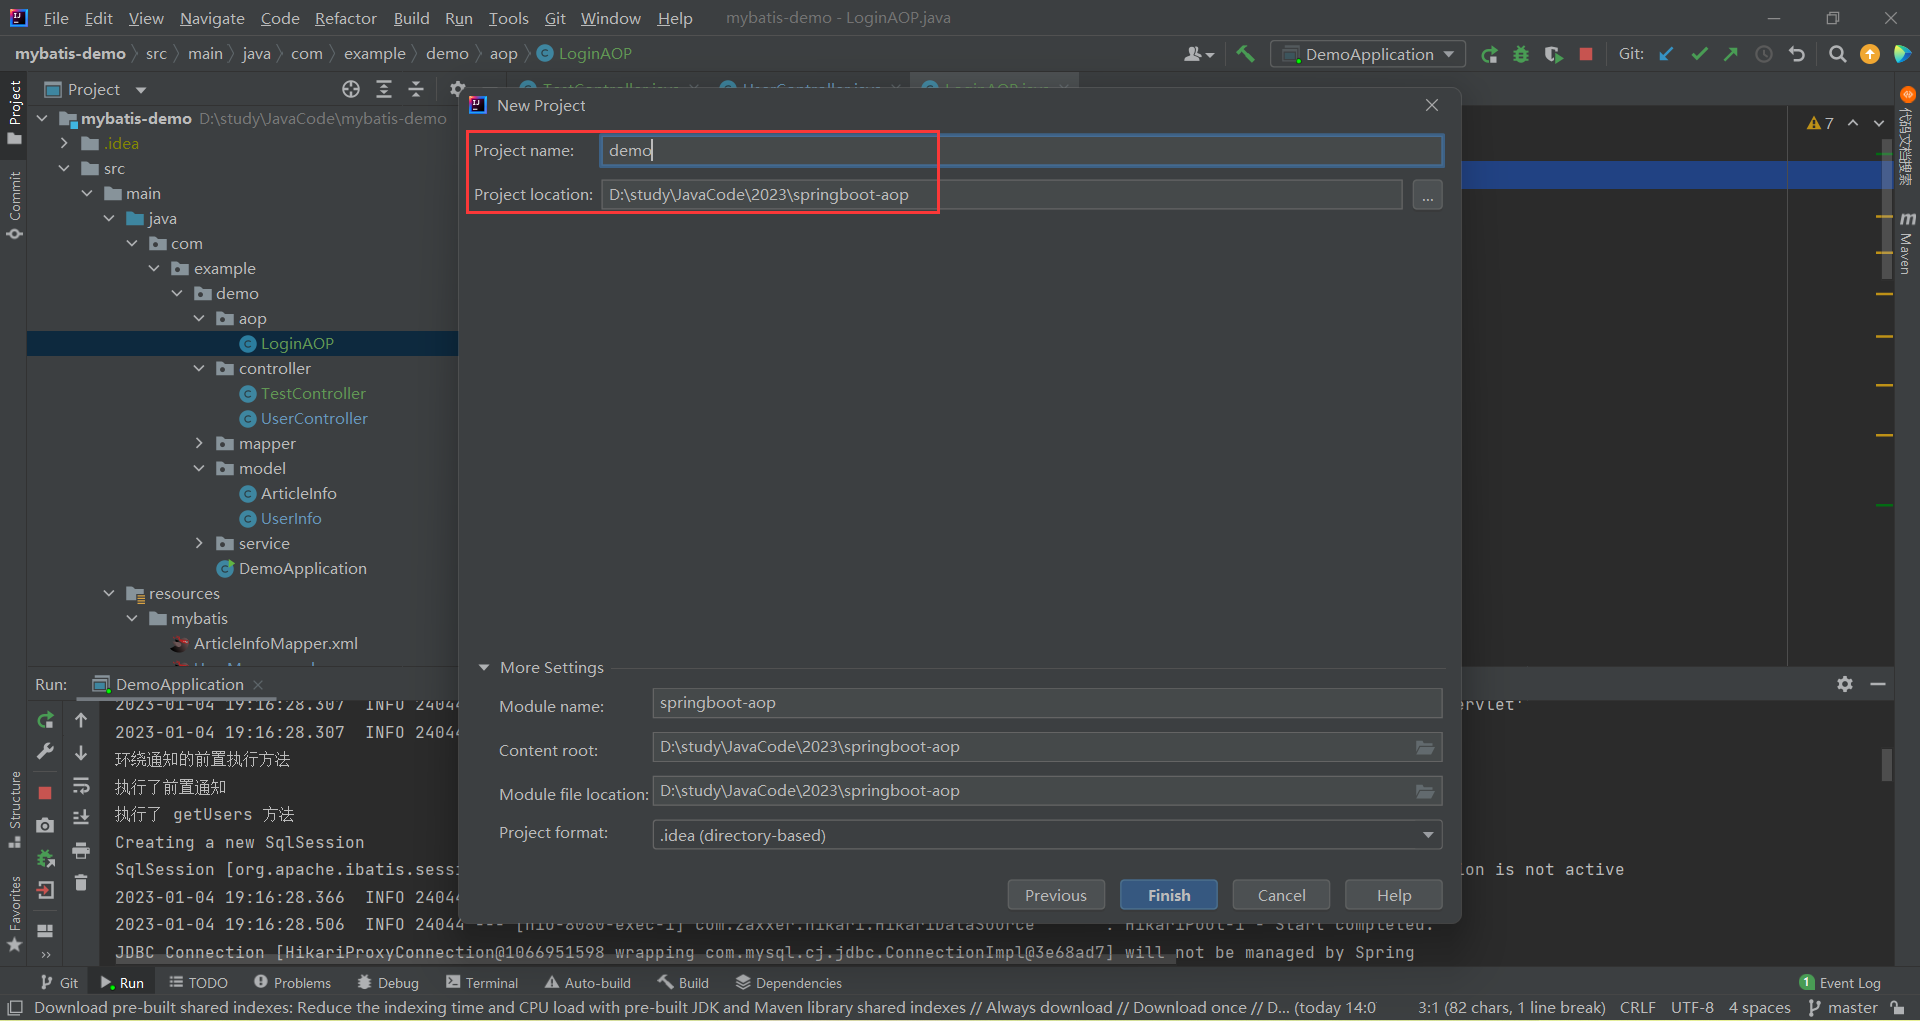



一 . 统一功能的处理
1.1 初级阶段 : 不断重复
我们先来回顾⼀下最初用户登录验证的实现方法 :
@RestController
@RequestMapping("/user")
public class UserController {
	/**
	 * 某⽅法 1
	 */
	@RequestMapping("/m1")
	public Object method(HttpServletRequest request) {
		// 有 session 就获取,没有不会创建
		HttpSession session = request.getSession(false);
		if (session != null && session.getAttribute("userinfo") != null) {
			// 说明已经登录,业务处理
			return true;
		} else {
			// 未登录
			return false;
		}
	}

	/**
	 * 某⽅法 2
	 */
	@RequestMapping("/m2")
	public Object method2(HttpServletRequest request) {
		// 有 session 就获取,没有不会创建
		HttpSession session = request.getSession(false);
		if (session != null && session.getAttribute("userinfo") != null) {
			// 说明已经登录,业务处理
			return true;
		} else {
			// 未登录
			return false;
		}
	}
	// 其他⽅法...
}

1.2 中级阶段 : 集成方法
我发现我们每一个需要登录授权的地方都需要写重复的代码 , 那我们索性就直接封装成统一的方法
但是在业务方法里面还是要调用公共方法的
一旦公共方法增加了参数 , 那我们调用公共方法的位置还是需要进行更改 , 依然很麻烦
1.3 高级阶段 : Spring AOP
import org.aspectj.lang.ProceedingJoinPoint;
import org.aspectj.lang.annotation.*;
import org.springframework.stereotype.Component;

@Aspect
@Component
public class UserAspect {
    // 定义切点⽅法 controller 包下、⼦孙包下所有类的所有⽅法
    @Pointcut("execution(* com.example.demo.controller..*.*(..))")
    public void pointcut() {
    }

    // 前置⽅法
    @Before("pointcut()")
    public void doBefore() {
    }

    // 环绕⽅法
    @Around("pointcut()")
    public Object doAround(ProceedingJoinPoint joinPoint) {
        Object obj = null;
        System.out.println("Around ⽅法开始执⾏");
        try {
            // 执⾏拦截⽅法
            obj = joinPoint.proceed();
        } catch (Throwable throwable) {
            throwable.printStackTrace();
        }
        System.out.println("Around ⽅法结束执⾏");
        return obj;
    }
}
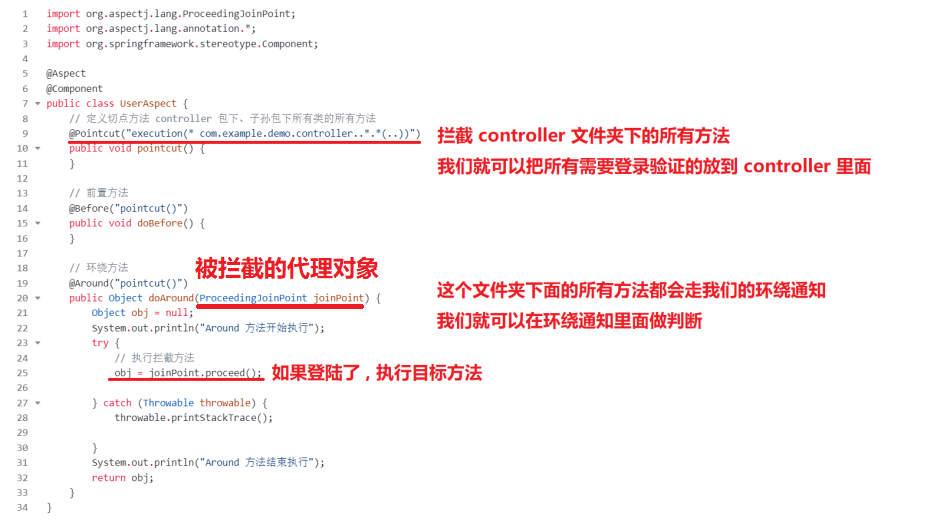
虽然环绕方法很香 , 但是我们也发现了两个问题 :
- 我们拿不到 HttpSession 对象了
- 拦截规则写起来还是比较复杂的 , 我们就是有一种需求 : controller 文件夹下 , 有的方法就是需要进行拦截的 , 而有的方法是不需要进行拦截的 , 那我们去写拦截表达式就会非常复杂

1.4 超高级阶段 : Spring 拦截器
对于上面的两个问题 , Spring 官方也考虑到了这个问题 , 他们就推出了具体的实现拦截器 : HandlerInterceptor , 他是在 Spring AOP 上进行了封装 , 让拦截变得更加简单 , 功能更加丰富 .
拦截器的实现分为以下两个步骤 :
- 创建自定义拦截器 , 实现 HandlerInterceptor 接口 , 重写 preHandle ( 执行具体方法之前的预处理 ) 方法 , 返回 boolean
- 将自定义拦截器加入 WebMvcConfigurer 的 addInterceptors 方法中
接下来 , 我们就尝试一下 Spring 拦截器
准备工作
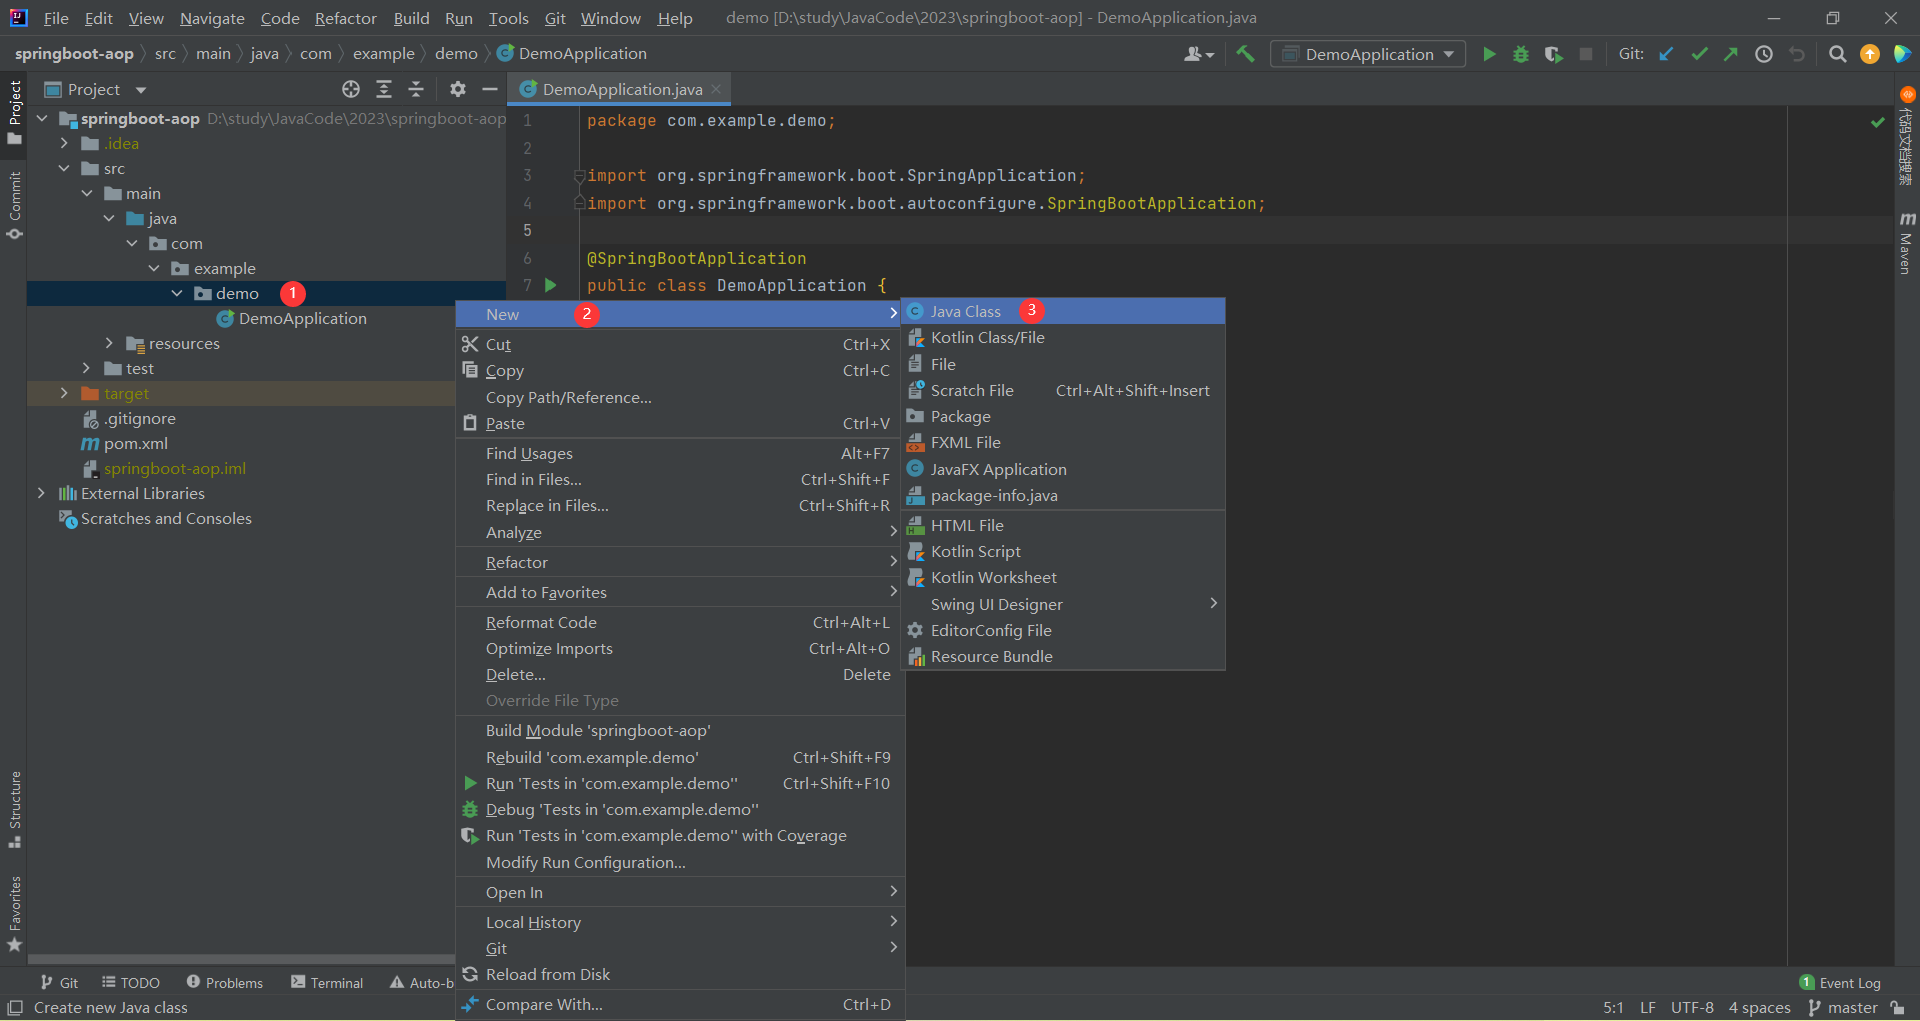
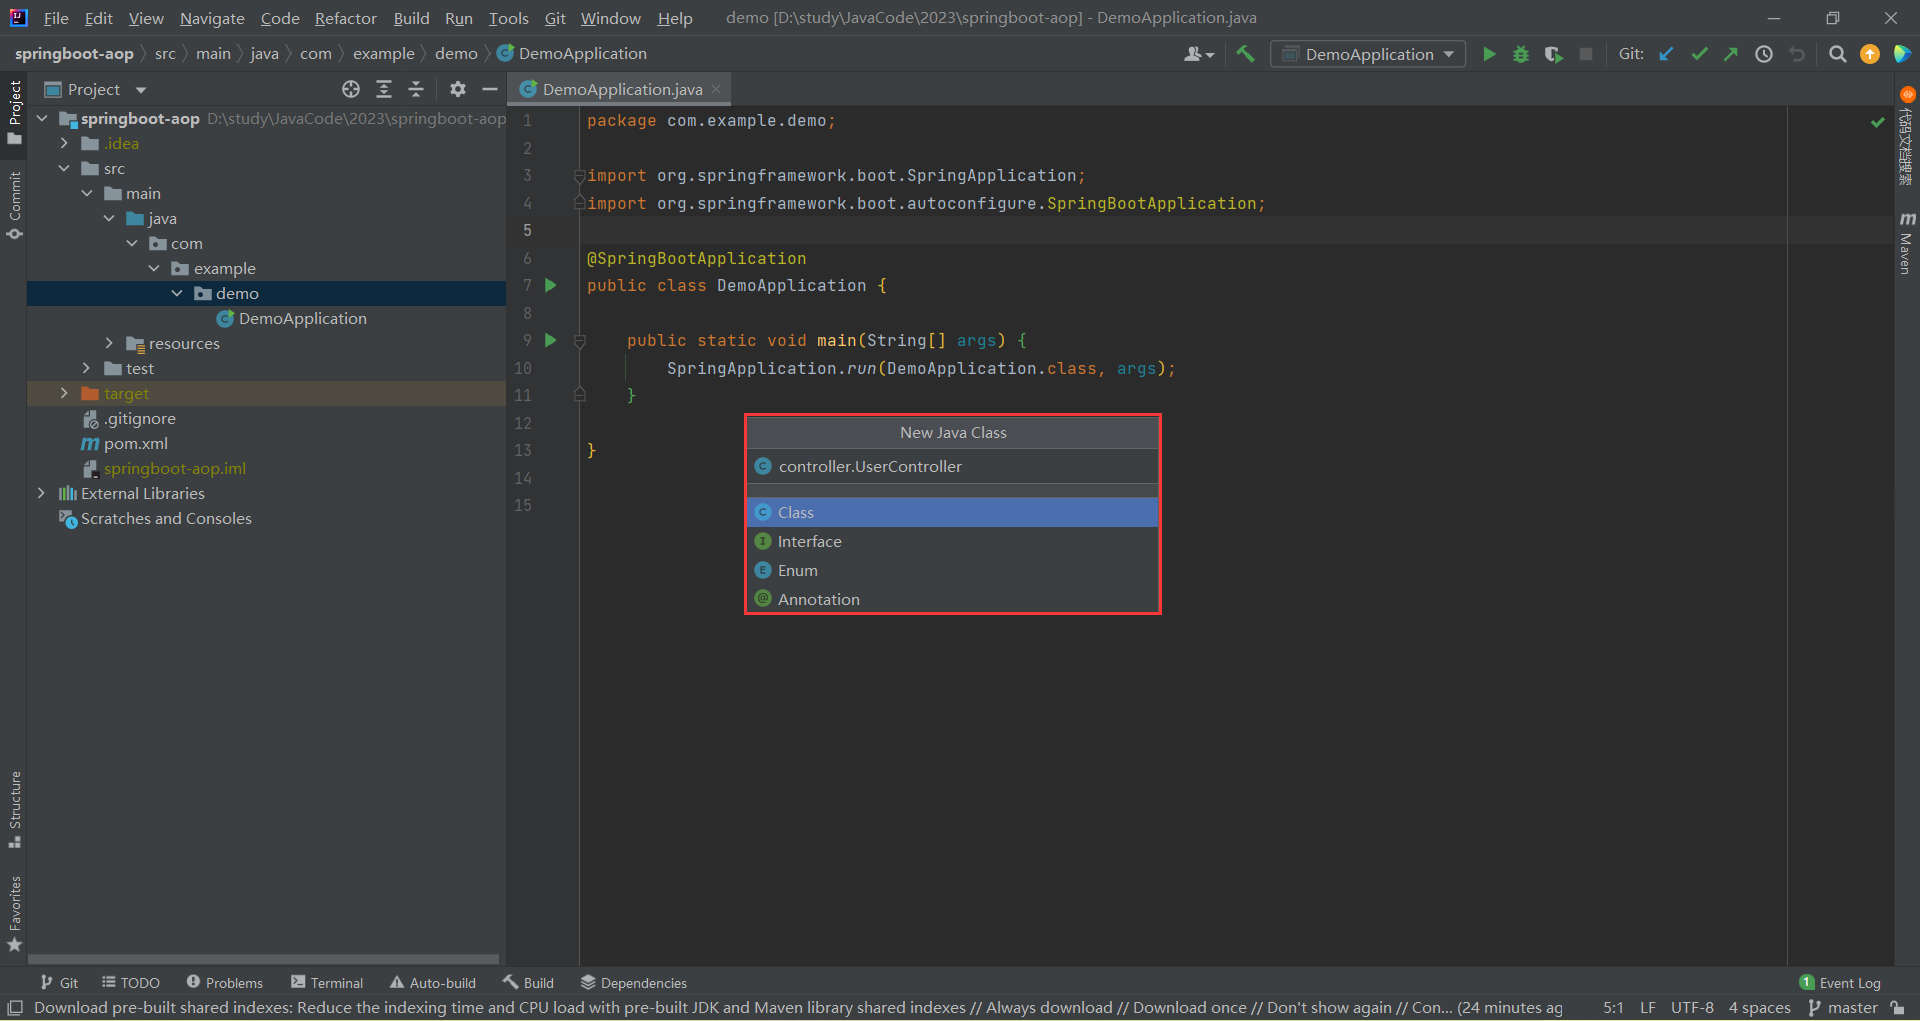
在 demo 底下新建一个包 controller , 里面写一个类 : UserController
编写业务逻辑
package com.example.demo.controller;

import org.springframework.web.bind.annotation.RequestMapping;
import org.springframework.web.bind.annotation.RestController;

import javax.servlet.http.HttpServletRequest;

@RestController
@RequestMapping("/user")
public class UserController {
    /**
     * 登录需要传入用户名密码
     * 验证用户名密码是否正确需要传入 request 对象
     * @param request
     * @param username
     * @param password
     * @return
     */
    @RequestMapping("login")
    public boolean login(HttpServletRequest request,
                         String username, String password) {
        // 1. 非空判断
        if(username != null && username != "" &&
           password != null && password != "") {
            // 2. 验证用户名和密码是否正确
        }

        return false;
    }
}
但是非空判断这里 , 不太雅观 , Spring 就给我们提供了一种方式

千万千万不要选错 , 咱们这个是 Spring Boot 项目 , 当然要去找 Spring 提供的方法
使用他的 hasLength() 方法就可以判定是不是空以及是不是空字符串
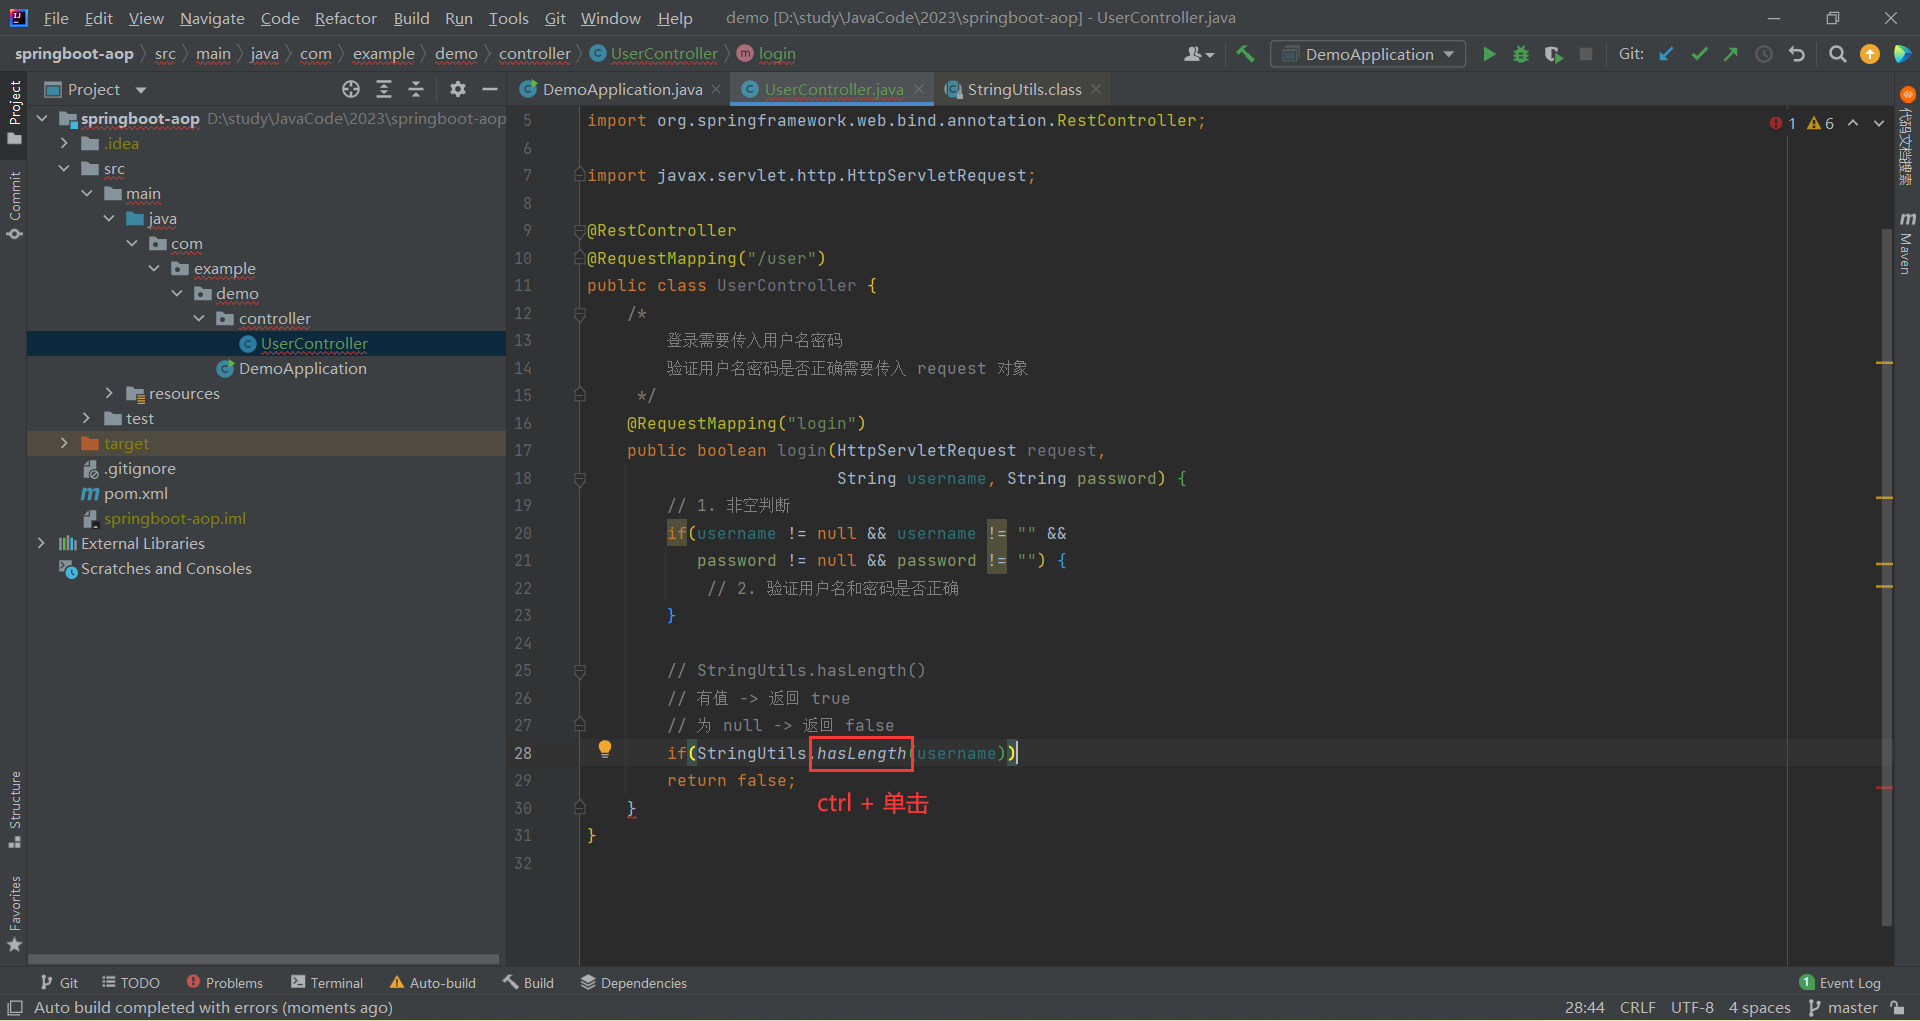
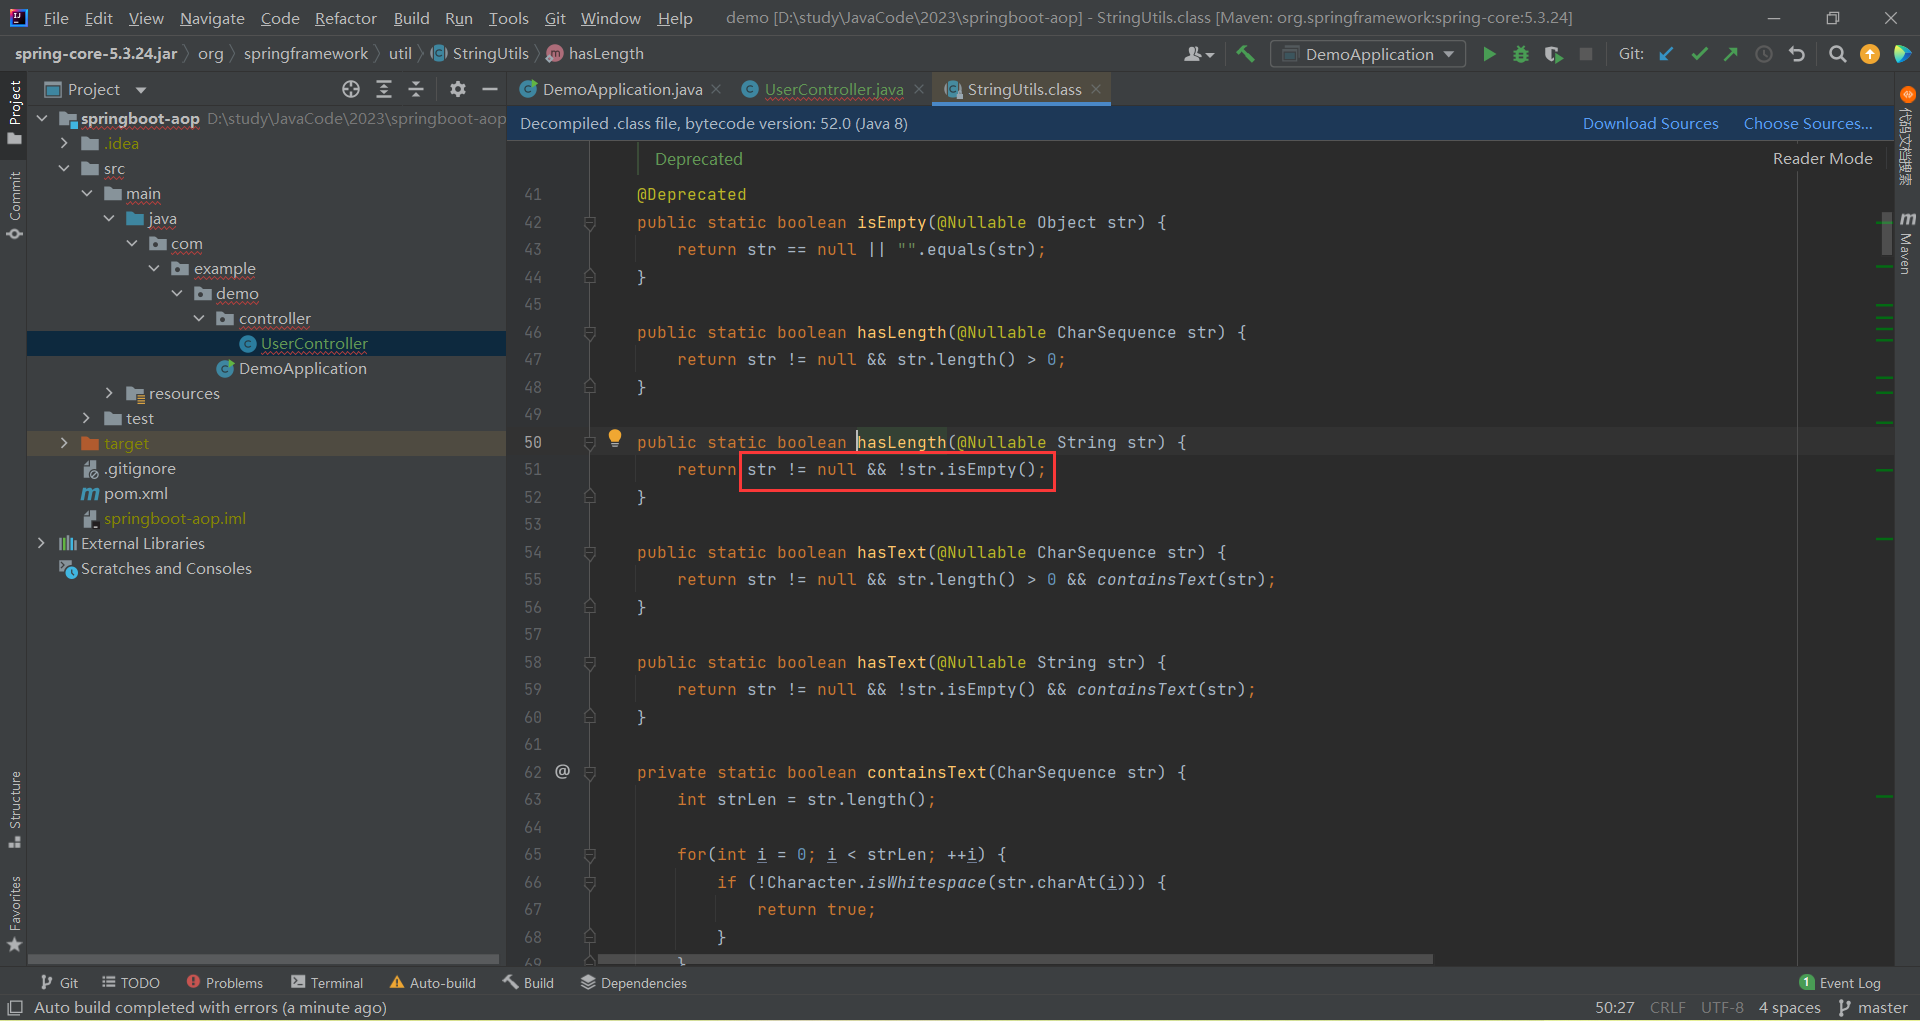
然后继续完善我们的登录功能
package com.example.demo.controller;

import org.springframework.util.StringUtils;
import org.springframework.web.bind.annotation.RequestMapping;
import org.springframework.web.bind.annotation.RestController;

import javax.servlet.http.HttpServletRequest;
import javax.servlet.http.HttpSession;

@RestController
@RequestMapping("/user")
public class UserController {
    /**
     * 登录需要传入用户名密码
     * 验证用户名密码是否正确需要传入 request 对象
     * @param request
     * @param username
     * @param password
     * @return
     */
    @RequestMapping("login")
    public boolean login(HttpServletRequest request,
                         String username, String password) {
        // 1. 非空判断
        // StringUtils.hasLength()
        // 有值 -> 返回 true
        // 为 null -> 返回 false
        if(StringUtils.hasLength(username) && StringUtils.hasLength(password)) {
            // 2. 验证用户名和密码是否正确(伪代码)
            if("admin".equals(username) && "admin".equals(password)) {
                // 登陆成功
                // 把登录信息放进 HttpSession 里面
                HttpSession session = request.getSession();
                session.setAttribute("userinfo","admin");
                return true;
            } else {
                // 登陆失败
                // 用户名或密码错误
                return false;
            }
        }
        return false;
    }

}
接下来 , 我们再去实现获取个人信息方法
package com.example.demo.controller;

import lombok.extern.slf4j.Slf4j;
import org.springframework.util.StringUtils;
import org.springframework.web.bind.annotation.RequestMapping;
import org.springframework.web.bind.annotation.RestController;

import javax.servlet.http.HttpServletRequest;
import javax.servlet.http.HttpSession;

@RestController
@RequestMapping("/user")
@Slf4j
public class UserController {
    /**
     * 登录需要传入用户名密码
     * 验证用户名密码是否正确需要传入 request 对象
     * @param request
     * @param username
     * @param password
     * @return
     */
    @RequestMapping("login")
    public boolean login(HttpServletRequest request,
                         String username, String password) {
        // 1. 非空判断
        // StringUtils.hasLength()
        // 有值 -> 返回 true
        // 为 null -> 返回 false
        if(StringUtils.hasLength(username) && StringUtils.hasLength(password)) {
            // 2. 验证用户名和密码是否正确(伪代码)
            if("admin".equals(username) && "admin".equals(password)) {
                // 登陆成功
                // 把登录信息放进 HttpSession 里面
                HttpSession session = request.getSession();
                session.setAttribute("userinfo","admin");
                return true;
            } else {
                // 登陆失败
                // 用户名或密码错误
                return false;
            }
        }
        return false;
    }

    /**
     * 获取个人信息(伪代码)
     * @return
     */
    @RequestMapping("/getinfo")
    public String getInfo() {
        // 使用日志,需要添加 @Slf4j 注解
        log.debug("执行了 getinfo 方法");
        return "执行了 getinfo 方法";
    }
}
接下来 , 我们再去实现注册功能
package com.example.demo.controller;

import lombok.extern.slf4j.Slf4j;
import org.springframework.util.StringUtils;
import org.springframework.web.bind.annotation.RequestMapping;
import org.springframework.web.bind.annotation.RestController;

import javax.servlet.http.HttpServletRequest;
import javax.servlet.http.HttpSession;

@RestController
@RequestMapping("/user")
@Slf4j
public class UserController {
    /**
     * 登录需要传入用户名密码
     * 验证用户名密码是否正确需要传入 request 对象
     * @param request
     * @param username
     * @param password
     * @return
     */
    @RequestMapping("/login")
    public boolean login(HttpServletRequest request,
                         String username, String password) {
        // 1. 非空判断
        // StringUtils.hasLength()
        // 有值 -> 返回 true
        // 为 null -> 返回 false
        if(StringUtils.hasLength(username) && StringUtils.hasLength(password)) {
            // 2. 验证用户名和密码是否正确(伪代码)
            if("admin".equals(username) && "admin".equals(password)) {
                // 登陆成功
                // 把登录信息放进 HttpSession 里面
                HttpSession session = request.getSession();
                session.setAttribute("userinfo","admin");
                return true;
            } else {
                // 登陆失败
                // 用户名或密码错误
                return false;
            }
        }
        return false;
    }

    /**
     * 获取个人信息
     * @return
     */
    @RequestMapping("/getinfo")
    public String getInfo() {
        // 使用日志,需要添加 @Slf4j 注解
        log.debug("执行了 getinfo 方法");
        return "执行了 getinfo 方法";
    }

    /**
     * 注册功能(伪代码)
     */
    @RequestMapping("/reg")
    public String reg() {
        // 使用日志,需要添加 @Slf4j 注解
        log.debug("执行了 reg 方法");
        return "执行了 reg 方法";
    }
}
在 UserController 中 , 我们需要拦截 getInfo() 方法 , 而 login() reg() 方法是不需要拦截的
实现拦截器
自定义拦截器
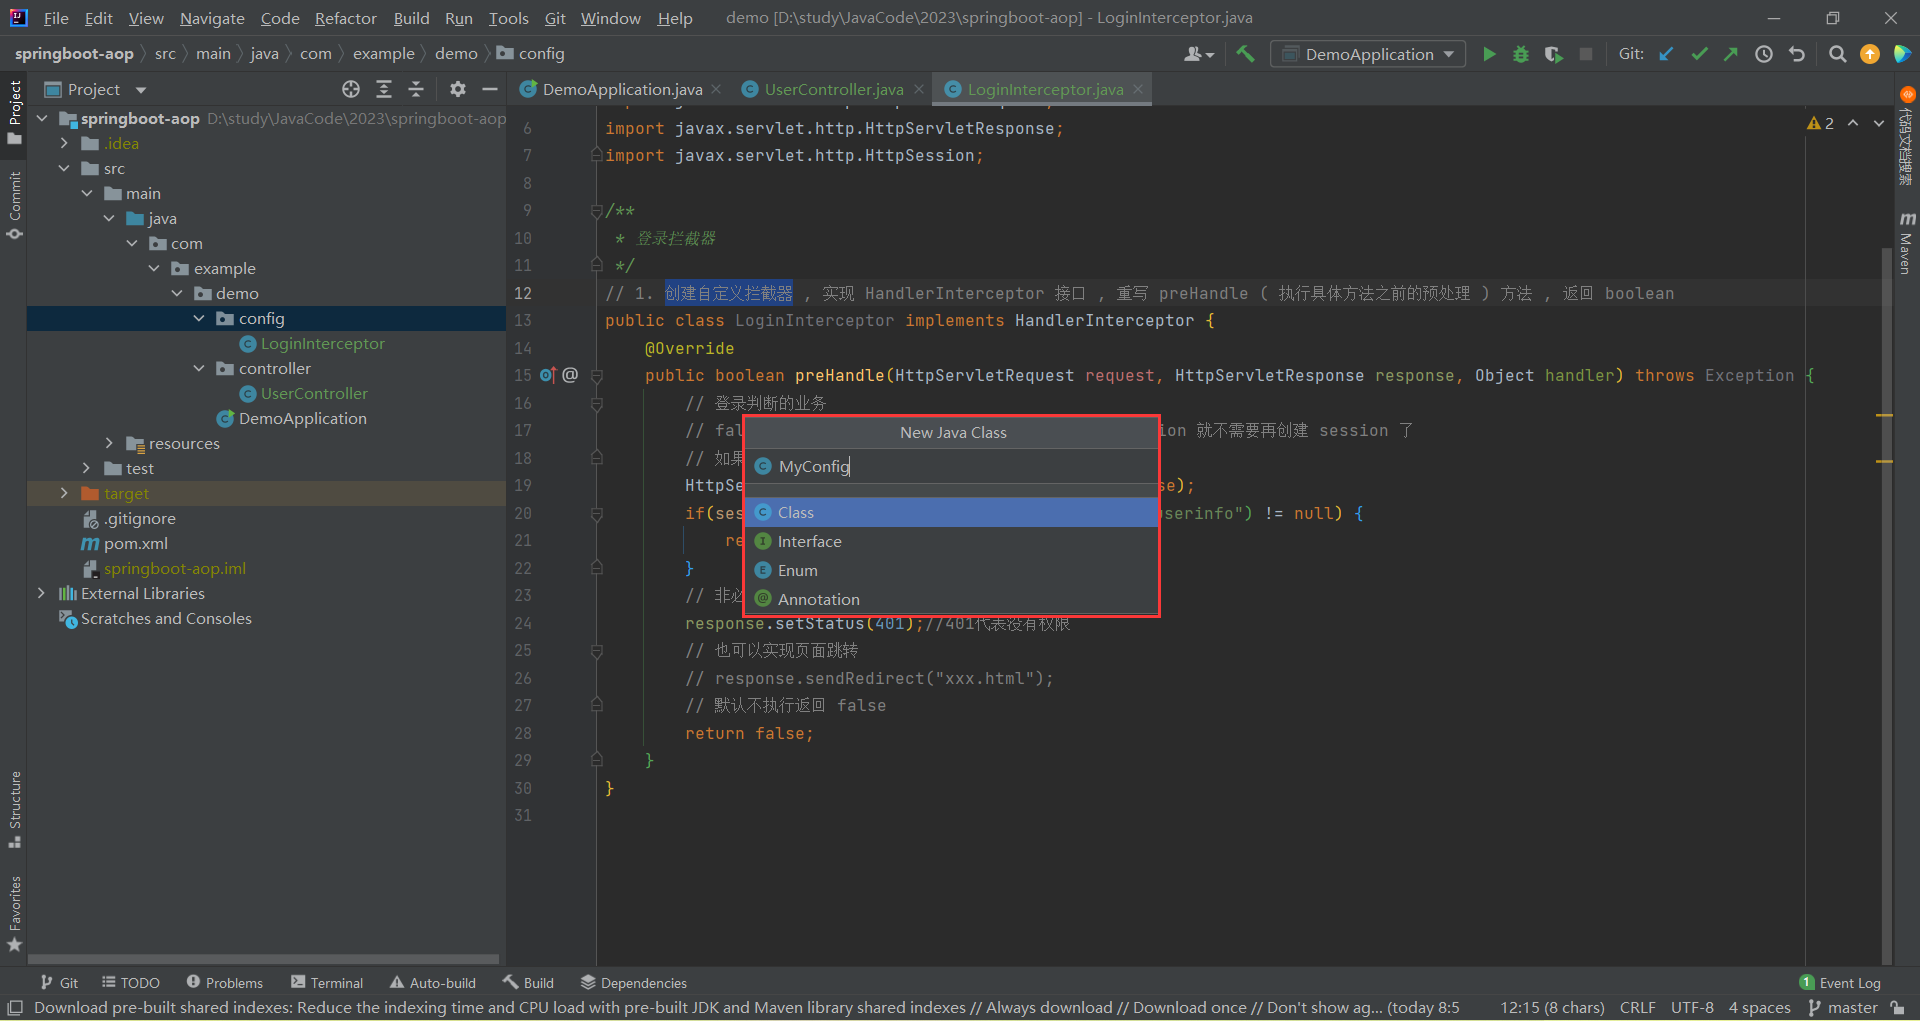
接下来 , 我们再新建一个包去写拦截器 , 包名叫做 config , 再写一个类 : LoginInterceptor ( 登录拦截器 )
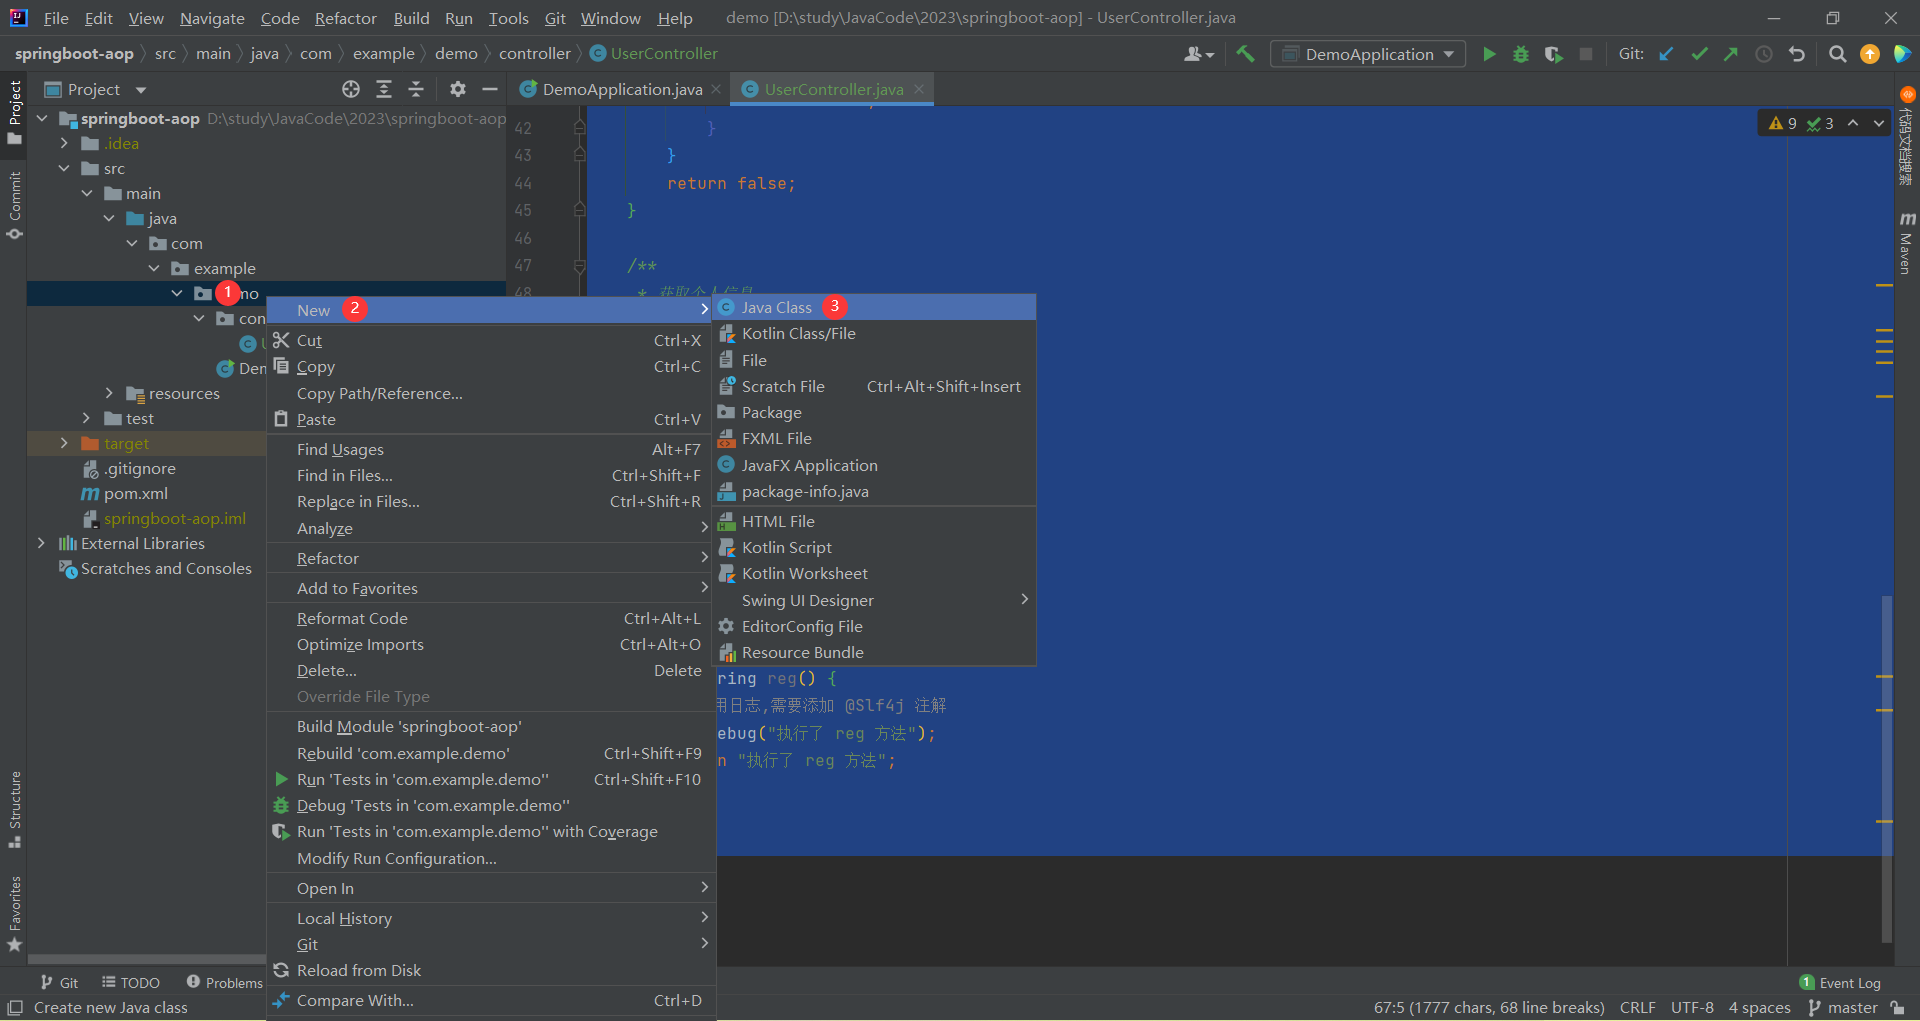
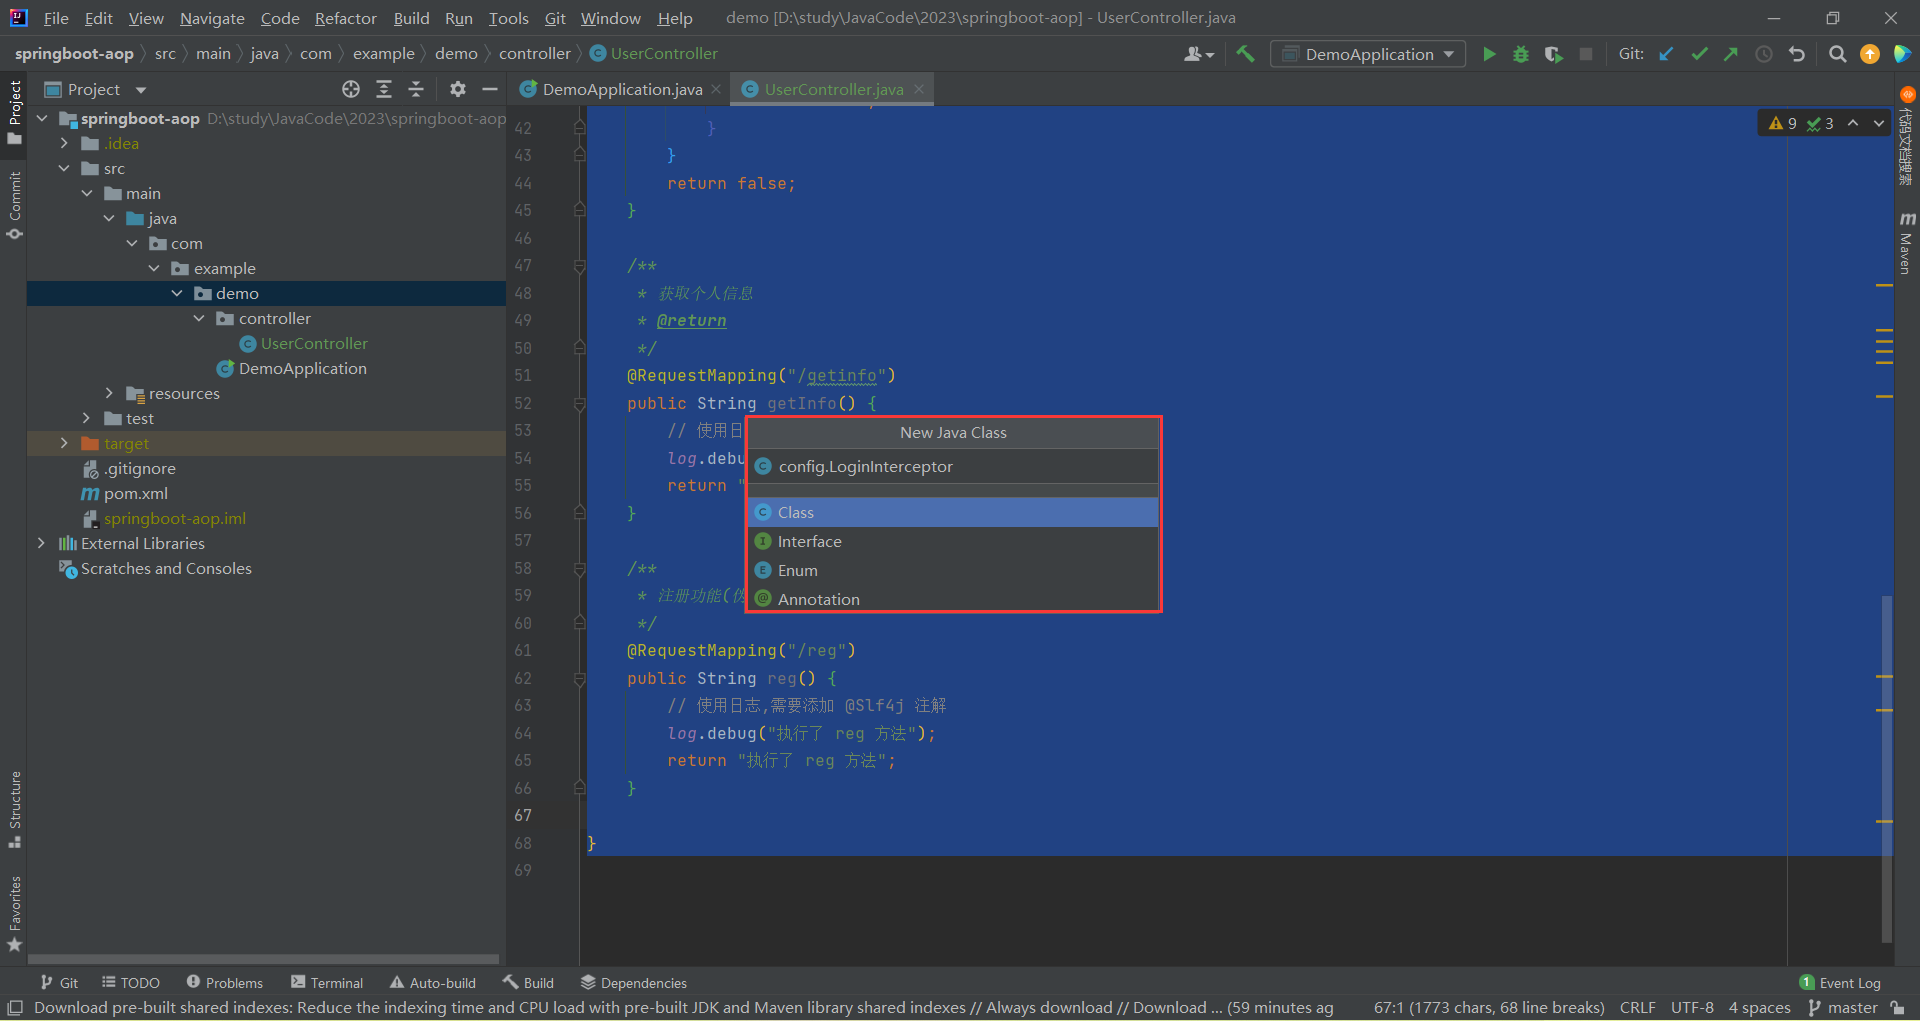
自定义拦截器的步骤 : 创建自定义拦截器 , 实现 HandlerInterceptor 接口 , 重写 preHandle ( 执行具体方法之前的预处理 ) 方法 , 返回 boolean
编写以下代码
package com.example.demo.config;

import org.springframework.web.servlet.HandlerInterceptor;

import javax.servlet.http.HttpServletRequest;
import javax.servlet.http.HttpServletResponse;
import javax.servlet.http.HttpSession;

/**
 * 登录拦截器
 */
// 1. 创建自定义拦截器 , 实现 HandlerInterceptor 接口 , 重写 preHandle ( 执行具体方法之前的预处理 ) 方法 , 返回 boolean
public class LoginInterceptor implements HandlerInterceptor {
    @Override
    public boolean preHandle(HttpServletRequest request, HttpServletResponse response, Object handler) throws Exception {
        // 登录判断的业务
        // false : 有 session 直接得到 session , 没有 session 就不需要再创建 session 了
        // 如果用在登录判断的业务上,一定要用 session
        HttpSession session = request.getSession(false);
        if(session != null && session.getAttribute("userinfo") != null) {
            return true;
        }
        // 非必须:可以设置状态码
        response.setStatus(401);//401代表没有权限
        // 也可以实现页面跳转
        // response.sendRedirect("xxx.html");
        // 默认不执行返回 false
        return false;
    }
}
将自定义拦截器加入到系统配置
目前我们实现了第一步 : 创建自定义拦截器 , 接下来完成第二步 : 配置拦截规则
- 创建一个类 , 实现 WebMvcConfigurer

- 重写 addInterceptors 方法
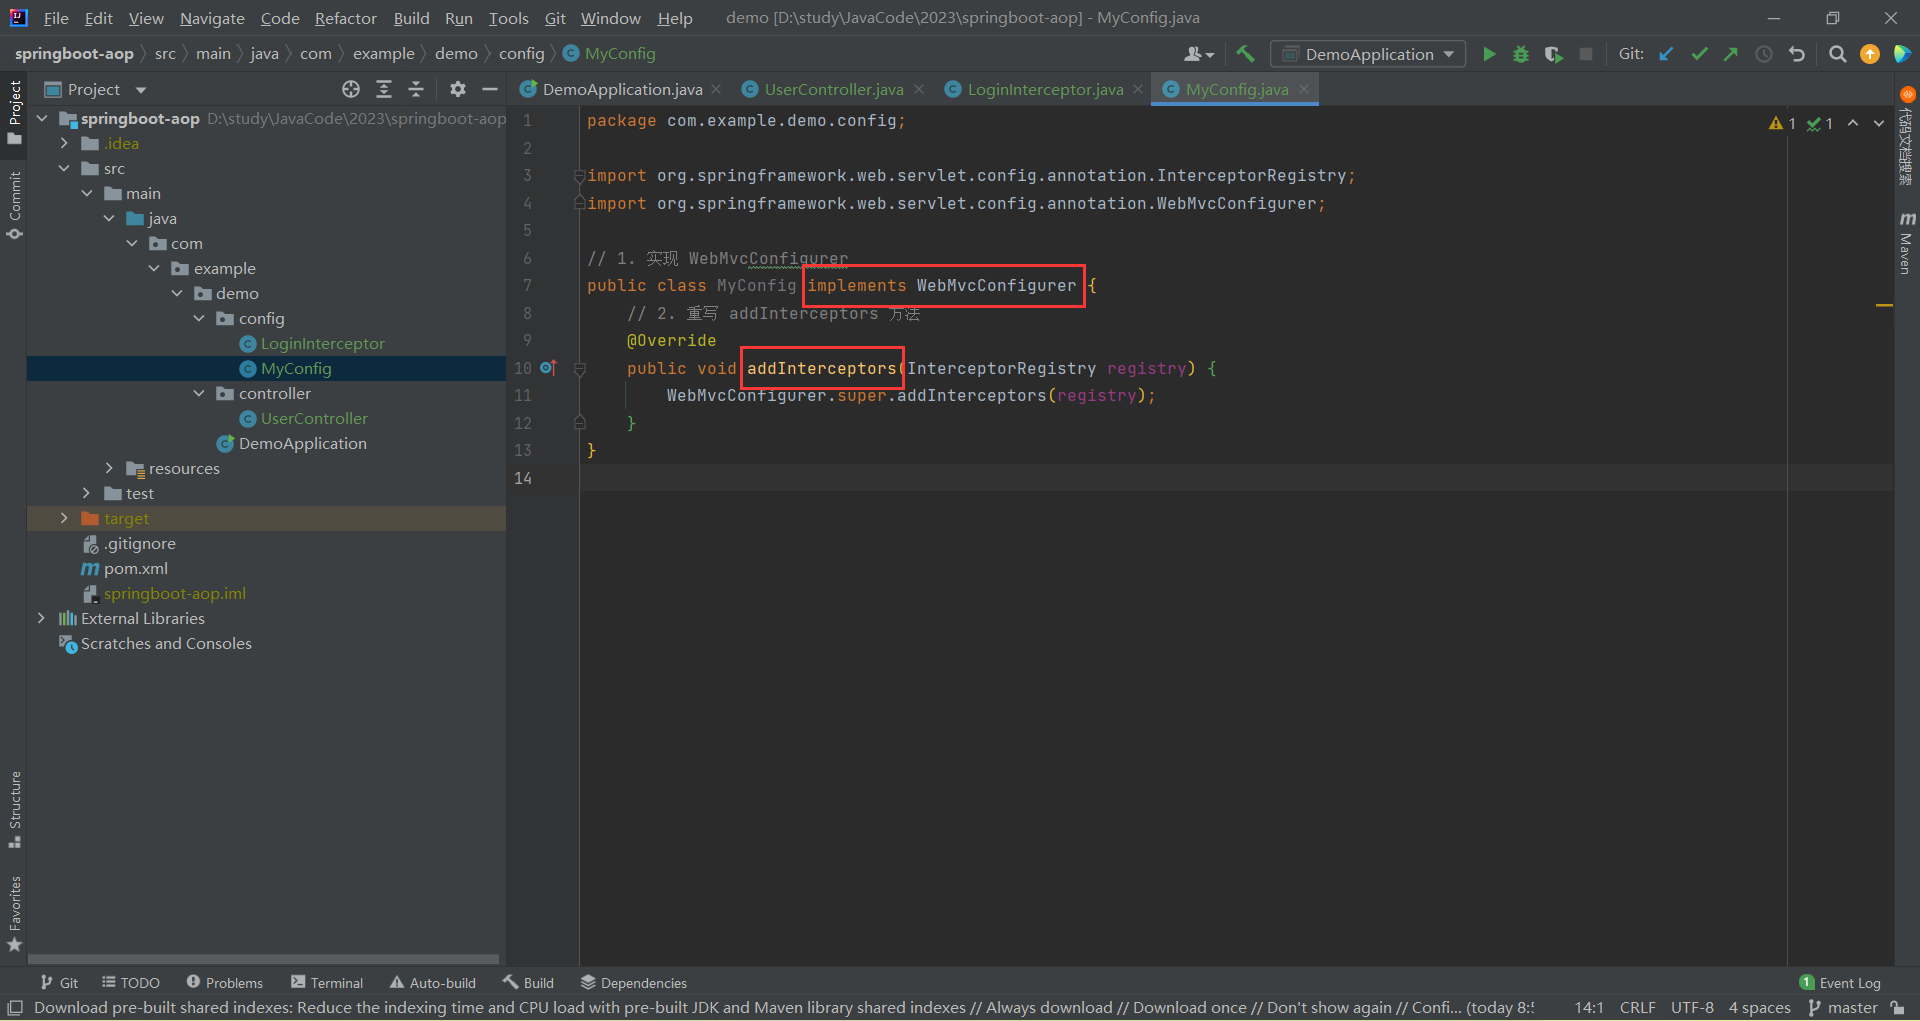
- 为了想要拦截器在 Spring 程序启动时就生效 , 我们需要添加 @Configuration 注解
package com.example.demo.config;

import org.springframework.context.annotation.Configuration;
import org.springframework.web.servlet.config.annotation.InterceptorRegistry;
import org.springframework.web.servlet.config.annotation.WebMvcConfigurer;

@Configuration
// 1. 实现 WebMvcConfigurer
public class MyConfig implements WebMvcConfigurer {
    // 2. 重写 addInterceptors 方法
    @Override
    public void addInterceptors(InterceptorRegistry registry) {

    }
}
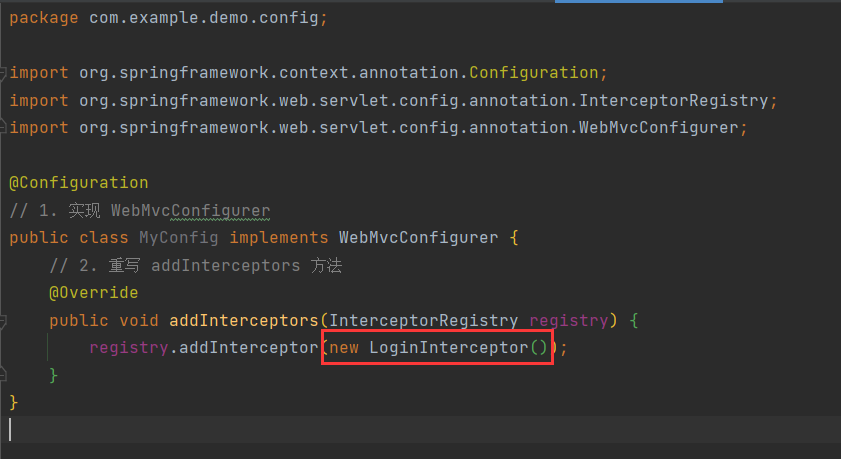
- 把自定义拦截器加载到拦截规则中 , 使用 registry
package com.example.demo.config;

import org.springframework.context.annotation.Configuration;
import org.springframework.web.servlet.config.annotation.InterceptorRegistry;
import org.springframework.web.servlet.config.annotation.WebMvcConfigurer;

@Configuration
// 1. 实现 WebMvcConfigurer
public class MyConfig implements WebMvcConfigurer {
    // 2. 重写 addInterceptors 方法
    @Override
    public void addInterceptors(InterceptorRegistry registry) {
        registry.addInterceptor(new LoginInterceptor());
    }
}
那为什么在 Spring 里面 , 我们还要 new 对象呢 ?
我们也可以不用 new , 在 登录拦截器的实现的类 (LoginInterceptor) 中添加 @Component 注解
这就代表我们当前的类托管到 Spring 里面了 , 那我们就可以在配置拦截规则的类中把属性注入进来了
package com.example.demo.config;

import org.springframework.beans.factory.annotation.Autowired;
import org.springframework.context.annotation.Configuration;
import org.springframework.web.servlet.config.annotation.InterceptorRegistry;
import org.springframework.web.servlet.config.annotation.WebMvcConfigurer;

@Configuration
// 1. 实现 WebMvcConfigurer
public class MyConfig implements WebMvcConfigurer {
    @Autowired
    private LoginInterceptor loginInterceptor;
    // 2. 重写 addInterceptors 方法
    @Override
    public void addInterceptors(InterceptorRegistry registry) {
        registry.addInterceptor(loginInterceptor);
    }
}
这样写完之后 , 我们的拦截器就生效了 , 但是规则还未制指定 , 制定规则使用 addPathPatterns 代表全部拦截 , excludePathPatterns 代表不拦截谁
package com.example.demo.config;

import org.springframework.beans.factory.annotation.Autowired;
import org.springframework.context.annotation.Configuration;
import org.springframework.web.servlet.config.annotation.InterceptorRegistry;
import org.springframework.web.servlet.config.annotation.WebMvcConfigurer;

@Configuration
// 1. 实现 WebMvcConfigurer
public class MyConfig implements WebMvcConfigurer {
    @Autowired
    private LoginInterceptor loginInterceptor;
    // 2. 重写 addInterceptors 方法
    @Override
    public void addInterceptors(InterceptorRegistry registry) {
        registry.addInterceptor(loginInterceptor)
                .addPathPatterns("/**") // 拦截所有请求
                .excludePathPatterns("/user/login")  // 排除不拦截的 URL
                .excludePathPatterns("/*.js") // 还可以使用表达式,拦截所有的js
                .excludePathPatterns("/user/reg");
    }
}
接下来齐活 , 我们就可以运行一下了
reg 方法是不拦截的 , 那么我们访问一下 reg 方法看看

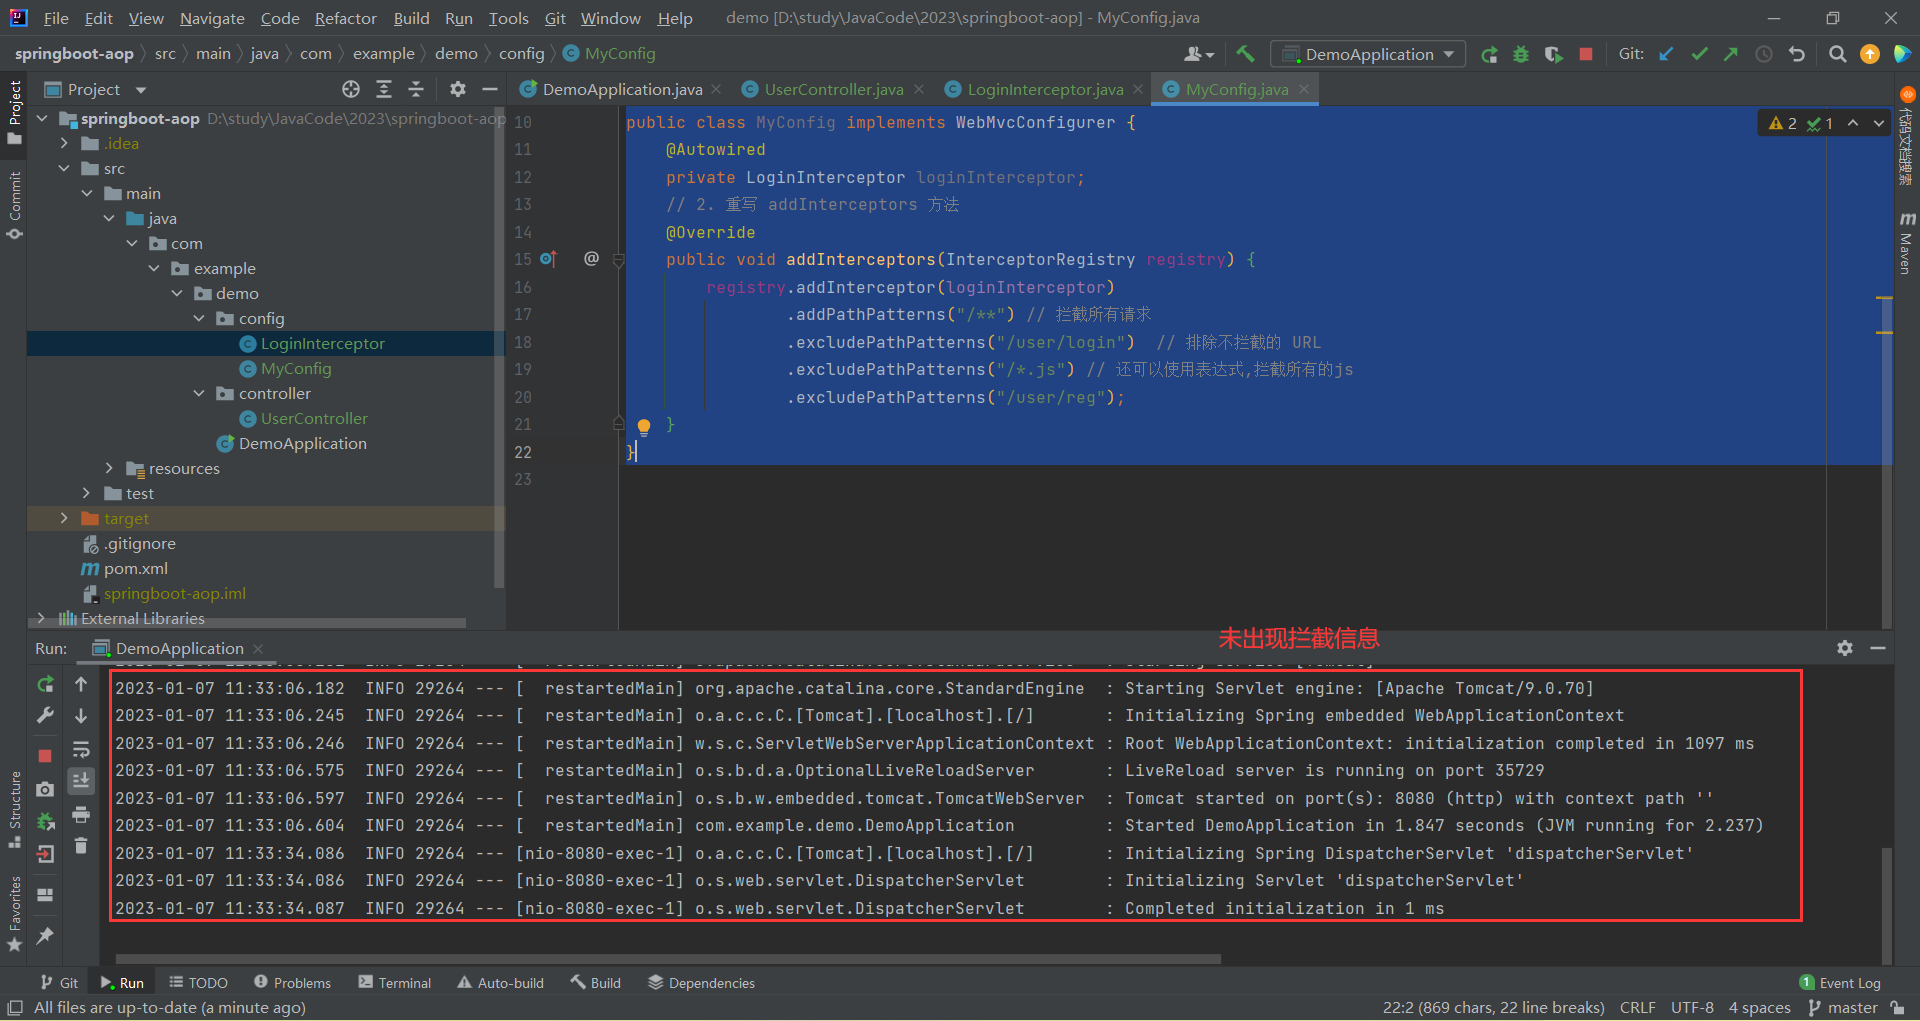
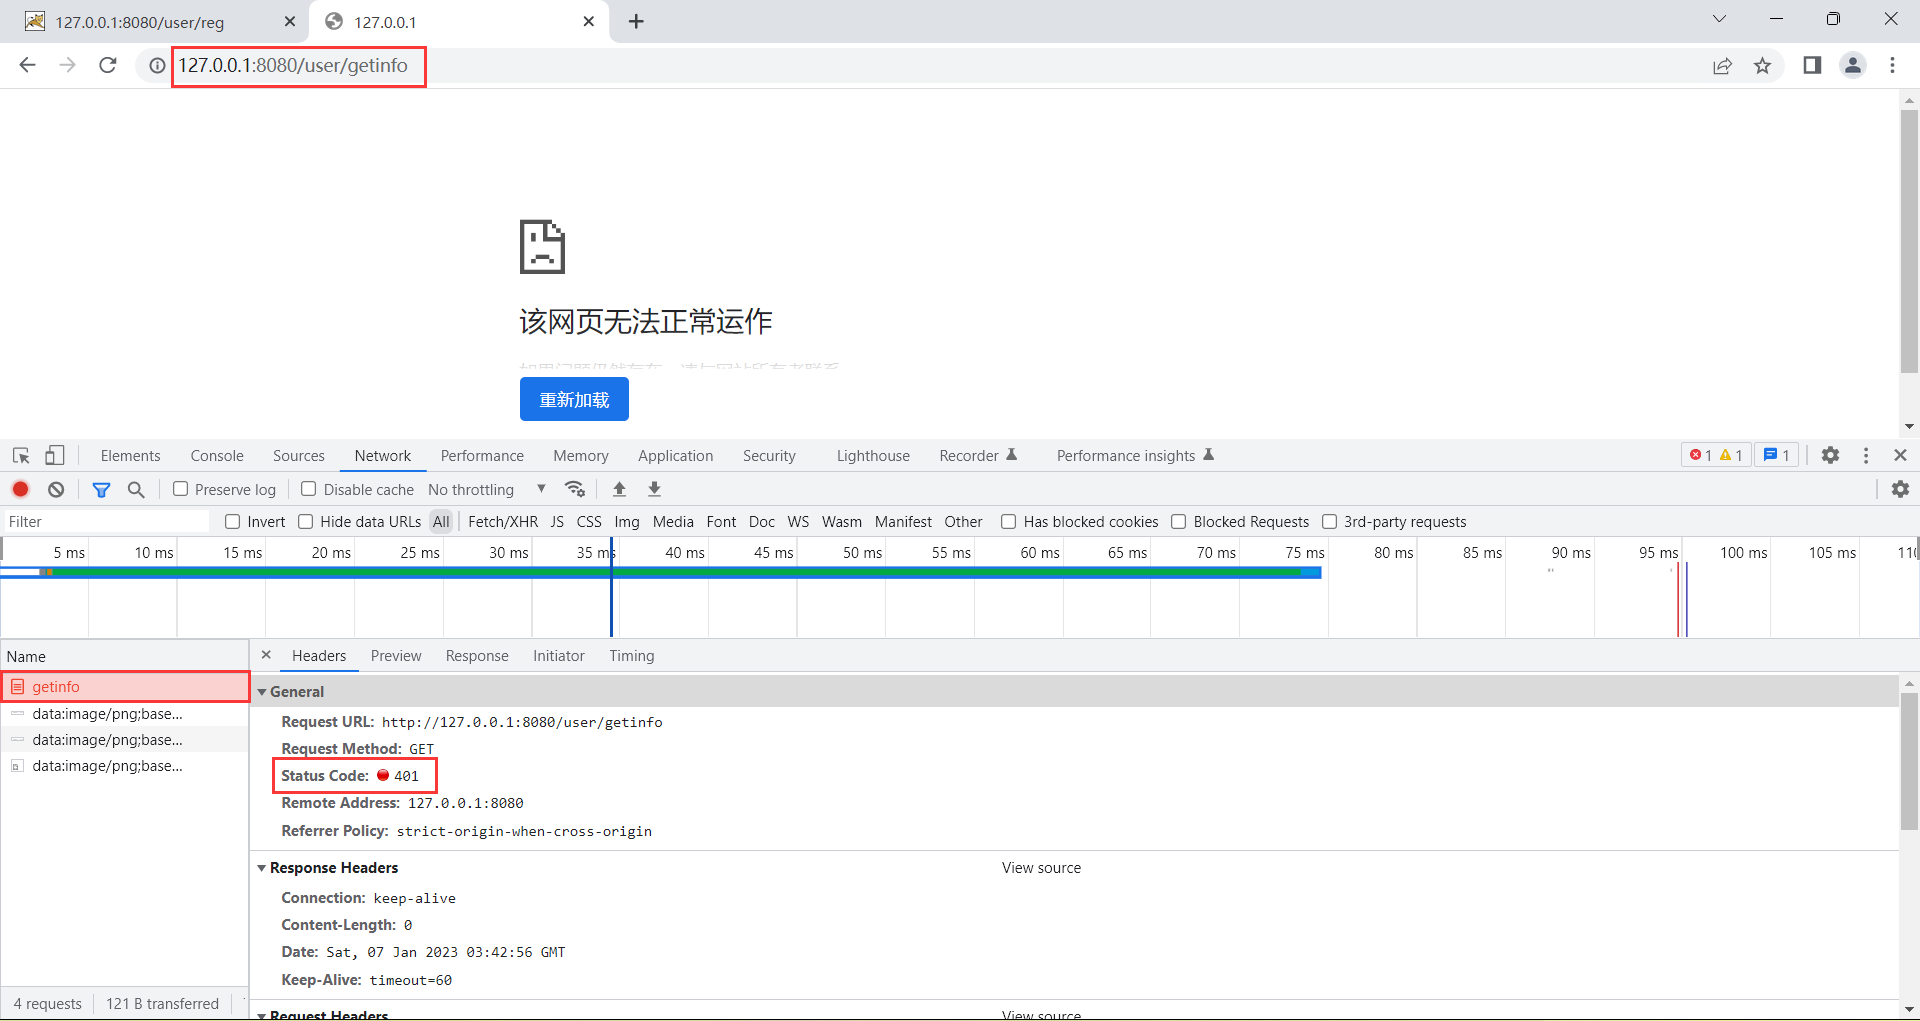
再看一下 getinfo 方法

打开谷歌的开发者工具看看
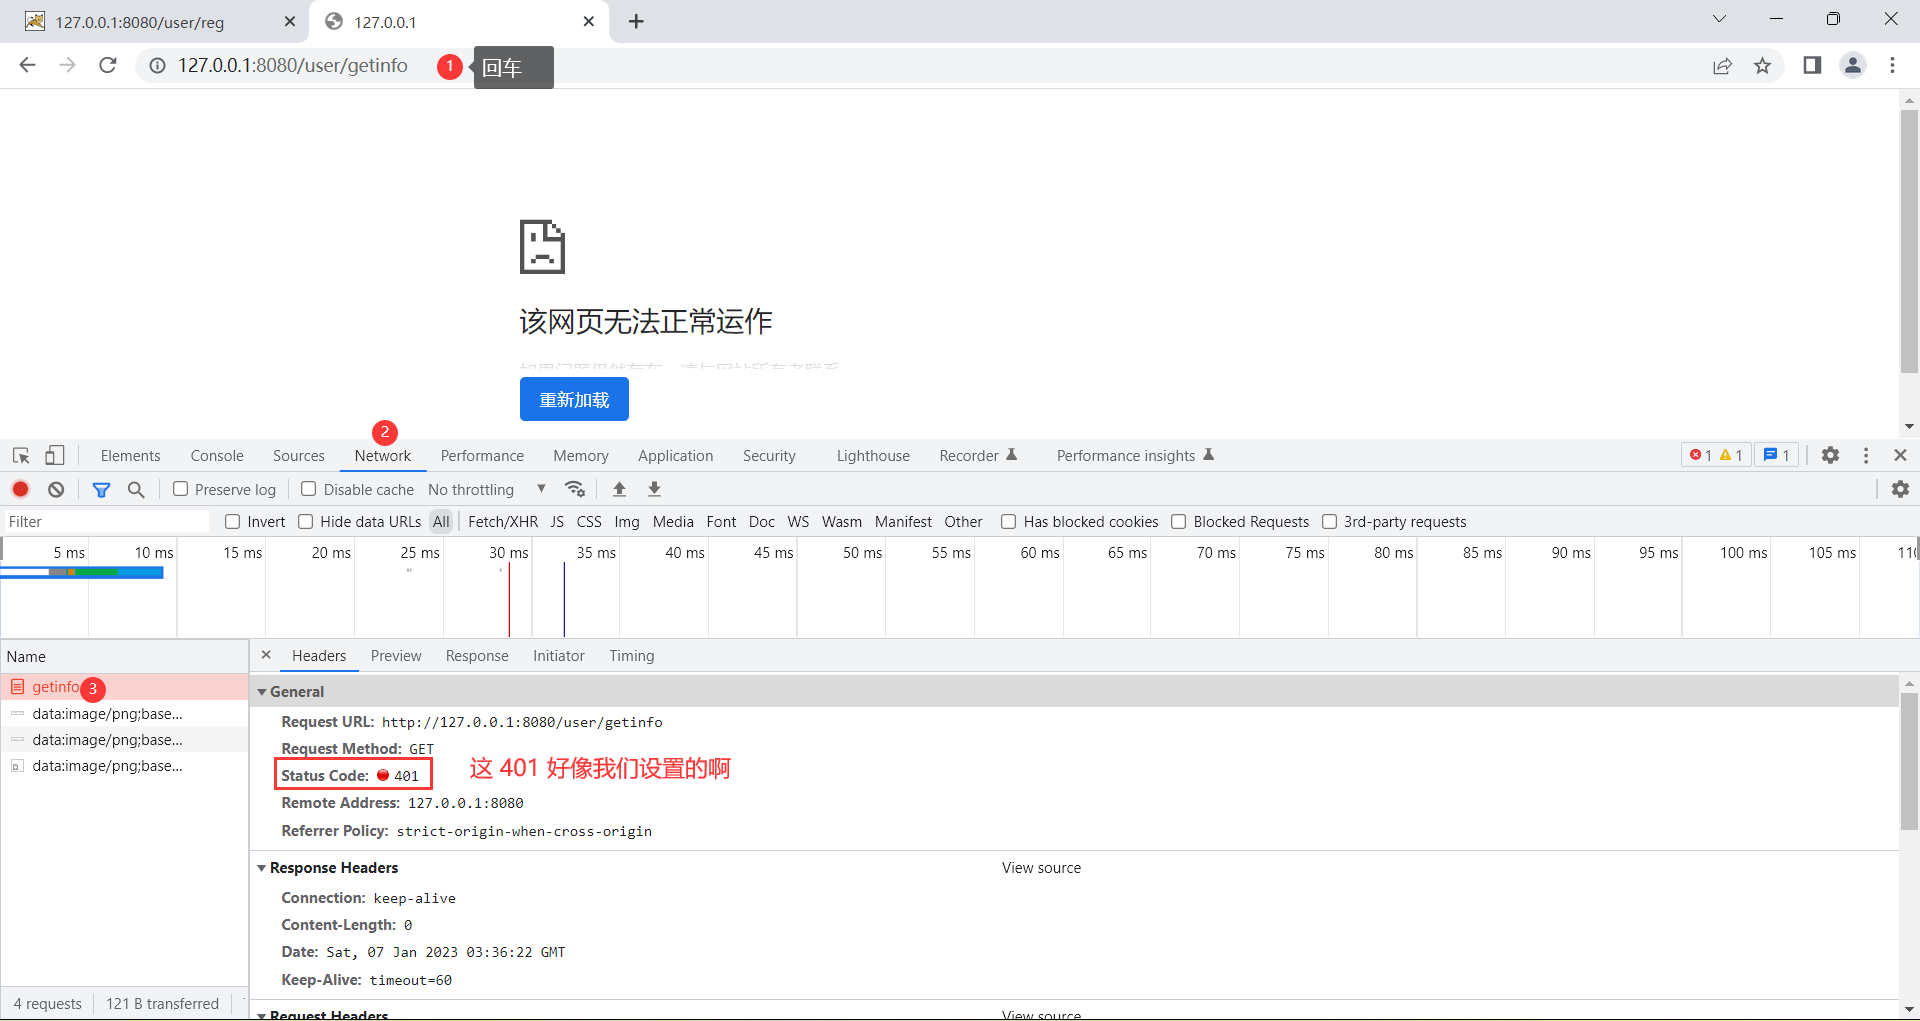
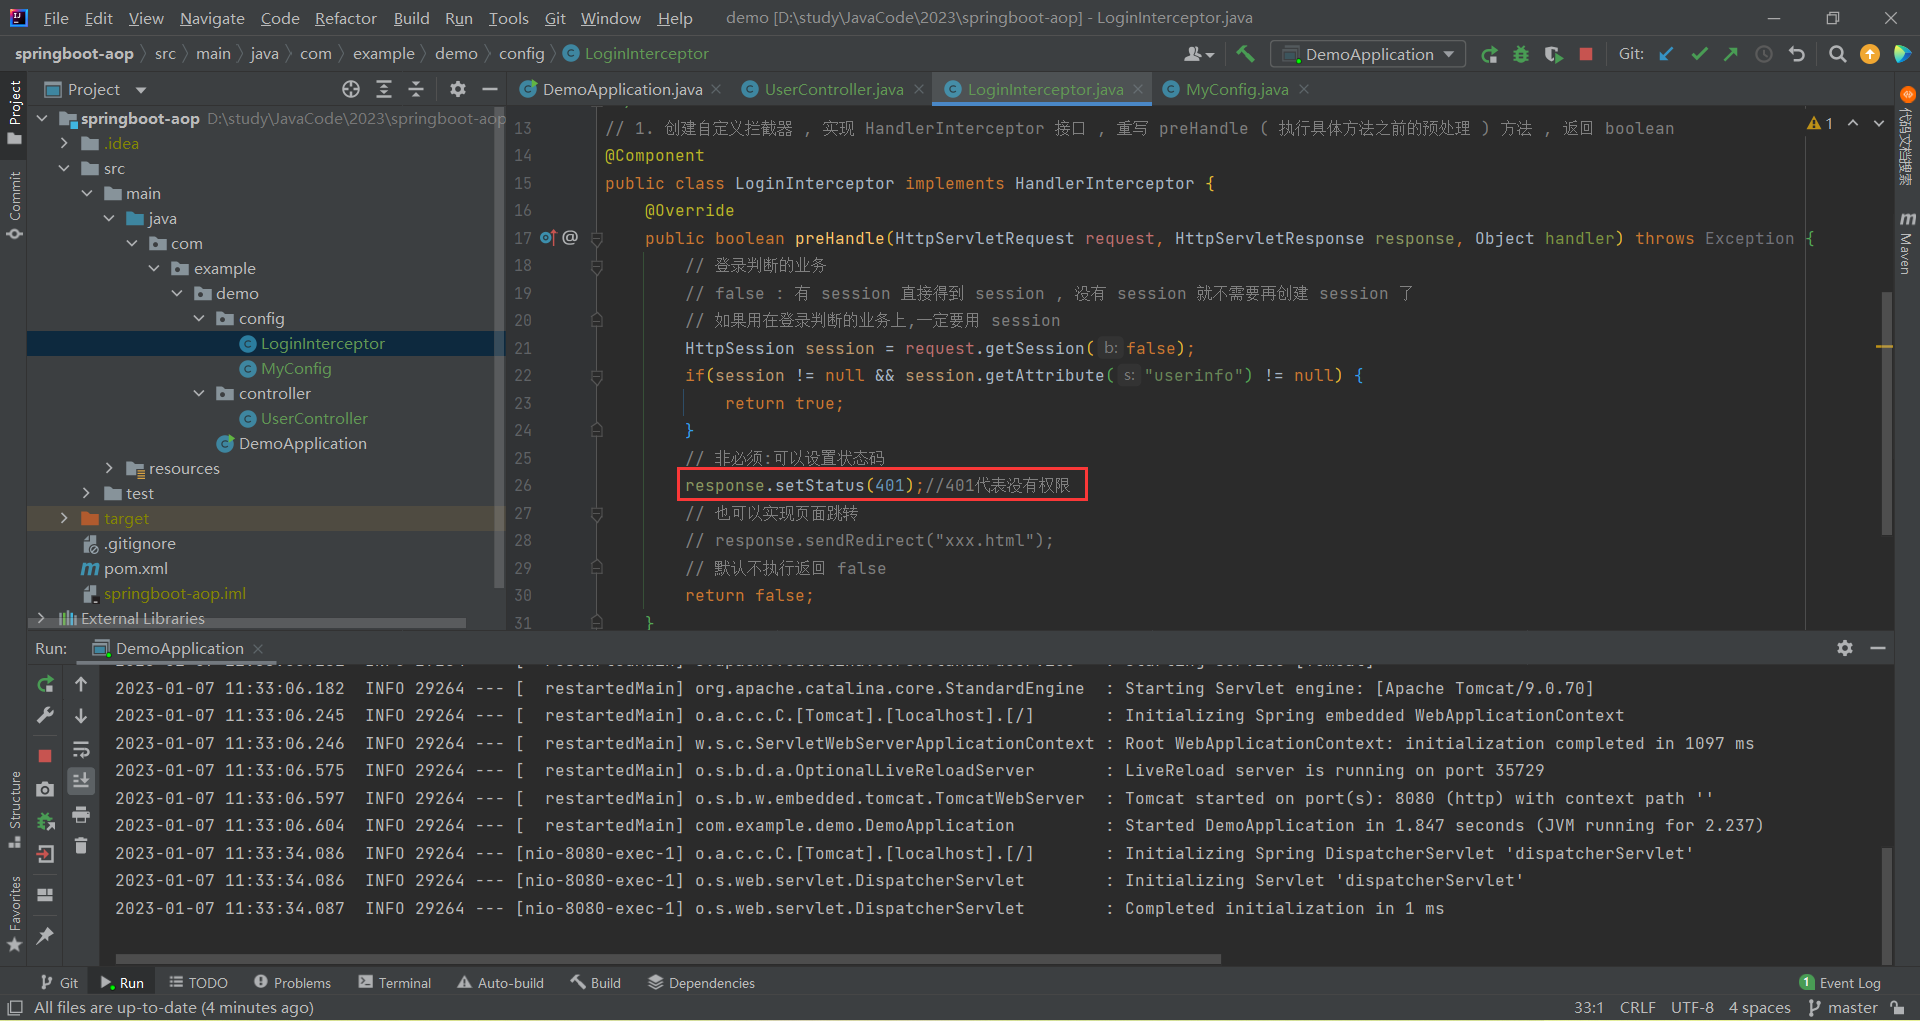
这就说明我们的拦截器起作用了
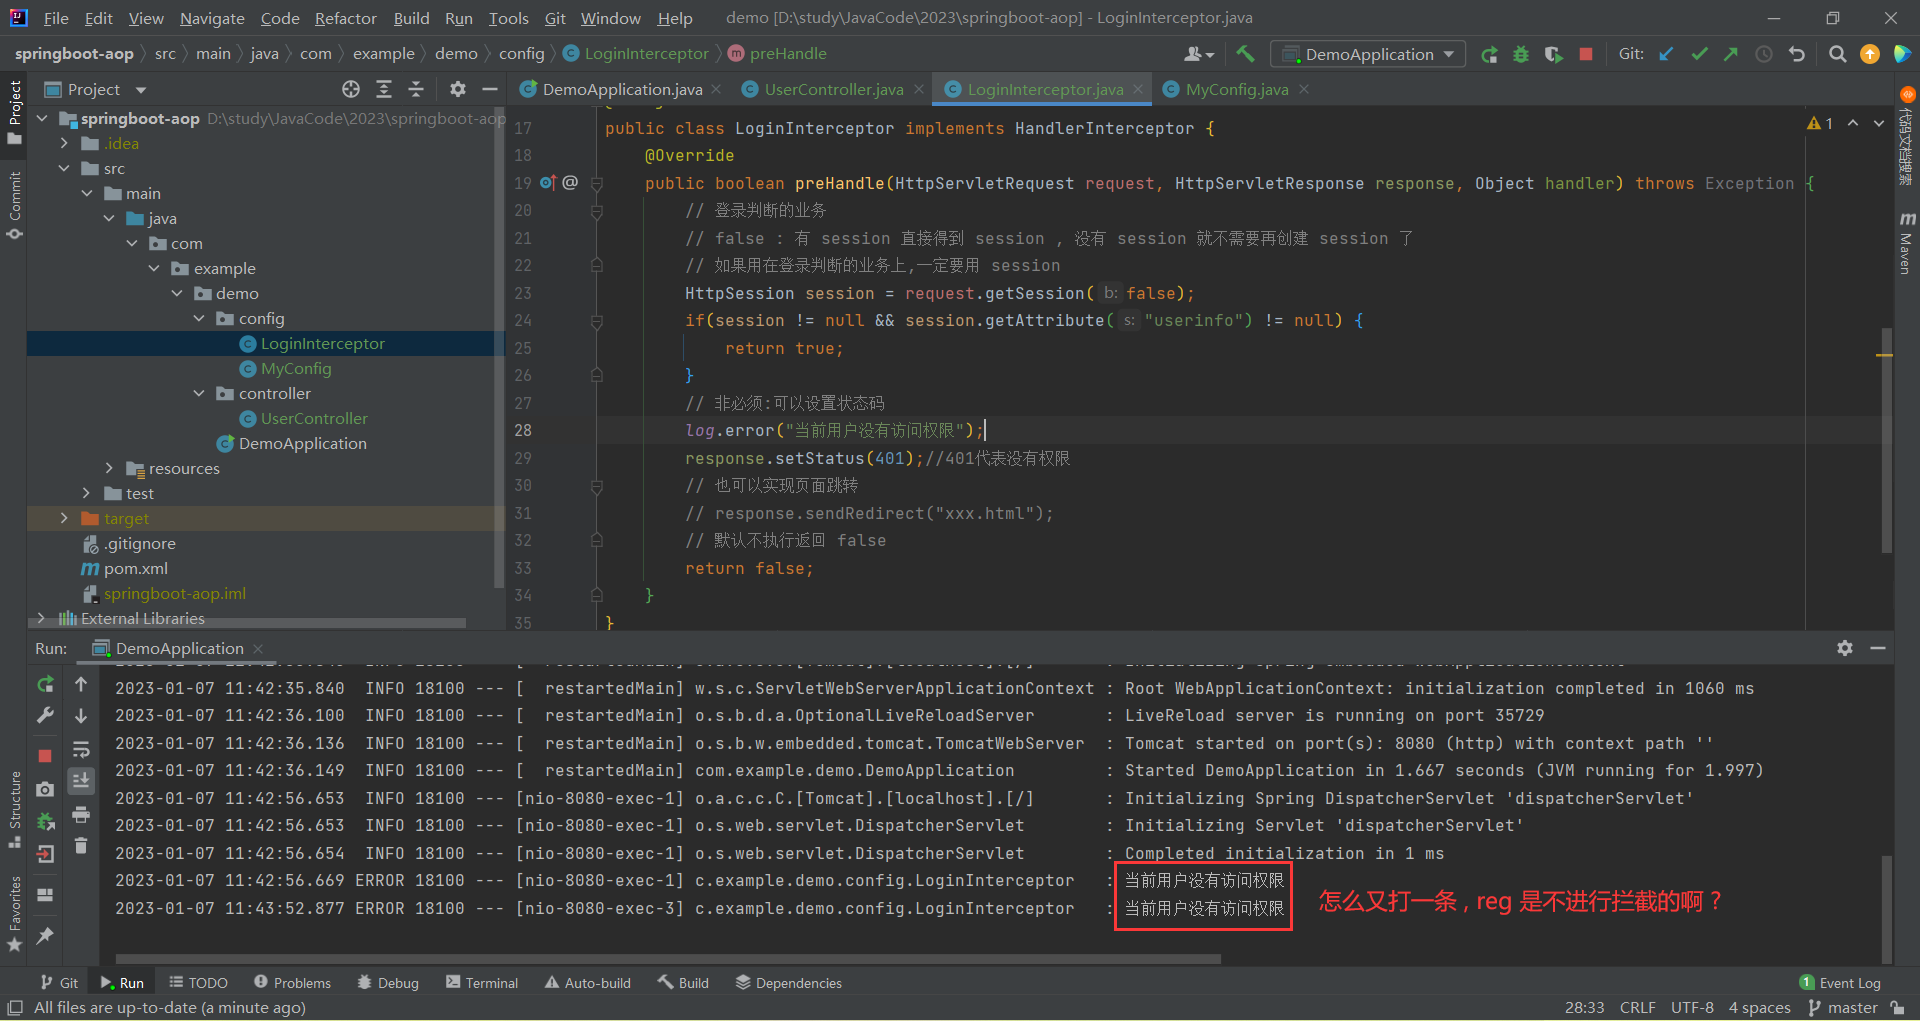
我们可以通过打印日志更清晰地查看效果
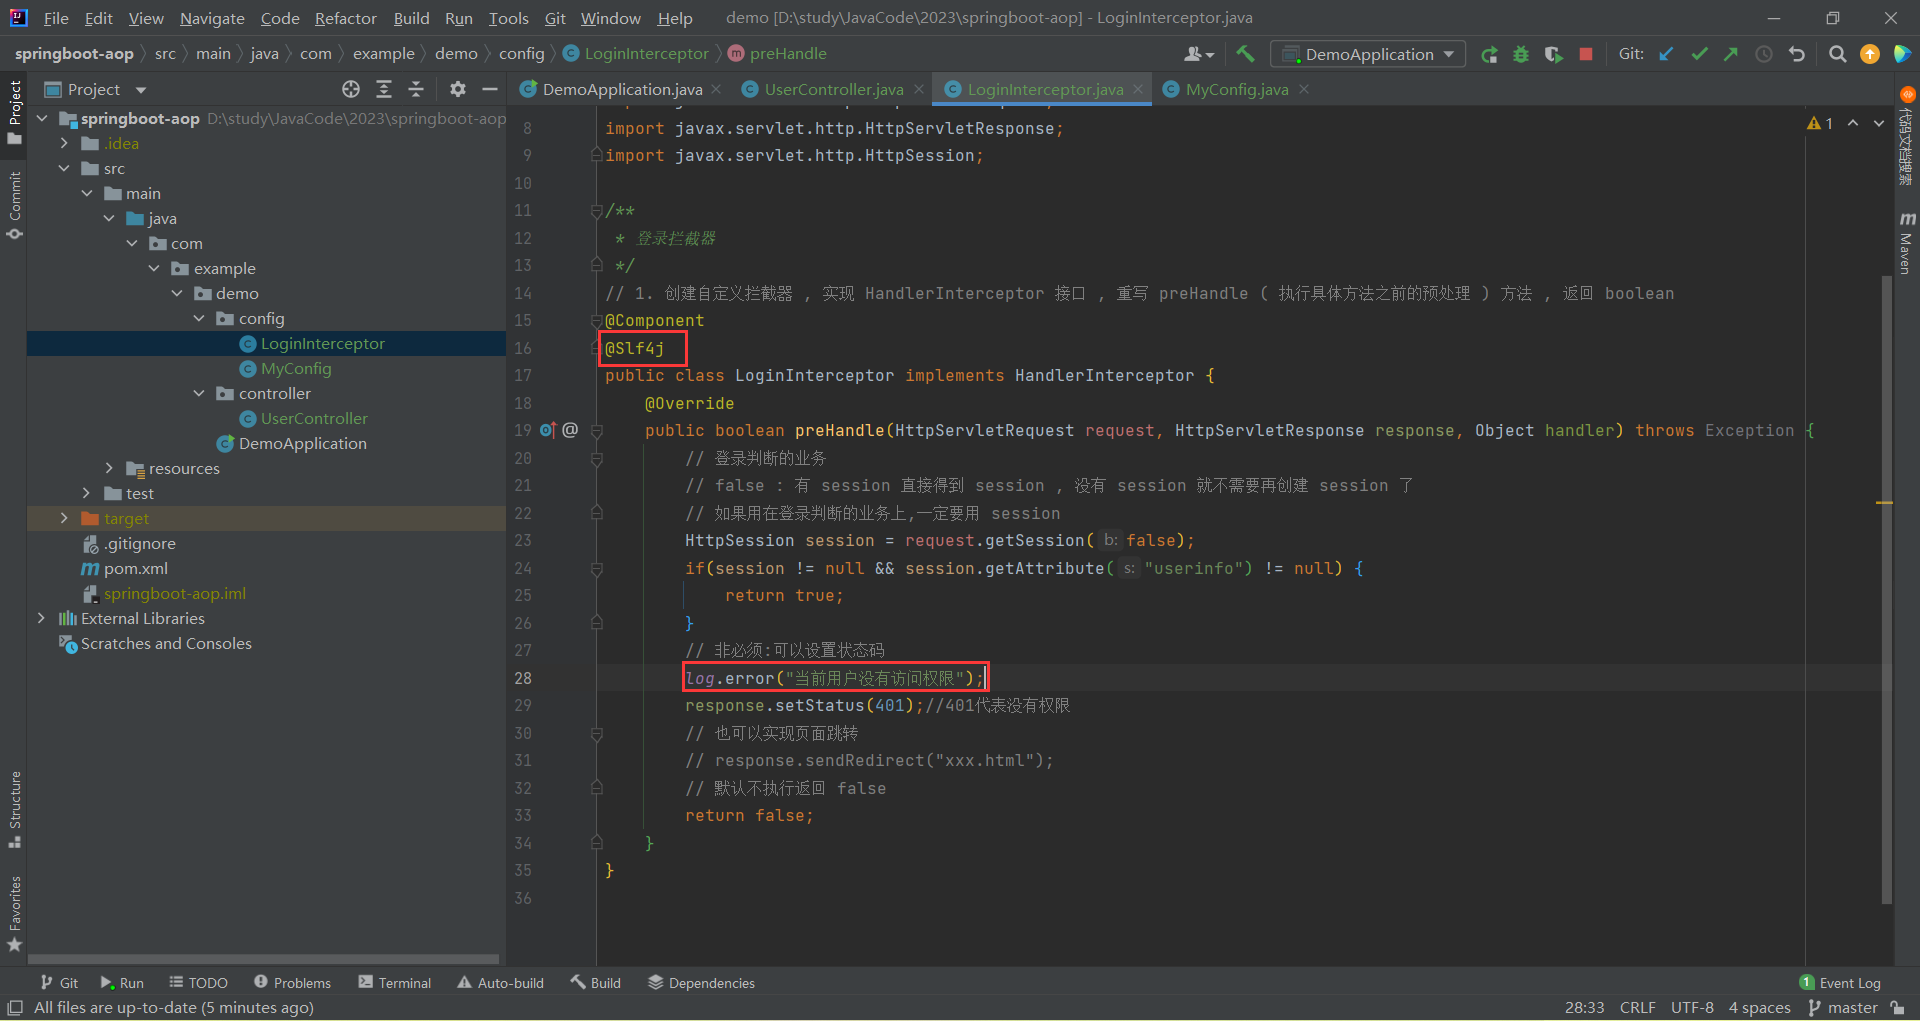
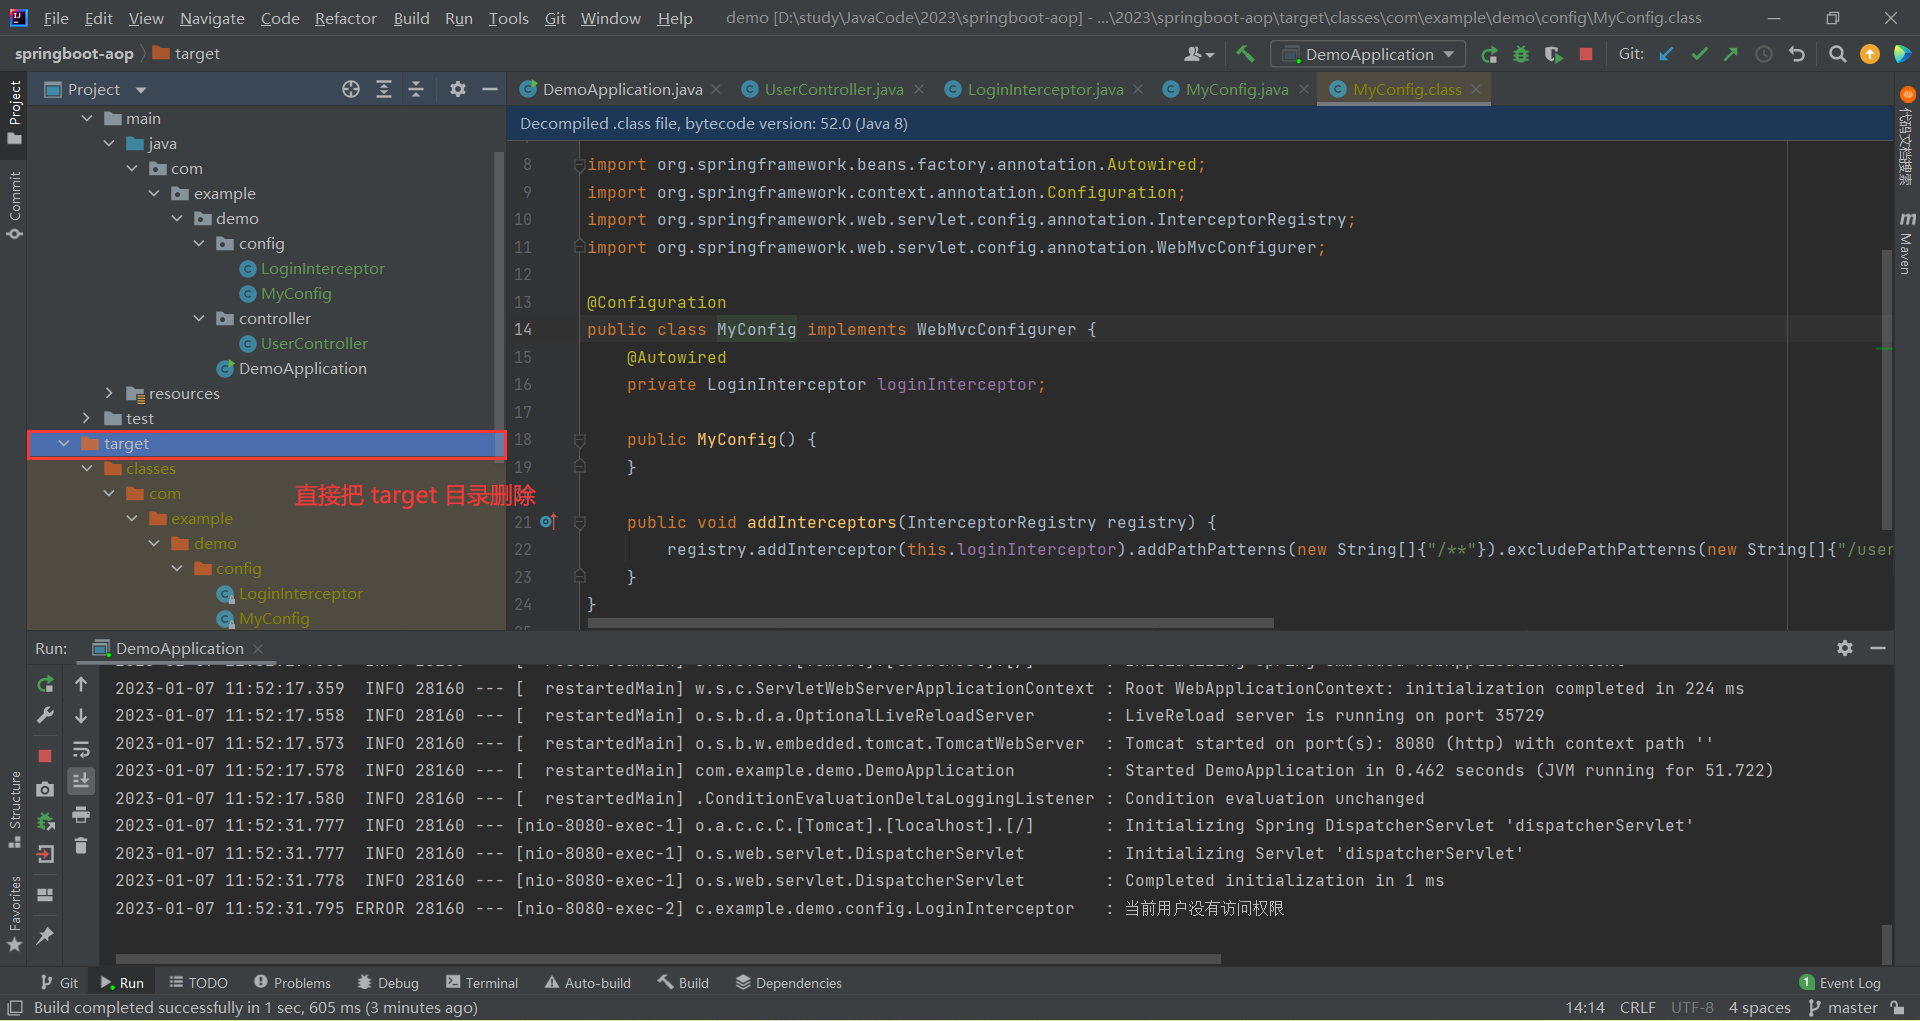
重新运行

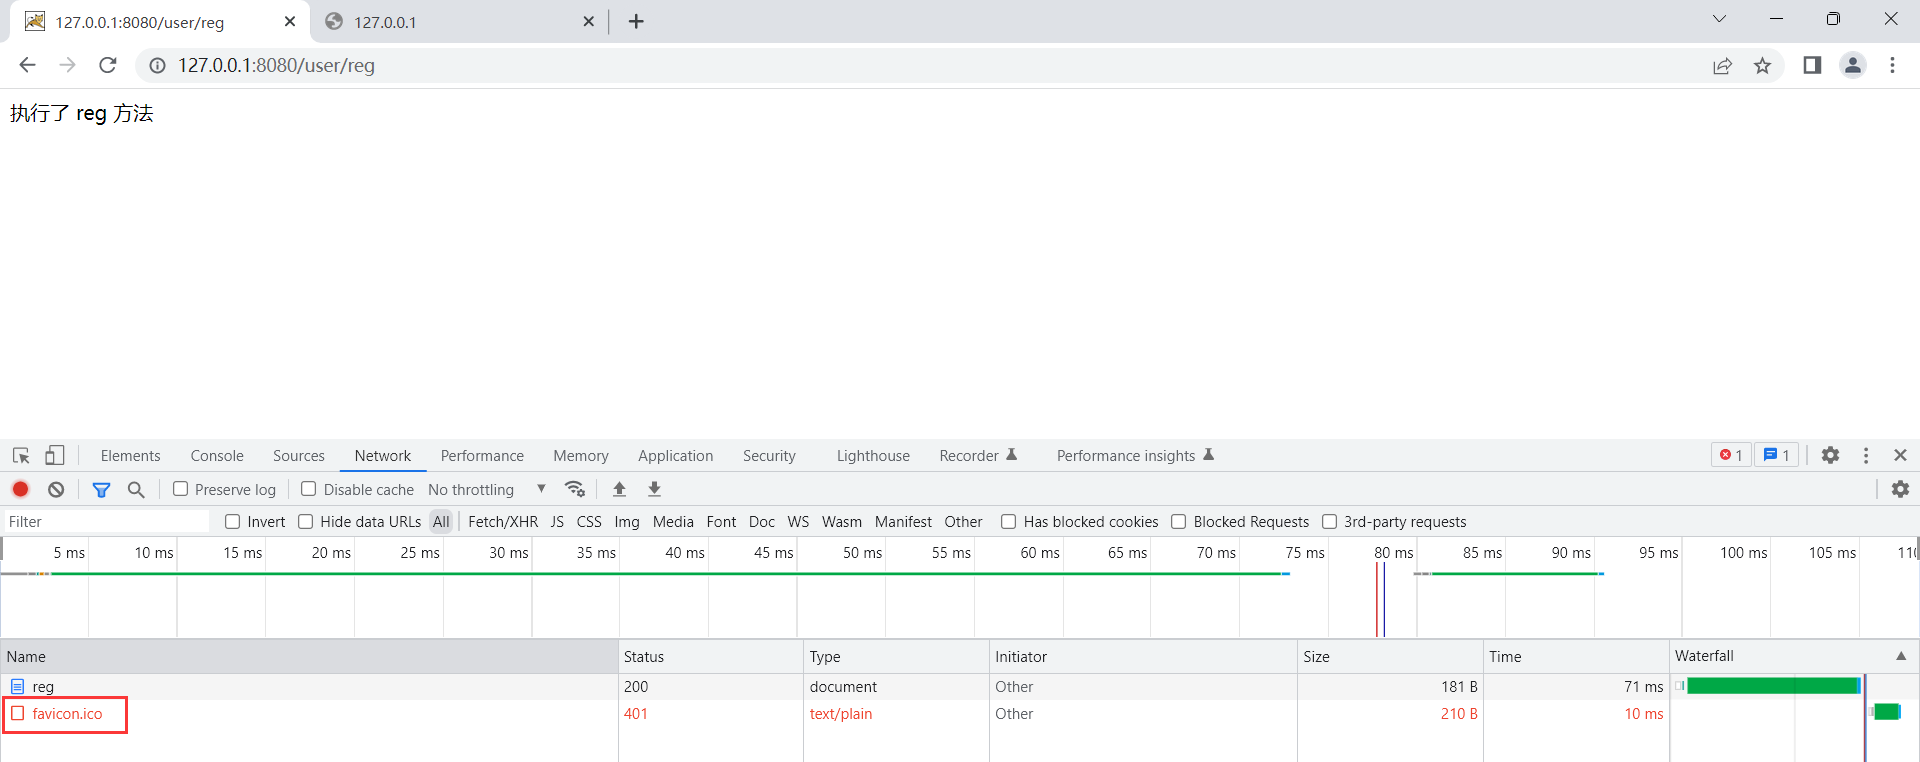
但是离谱的是 : 我们再访问 reg 方法 , 他仍然被拦截了
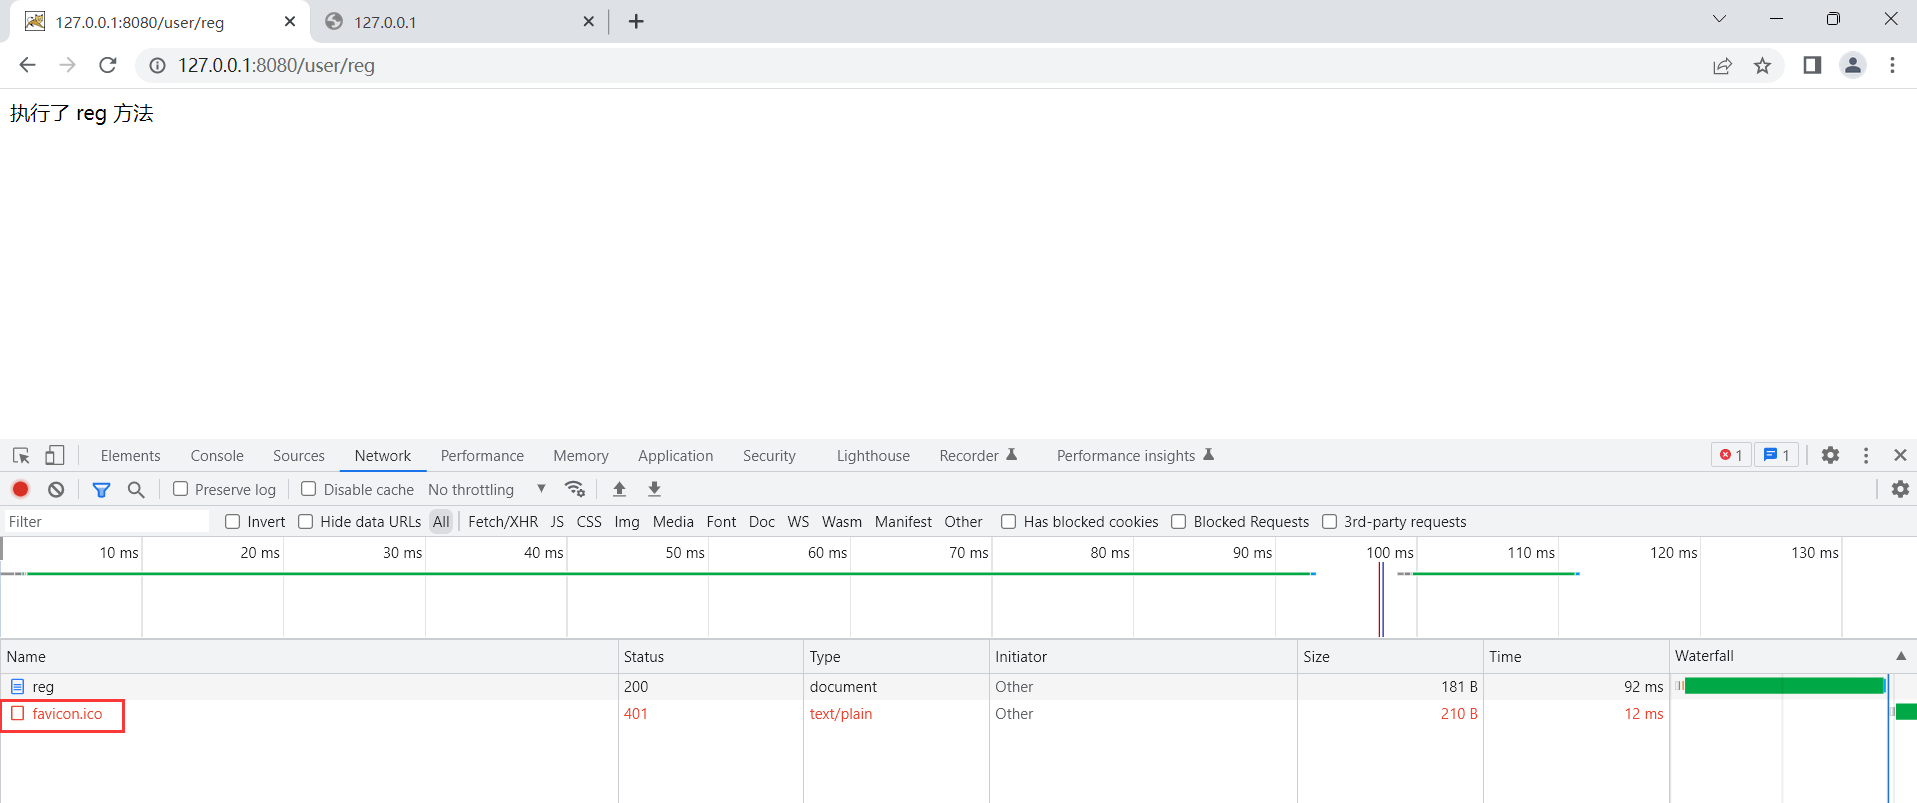
打开 reg 页面的开发者工具看一看是咋回事
那么这个 favicon.ico 是什么 , 他为什么会被拦截 ?
比如我们访问百度页面
圈出来的部分就是一个小的百度图标 , 其实这就是我们的 favicon.ico
我们设置拦截规则的时候也要把它排除在外 , 否则所有的页面都要被拦截的
package com.example.demo.config;

import org.springframework.beans.factory.annotation.Autowired;
import org.springframework.context.annotation.Configuration;
import org.springframework.web.servlet.config.annotation.InterceptorRegistry;
import org.springframework.web.servlet.config.annotation.WebMvcConfigurer;

@Configuration
// 1. 实现 WebMvcConfigurer
public class MyConfig implements WebMvcConfigurer {
    @Autowired
    private LoginInterceptor loginInterceptor;
    // 2. 重写 addInterceptors 方法
    @Override
    public void addInterceptors(InterceptorRegistry registry) {
        registry.addInterceptor(loginInterceptor)
                .addPathPatterns("/**") // 拦截所有请求
                .excludePathPatterns("/user/login")  // 排除不拦截的 URL
                .excludePathPatterns("/favicon.ico") // 排除状态栏标签小图标;
                .excludePathPatterns("/user/reg");
    }
}
接下来 , 再运行
还是一直被拦截 , 这时候 , 就需要考虑考虑是不是我们的缓存的问题呢 ?
再次运行
再次失败 (图标这个问题真的很顽固)
但是 reg 方法是没有被拦截的

getinfo 方法


接下来 , 我们挂载一下 session , 让他登陆成功
我们直接访问 login

访问 127.0.0.1:8080/user/login?username=admin&password=admin , 就变成 true 了

接下来再去访问 getinfo 是什么场景呢 ?

说明 session 成功挂载 , 但是换个浏览器还是 bbq

这是因为 session 的实现是通过谷歌浏览器帮助的 , 存储在谷歌浏览器的 cookie 里面了 , 但是并未存储到 edge 浏览器的 cookie 里面
拦截器实现原理
正常情况
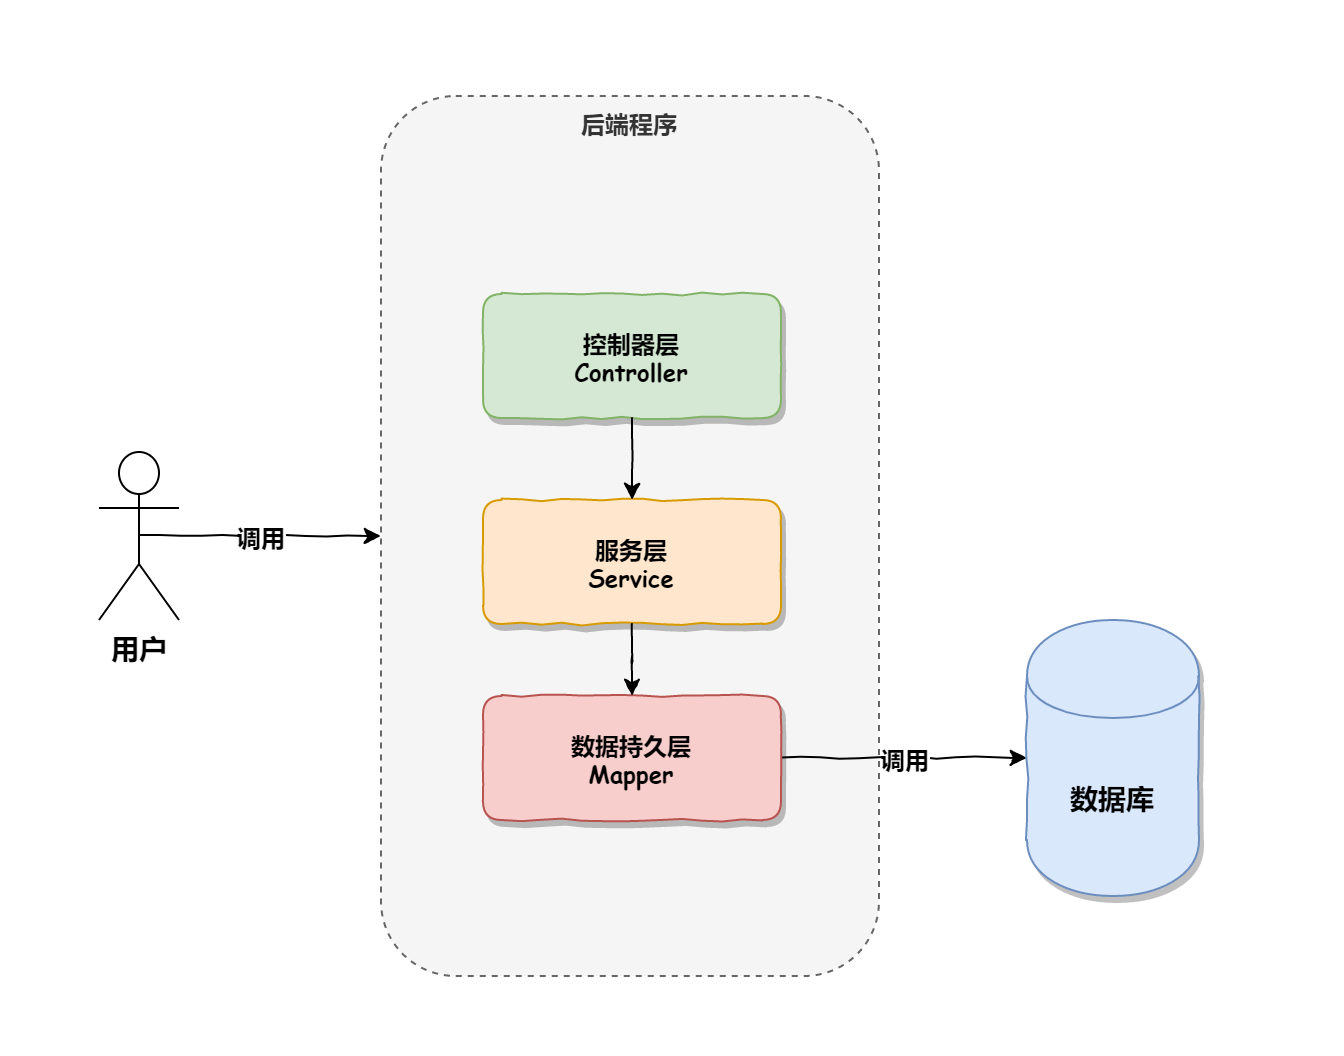
拦截器
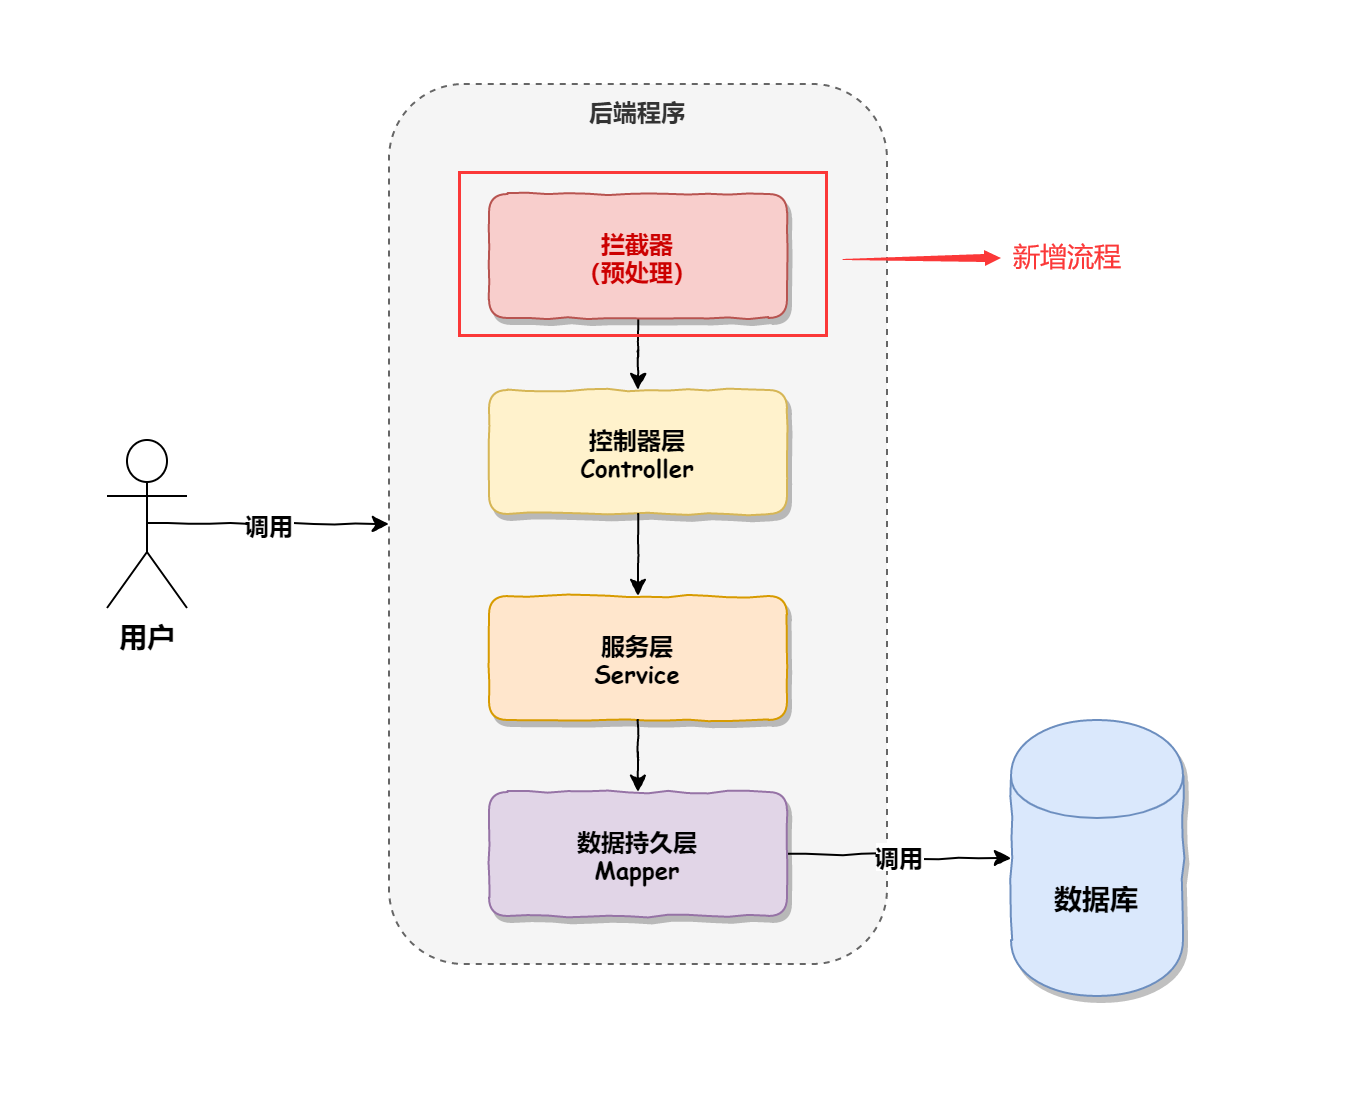
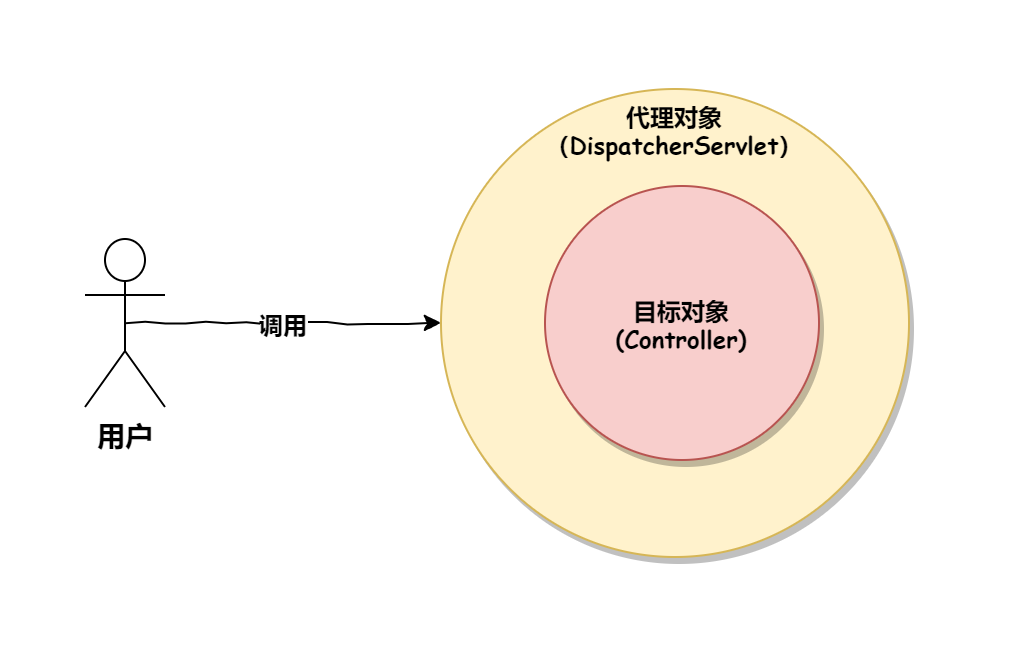
从最开始的直接进入控制器层 , 到现在多了一层校验才能进入控制器层 , Spring AOP 帮我们实现了校验拦截的功能
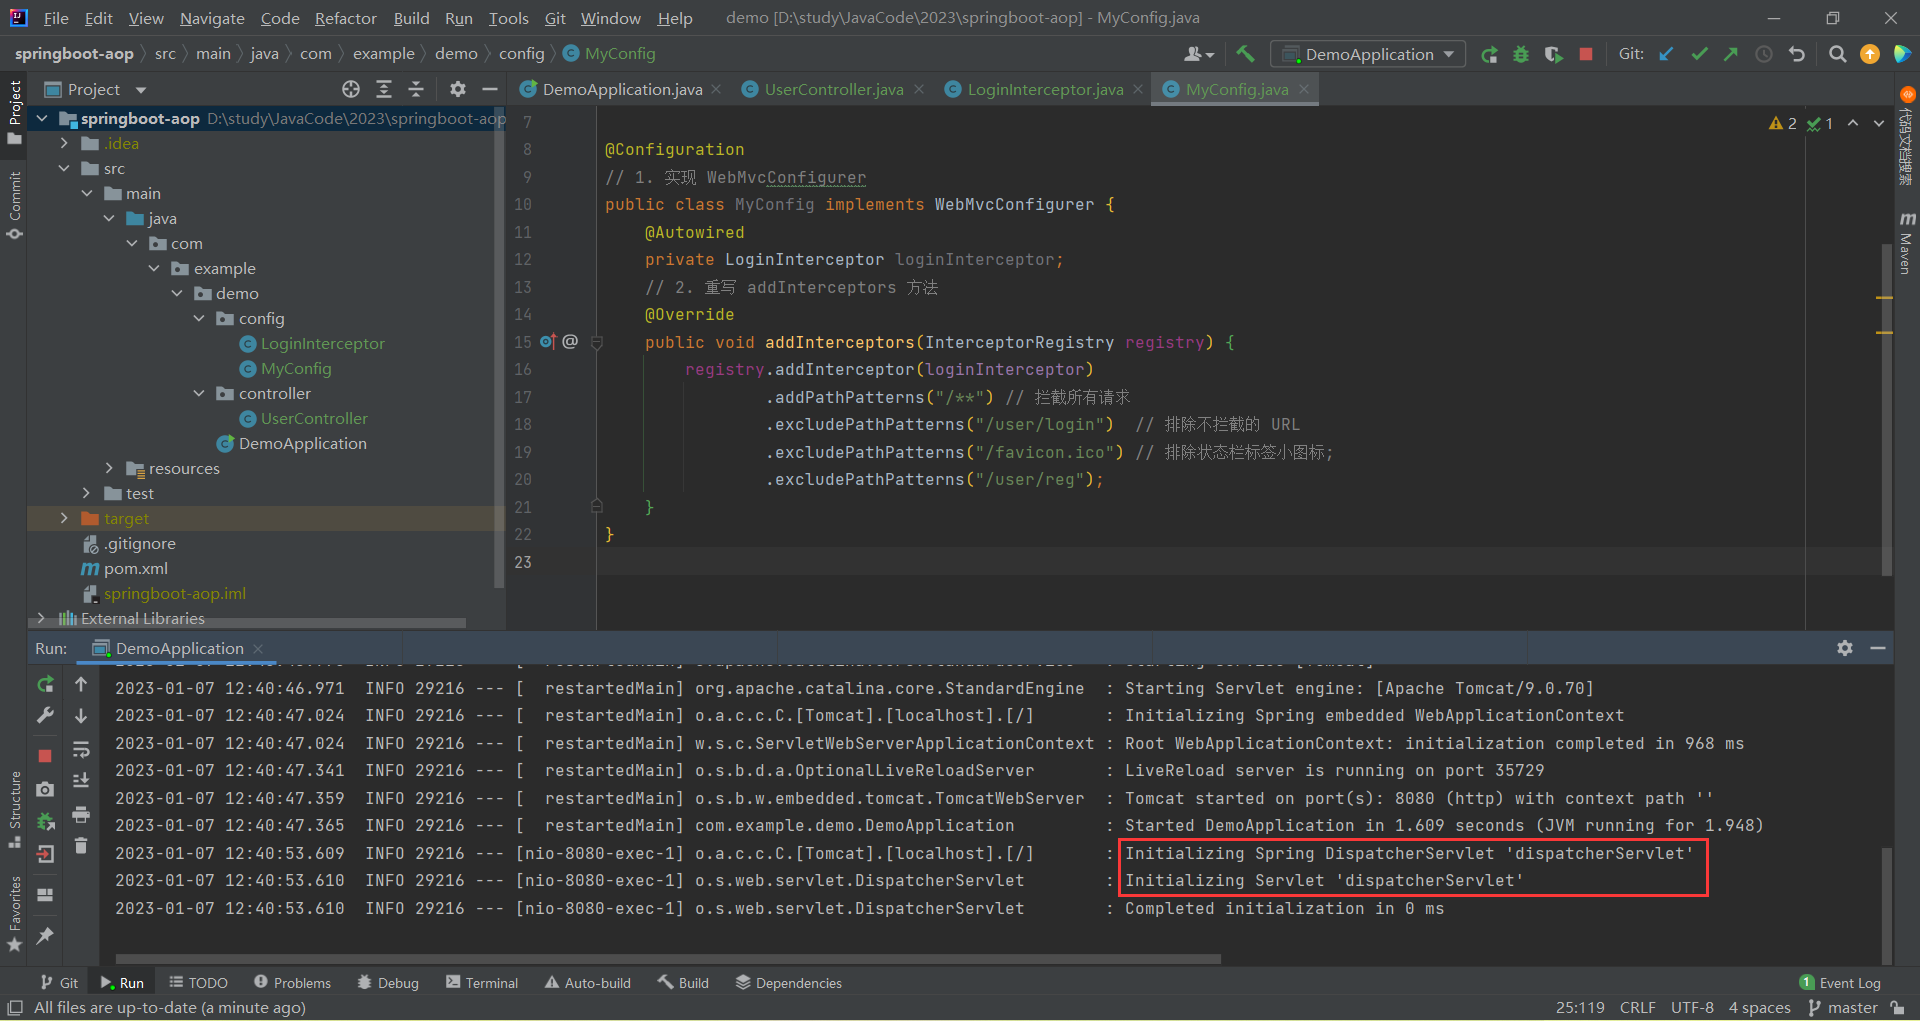
所有的 Controller 执行都会通过⼀个调度器 DispatcherServlet 来实现 , 可以从 Spring Boot 控制台的打印信息看出
我们访问 controller 底下的 login 方法

就可以在 Spring Boot 的控制台下面 , 发现 DispatcherServlet 的身影
从源码角度来分析
双击 shift 搜索 DispatchServlet
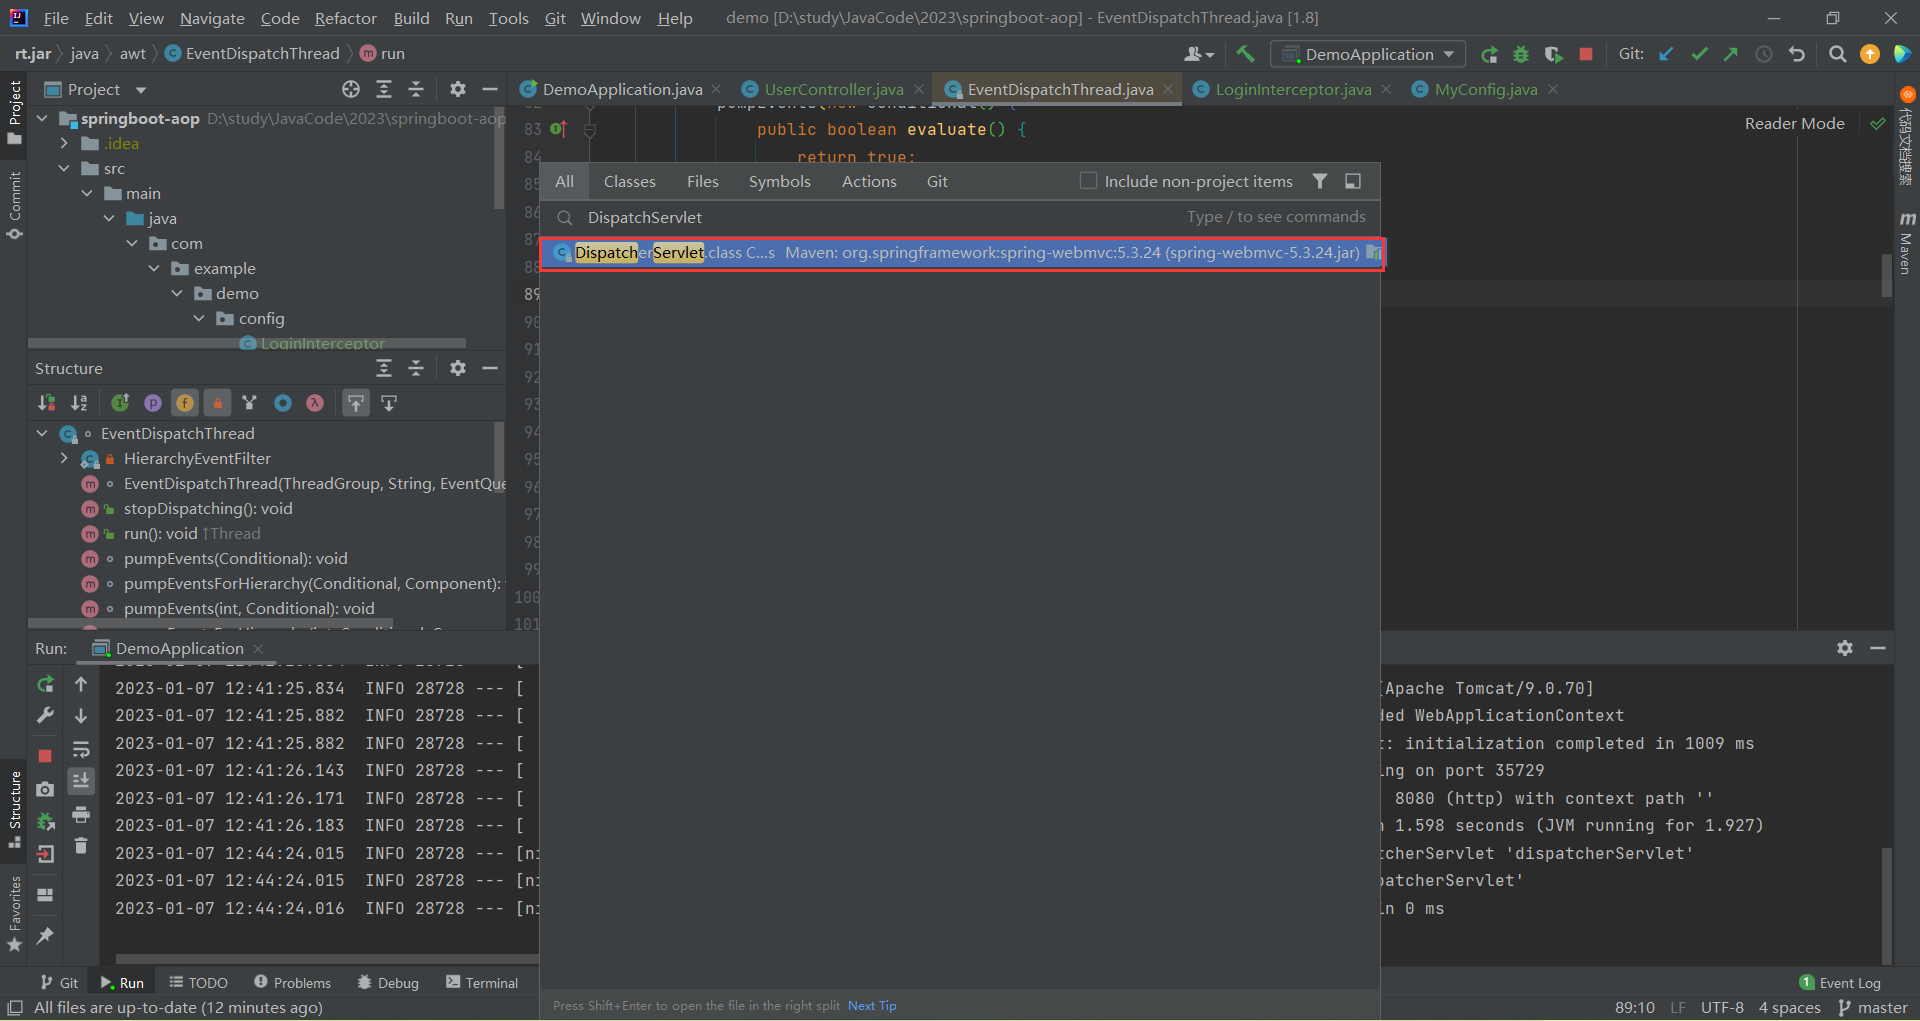
CTRL + F 搜索 doDispatch 就找到了
protected void doDispatch(HttpServletRequest request, HttpServletResponse response) throws Exception {
    HttpServletRequest processedRequest = request;
    HandlerExecutionChain mappedHandler = null;
    boolean multipartRequestParsed = false;

    WebAsyncManager asyncManager = WebAsyncUtils.getAsyncManager(request);

    try {
        ModelAndView mv = null;
        Exception dispatchException = null;

        try {
            processedRequest = checkMultipart(request);
            multipartRequestParsed = (processedRequest != request);

            mappedHandler = getHandler(processedRequest);
            if (mappedHandler == null) {
                noHandlerFound(processedRequest, response);
                return;
            }

            HandlerAdapter ha = getHandlerAdapter(mappedHandler.getHandler());

            String method = request.getMethod();
            boolean isGet = "GET".equals(method);
            if (isGet || "HEAD".equals(method)) {
                long lastModified = ha.getLastModified(request, mappedHandler.getHandler());
                if (new ServletWebRequest(request, response).checkNotModified(lastModified) && isGet) {
                    return;
                }
            }

            // 调用预处理[重要]
            if (!mappedHandler.applyPreHandle(processedRequest, response)) {
                return;
            }

            // 执行 controller 里面的业务
            mv = ha.handle(processedRequest, response, mappedHandler.getHandler());
            if (asyncManager.isConcurrentHandlingStarted()) {
                return;
            }
            applyDefaultViewName(processedRequest, mv);
            mappedHandler.applyPostHandle(processedRequest, response, mv);
        }
        catch (Exception ex) {
            dispatchException = ex;
        }
        catch (Throwable err) {
            dispatchException = new NestedServletException("Handler dispatch failed", err);
        }

        processDispatchResult(processedRequest, response, mappedHandler, mv, dispatchException);
    }
    catch (Exception ex) {
        triggerAfterCompletion(processedRequest, response, mappedHandler, ex);
    }
    catch (Throwable err) {
        triggerAfterCompletion(processedRequest, response, mappedHandler,
                               new NestedServletException("Handler processing failed", err));
    }
    finally {
        if (asyncManager.isConcurrentHandlingStarted()) {
            if (mappedHandler != null) {
                mappedHandler.applyAfterConcurrentHandlingStarted(processedRequest, response);
            }
        }
        else {
            if (multipartRequestParsed) {
                cleanupMultipart(processedRequest);
            }
        }
    }
}
我们再看一下源码里面的核心方法
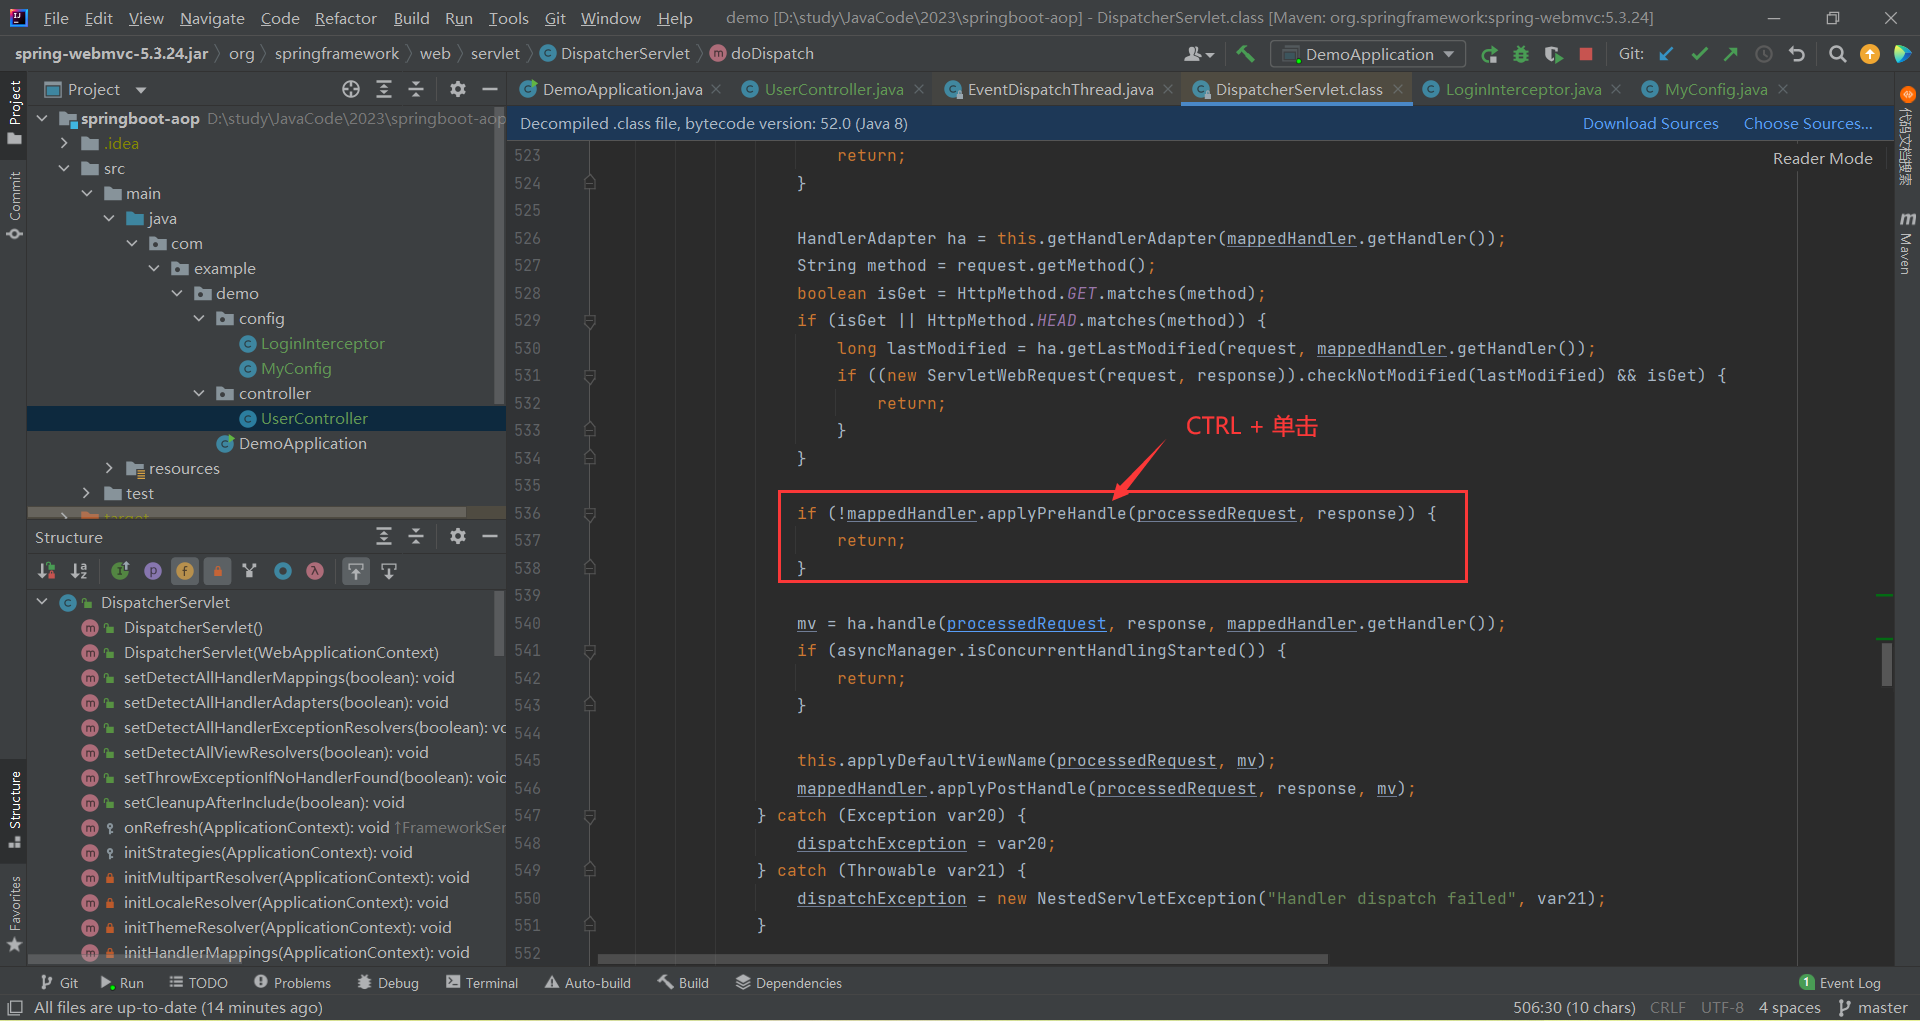
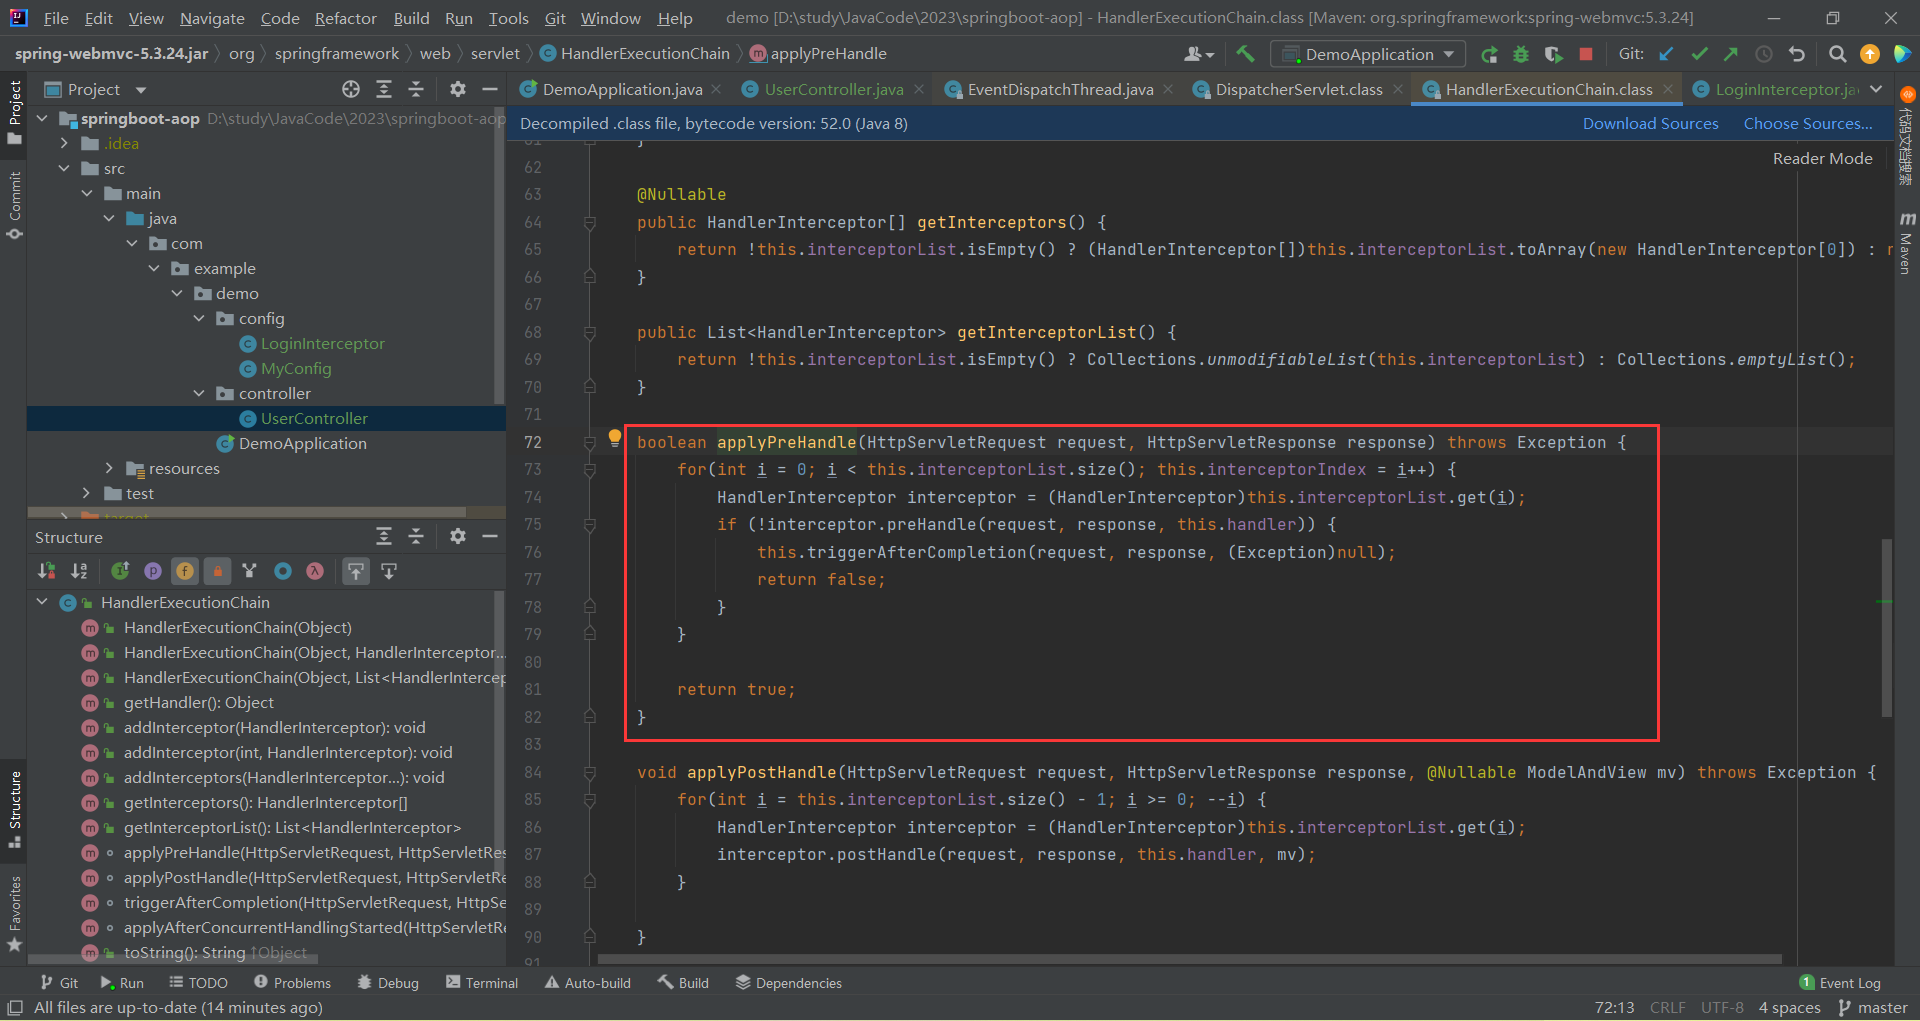
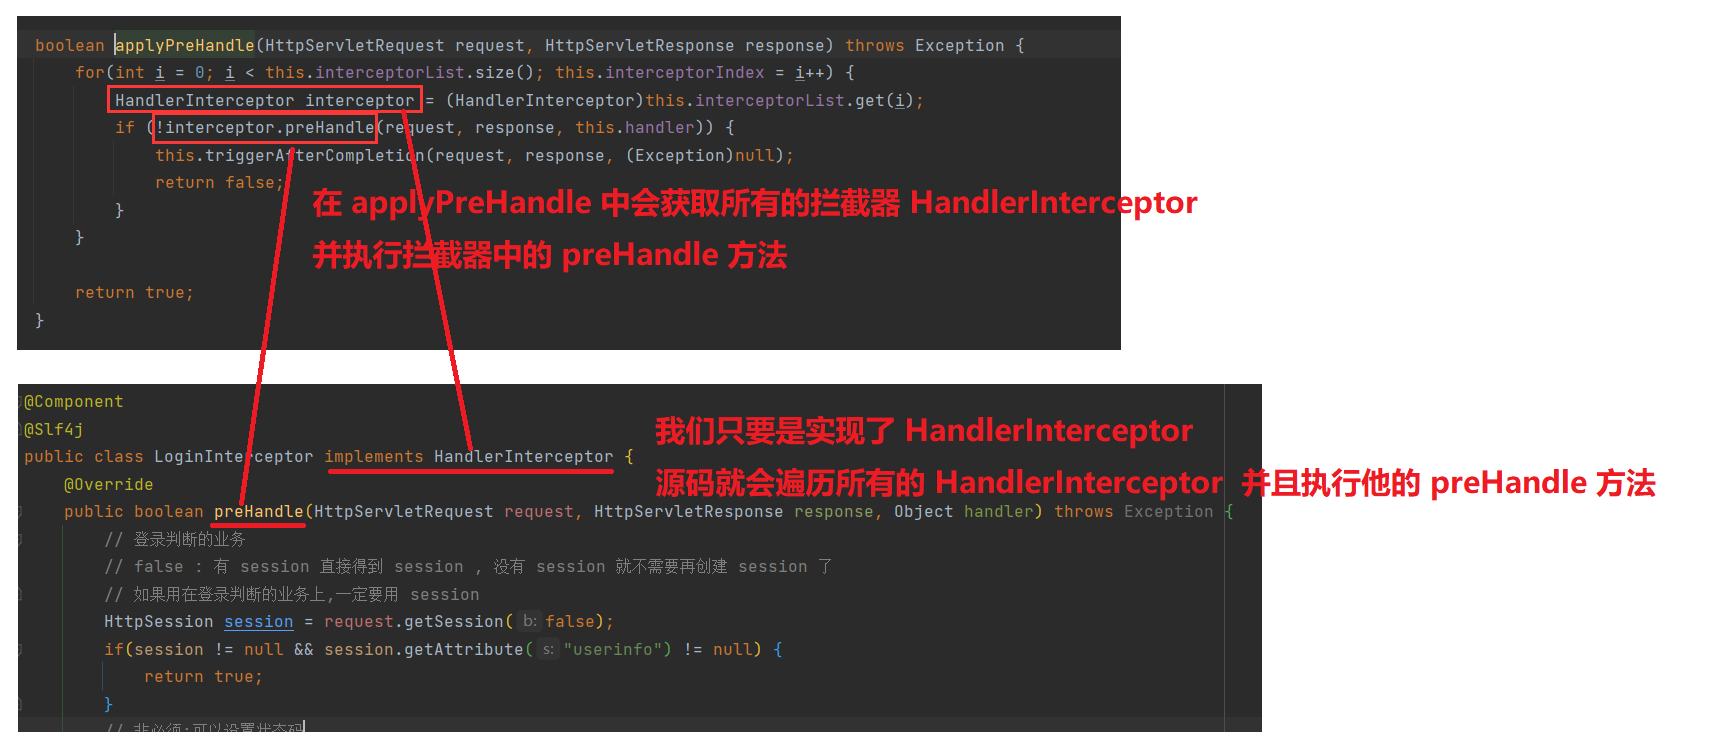
通过上面的源码分析 , 我们可以看出 , Spring 中的拦截器也是通过动态代理和环绕通知的思想实现的 , 大体的调用流程如下 :
扩展 : 统一访问前缀添加
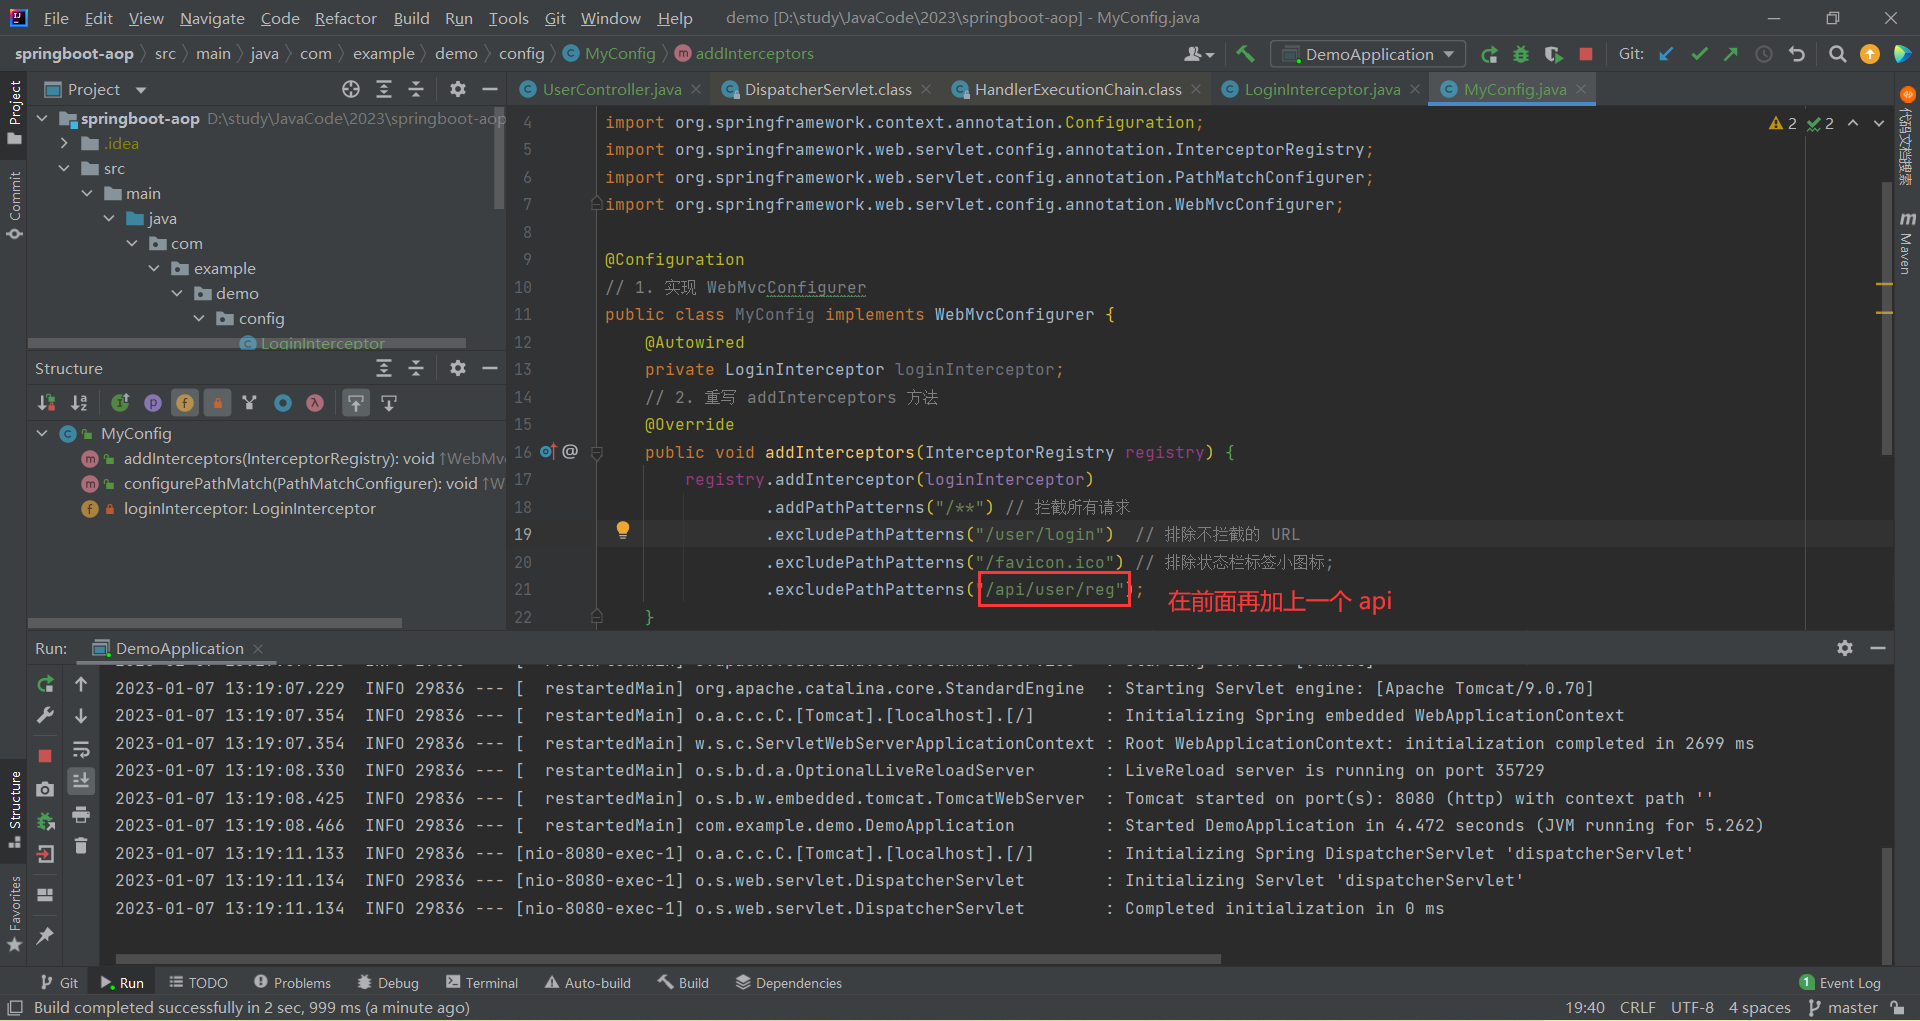
在 MyConfig 类中重写 configurePathMatch 方法 , 然后使用他的 addPathPrefix 方法
package com.example.demo.config;

import org.springframework.beans.factory.annotation.Autowired;
import org.springframework.context.annotation.Configuration;
import org.springframework.web.servlet.config.annotation.InterceptorRegistry;
import org.springframework.web.servlet.config.annotation.PathMatchConfigurer;
import org.springframework.web.servlet.config.annotation.WebMvcConfigurer;

@Configuration
// 1. 实现 WebMvcConfigurer
public class MyConfig implements WebMvcConfigurer {
    @Autowired
    private LoginInterceptor loginInterceptor;
    // 2. 重写 addInterceptors 方法
    @Override
    public void addInterceptors(InterceptorRegistry registry) {
        registry.addInterceptor(loginInterceptor)
                .addPathPatterns("/**") // 拦截所有请求
                .excludePathPatterns("/user/login")  // 排除不拦截的 URL
                .excludePathPatterns("/favicon.ico") // 排除状态栏标签小图标;
                .excludePathPatterns("/user/reg");
    }

    @Override
    public void configurePathMatch(PathMatchConfigurer configurer) {
        configurer.addPathPrefix("api",c -> true);
    }
}
其中第⼆个参数是⼀个表达式 , 设置为 true 表示启动前缀
它的作用就是 , 我们在地址栏输入的时候 , 需要在前面加上 api (其实很鸡肋)

想要成功访问 , 还要修改一下拦截路径
二 . 统一异常的处理
我们在 reg 方法里构造一个异常 , 当这个异常发生了 , 原本的期望是发生异常返回信息给前端 , 让前端知道出现问题了 .
但是我们目前程序的健壮性并不是很强 , 当我们制造出一个异常之后 , 目前的程序并不能返回错误给前端
package com.example.demo.controller;

import lombok.extern.slf4j.Slf4j;
import org.springframework.util.StringUtils;
import org.springframework.web.bind.annotation.RequestMapping;
import org.springframework.web.bind.annotation.RestController;

import javax.servlet.http.HttpServletRequest;
import javax.servlet.http.HttpSession;

@RestController
@RequestMapping("/user")
@Slf4j
public class UserController {
    /**
     * 登录需要传入用户名密码
     * 验证用户名密码是否正确需要传入 request 对象
     * @param request
     * @param username
     * @param password
     * @return
     */
    @RequestMapping("login")
    public boolean login(HttpServletRequest request,
                         String username, String password) {
        // 1. 非空判断
        // StringUtils.hasLength()
        // 有值 -> 返回 true
        // 为 null -> 返回 false
        if(StringUtils.hasLength(username) && StringUtils.hasLength(password)) {
            // 2. 验证用户名和密码是否正确(伪代码)
            if("admin".equals(username) && "admin".equals(password)) {
                // 登陆成功
                // 把登录信息放进 HttpSession 里面
                HttpSession session = request.getSession();
                session.setAttribute("userinfo","admin");
                return true;
            } else {
                // 登陆失败
                // 用户名或密码错误
                return false;
            }
        }
        return false;
    }

    /**
     * 获取个人信息
     * @return
     */
    @RequestMapping("/getinfo")
    public String getInfo() {
        // 使用日志,需要添加 @Slf4j 注解
        log.debug("执行了 getinfo 方法");
        return "执行了 getinfo 方法";
    }

    /**
     * 注册功能(伪代码)
     */
    @RequestMapping("/reg")
    public String reg() {
        int num = 10 / 0;
        log.debug("执行了 reg 方法");
        return "执行了 reg 方法";
    }

}

接下来 , 我们就去浏览器看看效果
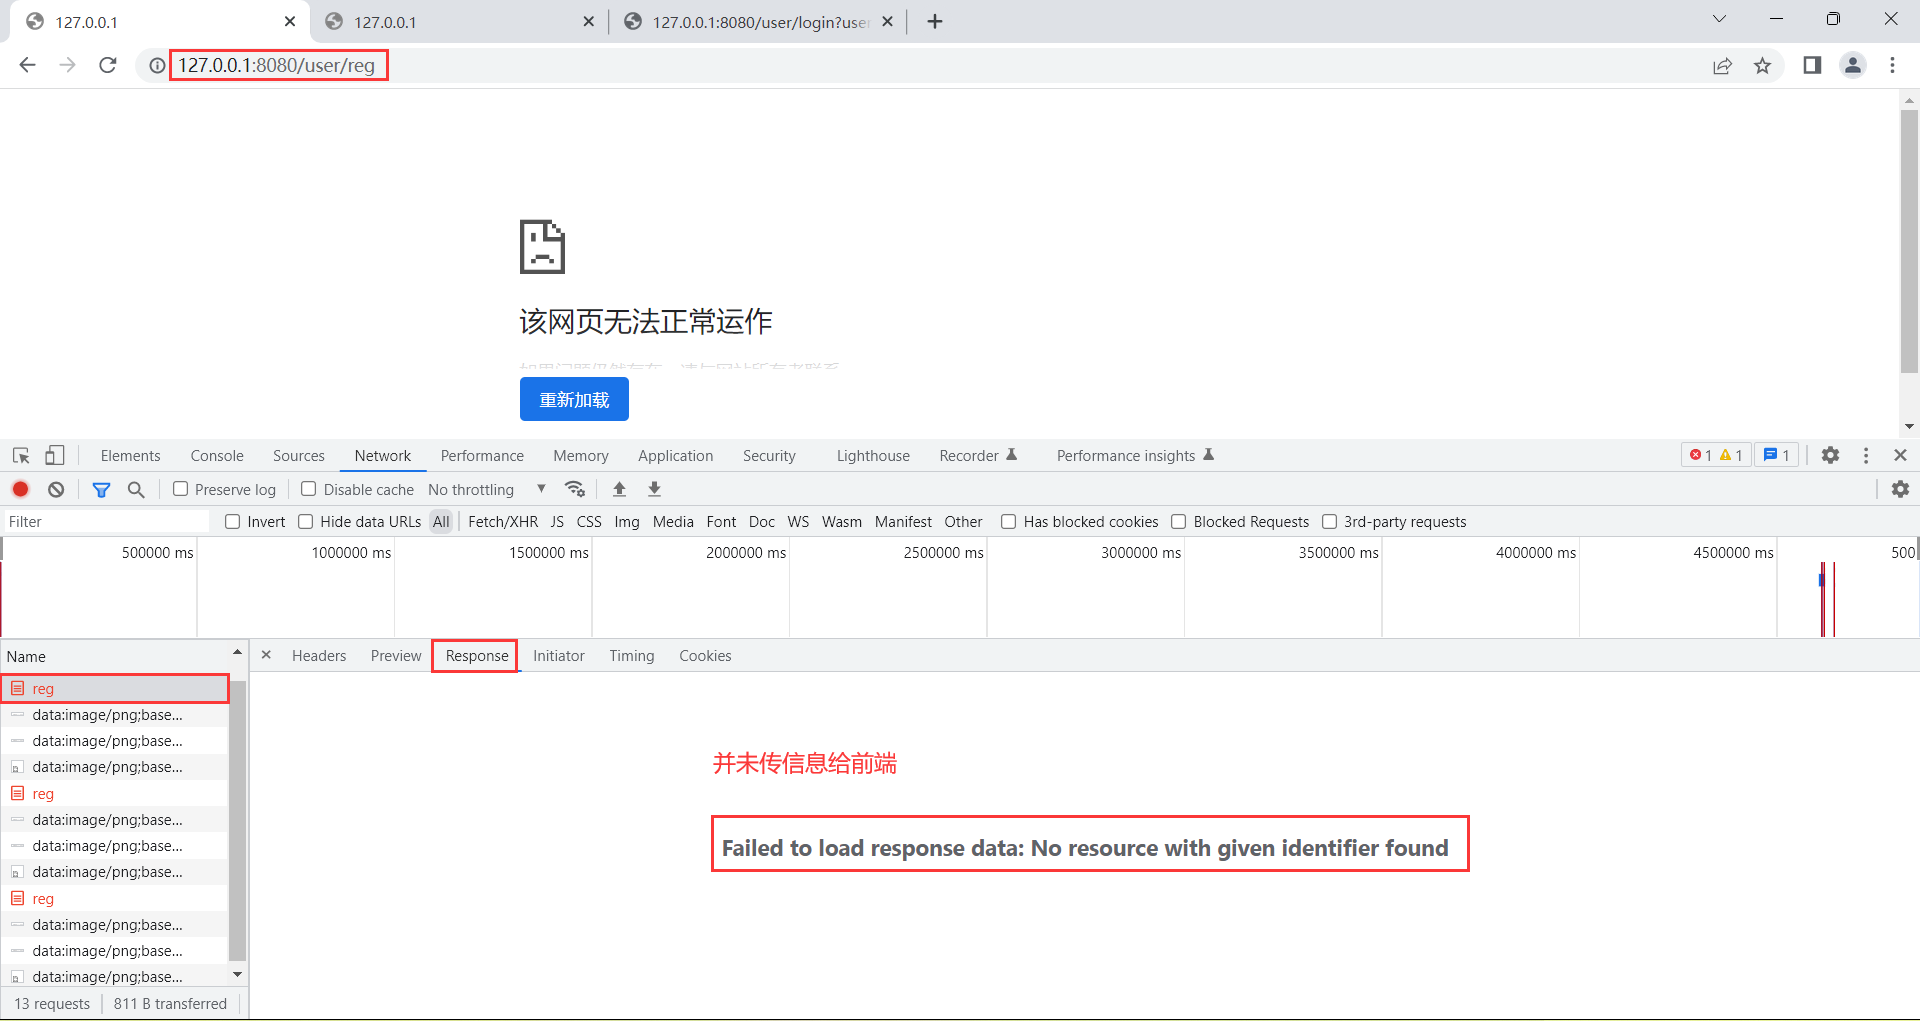
后端这里就报错了
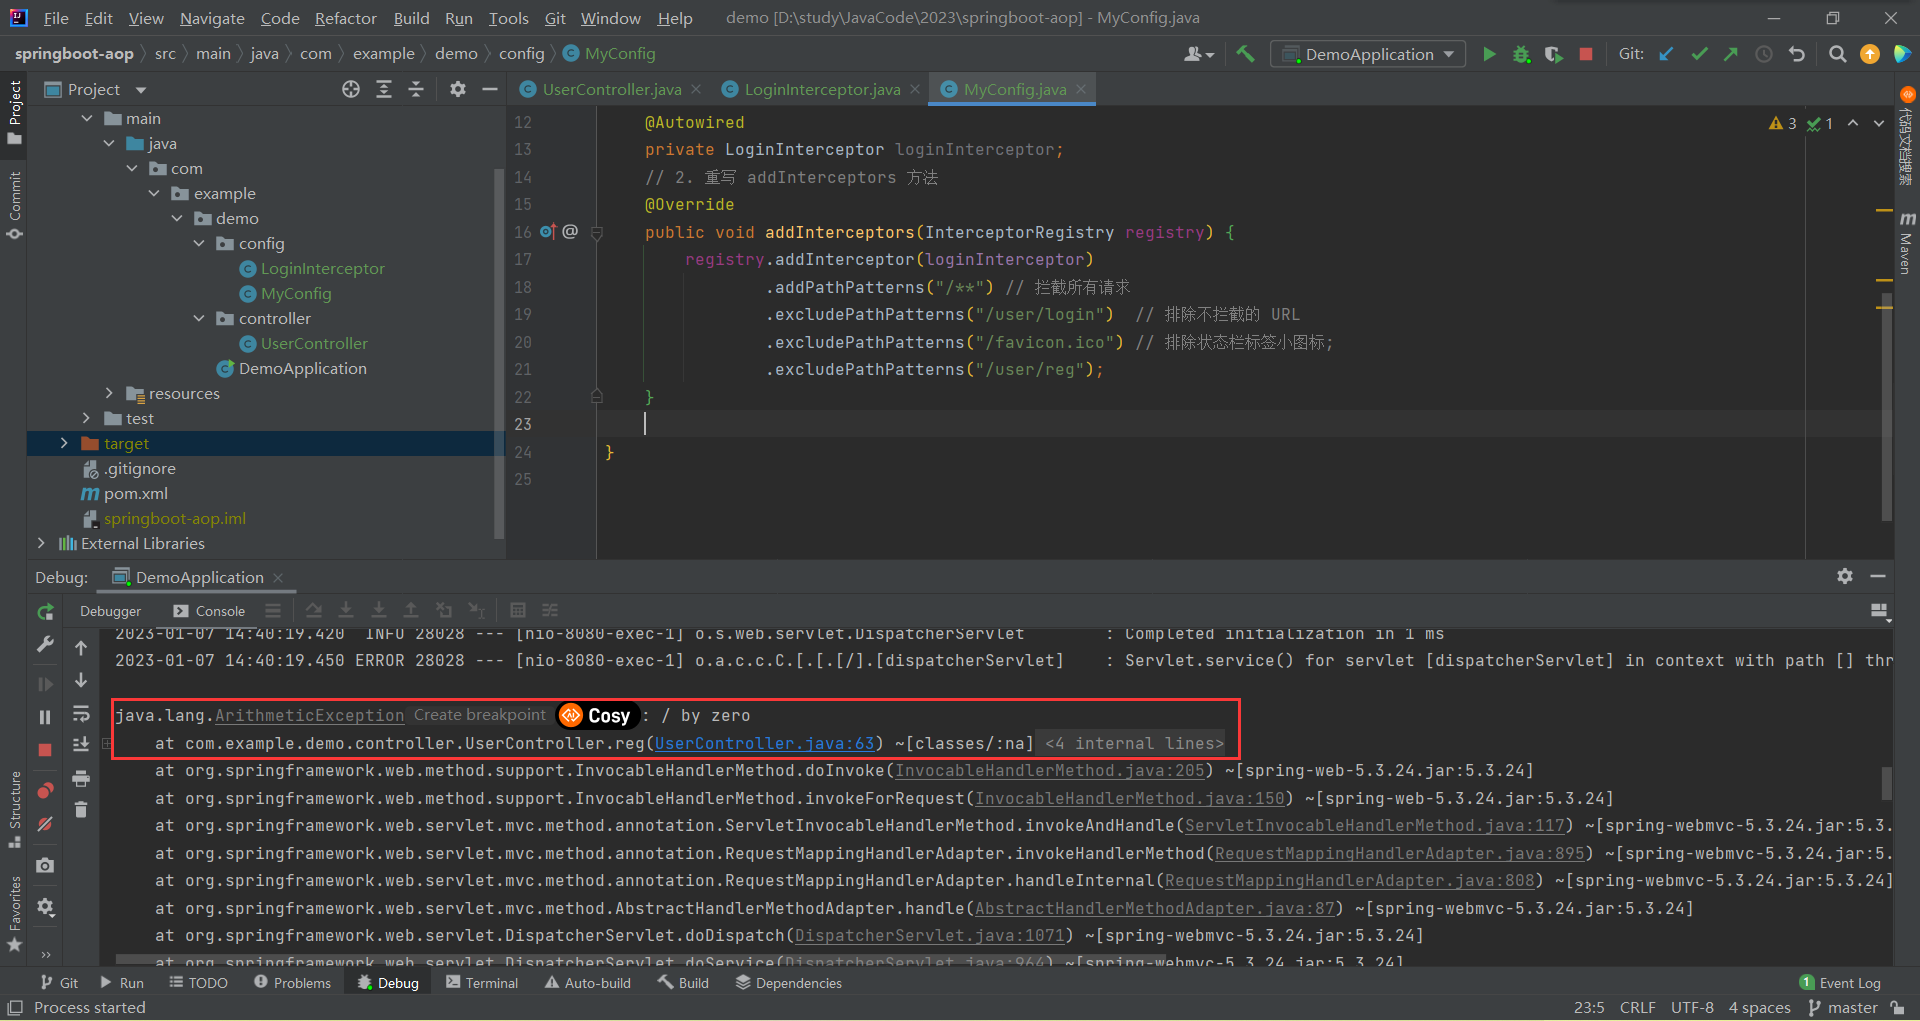
那前端就蒙了 , 我还在这等着你呢 , 你这头自己就偷摸报错了
那我们就需要通过 Spring AOP 统一异常的处理 , 来加强程序的鲁棒性
2.1 统一异常的处理的实现
我们在 config 包底下新创建一个类 , 叫做 ErrorAdvice
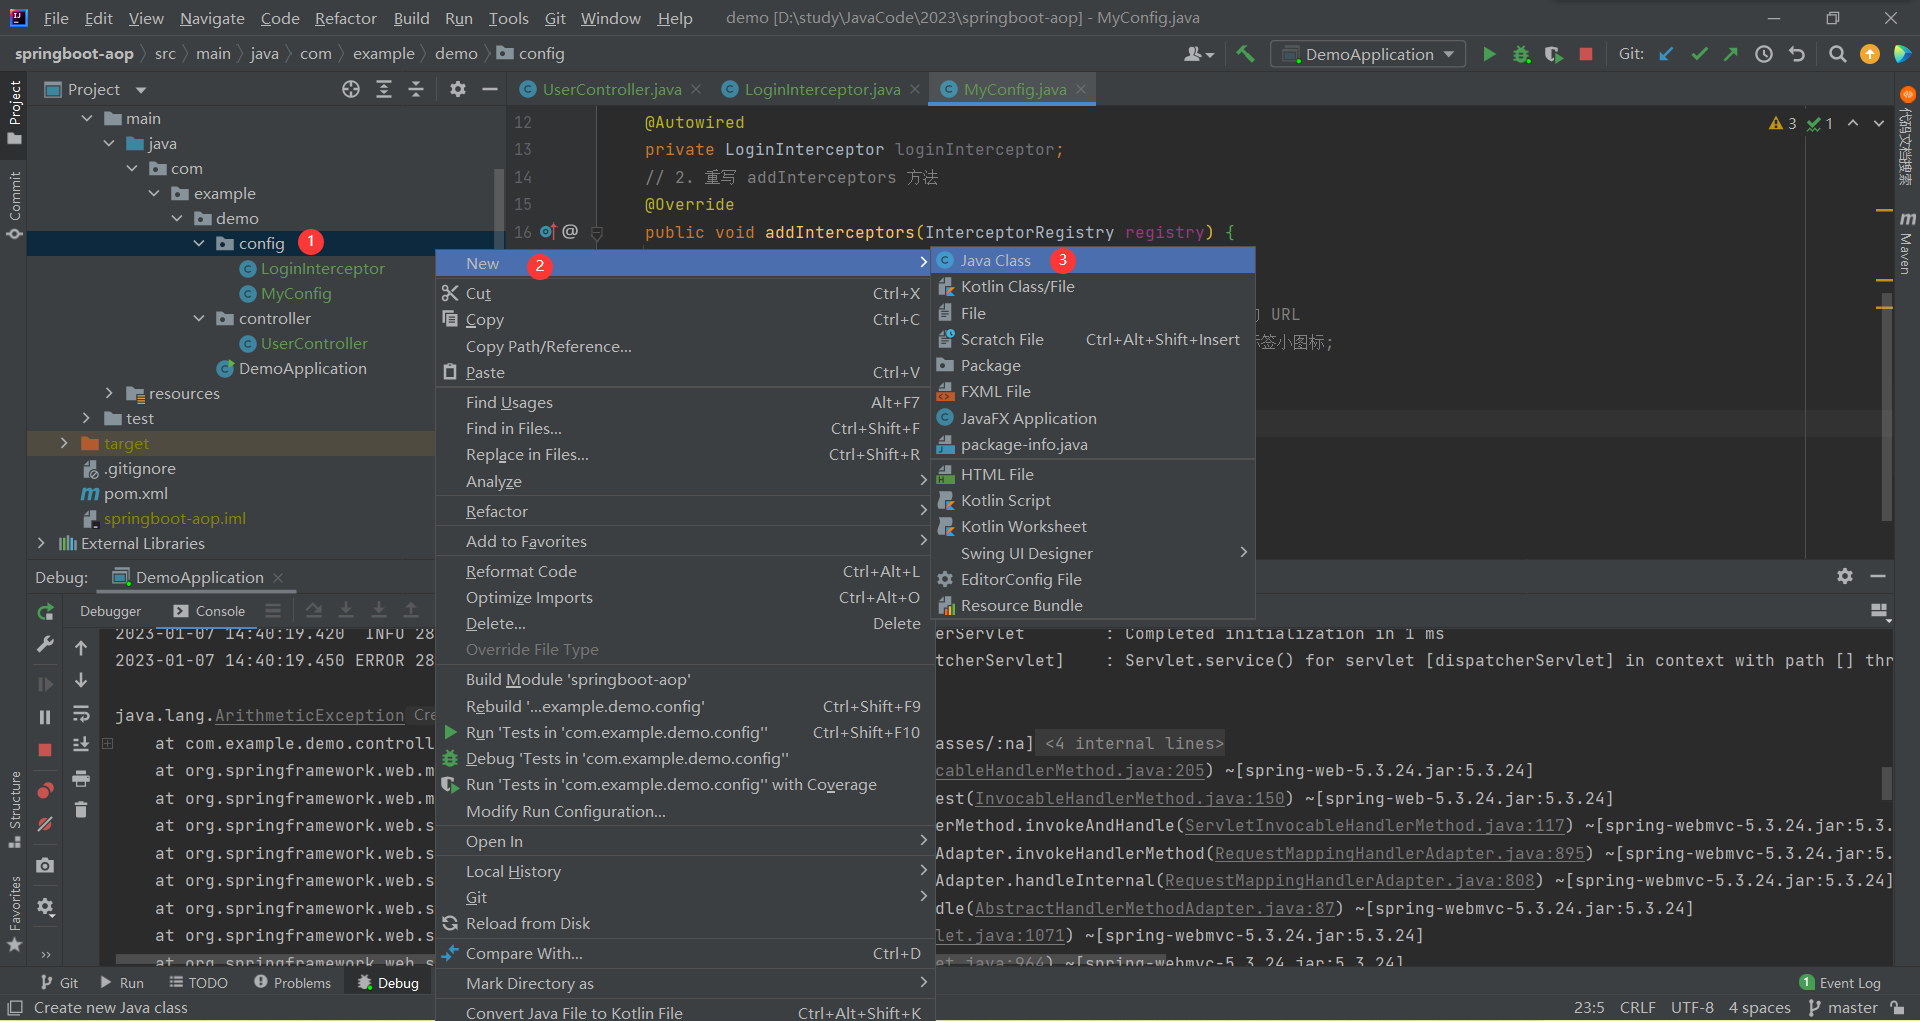
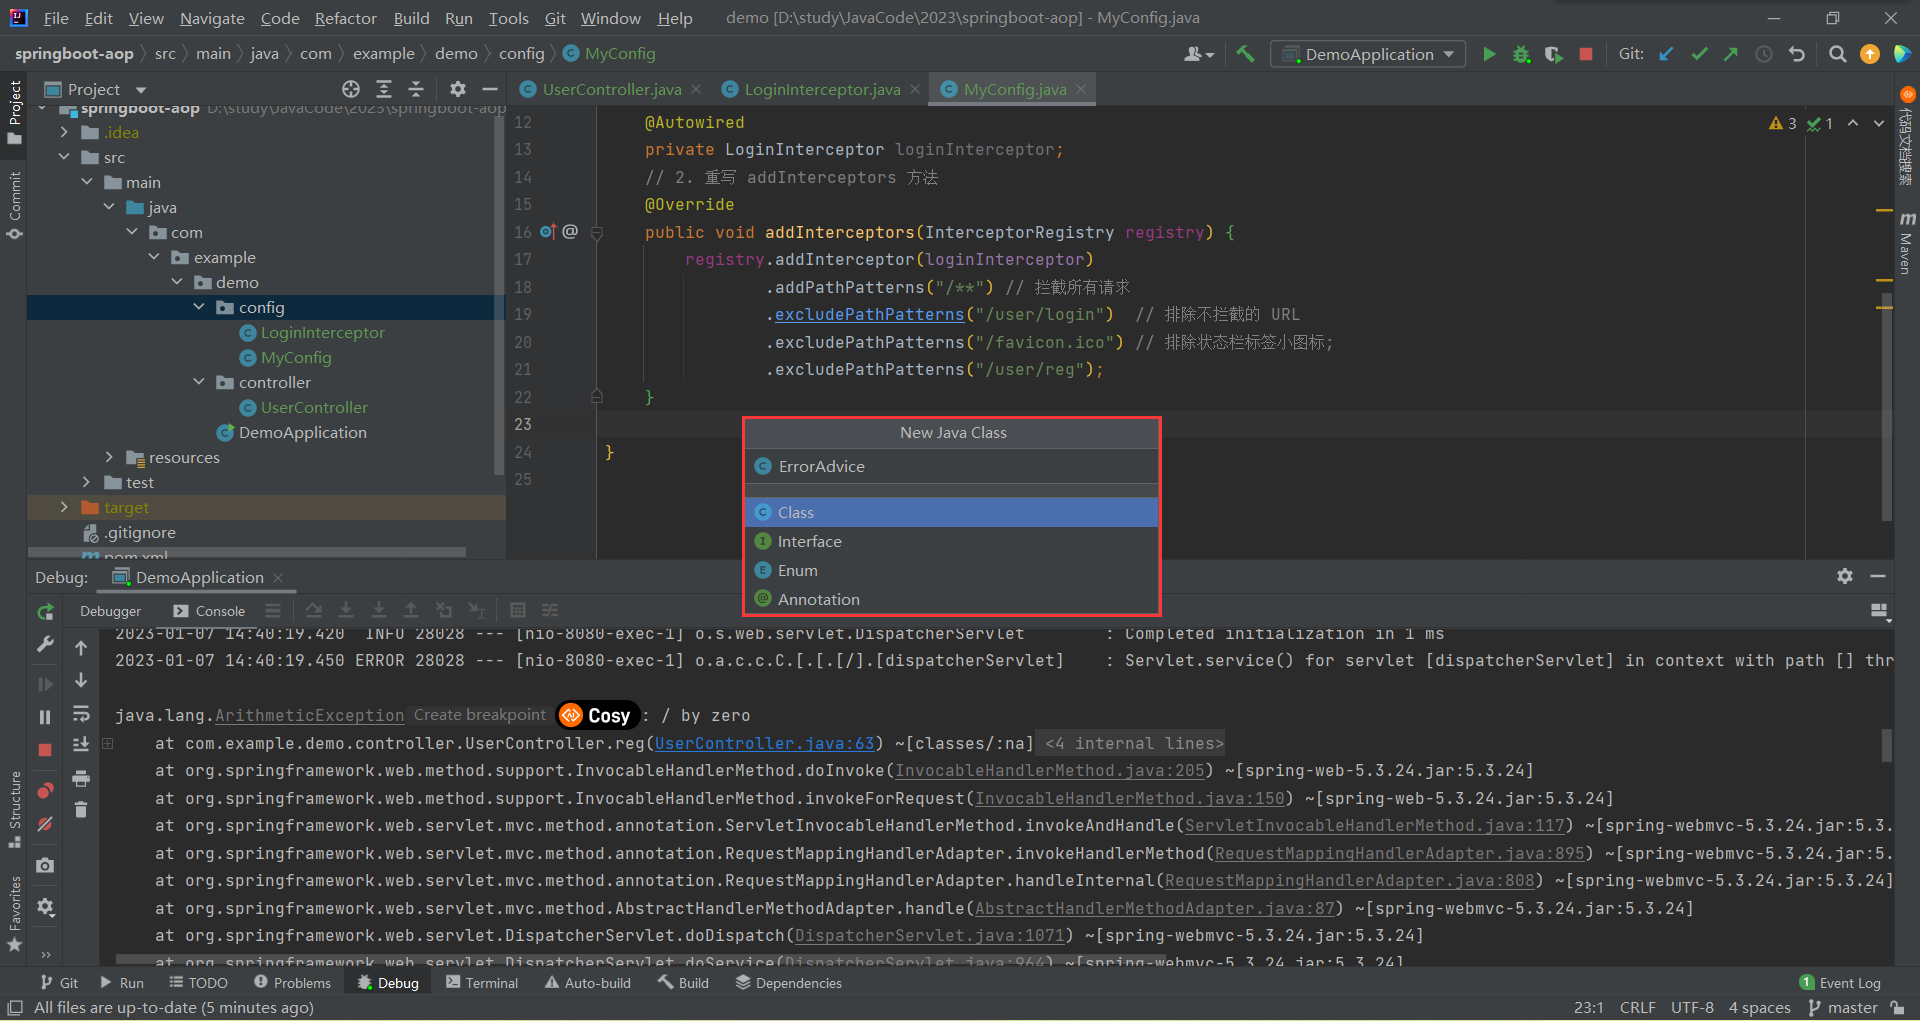
统一异常的处理分为以下几步 :
- 新建一个类 , 加上 @ControllerAdvice 注解
package com.example.demo.config;

/**
 * 统一处理异常
 */

import org.springframework.web.bind.annotation.ControllerAdvice;

@ControllerAdvice
public class ErrorAdvice {
}
- 编写具体的方法 , 在方法上面加上注解 : @ExceptionHandler(Exception.class)
package com.example.demo.config;

/**
 * 统一处理异常
 */

import org.springframework.web.bind.annotation.ControllerAdvice;
import org.springframework.web.bind.annotation.ExceptionHandler;
import org.springframework.web.bind.annotation.ResponseBody;

import java.util.HashMap;

@ControllerAdvice
public class ErrorAdvice {
    // 企业级要求:返回对象(返回HashMap)
    // 添加注解:@ExceptionHandler(Exception.class)
    @ExceptionHandler(Exception.class)
    @ResponseBody // 返回的是数据而不是页面
    public HashMap<String, Object> exAdvice() {
        HashMap<String, Object> result = new HashMap<>();

        return result;
    }
}
- 要修改状态码 , 以及把错误信息添加进去
package com.example.demo.config;

/**
 * 统一处理异常
 */

import org.springframework.web.bind.annotation.ControllerAdvice;
import org.springframework.web.bind.annotation.ExceptionHandler;
import org.springframework.web.bind.annotation.ResponseBody;

import java.util.HashMap;

@ControllerAdvice
public class ErrorAdvice {
    // 企业级要求:返回对象(返回HashMap)
    // 添加注解:@ExceptionHandler(Exception.class)
    @ExceptionHandler(Exception.class)
    @ResponseBody // 返回的是数据而不是页面
    public HashMap<String, Object> exAdvice(Exception e) {
        HashMap<String, Object> result = new HashMap<>();
        result.put("code","-1");// 出现异常,状态码改成-1
        result.put("msg",e.getMessage());// 把报错信息添加进去,需要在方法参数加上Exception e
        return result;
    }
}
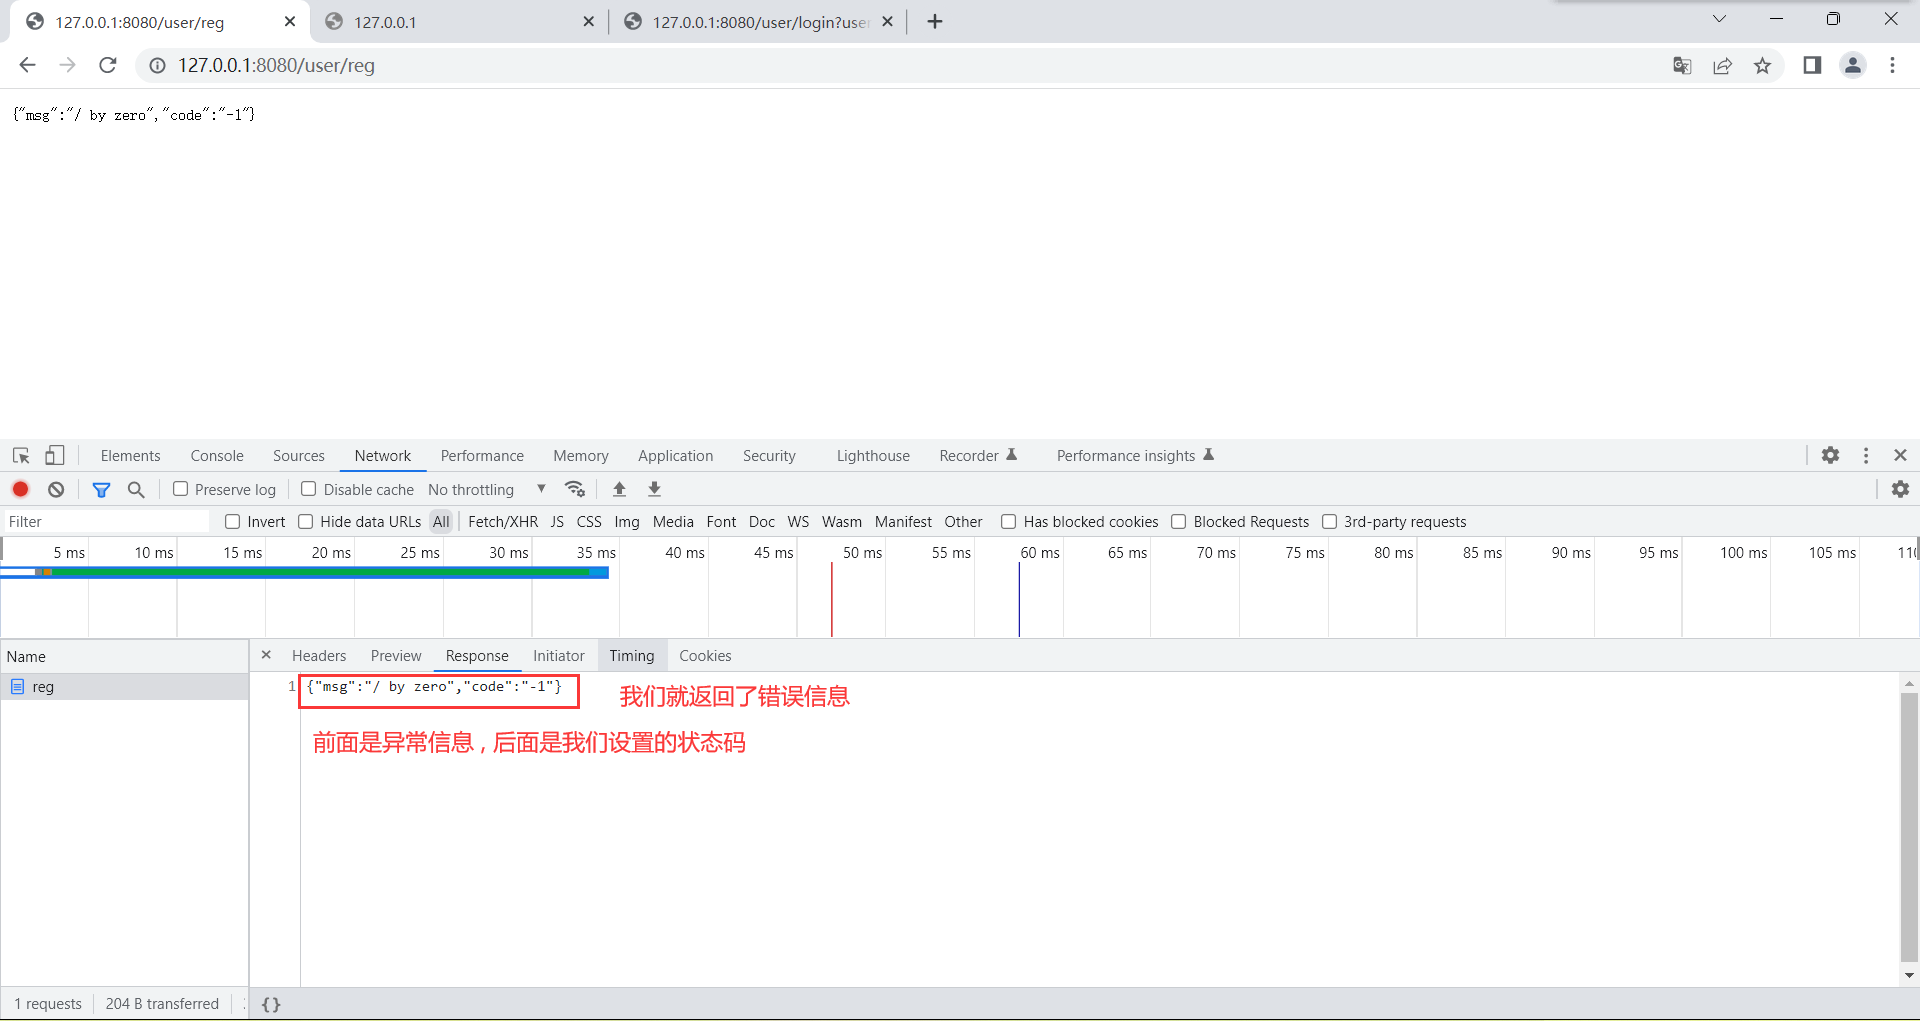
这就完成了统一异常的处理
接下来 , 我们再去运行一下
2.2 细化异常
目前我们是实现了大异常 , 我们还可以去实现更细级别的小异常
package com.example.demo.config;

/**
 * 统一处理异常
 */

import org.springframework.web.bind.annotation.ControllerAdvice;
import org.springframework.web.bind.annotation.ExceptionHandler;
import org.springframework.web.bind.annotation.ResponseBody;

import java.util.HashMap;

@ControllerAdvice
public class ErrorAdvice {
    // 企业级要求:返回对象(返回HashMap)
    // 添加注解:@ExceptionHandler(Exception.class)
    @ExceptionHandler(Exception.class)
    @ResponseBody // 返回的是数据而不是页面
    public HashMap<String, Object> exAdvice(Exception e) {
        HashMap<String, Object> result = new HashMap<>();
        result.put("code","-1");// 出现异常,状态码改成-1
        result.put("msg",e.getMessage());// 把报错信息添加进去,需要在方法参数加上Exception e
        return result;
    }

    @ExceptionHandler(ArithmeticException.class)
    @ResponseBody
    public HashMap<String, Object> arithmeticAdvice(ArithmeticException e) {
        HashMap<String, Object> result = new HashMap<>();
        result.put("code",-2);
        result.put("msg",e.getMessage());
        return result;
    }
}

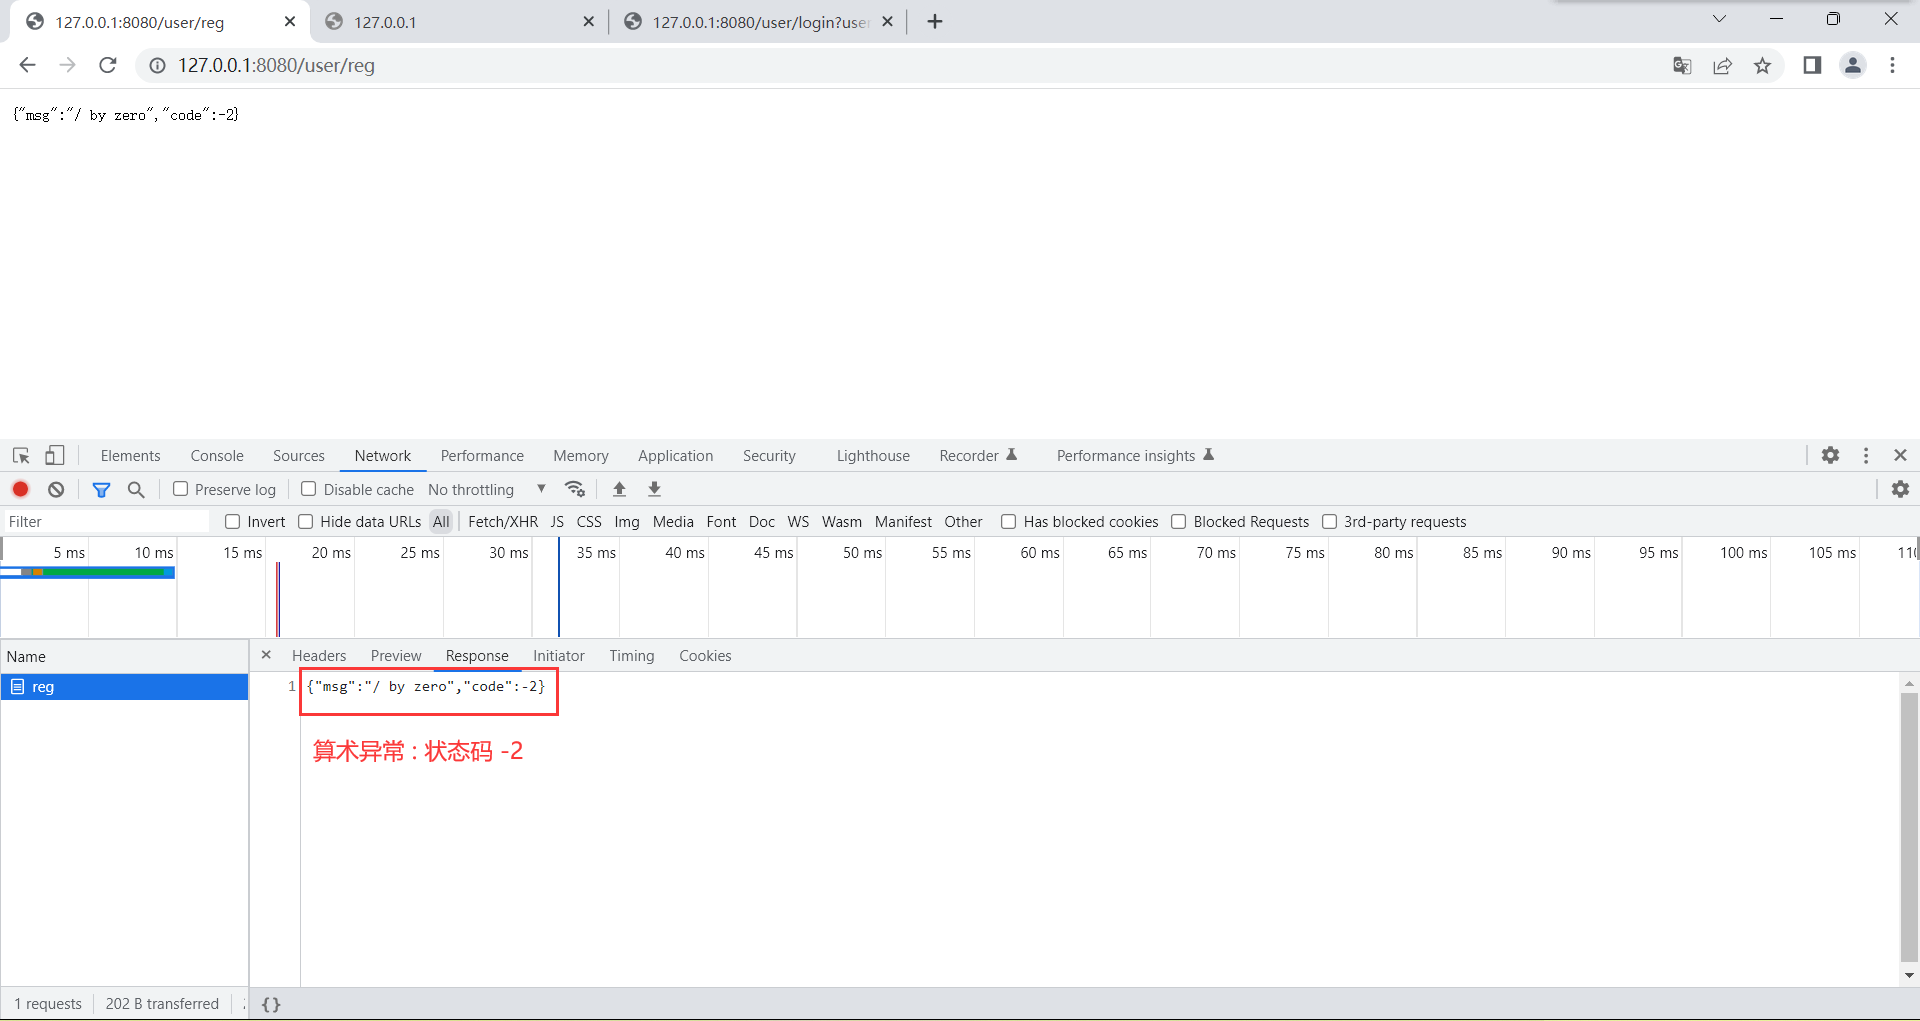
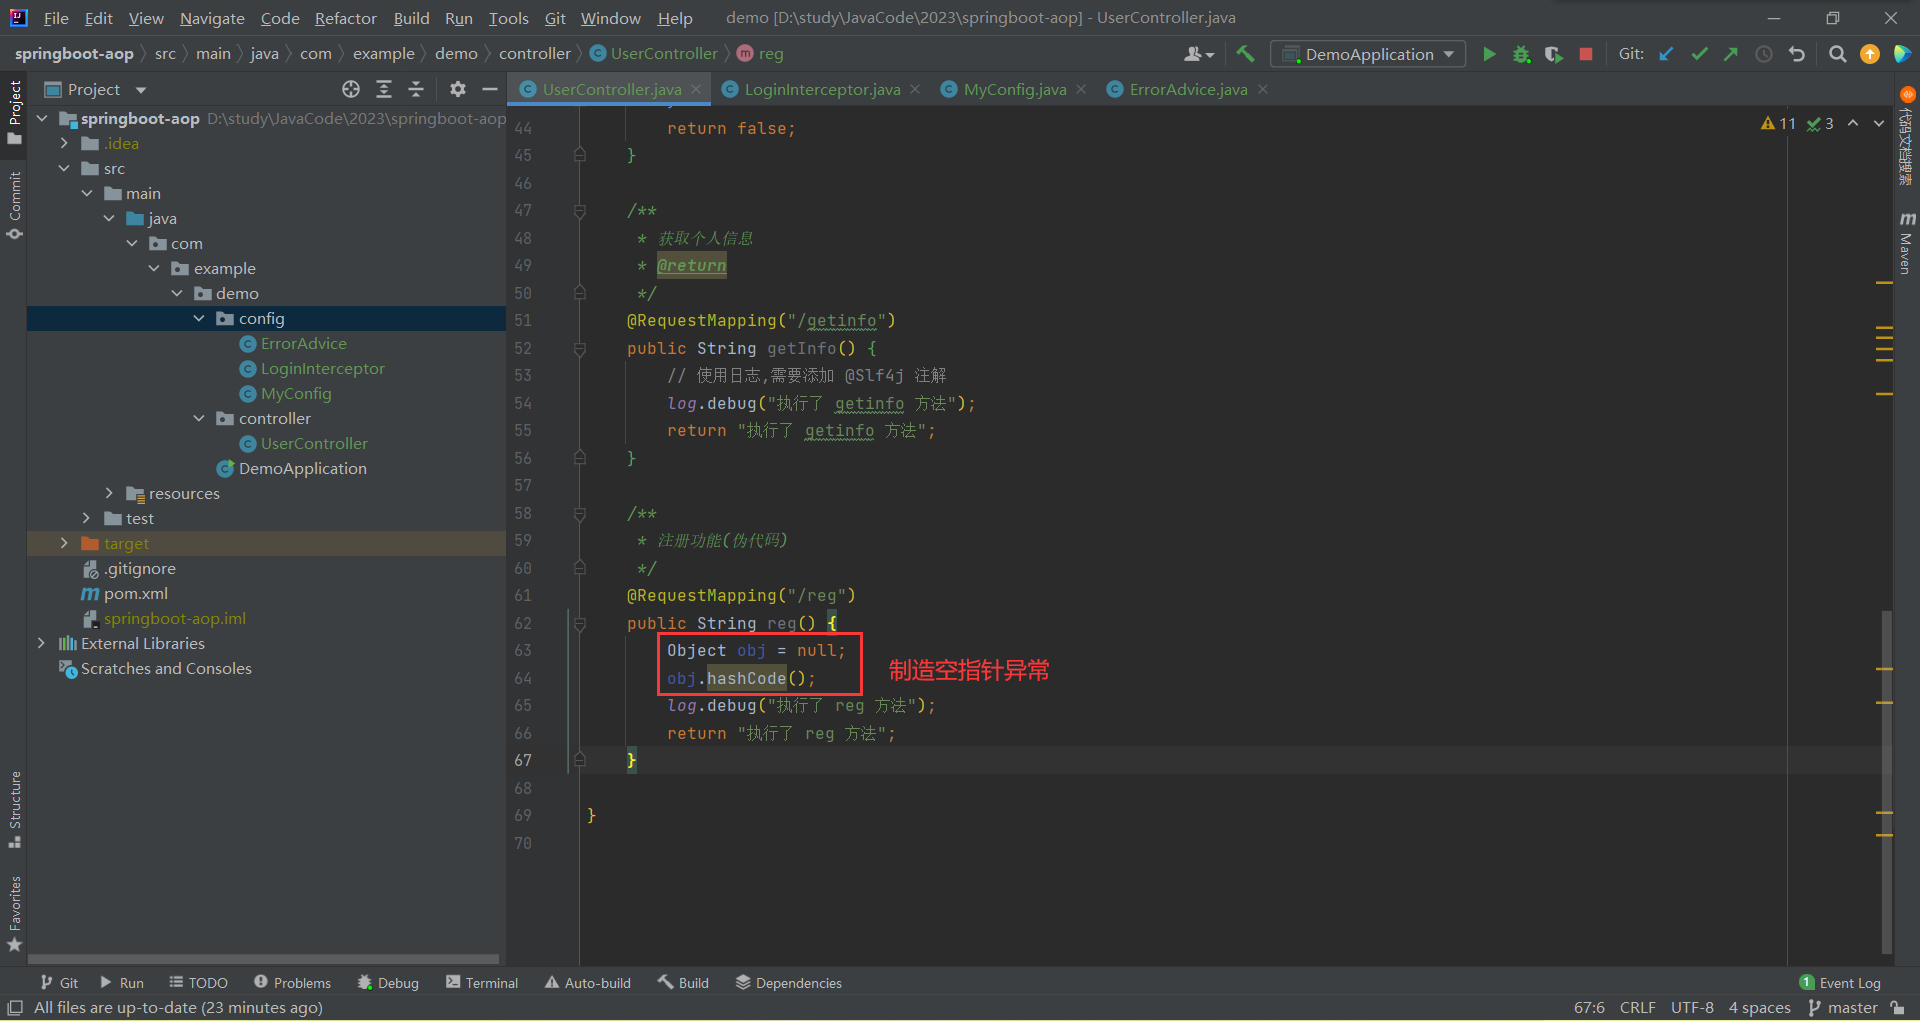
那我们再制造个空指针异常 , 状态码就应该为 -1
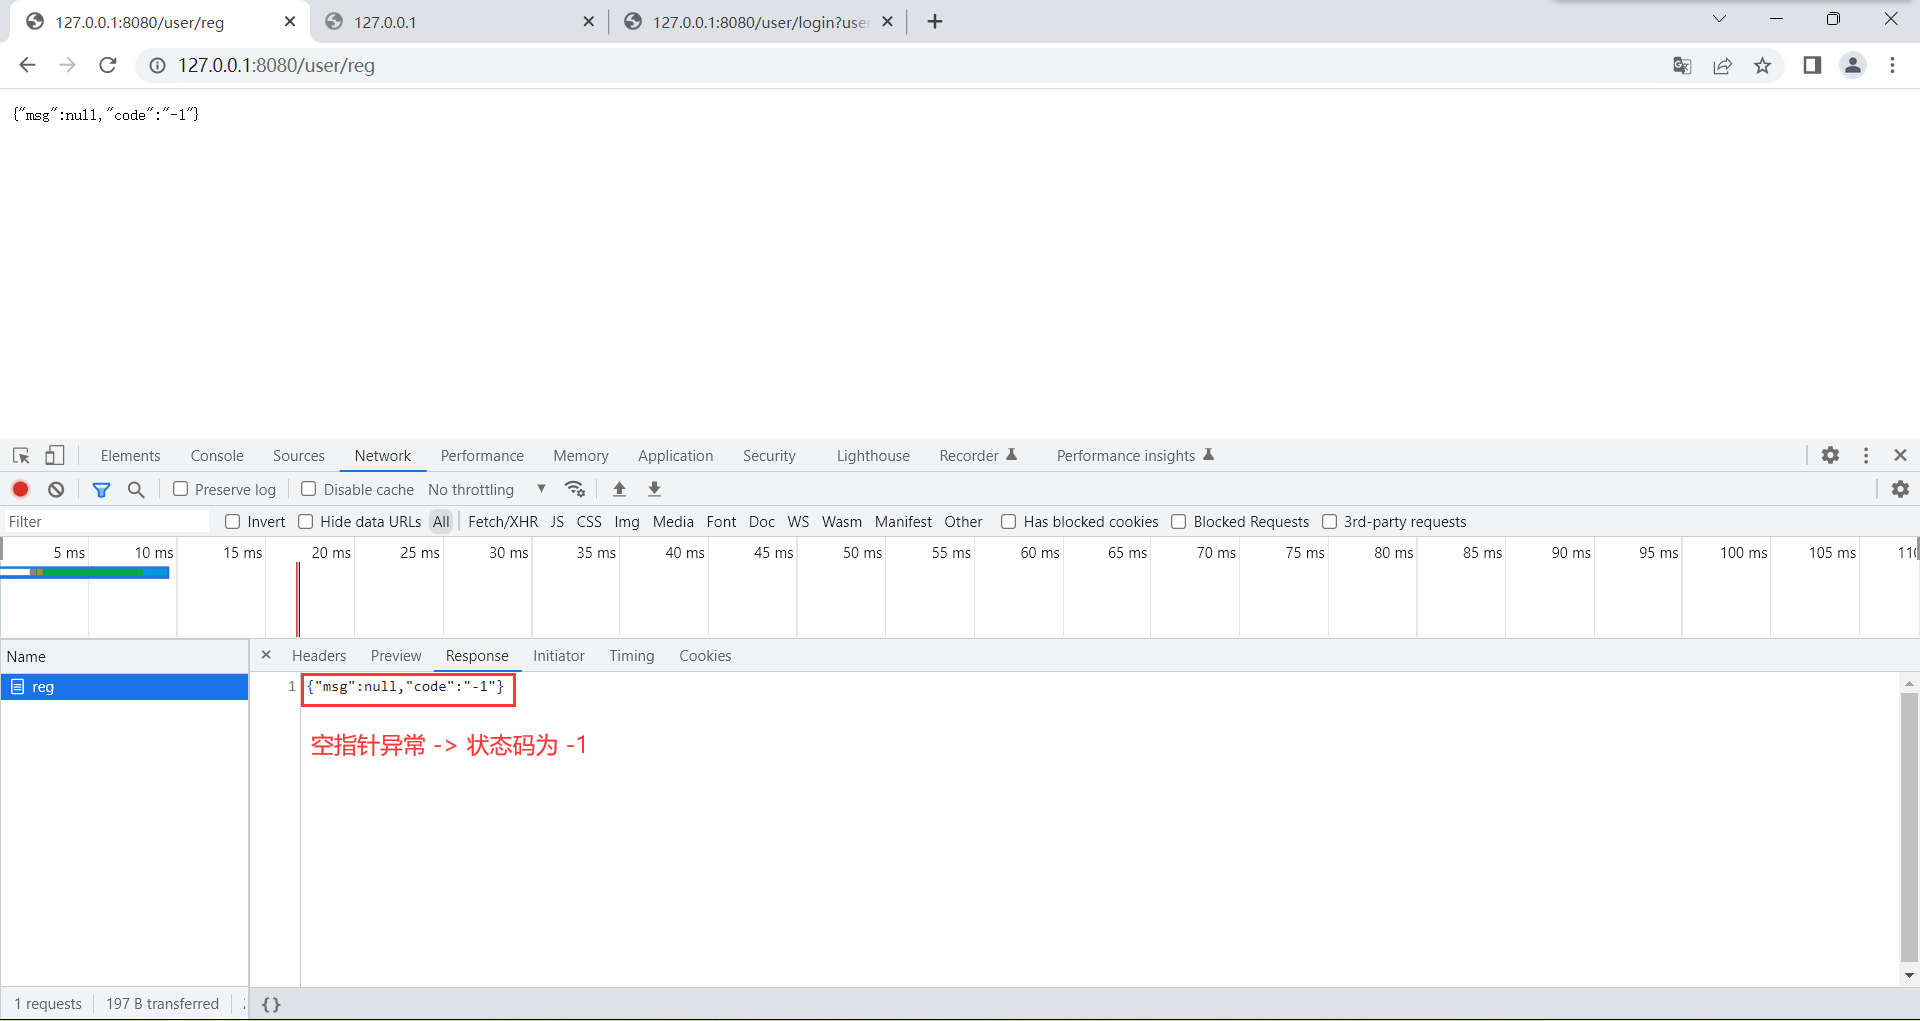
前端程序员收到错误信息之后 , 前端程序员就可以进行处理了 , 可以给用户一个页面或者弹窗提示运行失败
三 . 统一数据返回格式
3.1 为什么需要统一数据返回格式?
本质就是降低双方沟通成本
3.2 统一数据返回格式的实现
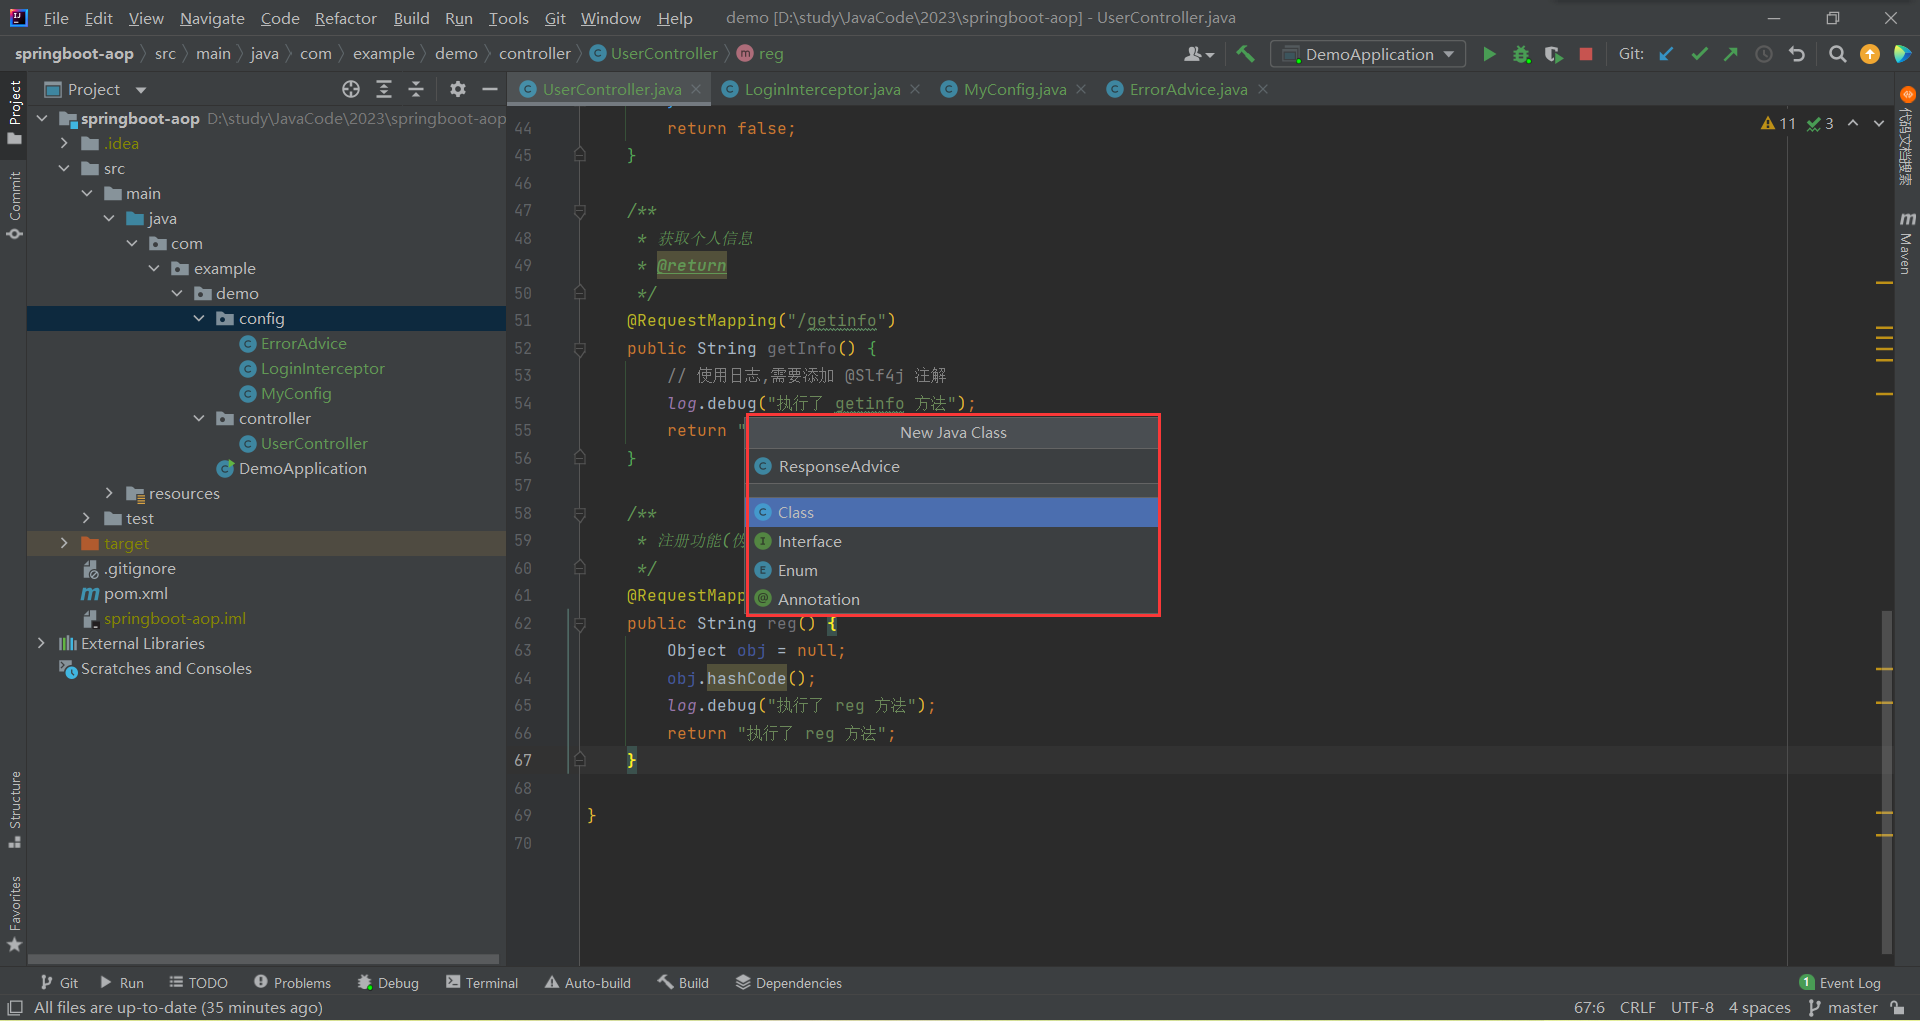
- 在类上添加 @ControllerAdvice 注解
- 实现 ResponseBodyAdvice
- 重写两个方法 :
- supports : 固定返回 true
- beforeBodyWrite : 在此方法内构造统一返回对象
我们可以实现一下

package com.example.demo.config;

import org.springframework.core.MethodParameter;
import org.springframework.http.MediaType;
import org.springframework.http.server.ServerHttpRequest;
import org.springframework.http.server.ServerHttpResponse;
import org.springframework.web.bind.annotation.ControllerAdvice;
import org.springframework.web.servlet.mvc.method.annotation.ResponseBodyAdvice;

import java.util.HashMap;

/**
 * 统一返回数据的处理
 */
@ControllerAdvice
public class ResponseAdvice implements ResponseBodyAdvice {

    @Override
    public boolean supports(MethodParameter returnType, Class converterType) {
        // 固定返回 true,这样才能调用下面的方法
        return true;
    }

    @Override
    public Object beforeBodyWrite(Object body, MethodParameter returnType, MediaType selectedContentType, Class selectedConverterType, ServerHttpRequest request, ServerHttpResponse response) {
        // 构造统一返回对象
        HashMap<String, Object> result = new HashMap<>();
        result.put("code", 200);// 状态码
        result.put("msg", "");// 状态的描述信息
        result.put("data", body);// 数据
        return result;
    }
}

运行查看效果
之前我们登录返回的是布尔值

现在就变成了 JSON 数据


但是统一数据返回格式的方法过于霸道 , 他把所有的对象都进行封装
比如我们的 getinfo 以及 reg , 已经报错了 , 然后统一异常处理就给他们封装成一个 HashMap 了

但是统一数据返回格式又把这个已经封装好的对象又抓过来了 , 进行再次封装 , 所以就会像图片里那样 , data 里面又包含了 code 以及 msg
3.3 @ControllerAdvice 源码分析
我们在统一异常的处理和统一数据返回格式之中 , 都用到了 @ControllerAdvice 注解
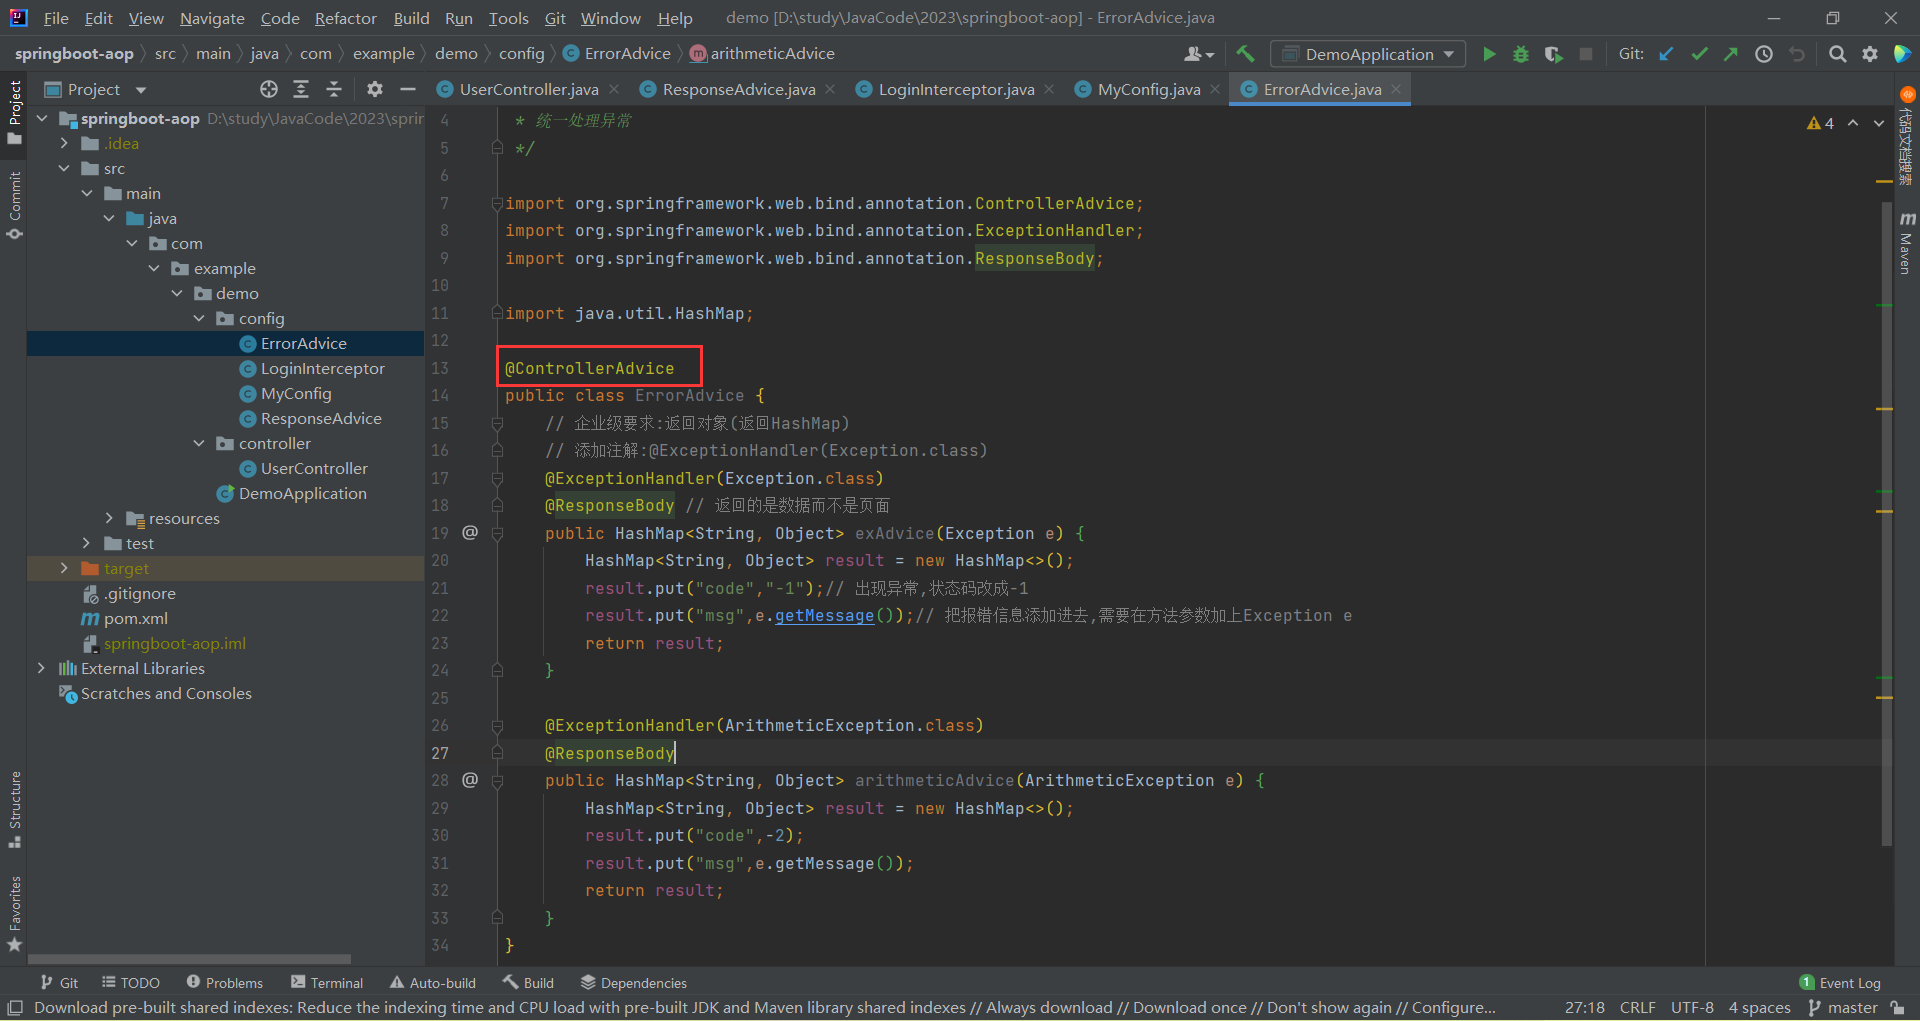
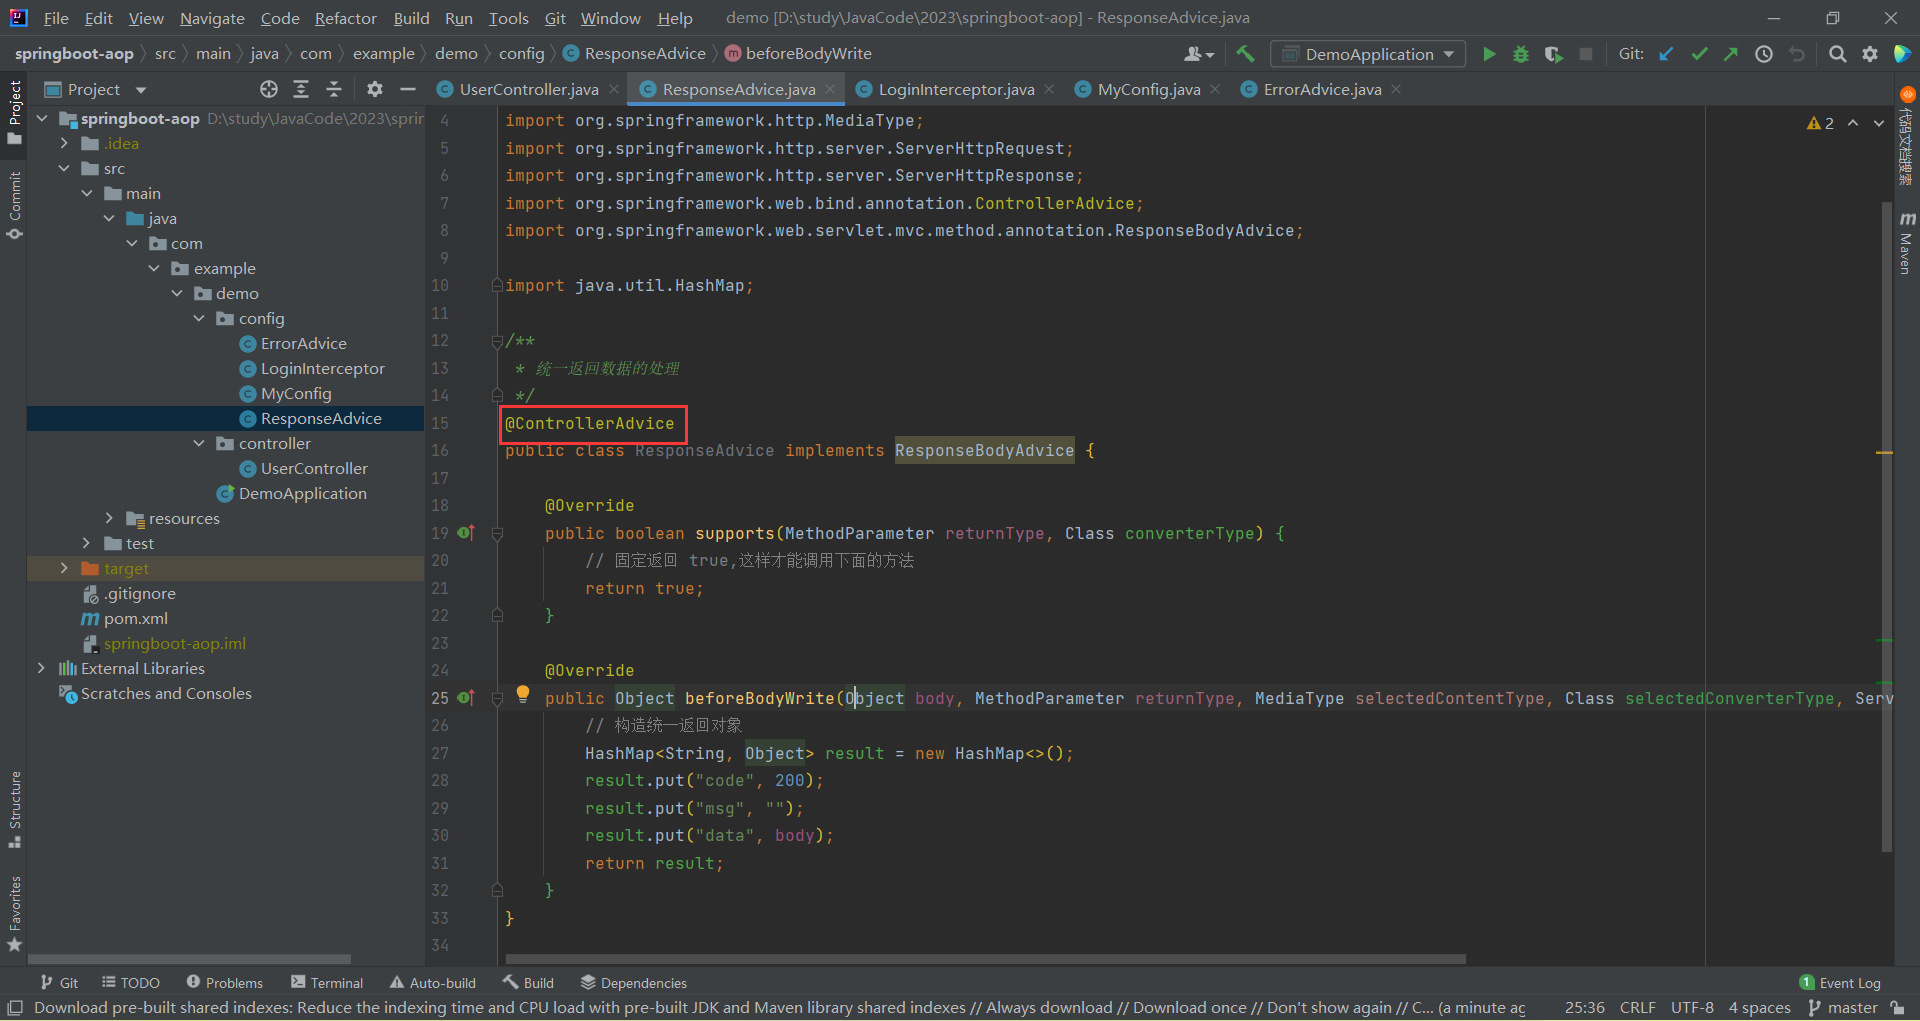
那这个 @ControllerAdvice 到底是怎么回事呢 ? 我们可以通过源码来看一下

@ControllerAdvice 注解也是来自于 @Component 注解的 , 他就相当于 Java 中的 “Object”
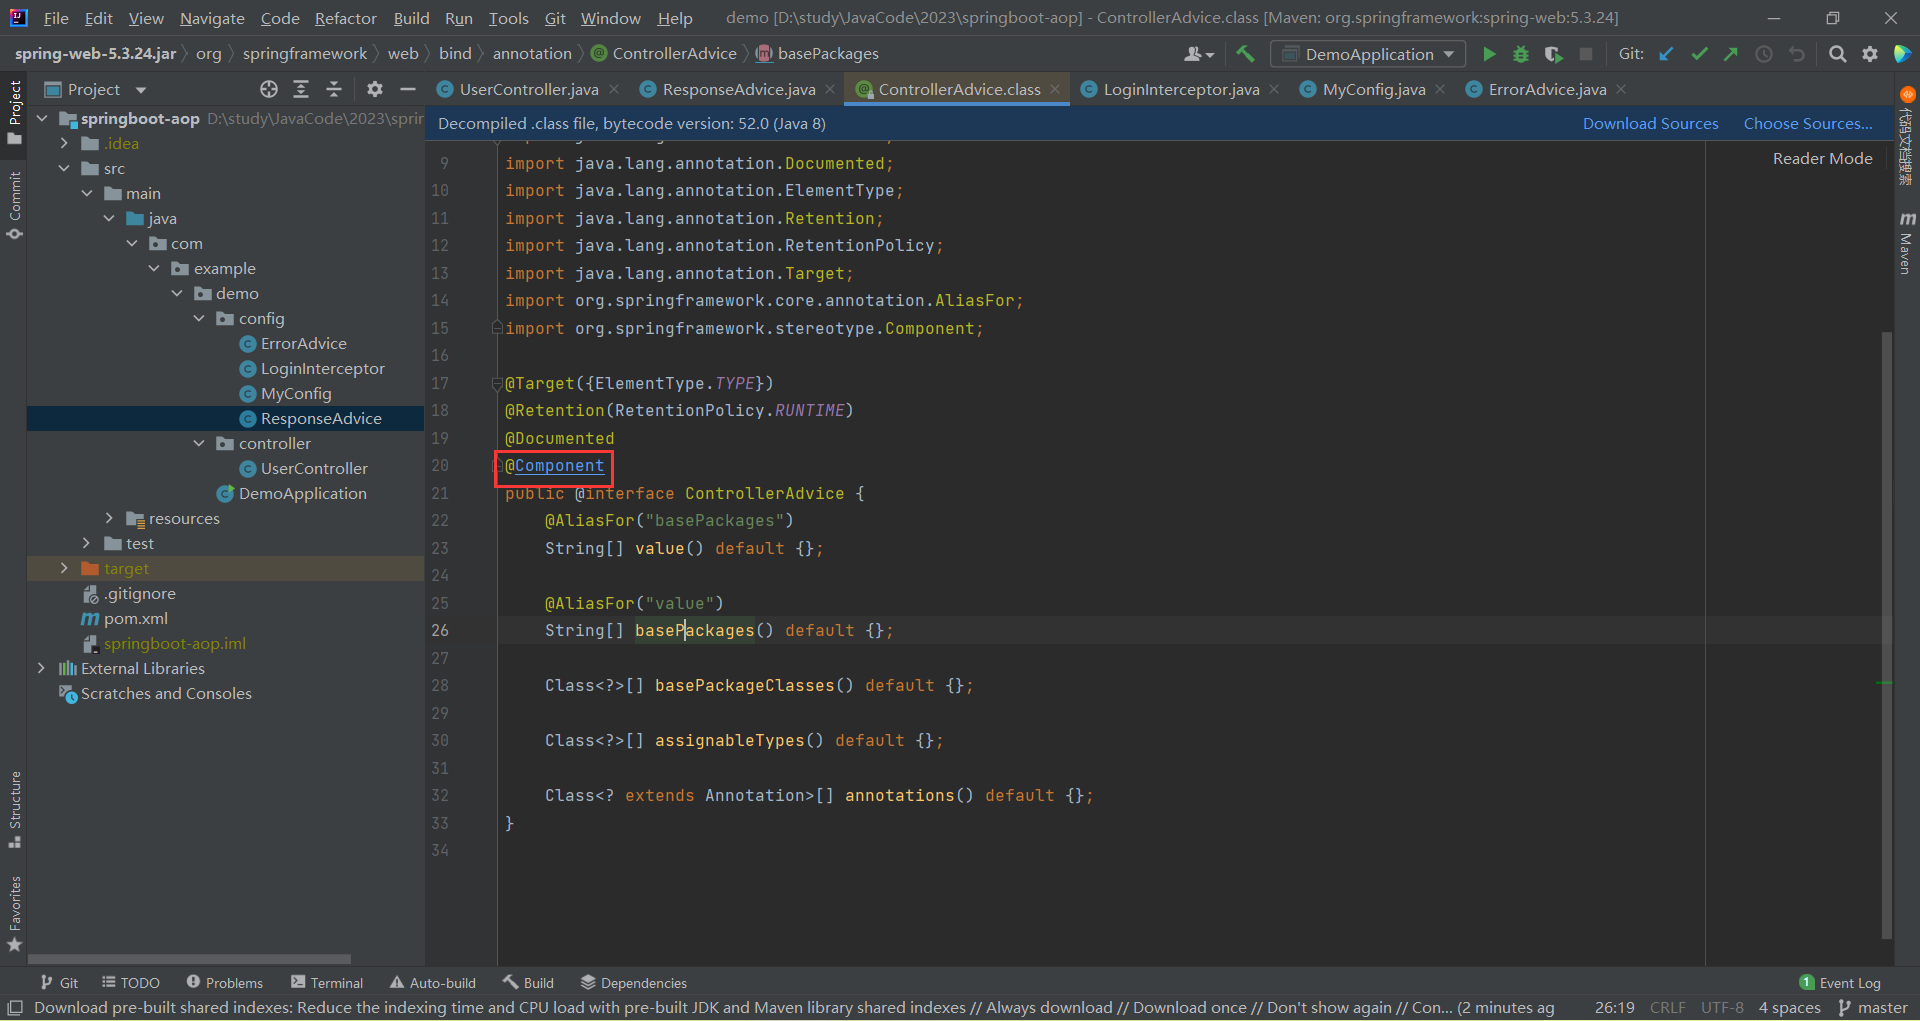
@ControllerAdvice 派生于 @Component 组件 , 而所有组件初始化都会调用 InitalizingBean 接口
所以接下来我们来看 InitializingBean 有哪些实现类 ? 在查询的过程中我们发现了 , 其中 Spring MVC
中的实现子类是 RequestMappingHandlerAdapter , 他里面有⼀个 afterPropertiesSet() 方法 , 表
示所有的参数设置完成之后执行的方法 (来源于 @Component 注解的其他注解都会使用 afterPropertiesSet() 方法 )
在 afterPropertiesSet() 方法 中 , 有这样一句代码
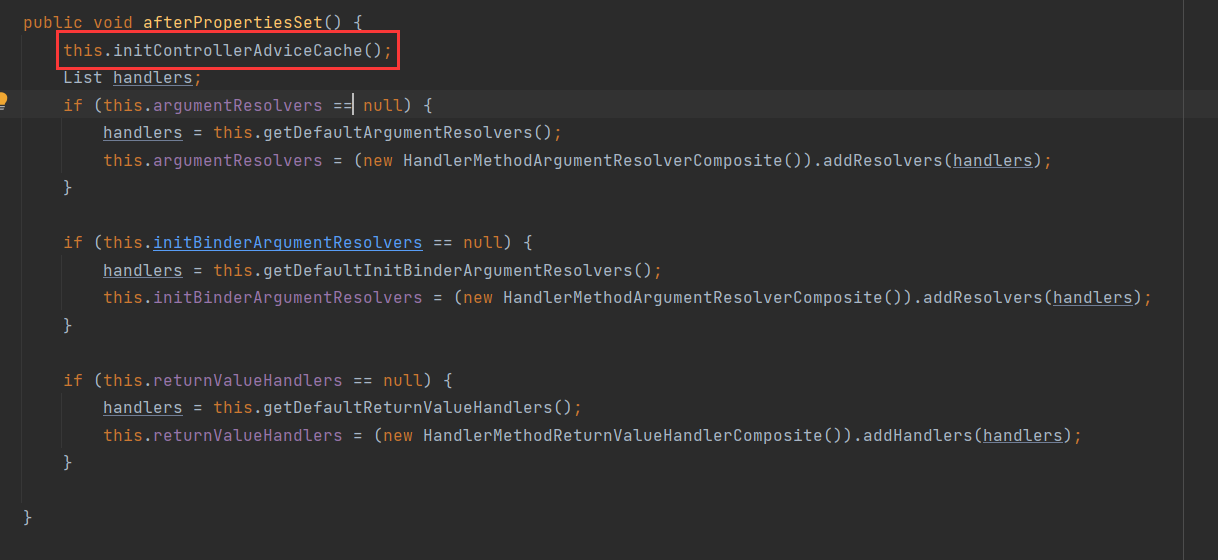
这个方法是干什么的呢 ?
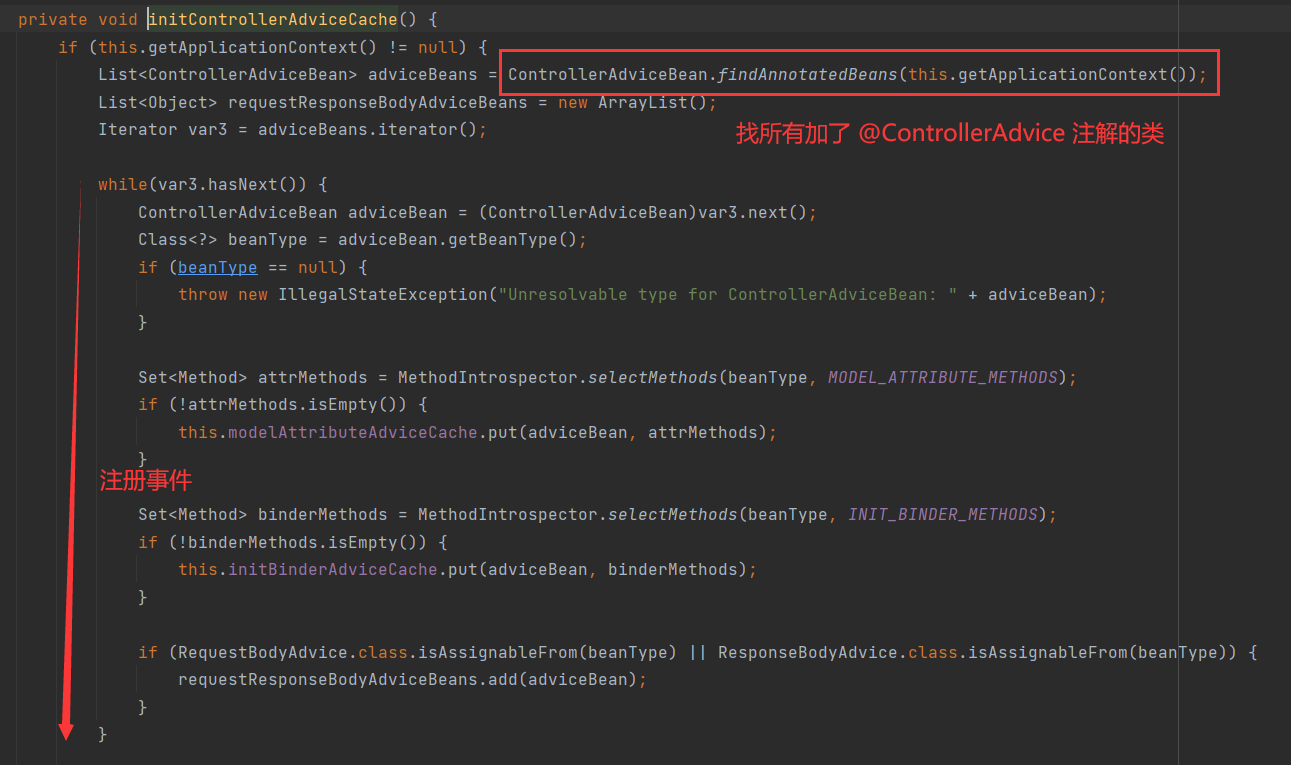
事件 : 到了某个时间点干什么事












![[学习笔记] fhq Treap 平衡树](https://img-blog.csdnimg.cn/6ced20524a6349f183c3864d8c783ae6.png)


