1. 集成编译器
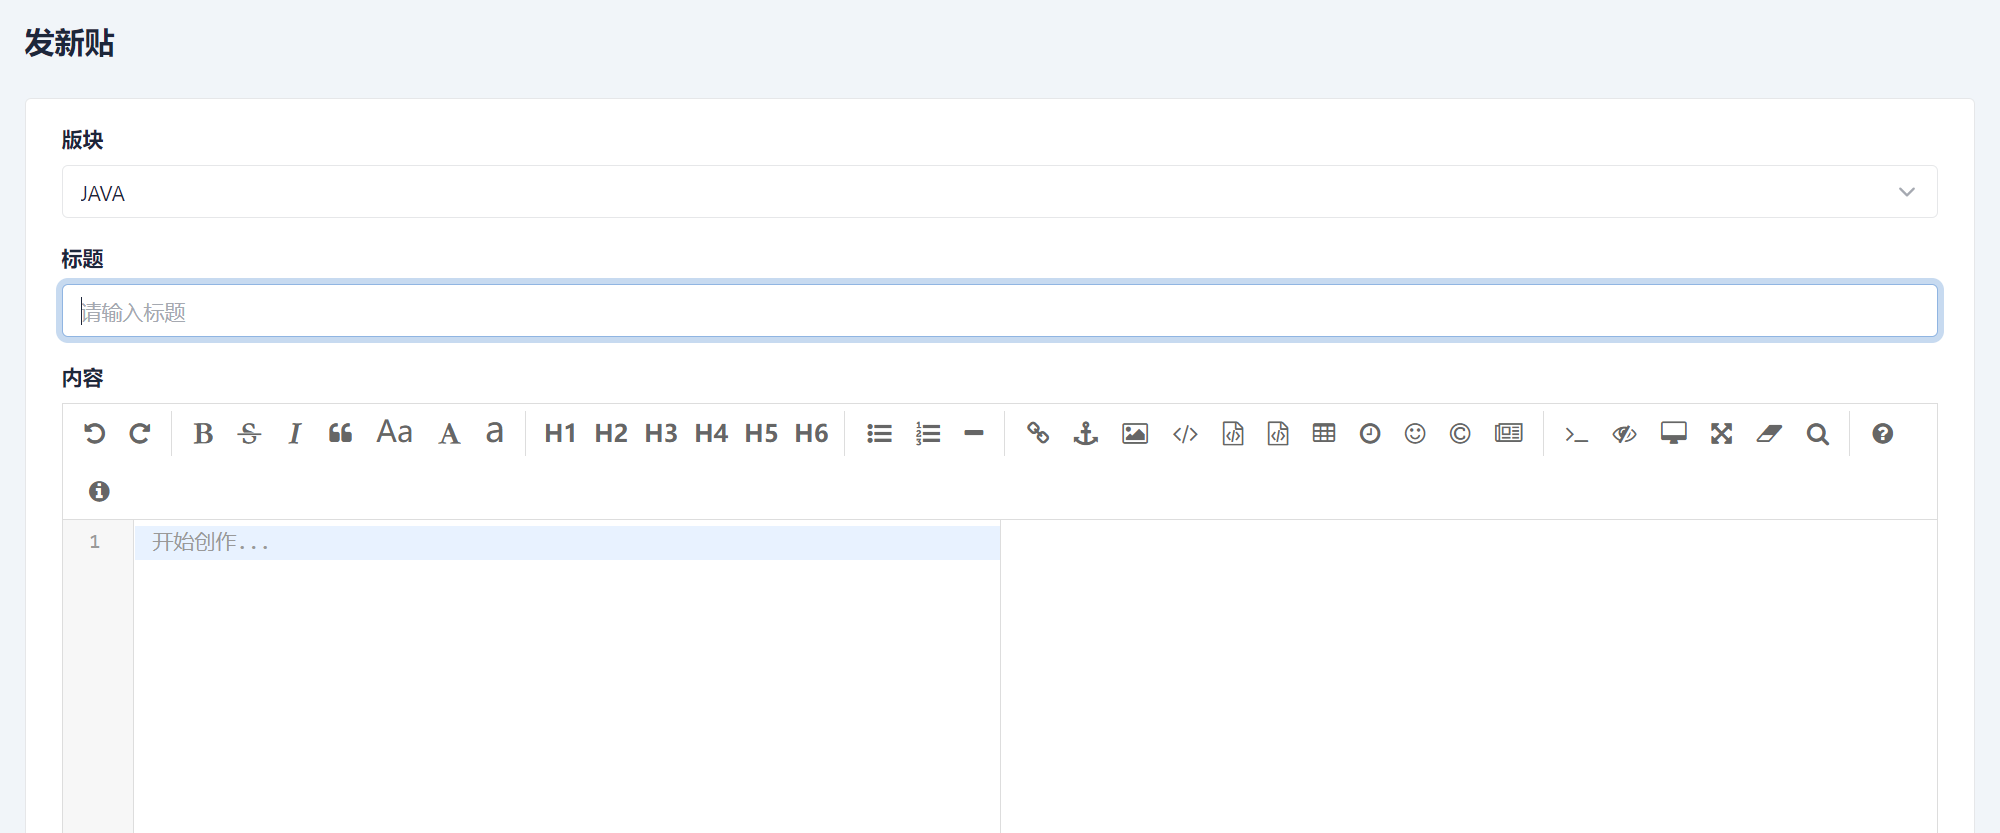
editor.md 支持 MarkDown 语法编辑,在需要用户输⼊内容的页面按以下代码嵌入编辑器
1.1 编写 HTML
<!-- 引⼊编辑器的CSS -->
<link rel="stylesheet" href="./dist/editor.md/css/editormd.min.css">
<!-- 引⼊编辑器JS -->
<script src="./dist/editor.md/editormd.min.js"></script>
<script src="./dist/editor.md/lib/marked.min.js"></script>
<script src="./dist/editor.md/lib/prettify.min.js"></script>
<script src="./dist/libs/tinymce/tinymce.min.js" defer></script>
<!-- 需要初始化编辑器的DIV -->
<div id="edit-article">
 <!-- textarea也是⼀个表单控件,当在editor.md中编辑好的内容会关联这个⽂本域上 -->
 <textarea id="article_post_content" style="display: none;"></textarea>
</div>
1.2 编写 JS
var editor = editormd("edit-article", {
 width: "100%",
 height: "100%",
 // theme : "dark",
 // previewTheme : "dark",
 // editorTheme : "pastel-on-dark",
 codeFold: true,
 //syncScrolling : false,
 saveHTMLToTextarea: true, // 保存 HTML 到 Textarea
 searchReplace: true,
 watch : true, // 关闭实时预览
 htmlDecode: "style,script,iframe|on*", // 开启 HTML 标签解析,为了安
全性,默认不开启
 // toolbar : false, //关闭⼯具栏
 // previewCodeHighlight : false, // 关闭预览 HTML 的代码块⾼亮,默认开启
 emoji: true,
 taskList: true,
 tocm: true, // Using [TOCM]
 tex: true, // 开启科学公式TeX语⾔⽀持,默认关闭
 // flowChart: true, // 开启流程图⽀持,默认关闭
 // sequenceDiagram: true, // 开启时序/序列图⽀持,默认关闭,
 placeholder: '开始创作...', // 占位符
 path: "./dist/editor.md/lib/"
});
2. 发布帖子
2.1 实现逻辑
1. 用户点击发布新帖按钮,进入发贴页面
2. 选择版块,填入标题、正文后提交服务器

3. 服务器校验信息,并写入数据库
4. 更新用户发帖数与版块贴子数
5. 返回结果
要对帖子表、用户表、板块表同时进行操作,就需要通过事务进行管理。
2.2 参数要求
| 参数名 | 描述 | 类型 | 默认值 | 条件 |
|---|---|---|---|---|
| boardId | 版块 Id | long | 必须 | |
| title | 文章标题 | String | 必须 | |
| content | 帖子内容 | String | 必须 |
作者 Id 需要从 Session 中获取(即当前的登录用户)。
2.3 在 UserExtMapper.xml 中编写 SQL 语句
<!-- 更新用户的发帖数 -->
  <update id="updateArticleCount" parameterType="java.lang.Long">
    update t_user set articleCount = articleCount + 1,updateTime = now() where id = #{id,jdbcType=BIGINT}
  </update>
2.4 创建 Service 接口
在 IUserService 定义方法:
    /**
     * 贴子数增加1
     * @param id
     * @return
     */
   void addOneArticleCountById(Long id);
在 IBoardService 定义方法:
    /**
     * 贴子数增加1
     * @param id
     * @return
     */
   void addOneArticleCountById(Long id);
在 IArticleService 定义方法:
使用事务管理,加入 @Transactional 注解
    /**
     * 发布帖⼦
     * @param article 帖⼦信息
     */
    // 事务管理
    @Transactional
    void create(Article article);
在这个方法中,需要对三个表进行更新操作,因此需要通过事务进行管理。如果在执行过程中抛出异常,那么事务将会被自动回滚。
2.5 实现 Service 接口
在 IBoradService.java 中实现以下方法:
 @Override
    public void addOneArticleCountById(Long id) {
        // 非空检验
        if(id == null || id <= 0){
            // 打印日志
            log.warn(ResultCode.FAILED_PARAMS_VALIDATE.toString());
            // 抛出异常
            throw new ApplicationException(AppResult.failed(ResultCode.FAILED_PARAMS_VALIDATE));
        }
        // 查询现有的用户信息
        User user = selectById(id);
        // 校验用户是否存在
        if (user == null) {
            // 打印日志
            log.info(ResultCode.FAILED_USER_NOT_EXISTS.toString());
            // 抛出异常
            throw new ApplicationException(AppResult.failed(ResultCode.FAILED_USER_NOT_EXISTS));
        }
        // 构造要更新的对象
        User updateUser = new User();
        updateUser.setId(user.getId()); // 用户Id
        updateUser.setArticleCount(user.getArticleCount() + 1); //帖子数量+1
        updateUser.setUpdateTime(new Date());// 更新时间

        // 调用 DAO
        int row = userMapper.updateByPrimaryKeySelective(updateUser);
        if(row != 1){
            // 打印日志
            log.warn(ResultCode.ERROR_SERVICES.toString());
            // 抛出异常
            throw new ApplicationException(AppResult.failed(ResultCode.ERROR_SERVICES));
        }
    }
在 BoardServiceImpl.java 中实现以下方法:
@Override
    public void addOneArticleCountById(Long id) {
        // 非空检验
        if(id == null || id <= 0){
            // 打印日志
            log.warn(ResultCode.FAILED_PARAMS_VALIDATE.toString());
            // 抛出异常
            throw new ApplicationException(AppResult.failed(ResultCode.FAILED_PARAMS_VALIDATE));
        }
        // 查询板块信息
        Board board = selectById(id);
        // 检验版块是否存在
        if(board == null){
            // 打印日志
            log.warn(ResultCode.FAILED_BOARD_NOT_EXISTS.toString());
            // 抛出异常
            throw new ApplicationException(AppResult.failed(ResultCode.FAILED_BOARD_NOT_EXISTS));
        }
        // 构造要更新的对象
        Board updateBoard = new Board();
        updateBoard.setId(board.getId()); // 版块Id
        updateBoard.setArticleCount(board.getArticleCount() + 1); //帖子数量
        updateBoard.setUpdateTime(new Date());// 更新时间

        // 调用 DAO
        int row = boardMapper.updateByPrimaryKeySelective(updateBoard);
    }
2.6 测试
在以上的实现方法写好后,编写测试代码:
在 UserServiceImplTest.java 文件中:
@Test
    @Transactional
    void addOneArticleCountById() {
        userService.addOneArticleCountById(1l);
        System.out.println("更新成功");

        userService.addOneArticleCountById(2l);
        System.out.println("更新成功");

    }
在 BoardServiceImplTest.java 中:
    @Test
    void addOneArticleCountById() {
        boradService.addOneArticleCountById(1l);
        System.out.println("更新成功");

        boradService.addOneArticleCountById(2l);
        System.out.println("更新成功");

        boradService.addOneArticleCountById(55l);
        System.out.println("更新成功");
    }
加了事务的注解后,测试的结果不在持久化到数据库,当测试通过后,写入的数据会被回滚。
    @Test
    void create() {
        Article article = new Article();
        article.setBoardId(1l);
        article.setUserId(1l);
        article.setTitle("单元测试标题");
        article.setContent("单元测试内容");
        // 调用service
        articleService.create(article);
        System.out.println("写入成功");
    }
测试成功:
2.7 实现 Controller
@ApiOperation("发布帖子")
    @PostMapping("/create")
    public AppResult create(HttpServletRequest request,
                            @ApiParam("版块Id") @RequestParam("boardId") @NonNull Long boardId,
                            @ApiParam("帖子标题") @RequestParam("title") @NonNull String title,
                            @ApiParam("帖子正文") @RequestParam("content") @NonNull String content){
        // 获取用户信息
        HttpSession session = request.getSession(false);
        User user =(User)session.getAttribute(AppConfig.SESSION_USER_KEY);
        // 校验用户状态
        if(user.getState() == 1){
            // 用户已禁言,返回提示
            return AppResult.failed(ResultCode.FAILED_USER_BANNED);
        }
        // 构造帖子对象
        Article article = new Article();
        article.setUserId(user.getId()); // 当前登录用户就是作者
        article.setBoardId(boardId); // 版块Id
        article.setTitle(title); // 帖子标题
        article.setContent(content); // 帖子正文
        // 调用 Service
        articleService.create(article);
        // 返回结果
        return AppResult.success("贴子发布成功");
    }

2.8 实现前端界面
// 构造帖子对象
      let postData = {
        boardId : boardIdEl.val(),
        title : titleEl.val(),
        content : contentEl.val()
      };


      // 提交, 成功后调用changeNavActive($('#nav_board_index'));回到首页并加载帖子列表
      // contentType: 'application/x-www-form-urlencoded'
      $.ajax({
        type : 'post',
        url : 'article/create',
        contentType : 'application/x-www-form-urlencoded',
        data : postData,
        // 成功回调
        success: function(respData){
          if(respData.code == 0){
            // 成功后跳转到首页
            changeNavActive($('#nav_board_index'));
          }else{
            // 失败
            $.toast({
                heading : '警告',
                text : respData.message,
                icon : 'Warning'
              });
            }
          },
          // 失败回调
          error: function(){
            $.toast({
                heading : '错误',
                text : '出错了,请联系管理员',
                icon : 'error'
              });
          }
3. 帖子详情
3.1 实现逻辑
1. 用户点击帖子,将帖子 Id 做为参数向服务器发送请求2. 服务器查询帖子信息3. 帖子访问次数加14. 返回查询结果
那么此时的操作有一个查询,一个更新需要用事务进行管理吗?
答:只对一条记录进行更新时,不需要事务。
在帖子详情中,必须包含帖子的全部信息。
3.2 创建扩展 Mapper.xml
在 ArticleExtMapper.xml 中添加SQL:
<?xml version="1.0" encoding="UTF-8"?>
<!DOCTYPE mapper PUBLIC "-//mybatis.org//DTD Mapper 3.0//EN" "http://mybatis.org/dtd/mybatis-3-mapper.dtd">
<mapper namespace="com.example.demo.dao.ArticleMapper">
  <!--  定义表关系的结果集映射  -->
  <resultMap id="AllInfoResultMap" type="com.example.demo.model.Article" extends="ResultMapWithBLOBs">
    <!--    关联User对象  -->
    <association property="user" resultMap="com.example.demo.dao.UserMapper.BaseResultMap" columnPrefix="u_"/>
    <!--    关联Board对象  -->
    <association property="board" resultMap="com.example.demo.dao.BoardMapper.BaseResultMap" columnPrefix="b_"/>
  </resultMap>
  <!--  查询所有的帖子集合  -->
  <select id="selectAll" resultMap="AllInfoResultMap">
    select
    u.id as u_id,
    u.nickname as u_nickname,
    u.gender as u_gender,
    u.avatarUrl as u_avatarUrl,
    a.id,
    a.boardId,
    a.userId,
    a.title,
    a.visitCount,
    a.replyCount,
    a.likeCount,
    a.state,
    a.deleteState,
    a.createTime,
    a.updateTime
    from t_article as a ,t_user as u
    where a.userId = u.id
    and a.deleteState = 0
    order by a.createTime desc
  </select>
  <!--  查询所有的帖子集合  -->
  <select id="selectByBoardId" resultMap="AllInfoResultMap">
    select
    u.id as u_id,
    u.nickname as u_nickname,
    u.gender as u_gender,
    u.avatarUrl as u_avatarUrl,
    a.id,
    a.boardId,
    a.userId,
    a.title,
    a.visitCount,
    a.replyCount,
    a.likeCount,
    a.state,
    a.deleteState,
    a.createTime,
    a.updateTime
    from t_article as a ,t_user as u
    where a.userId = u.id
    and a.deleteState = 0
    and a.boardId = #{boardId,jdbcType=BIGINT}
    order by a.createTime desc
  </select>

  <!--  根据帖子Id 查询帖子详情  -->
  <select id="selectById" resultMap="AllInfoResultMap" parameterType="java.lang.Long">
    select
    u.id as u_id,
    u.nickname as u_nickname,
    u.gender as u_gender,
    u.avatarUrl as u_avatarUrl,
    b.id as b_id,
    b.name as b_name,
    a.id,
    a.boardId,
    a.userId,
    a.title,
    a.visitCount,
    a.replyCount,
    a.likeCount,
    a.state,
    a.deleteState,
    a.createTime,
    a.updateTime
    from t_article as a ,t_user as u,t_board b
    where a.userId = u.id
    and a.boardId = b.id
    and a.id = #{id,jdbcType=BIGINT}
    and a.deleteState = 0
  </select>
</mapper>
3.3 修改 DAO
在 dao 包下的 ArticleMapper 中添加方法声明:
    /**
     * 根据帖子Id 查询帖子详情
     * @param id
     * @return
     */
    Article selectById(@Param("id") Long id);
3.4 创建 Service 接口
在 IArticleService 定义方法:
    /**
     * 根据帖子Id 查询帖子详情
     * @param id
     * @return
     */
    Article selectById(Long id);
3.5 实现 Service 接口
在 ArticleServiceImpl 中实现方法:
 @Override
    public Article selectById(Long id) {
        // 非空检验
        if(id == null || id <= 0){
            // 打印日志
            log.warn(ResultCode.FAILED_PARAMS_VALIDATE.toString());
            // 抛出异常
            throw new ApplicationException(AppResult.failed(ResultCode.FAILED_PARAMS_VALIDATE));
        }
        // 调用 DAO
        Article article = articleMapper.selectById(id);
        // 返回结果
        return article;
    }
3.6 测试
@Test
    void selectById() throws JsonProcessingException {
        Article article = articleService.selectById(1l);
        System.out.println(objectMapper.writeValueAsString(article));

        article = articleService.selectById(8l);
        System.out.println(objectMapper.writeValueAsString(article));

        article = articleService.selectById(100l);
        System.out.println(objectMapper.writeValueAsString(article));
    }
测试结果:

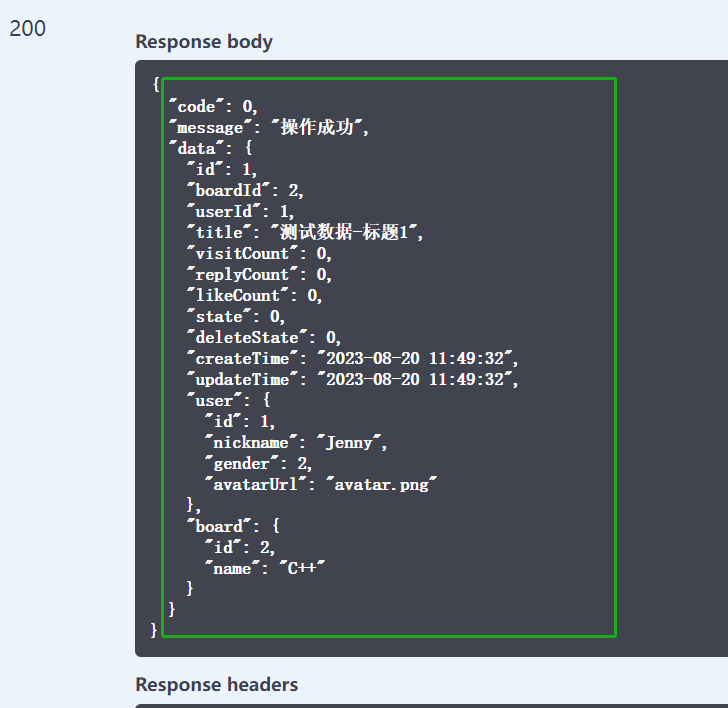
3.7 实现 Controller
在 ArticleController 中提供对外的API接口:
@ApiOperation("根据Id查询帖⼦详情")
    @GetMapping("/getById")
    public AppResult<Article> getDetails(@ApiParam("帖⼦Id")
                                         @RequestParam("id")
                                             @NonNull Long id) {
        // 调⽤Service层获取帖⼦详情
        Article article = articleService.selectById(id);
        // 校验
        if (article == null) {
            return AppResult.failed("帖子不存在");
        }
        // 返回成功信息
        return AppResult.success(article);
    }

3.8 实现前端界面
$.ajax({
      type : 'get',
      url : '/article/getById?id=' + currentArticle.id,
      // 成功回调
      success: function(respData){
          if(respData.code == 0){
            // 把查询到的数据设置到页面上
            initArticleDetails(respData.data);
          }else{
            // 失败
            $.toast({
                heading : '警告',
                text : respData.message,
                icon : 'Warning'
              });
            }
          },
          // 失败回调
          error: function(){
            $.toast({
                heading : '错误',
                text : '出错了,请联系管理员',
                icon : 'error'
              });
          }

    });