文章目录
- 嫌墨迹直接看代码
- Extra Credit: Image Captioning with LSTMs
- lstm_step_forward
- 题面
- 解析
- 代码
- 输出
- lstm_step_backward
- 题面
- 解析
- 代码
- 输出
- lstm_forward
- 题面
- 解析
- 代码
- 输出
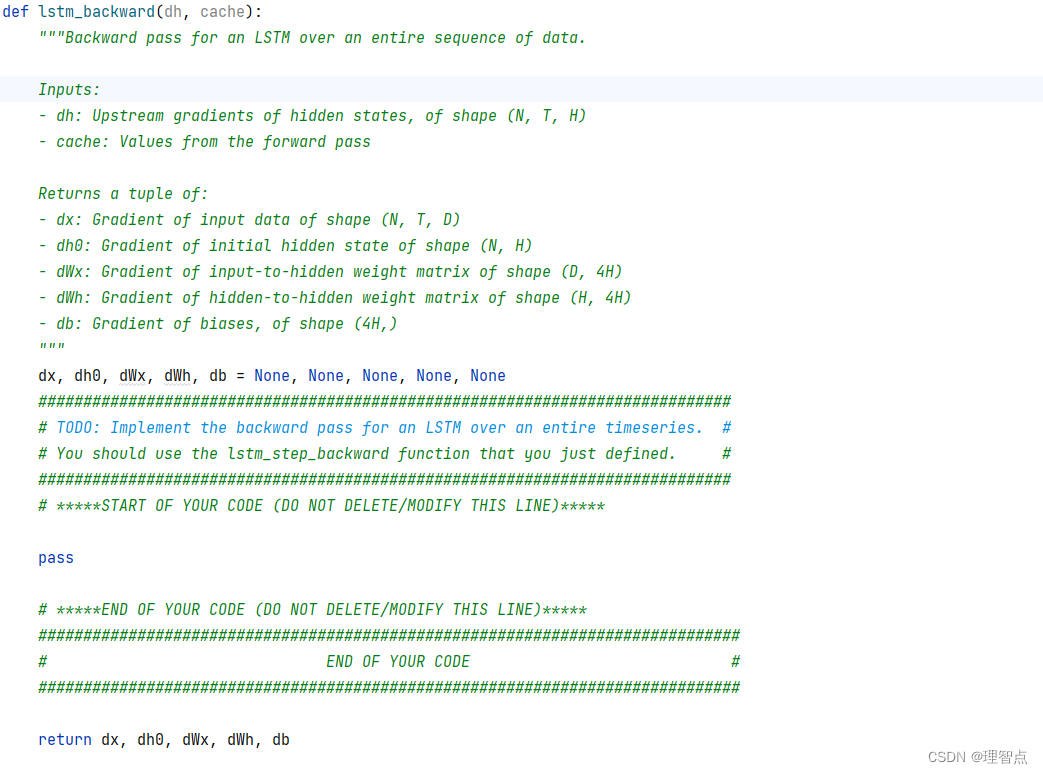
- lstm_backward
- 题面
- 解析
- 代码
- 输出
- CaptioningRNN.loss
- 解析
- 代码
- 输出
- 最后输出
- 结语
嫌墨迹直接看代码
Extra Credit: Image Captioning with LSTMs
lstm_step_forward
题面
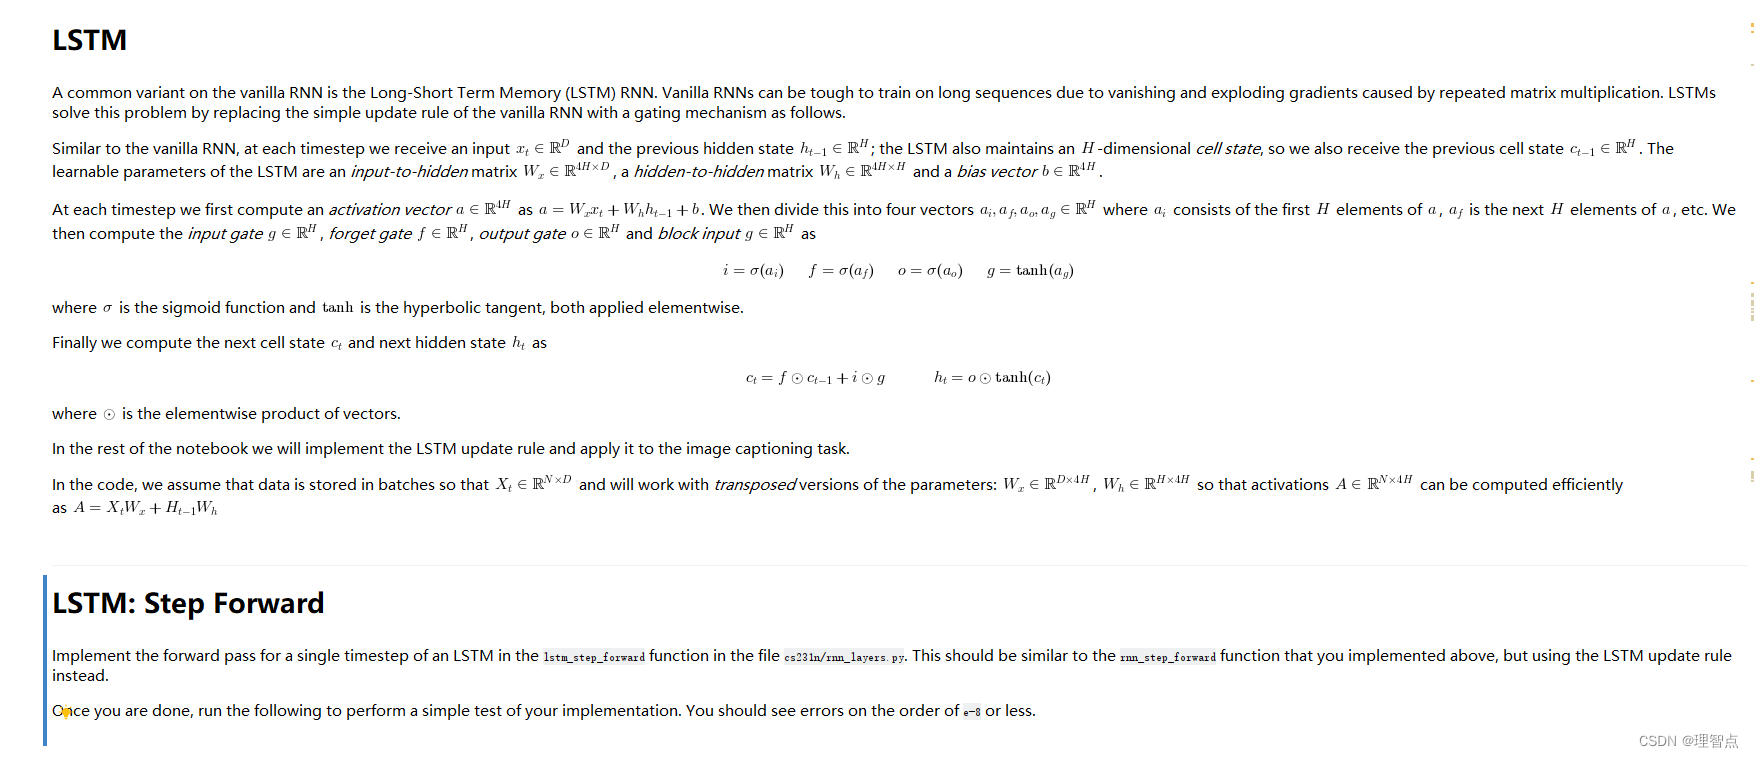
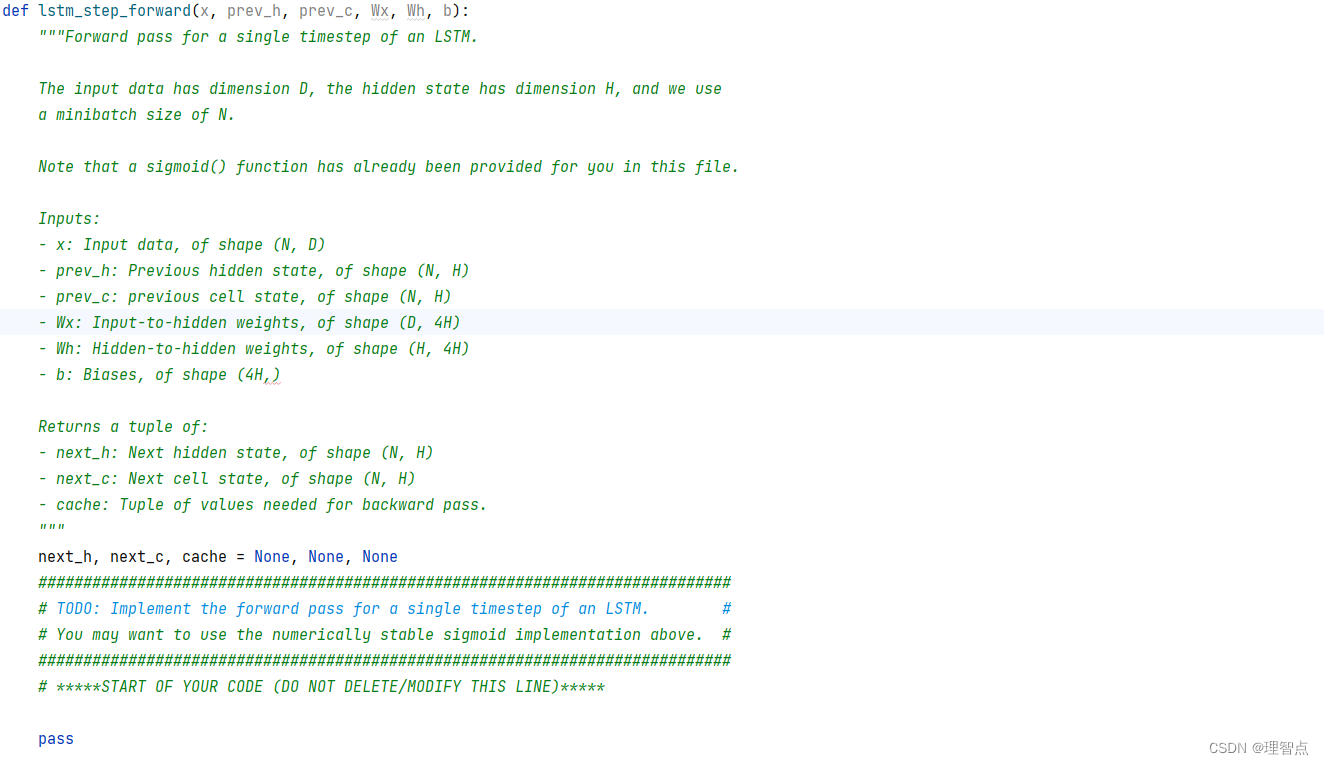

结合课程和上面的讲解,这部分就是让我们来实现lstm的前向操作,具体的操作流程在上面都写好了
解析
看代码注释吧
代码
def lstm_step_forward(x, prev_h, prev_c, Wx, Wh, b):
    """Forward pass for a single timestep of an LSTM.

    The input data has dimension D, the hidden state has dimension H, and we use
    a minibatch size of N.

    Note that a sigmoid() function has already been provided for you in this file.

    Inputs:
    - x: Input data, of shape (N, D)
    - prev_h: Previous hidden state, of shape (N, H)
    - prev_c: previous cell state, of shape (N, H)
    - Wx: Input-to-hidden weights, of shape (D, 4H)
    - Wh: Hidden-to-hidden weights, of shape (H, 4H)
    - b: Biases, of shape (4H,)

    Returns a tuple of:
    - next_h: Next hidden state, of shape (N, H)
    - next_c: Next cell state, of shape (N, H)
    - cache: Tuple of values needed for backward pass.
    """
    next_h, next_c, cache = None, None, None
    #############################################################################
    # TODO: Implement the forward pass for a single timestep of an LSTM.        #
    # You may want to use the numerically stable sigmoid implementation above.  #
    #############################################################################
    # *****START OF YOUR CODE (DO NOT DELETE/MODIFY THIS LINE)*****

    # 计算a
    a = x.dot(Wx) + prev_h.dot(Wh) + b
    # 分割a
    ai, af, ao, ag = np.split(a, 4, axis=1)
    # 计算i, f, o, g
    i = sigmoid(ai)
    f = sigmoid(af)
    o = sigmoid(ao)
    g = np.tanh(ag)

    # 计算next_c
    next_c = f * prev_c + i * g
    # 计算next_h
    next_h = o * np.tanh(next_c)

    cache = (x, prev_h, prev_c, Wx, Wh, b, a, i, f, o, g, next_c, next_h)

    # *****END OF YOUR CODE (DO NOT DELETE/MODIFY THIS LINE)*****
    ##############################################################################
    #                               END OF YOUR CODE                             #
    ##############################################################################

    return next_h, next_c, cache
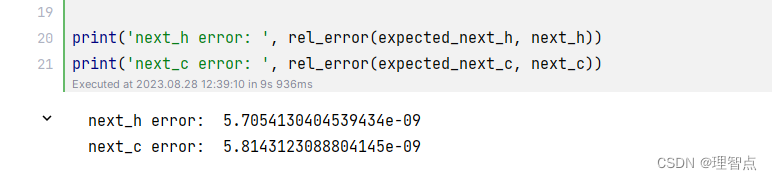
输出
lstm_step_backward
题面
计算lstm的反向操作
解析
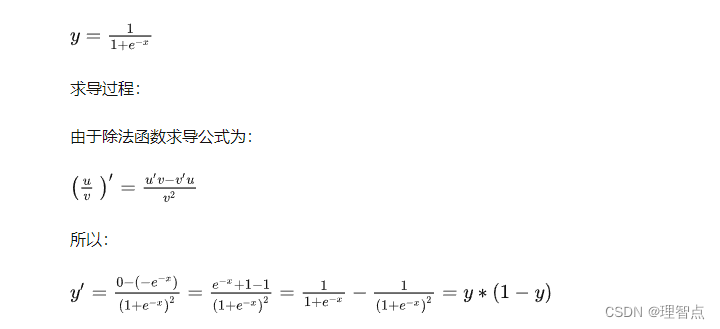
sigmoid求导
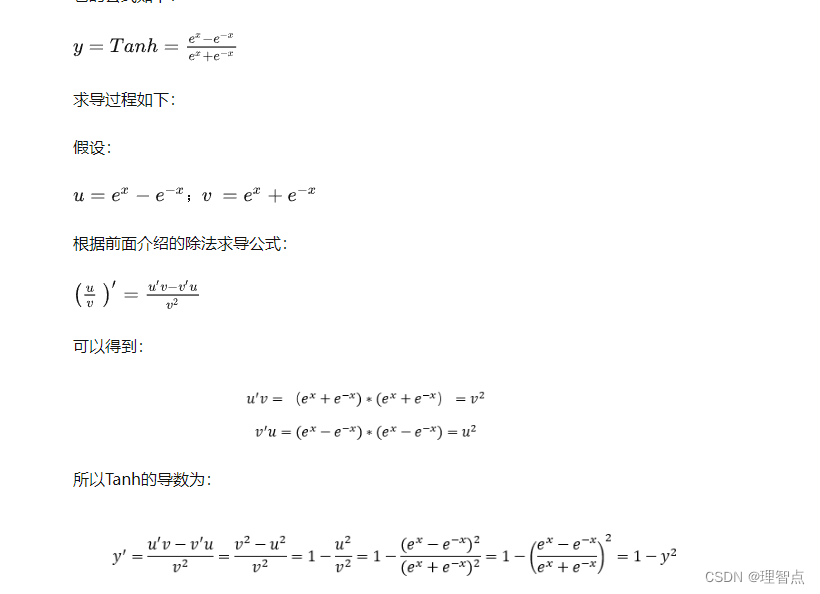
Tanh 求导
反向传播讲解可以看这个
然后结合代码注释,想想链式求导法则就好了
代码
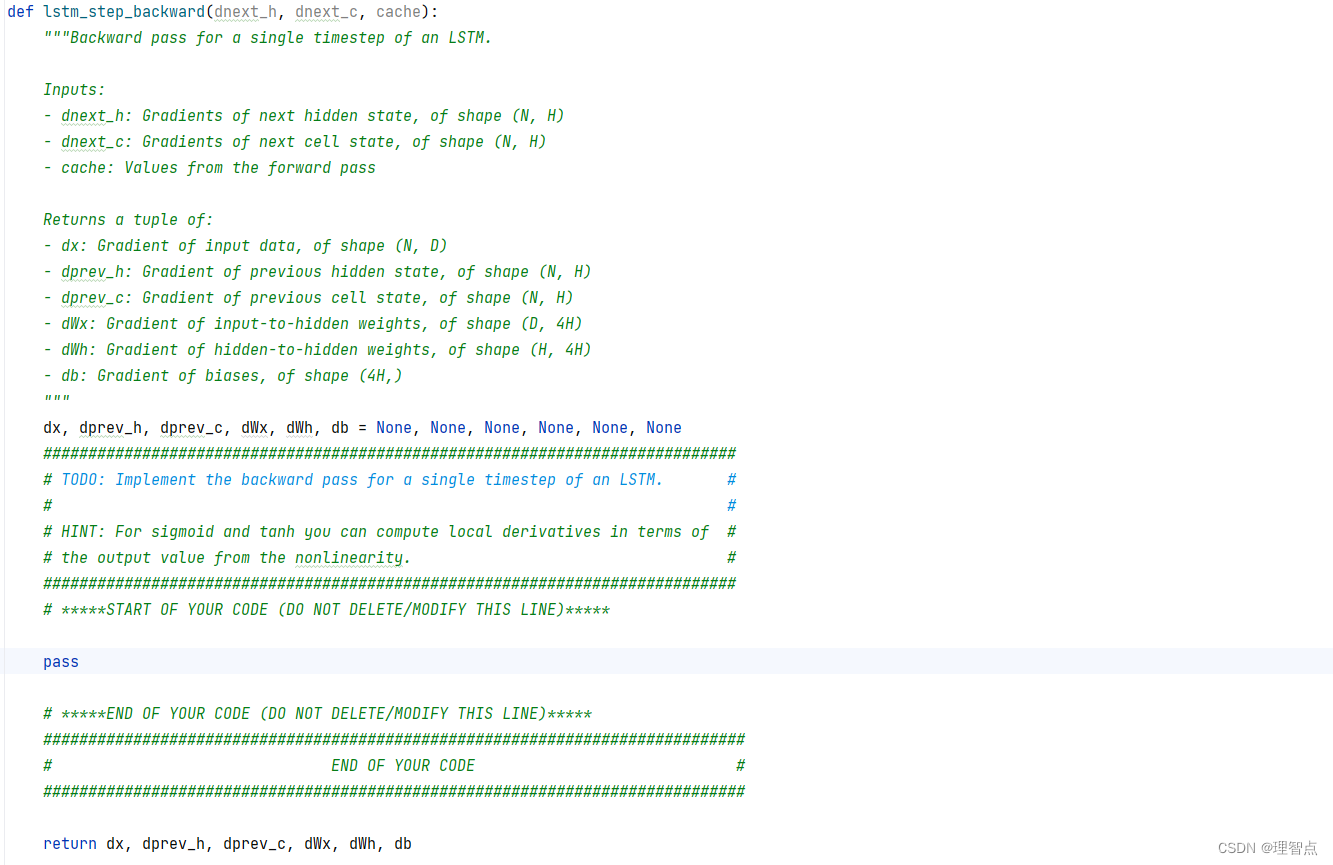
def lstm_step_backward(dnext_h, dnext_c, cache):
    """Backward pass for a single timestep of an LSTM.

    Inputs:
    - dnext_h: Gradients of next hidden state, of shape (N, H)
    - dnext_c: Gradients of next cell state, of shape (N, H)
    - cache: Values from the forward pass

    Returns a tuple of:
    - dx: Gradient of input data, of shape (N, D)
    - dprev_h: Gradient of previous hidden state, of shape (N, H)
    - dprev_c: Gradient of previous cell state, of shape (N, H)
    - dWx: Gradient of input-to-hidden weights, of shape (D, 4H)
    - dWh: Gradient of hidden-to-hidden weights, of shape (H, 4H)
    - db: Gradient of biases, of shape (4H,)
    """
    dx, dprev_h, dprev_c, dWx, dWh, db = None, None, None, None, None, None
    #############################################################################
    # TODO: Implement the backward pass for a single timestep of an LSTM.       #
    #                                                                           #
    # HINT: For sigmoid and tanh you can compute local derivatives in terms of  #
    # the output value from the nonlinearity.                                   #
    #############################################################################
    # *****START OF YOUR CODE (DO NOT DELETE/MODIFY THIS LINE)*****

    (x, prev_h, prev_c, Wx, Wh, b, a, i, f, o, g, next_c, next_h) = cache

    # 计算dnext_c
    dnext_c += dnext_h * o * (1 - np.tanh(next_c) ** 2)
    # 计算dprev_c
    dprev_c = dnext_c * f

    # 计算da
    dai = dnext_c * g * i * (1 - i)
    daf = dnext_c * prev_c * f * (1 - f)
    dao = dnext_h * np.tanh(next_c) * o * (1 - o)
    dag = dnext_c * i * (1 - g ** 2)
    # 组合
    da = np.concatenate((dai, daf, dao, dag), axis=1)

    # 计算dx
    dx = da.dot(Wx.T)
    # 计算dprev_h
    dprev_h = da.dot(Wh.T)
    # 计算dWx
    dWx = x.T.dot(da)
    # 计算dWh
    dWh = prev_h.T.dot(da)
    # 计算db
    db = np.sum(da, axis=0)

    # *****END OF YOUR CODE (DO NOT DELETE/MODIFY THIS LINE)*****
    ##############################################################################
    #                               END OF YOUR CODE                             #
    ##############################################################################

    return dx, dprev_h, dprev_c, dWx, dWh, db
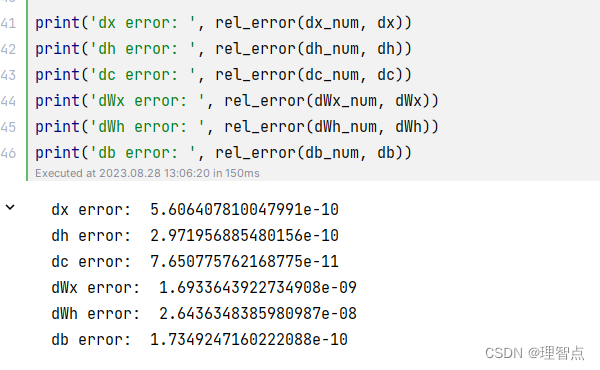
输出
lstm_forward
题面
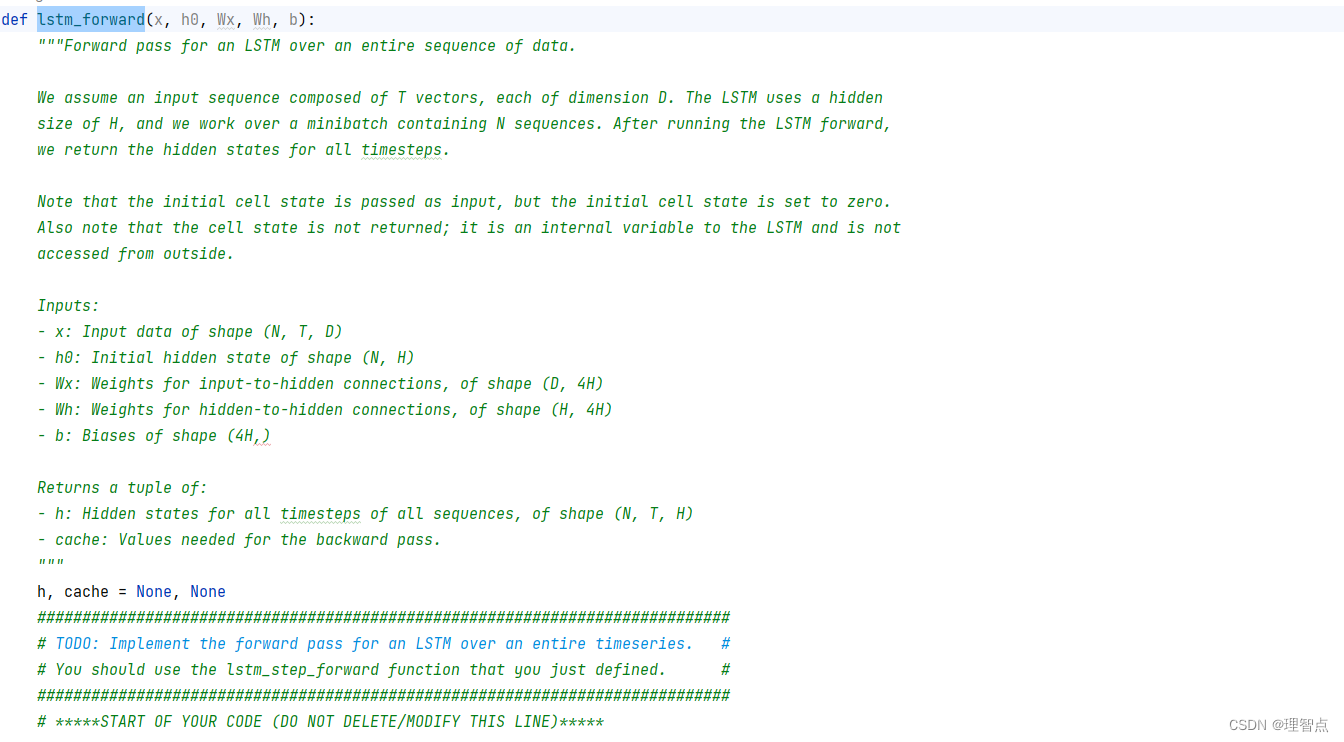

让我们实现lstm整个的前向传播
解析
没啥好说的
代码
def lstm_forward(x, h0, Wx, Wh, b):
    """Forward pass for an LSTM over an entire sequence of data.

    We assume an input sequence composed of T vectors, each of dimension D. The LSTM uses a hidden
    size of H, and we work over a minibatch containing N sequences. After running the LSTM forward,
    we return the hidden states for all timesteps.

    Note that the initial cell state is passed as input, but the initial cell state is set to zero.
    Also note that the cell state is not returned; it is an internal variable to the LSTM and is not
    accessed from outside.

    Inputs:
    - x: Input data of shape (N, T, D)
    - h0: Initial hidden state of shape (N, H)
    - Wx: Weights for input-to-hidden connections, of shape (D, 4H)
    - Wh: Weights for hidden-to-hidden connections, of shape (H, 4H)
    - b: Biases of shape (4H,)

    Returns a tuple of:
    - h: Hidden states for all timesteps of all sequences, of shape (N, T, H)
    - cache: Values needed for the backward pass.
    """
    h, cache = None, None
    #############################################################################
    # TODO: Implement the forward pass for an LSTM over an entire timeseries.   #
    # You should use the lstm_step_forward function that you just defined.      #
    #############################################################################
    # *****START OF YOUR CODE (DO NOT DELETE/MODIFY THIS LINE)*****

    (N, T, D) = x.shape
    (N, H) = h0.shape

    # 初始化c0
    c = np.zeros((N, H))
    # 初始化h
    h = np.zeros((N, T, H))
    # 初始化cache
    cache = []

    prev_h = h0
    prev_c = c

    # 遍历每个时间步
    for t in range(T):
        # 计算h和c
        next_h, next_c, cache_t = lstm_step_forward(x[:, t, :], prev_h, prev_c, Wx, Wh, b)
        # 更新prev_h和prev_c
        prev_h = next_h
        prev_c = next_c
        # 添加h
        h[:, t, :] = next_h
        # 添加cache
        cache.append(cache_t)

    # *****END OF YOUR CODE (DO NOT DELETE/MODIFY THIS LINE)*****
    ##############################################################################
    #                               END OF YOUR CODE                             #
    ##############################################################################

    return h, cache
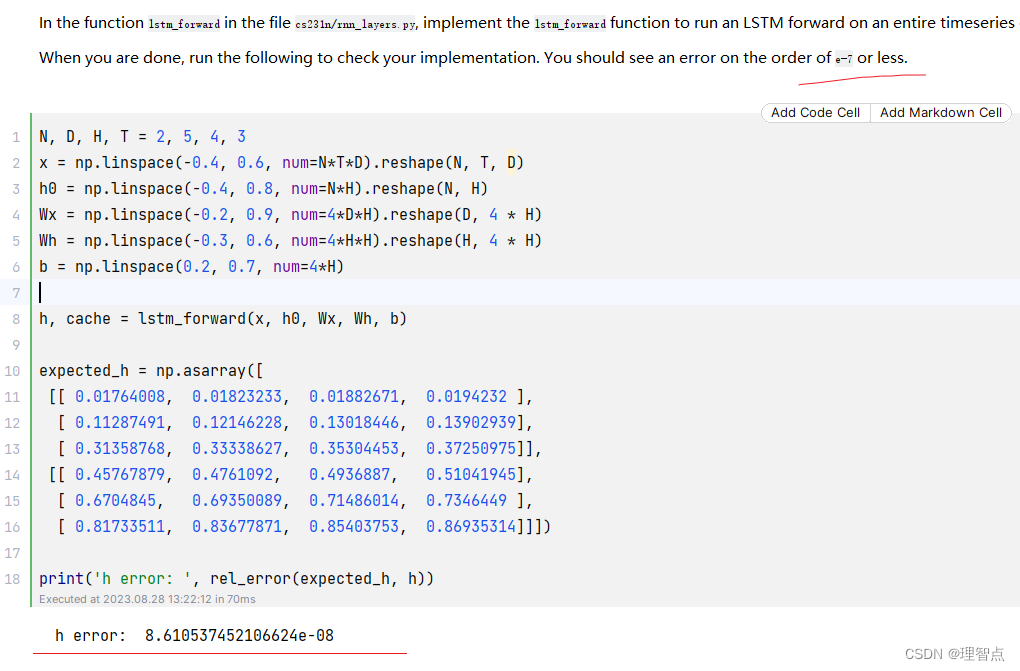
输出
lstm_backward
题面
解析
理解了上面的代码的话,这个写起来应该没压力
代码
def lstm_backward(dh, cache):
    """Backward pass for an LSTM over an entire sequence of data.

    Inputs:
    - dh: Upstream gradients of hidden states, of shape (N, T, H)
    - cache: Values from the forward pass

    Returns a tuple of:
    - dx: Gradient of input data of shape (N, T, D)
    - dh0: Gradient of initial hidden state of shape (N, H)
    - dWx: Gradient of input-to-hidden weight matrix of shape (D, 4H)
    - dWh: Gradient of hidden-to-hidden weight matrix of shape (H, 4H)
    - db: Gradient of biases, of shape (4H,)
    """
    dx, dh0, dWx, dWh, db = None, None, None, None, None
    #############################################################################
    # TODO: Implement the backward pass for an LSTM over an entire timeseries.  #
    # You should use the lstm_step_backward function that you just defined.     #
    #############################################################################
    # *****START OF YOUR CODE (DO NOT DELETE/MODIFY THIS LINE)*****

    (x, prev_h, prev_c, Wx, Wh, b, a, i, f, o, g, next_c, next_h) = cache[0]
    (N, T, H) = dh.shape
    (N, D) = x.shape

    # 初始化梯度
    dx = np.zeros((N, T, D))
    dnext_c = np.zeros((N, H))
    dnext_h = np.zeros((N, H))
    dWx = np.zeros((D, 4 * H))
    dWh = np.zeros((H, 4 * H))
    db = np.zeros((4 * H))

    # 反向传播
    for t in reversed(range(T)):
        # 计算梯度
        dnext_h += dh[:, t, :]
        dx[:, t, :], dnext_h, dnext_c, dWx_t, dWh_t, db_t = lstm_step_backward(dnext_h, dnext_c, cache[t])
        # 更新梯度
        dWx += dWx_t
        dWh += dWh_t
        db += db_t

    # 计算dh0
    dh0 = dnext_h

    # *****END OF YOUR CODE (DO NOT DELETE/MODIFY THIS LINE)*****
    ##############################################################################
    #                               END OF YOUR CODE                             #
    ##############################################################################

    return dx, dh0, dWx, dWh, db
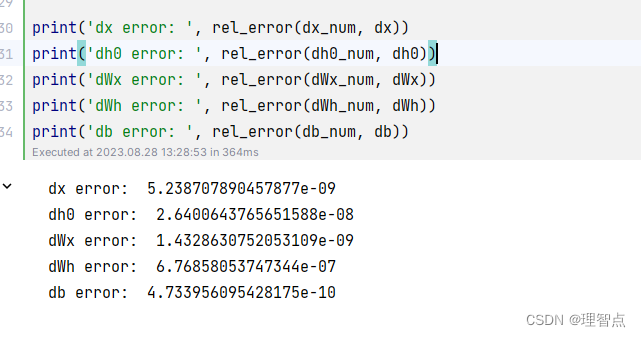
输出
CaptioningRNN.loss
解析
这个因为之前我就写好了,所以我直接吧代码贴上来了,其实之前写过普通RNN的话,不难理解这里的操作
代码
    def loss(self, features, captions):
        """
        Compute training-time loss for the RNN. We input image features and
        ground-truth captions for those images, and use an RNN (or LSTM) to compute
        loss and gradients on all parameters.

        Inputs:
        - features: Input image features, of shape (N, D)
        - captions: Ground-truth captions; an integer array of shape (N, T + 1) where
          each element is in the range 0 <= y[i, t] < V

        Returns a tuple of:
        - loss: Scalar loss
        - grads: Dictionary of gradients parallel to self.params
        """
        # Cut captions into two pieces: captions_in has everything but the last word
        # and will be input to the RNN; captions_out has everything but the first
        # word and this is what we will expect the RNN to generate. These are offset
        # by one relative to each other because the RNN should produce word (t+1)
        # after receiving word t. The first element of captions_in will be the START
        # token, and the first element of captions_out will be the first word.
        captions_in = captions[:, :-1]
        captions_out = captions[:, 1:]

        # You'll need this
        mask = captions_out != self._null

        # Weight and bias for the affine transform from image features to initial
        # hidden state
        W_proj, b_proj = self.params["W_proj"], self.params["b_proj"]

        # Word embedding matrix
        W_embed = self.params["W_embed"]

        # Input-to-hidden, hidden-to-hidden, and biases for the RNN
        Wx, Wh, b = self.params["Wx"], self.params["Wh"], self.params["b"]

        # Weight and bias for the hidden-to-vocab transformation.
        W_vocab, b_vocab = self.params["W_vocab"], self.params["b_vocab"]

        loss, grads = 0.0, {}
        ############################################################################
        # TODO: Implement the forward and backward passes for the CaptioningRNN.   #
        # In the forward pass you will need to do the following:                   #
        # (1) Use an affine transformation to compute the initial hidden state     #
        #     from the image features. This should produce an array of shape (N, H)#
        # (2) Use a word embedding layer to transform the words in captions_in     #
        #     from indices to vectors, giving an array of shape (N, T, W).         #
        # (3) Use either a vanilla RNN or LSTM (depending on self.cell_type) to    #
        #     process the sequence of input word vectors and produce hidden state  #
        #     vectors for all timesteps, producing an array of shape (N, T, H).    #
        # (4) Use a (temporal) affine transformation to compute scores over the    #
        #     vocabulary at every timestep using the hidden states, giving an      #
        #     array of shape (N, T, V).                                            #
        # (5) Use (temporal) softmax to compute loss using captions_out, ignoring  #
        #     the points where the output word is <NULL> using the mask above.     #
        #                                                                          #
        #                                                                          #
        # Do not worry about regularizing the weights or their gradients!          #
        #                                                                          #
        # In the backward pass you will need to compute the gradient of the loss   #
        # with respect to all model parameters. Use the loss and grads variables   #
        # defined above to store loss and gradients; grads[k] should give the      #
        # gradients for self.params[k].                                            #
        #                                                                          #
        # Note also that you are allowed to make use of functions from layers.py   #
        # in your implementation, if needed.                                       #
        ############################################################################
        # *****START OF YOUR CODE (DO NOT DELETE/MODIFY THIS LINE)*****

        # 第一步,使用全连接层,将图像特征转换为隐藏层的初始状态
        h0, cache_h0 = affine_forward(features, W_proj, b_proj)
        # 第二步,使用词嵌入层,将输入的单词转换为词向量
        word_vector, cache_word_vector = word_embedding_forward(captions_in, W_embed)
        # 第三步,使用RNN或者LSTM,将词向量序列转换为隐藏层状态序列
        if self.cell_type == "rnn":
            h, cache_h = rnn_forward(word_vector, h0, Wx, Wh, b)
        elif self.cell_type == "lstm":
            h, cache_h = lstm_forward(word_vector, h0, Wx, Wh, b)
        # 第四步,使用全连接层,将隐藏层状态序列转换为词汇表上的得分序列
        scores, cache_scores = temporal_affine_forward(h, W_vocab, b_vocab)
        # 第五步,使用softmax,计算损失
        loss, dscores = temporal_softmax_loss(scores, captions_out, mask)

        # 反向传播
        # 第四步,全连接层的反向传播
        dh, dW_vocab, db_vocab = temporal_affine_backward(dscores, cache_scores)
        # 第三步,RNN或者LSTM的反向传播
        if self.cell_type == "rnn":
            dword_vector, dh0, dWx, dWh, db = rnn_backward(dh, cache_h)
        elif self.cell_type == "lstm":
            dword_vector, dh0, dWx, dWh, db = lstm_backward(dh, cache_h)
        # 第二步,词嵌入层的反向传播
        dW_embed = word_embedding_backward(dword_vector, cache_word_vector)
        # 第一步,全连接层的反向传播
        dfeatures, dW_proj, db_proj = affine_backward(dh0, cache_h0)

        # 将梯度保存到grads中
        grads["W_proj"] = dW_proj
        grads["b_proj"] = db_proj
        grads["W_embed"] = dW_embed
        grads["Wx"] = dWx
        grads["Wh"] = dWh
        grads["b"] = db
        grads["W_vocab"] = dW_vocab
        grads["b_vocab"] = db_vocab

        # *****END OF YOUR CODE (DO NOT DELETE/MODIFY THIS LINE)*****
        ############################################################################
        #                             END OF YOUR CODE                             #
        ############################################################################

        return loss, grads
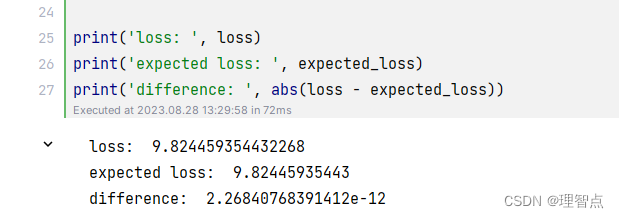
输出
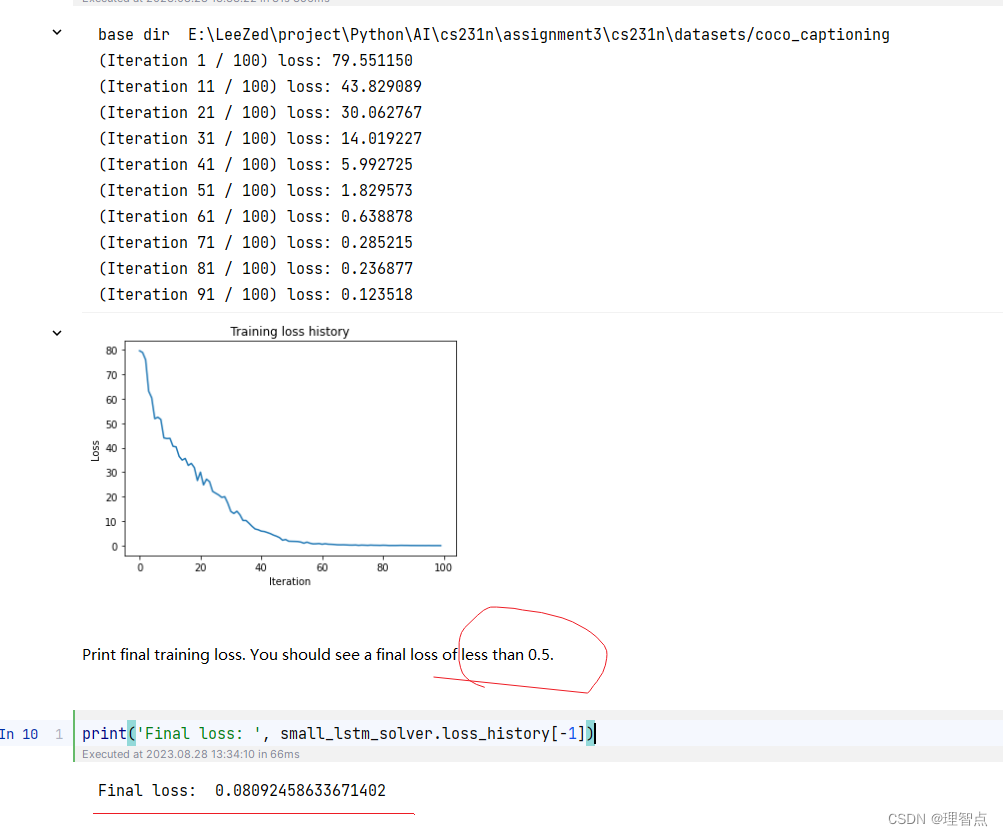
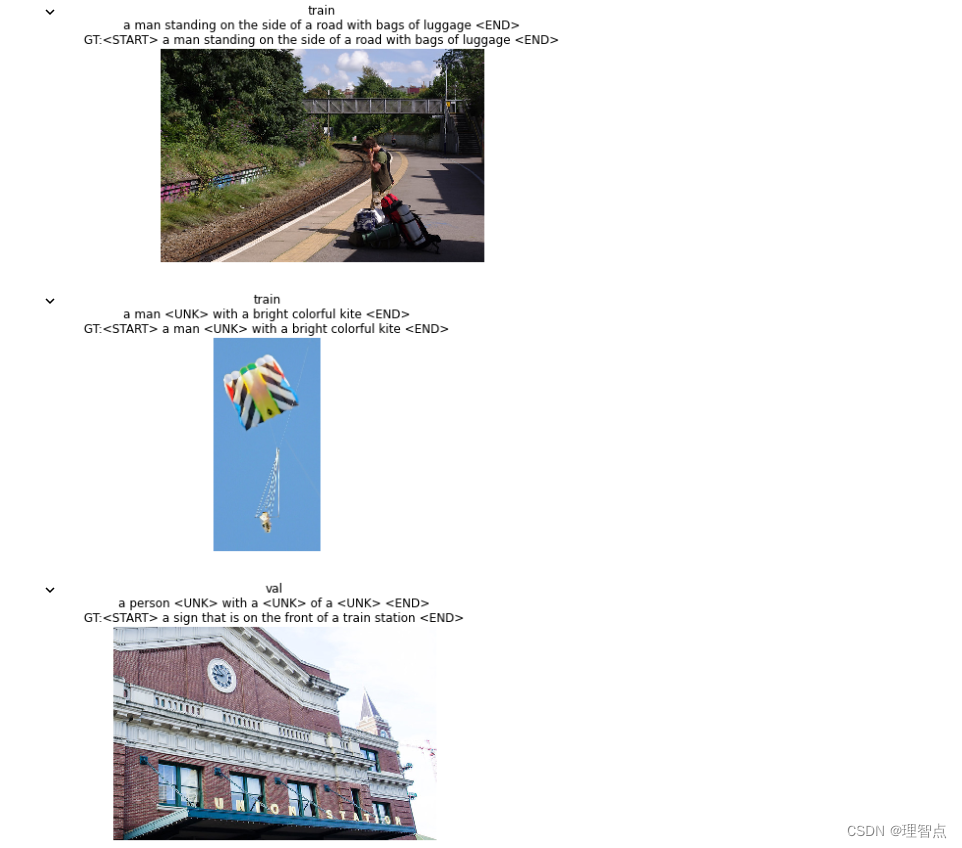
最后输出
结语
通过整个对cs231n的学习,让我们对整个深度学习有了个基础的认识,但是总体来说还是比较入门的讲解,对于深度学习的学习,还需要不断地钻研,这几个实验都挺好玩的,目前对于RNN虽然有了初步的印象,但是仍有一些地方比较模糊,还没有完全吃透。


![[QT]设置程序仅打开一个,再打开就唤醒已打开程序的窗口](https://img-blog.csdnimg.cn/8e3c0d6e8cdb4c55a80a3fe2ef116a80.gif)