Vue2项目练手——通用后台管理项目
- 知识补充
- yarn和npm区别
- npm的缺点:
- yarn的优点
- npm查看镜像和设置镜像
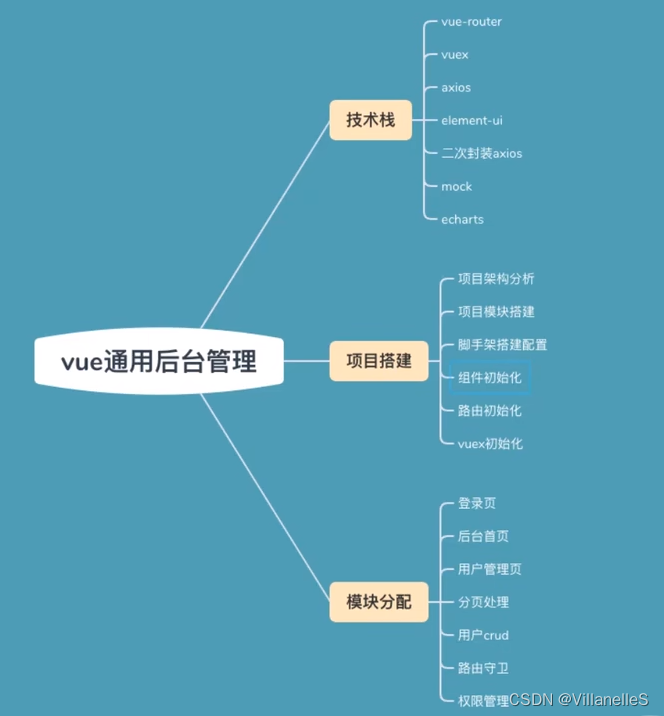
- 项目介绍
- 项目的技术栈
- 项目搭建
- 文件目录
- 创建路由,引入element-ui
- router/index.js
- main.js
- pages/Users.vue
- pages/Main.vue
- pages/Home.vue
- pages/Login.vue
- App.vue
- 使用element-ui搭建主页样式
- main页面布局使用这个
- Main.vue
- 导航栏使用
- 导航栏适配
- Main.vue
- App.vue
- CommonAside
- 导航栏跳转
- 文件目录
- src/router/index.js
- src/pages/Mall.vue
- src/pages/pageOne.vue
- src/pages/PageTwo.vue
- src/components/CommonAside.vue
知识补充
yarn和npm区别
npm的缺点:
- npm install时候巨慢
- 同一个项目,安装的时候无法保持一致性。 由于package.json文件中版本号的特点。
“5.0.3” 安装指定的5.0.3版本
“~5.0.3” 表示安装5.0.X中最新的版本
“^5.0.3” 表示安装5.X.X中最新的版本
有时候会出现版本不一致不能运行的情况。
yarn的优点
- 速度快
并行安装:同步执行所有任务,不像npm按照队列执行每个package,package安装不完成,后面也无法执行。
离线模式:安装过得软件包,直接从缓存中获取,不用像npm从网络中获取。 - 安装版本统一
- 更简洁的输出:
npm输出所有被安装上的依赖,但是yarn只打印必要的信息 - 多注册来源处理:安装某个包,只会从一个注册来源去安装,
- 更好的语义化,yarn安装和卸载是yarn add/remove,npm是npm install/uninstall
npm查看镜像和设置镜像
npm config get registry
npm config set registry https://registry.npmmirror.com/
项目介绍
项目的技术栈
- 使用yarn安装vue-cli
yarn global add @vue/cli
项目搭建
先vue create创建一个项目,然后安装element-ui组件和vue-router,less等组件
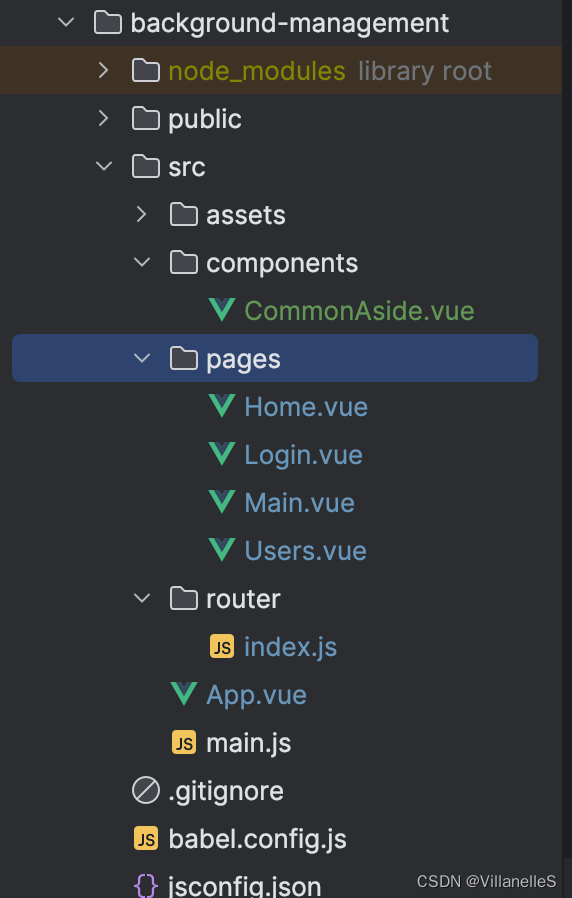
文件目录

创建路由,引入element-ui
router/index.js
import VueRouter from "vue-router";
import Login from "@/pages/Login.vue";
import Users from "@/pages/Users.vue";
import Main from '@/pages/Main.vue'
import Home from "@/pages/Home.vue";

const router= new VueRouter({
    // 浏览器模式设置,设置为history模式
    mode:'history',
    routes:[
        {
            path:"/login",
            component:Login,
            meta:{title:"登录"},
        },
        {
            // 主路由
            name:"main",
            path:'/',
            component:Main,
            children:[  //子路由
                {
                    name:"users",
                    path:"users",
                    component:Users,
                    meta:{title:"用户"}
                },
                {
                    name:"home",
                    path:"home",
                    component:Home,
                    meta:{title:"主页"}
                }
            ]
        }

    ]
})

// 后置路由守卫
router.afterEach((to,from)=>{
    document.title=to.meta.title||"通用后台管理系统"
})
export default router
main.js
import Vue from 'vue'
import App from './App.vue'
import VueRouter from "vue-router";
import router from "@/router";
import ElementUI from 'element-ui';
import 'element-ui/lib/theme-chalk/index.css'
Vue.config.productionTip = false
Vue.use(VueRouter)
Vue.use(ElementUI)
new Vue({
  router,
  render: h => h(App),
}).$mount('#app')
pages/Users.vue
<template>
  <div>
    我是Users组件
  </div>

</template>

<script>
export default {
  name: "Users",
}
</script>

<style scoped>

</style>
pages/Main.vue
<template>
  <div>
    <h1>main</h1>
    <router-view></router-view>
  </div>

</template>

<script>
export default {
  name: "Main",
}
</script>

<style scoped>

</style>
pages/Home.vue
<template>
  <div>
    home内容
  </div>

</template>

<script>
export default {
  name: "Home",
}
</script>

<style scoped>

</style>
pages/Login.vue
<template>
  <div id="app">
    <div class="main-content">
      <div class="title">系统登录</div>
      <div class="content">
        <el-form :model="ruleForm" status-icon :rules="rules" ref="ruleForm" label-width="100px" class="demo-ruleForm">
          <el-form-item label="用户名" prop="name">
            <el-input v-model="ruleForm.name" ></el-input>
          </el-form-item>
          <el-form-item label="密码" prop="password">
            <el-input v-model="ruleForm.password" type="password" autocomplete="off"></el-input>
          </el-form-item>
          <el-form-item>
            <el-row :gutter="20">
              <el-col :span="12" :offset="4"><router-link to="/login"><el-button type="primary" @click="submitForm('ruleForm')">登录</el-button></router-link></el-col>
            </el-row>
          </el-form-item>
        </el-form>
      </div>
    </div>

  </div>

</template>

<script>
export default {
  name: "login",
  data(){
    return{
      ruleForm: {
        name: '',
        password:""
      },
      rules: {
        name: [
          {required: true, message: '请输入用户名', trigger: 'blur'},
          {min: 3, max: 5, message: '长度在 3 到 5 个字符', trigger: 'blur'}
        ],
        password: [
          {required:true,message:"请输入密码",trigger:"blur"}
        ]
      }
    }
  },
  methods:{
    submitForm(formName) {
      this.$refs[formName].validate((valid) => {
        if (valid) {
          // alert('submit!');
        } else {
          console.log('error submit!!');
          return false;
        }
      });
    },
  }
}
</script>

<style lang="less" scoped>
*{
  padding: 0;
  margin: 0;
}
#app {
  display: flex;
  background-color: #333;
  height: 800px;
  .main-content{
    height: 300px;
    width: 400px;
    background-color: #fff;
    margin: 200px auto;
    border-radius: 10px;
    padding: 30px;
    box-sizing: border-box;
    box-shadow: 5px  5px 10px rgba(0,0,0,0.5),-5px -5px 10px rgba(0,0,0,0.5);
    .title{
      font-size: 20px;
      text-align: center;
      //margin-top: 30px;
      font-weight: 300;
    }
    .content{
      margin-top: 30px;
    }
  }
}
</style>
App.vue
<template>
  <div id="app">
    <router-view></router-view>
  </div>
</template>

<script>

export default {
  name: 'App',
}
</script>

<style lang="less">
*{
  padding: 0;
  margin: 0;
}
</style>

使用element-ui搭建主页样式
main页面布局使用这个

Main.vue
<template>
  <div>
    <el-container>
      <el-aside width="200px">Aside</el-aside>
      <el-container>
        <el-header>Header</el-header>
        <el-main>
          <router-view></router-view>
        </el-main>
      </el-container>
    </el-container>
  </div>

</template>

<script>
export default {
  name: "Main",
}
</script>

<style scoped>

</style>

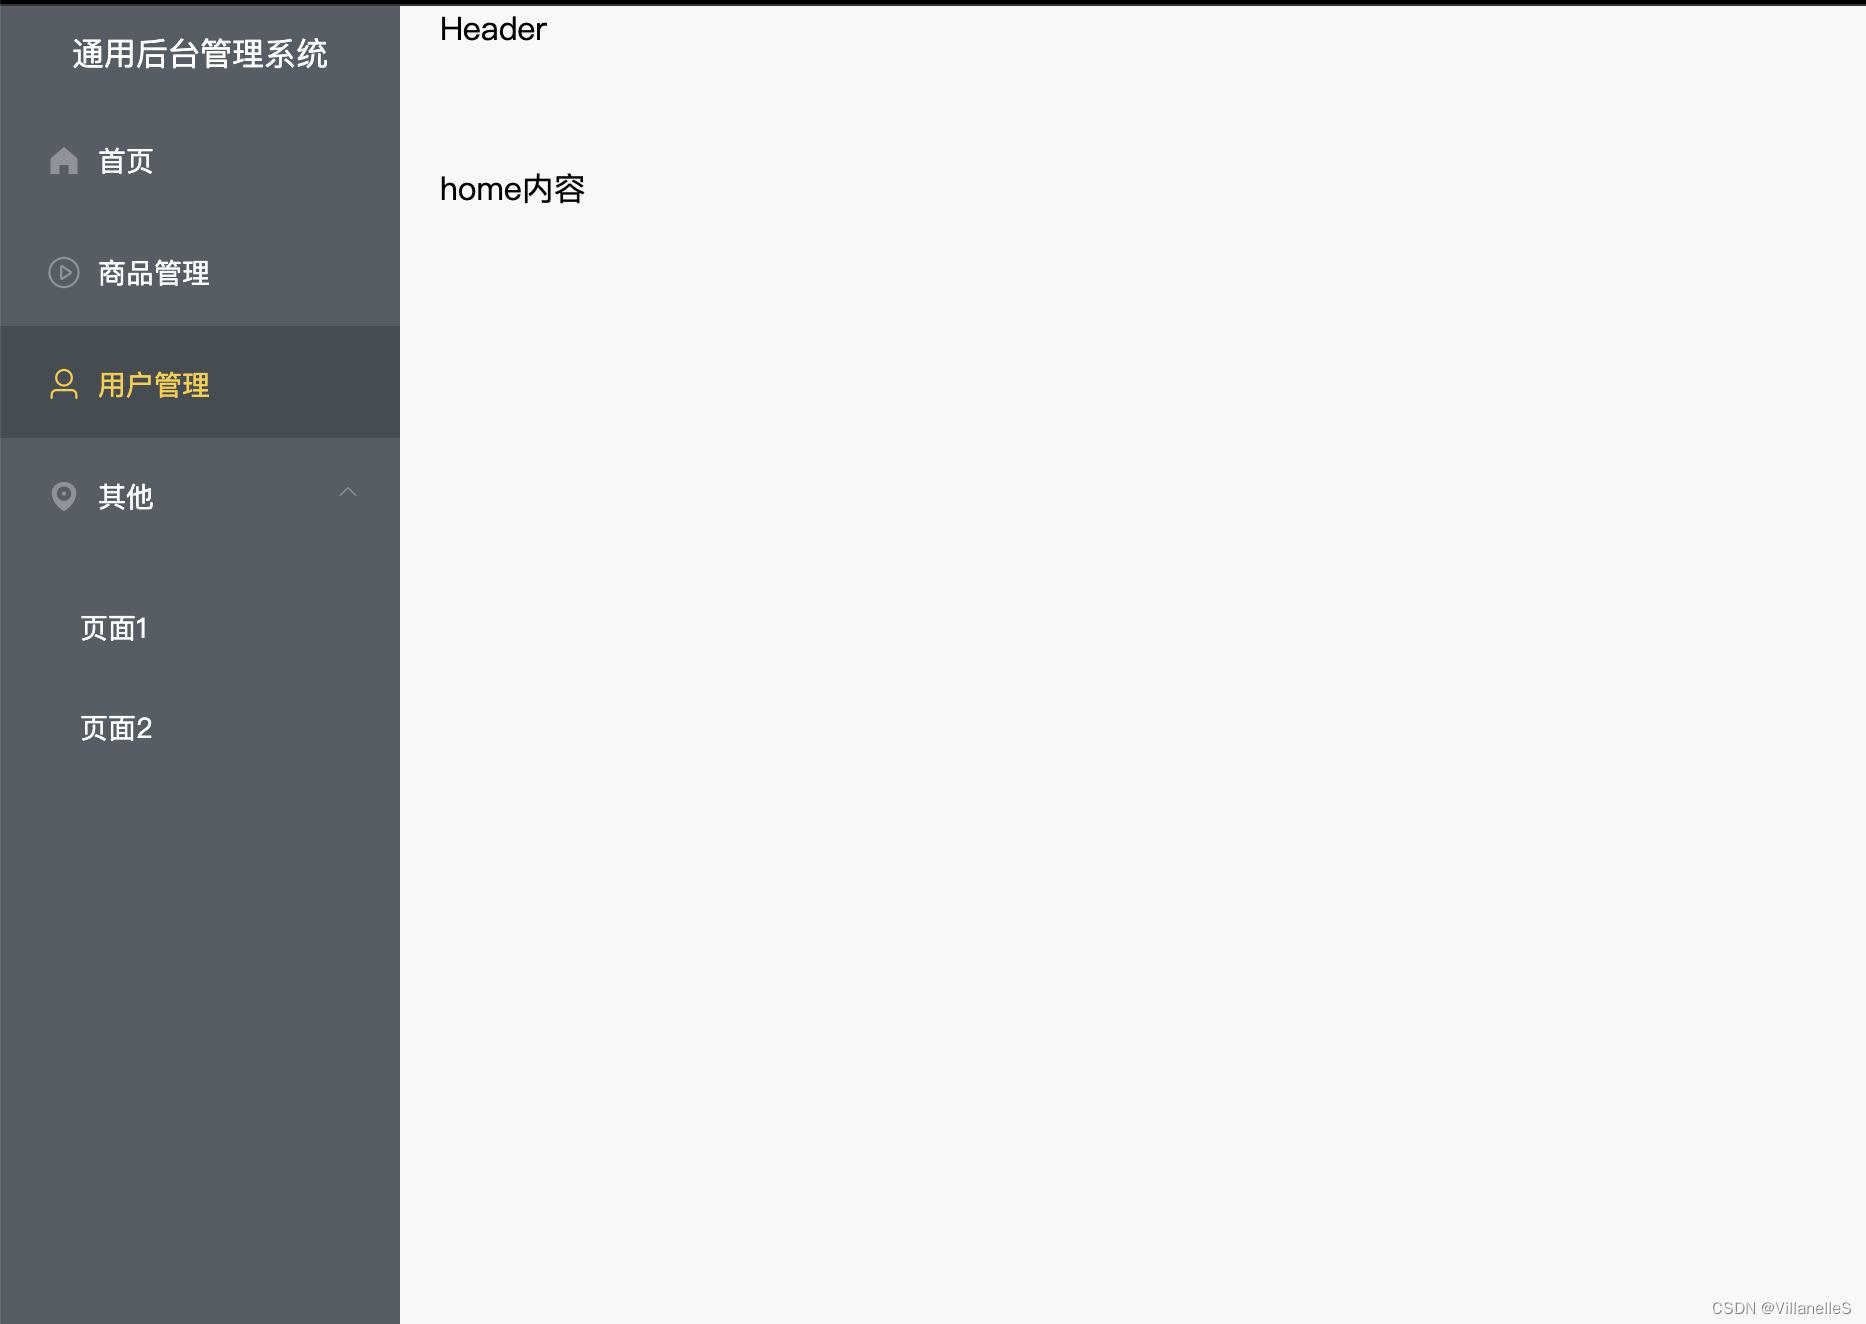
导航栏使用
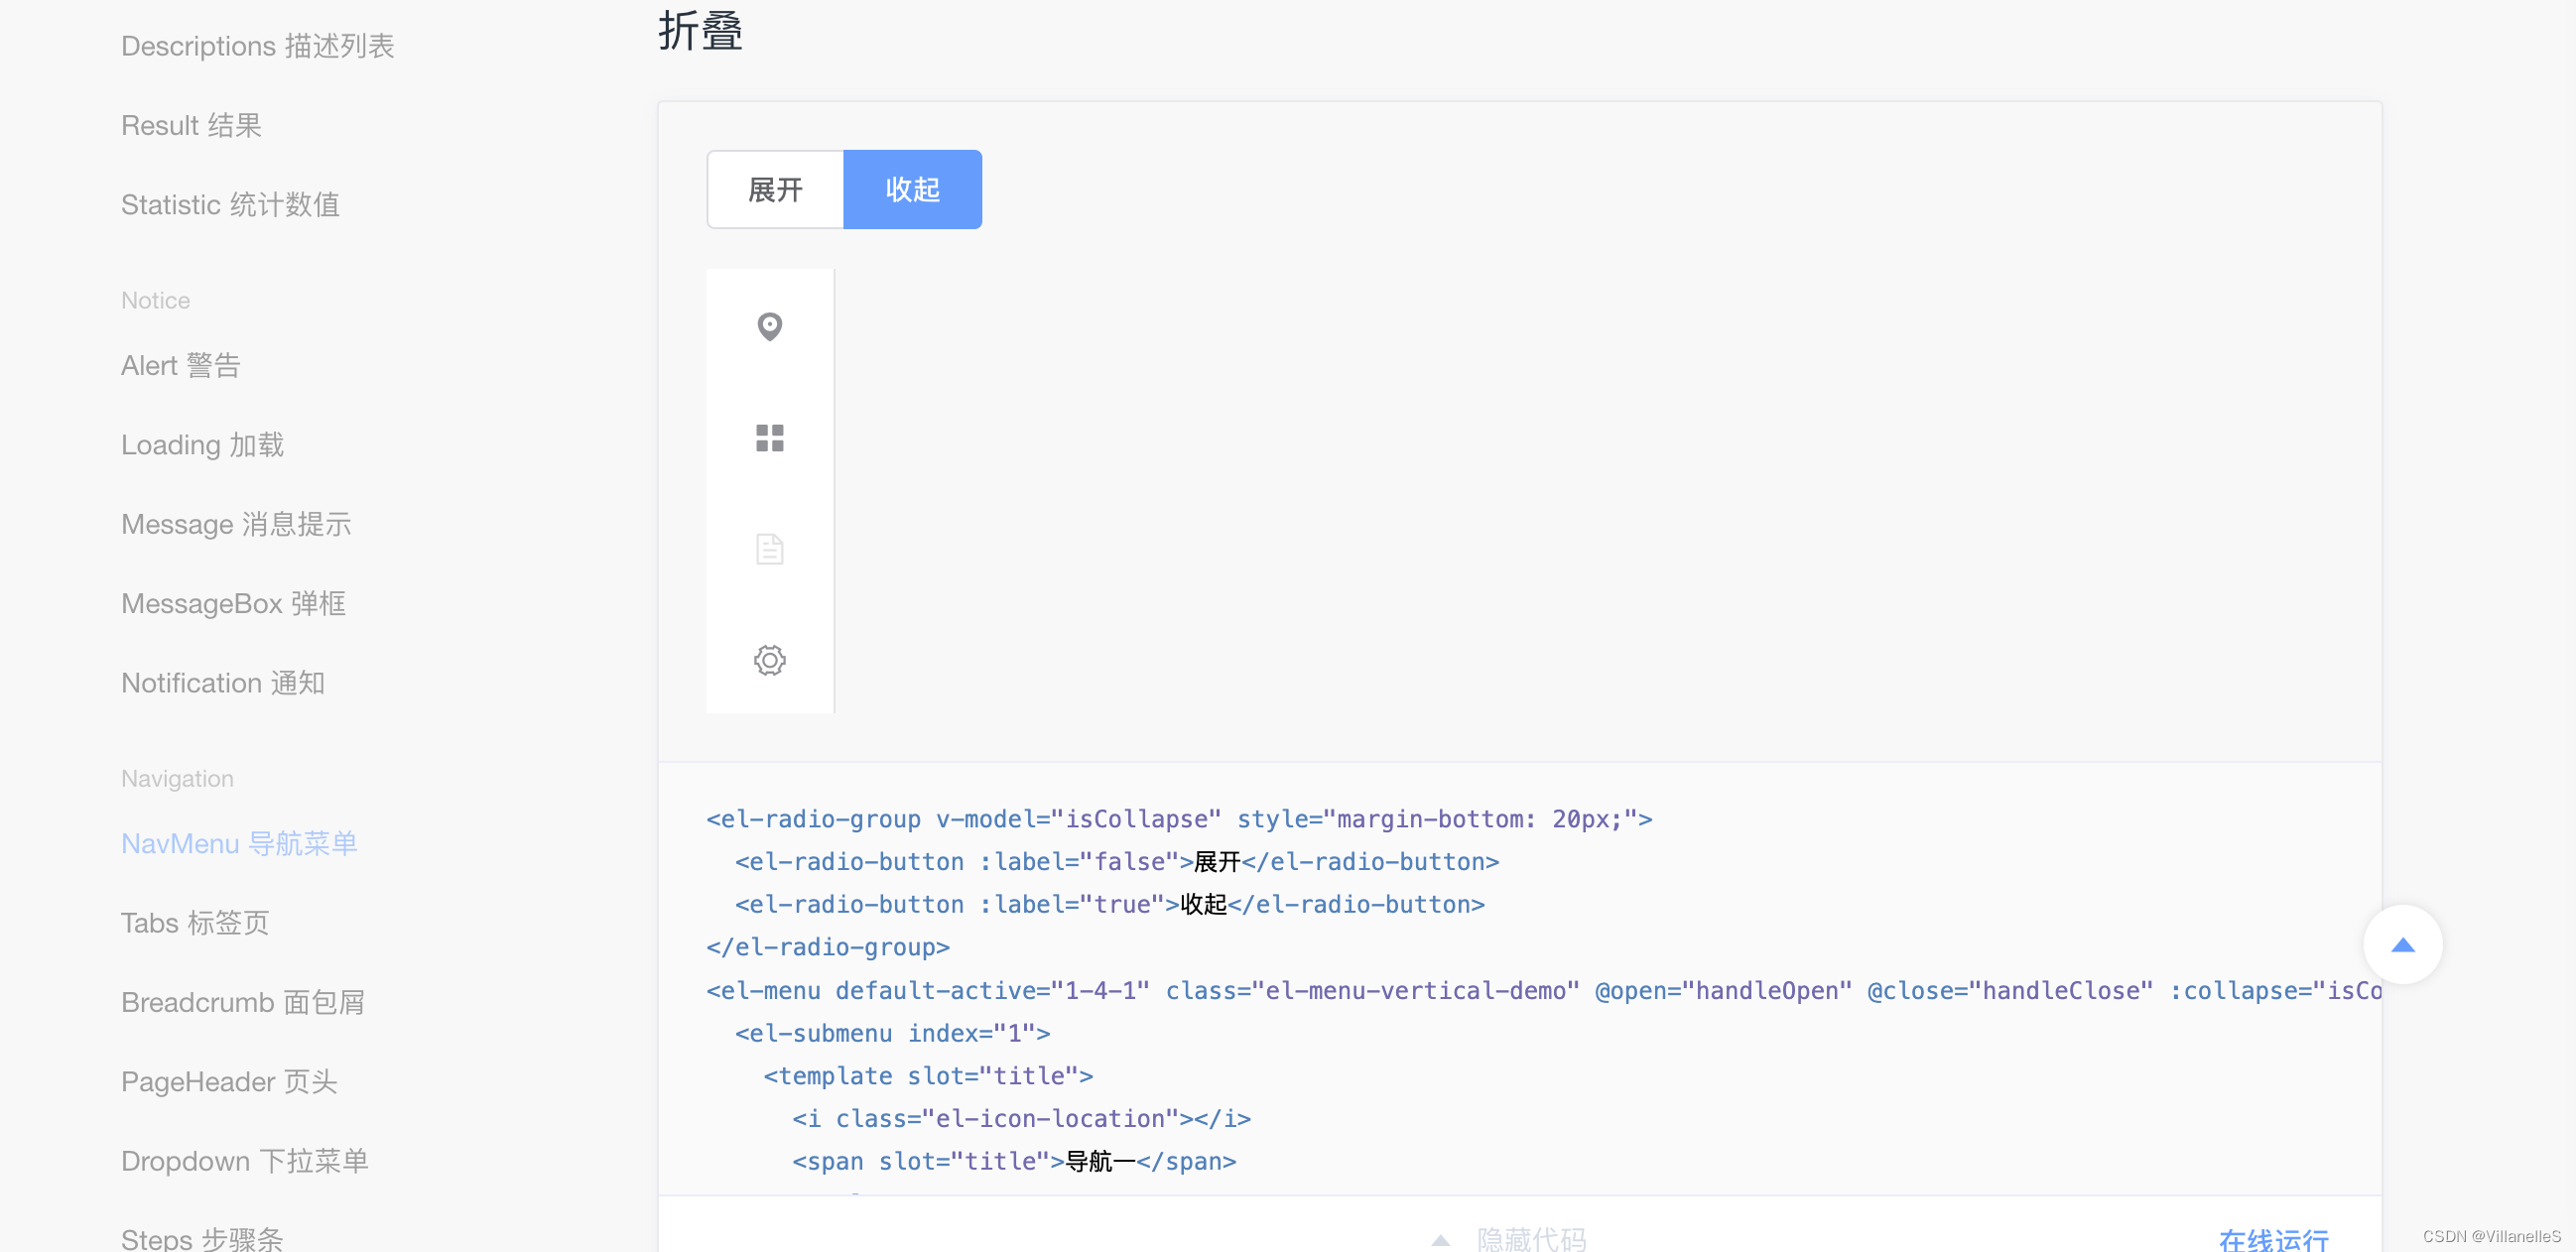
导航栏适配
Main.vue
<template>
  <div>
    <el-container>
      <el-aside width="200px">
        <CommonAside></CommonAside>
      </el-aside>
      <el-container>
        <el-header>Header</el-header>
        <el-main>
<!--         路由出口,路由匹配到的组件将渲染在这里 -->
          <router-view></router-view>
        </el-main>
      </el-container>
    </el-container>
  </div>

</template>

<script>
import CommonAside from "@/components/CommonAside.vue";
export default {
  name: "Main",
  components:{CommonAside}
}
</script>

<style scoped>

</style>
App.vue
<template>
  <div id="app">
    <router-view></router-view>
  </div>
</template>

<script>

export default {
  name: 'App',
}
</script>

<style lang="less">
html,body,h3{
  padding: 0;
  margin: 0;
}
</style>
CommonAside
<template>
    <el-menu default-active="1-4-1" class="el-menu-vertical-demo" @open="handleOpen" @close="handleClose"
             :collapse="isCollapse" background-color="#545c64" text-color="#fff"
             active-text-color="#ffd04b">
      <h3>通用后台管理系统</h3>
      <el-menu-item index="2" v-for="item in noChildren" :key="item.name" :index="item.name">
        <i :class="`el-icon-${item.icon}`"></i>
        <span slot="title">{{item.label}}</span>
      </el-menu-item>
      <el-submenu :index="item.label" v-for="item in hasChildren" :key="item.label">
        <template slot="title">
          <i :class="`el-icon-${item.icon}`"></i>
          <span slot="title">{{item.label}}</span>
        </template>
        <el-menu-item-group>
          <el-menu-item :index="subItem.path" :key="subItem.path" v-for="subItem in item.children">
            {{subItem.label}}
          </el-menu-item>
        </el-menu-item-group>
      </el-submenu>
    </el-menu>

</template>


<style lang="less" scoped>
.el-menu-vertical-demo:not(.el-menu--collapse) {
  width: 200px;
  min-height: 400px;
}
.el-menu{
  height: 100vh;  //占据页面高度100%
  h3{
    color: #fff;
    text-align: center;
    line-height: 48px;
    font-size: 16px;
    font-weight: 400;
  }
}
</style>

<script>
export default {
  data() {
    return {
      isCollapse: false,
      menuData:[
        {
          path:'/',
          name:"home",
          label:"首页",
          icon:"s-home",
          url:'Home/Home'
        },
        {
          path:'/mail',
          name:"mall",
          label:"商品管理",
          icon:"video-play",
          url:'MallManage/MallManage'
        },
        {
          path:'/user',
          name:"user",
          label:"用户管理",
          icon:"user",
          url:'userManage/userManage'
        },
        {
          label:"其他",
          icon:"location",
          children:[
            {
              path:'/page1',
              name:"page1",
              label:"页面1",
              icon:"setting",
              url:'Other/PageOne'
            },
            {
              path:'/page2',
              name:"page2",
              label:"页面2",
              icon:"setting",
              url:'Other/PageTwo'
            },
          ]
        },
      ]
    };
  },
  methods: {
    handleOpen(key, keyPath) {
      console.log(key, keyPath);
    },
    handleClose(key, keyPath) {
      console.log(key, keyPath);
    }
  },
  computed:{
    //没有子菜单的数据
    noChildren(){
      return this.menuData.filter(item=>!item.children)
    },
    hasChildren(){
      return this.menuData.filter(item=>item.children)
    }
    //有子菜单数组
  }
}
</script>
导航栏跳转
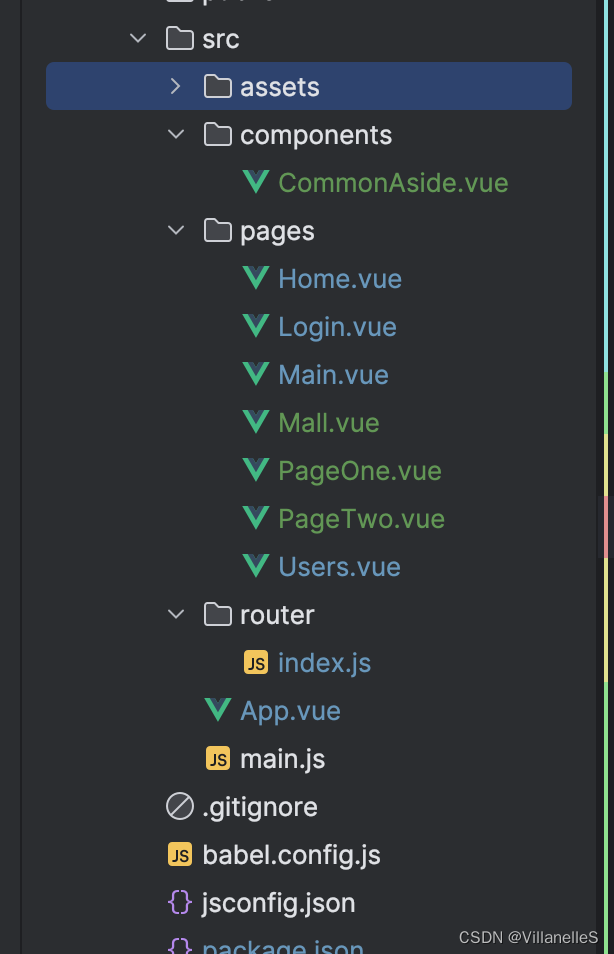
文件目录
src/router/index.js
import VueRouter from "vue-router";
import Login from "@/pages/Login.vue";
import Users from "@/pages/Users.vue";
import Main from '@/pages/Main.vue'
import Home from "@/pages/Home.vue";
import Mall from "@/pages/Mall.vue";
import PageOne from "@/pages/PageOne.vue";
import PageTwo from "@/pages/PageTwo.vue";

const router= new VueRouter({
    // 浏览器模式设置,设置为history模式
    // mode:'history',
    routes:[
        {
            path:"/login",
            component:Login,
            meta:{title:"登录"},
        },
        {
            // 子路由
            name:"main",
            path:'/',
            redirect:"/home",  //重定向 当路径为/,则重定向home
            component:Main,
            children:[
                {
                    name:"user",
                    path:"user",
                    component:Users,
                    meta:{title:"用户管理"}
                },
                {
                    name:"home",
                    path:"home",
                    component:Home,
                    meta:{title:"首页"}
                },
                {
                    name:"mall",
                    path:"mall",
                    component:Mall,
                    meta:{title:"商品管理"}
                },
                {
                    name:"page1",
                    path:"page1",
                    component:PageOne,
                    meta:{title:"页面1"}
                },
                {
                    name:"page2",
                    path:"page2",
                    component:PageTwo,
                    meta:{title:"页面2"}
                }
            ]
        }

    ]
})

// 后置路由守卫
router.afterEach((to,from)=>{
    document.title=to.meta.title||"通用后台管理系统"
})
export default router
src/pages/Mall.vue
<template>
  <div>
    我是mall
  </div>

</template>

<script>
export default {
  name: "Mall",
}
</script>

<style scoped>

</style>
src/pages/pageOne.vue
<template>
  <div>
    我是PageOne
  </div>

</template>

<script>
export default {
  name: "PageOne",
}
</script>

<style scoped>

</style>
src/pages/PageTwo.vue
<template>
  <div>
    我是PageTwo
  </div>

</template>

<script>
export default {
  name: "PageTwo",
}
</script>

<style scoped>

</style>
src/components/CommonAside.vue
<template>
    <el-menu default-active="1-4-1" class="el-menu-vertical-demo" @open="handleOpen" @close="handleClose"
             :collapse="isCollapse" background-color="#545c64" text-color="#fff"
             active-text-color="#ffd04b">
      <h3>通用后台管理系统</h3>
      <el-menu-item @click="clickMenu(item)"  v-for="item in noChildren" :key="item.name" :index="item.name">
        <i :class="`el-icon-${item.icon}`"></i>
        <span slot="title">{{item.label}}</span>
      </el-menu-item>
      <el-submenu :index="item.label" v-for="item in hasChildren" :key="item.label">
        <template slot="title">
          <i :class="`el-icon-${item.icon}`"></i>
          <span slot="title">{{item.label}}</span>
        </template>
        <el-menu-item-group>
          <el-menu-item @click="clickMenu(subItem)" :index="subItem.path" :key="subItem.path" v-for="subItem in item.children">
            {{subItem.label}}
          </el-menu-item>
        </el-menu-item-group>
      </el-submenu>
    </el-menu>

</template>


<style lang="less" scoped>
.el-menu-vertical-demo:not(.el-menu--collapse) {
  width: 200px;
  min-height: 400px;
}
.el-menu{
  height: 100vh;  //占据页面高度100%
  h3{
    color: #fff;
    text-align: center;
    line-height: 48px;
    font-size: 16px;
    font-weight: 400;
  }
}
</style>

<script>
export default {
  data() {
    return {
      isCollapse: false,
      menuData:[
        {
          path:'/',
          name:"home",
          label:"首页",
          icon:"s-home",
          url:'Home/Home'
        },
        {
          path:'/mall',
          name:"mall",
          label:"商品管理",
          icon:"video-play",
          url:'MallManage/MallManage'
        },
        {
          path:'/user',
          name:"user",
          label:"用户管理",
          icon:"user",
          url:'userManage/userManage'
        },
        {
          label:"其他",
          icon:"location",
          children:[
            {
              path:'/page1',
              name:"page1",
              label:"页面1",
              icon:"setting",
              url:'Other/PageOne'
            },
            {
              path:'/page2',
              name:"page2",
              label:"页面2",
              icon:"setting",
              url:'Other/PageTwo'
            },
          ]
        },
      ]
    };
  },
  methods: {
    handleOpen(key, keyPath) {
      console.log(key, keyPath);
    },
    handleClose(key, keyPath) {
      console.log(key, keyPath);
    },
    clickMenu(item){
      // console.log(item)
      this.$router.push(item.path)
    }
  },
  computed:{
    //没有子菜单的数据
    noChildren(){
      return this.menuData.filter(item=>!item.children)
    },
    //有子菜单数组
    hasChildren(){
      return this.menuData.filter(item=>item.children)
    }
  }
}
</script>