人工智能深度估计技术

news2025/4/16 23:58:29

人工智(能)走起!!!

下面是基本操作:

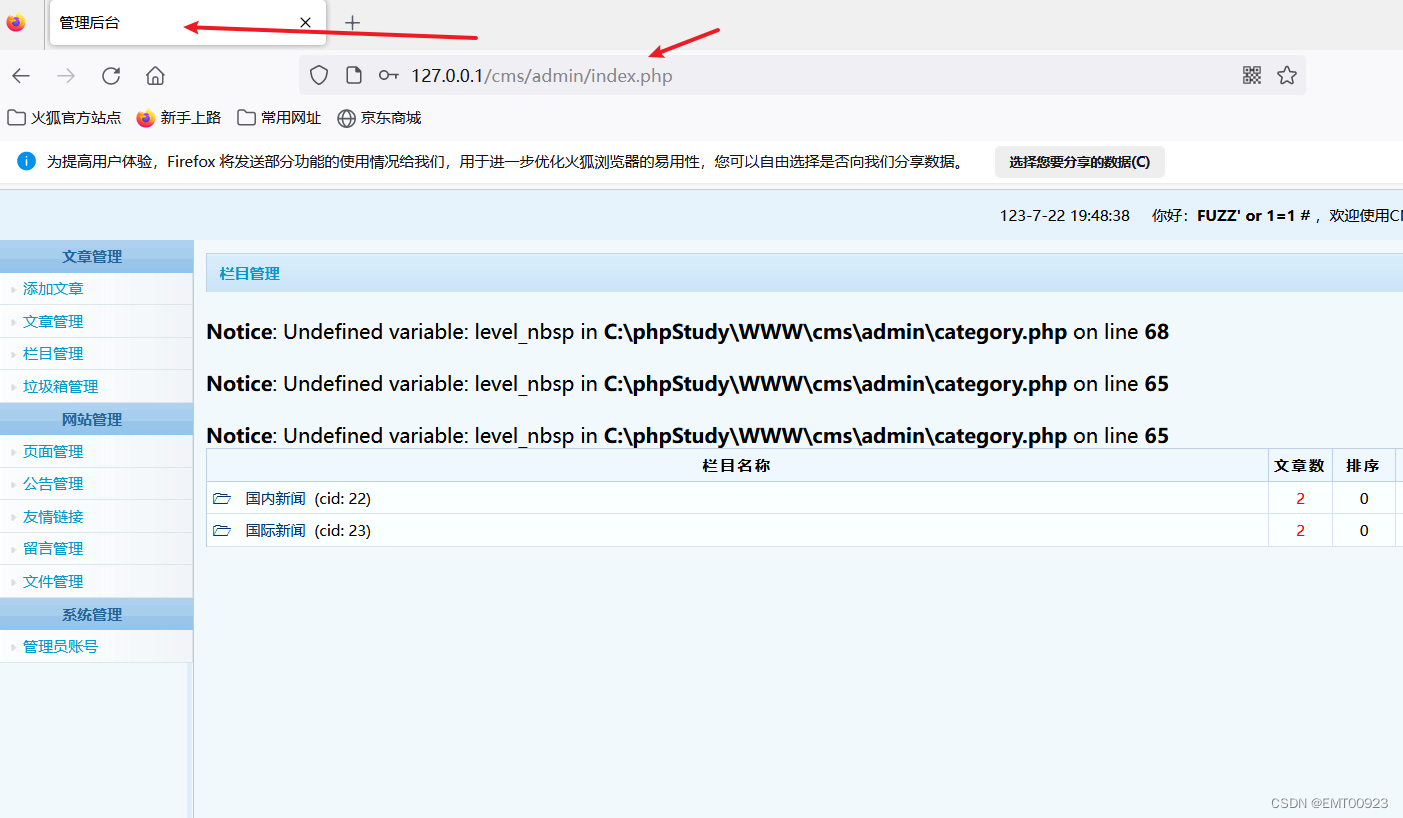
在Hugging Face网页中找到Depth Estimation的model,如下图:

Hugging Face – The AI community building the future.

 (上Hugging Face要翻墙!你翻不翻我不管。。。)

以下内容摘自Hugging Face:

Monocular depth estimation

Monocular depth estimation is a computer vision task that involves predicting the depth information of a scene from a single image. In other words, it is the process of estimating the distance of objects in a scene from a single camera viewpoint.

Monocular depth estimation has various applications, including 3D reconstruction, augmented reality, autonomous driving, and robotics. It is a challenging task as it requires the model to understand the complex relationships between objects in the scene and the corresponding depth information, which can be affected by factors such as lighting conditions, occlusion, and texture.

The task illustrated in this tutorial is supported by the following model architectures:

DPT, GLPN

In this guide you’ll learn how to:

  • create a depth estimation pipeline
  • run depth estimation inference by hand

Before you begin, make sure you have all the necessary libraries installed:

pip install -q transformers

Depth estimation pipeline

The simplest way to try out inference with a model supporting depth estimation is to use the corresponding pipeline(). Instantiate a pipeline from a checkpoint on the Hugging Face Hub:

from transformers import pipeline

checkpoint = "vinvino02/glpn-nyu"
depth_estimator = pipeline("depth-estimation", model=checkpoint)

 Next, choose an image to analyze:

from PIL import Image
import requests

url = "https://unsplash.com/photos/HwBAsSbPBDU/download?ixid=MnwxMjA3fDB8MXxzZWFyY2h8MzR8fGNhciUyMGluJTIwdGhlJTIwc3RyZWV0fGVufDB8MHx8fDE2Nzg5MDEwODg&force=true&w=640"
image = Image.open(requests.get(url, stream=True).raw)
image

Photo of a busy street

 Pass the image to the pipeline.

predictions = depth_estimator(image)

The pipeline returns a dictionary with two entries. The first one, called predicted_depth, is a tensor with the values being the depth expressed in meters for each pixel. The second one, depth, is a PIL image that visualizes the depth estimation result.

Let’s take a look at the visualized result:

predictions["depth"]

Depth estimation visualization

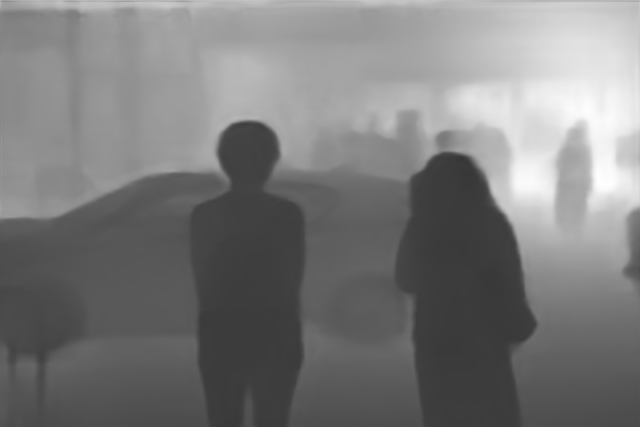
Depth estimation inference by hand

Now that you’ve seen how to use the depth estimation pipeline, let’s see how we can replicate the same result by hand.

Start by loading the model and associated processor from a checkpoint on the Hugging Face Hub. Here we’ll use the same checkpoint as before:

from transformers import AutoImageProcessor, AutoModelForDepthEstimation

checkpoint = "vinvino02/glpn-nyu"

image_processor = AutoImageProcessor.from_pretrained(checkpoint)
model = AutoModelForDepthEstimation.from_pretrained(checkpoint)

Prepare the image input for the model using the image_processor that will take care of the necessary image transformations such as resizing and normalization:

pixel_values = image_processor(image, return_tensors="pt").pixel_values

Pass the prepared inputs through the model:

import torch

with torch.no_grad():
    outputs = model(pixel_values)
    predicted_depth = outputs.predicted_depth

Visualize the results:

import numpy as np

# interpolate to original size
prediction = torch.nn.functional.interpolate(
    predicted_depth.unsqueeze(1),
    size=image.size[::-1],
    mode="bicubic",
    align_corners=False,
).squeeze()
output = prediction.numpy()

formatted = (output * 255 / np.max(output)).astype("uint8")
depth = Image.fromarray(formatted)
depth

声明:本文中文版可以在CSDN博主「XBL0430」的同名文章中阅读,

           关于版权问题,对方文章的发布已获得本人同意。

           文章链接:人工智能深度估计技术(中文翻译版)_XBL0430的博客-CSDN博客

           (对了,人家花了好多心思翻译我的文章,麻烦大家对TA多多支持! )


本文内容为小编自己汇总,内容可能会有错误或疏漏,感谢大家的提议!

记得点赞和关注哦~

本文来自互联网用户投稿,该文观点仅代表作者本人,不代表本站立场。本站仅提供信息存储空间服务,不拥有所有权,不承担相关法律责任。如若转载,请注明出处:http://www.coloradmin.cn/o/914968.html

如若内容造成侵权/违法违规/事实不符,请联系多彩编程网进行投诉反馈,一经查实,立即删除!

相关文章

从自动驾驶到智能助理:AI和ML技术的革命性应用与前景

人工智能(AI)和机器学习(ML)的快速发展正在改变我们的世界。它们以惊人的速度渗透到各个领域,从自动驾驶汽车到智能助理、语音识别和自然语言处理等。AI和ML技术的应用范围和影响力越来越广泛,为我们的日常…

SpringMVC拦截器学习笔记

SpringMVC拦截器 拦截器知识 拦截器(Interceptor)用于对URL请求进行前置/后置过滤 Interceptor与Filter用途相似但实现方式不同 Interceptor底层就是基于Spring AOP面向切面编程实现 拦截器开发流程 Maven添加依赖包servlet-api <dependency><groupId>javax.se…

【Rust】Rust学习 第十八章模式用来匹配值的结构

模式是 Rust 中特殊的语法&#xff0c;它用来匹配类型中的结构&#xff0c;无论类型是简单还是复杂。结合使用模式和 match 表达式以及其他结构可以提供更多对程序控制流的支配权。模式由如下一些内容组合而成&#xff1a; 字面值解构的数组、枚举、结构体或者元组变量通配符占…

CSS笔记

介绍 CSS导入方式 三种方法都将文字设置成了红色 CSS选择器 元素选择器 id选择器 图中div将颜色控制为红色&#xff0c;#name将颜色控制为蓝色&#xff0c;谁控制的范围最小&#xff0c;谁就生效&#xff0c;所以第二个div是蓝色的。id属性值要唯一&#xff0c;否则报错。 clas…

【STM32RT-Thread零基础入门】 6. 线程创建应用(线程挂起与恢复)

硬件&#xff1a;STM32F103ZET6、ST-LINK、usb转串口工具、4个LED灯、1个蜂鸣器、4个1k电阻、2个按键、面包板、杜邦线 文章目录 前言一、RT-Thread相关接口函数1. 挂起线程2. 恢复线程 二、程序设计1. car_led.c2.car_led.h3. main.c 三、程序测试总结 前言 在上一个任务中&a…

Mysql group by使用示例

文章目录 1. groupby时不能查询*2. 查询出的列必须在group by的条件列中3. group by多个字段&#xff0c;这些字段都有索引也会索引失效&#xff0c;只有group by单个字段索引才能起作用4. having条件必须跟group by相关联5. 用group by做去重6. 使用聚合函数做数量统计7. havi…

ShardingSphere02-MySQL主从同步配置

1、MySQL主从同步原理 基本原理&#xff1a; slave会从master读取binlog来进行数据同步 具体步骤&#xff1a; step1&#xff1a;master将数据改变记录到二进制日志&#xff08;binary log&#xff09;中。step2&#xff1a; 当slave上执行 start slave 命令之后&#xff0c…

mysql------做主从复制,读写分离

1.为什么要做主从复制&#xff08;主从复制的作用&#xff09; 做数据的热备&#xff0c;作为后备数据库&#xff0c;主数据库服务器故障后&#xff0c;可切换到从数据库继续工作&#xff0c;避免数据丢失。 架构的扩展。业务量越来越大,I/O访问频率过高&#xff0c;单机无法满…

matlab面向对象

一、面向对象编程 1.1 面向过程与面向对象 区别&#xff1a; 面向过程的核心是一系列函数&#xff0c;执行过程是依次使用每个函数面向对象的核心是对象&#xff08;类&#xff09;及其属性、方法&#xff0c;每个对象根据需求执行自己的方法以解决问题 对象&#xff1a;单个…

JAVA 读取jar包中excel模板

1、在resources路径下&#xff0c;新建report文件夹&#xff0c;放入excel模板 2、配置文件中的目录&#xff0c;分隔符使用 / template: /report/报告模板V1.0.xlsx3、使用getResourceAsStream()读取 XSSFWorkbook wb;try {//需要以/开始InputStream resourceAsStream this.g…

中国芯,寻找新赛道迫在眉睫

北京华兴万邦管理咨询有限公司 商瑞 陈皓 近期国内半导体行业的热点可以用两个“有点多”来描述&#xff0c;一个是中国芯群体中上市公司股价闪崩的有点多&#xff0c;另一个是行业和企业的活动有点多。前者说明了许多国内芯片设计企业&#xff08;fabless商业模式&#xff09;…

怎么去选消息队列? Kafka vs. RabbitMQ

在上周&#xff0c;我们讨论了使用消息队列的好处。然后我们回顾了消息队列产品的发展历史。如今&#xff0c;在项目中需要使用消息队列时&#xff0c;Apache Kafka似乎是首选产品。然而&#xff0c;考虑到特定需求时&#xff0c;它并不总是最佳选择。 基于数据库的队列 让我们…

【由于无法验证发布者,所以 windozs 已经阳止此软件。】

由于无法验证发布者&#xff0c;所以 windozs 已经阳止此软件。 由于无法验证发布者&#xff0c;所以 windozs 已经阳止此软件。IE点击【Internet选项】在打开Internet选项的对话框中&#xff0c;点击“安全”选项卡在打开的新窗口中点击“受信任的站点”图标&#xff0c;然后点…

Linux查看文本内容的一些技巧

Linux查看文本内容的一些技巧 headtailcat输出filename.txt中第二列的内容awkcutvimdiff abc.txt def.txt 你好&#xff01; 这是你第一次使用 Markdown编辑器 所展示的欢迎页。如果你想学习如何使用Markdown编辑器, 可以仔细阅读这篇文章&#xff0c;了解一下Markdown的基本语…

sql入门-约束

约束 作用于表中字段上的规则&#xff0c;用于限制存储在表中的数据 外键增加--删除 # 创建dept -- 主表 create table dept ( id int primary key auto_increment comment id, name varchar(50) unicode comment 部门名称 )comment 部门表; insert into dept(name) v…

SQL注入之万能用户名

文章目录 分析代码原理实现 分析代码 在安装的cms数据库目录C:\phpStudy\WWW\cms\admin下找到login.action.php文件&#xff0c;查看第20行&#xff0c;发现如下php代码&#xff1a; $user_row $db->getOneRow("select userid from cms_users where username "…

FreeCAD傻瓜式教程之约束设定、构建实体、开孔、调整颜色、透明度、参考距离、任意修改尺寸、保持开孔居中、外部图形、基准平面等

本内容基于官方教程中的绘制简单的零件中的体会&#xff0c;在初次绘制的时候&#xff0c;总是无法完成&#xff0c;几经尝试才发现其关键点所在&#xff0c;以此文记录&#xff0c;用以被查资料&#xff0c;同时也希望能够帮到纯白新手快速熟悉该软件的绘图方法。 一、. 打开软…

联想小新Pro 16笔记本键盘失灵处理方法

问题描述&#xff1a; 联想小新Pro 16新笔记本开机准备激活&#xff0c;到连接网络的时候就开始触控板、键盘失灵&#xff0c;但是有意思的是键盘的背光灯是可以调节关闭的&#xff1b;外接鼠标是正常可以移动的&#xff0c;但是只要拔掉外接鼠标再插回去的时候就不能用了&…

8.22 作业

1. 中断实验 按下key1 led3取反 按下key2 led2取反 按下key3 led1取反 main.c #include "key.h" extern void printf(const char *fmt, ...); void delay_ms(int ms) {int i,j;for(i 0; i < ms;i)for (j 0; j < 1800; j); }int main() {rcc_init();led_…

pbootcms系统安全防护设置大全

PbootCMS系统简介 PbootCMS是全新内核且永久开源免费的PHP企业网站开发建设管理系统&#xff0c;是一套高效、简洁、 强悍的可免费商用的PHP CMS源码&#xff0c;能够满足各类企业网站开发建设的需要。系统采用简单到想哭的模板标签&#xff0c;只要懂HTML就可快速开发企业网站…