分类:动作捕捉
github地址:https://github.com/open-mmlab/mmhuman3d
所需环境:
Windows10,CUDA11.6,conda 4.13.0,Visual Studio 2017;
Ubuntu18.04,conda22.9.0,CUDA11.4
目录
- Windows10配置
- 一.新建Pytorch基本环境
- 1.创建并激活环境
- 2.安装ffmpeg
- 3.安装 PyTorch 全家桶
- 4.从源码安装 PyTorch3D
- 4.1使用git下载PyTorch3D源码包
- 4.2手动下载CUB库并解压至本地
- 4.3修改PyTorch3D的setup.py
- 4.4安装Pytorch3D
- 4.5检验是否安装成功
- 二.安装其他的mmlab
- 2.1 mmcv
- 2.2 mmdetection
- 2.3 mmpose
- 2.4 mmtrack
- 三.安装mmhuman3d
- Linux中的OpenMMlab全家桶的安装
- 参考链接
Windows10配置
一.新建Pytorch基本环境
1.创建并激活环境
conda create -n open-mmlab python=3.8 -y
conda activate open-mmlab
2.安装ffmpeg
conda install ffmpeg
3.安装 PyTorch 全家桶
(CUDA与cudnn没安装的话可以采用之前的1安装方式。Pytorch选择以下指令在线安装,这会自动适配CUDA11.6,下载最新的Pytorch版本。新版本会改正很多bug,很好地兼容mmlab全家桶。在下面的安装过程中mmlab全家桶也全下载最新版的,以免出现问题后各种查issue,其实大部分issue都是版本问题引起的。)
安装适配CUDA11.6最新版本的Pytorch全家桶(注意:windows上只能下载cpu版本的,gpu版本的pytorch会存在CUDA依赖问题导致无法编译mmhuman3d和mmtrack)
#如果在Windows上安装GPU版本Pytorch在编译mmhuman3d和mmtrack时会报错如下:
d:\anaconda3\envs\test\lib\site-packages\torch\include\pybind11\cast.h(624): error: too few arguments for template template parameter “Tuple”
d:\anaconda3\envs\test\lib\site-packages\torch\include\pybind11\cast.h(717): error: too few arguments for template template parameter “Tuple”
pip3 install torch torchvision torchaudio --index-url https://download.pytorch.org/whl/cu116 -i https://pypi.tuna.tsinghua.edu.cn/simple
4.从源码安装 PyTorch3D
请参考这个2。其实直接使用pip安装会更方便,源码构建比较麻烦。只是官网这么写的所以我就源码构建了。直接用pip安装的PyTorch3D理论上应该不会影响后续安装,读者可以一试。
4.1使用git下载PyTorch3D源码包
conda install git
git config --global http.proxy http://127.0.0.1:7890# 简单粗暴直接给git命令开代理,避免下载超时。端口号是clash的默认端口
cd D:\WLm_Project\MotionCatch\Openmmlab\Pytorch3D
git clone https://github.com/facebookresearch/pytorch3d.git # 运行此句前需要开启clash,运行完毕后记得退出clash
4.2手动下载CUB库并解压至本地
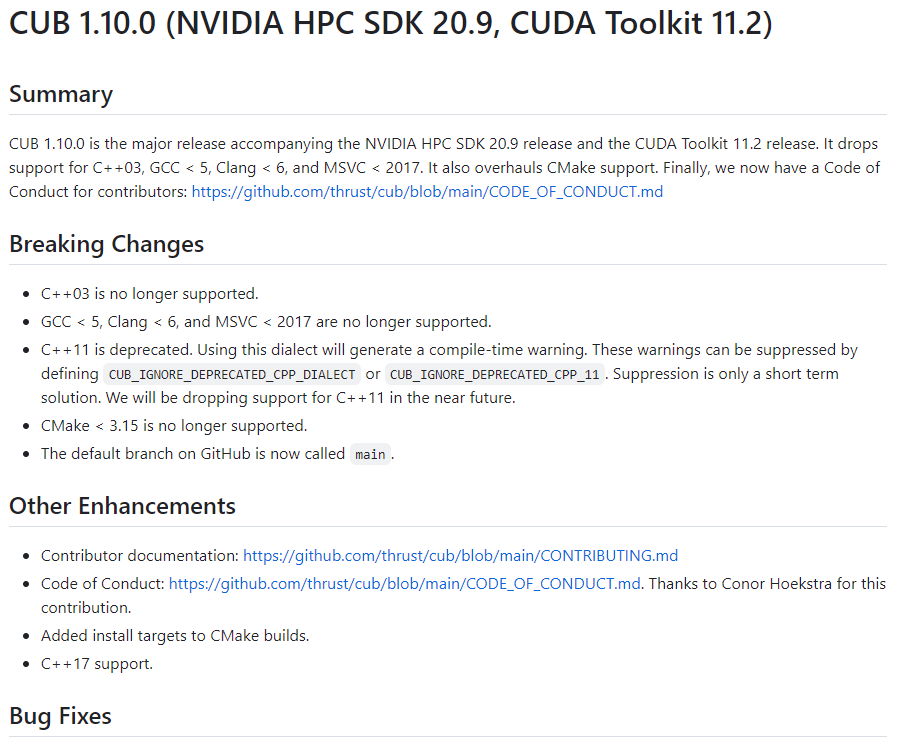
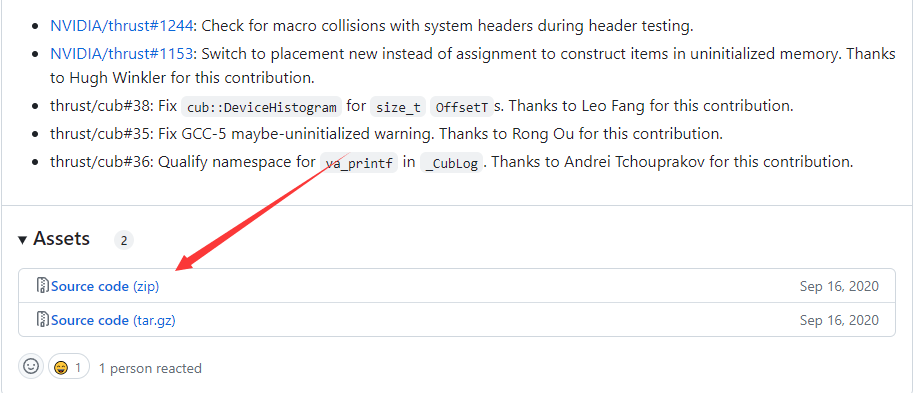
下载CUB1.10.0
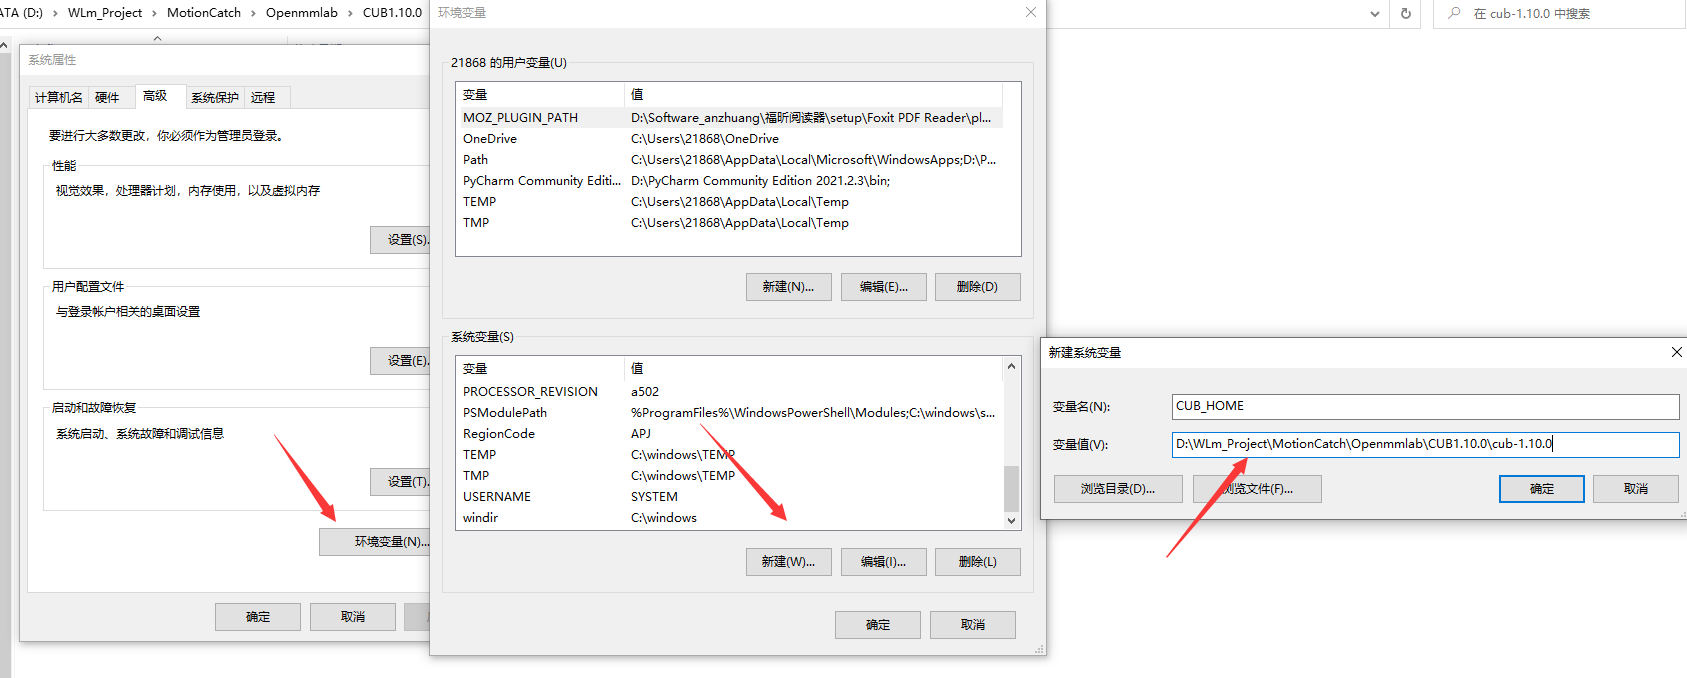
设置环境变量-系统变量CUB_HOME,确定三连
4.3修改PyTorch3D的setup.py
修改Pytorch3D的setup.py 52行:extra_compile_args = {"cxx": ["-std=c++14"]} 为 extra_compile_args = {"cxx": []}

删除Pytorch3D的setup.py.78行:-std=c++14

4.4安装Pytorch3D
cd D:\WLm_Project\MotionCatch\Openmmlab\Pytorch3D\pytorch3d
python setup.py install
需要编译好一阵子!
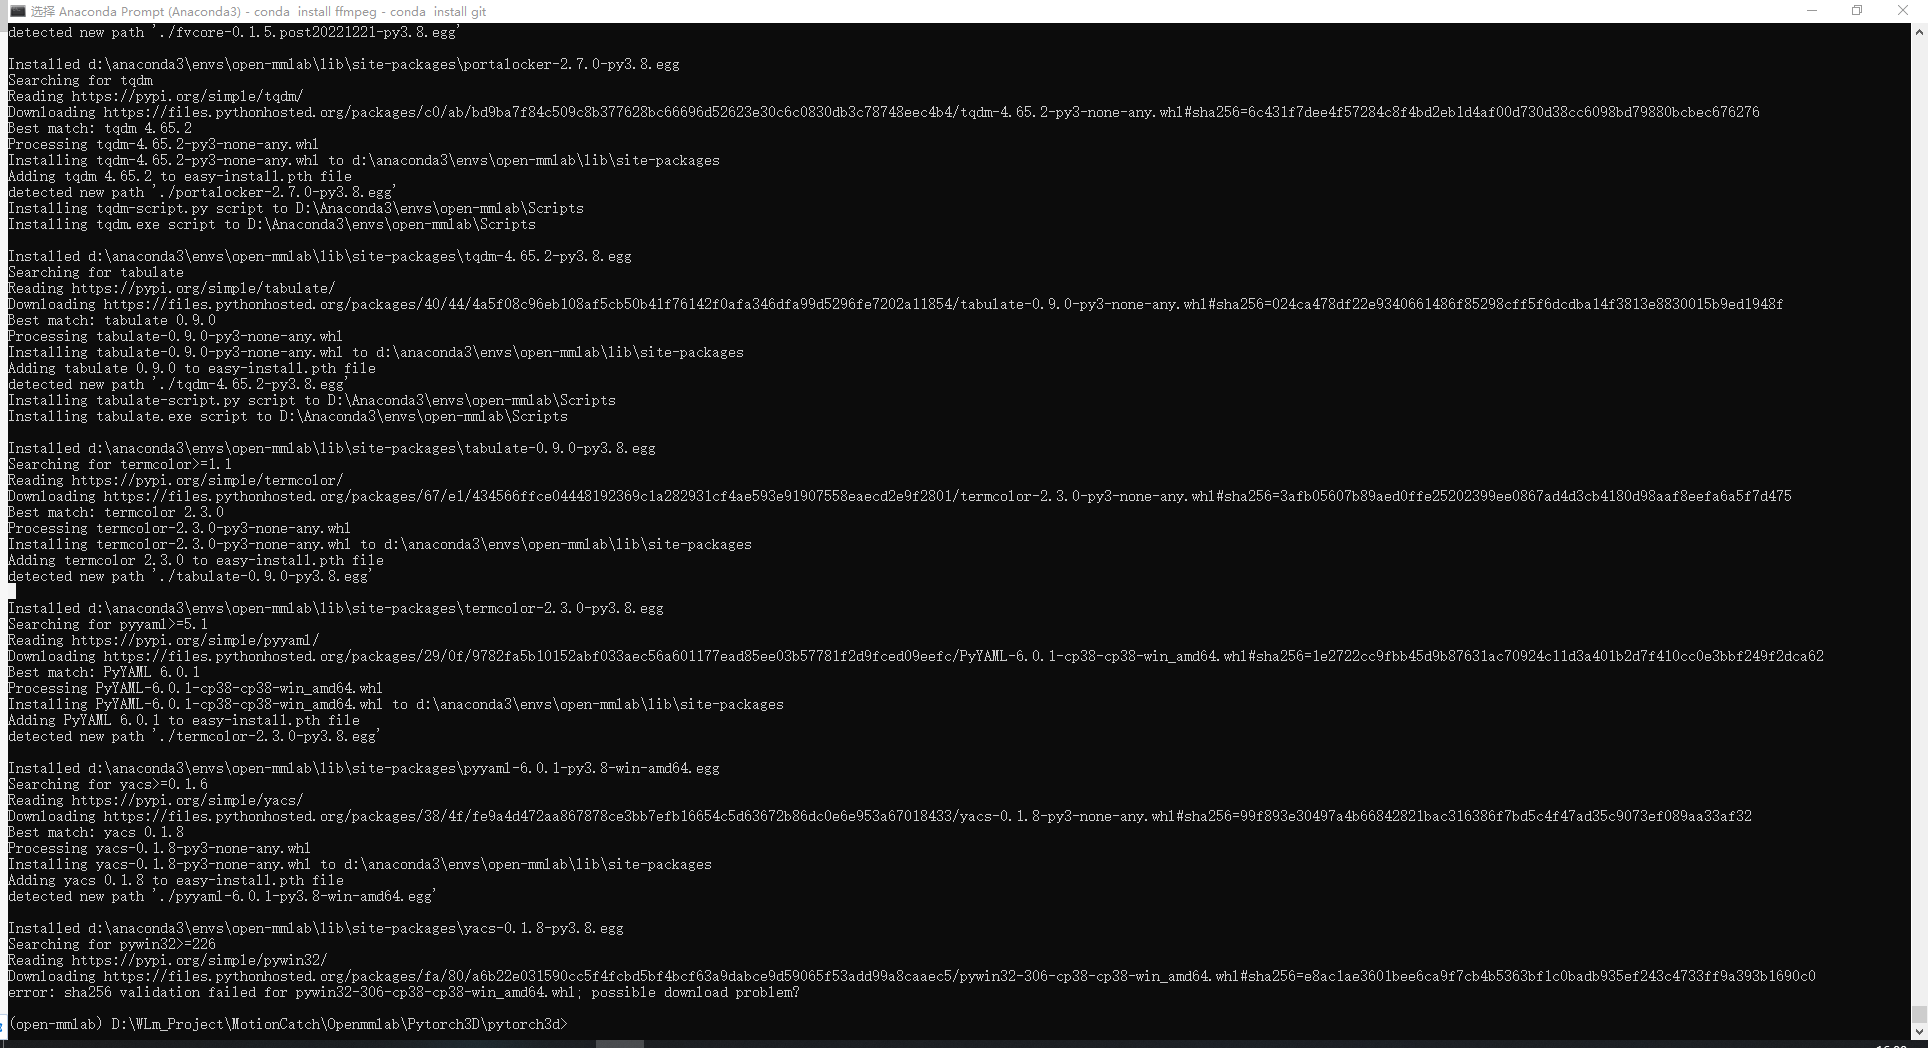
说明已经安装完毕了
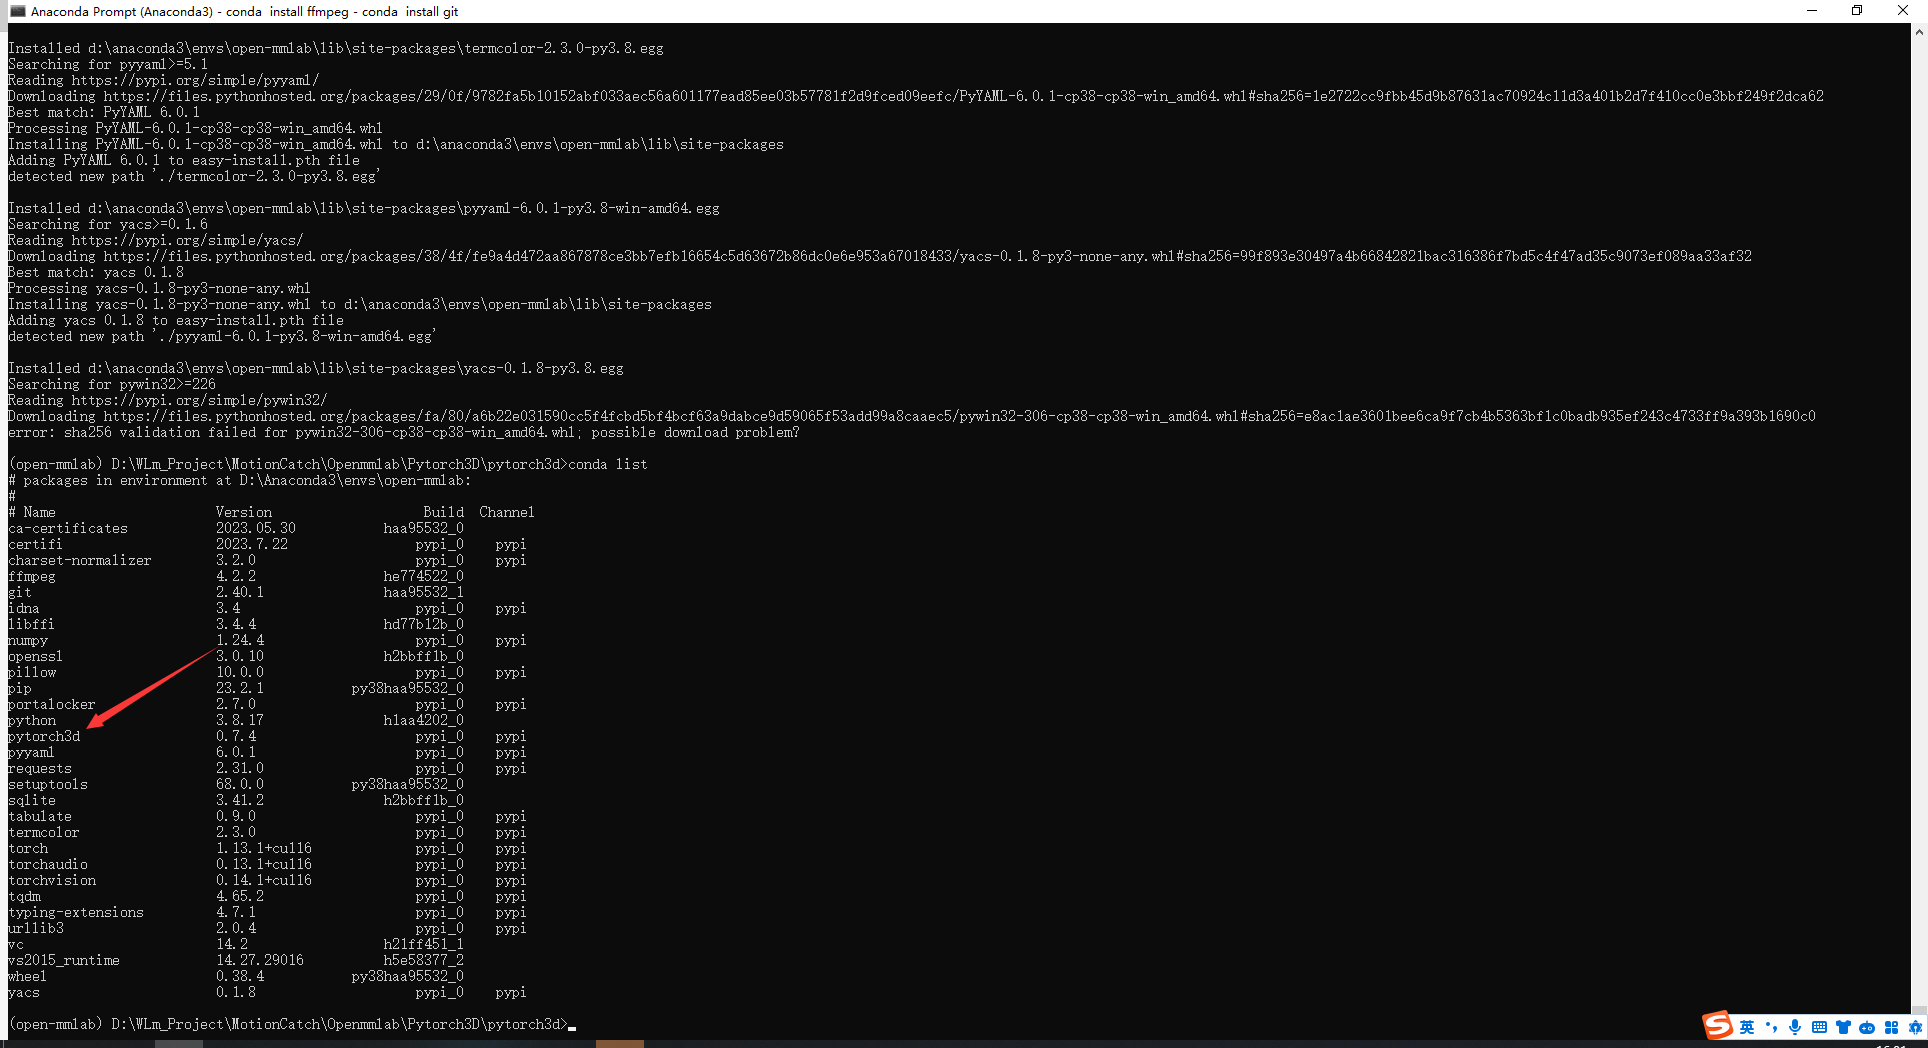
4.5检验是否安装成功
注意:以下python代码不要本地Pytorch3D路径(Openmmlab\Pytorch3D\pytorch3d)中运行3.以免发生ImportError: cannot import name '_C' from 'pytorch3d'错误。
import pytorch3d
print(pytorch3d.__version__)
from pytorch3d.renderer import MeshRenderer
print(MeshRenderer)
from pytorch3d.structures import Meshes
print(Meshes)
from pytorch3d.renderer import cameras
print(cameras)
from pytorch3d.transforms import Transform3d
print(Transform3d)

import torch
device=torch.device('cuda')
from pytorch3d.utils import torus
Torus = torus(r=10, R=20, sides=100, rings=100, device=device)
print(Torus.verts_padded())
注意:gpu版本才会出现下图,cpu版本因为无法使用CUDA会报错。

二.安装其他的mmlab
2.1-2.4都可以直接安装,读者可以尝试官网教程。但是我是直接从源码构建的。
https://github.com/open-mmlab/mmhuman3d/blob/main/docs/install.md
2.1 mmcv
打开Anaconda的Powershell Prompt4,配置open-mmlab环境的环境变量,输入以下指令:
conda activate open-mmlab
$env:TORCH_CUDA_ARCH_LIST="7.5" # 显卡算力 2080是7.5
$env:MMCV_WITH_OPS = 1 # mmcv默认没有cuda选项,手动改成使用CUDA
$env:MAX_JOBS = 8  # 基于电脑内核,我是12核,给定最大8线程
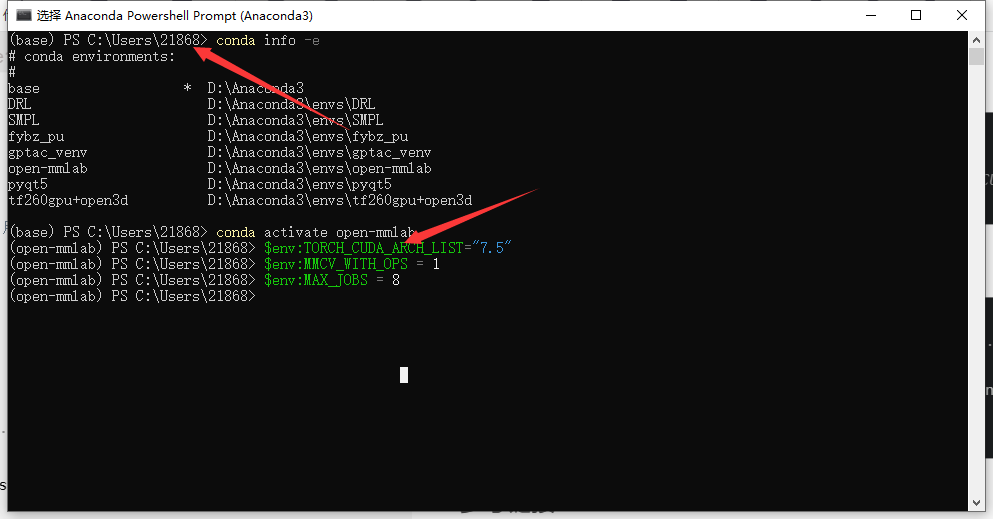
回到Anaconda的Powershell Prompt,安装mmcv5:
cd D:\WLm_Project\MotionCatch\Openmmlab\mmcv
# git clone https://github.com/open-mmlab/mmcv.git -b v1.5.3
git clone https://github.com/open-mmlab/mmcv.git # 获取当前版本2.0.1
cd mmcv
pip install -r requirements.txt -i https://pypi.tuna.tsinghua.edu.cn/simple
pip install -e . -i https://pypi.tuna.tsinghua.edu.cn/simple

2.2 mmdetection
cd D:\WLm_Project\MotionCatch\Openmmlab\mmdetection
# git clone https://github.com/open-mmlab/mmdetection.git -b v2.25.1
git clone https://github.com/open-mmlab/mmdetection.git# 安装最新版本mmdet3.1.0
cd mmdetection
pip install -r requirements/build.txt -i https://pypi.tuna.tsinghua.edu.cn/simple
pip install -v -e . -i https://pypi.tuna.tsinghua.edu.cn/simple

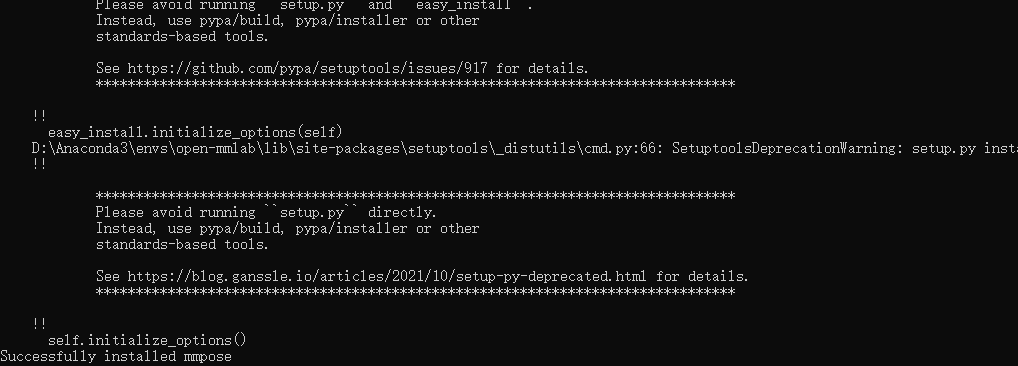
2.3 mmpose
cd D:\WLm_Project\MotionCatch\Openmmlab\mmpose
# git clone https://github.com/open-mmlab/mmpose.git -b v0.28.1
git clone https://github.com/open-mmlab/mmpose.git# 安装最新版本mmpose1.1.0
cd mmpose
git config --global --unset http.proxy # 取消之前的git代理设置,不然requirements下载不完全
pip install -r requirements.txt -i https://pypi.tuna.tsinghua.edu.cn/simple
pip install -v -e . -i https://pypi.tuna.tsinghua.edu.cn/simple
2.4 mmtrack
cd D:\WLm_Project\MotionCatch\Openmmlab\mmtracking
# git clone https://github.com/open-mmlab/mmtracking.git -b v0.13.0
git clone https://github.com/open-mmlab/mmtracking.git# 安装最新版本0.14.0
cd mmtracking
pip install -r requirements/build.txt -i https://pypi.tuna.tsinghua.edu.cn/simple
pip install -v -e .  -i https://pypi.tuna.tsinghua.edu.cn/simple # or "python setup.py develop"

提示scipy版本冲突,但是mmtrack0.14.0安装上了。冲突问题可暂时不考虑,以后跑代码时出现问题再说。
三.安装mmhuman3d
# !!!!!!!!!!!!!!此部分指令不要输入进conda 这是错的
cd D:\WLm_Project\MotionCatch\Openmmlab\mmhuman3d
git clone https://github.com/open-mmlab/mmhuman3d.git
cd mmhuman3d
pip install -r requirements.txt -i https://pypi.tuna.tsinghua.edu.cn/simple
pip install -v -e . -i https://pypi.tuna.tsinghua.edu.cn/simple  # or "python setup.py develop"
这会出现错误:picklebufobject.obj : error LNK2005: PyPickleBuffer_GetBuffer 已经在 python38.lib(python38.dll) 中定义 build\lib.win-amd64-cpython-38\pickle5\_pickle.cp38-win_amd64.pyd : fatal error LNK1169: 找到一个或多个多重定义的符号 error: command 'C:\\Program Files (x86)\\Microsoft Visual Studio\\2017\\Community\\VC\\Tools\\MSVC\\14.16.27023\\bin\\HostX86\\x64\\link.exe' failed with exit code 1169
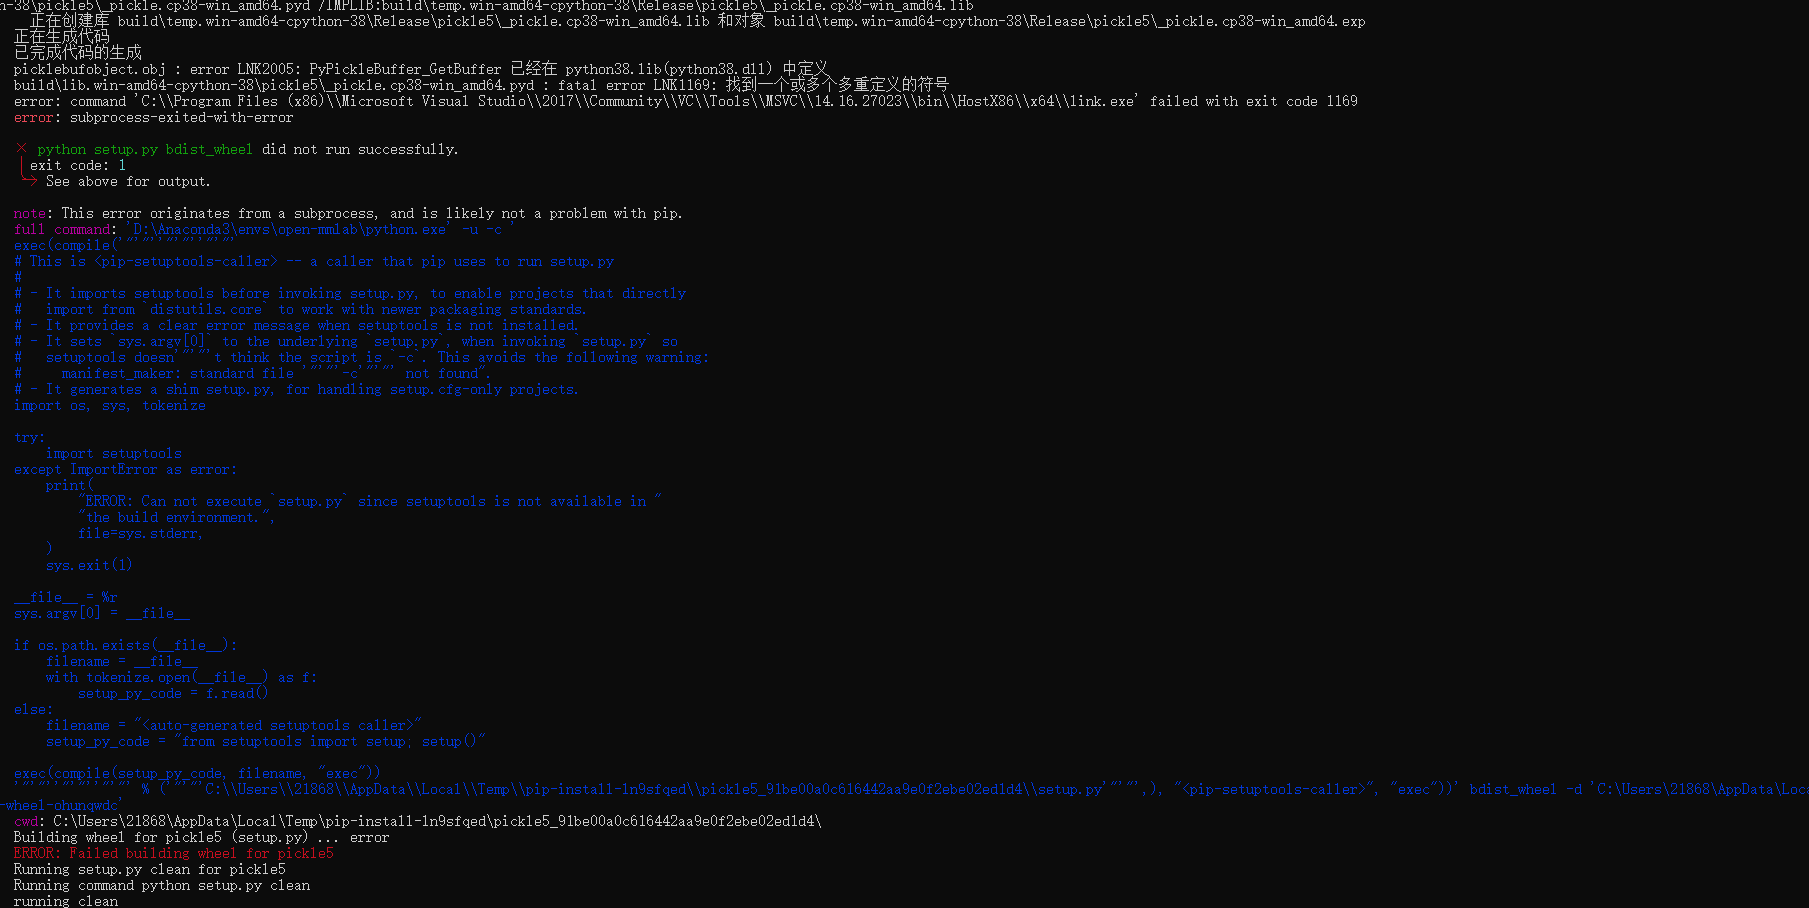

这个是没法解决的,我在这里找到了这个issue6。意思是pickle5三年前就没人维护了,建议删除pickle5,因为会阻止mmhuman3d在windows上的安装(pickle5没法编译所以mmhuman3d安装就会中断)。
显然作者团队也已经注意到这个问题7,并且画饼会给出解决方案,然而过去了一年没消息。
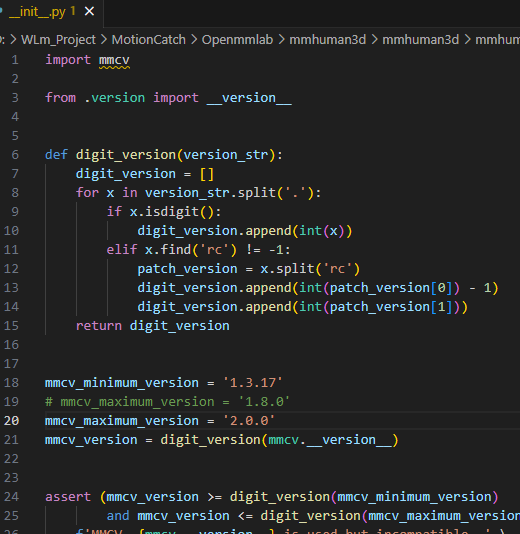
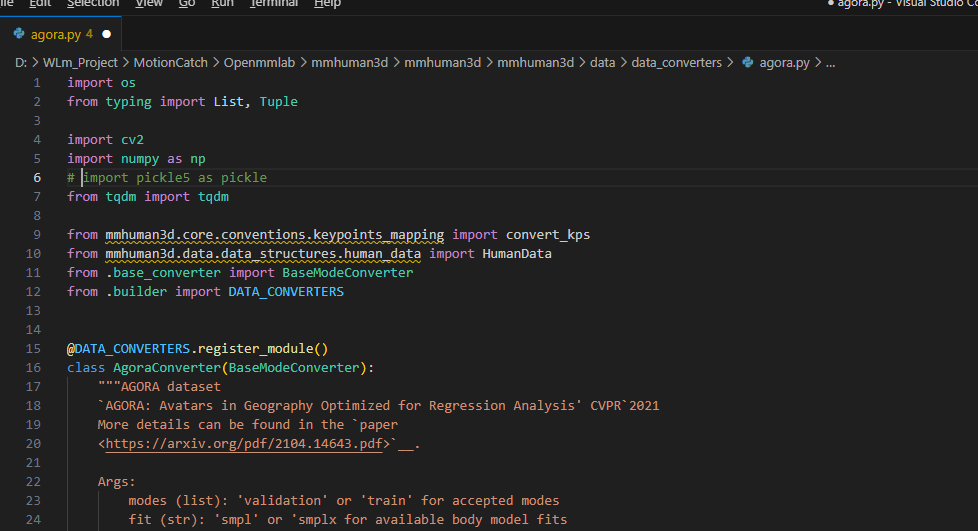
这个是找到的修改策略8,是别人的改进方式,但是官方还没有拉到自己仓库中。我直接克隆了这个仓库,尝试后发现可以正常在windows中安装mmhuman3d。相对于官方仓库而言,他改了以下四个文件(直接取消了对pickle5的调用)
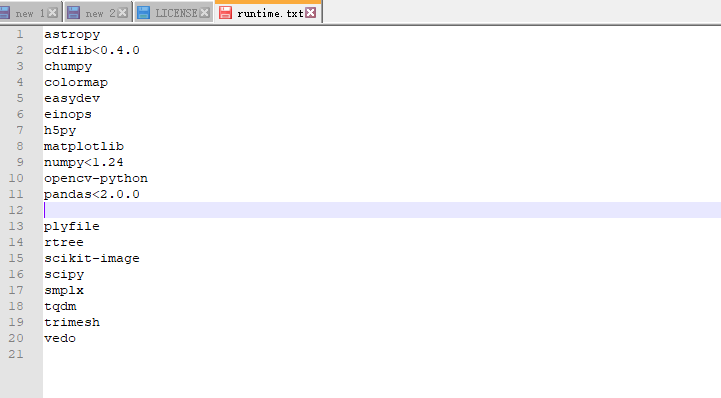

安装指令如下:
cd D:\WLm_Project\MotionCatch\Openmmlab\mmhuman3d
git clone https://github.com/Wei-Chen-hub/mmhuman3d.git# 安装Wei-Chen-hub给出的mmhuman3d-0.11.0修改版本
cd mmhuman3d
pip install -r requirements.txt -i https://pypi.tuna.tsinghua.edu.cn/simple
pip install -v -e . -i https://pypi.tuna.tsinghua.edu.cn/simple  # or "python setup.py develop"
成功安装mmhuman3d0.11.0
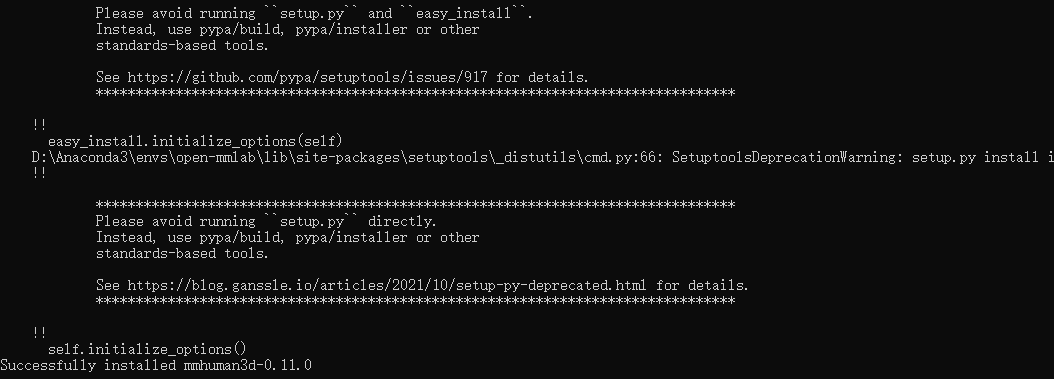
升级某个库时,首先pip uninstall将其卸载。然后删掉源码文件夹从新git。重新执行安装requirments的依赖和setup的安装指令。
# git config --global http.proxy http://127.0.0.1:7890
# git config --global --unset http.proxy
# 试图在windows gpu pytorch上安装MMhuman3d所做的一些尝试:
# 卸载
 pip uninstall torch torchvision torchaudio  -y

 # windows cpu pytorch(2.0.1) 无cudatoolkit:完美安装
 pip3 install torch torchvision torchaudio --index-url https://download.pytorch.org/whl/cu116 -i https://pypi.tuna.tsinghua.edu.cn/simple

 # windows gpu pytorch(1.13.1) 无cudatoolkit:不可安装
 pip install torch-1.13.1+cu116-cp38-cp38-win_amd64.whl
 pip install torch==1.13.1+cu116 torchvision==0.14.1+cu116 torchaudio==0.13.1 --extra-index-url https://download.pytorch.org/whl/cu116

 # windows gpu pytorch(2.0.0) cudatoolkit(11.8):不可安装
 conda install cudatoolkit=11.8
 cd D:\WLm_Project\MotionCatch\Openmmlab
 pip install torch-2.0.0+cu117-cp38-cp38-win_amd64.whl -i https://pypi.tuna.tsinghua.edu.cn/simple
 pip install torch==2.0.0+cu117 torchvision==0.15.1+cu117 torchaudio==2.0.1 --index-url https://download.pytorch.org/whl/cu117

 # windows gpu pytorch(1.10.1) cudatoolkit(11.3):不可安装
 conda install cudatoolkit=11.3
 pip install torch-1.10.1+cu111-cp38-cp38-win_amd64.whl
 pip install torch==1.10.1+cu111 torchvision==0.11.2+cu111 torchaudio==0.10.1 -f https://download.pytorch.org/whl/cu111/torch_stable.html

 # mmhuman3d安装指令
 cd D:\WLm_Project\MotionCatch\Openmmlab\mmhuman3d\mmhuman3d
 pip install -r requirements.txt -i https://pypi.tuna.tsinghua.edu.cn/simple
 pip install -v -e . -i https://pypi.tuna.tsinghua.edu.cn/simple
Linux中的OpenMMlab全家桶的安装
在linux下安装OpenMMlab全家桶非常简单,也不会遇到什么大问题。windows10中最令人头疼的pickle5和编译器问题在Ubuntu18.04中并不是问题。因为OpenMMlab就是针对linux开发的。
同样,从源码构建的方式,升级需要先pip uninstall卸载相应的包,再删除源码文件夹重新后git并编译。
# 创建环境
conda create -n OpenMMlab python=3.7 -y
conda activate OpenMMlab

#ffmpeg
conda install ffmpeg -y

#pytorch全家桶
conda install pytorch==1.12.1 torchvision==0.13.1 torchaudio==0.12.1 cudatoolkit=11.3 -c pytorch -y

# pytorch3D
conda install -c fvcore -c iopath -c conda-forge fvcore iopath -y
conda install -c bottler nvidiacub -y
conda install pytorch3d -c pytorch3d

# mmcv
cd
mkdir OpenMMlab/mmcv
cd  OpenMMlab/mmcv
git clone https://github.com/open-mmlab/mmcv.git
cd mmcv
pip install -r requirements.txt
MMCV_WITH_OPS=1 pip install -e .

# mmdetection
cd
mkdir OpenMMlab/mmdetection
cd OpenMMlab/mmdetection
git clone https://github.com/open-mmlab/mmdetection.git
cd mmdetection
pip install -r requirements/build.txt
pip install -v -e .

# mmpose
cd
mkdir OpenMMlab/mmpose
cd OpenMMlab/mmpose
git clone https://github.com/open-mmlab/mmpose.git
cd mmpose
pip install -r requirements.txt
pip install -v -e .

#mmtrack
cd
mkdir OpenMMlab/mmtrack
cd OpenMMlab/mmtrack
git clone https://github.com/open-mmlab/mmtracking.git
cd mmtracking
pip install -r requirements/build.txt
pip install -v -e .

# mmhuman3D
cd
mkdir OpenMMlab/mmhuman3D
cd OpenMMlab/mmhuman3D
git clone https://github.com/open-mmlab/mmhuman3d.git
cd mmhuman3d
pip install -r requirements.txt
pip install -v -e .
以下是安装完成后的截图:
mmcv

mmdet

mmpose

mmtrack

mmhuman3D
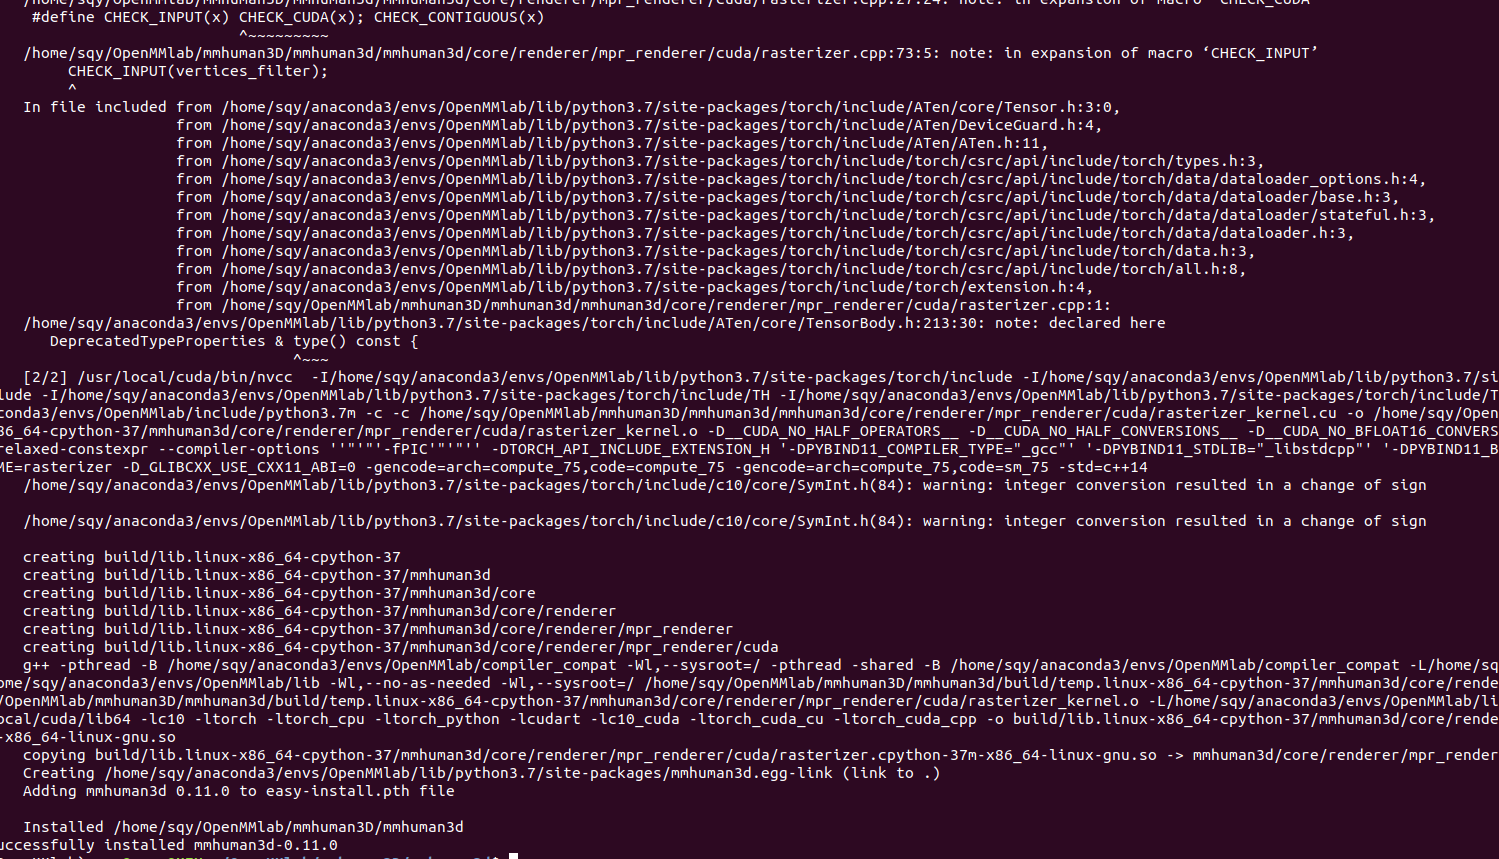
参考链接
1.win10中CUDA cundnn pytorch环境搭建记录
2.在windows中安装Pytorch3D
3.ImportError: cannot import name ‘_C’ from ‘pytorch3d’
4.Windows10下面安装MMCV全过程图文详解
5.【OpenMMLab全家桶】Win10编译配置教程
6.呼吁移除pickle5
7.pickle5有何作用
8.其他作者fork的代码,但是mmhuman3d团队暂时没有归并到自己repo中

![人工智能能够通过所有[创造力测试]](https://img-blog.csdnimg.cn/img_convert/1bb27851d2d44cd0920278caef1464d4.png)


