网页输入http://localhost:8080/hello,浏览器展示“Hello Spring MVC”。
1. 创建项目
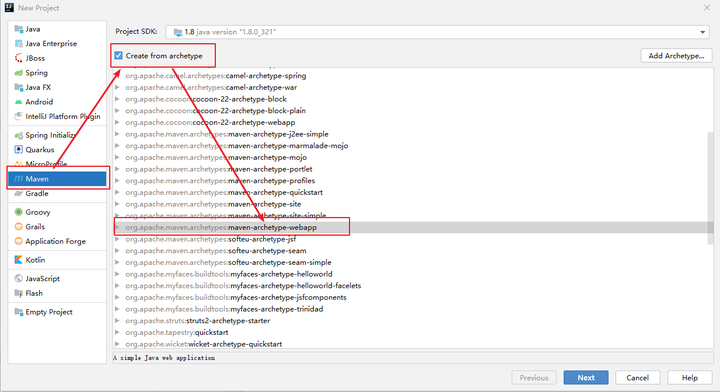
选择Maven快速构建web项目,项目名称为case12-springmvc01。
2.配置Maven依赖
<?xml version="1.0" encoding="UTF-8"?>

<project xmlns="http://maven.apache.org/POM/4.0.0" xmlns:xsi="http://www.w3.org/2001/XMLSchema-instance"
  xsi:schemaLocation="http://maven.apache.org/POM/4.0.0 http://maven.apache.org/xsd/maven-4.0.0.xsd">
  <modelVersion>4.0.0</modelVersion>

  <groupId>com.wfit.springmvc</groupId>
  <artifactId>springmvc01</artifactId>
  <version>1.0-SNAPSHOT</version>
  <packaging>war</packaging>

  <properties>
    <project.build.sourceEncoding>UTF-8</project.build.sourceEncoding>
    <maven.compiler.source>1.8</maven.compiler.source>
    <maven.compiler.target>1.8</maven.compiler.target>
  </properties>

  <dependencies>
    <!--spring mvc-->
    <dependency>
      <groupId>org.springframework</groupId>
      <artifactId>spring-webmvc</artifactId>
      <version>5.3.25</version>
    </dependency>
    <!--servlet-->
    <dependency>
      <groupId>javax.servlet</groupId>
      <artifactId>javax.servlet-api</artifactId>
      <version>3.1.0</version>
      <!--provided仅在编译期间使用,项目打包不包含这个依赖,并且这个依赖不会被传递-->
      <scope>provided</scope>
    </dependency>
  </dependencies>
</project>
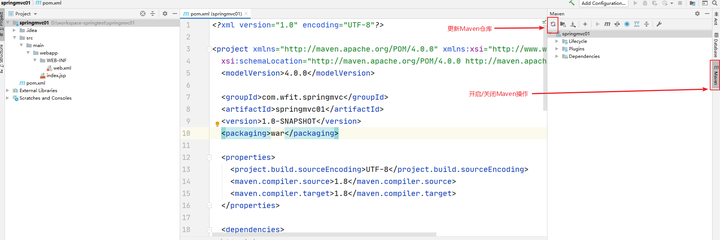
3. 更新Maven仓库
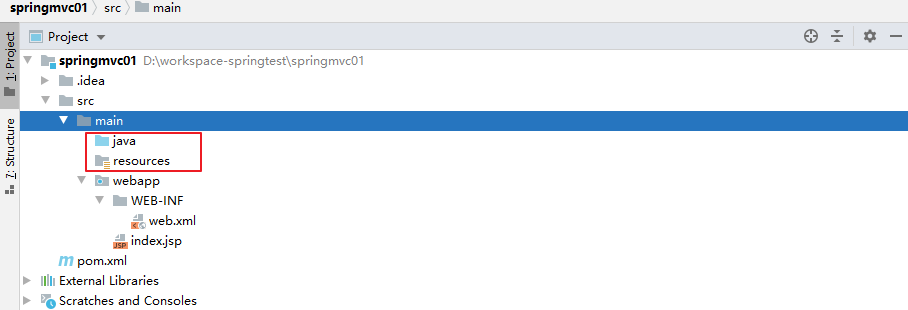
4. 创建java和resources目录
src.main路径下,执行new – Directory操作,选择java、resources后,执行回车键。
5. 创建Spring MVC配置文件
src.main.resources下创建spring-mvc.xml文件。
<?xml version="1.0" encoding="UTF-8"?>
<beans xmlns="http://www.springframework.org/schema/beans"
       xmlns:xsi="http://www.w3.org/2001/XMLSchema-instance"
       xmlns:context="http://www.springframework.org/schema/context"
       xmlns:mvc="http://www.springframework.org/schema/mvc"
       xsi:schemaLocation="http://www.springframework.org/schema/beans http://www.springframework.org/schema/beans/spring-beans.xsd http://www.springframework.org/schema/context https://www.springframework.org/schema/context/spring-context.xsd http://www.springframework.org/schema/mvc https://www.springframework.org/schema/mvc/spring-mvc.xsd">
    <!--开启注解-->
    <context:component-scan base-package="com.wfit"/>
    <!--启用mvc(适配器、映射器)-->
    <mvc:annotation-driven></mvc:annotation-driven>
    <!--视图解析器-->
    <bean class="org.springframework.web.servlet.view.InternalResourceViewResolver">
        <!--逻辑视图存放位置-->
        <property name="prefix" value="/pages/"/>
        <!--逻辑视图后缀-->
        <property name="suffix" value=".jsp"/>
    </bean>
</beans>
6. 配置web.xml
在web.xml中配置DispatcherServlet。
<!DOCTYPE web-app PUBLIC
 "-//Sun Microsystems, Inc.//DTD Web Application 2.3//EN"
 "http://java.sun.com/dtd/web-app_2_3.dtd" >

<web-app>
  <!--配置前端控制器DispatcherServlet-->
  <servlet>
    <servlet-name>dispatcherServlet</servlet-name>
    <servlet-class>org.springframework.web.servlet.DispatcherServlet</servlet-class>
    <!--加载Spring MVC配置文件-->
    <init-param>
      <param-name>contextConfigLocation</param-name>
      <param-value>classpath:spring-mvc.xml</param-value>
    </init-param>
    <!--启动容器时候加载servlet-->
    <load-on-startup>1</load-on-startup>
  </servlet>
  <servlet-mapping>
    <servlet-name>dispatcherServlet</servlet-name>
    <!--表示拦截所有请求-->
    <url-pattern>/</url-pattern>
  </servlet-mapping>
</web-app>
7. 创建HelloController类
src.main.java目录下创建com.wfit.hello目录,在com.wfit.hello目录下创建HelloController类。
@Controller
public class HelloController {
    @RequestMapping("/hello")
    public String hello(){
        //跳转到/pages/hello.jsp页面
        return "hello";
    }
}
8. 创
8. 创建hello.jsp页面
src.main.webapp目录下创建pages目录,在pages目录下创建hello.jsp类。
<%@ page contentType="text/html;charset=UTF-8" language="java" %>
<html>
<head>
    <title>hello</title>
</head>
<body>
    hello Spring MVC!
</body>
</html>
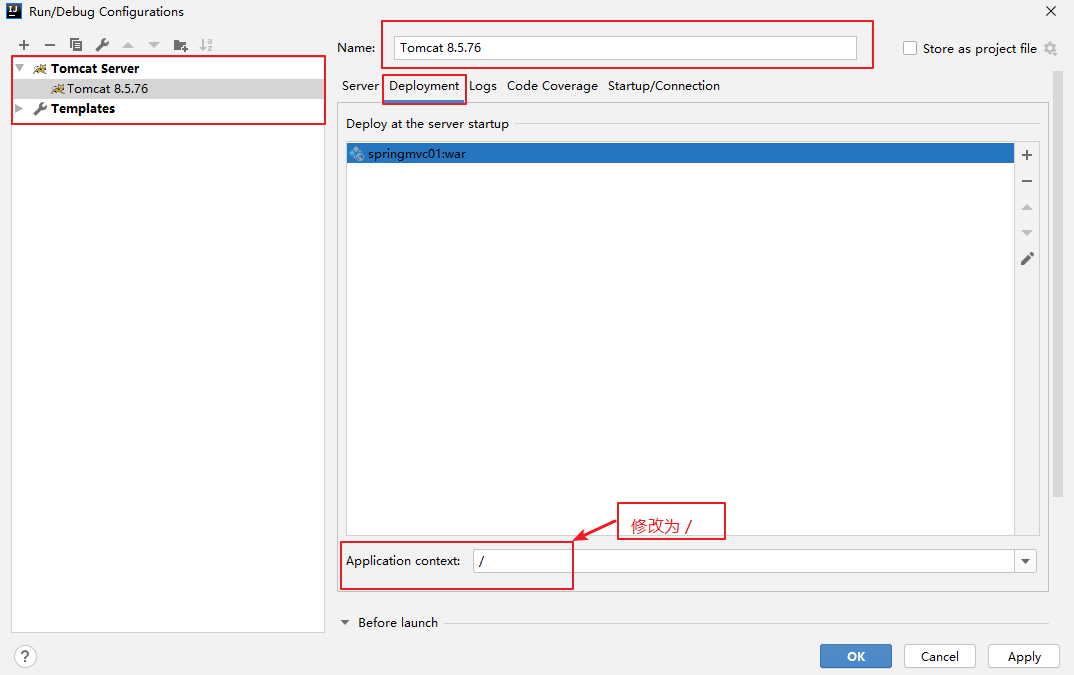
9. 部署项目
将项目部署到Tomcat。
-
第一步

-
第二步

-
第三步

-
第四步

编辑切换为居中
添加图片注释,不超过 140 字(可选)
-
第五步

编辑切换为居中
添加图片注释,不超过 140 字(可选)
-
第六步
编辑切换为居中
添加图片注释,不超过 140 字(可选)
10. 启动项目

11. 访问项目
网页输入:http://localhost:8080/hello


