目录:
- allure2安装
- allure2运行方式
- allure2报告生成
- allure2报告中添加用例标题
- allure2报告中添加用例步骤
- allure2报告中添加用例链接
- allure2报告中添加用例分类
- allure2报告中添加用例描述
- allure2报告中添加用例优先级
- allure2报告中添加用例支持tags标签
- allure2报告中支持记录失败重试功能
- allure2报告中添加附件-图片
- allure2报告中添加附件-日志
- allure2报告中添加附件-html
- allure2报告中添加附件-视频
- allure2报告定制
1.allure2安装
Allure2 介绍
- Allure 是由 Java 语⾔开发的⼀个轻量级,灵活的测试报告⼯具。
- Allure 多平台的 Report 框架。
- Allure ⽀持多语⾔,包括 python、JaveScript、PHP、Ruby 等。
- 可以为开发/测试/管理等人员提供详尽的的测试报告,包括测试类别、测试步骤、日志、图片、视频等。
- 可以为管理层提供高水准的统计报告。
- 可以集成到 Jenkins 生成在线的趋势汇总报告。
2.allure2运行方式
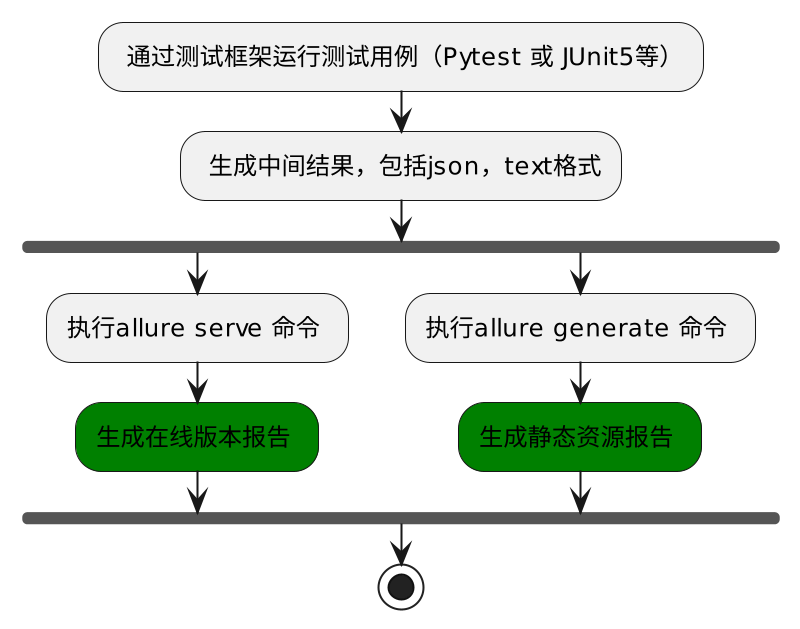
生成测试报告流程:
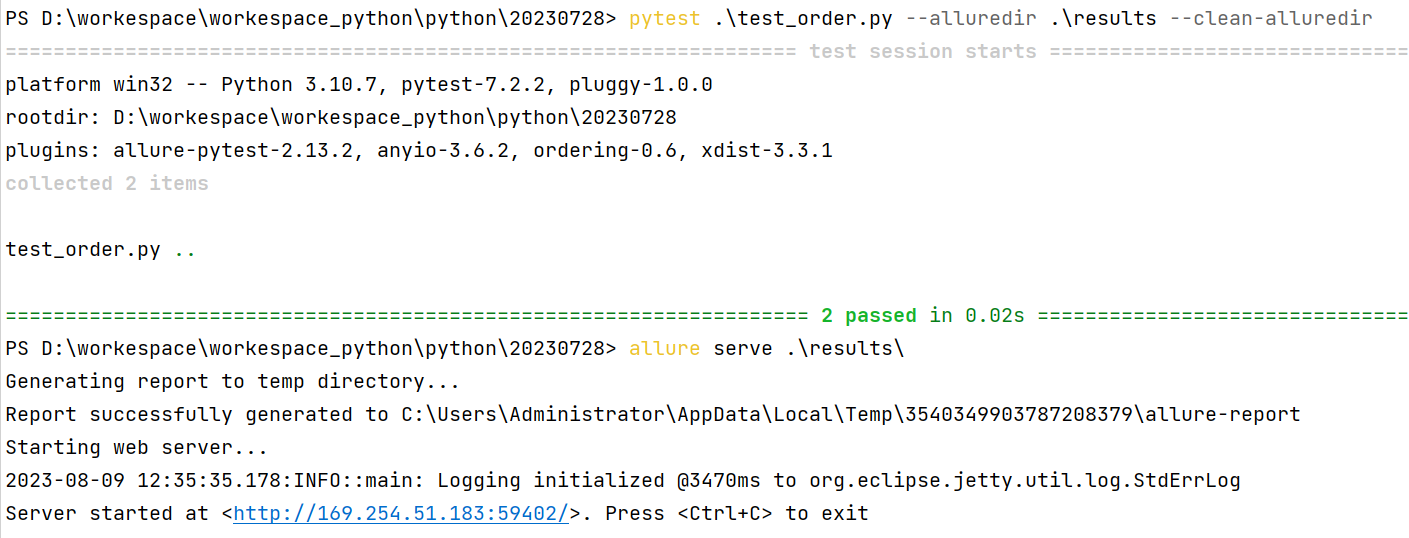
使用 Allure2 运行方式-Python
使用 --alluredir 参数生成测试报告
# 在测试执行期间收集结果
pytest [测试用例/模块/包] --alluredir=./result/  (—alluredir这个选项 用于指定存储测试结果的路径)

# 生成在线的测试报告
allure serve ./result
代码示例:
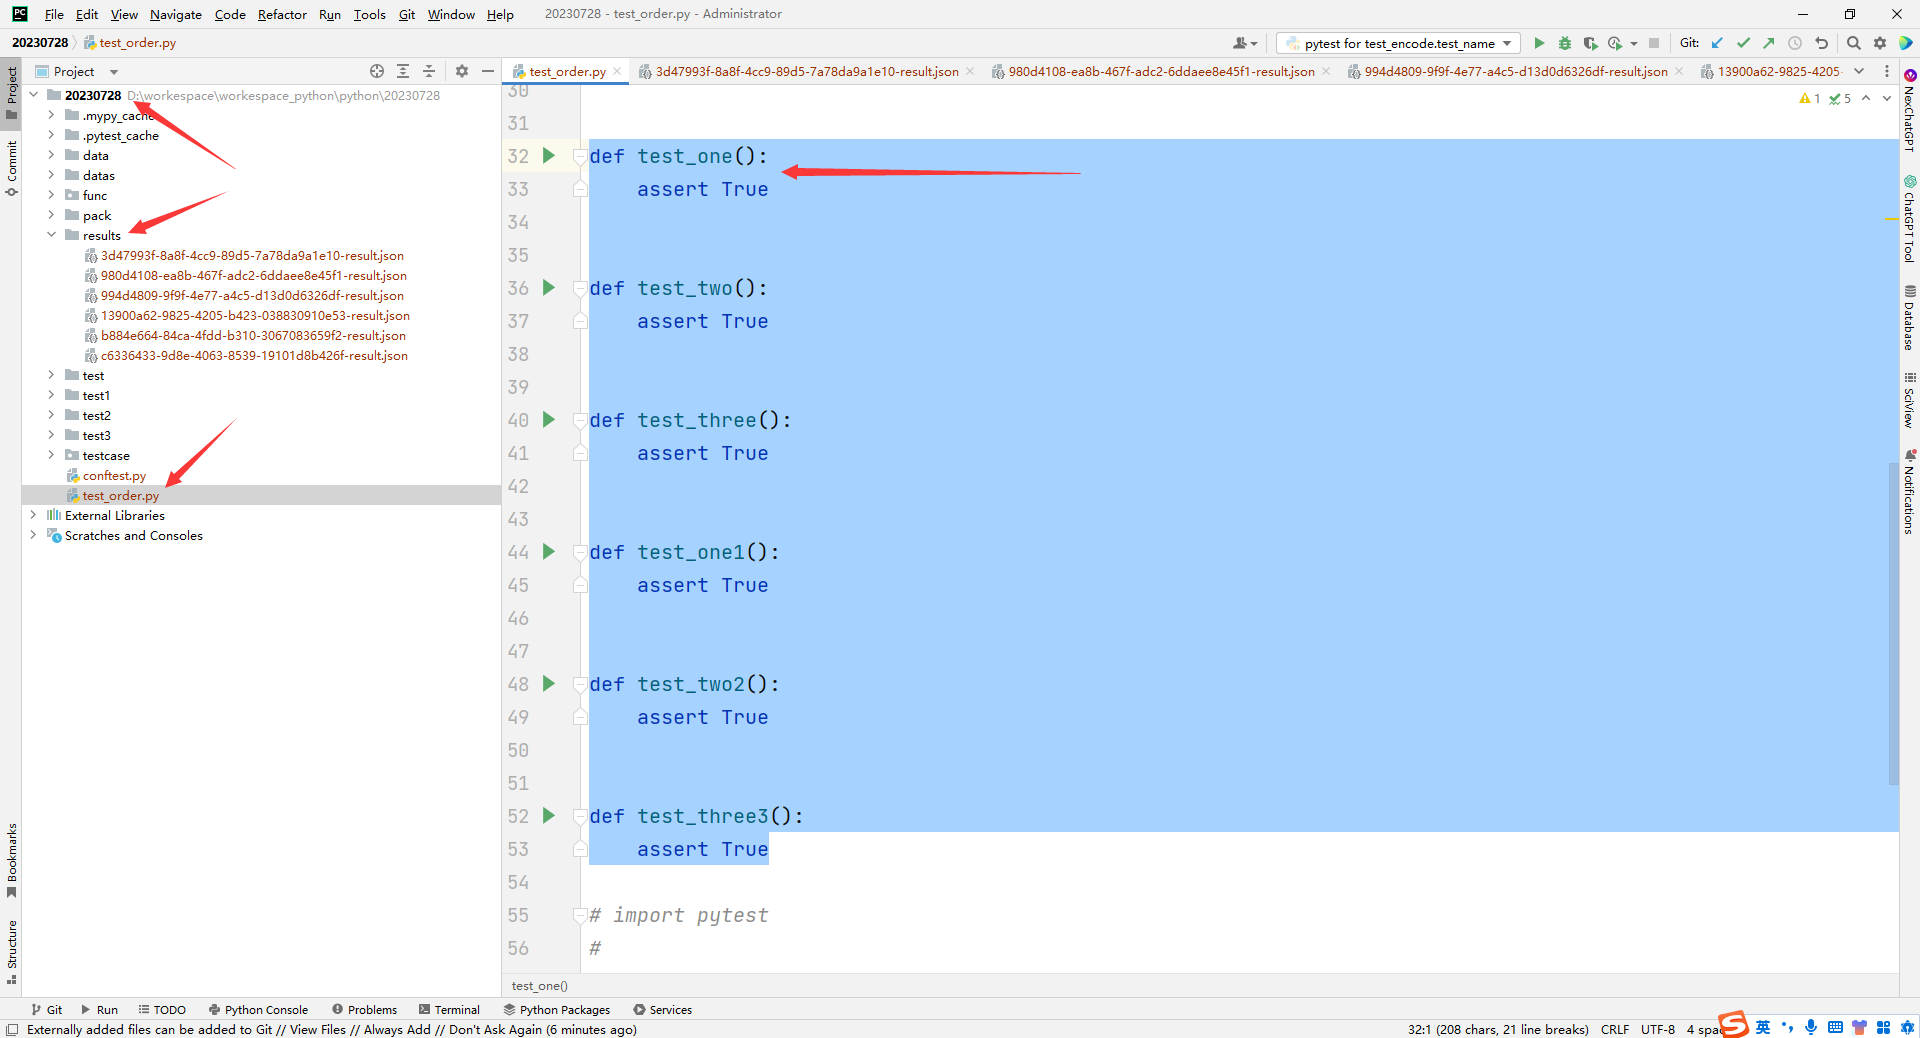
test_order.py
def test_one():
assert True
def test_two():
assert True
def test_three():
assert True
def test_one1():
assert True
def test_two2():
assert True
def test_three3():
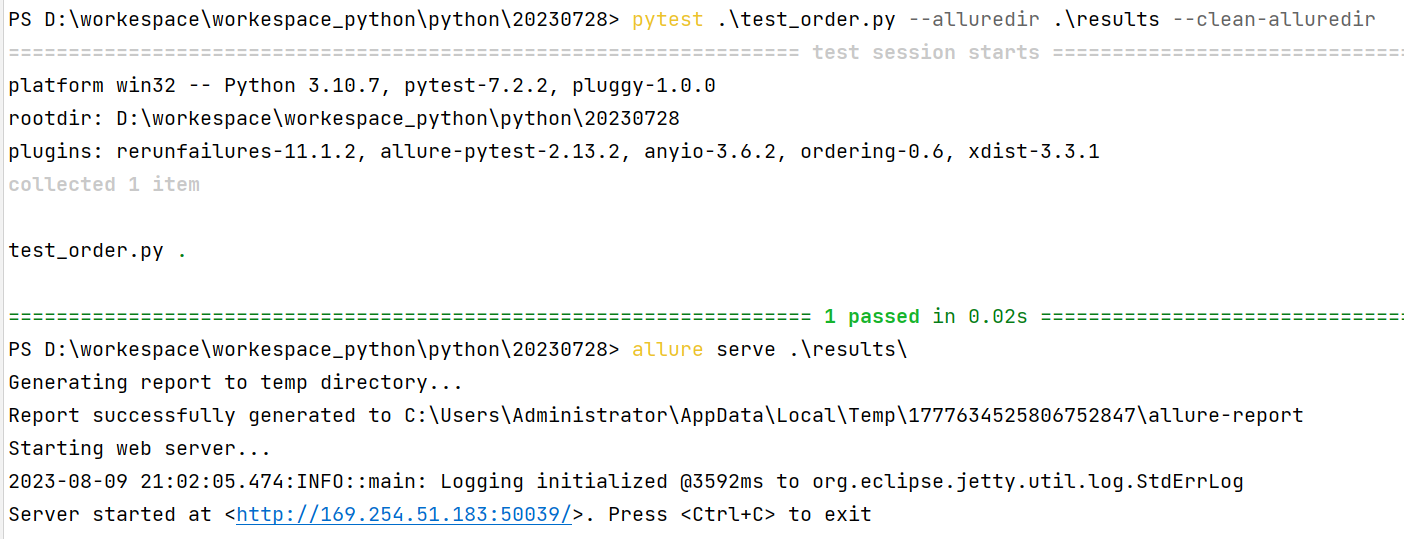
assert True在终端运行:
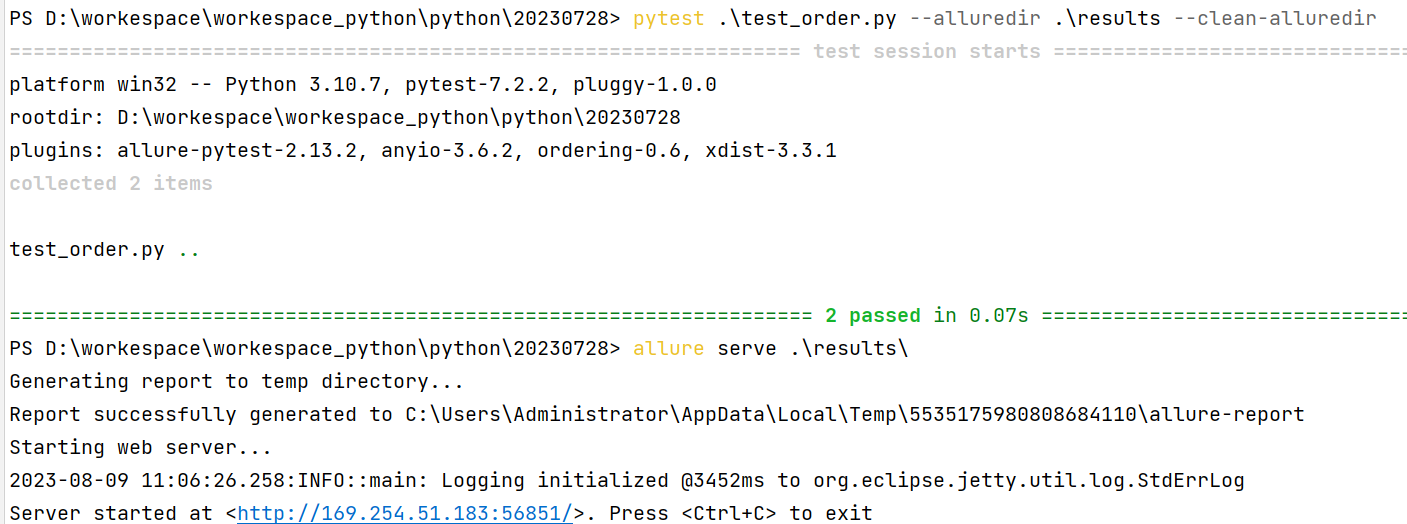
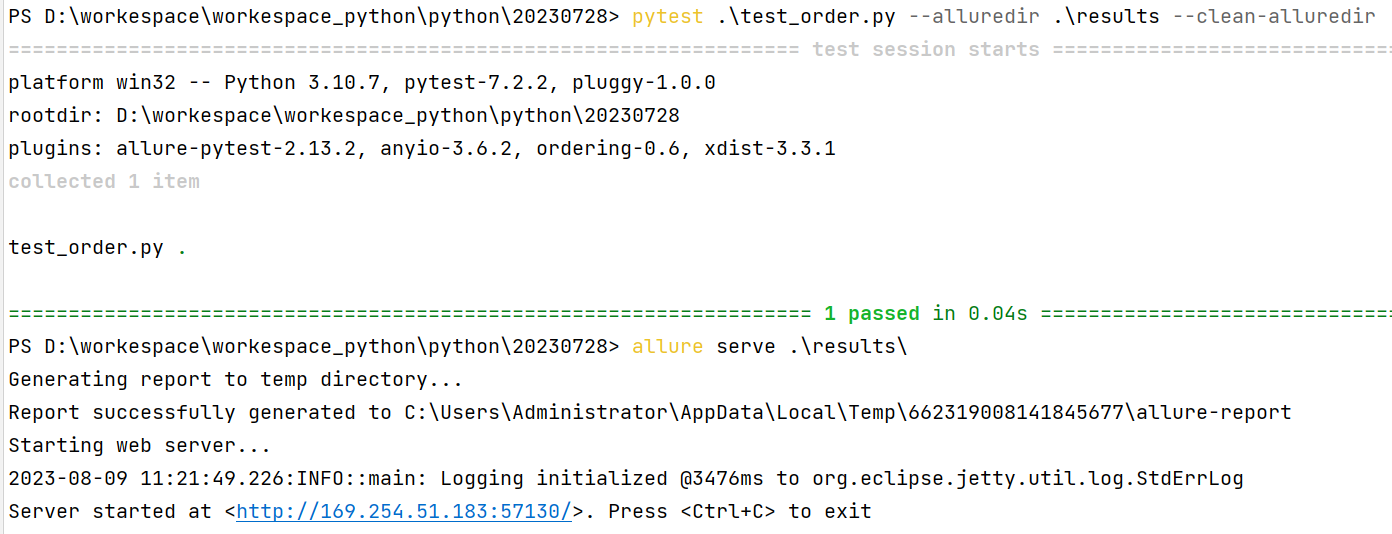
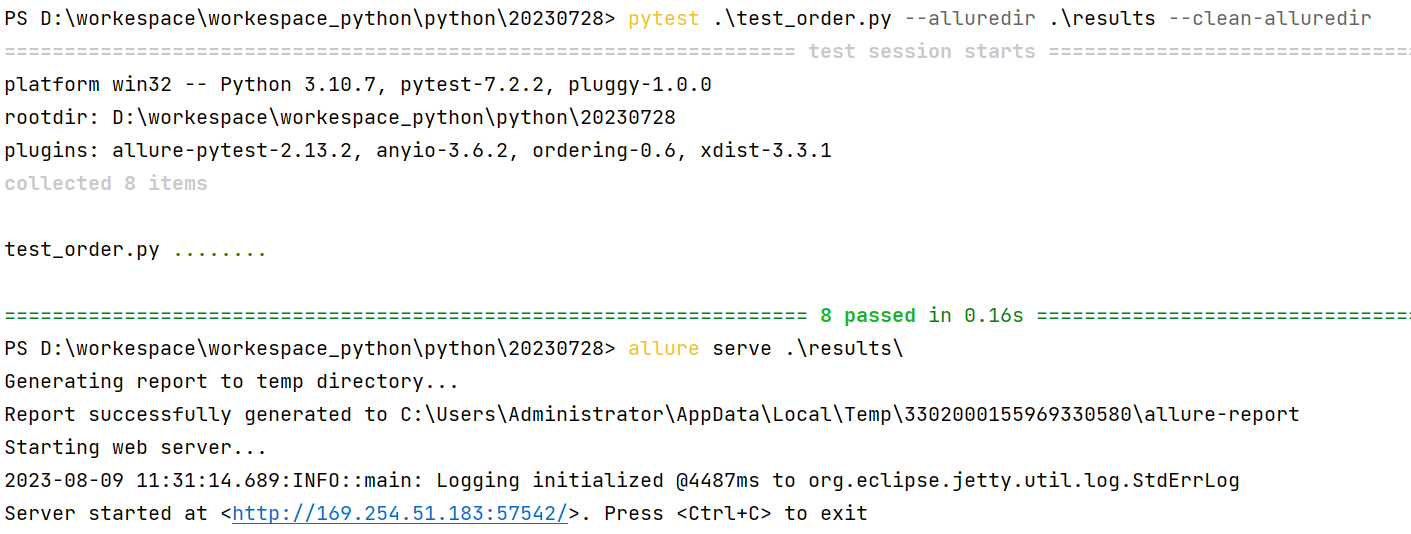
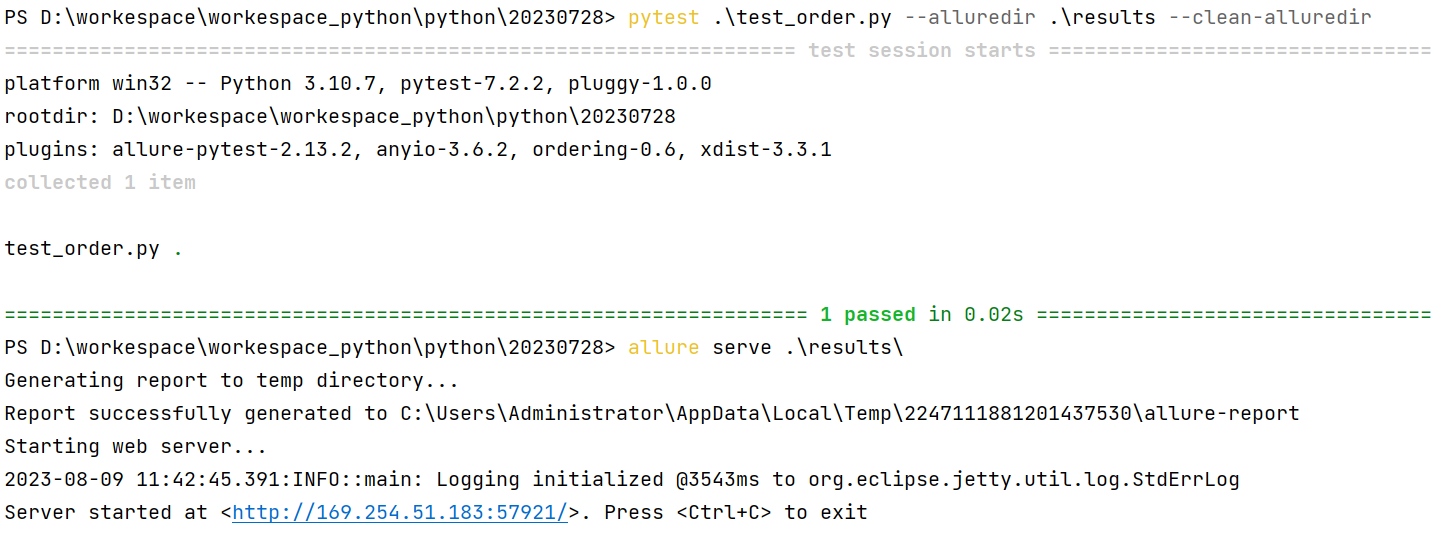
pytest .\test_order.py --alluredir=./results
allure serve .\results 运行结果:


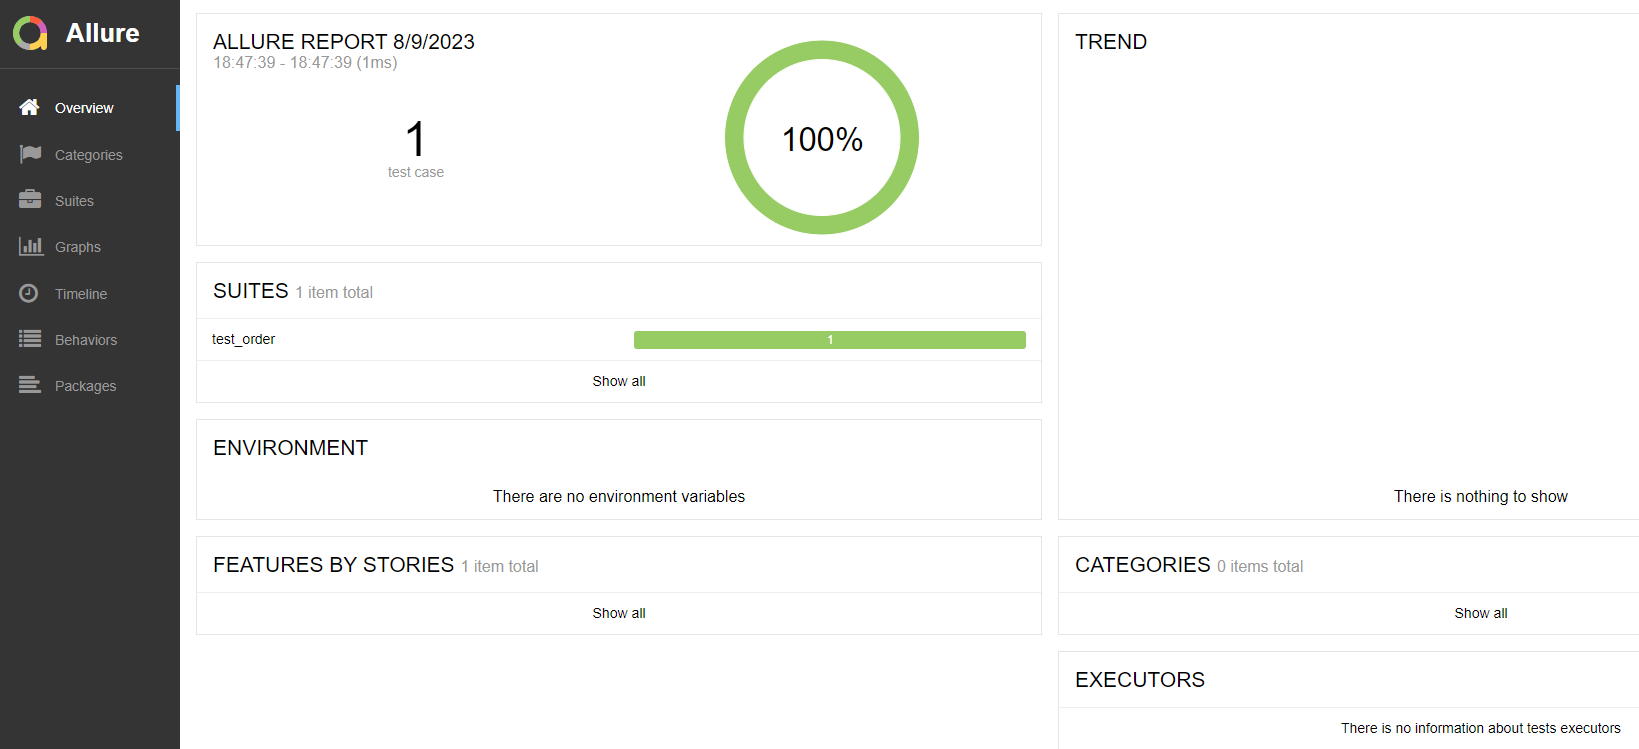
3.allure2报告生成
使用 Allure2 生成精美报告
-
生成测试报告需要使用命令行工具 allure
-
命令格式:
allure [option] [command] [command options]
# 步骤一:在测试执行期间收集结果
# —alluredir这个选项 用于指定存储测试结果的路径
pytest [测试文件] -s –q --alluredir=./result/
# 如果要清除已经生成的报告的历史记录,可以添加参数--clean-alluredir
pytest [测试文件] -s –q --alluredir=./result/ --clean-alluredir
# 步骤二:查看测试报告,注意这里的serve书写
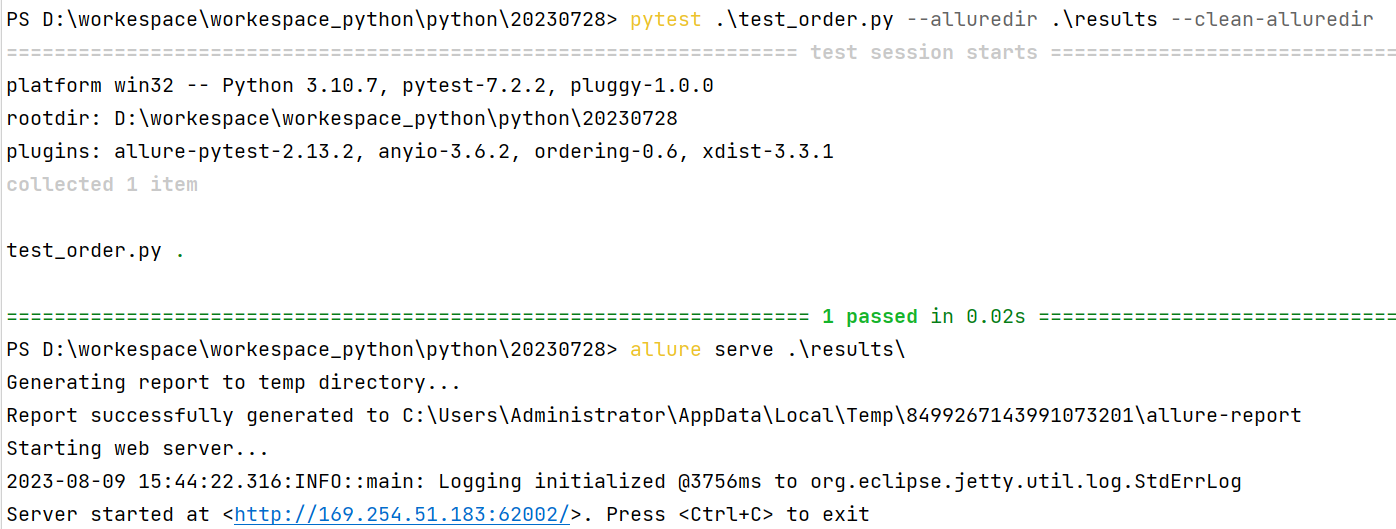
allure serve ./result/Allure 报告生成的两种方式
Allure 报告生成报告 - 方式一
- 方式一:在线报告,会直接打开默认浏览器展示当前报告。
- 方式二:静态资源文件报告(带 index.html、css、js 等文件),需要将报告布署到 web 服务器上。
# 方式一:测试完成后查看实际报告,在线查看报告,会直接打开默认浏览器展示当前报告。
pytest .\test_order.py --alluredir=./results

allure serve ./results/   (注意这里的serve书写)
Allure 报告生成报告 - 方式二
- 应用场景:如果希望随时打开报告,可以生成一个静态资源文件报告,将这个报告布署到 web 服务器上,启动 web 服务,即可随时随地打开报告。
- 解决方案:使用
allure generate生成带有 index.html 的结果报告。这种方式需要两个步骤:- 第一步:生成报告。
- 第二步:打开报告。
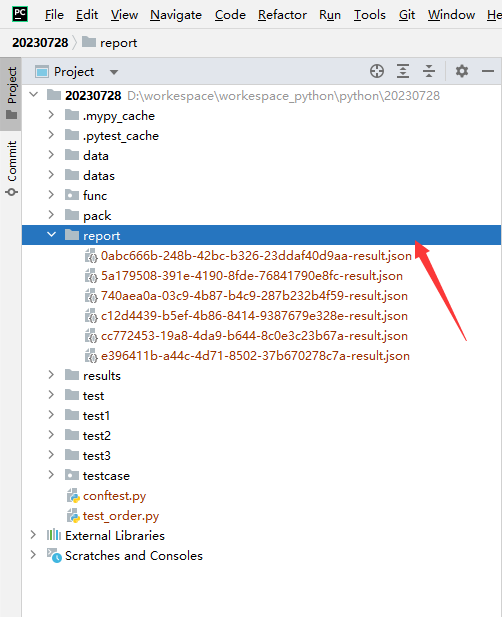
pytest .\test_order.py --alluredir=./report
# 生成报告
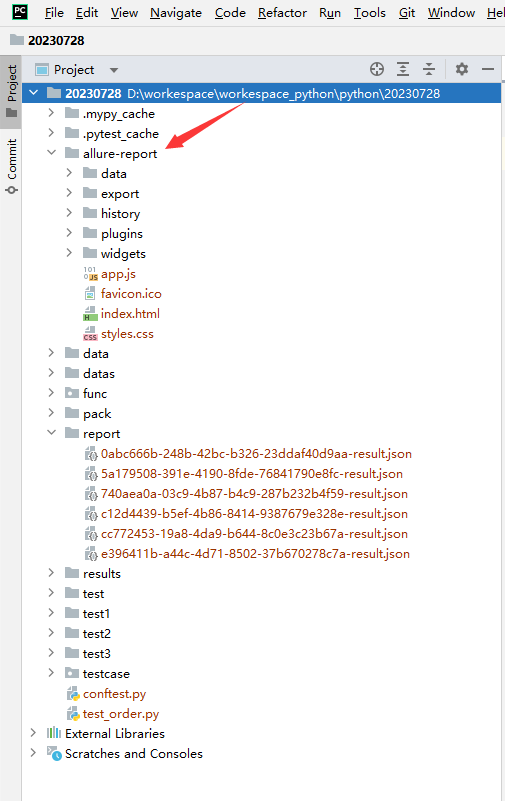
allure generate ./report
# 打开报告
allure open ./report/代码示例:
test_order.py
def test_one():
    assert True


def test_two():
    assert True


def test_three():
    assert True


def test_one1():
    assert True


def test_two2():
    assert True


def test_three3():
assert True 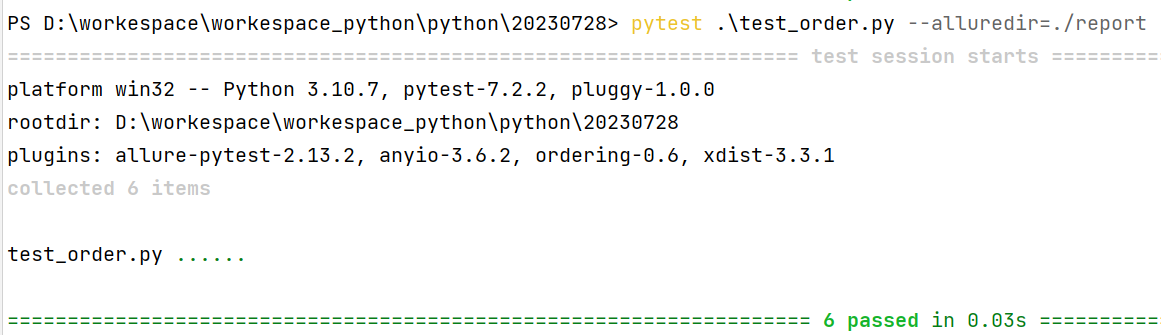


常用参数
allure generate可以指定输出路径,也可以清理上次的报告记录。- -o / –output 输出报告的路径。
- -c / –clean 如果报告路径重复。
allure open打开报告。- -h / –host 主机 IP 地址,此主机将用于启动报表的 web 服务器。
- -p / –port 主机端口,此端口将用于启动报表的 web 服务器,默认值:0。
# 生成报告,指定输出路径,清理报告。
allure generate ./result -o ./report --clean

# 打开报告,指定IP地址和端口。
allure open -h 127.0.0.1 -p 8883 ./report/
4.allure2报告中添加用例标题
Allure 用法
| 方法名 | 方法参数 | 参数说明 |
|---|---|---|
| @allure.epic() | epic 描述 | 敏捷里面的概念,定义史诗,往下是 feature |
| @allure.feature() | 模块名称 | 功能点的描述,往下是 story |
| @allure.story() | 用户故事 | 用户故事,往下是 title |
| @allure.title(用例的标题) | 用例的标题 | 重命名 html 报告名称 |
| @allure.step() | 操作步骤 | 测试用例的步骤 |
| @allure.testcase() | 测试用例的链接地址 | 对应功能测试用例系统里面的 case |
| @allure.issue() | 缺陷 | 对应缺陷管理系统里面的链接 |
| @allure.description() | 用例描述 | 测试用例的描述 |
| @allure.severity() | 用例等级 | blocker,critical,normal,minor,trivial |
| @allure.link() | 链接 | 定义一个链接,在测试报告展现 |
| @allure.attachment() | 附件 | 报告添加附件 |
Allure2 报告中添加用例标题
应用场景:为了让生成的测试报告便于阅读,可以为每条用例添加一个便于阅读的标题(可以使用中文标题)。生成的报告展示用例时,就会以设置的标题名展示出来。
代码示例:
test_order.py
import allure

@allure.title("自定义测试用例标题")
def test_with_title():
    assert True
终端中运行:

运行结果:

Allure2 报告中添加用例标题
- 通过使用装饰器
@allure.title可以为测试用例自定义一个可阅读性的标题。 allure.title的三种使用方式:- 直接使用
@allure.title为测试用例自定义标题。 @allure.title支持通过占位符的方式传递参数,可以实现测试用例标题参数化,动态生成测试用例标题。allure.dynamic.title动态更新测试用例标题。
- 直接使用
Allure2 报告直接设置标题
- 方法一:直接使用装饰器。
import allure
import pytest

@allure.title("自定义测试用例标题")
def test_with_title():
    assert True
Allure2 报告参数化设置用例标题
- 方式二:通过占位符的方式传递参数,可以实现测试用例标题参数化,动态生成测试用例标题。
import allure
import pytest

@allure.title("参数化用例标题:参数一:{param1} ,参数二: {param2}")
@pytest.mark.parametrize("param1, param2, expected", [
    (1, 1, 2),
    (0.1, 0.3, 0.4)
])
def test_with_parametrize_title(param1, param2, expected):
    assert param1 + param2 == expected
代码示例:
test_order.py
import allure
import pytest


@allure.title("参数化用例标题:参数一:{param1} ,参数二: {param2}")
@pytest.mark.parametrize("param1, param2, expected", [
    (1, 1, 2),
    (0.1, 0.3, 0.4)
])
def test_with_parametrize_title(param1, param2, expected):
    assert param1 + param2 == expected
终端运行命令:

Allure2 报告动态更新测试用例标题
- 方式三:动态更新测试用例标题。
@allure.title("原始标题")
def test_with_dynamic_title():
    assert True
    allure.dynamic.title("更改后的新标题")
test_order.py
import allure


@allure.title("原始标题")
def test_with_dynamic_title():
    assert True
    allure.dynamic.title("更改后的新标题")
终端运行命令:

5.allure2报告中添加用例步骤
Allure2 报告中添加用例步骤
应用场景:编写自动化测试用例的时候经常会遇到需要编写流程性测试用例的场景,一般流程性的测试用例的测试步骤比较多,我们在测试用例中添加详细的步骤会提高测试用例的可阅读性。
Allure2 报告中添加用例步骤
- Allure 支持两种方法:
- 方法一:使用装饰器定义一个测试步骤,在测试用例中使用。
- 方法二:使用
with allure.step()添加测试步骤。
Allure2 报告装饰器添加用例步骤
- 方法一:使用装饰器定义一个测试步骤,在测试用例中使用。
代码示例:
# 方法一:使用装饰器定义一个测试步骤,在测试用例中使用
import allure
import pytest


@allure.step
def simple_step1(step_param1, step_param2=None):
    '''定义一个测试步骤'''
    print("首先:连接数据库,准备测试数据")
    print(f"步骤1:打开页面1,参数1: {step_param1}, 参数2:{step_param2}")


@allure.step
def simple_step2(step_param):
    '''定义一个测试步骤'''
    print(f"步骤2:完成搜索 {step_param} 功能")


@pytest.mark.parametrize('param1', ["pytest", "allure"], ids=['search pytest', 'search allure'])
def test_parameterize_with_id(param1):
    simple_step2(param1)


@pytest.mark.parametrize('param1', [True, False])
@pytest.mark.parametrize('param2', ['value 1', 'value 2'])
def test_parametrize_with_two_parameters(param1, param2):
    simple_step1(param1, param2)


@pytest.mark.parametrize('param2', ['pytest', 'unittest'])
@pytest.mark.parametrize('param1,param3', [[1, 2]])
def test_parameterize_with_uneven_value_sets(param1, param2, param3):
    simple_step1(param1, param3)
    simple_step2(param2)
终端中运行:

- 方法二:使用
with allure.step()添加测试步骤。
test_order.py
import allure


# 方法二:使用 `with allure.step()` 添加测试步骤
@allure.title("搜索用例")
def test_step_in_method():
    with allure.step("测试步骤一:打开页面"):
        print("操作 a")
        print("操作 b")

    with allure.step("测试步骤二:搜索"):
        print("搜索操作 ")

    with allure.step("测试步骤三:断言"):
        assert True
在终端中运行:

6.allure2报告中添加用例链接
Allure2 用例链接
应用场景:将报告与 bug 管理系统或测试用例管理系统集成,可以添加链接装器
@allure.link@allure.issue@allure.testcase
格式1:@allure.link(url, name)添加一个普通的 link 链接。- 格式 2:
@allure.testcase(url, name)添加一个用例管理系统链接。 - 格式 3:
@allure.issue(url, name),添加 bug 管理系统链接。
格式1代码示例:
test_order.py
import allure


# 格式1:添加一个普通的link 链接
@allure.link('https://www.baidu.com')
def test_with_link():
    pass


# 格式1:添加一个普通的link 链接,添加链接名称
@allure.link('https://www.baidu.com', name='这是用例链接地址')
def test_with_named_link():
    pass
终端中运行:

格式二,格式三:
import allure


# 格式1:添加一个普通的link 链接
@allure.link('https://www.baidu.com')
def test_with_link():
    pass


# 格式1:添加一个普通的link 链接,添加链接名称
@allure.link('https://www.baidu.com', name='这是用例链接地址')
def test_with_named_link():
    pass


# 格式2:添加用例管理系统链接
TEST_CASE_LINK = 'https://github.com/qameta/allure-integrations/issues/8#issuecomment-268313637'


@allure.testcase(TEST_CASE_LINK, '用例管理系统')
def test_with_testcase_link():
    pass


# 格式3:添加bug管理系统链接
# 这个装饰器在展示的时候会带 bug 图标的链接。可以在运行时通过参数
# `--allure-link-pattern` 指定一个模板链接,以便将其与提供的问题链
# 接类型链接模板一起使用。执行命令需要指定模板链接:
# `--allure-link-pattern=issue:https://www.baidu.com/t/topic/{15860}`
# @allure.issue("https://www.baidu.com/t/topic/15860", 'bug管理系统')
@allure.issue("15860", 'bug管理系统')
#pytest .\test_order.py --alluredir .\results --clean-alluredir
# --allure-link-pattern=issue:https://www.baidu.com/t/topic/{}
def test_with_issue():
    pass
7.allure2报告中添加用例分类
Allure 分类
- 应用场景:可以为项目,以及项目下的不同模块对用例进行分类管理。也可以运行某个类别下的用例。
- 报告展示:类别会展示在测试报告的 Behaviors 栏目下。
- Allure 提供了三个装饰器:
@allure.epic:敏捷里面的概念,定义史诗,往下是 feature。@allure.feature:功能点的描述,理解成模块往下是 story。@allure.story:故事 story 是 feature 的子集。
Allure 分类 - epic
- 场景:希望在测试报告中看到用例所在的项目,需要用到 epic,相当于定义一个项目的需求,由于粒度比较大,在 epic 下面还要定义略小粒度的用户故事。
- 解决:
@allure.epic
代码示例:
test_order.py
import allure

@allure.epic("需求1")
class TestEpic:
    def test_case1(self):
        print("用例1")

    def test_case2(self):
        print("用例2")

    def test_case3(self):
        print("用例3")
终端运行:


Allure 分类 - feature/story
- 场景: 希望在报告中看到测试功能,子功能或场景。
- 解决:
@allure.Feature、@allure.story - 步骤:
- 功能上加
@allure.feature('功能名称') - 子功能上加
@allure.story('子功能名称')
- 功能上加
代码示例:
import allure


@allure.epic("需求1")
@allure.feature("功能模块1")
class TestEpic:
    @allure.story("子功能1")
    @allure.title("用例1")
    def test_case1(self):
        print("用例1")

    @allure.story("子功能2")
    @allure.title("用例2")
    def test_case2(self):
        print("用例2")

    @allure.story("子功能2")
    @allure.title("用例3")
    def test_case3(self):
        print("用例3")

    @allure.story("子功能1")
    @allure.title("用例4")
    def test_case4(self):
        print("用例4")


@allure.epic("需求1")
@allure.feature("功能模块2")
class TestEpic1:
    @allure.story("子功能1")
    @allure.title("用例1")
    def test_case1(self):
        print("用例1")

    @allure.story("子功能2")
    @allure.title("用例2")
    def test_case2(self):
        print("用例2")

    @allure.story("子功能2")
    @allure.title("用例3")
    def test_case3(self):
        print("用例3")

    @allure.story("子功能1")
    @allure.title("用例4")
    def test_case4(self):
print("用例4") 


- allure 相关的命令查看 :
pytest --help|grep allure - 通过指定命令行参数,运行 epic/feature/story 相关的用例:
pytest 文件名 --allure-epics=EPICS_SET --allure-features=FEATURES_SET --allure-stories=STORIES_SET
# 只运行 epic 名为 "需求1" 的测试用例
pytest --alluredir ./results --clean-alluredir --allure-epics=需求1

# 只运行 feature 名为 "功能模块2" 的测试用例
pytest --alluredir ./results --clean-alluredir --allure-features=功能模块2

# 只运行 story 名为 "子功能1" 的测试用例
pytest --alluredir ./results --clean-alluredir --allure-stories=子功能1

# 运行 story 名为 "子功能1和子功能2" 的测试用例
pytest --alluredir ./results --clean-alluredir --allure-stories=子功能1,子功能2

# 运行 feature + story 的用例(取并集)
pytest --alluredir ./results --clean-alluredir --allure-features=功能模块1 --allure-stories=子功能1,子功能2
8.allure2报告中添加用例描述
Allure2 用例描述
- 应用场景:Allure 支持往测试报告中对测试用例添加非常详细的描述语,用来描述测试用例详情。
- Allure 添加描述的四种方式:
- 方式一:使用装饰器
@allure.description()传递一个字符串参数来描述测试用例。 - 方式二:使用装饰器
@allure.description_html传递一段 HTML 文本来描述测试用例。 - 方式三:直接在测试用例方法中通过编写文档注释的方法来添加描述。
- 方式四:用例代码内部动态添加描述信息。
- 方式一:使用装饰器
方式一:添加装饰器@allure.description()。
代码示例:
import allure


@allure.description("""
多行描述语:<br/>
这是通过传递字符串参数的方式添加的一段描述语,<br/>
使用的是装饰器 @allure.description
""")
def test_description_provide_string():
    assert True
终端运行:


方式二:添加装饰器@allure.description_html()
代码示例:
test_order.py
import allure


@allure.description_html("""html代码块""")
def test_description_privide_html():
    assert True
终端运行:


方式三:直接在代码中添加文档注释。
代码示例:
def test_description_docstring():
    """
    直接在测试用例方法中 <br/>
    通过编写文档注释的方法 <br/>
    来添加描述。 <br/>
    :return:
    """
    assert True
终端运行:


方式四:代码中添加动态描述信息。
代码示例:
import allure


@allure.description("""这个描述将被替换""")
def test_dynamic_description():
    assert 42 == int(6 * 7)
    allure.dynamic.description('这是最终的描述信息')
    # allure.dynamic.description_html(''' html 代码块 ''')
终端运行:


9.allure2报告中添加用例优先级
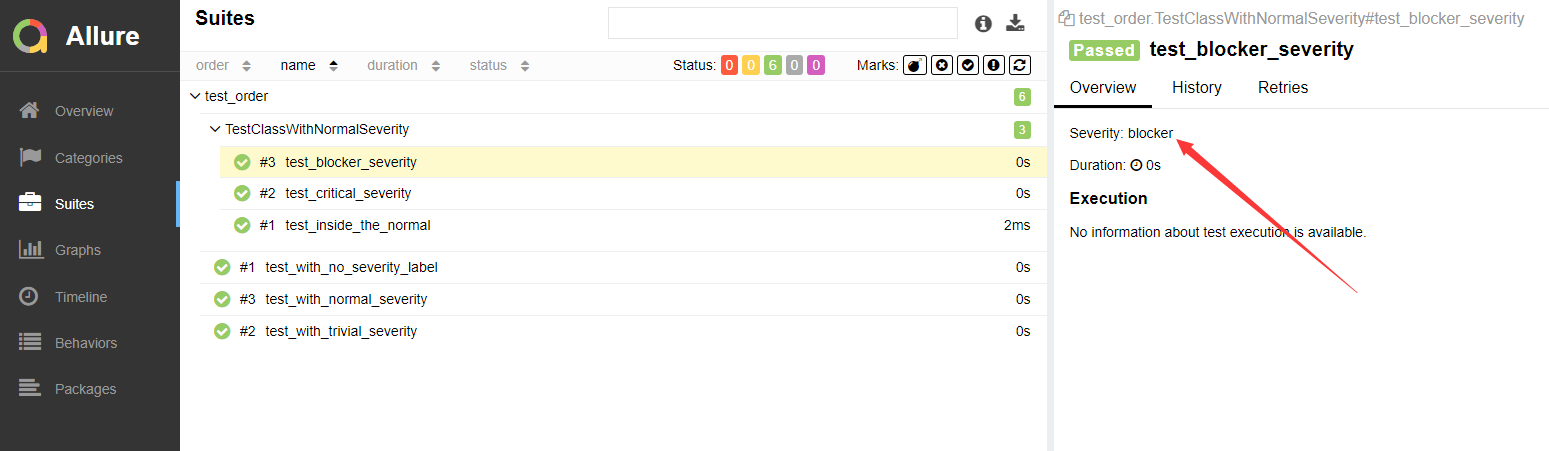
Alluer2 报告中添加用例优先级
- Allure 对严重级别的定义分为 5 个级别:
- Blocker级别:中断缺陷(客户端程序无响应,无法执行下一步操作)。
- Critical级别:临界缺陷( 功能点缺失)。
- Normal级别:普通缺陷(数值计算错误)。
- Minor级别:次要缺陷(界面错误与UI需求不符)。
- Trivial级别:轻微缺陷(必输项无提示,或者提示不规范)。
应用场景:用例执行时,希望按照严重级别执行测试用例。
解决:可以为每个用例添加一个等级的装饰器,用法:@allure.severity。
- 使用装饰器添加用例方法/类的级别。
- 类上添加的级别,对类中没有添加级别的方法生效。
- 运行时添加命令行参数
--allure-severities:pytest --alluredir ./results --clean-alluredir --allure-severities normal,blocker
代码示例:
test_order.py
import allure


def test_with_no_severity_label():
    pass


@allure.severity(allure.severity_level.TRIVIAL)
def test_with_trivial_severity():
    pass


@allure.severity(allure.severity_level.NORMAL)
def test_with_normal_severity():
    pass


@allure.severity(allure.severity_level.NORMAL)
class TestClassWithNormalSeverity(object):

    def test_inside_the_normal(self):
        pass

    @allure.severity(allure.severity_level.CRITICAL)
    def test_critical_severity(self):
        pass

    @allure.severity(allure.severity_level.BLOCKER)
    def test_blocker_severity(self):
        pass
终端运行命令:


10.allure2报告中添加用例支持tags标签
Allure2 添加用例标签-xfail、skipif
- 用法:使用装饰器
@pytest.xfail()、@pytest.skipif()
代码示例:
test_order.py
import pytest


# 当用例通过时标注为 xfail
@pytest.mark.xfail(condition=lambda: True, reason='这是一个预期失败的用例')
def test_xfail_expected_failure():
    """this test is an xfail that will be marked as expected failure"""
    assert False


# 当用例通过时标注为 xpass
@pytest.mark.xfail
def test_xfail_unexpected_pass():
    """this test is an xfail that will be marked as unexpected success"""
    assert True


# 跳过用例
@pytest.mark.skipif('2 + 2 != 5', reason='当条件触发时这个用例被跳过 @pytest.mark.skipif')
def test_skip_by_triggered_condition():
    pass
终端运行:


Allure2 添加用例标签-fixture
- 应用场景:fixture 和 finalizer 是分别在测试开始之前和测试结束之后由 Pytest 调用的实用程序函数。Allure 跟踪每个 fixture 的调用,并详细显示调用了哪些方法以及哪些参数,从而保持了调用的正确顺序。
代码示例:
import pytest


@pytest.fixture()
def func(request):
    # 前置动作--相当于setup
    print("这是一个fixture方法")

    # 后置动作--相当于teardown
    # 定义一个终结器,teardown动作放在终结器中
    def over():
        print("session级别终结器")

    # 添加终结器,在执行完测试用例之后会执行终结器中的内容
    request.addfinalizer(over)


class TestClass(object):
    def test_with_scoped_finalizers(self, func):
        print("测试用例")
终端运行:


代码示例二:
import pytest


@pytest.fixture()
def func1():
    print('这是fixture func1 前置动作')
    yield
    print('这是fixture func1 后置动作')


@pytest.fixture()
def func(request):
    # 前置动作--相当于setup
    print("这是一个fixture方法")

    # 后置动作--相当于teardown
    # 定义一个终结器,teardown动作放在终结器中
    def over():
        print("session级别终结器")

    # 添加终结器,在执行完测试用例之后会执行终结器中的内容
    request.addfinalizer(over)


class TestClass(object):
    def test_with_scoped_finalizers(self, func, func1):
        print("测试用例")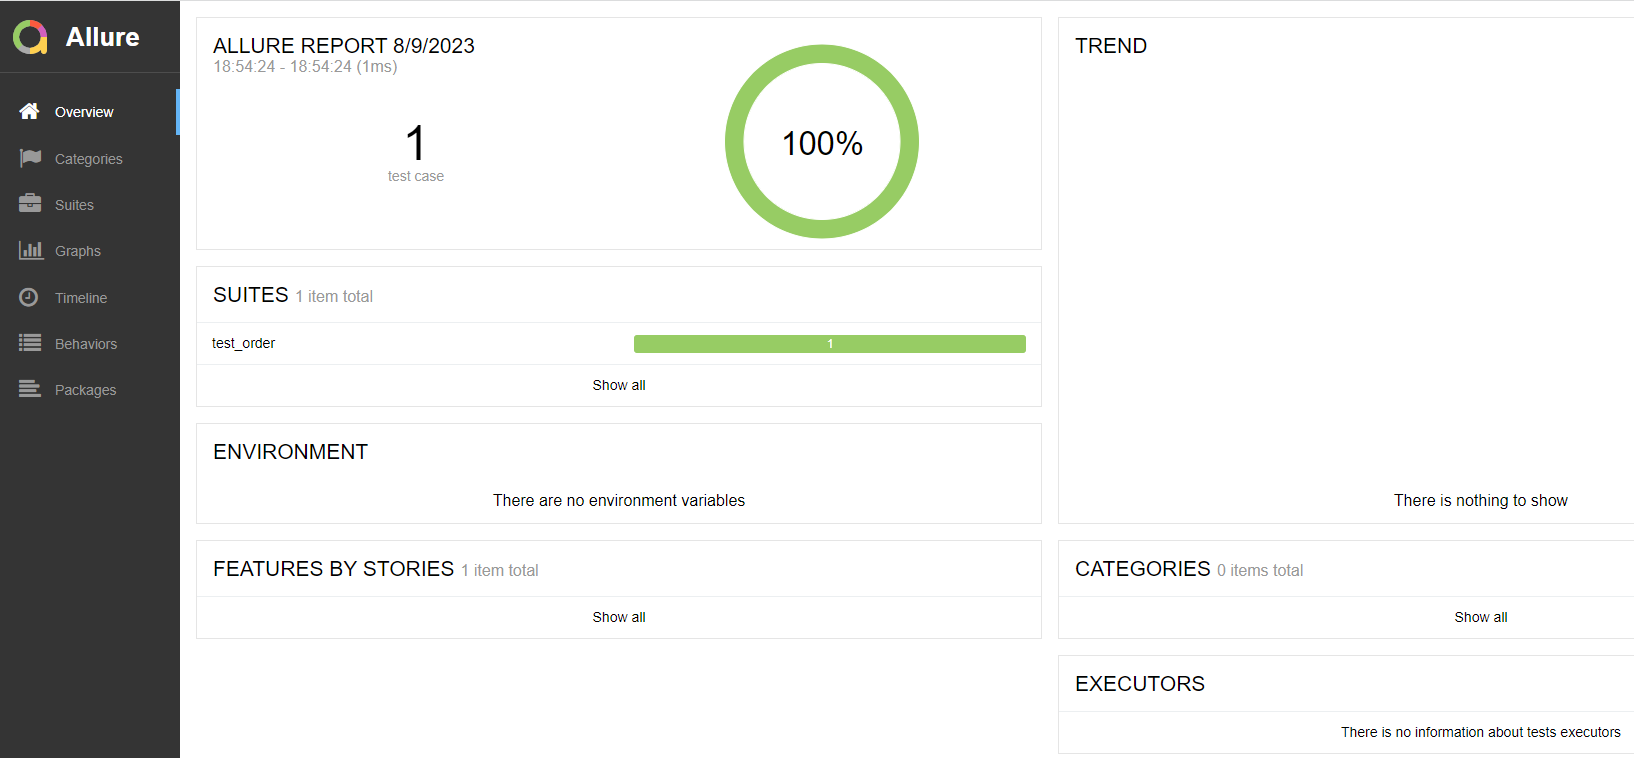

11.allure2报告中支持记录失败重试功能
Allure2 失败重试功能应用场景
- Allure 可以收集用例运行期间,重试的用例的结果,以及这段时间重试的历史记录。
- 重试功能可以使用 pytest 相关的插件,例如
pytest-rerunfailures。 - 重试的结果信息,会展示在详情页面的”Retries” 选项卡中。
代码示例:
test_order.py
import pytest


@pytest.mark.flaky(reruns=2, reruns_delay=2)
def test_rerun2():
    assert False
终端运行:


12.allure2报告中添加附件-图片
Allure2 报告中添加附件
TEXT = ("text/plain", "txt")
CSV = ("text/csv", "csv")
TSV = ("text/tab-separated-values", "tsv")
URI_LIST = ("text/uri-list", "uri")

HTML = ("text/html", "html")
XML = ("application/xml", "xml")
JSON = ("application/json", "json")
YAML = ("application/yaml", "yaml")
PCAP = ("application/vnd.tcpdump.pcap", "pcap")

PNG = ("image/png", "png")
JPG = ("image/jpg", "jpg")
SVG = ("image/svg-xml", "svg")
GIF = ("image/gif", "gif")
BMP = ("image/bmp", "bmp")
TIFF = ("image/tiff", "tiff")

MP4 = ("video/mp4", "mp4")
OGG = ("video/ogg", "ogg")
WEBM = ("video/webm", "webm")

PDF = ("application/pdf", "pdf")
Allure2 报告中添加附件(图片)应用场景
- 应用场景:在做 UI 自动化测试时,可以将页面截图,或者出错的页面进行截图,将截图添加到测试报告中展示,辅助定位问题。
- 解决方案:
- Python:使用
allure.attach或者allure.attach.file()添加图片。 - Java:直接通过注解或调用方法添加。
- Python:使用
Allure2 报告中添加附件(图片)- Python
- 语法:
allure.attach.file(source, name, attachment_type, extension),参数解释:- source:文件路径,相当于传一个文件。
- name:附件名字。
- attachment_type:附件类型,是
allure.attachment_type其中的一种(支持 PNG、JPG、BMP、GIF 等)。 - extension:附件的扩展名。
代码示例:
import allure

class TestWithAttach:
    def test_pic(self):
        allure.attach.file('./img/111.jpg',
                           name="这是一个图片",
                           attachment_type=allure.attachment_type.JPG,
                           extension="jpg")
终端运行:


- 语法:
allure.attach(body, name=None, attachment_type=None, extension=None):,参数解释:- body:要写入附件的内容
- name:附件名字。
- attachment_type:附件类型,是
allure.attachment_type其中的一种(支持 PNG、JPG、BMP、GIF 等)。 - extension:附件的扩展名。
代码示例:
import allure


class TestWithAttach:
    def test_pic2(self):
        with open("./img/111.jpg", mode="rb") as f:
            file = f.read()
            allure.attach(file, "页面截图", attachment_type=allure.attachment_type.JPG)
终端运行:


13.allure2报告中添加附件-日志
Allure2 报告中添加附件(日志)应用场景
- 应用场景:报告中添加详细的日志信息,有助于分析定位问题。
- 解决方案:
- Python:使用 python 自带的 logging 模块生成日志,日志会自动添加到测试报告中。
- Java:直接通过注解或调用方法添加。
日志配置,在测试报告中使用 logger 对象生成对应级别的日志。
代码示例:
log_util.py
import logging
import os

from logging.handlers import RotatingFileHandler

# 绑定绑定句柄到logger对象
logger = logging.getLogger(__name__)
# 获取当前工具文件所在的路径
root_path = os.path.dirname(os.path.abspath(__file__))
# 拼接当前要输出日志的路径
log_dir_path = os.sep.join([root_path, f'/logs'])
if not os.path.isdir(log_dir_path):
    os.mkdir(log_dir_path)
# 创建日志记录器,指明日志保存路径,每个日志的大小,保存日志的上限
file_log_handler = RotatingFileHandler(os.sep.join([log_dir_path, 'log.log']), maxBytes=1024 * 1024, backupCount=10 , encoding="utf-8")
# 设置日志的格式
date_string = '%Y-%m-%d %H:%M:%S'
formatter = logging.Formatter(
    '[%(asctime)s] [%(levelname)s] [%(filename)s]/[line: %(lineno)d]/[%(funcName)s] %(message)s ', date_string)
# 日志输出到控制台的句柄
stream_handler = logging.StreamHandler()
# 将日志记录器指定日志的格式
file_log_handler.setFormatter(formatter)
stream_handler.setFormatter(formatter)
# 为全局的日志工具对象添加日志记录器
# 绑定绑定句柄到logger对象
logger.addHandler(stream_handler)
logger.addHandler(file_log_handler)
# 设置日志输出级别
logger.setLevel(level=logging.INFO)
test_order.py
import allure
from utils.log_util import logger


@allure.epic("需求1")
@allure.feature("功能模块1")
class TestEpic:
    @allure.story("子功能1")
    @allure.title("用例1")
    def test_case1(self):
        logger.info('这是TestEpic 第一条用例')
        print("用例1")

    @allure.story("子功能2")
    @allure.title("用例2")
    def test_case2(self):
        logger.debug('这是TestEpic 第二条用例')
        print("用例2")

    @allure.story("子功能2")
    @allure.title("用例3")
    def test_case3(self):
        logger.warning('这是TestEpic 第三条用例')
        print("用例3")

    @allure.story("子功能1")
    @allure.title("用例4")
    def test_case4(self):
        logger.error('这是TestEpic 第四条用例')
        print("用例4")
终端运行:


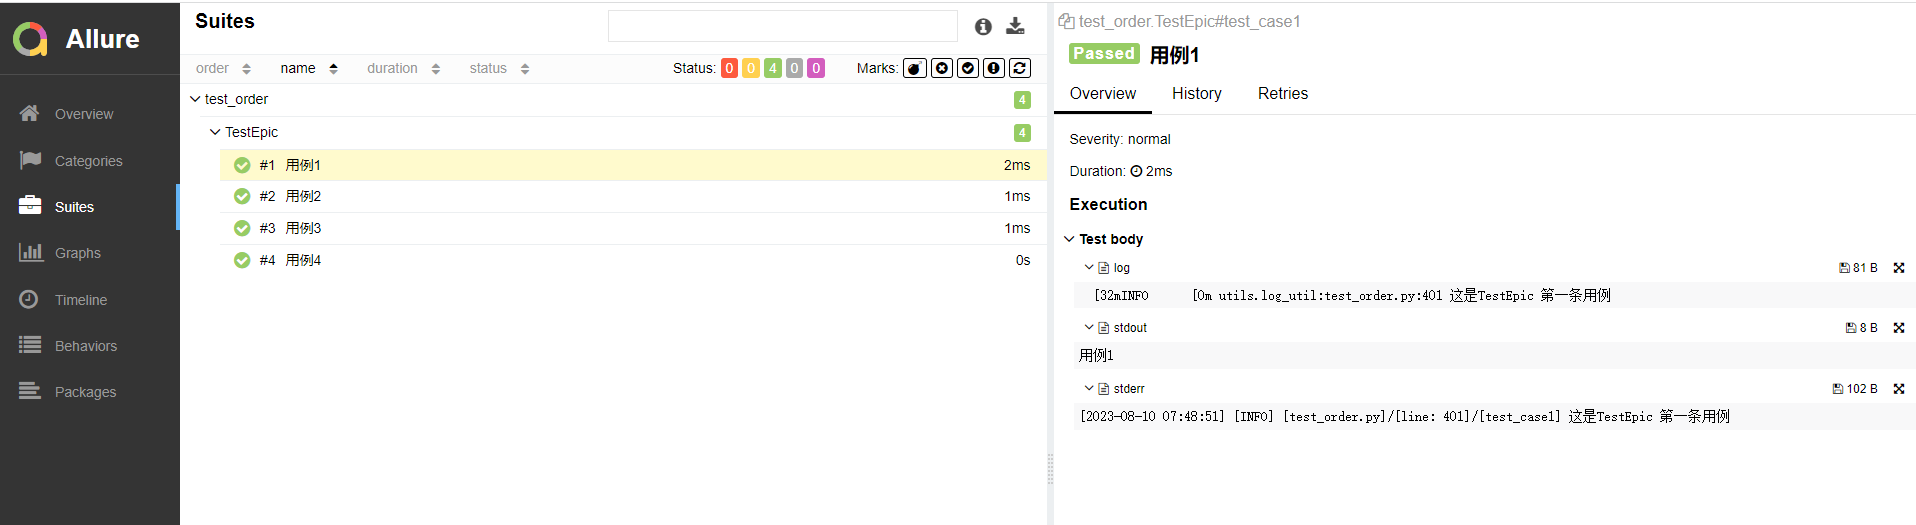
日志展示在 Test body 标签下,标签下可展示多个子标签代表不同的日志输出渠道:
- log 子标签:展示日志信息。
- stdout 子标签:展示 print 信息。
- stderr 子标签:展示终端输出的信息。
禁用日志,可以使用命令行参数控制 --allure-no-capture
pytest --alluredir ./results --clean-alluredir --allure-no-capture14.allure2报告中添加附件-html
Allure2 报告中添加附件(html)应用场景
- 应用场景:可以定制测试报告页面效果,可以将 HTML 类型的附件显示在报告页面上。
- 解决方案:
- Python:使用
allure.attach()添加 html 代码。 - Java:直接通过注解或调用方法添加。
- Python:使用
语法:allure.attach(body, name, attachment_type, extension),参数解释:
- body:要写入附件的内容(HTML 代码块)。
- name:附件名字。
- attachment_type:附件类型,是
allure.attachment_type其中的一种。 - extension:附件的扩展名。
代码示例:
import allure


class TestWithAttach:
    def test_html(self):
        allure.attach('<head></head><body> a page </body>',
                      '附件是HTML类型',
                      allure.attachment_type.HTML)

    def test_html_part(self):
        allure.attach('''html代码块''',
                      '附件是HTML类型',
                      allure.attachment_type.HTML)
终端运行:


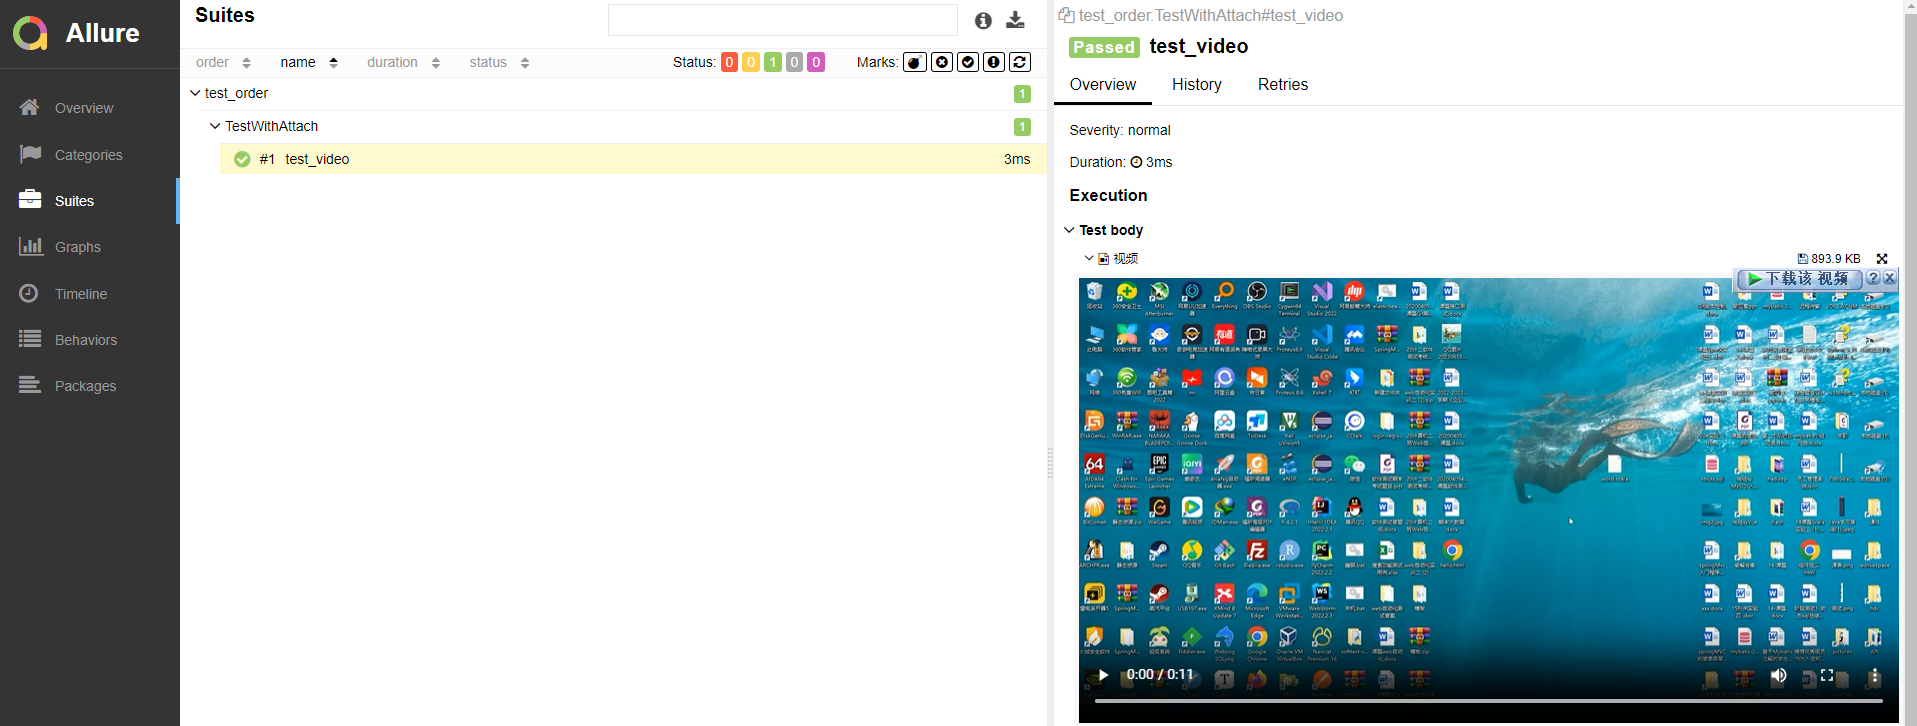
15.allure2报告中添加附件-视频
Allure2 报告中添加附件(视频)应用场景
- 应用场景:在做 UI 自动化测试时,可以将页面截图,或者出错的页面进行截图,将截图添加到测试报告中展示,辅助定位问题。
- 解决方案:
- Python:使用
allure.attach.file()添加视频。 - Java:直接通过注解或调用方法添加。
- Python:使用
语法:allure.attach.file(source, name, attachment_type, extension),参数解释:
- source:文件路径,相当于传一个文件。
- name:附件名字。
- attachment_type:附件类型,是
allure.attachment_type其中的一种。 - extension:附件的扩展名。
代码示例:
import allure


class TestWithAttach:
    def test_video(self):
        allure.attach.file("./mp4/111.mp4",
                           name="视频",
                           attachment_type=allure.attachment_type.MP4,
                           extension="mp4")
终端运行:


16.allure2报告定制
Allure2 报告定制应用场景
应用场景:针对不同的项目可能需要对测试报告展示的效果进行定制,比如修改页面的 logo、修改项目的标题或者添加一些定制的功能等等。
- 修改
allure.yml文件,添加 logo 插件custom-logo-plugin(在 allure 安装路径下,可以通过where allure或者which allure查看 allure 安装路径)。 - 编辑 styles.css 文件,配置 logo 图片。
/* 打开 styles.css 文件,
目录在:/xxx/allure-2.13.2/plugins/custom-logo-plugin/static/styles.css,
将内容修改为:*/

.side-nav__brand {
  background: url("logo.png") no-repeat left center !important;
  margin-left: 10px;
  height: 40px;
  background-size: contain !important;
}- 编辑 styles.css 文件,添加修改标题对应的代码。
/* 去掉图片后边 allure 文本 */
.side-nav__brand-text {
  display: none;
}

/* 设置logo 后面的字体样式与字体大小 */
.side-nav__brand:after {
  content: "要修改的标题";
  margin-left: 18px;
  height: 20px;
  font-family: Arial;
  font-size: 13px;
}