目录
创建私有仓库
将修改过的nginx镜像做标记封装,准备上传到私有仓库
将镜像上传到私有仓库
从私有仓库中下载镜像到本地
CPU使用率
CPU共享比例
CPU周期限制
CPU 配额控制参数的混合案例
内存限制
Block IO 的限制
限制bps 和iops
创建私有仓库
仓库(Repository)是集中存放镜像的地方。
仓库注册服务器才是存放仓库具体的服务器(Registry),每个服务器上都可以放置多个仓库,而每个仓库下可以放置多个镜像,每个镜像上可以运行多个容器,每个容器上可以跑一个应用或应用组。
安装docker后,可以通过官方提供的registry镜像部署一套本地的私有仓库环境
[root@localhost ~]# mkdir -p /opt/data/registry
[root@localhost ~]# docker run -d --restart=always -p 5000:5000 -v /opt/data/registry:/tmp/registry registry
Unable to find image 'registry:latest' locally
Trying to pull repository docker.io/library/registry ...
latest: Pulling from docker.io/library/registry
79e9f2f55bf5: Pull complete
0d96da54f60b: Pull complete
5b27040df4a2: Pull complete
e2ead8259a04: Pull complete
3790aef225b9: Pull complete
Digest: sha256:169211e20e2f2d5d115674681eb79d21a217b296b43374b8e39f97fcf866b375
Status: Downloaded newer image for docker.io/registry:latest
a0edf5ac6cdda7464855c98db855c60f32f54bf8f078647dc2b8357aa8581151
[root@localhost ~]# docker ps -l
CONTAINER ID IMAGE COMMAND CREATED STATUS PORTS NAMES
a0edf5ac6cdd registry "/entrypoint.sh /e..." 31 seconds ago Up 29 seconds 0.0.0.0:5000->5000/tcp thirsty_ptolemy
准备测试镜像
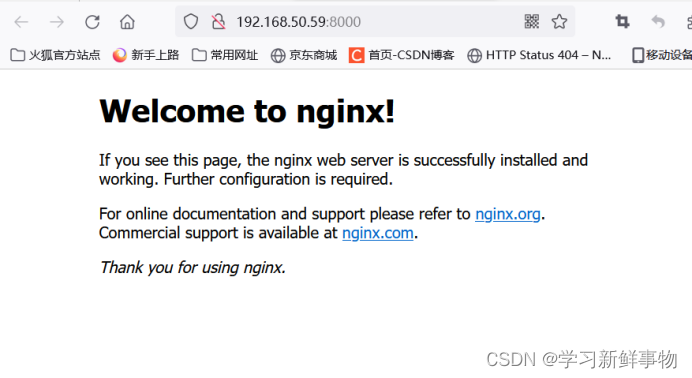
[root@localhost ~]# docker run -d -p 8000:80 nginx //将宿主机8000端口映射给容器的业务端口
ea26add1a77cd25a90041acfd3b0994630cecc098de2ed15f088be9b4fa8335a
[root@localhost ~]# docker ps -l
CONTAINER ID IMAGE COMMAND CREATED STATUS PORTS NAMES
ea26add1a77c nginx "/docker-entrypoin..." 9 seconds ago Up 8 seconds 0.0.0.0:8000->80/tcp nifty_knuth
宿主机访问8000端口测试:
[root@localhost ~]# docker logs ea26add1a77c
[root@localhost ~]# docker tag nginx 192.168.50.59:5000/nginx-awd
将修改过的nginx镜像做标记封装,准备上传到私有仓库
[root@localhost ~]# cat /etc/docker/daemon.json
{
"registry-mirrors":[ "https://nyakyfun.mirror.aliyuncs.com" ]
}
[root@localhost ~]# vim /etc/docker/daemon.json
{
"registry-mirrors":[ "https://nyakyfun.mirror.aliyuncs.com" ],"insecure-registries":["192.168.50.59:5000"]
}
[root@localhost ~]# systemctl daemon-reload
[root@localhost ~]# systemctl restart docker
将镜像上传到私有仓库
[root@localhost ~]# docker push 192.168.50.59:5000/nginx-awd
The push refers to a repository [192.168.50.59:5000/nginx-awd]
d874fd2bc83b: Pushed
32ce5f6a5106: Pushed
f1db227348d0: Pushed
b8d6e692a25e: Pushed
e379e8aedd4d: Pushed
2edcec3590a4: Pushed
latest: digest: sha256:ee89b00528ff4f02f2405e4ee221743ebc3f8e8dd0bfd5c4c20a2fa2aaa7ede3 size: 1570
查看
[root@localhost ~]# docker images
REPOSITORY TAG IMAGE ID CREATED SIZE
centos exp c85e59d0ca2f 23 hours ago 231 MB
192.168.50.59:5000/nginx-awd latest 605c77e624dd 19 months ago 141 MB
删除掉测试
[root@localhost ~]# docker rmi 192.168.50.59:5000/nginx-awd
Untagged: 192.168.50.59:5000/nginx-awd:latest
Untagged: 192.168.50.59:5000/nginx-awd@sha256:ee89b00528ff4f02f2405e4ee221743ebc3f8e8dd0bfd5c4c20a2fa2aaa7ede3
[root@localhost ~]# docker images
REPOSITORY TAG IMAGE ID CREATED SIZE
centos exp c85e59d0ca2f 23 hours ago 231 MB
docker.io/nginx latest 605c77e624dd 19 months ago 141 MB
docker.io/registry latest b8604a3fe854 20 months ago 26.2 MB
docker.io/centos latest 5d0da3dc9764 22 months ago 231 MB
从私有仓库中下载镜像到本地
[root@localhost ~]# docker pull 192.168.50.59:5000/nginx-awd
Using default tag: latest
Trying to pull repository 192.168.50.59:5000/nginx-awd ...
latest: Pulling from 192.168.50.59:5000/nginx-awd
Digest: sha256:ee89b00528ff4f02f2405e4ee221743ebc3f8e8dd0bfd5c4c20a2fa2aaa7ede3
Status: Downloaded newer image for 192.168.50.59:5000/nginx-awd:latest
[root@localhost ~]# docker images
REPOSITORY TAG IMAGE ID CREATED SIZE
centos exp c85e59d0ca2f 23 hours ago 231 MB
192.168.50.59:5000/nginx-awd latest 605c77e624dd 19 months ago 141 MB
Docker资源限制
Docker容器技术底层是通过Cgroup(Control Group 控制组)实现容器对物理资源使用的限制,限制的资源包括CPU、内存、磁盘三个方面。基本覆盖了常见的资源配额和使用量控制。
Cgroup 是Linux 内核提供的一种可以限制、记录、隔离进程组所使用的物理资源的机制,被LXC及Docker等很多项目用于实现进程的资源控制。
Cgroup 是提供将进程进行分组化管理的功能和接口的基础结构,Docker中I/O 或内存的分配控制等具体的资源管理功能都是通过Cgroup功能来实现的。这些具体的资源管理功能称为Cgroup子系统
使用下面的Dockerfile 来创建一个基于CentOS的stress工具镜像。
[root@localhost ~]# cat centos-7-x86_64.tar.gz | docker import - centos:7
sha256:6e593ec2c4f80e5d44cd15d978c59c701f02b72b1c7458778854a6dc24d492b8
[root@localhost ~]# mkdir stress
[root@localhost ~]# vim stress/Dockerfile
FROM centos:7
MAINTAINER crushlinux "crushlinux@163.com"
RUN yum -y install wget
RUN wget -O /etc/yum.repos.d/epel.repo http://mirrors.aliyun.com/repo/epel-7.repo
RUN yum -y install stress
~
[root@localhost ~]# cd stress/
[root@localhost stress]# docker build -t centos:stress .
CPU使用率
[root@localhost stress]# docker run -itd centos:stress /bin/bash
9d9428089027bf70bf2b4e6a441cab0d465c2f5dd3988420b05c7149d4a9ff3d
utes ago suspicious_franklin
[root@localhost stress]# docker ps -a
CONTAINER ID IMAGE COMMAND CREATED STATUS PORTS NAMES
9d9428089027 centos:stress "/bin/bash" 39 seconds ago Up 38 seconds silly_mestorf
[root@localhost stress]# vim /sys/fs/cgroup/cpu,cpuacct/cpu.cfs_quota_us
-1
CPU共享比例
当多个容器任务运行时,很难计算CPU的使用率,为了使容器合理使用CPU资源,可以通过--cpu-shares选项设置容器按比例共享CPU资源,这种方式还可以实现CPU使用率的动态调整。
命令中的--cpu-shares 选项值不能保证可以获得1 个vcpu 或者多少GHz 的CPU 资源,仅仅只是一个弹性的加权值。
[root@localhost ~]# docker run --name aa -itd --cpu-shares 1024 centos:stress /bin/bash
1c9d6552e940da713e8ce89c9b10f045aff0b1fcbfdef45f2f9bf1d2189c4604
[root@localhost ~]# docker run --name bb -itd --cpu-shares 1024 centos:stress /bin/bash
4a7ea87192d16d4b8b086c125a467357f28aed00157726367cefea7fada12a21
[root@localhost ~]# docker run --name cc -itd --cpu-shares 2048 centos:stress /bin/bash
7b52275fa1b3c00b1bcbbb5ef6ef165f4b33bc5ccab51908b66e19b7f50fe772
[root@localhost ~]# docker run --name dd -itd --cpu-shares 4096 centos:stress /bin/bash
b56f55536170be6ac5bf25b6e1350e126c05fc44cf54d954a7c9d679ef73c110
默认情况下,每个docker容器的cpu份额都是1024。单独一个容器的份额是没有意义的。只有在同时运行多个容器时,容器的CPU加权的效果才能体现出来。例如,两个容器A、B的CPU份额分别为1000和500,在CPU进行时间片分配的时候,容器A比容器B多一倍的机会获得CPU的时间片。但分配的结果取决于当时主机和其他容器的运行状态,实际上也无法保证容器A一定能获得CPU时间片。比如容器A的进程一直是空闲的,那么容器B 是可以获取比容器A更多的CPU时间片的。极端情况下,比如说主机上只运行了一个容器,即使它的CPU份额只有50,它也可以独占整个主机的CPU资源。
换句话说,可以通过cpu shares可以设置容器使用CPU的优先级,比如启动了两个容器及运行查看CPU使用百分比。
[root@localhost ~]# docker run -tid --name cpu1024 --cpu-shares 1024 centos:stress stress -c 10
3aa4978e3257d760b66b8d85a9c78257e982fcff593f4211880a914a59978603
[root@localhost ~]# docker run -tid --name cpu512 --cpu-shares 512 centos:stress stress -c 10
[root@localhost ~]# docker ps -a
CONTAINER ID IMAGE COMMAND CREATED STATUS PORTS NAMES
3aa4978e3257 centos:stress "stress -c 10" About a minute ago Up About a minute cpu1024
8a0048522072 centos:stress "stress -c 10" 2 minutes ago Up 2 minutes cpu512
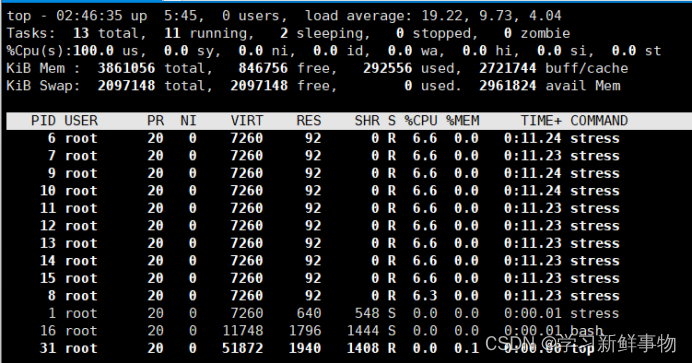
[root@localhost ~]# docker exec -it 3a /bin/bash
[root@3aa4978e3257 /]# top
top - 02:46:44 up 5:45, 0 users, load average: 19.34, 10.07, 4.21
Tasks: 13 total, 11 running, 2 sleeping, 0 stopped, 0 zombie
%Cpu(s): 98.6 us, 1.4 sy, 0.0 ni, 0.0 id, 0.0 wa, 0.0 hi, 0.0 si, 0.0 st
KiB Mem : 3861056 total, 846756 free, 292556 used, 2721744 buff/cache
KiB Swap: 2097148 total, 2097148 free, 0 used. 2961824 avail Mem
PID USER PR NI VIRT RES SHR S %CPU %MEM TIME+ COMMAND
11 root 20 0 7260 92 0 R 7.0 0.0 0:11.83 stress
14 root 20 0 7260 92 0 R 7.0 0.0 0:11.84 stress
6 root 20 0 7260 92 0 R 6.7 0.0 0:11.83 stress
7 root 20 0 7260 92 0 R 6.7 0.0 0:11.83 stress
8 root 20 0 7260 92 0 R 6.7 0.0 0:11.84 stress
9 root 20 0 7260 92 0 R 6.7 0.0 0:11.84 stress
10 root 20 0 7260 92 0 R 6.3 0.0 0:11.83 stress
12 root 20 0 7260 92 0 R 6.3 0.0 0:11.82 stress
13 root 20 0 7260 92 0 R 6.3 0.0 0:11.83 stress
15 root 20 0 7260 92 0 R 6.3 0.0 0:11.83 stress
1 root 20 0 7260 640 548 S 0.0 0.0 0:00.01 stress
16 root 20 0 11748 1796 1444 S 0.0 0.0 0:00.01 bash
31 root 20 0 51872 1940 1408 R 0.0 0.1 0:00.00 top
开启了10 个stress 进程,目的是充分让系统资源变得紧张。只有这样竞争资源,设定的资源比例才可以显现出来。如果只运行一个进行,会自动分配到空闲的CPU,这样比例就无法看出来。由于案例的环境不一样,可能导致上面两张图中占用CPU 百分比会不同,但是从cpu share 来看两个容器总比例一定会是1:2。
[root@localhost ~]# docker exec -it 8a /bin/bash
[root@8a0048522072 /]# top
top - 02:47:53 up 5:47, 0 users, load average: 20.04, 12.21, 5.38
Tasks: 13 total, 11 running, 2 sleeping, 0 stopped, 0 zombie
%Cpu(s): 98.2 us, 1.8 sy, 0.0 ni, 0.0 id, 0.0 wa, 0.0 hi, 0.0 si, 0.0 st
KiB Mem : 3861056 total, 846756 free, 292548 used, 2721752 buff/cache
KiB Swap: 2097148 total, 2097148 free, 0 used. 2961828 avail Mem
PID USER PR NI VIRT RES SHR S %CPU %MEM TIME+ COMMAND
9 root 20 0 7260 92 0 R 3.7 0.0 0:15.21 stress
12 root 20 0 7260 92 0 R 3.7 0.0 0:15.21 stress
14 root 20 0 7260 92 0 R 3.7 0.0 0:15.20 stress
6 root 20 0 7260 92 0 R 3.3 0.0 0:15.20 stress
7 root 20 0 7260 92 0 R 3.3 0.0 0:15.19 stress
10 root 20 0 7260 92 0 R 3.3 0.0 0:15.20 stress
13 root 20 0 7260 92 0 R 3.3 0.0 0:15.19 stress
15 root 20 0 7260 92 0 R 3.3 0.0 0:15.21 stress
8 root 20 0 7260 92 0 R 3.0 0.0 0:15.19 stress
11 root 20 0 7260 92 0 R 3.0 0.0 0:15.19 stress
1 root 20 0 7260 640 548 S 0.0 0.0 0:00.01 stress
16 root 20 0 11772 1896 1500 S 0.0 0.0 0:00.01 bash
31 root 20 0 51872 1944 1408 R 0.0 0.1 0:00.00 top
CPU周期限制
cpu-period 和cpu-quota 的单位为微秒(μs)。cpu-period 的最小值为1000 微秒,
最大值为1 秒(10^6 μs),默认值为0.1 秒(100000 μs)。cpu-quota 的值默认为-1,
表示不做控制。cpu-period、cpu-quota 这两个参数一般联合使用。
[root@localhost ~]# docker run -it --cpu-period 100000 --cpu-quota 200000 centos:stress /bin/bash
[root@67f52c4e2d20 /]# cat /sys/fs/cgroup/cpu/cpu.cfs_period_us
100000
[root@67f52c4e2d20 /]# cat /sys/fs/cgroup/cpu/cpu.cfs_quota_us
200000
CPU 配额控制参数的混合案例
通过--cpuset-cpus 指定容器A 使用CPU 内核0,容器B 只是用CPU 内核1。在主机上只有这两个容器使用对应CPU 内核的情况,它们各自占用全部的内核资源,--cpu-shares 没有明显效果。
--cpuset-cpus、--cpuset-mems 参数只在多核、多内存节点上的服务器上有效,并且必须与实际的物理配置匹配,否则也无法达到资源控制的目的。
在系统具有多个CPU 内核的情况下,需要通过cpuset-cpus 为容器CPU 内核才能比较方便地进行测试。
[root@localhost ~]# docker run -itd --name cpu0 --cpuset-cpus 0 --cpu-shares 512 centos:stress stress -c 1
d3734959ddb9a118d857a5d7d35b426b697b3d6a09670e6041096a74c17b6c4f
[root@localhost ~]# docker ps -a
CONTAINER ID IMAGE COMMAND CREATED STATUS PORTS NAMES
d3734959ddb9 centos:stress "stress -c 1" About a minute ago Up 1 second cpu0
[root@localhost ~]# docker exec -it d37 /bin/bash
[root@d3734959ddb9 /]# top
top - 06:25:23 up 3:32, 0 users, load average: 0.42, 0.20, 0.48
Tasks: 4 total, 2 running, 2 sleeping, 0 stopped, 0 zombie
%Cpu(s): 6.3 us, 14.6 sy, 0.0 ni, 79.1 id, 0.0 wa, 0.0 hi, 0.1 si, 0.0 st
KiB Mem : 3861048 total, 415924 free, 251640 used, 3193484 buff/cache
KiB Swap: 2097148 total, 2096884 free, 264 used. 2961148 avail Mem
PID USER PR NI VIRT RES SHR S %CPU %MEM TIME+ COMMAND
6 root 20 0 7260 92 0 R 100.0 0.0 0:08.09 stress
1 root 20 0 7260 432 352 S 0.0 0.0 0:00.00 stress
7 root 20 0 11772 1804 1444 S 0.0 0.0 0:00.01 bash
21 root 20 0 51868 1896 1388 R 0.0 0.0 0:00.00 top
内存限制
与操作系统类似,容器可使用的内存包括两部分:物理内存和swap。Docker 通过下面两组参数来控制容器内存的使用量。
- -m 或--memory:设置内存的使用限额,例如100M, 1024M。
- --memory-swap:设置内存swap 的使用限额。
当执行如下命令:
其含义是允许该容器最多使用200M 的内存和300M 的swap。
[root@localhost ~]# docker run -it -m 200M --memory-swap=300M progrium/stress --vm 1 --vm-bytes 280M
Unable to find image 'progrium/stress:latest' locally
Trying to pull repository docker.io/progrium/stress ...
latest: Pulling from docker.io/progrium/stress
a3ed95caeb02: Pull complete
871c32dbbb53: Pull complete
dbe7819a64dd: Pull complete
d14088925c6e: Pull complete
58026d51efe4: Pull complete
7d04a4fe1405: Pull complete
1775fca35fb6: Pull complete
5c319e267908: Pull complete
Digest: sha256:e34d56d60f5caae79333cee395aae93b74791d50e3841986420d23c2ee4697bf
Status: Downloaded newer image for docker.io/progrium/stress:latest
stress: info: [1] dispatching hogs: 0 cpu, 0 io, 1 vm, 0 hdd
stress: dbug: [1] using backoff sleep of 3000us
stress: dbug: [1] --> hogvm worker 1 [6] forked
stress: dbug: [6] allocating 293601280 bytes ...
stress: dbug: [6] touching bytes in strides of 4096 bytes ...
stress: dbug: [6] freed 293601280 bytes
stress: dbug: [6] allocating 293601280 bytes ...
stress: dbug: [6] touching bytes in strides of 4096 bytes ...
stress: dbug: [6] freed 293601280 bytes
stress: dbug: [6] allocating 293601280 bytes ...
stress: dbug: [6] touching bytes in strides of 4096 bytes ...
stress: dbug: [6] freed 293601280 bytes
stress: dbug: [6] allocating 293601280 bytes ...
stress: dbug: [6] touching bytes in strides of 4096 bytes ...
stress: dbug: [6] freed 293601280 bytes
stress: dbug: [6] allocating 293601280 bytes ...
stress: dbug: [6] touching bytes in strides of 4096 bytes ...
stress: dbug: [6] freed 293601280 bytes
stress: dbug: [6] allocating 293601280 bytes ...
stress: dbug: [6] touching bytes in strides of 4096 bytes ...
- --vm 1:启动1 个内存工作线程。
- --vm-bytes 280M:每个线程分配280M 内存。
默认情况下,容器可以使用主机上的所有空闲内存。与CPU 的cgroups 配置类似,docker 会自动为容器在目录/sys/fs/cgroup/memory/docker/<容器的完整长ID>中创建相应cgroup 配置文件。
因为280M 在可分配的范围(300M)内,所以工作线程能够正常工作,其过程是:
- 分配280M 内存。
- 释放280M 内存。
- 再分配280M 内存。
- 再释放280M 内存。
- 一直循环......
如果让工作线程分配的内存超过300M,分配的内存超过限额,stress 线程报错,容器退出。
[root@localhost ~]# docker run -it -m 200M --memory-swap=300M progrium/stress --vm 1 --vm-bytes 380M
stress: info: [1] dispatching hogs: 0 cpu, 0 io, 1 vm, 0 hdd
stress: dbug: [1] using backoff sleep of 3000us
stress: dbug: [1] --> hogvm worker 1 [6] forked
stress: dbug: [6] allocating 398458880 bytes ...
stress: dbug: [6] touching bytes in strides of 4096 bytes ...
stress: FAIL: [1] (416) <-- worker 6 got signal 9
stress: WARN: [1] (418) now reaping child worker processes
stress: FAIL: [1] (422) kill error: No such process
stress: FAIL: [1] (452) failed run completed in 1s
Block IO 的限制
默认情况下,所有容器能平等地读写磁盘,可以通过设置--blkio-weight 参数来改变容器block IO 的优先级。
--blkio-weight 与--cpu-shares 类似,设置的是相对权重值,默认为500。在下面的例子中,容器A 读写磁盘的带宽是容器B 的两倍。
[root@localhost ~]# docker run -it --name container_A --blkio-weight 600 centos:stress /bin/bash
[root@ee06408457d8 /]# cat /sys/fs/cgroup/blkio/blkio.weight
600
[root@localhost ~]# docker run -it --name container_B --blkio-weight 300 centos:stress /bin/bash
[root@0ad7376f831b /]# cat /sys/fs/cgroup/blkio/blkio.weight
300
限制bps 和iops
如果在一台服务器上进行容器的混合部署,那么会存在同时几个程序写磁盘数据的情况,这时可以通过--device-write-iops选项来限制每秒写io次数来限制制定设备的写速度。相应的还有--device-read-iops选项可以限制读取IO的速度,但是这种方法只能限制设备,而不能限制分区,相应的Cgroup写配置文件为/sys/fs/cgroup/blkio/容器ID/ blkio.throttle.write_iops_device。
- bps 是byte per second,每秒读写的数据量。
- iops 是io per second,每秒IO 的次数。
[root@localhost ~]# docker run -it --device-write-bps /dev/sda:5MB centos:stress /bin/bash
[root@bef94b99dc95 /]# dd if=/dev/zero of=test bs=1M count=100 oflag=direct
100+0 records in
100+0 records out
104857600 bytes (105 MB) copied, 20.0237 s, 5.2 MB/s


![[深度学习] GPU处理能力(TFLOPS/TOPS)](https://img-blog.csdnimg.cn/88f630201e5f4a26877de460331d60bf.png)