DOS 简介
DOS是Disk Operating System的缩写,即“磁盘操作系统”。DOS主要是一种面向磁盘的系统软件,有了DOS,我们就可以更容易理解怎么给机器下命令,不必去深入了解机器的硬件结构,也不必去死记硬背那些枯燥2进制数字的机器命令,只需通过一些接近于英语的DOS命令,我们就可以轻松地完成绝大多数的日常操作。
DOS命令,是DOS操作系统的命令,是一种面向磁盘的操作命令,主要包括目录操作类命令、磁盘操作类命令、文件操作类命令和其它命令。
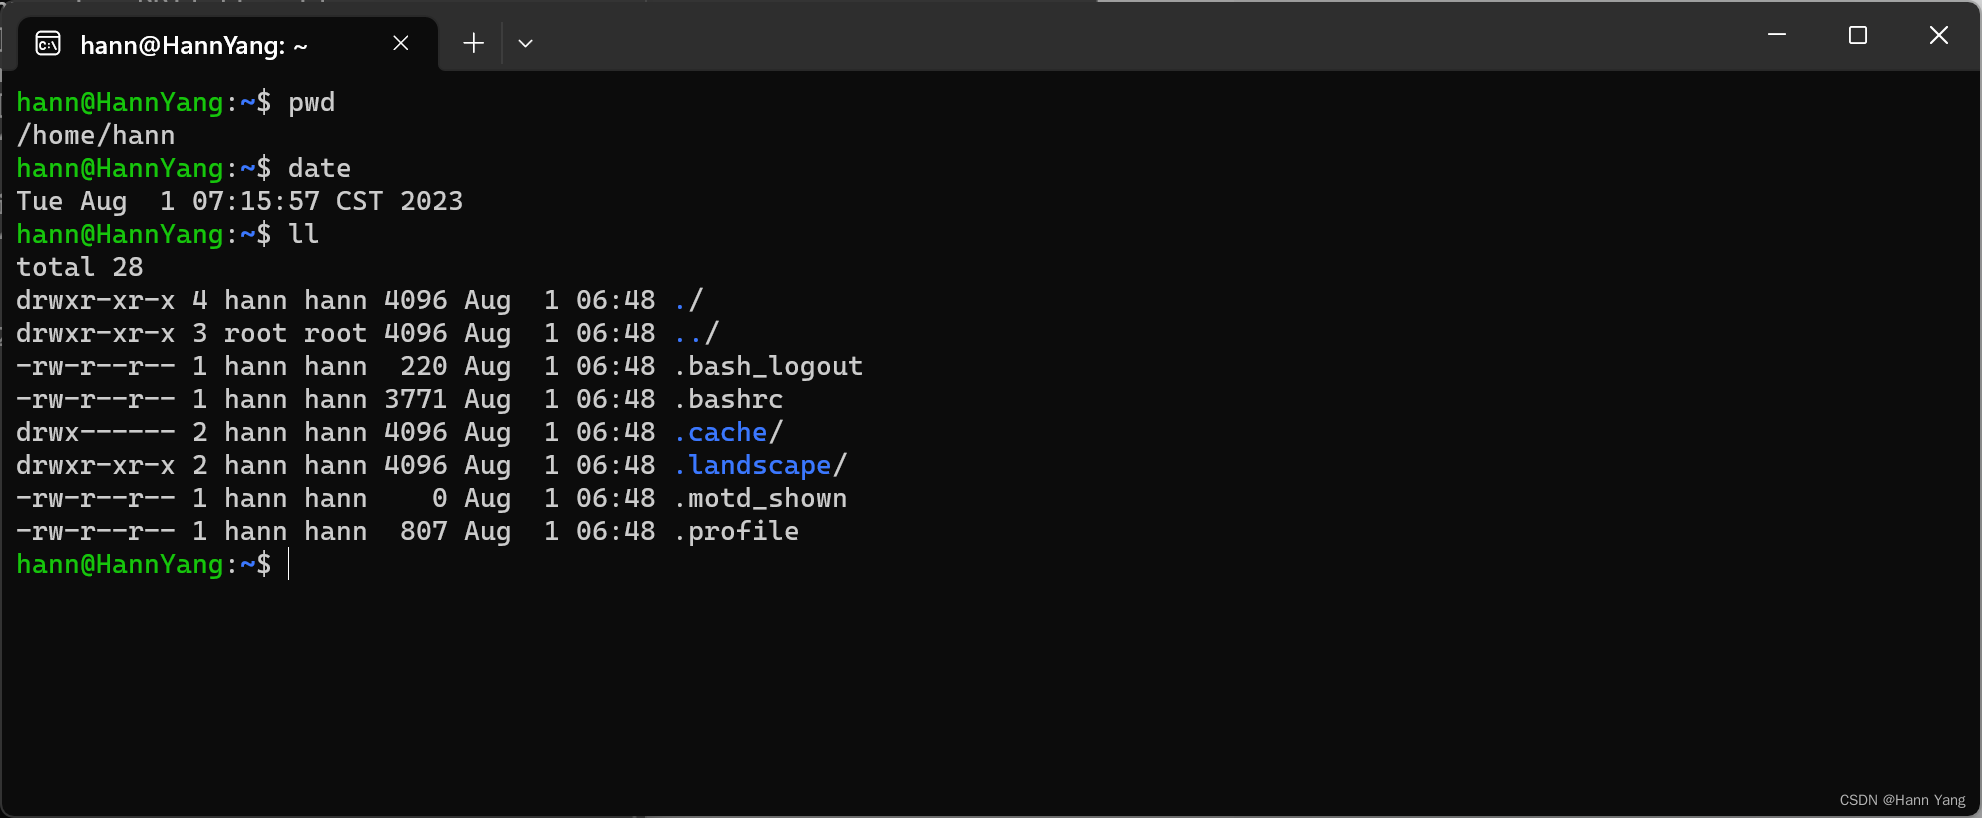
DOS 命令行调用
在Windows系统中三种方法调用:
①快捷键win+R,调出“运行”对话框,输入cmd(推荐) ,回车;
②资源管理器地址栏输入cmd——>回车——>选择打开或以管理员身份运行(获得最高权限);
③双击C:\Windows\System32\cmd.exe。
DOS 支持函数类别
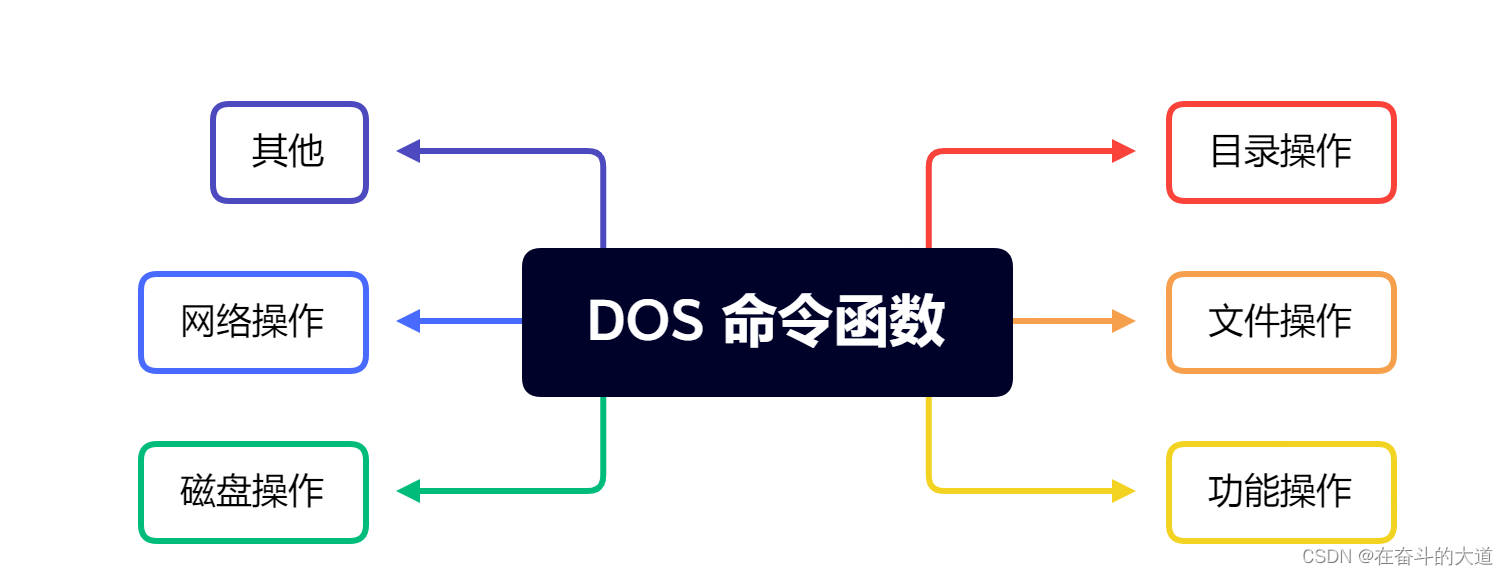
在线DOS函数查询手册
DOS 常用函数简介
 1. 命令 /?       #查看帮助
 2. exit		  #退出终端
 3. start		  #启动一个单独的窗口以运行指定的程序或命令
 4. dir			  #查看当前目录下的所有文件
 5. tree		  #以树形结构显示出目录,用参数-f 将列出第个文件夹中文件名称
 6. slmgr.vbs /xpr    #查看windows激活权限;
 7. cd        #切换目录
 8. cd /d d:\software     #切换目录至d盘的software下
 9. cd ..			#返回上一级目录(chang directory)
 10. chdir			#显示当前目录名
 11. cls         	#清除屏幕(clear screen)
 12. md+空格+目录名  #创建目录(make directory)
 13. rd 			# 删除目录(remove directory)
 14. del+空格+文件名+扩展名				#删除文件
 15. copy  源文件路径 目标文件路径		#复制文件
 16. move  源文件路径 目标文件路径		#移动文件
 17. ren  源文件路径 目标文件路径			#重命名文件
 18. ipconfig				 #查看电脑的ip
 19. ipconfig /all           #显示详细信息
 20. ipconfig /renew     	 #更新所有适配器
 21. ipconfig /release    	 #释放指定适配器的 IPv4 地址
 22. ipconfig /displaydns    #显示 DNS 解析程序缓存的内容
 23. ipconfig /flushdns      #清除 DNS 解析程序缓存
 24. ping 			#检测网络的连通情况和分析网络速度
 25. nslookup		#查询DNS的记录,查看域名解析是否正常,在网络故障的时候用来诊断网络问题,可指定dns服务器
 26. nslookup www.baidu.com
 27. nslookup -qt=a www.baidu.com ip  #指定解析的域名服务器
 28. tracert						  #路由追踪命令(例:tracert www.baidu.com)
 29. netsh wlan show profiles		  #查看所有连接过的无线网络名称
 30. netsh wlan show profiles 无线名称 key =clear		#查看无线网络名称、密码
 31. nslookup		#IP地址侦测器
 32. netstat		#显示协议统计信息和当前 TCP/IP 网络连接
DOS 应用快捷指令
 1. Systeminfo		#显示关于计算机及其操作系统的详细配置信息,包括操作系统配置、安全信息、产品 ID 和硬件属性,如 RAM、磁盘空间和网卡等信息;
 2. set 			#显示当前所有的环境变量
 3. path  			#路径可执行文件的文件名 为可执行文件设置一个路径
 4. calc			#打开计算机
 5. notepad 	    #打开记事本
 6. mspaint		#打开画图工具
 7. explorer		#打开资源管理器
 8. dvdplay  		#DVD播放器
 9. taskmgr   		#打开任务管理器
 10. gpedit.msc		#打开本地组策略编辑器
 11. services.ms	#打开服务
 12. regedit        #打开注册表
 13. winver			#检查Windows版本
 14. mstsc 			#远程桌面连接
 15. mmc 			#打开控制台
 16. chkdsk.exe     #打开Chkdsk磁盘检查
 17. osk			#打开屏幕键盘
 18. 快捷键win+R——>%temp%——>回车——>删除电脑运行的垃圾
PyQT 实现Windows 快捷指令
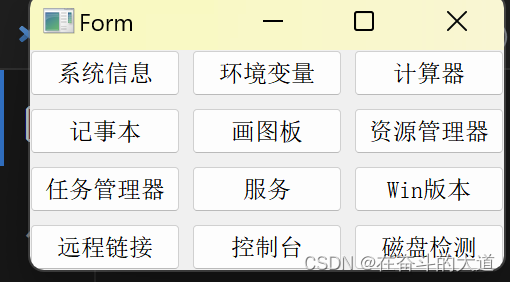
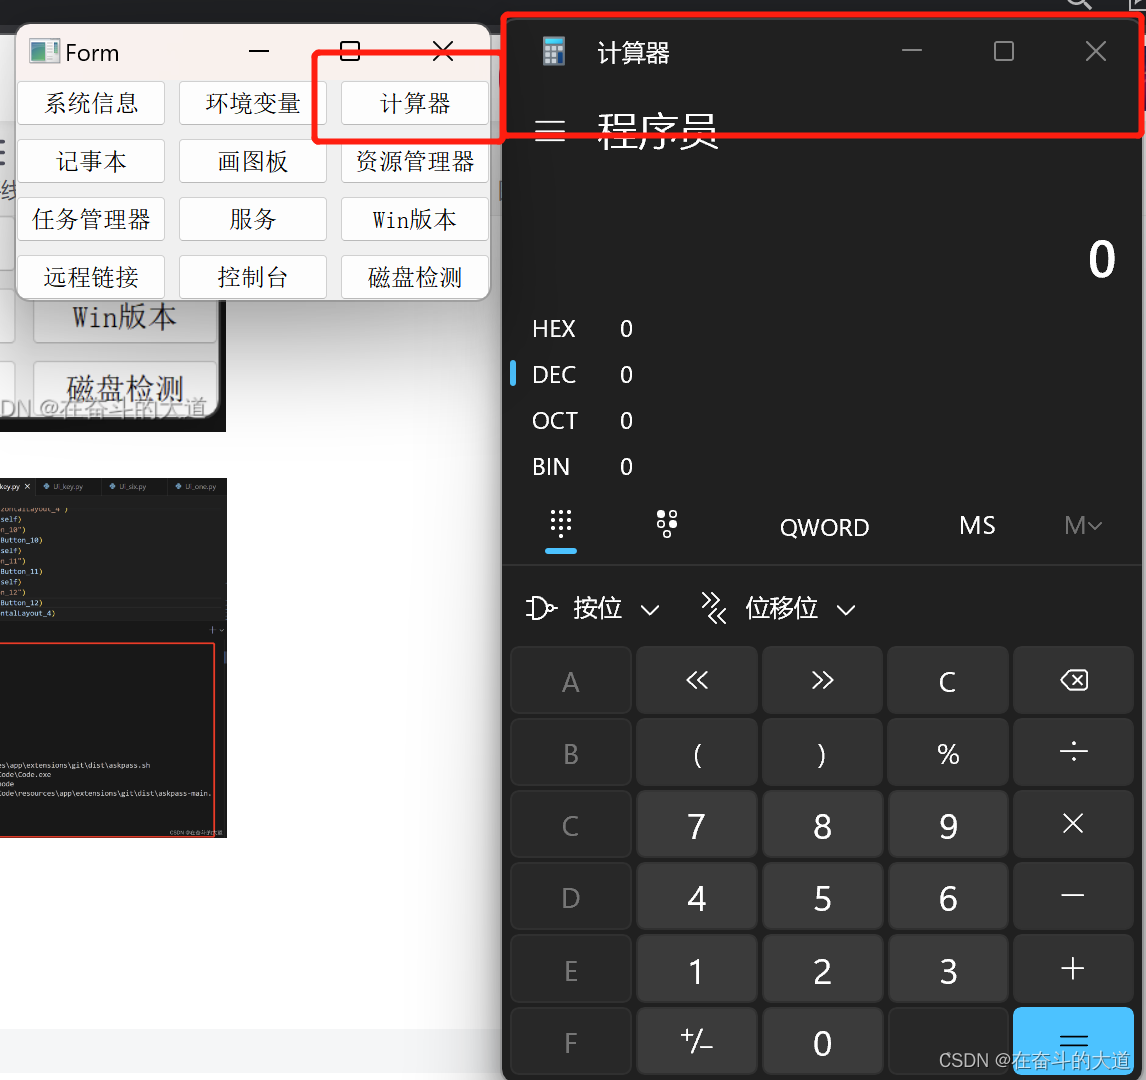
场景需求:老婆大人总是跟我抱怨Windows 的快捷指令太多,让我想办法解决她的需求痛点。
解决办法:基于PyQT + os 函数功能模块,实现Windows 快捷键九宫格功能。
效果截图:

PyQT UI文件和源代码
windows_key.ui
<?xml version="1.0" encoding="UTF-8"?>
<ui version="4.0">
 <class>Form</class>
 <widget class="QWidget" name="Form">
  <property name="geometry">
   <rect>
    <x>0</x>
    <y>0</y>
    <width>400</width>
    <height>300</height>
   </rect>
  </property>
  <property name="windowTitle">
   <string>Form</string>
  </property>
  <widget class="QWidget" name="">
   <property name="geometry">
    <rect>
     <x>30</x>
     <y>50</y>
     <width>241</width>
     <height>120</height>
    </rect>
   </property>
   <layout class="QVBoxLayout" name="verticalLayout_2">
    <item>
     <layout class="QHBoxLayout" name="horizontalLayout">
      <item>
       <widget class="QPushButton" name="pushButton">
        <property name="text">
         <string>系统信息</string>
        </property>
       </widget>
      </item>
      <item>
       <widget class="QPushButton" name="pushButton_2">
        <property name="text">
         <string>环境变量</string>
        </property>
       </widget>
      </item>
      <item>
       <widget class="QPushButton" name="pushButton_3">
        <property name="text">
         <string>计算器</string>
        </property>
       </widget>
      </item>
     </layout>
    </item>
    <item>
     <layout class="QHBoxLayout" name="horizontalLayout_2">
      <item>
       <widget class="QPushButton" name="pushButton_4">
        <property name="text">
         <string>记事本</string>
        </property>
       </widget>
      </item>
      <item>
       <widget class="QPushButton" name="pushButton_5">
        <property name="text">
         <string>画图板</string>
        </property>
       </widget>
      </item>
      <item>
       <widget class="QPushButton" name="pushButton_6">
        <property name="text">
         <string>资源管理器</string>
        </property>
       </widget>
      </item>
     </layout>
    </item>
    <item>
     <layout class="QHBoxLayout" name="horizontalLayout_3">
      <item>
       <widget class="QPushButton" name="pushButton_7">
        <property name="text">
         <string>任务管理器</string>
        </property>
       </widget>
      </item>
      <item>
       <widget class="QPushButton" name="pushButton_8">
        <property name="text">
         <string>服务</string>
        </property>
       </widget>
      </item>
      <item>
       <widget class="QPushButton" name="pushButton_9">
        <property name="text">
         <string>Win版本</string>
        </property>
       </widget>
      </item>
     </layout>
    </item>
    <item>
     <layout class="QHBoxLayout" name="horizontalLayout_4">
      <item>
       <widget class="QPushButton" name="pushButton_10">
        <property name="text">
         <string>远程链接</string>
        </property>
       </widget>
      </item>
      <item>
       <widget class="QPushButton" name="pushButton_11">
        <property name="text">
         <string>控制台</string>
        </property>
       </widget>
      </item>
      <item>
       <widget class="QPushButton" name="pushButton_12">
        <property name="text">
         <string>磁盘检测</string>
        </property>
       </widget>
      </item>
     </layout>
    </item>
   </layout>
  </widget>
 </widget>
 <resources/>
 <connections>
  <connection>
   <sender>pushButton</sender>
   <signal>clicked()</signal>
   <receiver>Form</receiver>
   <slot>close()</slot>
   <hints>
    <hint type="sourcelabel">
     <x>69</x>
     <y>63</y>
    </hint>
    <hint type="destinationlabel">
     <x>199</x>
     <y>149</y>
    </hint>
   </hints>
  </connection>
  <connection>
   <sender>pushButton_10</sender>
   <signal>clicked()</signal>
   <receiver>Form</receiver>
   <slot>close()</slot>
   <hints>
    <hint type="sourcelabel">
     <x>69</x>
     <y>156</y>
    </hint>
    <hint type="destinationlabel">
     <x>199</x>
     <y>149</y>
    </hint>
   </hints>
  </connection>
  <connection>
   <sender>pushButton_11</sender>
   <signal>clicked()</signal>
   <receiver>Form</receiver>
   <slot>close()</slot>
   <hints>
    <hint type="sourcelabel">
     <x>150</x>
     <y>156</y>
    </hint>
    <hint type="destinationlabel">
     <x>199</x>
     <y>149</y>
    </hint>
   </hints>
  </connection>
  <connection>
   <sender>pushButton_12</sender>
   <signal>clicked()</signal>
   <receiver>Form</receiver>
   <slot>close()</slot>
   <hints>
    <hint type="sourcelabel">
     <x>231</x>
     <y>156</y>
    </hint>
    <hint type="destinationlabel">
     <x>199</x>
     <y>149</y>
    </hint>
   </hints>
  </connection>
  <connection>
   <sender>pushButton_2</sender>
   <signal>clicked()</signal>
   <receiver>Form</receiver>
   <slot>close()</slot>
   <hints>
    <hint type="sourcelabel">
     <x>150</x>
     <y>63</y>
    </hint>
    <hint type="destinationlabel">
     <x>199</x>
     <y>149</y>
    </hint>
   </hints>
  </connection>
  <connection>
   <sender>pushButton_3</sender>
   <signal>clicked()</signal>
   <receiver>Form</receiver>
   <slot>close()</slot>
   <hints>
    <hint type="sourcelabel">
     <x>231</x>
     <y>63</y>
    </hint>
    <hint type="destinationlabel">
     <x>199</x>
     <y>149</y>
    </hint>
   </hints>
  </connection>
  <connection>
   <sender>pushButton_4</sender>
   <signal>clicked()</signal>
   <receiver>Form</receiver>
   <slot>close()</slot>
   <hints>
    <hint type="sourcelabel">
     <x>69</x>
     <y>94</y>
    </hint>
    <hint type="destinationlabel">
     <x>199</x>
     <y>149</y>
    </hint>
   </hints>
  </connection>
  <connection>
   <sender>pushButton_5</sender>
   <signal>clicked()</signal>
   <receiver>Form</receiver>
   <slot>close()</slot>
   <hints>
    <hint type="sourcelabel">
     <x>150</x>
     <y>94</y>
    </hint>
    <hint type="destinationlabel">
     <x>199</x>
     <y>149</y>
    </hint>
   </hints>
  </connection>
  <connection>
   <sender>pushButton_6</sender>
   <signal>clicked()</signal>
   <receiver>Form</receiver>
   <slot>close()</slot>
   <hints>
    <hint type="sourcelabel">
     <x>231</x>
     <y>94</y>
    </hint>
    <hint type="destinationlabel">
     <x>199</x>
     <y>149</y>
    </hint>
   </hints>
  </connection>
  <connection>
   <sender>pushButton_7</sender>
   <signal>clicked()</signal>
   <receiver>Form</receiver>
   <slot>close()</slot>
   <hints>
    <hint type="sourcelabel">
     <x>69</x>
     <y>125</y>
    </hint>
    <hint type="destinationlabel">
     <x>199</x>
     <y>149</y>
    </hint>
   </hints>
  </connection>
  <connection>
   <sender>pushButton_8</sender>
   <signal>clicked()</signal>
   <receiver>Form</receiver>
   <slot>close()</slot>
   <hints>
    <hint type="sourcelabel">
     <x>150</x>
     <y>125</y>
    </hint>
    <hint type="destinationlabel">
     <x>199</x>
     <y>149</y>
    </hint>
   </hints>
  </connection>
  <connection>
   <sender>pushButton_9</sender>
   <signal>clicked()</signal>
   <receiver>Form</receiver>
   <slot>close()</slot>
   <hints>
    <hint type="sourcelabel">
     <x>231</x>
     <y>125</y>
    </hint>
    <hint type="destinationlabel">
     <x>199</x>
     <y>149</y>
    </hint>
   </hints>
  </connection>
 </connections>
</ui>
UI_windows_key.py
# -*- coding: utf-8 -*-

# Form implementation generated from reading ui file 'e:\py_workspace\py-qt-demo\windows_key.ui'
#
# Created by: PyQt5 UI code generator 5.15.9
#
# WARNING: Any manual changes made to this file will be lost when pyuic5 is
# run again.  Do not edit this file unless you know what you are doing.
import sys
import os
from PyQt5 import QtCore, QtWidgets
from PyQt5.QtWidgets import QApplication, QWidget

class Ui_Form(QWidget):
    def __init__(self):
        super().__init__()
        self.setupUi()

    def setupUi(self):
        self.setObjectName("Form")
        self.resize(400, 300)
        self.setGeometry(QtCore.QRect(30, 50, 241, 120))
        self.setObjectName("widget")

        self.verticalLayout_2 = QtWidgets.QVBoxLayout(self)
        self.verticalLayout_2.setContentsMargins(0, 0, 0, 0)
        self.verticalLayout_2.setObjectName("verticalLayout_2")

        self.horizontalLayout = QtWidgets.QHBoxLayout()
        self.horizontalLayout.setObjectName("horizontalLayout")
        self.pushButton = QtWidgets.QPushButton(self)
        self.pushButton.setObjectName("pushButton")
        self.horizontalLayout.addWidget(self.pushButton)
        self.pushButton_2 = QtWidgets.QPushButton(self)
        self.pushButton_2.setObjectName("pushButton_2")
        self.horizontalLayout.addWidget(self.pushButton_2)
        self.pushButton_3 = QtWidgets.QPushButton(self)
        self.pushButton_3.setObjectName("pushButton_3")
        self.horizontalLayout.addWidget(self.pushButton_3)
        self.verticalLayout_2.addLayout(self.horizontalLayout)

        self.horizontalLayout_2 = QtWidgets.QHBoxLayout()
        self.horizontalLayout_2.setObjectName("horizontalLayout_2")
        self.pushButton_4 = QtWidgets.QPushButton(self)
        self.pushButton_4.setObjectName("pushButton_4")
        self.horizontalLayout_2.addWidget(self.pushButton_4)
        self.pushButton_5 = QtWidgets.QPushButton(self)
        self.pushButton_5.setObjectName("pushButton_5")
        self.horizontalLayout_2.addWidget(self.pushButton_5)
        self.pushButton_6 = QtWidgets.QPushButton(self)
        self.pushButton_6.setObjectName("pushButton_6")
        self.horizontalLayout_2.addWidget(self.pushButton_6)
        self.verticalLayout_2.addLayout(self.horizontalLayout_2)

        self.horizontalLayout_3 = QtWidgets.QHBoxLayout()
        self.horizontalLayout_3.setObjectName("horizontalLayout_3")
        self.pushButton_7 = QtWidgets.QPushButton(self)
        self.pushButton_7.setObjectName("pushButton_7")
        self.horizontalLayout_3.addWidget(self.pushButton_7)
        self.pushButton_8 = QtWidgets.QPushButton(self)
        self.pushButton_8.setObjectName("pushButton_8")
        self.horizontalLayout_3.addWidget(self.pushButton_8)
        self.pushButton_9 = QtWidgets.QPushButton(self)
        self.pushButton_9.setObjectName("pushButton_9")
        self.horizontalLayout_3.addWidget(self.pushButton_9)
        self.verticalLayout_2.addLayout(self.horizontalLayout_3)

        self.horizontalLayout_4 = QtWidgets.QHBoxLayout()
        self.horizontalLayout_4.setObjectName("horizontalLayout_4")
        self.pushButton_10 = QtWidgets.QPushButton(self)
        self.pushButton_10.setObjectName("pushButton_10")
        self.horizontalLayout_4.addWidget(self.pushButton_10)
        self.pushButton_11 = QtWidgets.QPushButton(self)
        self.pushButton_11.setObjectName("pushButton_11")
        self.horizontalLayout_4.addWidget(self.pushButton_11)
        self.pushButton_12 = QtWidgets.QPushButton(self)
        self.pushButton_12.setObjectName("pushButton_12")
        self.horizontalLayout_4.addWidget(self.pushButton_12)
        self.verticalLayout_2.addLayout(self.horizontalLayout_4)

        self.retranslateUi()
        self.pushButton.clicked.connect(self.getSystemInfo) # type: ignore
        self.pushButton_10.clicked.connect(self.getMstsc) # type: ignore
        self.pushButton_11.clicked.connect(self.getMmc) # type: ignore
        self.pushButton_12.clicked.connect(self.getChkdsk) # type: ignore
        self.pushButton_2.clicked.connect(self.getSet) # type: ignore
        self.pushButton_3.clicked.connect(self.getCalc) # type: ignore
        self.pushButton_4.clicked.connect(self.getNotepad) # type: ignore
        self.pushButton_5.clicked.connect(self.getMsPaint) # type: ignore
        self.pushButton_6.clicked.connect(self.getExplorer) # type: ignore
        self.pushButton_7.clicked.connect(self.getTaskmgr) # type: ignore
        self.pushButton_8.clicked.connect(self.getServices) # type: ignore
        self.pushButton_9.clicked.connect(self.getWin) # type: ignore
        QtCore.QMetaObject.connectSlotsByName(self)

    def retranslateUi(self):
        _translate = QtCore.QCoreApplication.translate
        self.setWindowTitle(_translate("Form", "Form"))
        self.pushButton.setText(_translate("Form", "系统信息"))
        self.pushButton_2.setText(_translate("Form", "环境变量"))
        self.pushButton_3.setText(_translate("Form", "计算器"))
        self.pushButton_4.setText(_translate("Form", "记事本"))
        self.pushButton_5.setText(_translate("Form", "画图板"))
        self.pushButton_6.setText(_translate("Form", "资源管理器"))
        self.pushButton_7.setText(_translate("Form", "任务管理器"))
        self.pushButton_8.setText(_translate("Form", "服务"))
        self.pushButton_9.setText(_translate("Form", "Win版本"))
        self.pushButton_10.setText(_translate("Form", "远程链接"))
        self.pushButton_11.setText(_translate("Form", "控制台"))
        self.pushButton_12.setText(_translate("Form", "磁盘检测"))

    def getSystemInfo(self):
        p = os.popen('Systeminfo')
        print("p.read(): {}\n".format(p.read()))

    def getSet(self):
        p = os.popen('set')
        print("p.read(): {}\n".format(p.read()))

    def getCalc(self):
        os.system('calc')

    def getNotepad(self):
        os.system('notepad')

    def getMsPaint(self):
        os.system('mspaint')

    def getExplorer(self):
        os.system("explorer")

    def getTaskmgr(self):
        os.system("taskmgr")

    def getServices(self):
        os.system("services.msc")

    def getWin(self):
        p = os.popen('winver')
        print("p.read(): {}\n".format(p.read()))

    def getMstsc(self):
        os.system("mstsc")

    def getMmc(self):
        os.system('mmc')

    def getChkdsk(self):
        os.system('chkdsk.exe')

if __name__ == '__main__':

    app = QApplication(sys.argv)

    w = Ui_Form()
    w.show()
    sys.exit(app.exec_())
至此,PyQT 实现Windows 快捷键小应用完毕。童鞋 们可以基于我提供的源码,设计自己的功能快捷键。
