Vue是渐进式的JavaScript框架,易学易用,性能出色,适用场景丰富的web前端框架,vue算是目前最火的web前端框架之一,使用vue可以提升开发体验。Vue组件可以按照两种不同的风格写,即选项式api和组合式api两种。
目录
一、vue开发准备
1.1、安装vscode和node
1.2、安装cli工具与创建vue项目
1.3、创建一个vue项目(最新)
1.4、Vue项目的目录结构
二、vue基础
2.1、模板语法
2.2、属性绑定
2.3、条件渲染
2.4、列表渲染
2.5、通过key管理状态
2.6、事件处理
2.7、数组变化的侦测
2.8、计算属性
2.9、Class绑定
2.10、Style绑定
2.11、侦听器
2.12、表单输入绑定
2.13、模板引用
三、深入组件
3.1、组件组成
3.2、组件嵌套关系
3.3、组件注册方式
3.4、组件传递数据
3.5、组件传递props检验
3.6、组件事件
3.7、组件事件+v-model
3.8、组件数据传递
3.9、插槽Slots
3.10、组件生命周期
3.11、组件生命周期应用
3.12、动态组件
3.13、组件保持存活
3.14、异步组件
3.15、Vue应用
四、第三方应用
4.1、Axios网络应用
4.2、Vue引入路配置
4.3、路由传递参数
五、Vue3新特性
5.1、vue3新特性1
5.2、vue3新特性2
六、ElementUI
6.1、vue3加载Element-plus
一、vue开发准备
1.1、安装vscode和node
我用的mac本,具体安装很简单,直接官网下载,然后下一步就行,直至安装成功。
1.2、安装cli工具与创建vue项目
vuecli是快速进行vue.js开发的标准工具,是一个基于vue.js开发的完整系统,用来快速创建vue的开发环境。
可以在命令行使用以下命令进行安装cli工具,不过需要先安装npm和cnpm才行,具体方法自行搜索,安装完成后使用该命令安装cli工具。

安装成功,如下所示。

使用下面指令创建一个名为vue-demo的vue项目。
vue create vue-demo
然后,使用cd命令切换到当前目录,并使用npm命令启动项目。

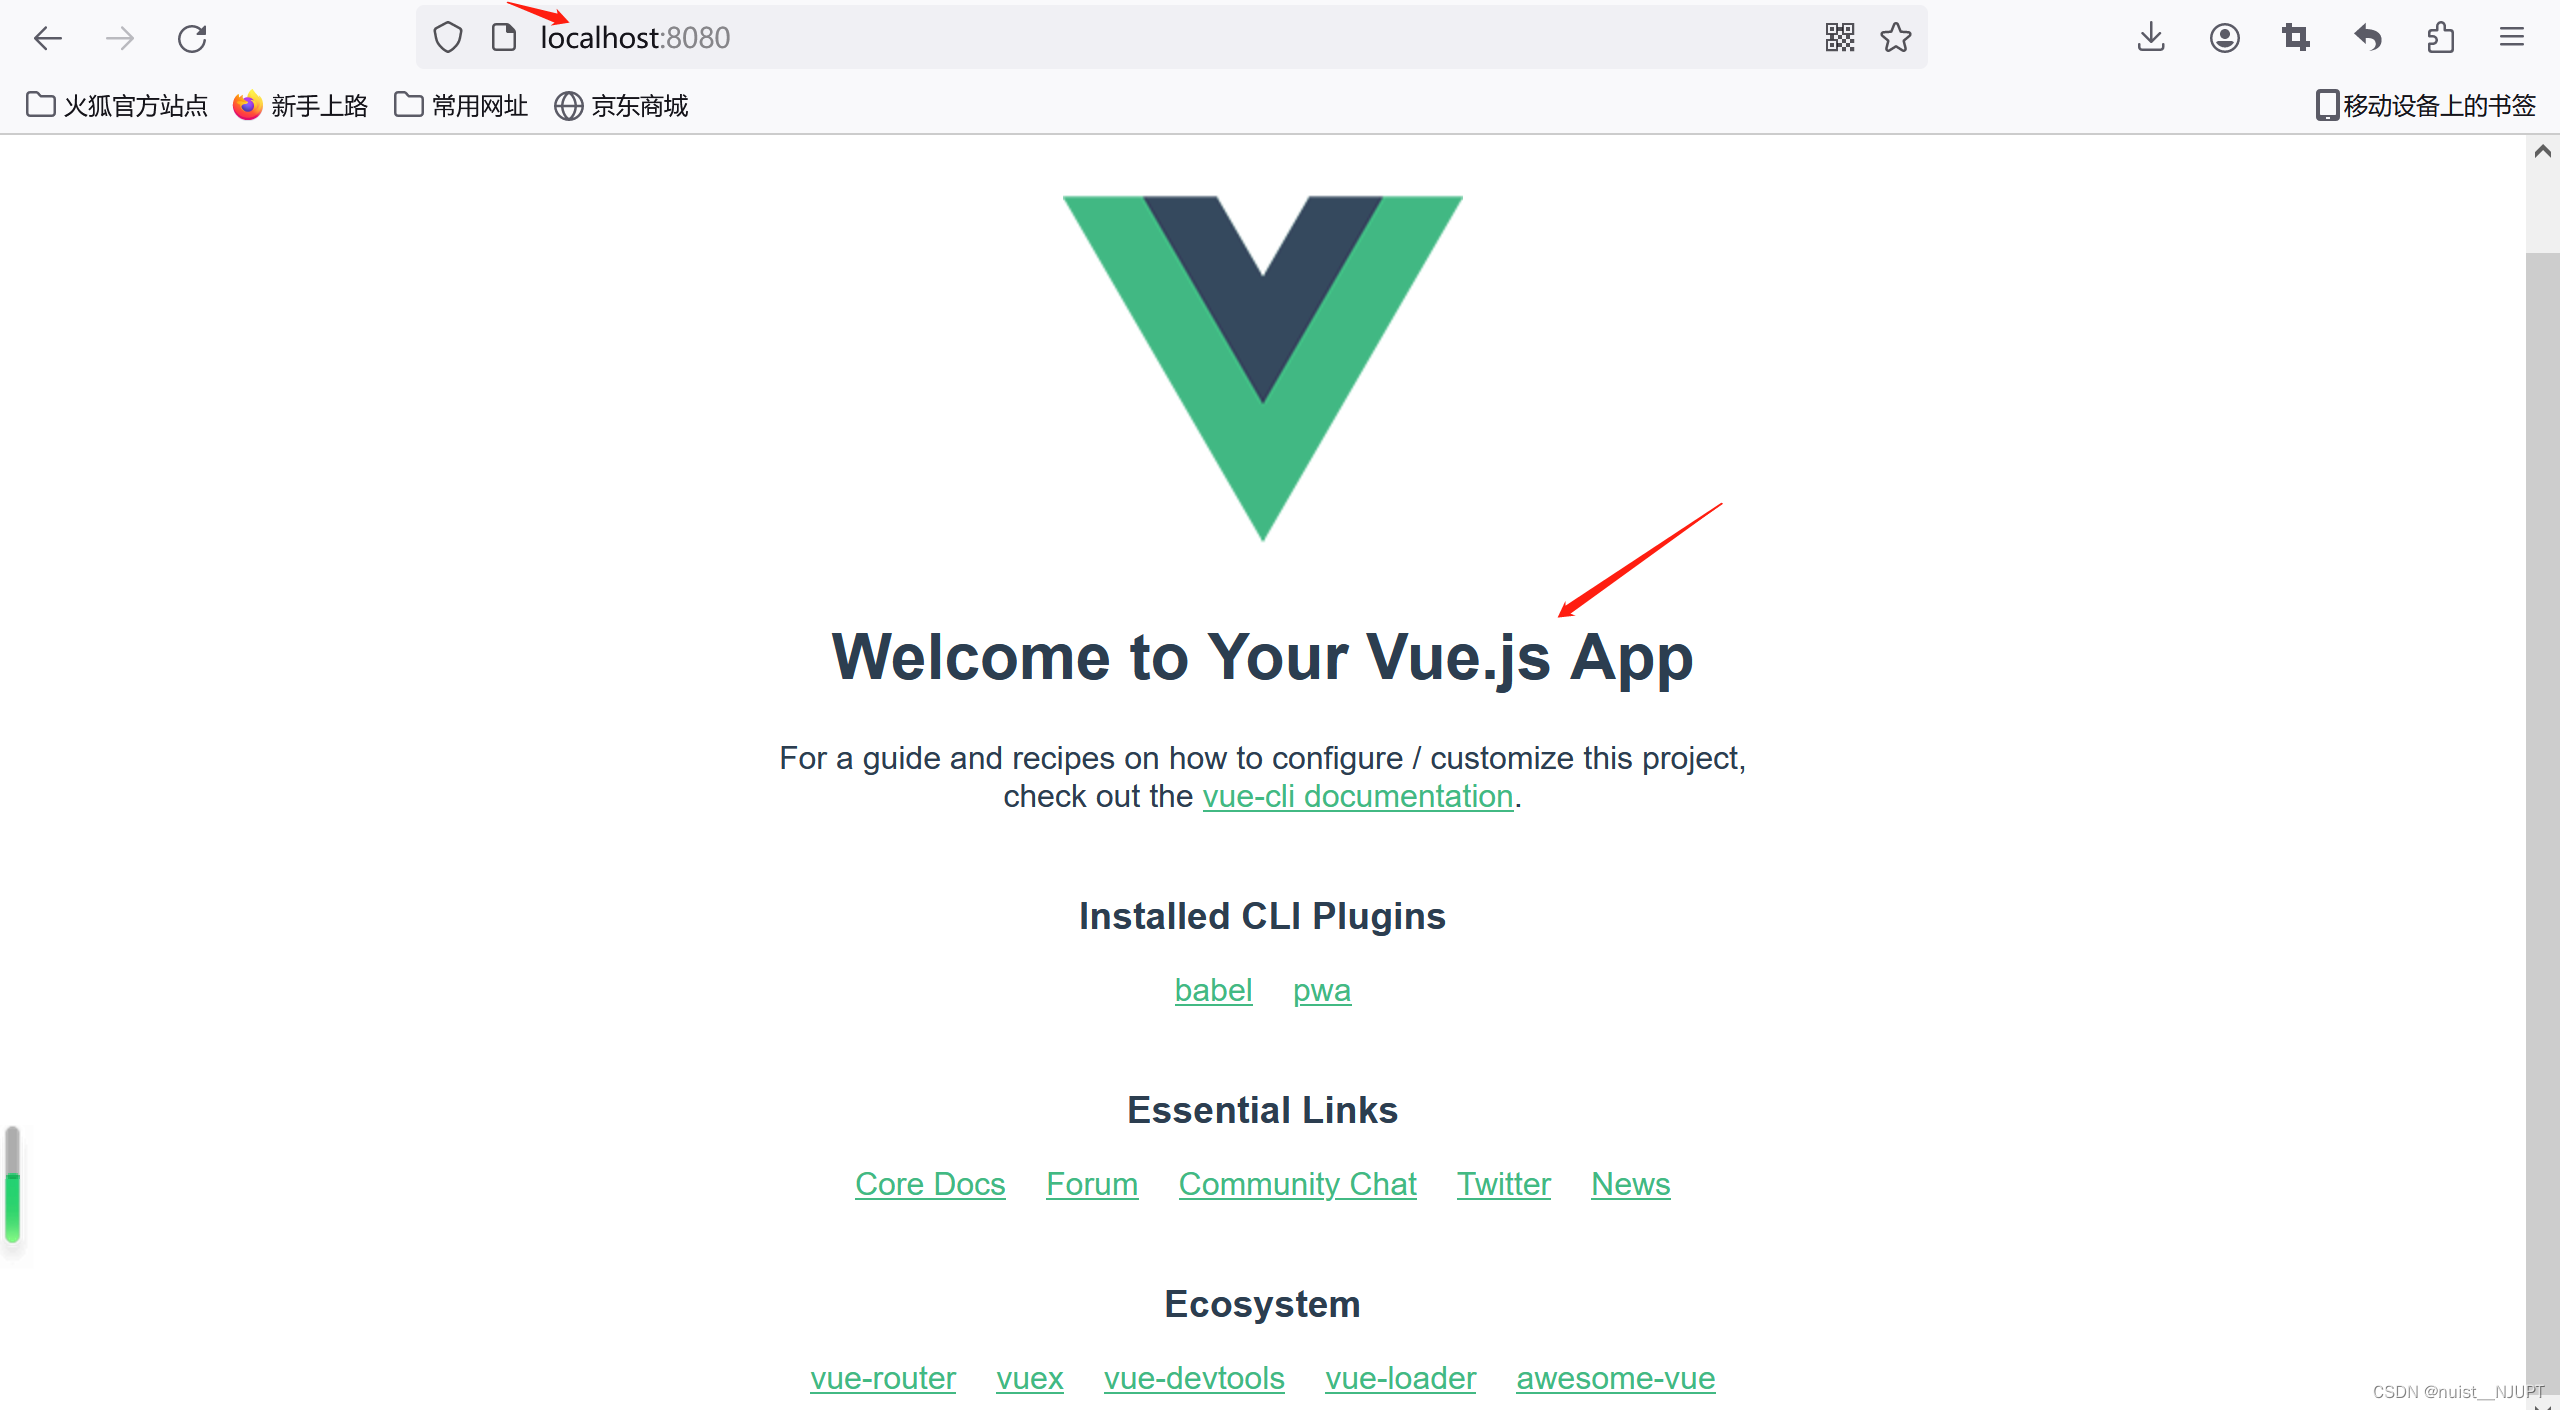
浏览器输入,如下表示启动项目成功。
1.3、创建一个vue项目(最新)
命令终端输入npm init vue@latest创建vue,提示信息都选N。
然后使用npm install安装项目支持的依赖文件,并使用npm run dev运行项目,看到如下页面表示项目运行成功。

1.4、Vue项目的目录结构
vue项目的目录结构如下所示,我们最关心的是src目录,后期的代码都是写在src目录下,当然其他目录结构用到的时候继续解释吧。

二、vue基础
2.1、模板语法
Vue 使用一种基于 HTML 的模板语法,使我们能够声明式地将其组件实例的数据绑定到呈现的 DOM 上。所有的 Vue 模板都是语法层面合法的 HTML,可以被符合规范的浏览器和 HTML 解析器解析。
在底层机制中,Vue 会将模板编译成高度优化的 JavaScript 代码。结合响应式系统,当应用状态变更时,Vue 能够智能地推导出需要重新渲染的组件的最少数量,并应用最少的 DOM 操作。
如果你对虚拟 DOM 的概念比较熟悉,并且偏好直接使用 JavaScript,你也可以结合可选的 JSX 支持直接手写渲染函数而不采用模板。但请注意,这将不会享受到和模板同等级别的编译时优化。
我们看一下模板语法,每个绑定仅支持单一表达式,也就是一段能够被求值的js代码,一个简单的判断方法是是否可以合法。

2.2、属性绑定
vue可以使用v-bind:指令进行动态绑定,当然也可以省略,直接使用:进行属性绑定,可以绑定单一属性,也可以同时绑定多个属性。
<template>
  <h2>我们一起学习属性绑定吧</h2>
  <div v-bind:id="dynamicId" :class="dynamicClass">单一属性绑定</div>
  <button :disabled="isDisabled">点击一下</button>
  <div :id="objectArr">多个属性绑定</div>
</template>

<script >
export default{
  data(){
    return{
     dynamicId : "appId",
     dynamicClass : "appClass",
     isDisabled : false,
     objectArr:{
      dynamicId : "appId",
      dynamicClass : "appClass"
     }
    }
  }
}
</script>

<style>
.appClass{
  color: rebeccapurple;
}
</style>
2.3、条件渲染
条件渲染的标签主要有v-if,v-else,v-else-if,v-show等,其实v-show和v-if的功能类似,都是控制标签是否显示,v-if有较高的切换开销,在切换时,条件区块内的时间监听器和子组件都会被销毁和重建,v-show只有css的display属性会被切换。
<template>
  <h2>我们一起学习条件渲染吧</h2>
  <div v-if="flag">当flag为true的时候您能看到我</div>
  <div v-else>当flag为false的时候您能看到我</div>
  <div v-if="type == 'A'">A</div>
  <div v-else-if="type == 'B'">B</div>
  <div v-else>not A/B</div>
</template>

<script >
export default{
  data(){
    return{
      flag : true,
      type : "D"
     }
    }
  }

</script>
2.4、列表渲染
使用v-for可以进行列表渲染,其中使用in或者of 从迭代对象中取值,对于数组一般有item和index,对于对象列表,一般有value,key,item三个。
<template>
  <h2>我们一起学习列表渲染吧</h2>
  <p v-for="(item, index) in names">{{ index }} - {{ item }}</p>
   <div v-for="item in results">
    <p>{{ item.title }}</p>
    <img :src="avator" alt="">
   </div>
   <div>
    <p v-for="(value, key, index) in userInfo">{{ index }} - {{ key }} : {{ value }}</p>
   </div>
</template>

<script >
export default{
  data(){
    return{
      names :["北京大学","清华大学","南京大学"],
      results:[
        {
          "id":1,
          "title":"北京",
          "avator":"https://www.baidu.com"

        },
        {
          "id":2,
          "title":"南京",
          "avator":"https://www.baidu.com"

        }
      ],
      userInfo:{
        username : "wang",
        password : "123"
      }
     }
    }
  }

</script>
2.5、通过key管理状态
Vue 默认按照就地更新的策略来通过v-for渲染列表元素,当数据项的顺序发生改变时,Vue不会随之移动DOM元素的顺序,而是就地更新每个元素,确保他们在指定的索引位置上渲染,一般我们需要给Vue一个提示,即提供一个key属性(id),用来跟踪每个节点的标识,减少对现有元素重排序的开销。
<template>
  <h2>我们一起学习列表渲染吧</h2>
  <p v-for="(item, index) in names">{{ index }} - {{ item }}</p>
   <div v-for="item in results" :key="item.id">
    <p>{{ item.title }}</p>
    <img :src="avator" alt="">
   </div>
   <div>
    <p v-for="(value, key, index) in userInfo">{{ index }} - {{ key }} : {{ value }}</p>
   </div>
</template>

<script >
export default{
  data(){
    return{
      names :["北京大学","清华大学","南京大学"],
      results:[
        {
          "id":1,
          "title":"北京",
          "avator":"https://www.baidu.com"

        },
        {
          "id":2,
          "title":"南京",
          "avator":"https://www.baidu.com"

        }
      ],
      userInfo:{
        username : "wang",
        password : "123"
      }
     }
    }
  }

</script>
2.6、事件处理
事件处理器包括内联事件处理器和方法事件处理器,常用的是方法事件处理器,v-on绑定就事件,调用方法里面的逻辑进行处理事件响应。
<template>
  <h2>我们一起学习事件处理吧</h2>
  <button @click="add"> 点击一下</button>
  <p>{{ count }}</p>

</template>

<script >
export default{
  data(){
    return{
      count:0
     }
    },
    methods:{
      add(){
        this.count ++ ;
      }
    }
  }

</script>
上面是没有参数传递的案例,下面我们看一下事件传参的具体案例。
<template>
  <h2>我们一起学习事件处理吧</h2>
  <p @click="add(item, $event)" v-for="(item, index) in lists">  {{ index }} - {{ item }}</p>


</template>

<script >
export default{
  data(){
    return{
      lists: ["1","2","3"] ,
      count:0
     }
    },
    methods:{
      add(x, y){
        alert(x) ;
        alert(y) ;

      }
    }
  }

</script>
下面我们看一下事件修饰符,在处理事件调用的时候,为了使得方法内部更专注于处理数据逻辑而不是处理dom事件细节会更好一些,为了解决这一问题,Vue为v-on事件提供了事件修饰符,常见的有.stop .prevent .once .enter等。
<template>
  <h2>我们一起学习事件处理吧</h2>
 <a @click.prevent="clickHandler" href="https://www.baidu.com">百度一下</a>

</template>

<script >
export default{
  data(){
    return{
     }
    },
    methods:{
      clickHandler(){
        //事件处理
        console.log("点击了") ;
      }
    }
  }

</script>
2.7、数组变化的侦测
Vue能够监听响应式数组的变更,包括变更方法和替换方法两种,常见的变更方法有:push、pop、shift、unshift、splice、sort、reverse等。常见的替换方法有:filter、concat、slice等
下面看个案例。
<template>
  <h2>数组变化侦听</h2>
 <button @click ="clickHandler" >添加数据</button>
  <ul>
    <li v-for="(item, index) in names" :key="index">{{ index}} - {{ item }}</li>
  </ul>
</template>

<script >
export default{
  data(){
    return{
      names:["wang","li","zhang "]
     }
    },
    methods:{
      clickHandler(){
        //变更
        //this.names.push("liu") ;
        //替换
        this.names = this.names.concat(["liu"]);
      }
    }
  }

</script>
2.8、计算属性
为了使模板变得更加简洁,一般使用计算属性来描述依赖响应式状态的复杂逻辑。
<template>
  <h2>计算属性</h2>
 <button @click ="clickHandler" >添加数据</button>
  <ul>
    <li v-for="(item, index) in names" :key="index">{{ index}} - {{ item }}</li>
  </ul>
  <p>{{ compute }}</p>
</template>

<script >
export default{
  data(){
    return{
      names:["wang","li","zhang "]
     }
    },computed:{
      compute(){
        return this.names.length > 0 ? "Yes" : "No" ;
      }
    },
    methods:{
      clickHandler(){
        //变更
        //this.names.push("liu") ;
        //替换
        this.names = this.names.concat(["liu"]);
      }
    }
  }

</script>
2.9、Class绑定
class绑定可以绑定数组和对象,vue为class的v-bind做了功能增强,不仅可以绑定字符串,数组和对象也可以。如下:
<template>
  <h2>class绑定</h2>
  <p :class="{'active':isActive,'text-danger':hasError}">class样式绑定 </p>
  <p :class="classObject">class样式绑定2</p>
  <p :class="[arrActive,arrHasError]">class样式绑定3</p>
  <p :class="[isActive ? 'active text-danger' : '']">class样式绑定4</p>
</template>

<script >
export default{
  data(){
    return{
      isActive:true,
      hasError:true,
      classObject:{
        'active':true,
        'text-danger':true
      },
      arrActive:"active",
      arrHasError:"text-danger"
     }
    }
  }

</script>
<style>
.active{
  color: rebeccapurple;
}
.text-danger{
  font-size: 30px;
}
</style>
2.10、Style绑定
vue除了为class提供了专门的功能增强,也为style提供了专门的功能增强,v-bind除了可以绑定字符串之外,还可以绑定对象和数组。
<template>
  <h2>style绑定</h2>
  <p :style="{color:activeColor, fontSize:fontSize}">style绑定1</p>
  <p :style="styleObject">style绑定2</p>

</template>

<script >
import { resolveDirective } from 'vue';

export default{
  data(){
    return{
      activeColor:"red",
      fontSize:"30px",
      styleObject:{
        color:"red",
        fontSize:"30px"
      }
     }
    }
  }

</script>
<style>
.active{
  color: rebeccapurple;
}
.text-danger{
  font-size: 30px;
}
</style>
2.11、侦听器
通过侦听器可以侦听数据的变化,可以使用watch属性在每次响应式属性发生变化时触发一个函数。
<template>
  <h2>侦听器</h2>
  <p>{{ message }}</p>
  <button @click="updateHandler">修改数据</button>

</template>

<script >
import { resolveDirective } from 'vue';

export default{
  data(){
    return{
      message : "hello"
     }
    },
    methods:{
      updateHandler(){
        this.message = "hi" ;
      }
    },
    watch:{
      message(newValue, oldValue){
        console.log(newValue, oldValue) ;
      }
    }
  }

</script>
2.12、表单输入绑定
表单输入绑定一帮使用v-model指令,可以实现实时获取最新数据,另外可以使用.lazy为表单输入添加惰性属性。
<template>
  <h2>表单输入绑定</h2>
  <form>
    <input type="text" v-model="message">
    <p>{{ message }}</p>
    <input type="checkbox" id="checkbox" v-model="checked">
    <label>{{ checked }}</label>
  </form>

</template>

<script >
import { resolveDirective } from 'vue';

export default{
  data(){
    return{
      message : "",
      checked:false
     }
  }
  }

</script>
2.13、模板引用
所谓的模板引用就是获取dom元素,一般情况下,不需要获取dom元素就可以完成响应的操作,但是有些情况我们需要获取dom元素,在methods中使用this.$refs就可以获取。
三、深入组件
3.1、组件组成
一般来说,组件的使用包含三步:引入组件、注入组件,显示组件。每个组件有模板、逻辑和样式三部分组成。使用style的scoped属性可以限定作用范围为该组件,而不是全局有效。
定义组件:
<template>
<h2>我的组件</h2>
<div class="container">{{ message }}</div>
</template>

<script>
export default{
    data(){
        return {
            message:"组件基础"
        }
    }
}
</script>

<style scoped>
.container{
    font-size: 30px;
    color: red;
}
</style>
组件引入:
<template>
 <!--显示组件-->
 <MyComponent/>
</template>

<script >
//1、引入组件
import MyComponent from "./components/MyComponents.vue"
export default{
  //2.注入组件
  components:{
    MyComponent
  }
  }

</script>

<style>

</style>
3.2、组件嵌套关系
组件允许我们将 UI 划分为独立的、可重用的部分,并且可以对每个部分进行单独的思考。在实际应用中,组件常常被组织成层层嵌套的树状结构。
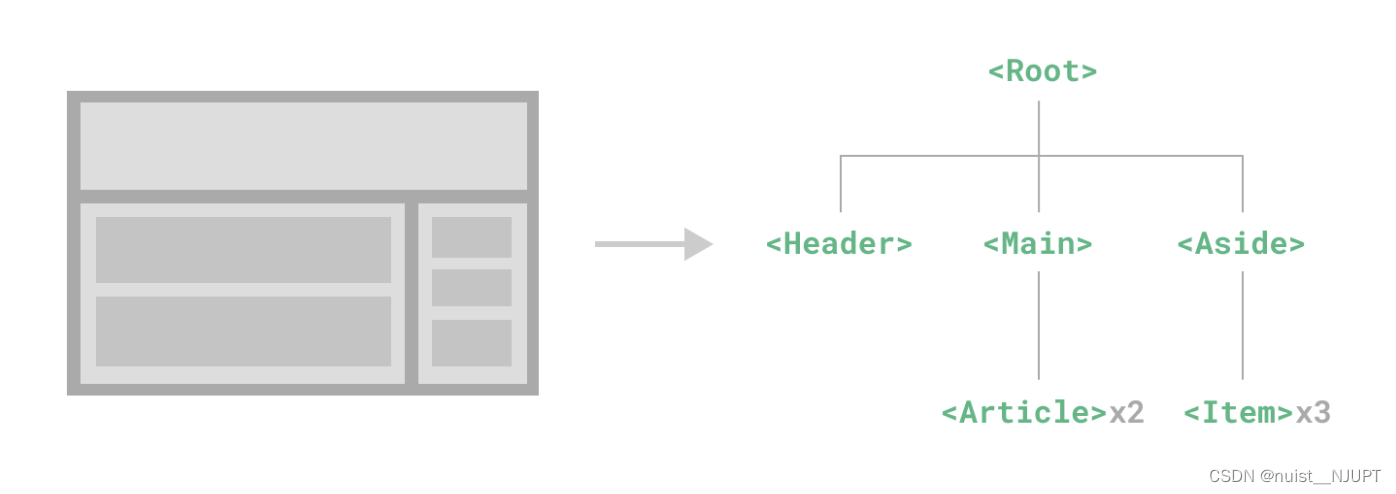
下面我们定义一些组件实现上述的树状嵌套关系,如下:

App.vue:嵌入了Header、Main、Aside三个组件。
<template>
 <!--显示组件-->
 <Header/>
 <Main/>
 <Aside/>
</template>

<script >
//1、引入组件
import Header from "./papers/Header.vue"
import Main from "./papers/Main.vue"
import Aside from "./papers/Aside.vue"
export default{
  //2.注入组件
  components:{
    Header,
    Main,
    Aside
  }
  }

</script>

<style>

</style>
Header.vue:
<template>
<h3>Header</h3>
</template>

<script>

</script>

<style scoped>
h3{
    width: 100%;
    height: 100px;
    border: 5px solid #999 ;
    text-align: center;
    line-height: 100px;
    box-sizing: border-box;
}
</style>
Main.vue:嵌套2个Article
<template>

<div class="main">
    <h3>Main</h3>
    <Article/>
    <Article/>
</div>


</template>

<script>
 import Article from "./Article.vue"
    export default{
        components:{
            Article
        }
    }
 </script>

 <style scoped>
    .main{
        float: left;
        width: 70%;
        height: 400px;
        border: 5px solid #999 ;
        box-sizing: border-box;
    }
 </style>
Aside.vue:嵌套三个Item
<template>
    <div class="aside">
        <h3>Aside</h3>
        <Item/>
        <Item/>
        <Item/>
    </div>

    </template>

    <script>
    import Item from "./Item.vue"
        export default{
            components:{
                Item
            }
        }
     </script>

     <style scoped>
        .aside{
            float: right;
            width: 30%;
            height: 400px;
            border: 5px solid #999 ;
            box-sizing: border-box;


        }
     </style>
Article.vue:
<template>
    <h3>Article</h3>
    </template>

    <script>

    </script>

    <style scoped>
    h3{
        width: 80%;
        margin: 0 auto;;
        text-align: center;
        line-height: 50px;
        box-sizing: border-box;
        margin-top: 50px;
        background: #999;
    }
    </style>
Item.vue:
<template>
    <h3>Item</h3>
    </template>

    <script>

    </script>

    <style scoped>
    h3{
        width: 80%;
        margin: 0 auto;;
        text-align: center;
        line-height: 100px;
        box-sizing: border-box;
        margin-top: 10px;
        background: #999;
    }
    </style>
3.3、组件注册方式
组件的注册分为全局注册和局部注册,之前用的都是局部注册,下面我们看看全局注册,在main.js文件中进行全局注册。
import { createApp } from 'vue'
import App from './App.vue'
import Header from "./papers/Header.vue"

const app = createApp(App) ;

//全局注册
app.component("Header",Header)

app.mount('#app');
3.4、组件传递数据
App.vue:爷爷类
<template>
 <!--显示组件-->
<Parent/>

</template>

<script >
//1、引入组件
import Parent from "./components/Parent.vue"

export default{
  //2.注入组件
  components:{
    Parent
  }
  }

</script>

<style>

</style>
Parent.vue:父亲类
<template>
    <h3>Parent </h3>
    <Child :title="message"/>
    </template>

<script>
import Child from "./Child.vue"
    export default{
        data(){
            return{
                message : "parent数据!"
            }
        },
        components:{
            Child
        }
    }
</script>
Child.vue:儿子类
<template>
    <h3>Child</h3>
    <p>{{ title }}</p>
</template>

<script>
    export default{
        data(){
            return{

            }
        },
        props:["title"]
    }
</script>
其实props能接收任何数据类型的传递,允许父组件向子组件传递数据,看下面的案例。
<template>
    <h3>Parent </h3>
    <Child :title="message" :age="age" :names="names" :userInfo="userInfo"/>
    </template>

<script>
import Child from "./Child.vue"
    export default{
        data(){
            return{
                message : "parent数据!",
                age : 20,
                names :["wang","lu","li"],
                userInfo:{
                    name:"liu",
                    age:30
                }
            }
        },
        components:{
            Child
        }
    }
</script>
<template>
    <h3>Child</h3>
    <p>{{ title }}</p>
    <p>{{ age }}</p>
    <ul>
        <li v-for="(item, index) in names" :key="index">{{ index }} - {{ item }}</li>
    </ul>
    <p>{{  userInfo.name}}</p>
    <p>{{ userInfo.age }}</p>
</template>

<script>
    export default{
        data(){
            return{

            }
        },
        props:["title","age","names","userInfo"]
    }
</script>
3.5、组件传递props检验
父类通过props给子类传递数据,可以做数据类型的校验,也可以设置默认值和是否必须传数据等。
<template>
    <h3>Parent </h3>
    <Child :title="message" />
    </template>

<script>
import Child from "./Child.vue"
    export default{
        data(){
            return{
                message : "parent数据!"
            }
        },
        components:{
            Child
        }
    }
</script>
<template>
    <h3>Child</h3>
    <p>{{ title }}</p>
    <p>{{ age }}</p>
    <p>{{ names }}</p>

</template>

<script>
    export default{
        data(){
            return{

            }
        },
        props:{
            //数据类型的校验
            title:{
                type:[String,Number,Object,Array]
            },age:{
                type:Number,
                //如果父没给子传值,就默认为0
                default:0,
                //标识为必传项
                required: true
            },names:{
                //对于数组和对象的默认值,需要使用工厂函数进行设置
                type:Array,
                default(){
                    return ["空值1","空值2"]
                }
            }
        }
    }
</script>
3.6、组件事件
组件事件用来做组件之间的数据传递的,在组件的模板表达式中,可以使用$emit方法来触发自定义事件。这里是用来子传父。父传子:props,子传父:this.$emit
Parent.vue:
<template>
    <h3>组件事件 </h3>
    <Child @someEvent = "getHandle"/>
    {{ message }}
    </template>

<script>
import Child from "./Child.vue"
    export default{
        data(){
            return{
                message : ""
            }
        },
        components:{
            Child
        },
        methods:{
            getHandle(data){
                this.message = data ;
            }
        }
    }
</script>
Child.vue:
<template>
    <h3>Child</h3>
    <button @click="clickEventHandle">传递数据</button>
</template>

<script>
    export default{
        data(){
            return{

            }
        },
        methods:{
            clickEventHandle(){
                this.$emit("someEvent","子元素数据") ;
            }
        }
    }
</script>
3.7、组件事件+v-model
如果用户输入,我们希望在获取数据的同时发送数据配合v-model来使用。
App.vue:主要用来引入父组件Main.vue
<template>
 <!--显示组件-->
<Main/>

</template>

<script >
//1、引入组件
import Main from "./components/Main.vue"

export default{
  //2.注入组件
  components:{
    Main
  }
  }

</script>

<style>

</style>
父组件Main.vue:父组件中引入子组件,子组件通过v-model绑定数据数据,监听器监听数据并通过this.$emit传递给父亲组件。父组件可以获取实时数据。
<template>
 <h2>Main</h2>
 <p>搜索的内容为:{{ msg }}</p>
 <Search @searchEvent="getHandle" />
</template>

<script>
import Search from "./Search.vue"
    export default{
        data(){
            return{
                msg : ""
            }
        },
        components:{
            Search
        },
        methods:{
            getHandle(data){
                this.msg = data ;
            }
        }
    }
</script>
子组件Search.vue:
<template>
   搜索: <input type="text" v-model="search">
</template>

<script>
    export default{
        data(){
            return{
                search : ""
            }
        },
        // 侦听器监听输入框的值
        watch:{
            search(newValue, OldValue){
                //将改变的新值传递给父组件
                this.$emit("searchEvent", newValue) ;
            }
        }
    }
</script>
3.8、组件数据传递
父传子不仅可以传普通类型的数据,还可以传递函数,下面看一下具体的案例。
App.vue:引入父组件A
<template>
 <!--显示组件-->
<ComponentA/>

</template>

<script >
//1、引入组件
import ComponentA from "./components/ComponentA.vue"

export default{
  //2.注入组件
  components:{
    ComponentA
  }
  }

</script>

<style>

</style>
父组件传递函数给子组件:
<template>
   <h2>父组件</h2>
   {{ msg }}
   <ComponentB title="标题" :onEvent="getHandle"/>
</template>

<script>
   import ComponentB from "./ComponentB.vue"
       export default{
           data(){
               return{
                   msg : ""
               }
           },
           components:{
               ComponentB
           },
           methods:{
               getHandle(data){
                   this.msg = data ;
               }
           }
       }
</script>
子组件返回参数给父组件:
<template>
   <h2>子组件</h2>
   <p>{{ title }}</p>
   <p>{{ onEvent("传递参数") }}</p>
</template>

<script>

       export default{
           data(){
               return{
                   msg : ""
               }
           },
           props:{
            title:String ,
            onEvent:Function
           }
       }
</script>
3.9、插槽Slots
slot元素是一个插槽出口,标识父元素提供的插槽内容在哪里被渲染。
父元素在子元素组件内部插入元素,通过插槽slot控制在子元素中显示。
<template>
 <!--显示组件-->
<SlotBase>
  <div>
    <h3>插槽标题</h3>
    <p>插槽内容</p>
  </div>
</SlotBase>

</template>

<script >
//1、引入组件
import SlotBase from './components/SlotBase.vue';
export default{
  //2.注入组件
  components:{
    SlotBase
  }
  }

</script>

<style>

</style>
子元素通过slot插槽控制显示:
<template>
 <h2>插槽基础</h2>
 <slot></slot>
</template>

<script >

 export default{
    data(){
        return{

        }
    }
     }

 </script>
插槽内容可以访问父组件的数据作用域,因为插槽内容在父组件模板中定义。v-slot可以简写成#
父组件设置具名插槽。
<template>
 <!--显示组件-->
<SlotBase2>
  <template v-slot:header>
    <p>{{ message }}</p>
  </template>

  <template v-slot:main>
    <p>{{ content }}</p>
  </template>
</SlotBase2>

</template>

<script >
//1、引入组件
import SlotBase2 from './components/SlotBase2.vue';
export default{
  //2.注入组件
  components:{
    SlotBase2
  },
  data(){
    return{
      message : "插槽标题",
      content: "插槽内容"
    }
  }
  }

</script>
子组件引用相应的插槽:
<template>
    <h2>插槽基础续集</h2>
    <slot>插槽默认值</slot>
    <slot name="header"></slot>

    <slot name="main"></slot>

   </template>

   <script >

    export default{
       data(){
           return{

           }
       }
        }

    </script>
在某些场景下,插槽内容可能想要同时使用父组件域内和子组件域内的数据,因为我们需要使用一种方法让子组件渲染时让出一部分数据提供给插槽。
3.10、组件生命周期
组件完整的生命周期包括:创建、挂载(渲染)、更新、销毁四个部分。
<template>
 <h2>组件生命周期</h2>
 <p>{{ message }}</p>
 <button  @click="updateHandle">点击更新组件</button>
</template>

<script >
/**
 * 组件生命周期函数
 * 创建期: beforeCreate created
 * 挂载期: beforeMount mounted
 * 更新期: beforeUpdate updated
 * 销毁期:beforeUnmount unmounted
 */
export default{
  data(){
    return{
      message : "更新之前"
    }
  },methods:{
    updateHandle(){
      this.message = "更新之后" ;
    }
  },
  beforeCreate(){

  },created(){

  },beforeMount(){

  },mounted(){

  },beforeUpdate(){

  },updated(){

  },beforeUnmount(){

  },unmounted(){

  }
  }

</script>
3.11、组件生命周期应用
组件生命周期的应用主要包括两个部分:1.通过ref获取元素dom结构,2.模拟网络请求渲染数据。
<template>
 <h2>组件生命周期应用</h2>
 <p ref="name">通过ref获取元素dom结构 </p>
 <ul>
  <li v-for="(item, index) in message" :key="item.id">
    <h3>{{ item.id }}</h3>
    <p>{{ item.name }}</p>
  </li>
</ul>
</template>

<script >
/**
 * 组件生命周期函数
 * 创建期: beforeCreate created
 * 挂载期: beforeMount mounted
 * 更新期: beforeUpdate updated
 * 销毁期:beforeUnmount unmounted
 */
export default{
  data(){
    return{
      message : []
    }
  },mounted(){
    //模拟网络请求
    this.message = [{
      "id" : 1,
      "name" : "wang"
    },
    {
    "id" : 2,
    "name" : "li"
    }]
  }
  }

</script>
3.12、动态组件
定义一个组件,通过按钮切换不同的组件,下面看这个例子。
定义一个A组件。
<template>
<h3>A组件</h3>
</template>

<script>


</script>
定义一个B组件。
<template>
 <h3>B组件</h3>
</template>

<script>


</script>
引入A,B组件,定义按钮和动态组件,按钮点击切换组件。
<template>

 <component :is="tabComponent"></component>
 <button @click="changeHandle">组件切换</button>
</template>

<script >
import ComponentA from "./components/ComponentA.vue"
import ComponentB from "./components/ComponentB.vue"
export default{
  data(){
    return{
      tabComponent:"ComponentA"
    }
  },
  components:{
    ComponentA,
    ComponentB
  }
  ,methods:{
    changeHandle(){
      this.tabComponent = this.tabComponent == "ComponentA" ? "ComponentB" : "ComponentA" ;
    }
  }
}

</script>
3.13、组件保持存活
使用上述动态组件会使组件被卸载,可以使用keep-alive属性保持组件存活。
<template>
<keep-alive>
  <component :is="tabComponent"></component>
</keep-alive>

 <button @click="changeHandle">组件切换</button>
</template>

<script >
import ComponentA from "./components/ComponentA.vue"
import ComponentB from "./components/ComponentB.vue"
export default{
  data(){
    return{
      tabComponent:"ComponentA"
    }
  },
  components:{
    ComponentA,
    ComponentB
  }
  ,methods:{
    changeHandle(){
      this.tabComponent = this.tabComponent == "ComponentA" ? "ComponentB" : "ComponentA" ;
    }
  }
}

</script>
3.14、异步组件
异步组件可以优化项目的性能,因为用到的时候才去加载组件,用不到的不去加载。
<template>
<keep-alive>
  <component :is="tabComponent"></component>
</keep-alive>

 <button @click="changeHandle">组件切换</button>
</template>

<script >
import ComponentA from "./components/ComponentA.vue"
// import ComponentB from "./components/ComponentB.vue"
//异步加载组件
import { defineAsyncComponent } from "vue";
const ComponentB = defineAsyncComponent(()=>
import("./components/ComponentB.vue"))

export default{
  data(){
    return{
      tabComponent:"ComponentA"
    }
  },
  components:{
    ComponentA,
    ComponentB
  }
  ,methods:{
    changeHandle(){
      this.tabComponent = this.tabComponent == "ComponentA" ? "ComponentB" : "ComponentA" ;
    }
  }
}

</script>
3.15、Vue应用
首先每个vue应用都通过create函数创建一个新的应用实例,其中传入的App是根组件,每个应用都需要一个根组件,其他组件作为其子组件,应用示例必须在调用mount()方法才会被渲染,该方法接收一个容器作为参数,可以是一个DOM元素或者CSS选择器字符串。
import { createApp } from 'vue'
import App from './App.vue'

// app是vue是vue的实例对象
// 在一个vue项目中,有且只有一个vue实例对象
const app = createApp(App) ;

//App是根组件
app.mount('#app');
真正的运行入口是index.html文件,<div id="app"></div>就是我们挂在的#app。
<!DOCTYPE html>
<html lang="en">
  <head>
    <meta charset="UTF-8">
    <link rel="icon" href="/favicon.ico">
    <meta name="viewport" content="width=device-width, initial-scale=1.0">
    <title>Vite App</title>
  </head>
  <body>
    <div id="app"></div>
    <script type="module" src="/src/main.js"></script>
  </body>
</html>
四、第三方应用
4.1、Axios网络应用
首先在终端使用npm install --save axios指令安装axios,然后先看一下局部引用axios,如下:
<template>
<p>{{ chengpin }}</p>
<p>{{ message }}</p>
</template>

<script >
import axios from "axios"
export default{
  name:'HelloWold',
  data(){
    return{
      chengpin:"",
      message: ""
    }
  }
  ,mounted(){
    /**
    // get请求
    axios({
        method:"get",
        url:"http://iwenwiki.com/api/blueberryapi/getChengpinDetails.php"
    }).then(res=>{
        this.chengpin = res.data.chengpinDetails[0]
    })
    // post请求
    axios({
        method:"post",
        url:"http://iwenwiki.com/api/blueberryapi/login.php",
        data: querystring.stringify({
            user_id : "iwen@qq.com",
            password: "iwen123",
            verification_code : "crfvw"
        })
    }).then(res=>{
        console.log(res.data) ;
    })
    */

    //get与post请求快捷方案
    axios.get("https://autumnfish.cn/api/joke").then(res=>{
       this.chengpin =  res.data ;
    })

    axios.post("https://autumnfish.cn/api/user/reg",{username:"zhangsan"}).then(res=>{
        this.message = res.data ;
    })
  }

}


</script>
我们可以把axios的局部引用改成全局引用,具体如下,在main.js中将axios挂载到全局:
import { createApp } from 'vue'
import App from './App.vue'
import axios from "axios"

// app是vue是vue的实例对象
// 在一个vue项目中,有且只有一个vue实例对象
const app = createApp(App) ;
// 将axios挂在到全局
app.config.globalProperties.$axios = axios
//App是根组件
app.mount('#app');
然后在组件中引用:
<template>
<p>{{ chengpin }}</p>
<p>{{ message }}</p>
</template>

<script >

export default{
  name:'HelloWold',
  data(){
    return{
      chengpin:"",
      message: ""
    }
  }
  ,mounted(){
    /**
    // get请求
    axios({
        method:"get",
        url:"http://iwenwiki.com/api/blueberryapi/getChengpinDetails.php"
    }).then(res=>{
        this.chengpin = res.data.chengpinDetails[0]
    })
    // post请求
    axios({
        method:"post",
        url:"http://iwenwiki.com/api/blueberryapi/login.php",
        data: querystring.stringify({
            user_id : "iwen@qq.com",
            password: "iwen123",
            verification_code : "crfvw"
        })
    }).then(res=>{
        console.log(res.data) ;
    })
    */

    //get与post请求快捷方案
    this.$axios.get("https://autumnfish.cn/api/joke").then(res=>{
       this.chengpin =  res.data ;
    })

    this.$axios.post("https://autumnfish.cn/api/user/reg",{username:"zhangsan"}).then(res=>{
        this.message = res.data ;
    })
  }

}


</script>
4.2、Vue引入路配置
在vue中,我们可以通过vue-router路由管理页面之间的关系。
第一步:首先在vscode终端使用npm install --save vue-router 命令安装路由。
第二步:配置独立的路由文件,在src下创建view目录,目录中创建index.js文件
import {createRouter, createWebHashHistory} from "vue-router"
import HomeView from "../view/HomeView.vue"
import AboutView from "../view/AboutView.vue"


//配置信息中需要页面的相关配置

const routes = [
    {
        path:"/",
        component: HomeView
    },
    {
        path:"/about",
        component: AboutView
    }
]
const router = createRouter({
    history:createWebHashHistory(),
    routes
})

export default router ;
第三步,在main.js中引入路由到项目
import { createApp } from 'vue'
import App from './App.vue'
import axios from "axios"
import router from './router';

// app是vue是vue的实例对象
// 在一个vue项目中,有且只有一个vue实例对象
const app = createApp(App) ;
// 将axios挂在到全局
app.config.globalProperties.$axios = axios
//App是根组件
app.use(router).mount('#app');
最后是需要指定路由显示入口和路由跳转,如下:
<template>
  <!--路由的显示入口-->
  <router-view></router-view>
  <!--路由跳转-->
  <router-link to="/">首页</router-link>|
  <router-link to="/about">关于</router-link>
</template>

<script >
import router from './router';


export default{
    data() {
        return {};
    },
    components: { router }
}

</script>
4.3、路由传递参数
第一步,在路由配置中参数携带的key
import {createRouter, createWebHashHistory} from "vue-router"
import HomeView from "../view/HomeView.vue"


//配置信息中需要页面的相关配置

const routes = [
    {
        path:"/",
        component: HomeView
    },
    {
        path:"/about",
        component:()=>import("../view/AboutView.vue")
    },
    {
        path:"/news",
        // 异步加载组件
        component:()=>import("../view/NewsView.vue")
    },{
        path:"/newsdetails/:name",
        name:"newdetails",
        component:()=>import("../view/NewsDetailsView.vue")
    }
]
const router = createRouter({
    history:createWebHashHistory(),
    routes
})

export default router ;
第二步,在跳转过程中携带参数。
<template>
    <ul>
        <li><router-link to="/newsdetails/百度">百度新闻</router-link></li>
        <li><router-link to="/newsdetails/网易">网易新闻</router-link></li>
        <li><router-link to="/newsdetails/头条">头条新闻</router-link></li>
    </ul>
</template>
第三步,在详情页面读取路由携带的参数。
<template>
    <p>{{ $route.params.name }}</p>
</template>
五、Vue3新特性
5.1、vue3新特性1
6大亮点:
1、性能比vue2更强。
2、可以将无用的模块剪辑,只打包自己需要的。
3、组合式api。
4、碎片和悬念。
5、更好的js支持。
6、暴露了自定义渲染api。
我们先看一下组合式api,准确说就是setup,可以把数据和事件等都卸载setup中,如下:
支持ref和reactive返回数据,支持事件处理和组件传参。
<template>
<p>{{ message }}</p>
<ul>
    <li v-for="(item, index) in names.list" :key="index">{{ item }}</li>
</ul>
<button @click="clickHandle">点击</button>
<p>{{ msg }}</p>
</template>

<script>
import { ref, reactive } from 'vue';
export default{
    name: 'HelloVue',
    props:{
        msg:String
    },
    // 组合式api
    setup(props,ctx){
        //setup中没有this关键字,ctx就是当前对象
        console.log(ctx) ;

        // ref
        const message = ref("消息")
        // reactive
        const names = reactive({
            list:["wang","li","zhang"]
        })
        // 事件之前放在methods中,现在放在setup
        function clickHandle(){
            alert("点击了") ;
        }
        // setup中可以使用props
        const msg = props.msg
        return{
            message,
            names,
            clickHandle,
            msg
        }
    }
}

</script>
App.vue:
<template>
 <HelloVue msg="数据"/>
</template>

<script >
import HelloVue from "./components/HelloVue.vue"

export default{
    data() {
        return {};
    },components:{
      HelloVue
    }

}

</script>
5.2、vue3新特性2
在setup()中使用生命周期函数,如下:
<template>

</template>

<script>
import { onMounted } from 'vue';
export default{
    name: 'HelloVue',

    // 组合式api
    setup(){
        onMounted(()=>{
            alert("onMounted") ;
        })

    }
}

</script>
六、ElementUI
6.1、vue3加载Element-plus
需要使用ElementUI首先需要将其引入到项目之中,使用npm install element-plus --save命令安装。
安装成功之后,在main.js中引入element-plus,如下:
import { createApp } from 'vue'
import App from './App.vue'
import axios from "axios"
import router from './router';
import ElementPlus from "element-plus"
import 'element-plus/dist/index.css'

// app是vue是vue的实例对象
// 在一个vue项目中,有且只有一个vue实例对象
const app = createApp(App) ;
// 将axios挂在到全局
app.config.globalProperties.$axios = axios
app.use(ElementPlus)
//App是根组件
app.use(router).mount('#app');
最后在相应的组件中直接使用就可以了,如下:
<template>
<div>
<el-switch v-model="value1" />
  <el-switch
    v-model="value2"
    class="ml-2"
    style="--el-switch-on-color: #13ce66; --el-switch-off-color: #ff4949"
  />
</div>

</template>

<script>
import { ref } from 'vue';
export default{
    name: 'HelloVue',

    // 组合式api
    setup(){
       const value1 = ref(false)
       const value2 = ref(true)
       return{
        value1,
        value2
       }

    }
}

</script>
上面引入element-plus是全局引用,现在我们是按需引用,提升系统性能,直接使用命令安装插件,然后修改配置文件vue.config.js中即可。


