⭐️我叫恒心,一名喜欢书写博客的研究生在读生。
原创不易~转载麻烦注明出处,并告知作者,谢谢!!!
这是一篇近期会不断更新的博客欧~~~ 有什么问题的小伙伴 欢迎留言提问欧。
文章目录
- 前言
- 一、链表问题
- 1 合并有序的链表
- 2 翻转链表
- 3 重排链表
- 4 奇偶链表
- 二、设计模式
- 1 单例模式
- 1.1 饿汉模式(线程安全)
- 1.2 :smiling_imp: 懒汉模式(线程安全)
- 1.3 为什么要用双检测,只检测一次不行吗?
- 1.4 优雅的单例模式
- 1.4 单例模式的适用场景
- 2 工厂模式
- 2.1 简单工厂
- 2.2 抽象工厂
- 3 装饰者模式
- 4 观察者模式
- 三、排序算法
- 1 快速排序
- 2 归并排序
- 3 堆排序
- 四、:o:设计一个LRU缓存算法
- 五、写三个线程交替打印ABC
- 六、Top K问题
- 6.1 利用堆
- 快排实现
- 七、其他
- 洗牌算法
- 八、图数据结构
- 8.1 最短路径算法
前言
本文主要介绍一些面试中常见的链表算法、设计模式、排序算法、情景题与图方面的数据结构算法。
🐶 参加过今年的暑期实习面试、秋招面试,许多公司在面试的时候通常会考察一些基本的算法,主要是考察以下你的数据结构、设计模式以及代码能力的长度,这部分比较考察编程能力,但是通常也不会出的太难,问题往往都是比较经典和具有代表性的。
一、链表问题
1 合并有序的链表
力扣链接
将两个有序的链表合并为一个新链表,要求新的链表是通过拼接两个链表的节点来生成的。
输入:1->2->4, 1->3->4 输出:1->1->2->3->4->4
#include <iostream>
using namespace std;

struct myList {
    int val;
    myList* next;
    myList(int _val) :val(_val), next(nullptr) {}// 注意这里初始化列表是,
};

myList* merge(myList* l1, myList* l2) {

    if (l1 == nullptr) return l2;
    if (l2 == nullptr) return l1;
    myList head(0);
    myList* node = &head;
    while (l1 != nullptr && l2 != nullptr) {
        if (l1->val < l2->val) {
            node->next = l1;
            l1 = l1->next;

        }
        else {
            node->next = l2;
            l2 = l2->next;
        }
        node = node->next;
    }

    if (l1 == nullptr)
        node->next = l2;
    if (l2 == nullptr)
        node->next = l1;

    return head.next;

};

int main(void) {

    myList* node0 = new myList(0);
    myList* node1 = new myList(1);
    myList* node2 = new myList(2);
    myList* node3 = new myList(3);

    myList* node4 = new myList(1);
    myList* node5 = new myList(4);
    node0->next = node1;
    node1->next = node2;
    node2->next = node3;
    node3->next = nullptr;
    node4->next = node5;
    node5->next = nullptr;

    auto node = merge(node0, node4);
    while (node != nullptr) {
        cout << node->val << endl;
        node = node->next;
    }

    return 0;
}
/**
 * Definition for singly-linked list.
 * struct ListNode {
 *     int val;
 *     ListNode *next;
 *     ListNode(int x) : val(x), next(NULL) {}
 * };
 */
class Solution {
public:
    ListNode* mergeTwoLists(ListNode* l1, ListNode* l2) {
        if(l1 == nullptr) return l2;
        if(l2 == nullptr) return l1;
        ListNode* dummy = new ListNode(0);
        ListNode* cur = dummy;
        while(l1 && l2){
            if(l1->val <= l2->val){
                cur->next = l1;
                cur = l1;
                l1 = l1->next;
            }else if(l1->val > l2->val){
                cur->next = l2;
                cur = l2;
                l2 = l2->next;
            }
        }
        if(l1!=nullptr){
            cur->next = l1;
        }else if(l2 != nullptr){
            cur->next = l2;
        }
        return dummy->next;
    }
};
2 翻转链表
定义一个函数,输入一个链表的头节点,反转该链表并输出反转后链表的头节点。
输入: 1->2->3->4->5->NULL 输出: 5->4->3->2->1->NULL
#include<algorithm>
#include<unordered_map>
#include <iostream>
#include<vector>

using namespace std;

struct node {
    int  data;
    struct node* next;
    node(int _data) :data(_data), next(nullptr) {
    }
};

struct node* init() {
    node* head = new node(1);
    node* node1 = new node(2);
    node* node2 = new node(3);
    node* node3 = new node(4);
    node* node4 = new node(5);

    head->next = node1;
    node1->next = node2;
    node2->next = node3;
    node3->next = node4;
    node4->next = nullptr;

    return head;
}

struct node* reverse(node* head) {
    node* newHead = nullptr;
    while(head){
		node* nextTemp =  head->next;
        head->next = newHead;
        newHead = head;
        head = nextTemp;
    }
    return newHead;
}

int main(){
    auto head = init();
    head = reverse(head);
    while (head != nullptr) {
        cout << head->data << endl;
        head = head->next;
    }

    return 0;
}
3 重排链表
给定一个单链表 L:L0→L1→…→Ln-1→Ln , 将其重新排列后变为: L0→Ln→L1→Ln-1→L2→Ln-2→…
你不能只是单纯的改变节点内部的值,而是需要实际的进行节点交换。
示例 1:
给定链表 1->2->3->4, 重新排列为 1->4->2->3.
示例 2:
给定链表 1->2->3->4->5, 重新排列为 1->5->2->4->3.
方法一:
线性法:
class Solution {
public:
    void reorderList(ListNode *head) {
        if (head == nullptr) {
            return;
        }
        vector<ListNode *> vec;
        ListNode *node = head;
        while (node != nullptr) {
            vec.emplace_back(node);
            node = node->next;
        }
        int i = 0, j = vec.size() - 1;
        while (i < j) {
            vec[i]->next = vec[j];
            i++;
            if (i == j) {
                break;
            }
            vec[j]->next = vec[i];
            j--;
        }
        vec[i]->next = nullptr;
    }
};
改进方法:
-
找到原链表的中间节点「876. 链表的中间结点」
- 我们可以使用快慢指针来
*O*(*N*)地找到链表的中间节点
- 我们可以使用快慢指针来
-
将原链表的右半端反转(参考「206. 反转链表」)。
- 我们可以使用迭代法实现链表的反转。
-
将原链表的两端合并。
- 因为两链表长度相差不超过 11,因此直接合并即可。
/**
 * Definition for singly-linked list.
 * struct ListNode {
 *     int val;
 *     ListNode *next;
 *     ListNode() : val(0), next(nullptr) {}
 *     ListNode(int x) : val(x), next(nullptr) {}
 *     ListNode(int x, ListNode *next) : val(x), next(next) {}
 * };
 */
class Solution {
public:
    ListNode* searchMid(ListNode* head){
        ListNode* fast = head;
        ListNode* slow = head;
        while(fast && fast->next){
            fast = fast->next->next;
            slow = slow->next;
        }
        return slow;
    }

    ListNode* reverseList(ListNode* head){
        ListNode* cur = head;
        ListNode* newHead = nullptr;
        while(cur){
            ListNode* tempNext = cur->next;
            cur->next = newHead;
            newHead = cur;
            cur = tempNext;
        }
        return newHead;
    }

    void mergeList(ListNode* l1, ListNode* l2){
        while(l1 && l2){
            ListNode* temp1Next = l1->next;
            ListNode* temp2Next = l2->next;
            l1->next = l2;
            l2->next = temp1Next;
            l1 = temp1Next;
            l2 = temp2Next;
        }
    }
    void reorderList(ListNode* head) {
        ListNode* L1 = head;
        // 先找到中间节点
        // 通过中间阶段切分成两部分
        // 将后半部分逆序
        // 逆序的后半部分
        // 合并这两部分
        if(head == nullptr) return ;
        ListNode* mid = searchMid(L1);
        L1 = head;
        ListNode* L2 = mid->next;
        mid->next = nullptr;
        L2 = reverseList(L2);
        mergeList(L1,L2);
    }
};
4 奇偶链表
力扣链接
给定一个单链表,把所有的奇数节点和偶数节点分别排在一起。请注意,这里的奇数节点和偶数节点指的是节点编号的奇偶性,而不是节点的值的奇偶性。
请尝试使用原地算法完成。你的算法的空间复杂度应为 O(1),时间复杂度应为 O(nodes),nodes 为节点总数。
class Solution {
public:
    ListNode* oddEvenList(ListNode* head) {
        if(head == nullptr) return head;
        ListNode* first = head;
        ListNode* second = head->next;
        ListNode* cur = second;// 保存偶数链表的头
        while(second!=nullptr && second->next!=nullptr){
            //ListNode* tempNext = first->next;
            //cout<<first->val<<" ";
            first->next = second->next;
            first = first->next;// 记得移动指针
            second->next = second->next->next;
            second = second->next;
        }
        first->next = cur;
        return head;
    }
};
二、设计模式
面试的时候关于项目部分,基本上会问起数据结构,对于C++而言,学好设计模式也是非常重要的:
简单的掌握单例模式是肯定远远不够的,至少今年面试的,单例模式,面试官甚至连问得欲望都没有,但是其他集中模式倒是比较有趣,建议以下几种设计模式一定要掌握好!
- 单例模式: 保证一个类仅有一个实例,并提供一个访问它的全局访问点。
- 工厂模式:包括简单工厂模式、抽象工厂模式、工厂方法模式
- 简单工厂模式: 主要用于创建对象。用一个工厂来根据输入的条件产生不同的类,然后根据不同类的虚函数得到不同的结果。
- 抽象工厂模式:定义了一个创建一系列相关或相互依赖的接口,而无需指定他们的具体类。
- 观察者模式:定义了一种一对多的关系,让多个观察对象同时监听一个主题对象,主题对象发生变化时, 会通知所有的观察者,使他们能够更新自己。
- 装饰模式:动态地给一个对象添加一些额外的职责,就增加功能来说,装饰模式比生成派生类更为灵活。
1 单例模式
类中包含一个静态成员指针,该指针指向该类的一个对象,提供一个公有的静态成员方法,返回该对象指针,为了使得对象唯一,将构造函数等涉及到创建对象的都设为私有。
有懒汉模式和饿汉模式
1.1 饿汉模式(线程安全)
#include<iostream>
using namespace std;

class SingleInstance{
public:
	static SingleInstance* getInstance(){
		return ins;
	}
	~SingleInstance(){};
private:
	static SingleInstance* ins;
	SingleInstance(){
		cout<<"SingleInstance() 执行"<<endl;
	}
};
SingleInstance* SingleInstance::ins = new SingleInstance();
int main(){
	SingleInstance* instance = SingleInstance::getInstance();
	return 0;
}
1.2 😈 懒汉模式(线程安全)
#include<iostream>
#include<pthread.h>
#include<algorithm>
using namespace std;
class SingleInstance{
public:
	static SingleInstance* getInstance(){
		if(ins == nullptr){
			// 创建过程中注意上锁
			pthread_mutex_lock(&mutex);
			if(ins == nullptr){
				ins = new SingleInstance();
			}
			pthread_mutex_unlock(&mutex);
		}
		return ins;
	}
	~SingleInstance(){};
	// 互斥锁
	static pthread_mutex_t mutex;
private:
	SingleInstance(){
		cout<<"懒汉模式 "<<endl;
	}
	static SingleInstance* ins;
};
SingleInstance* SingleInstance::ins = nullptr;
pthread_mutex_t SingleInstance::mutex;
int main(){
	SingleInstance* instance = SingleInstance::getInstance();
	delete instance;
	return 0;
}
1.3 为什么要用双检测,只检测一次不行吗?
如果只检测一次,在每次调用获取实例的方法时,都需要加锁,这将严重影响程序性能。双层检测可以有效避免这种情况,仅在第一次创建单例的时候加锁,其他时候都不再符合NULL == p的情况,直接返回已创建好的实例。
1.4 优雅的单例模式
#include<iostream>
using namespace std;

//单例模式
class Singleton{
private:
    Singleton(){printf("Singeleton init \n");};
    ~Singleton(){printf("delete Singeleton \n");};
    Singleton(const Singleton&) = delete;
    Singleton& operator=(const Singleton&) =delete;
public:
    static Singleton* GetInstance(){
        static Singleton instance;  //函数内的静态局部变量,第一次访问才初始化,程序结束,自动释放。
        return &instance;
    }
};


int main(){
  Singleton* s = Singleton::GetInstance();
  return 0;
}
1.4 单例模式的适用场景
- 系统只需要一个实例对象,或则考虑到资源消耗的太大而只允许创建一个对象。
- 客户调用类的单个实例只允许使用一个公共访问点,出了该访问点之外不允许通过其他方式访问该实例(就是共有的静态方法)
2 工厂模式
工厂模式的目的是为了解耦,为了进一步解耦,可以在简单工厂模式的基础上发展成抽象工厂模式,既连工厂模式都抽象出来。
2.1 简单工厂
**建立一个工厂类,对实现同一个接口的一些类进行实例的创建。**简单工厂模式的是指是由一个工厂类根据传入的参数,动态决定应该创建哪一个产品类(这些产品类继承自一个父类或接口)的实例。
#include<iostream>
using namespace std;
// 产品类
class Product{
public:
	Product(){};
	virtual void show()=0;// 纯虚函数
};

class productA : public Product{
public:
	productA(){};
	void show(){
		cout<<"product A create!"<<endl;
	}
	~productA(){};
};

class productB : public Product{
public:
	productB(){};
	void show(){
		cout<<"product B create!"<<endl;
	}
	~productB(){};
};

class productC : public Product{
public:
	productC(){};
	void show(){
		cout<<"product C create!"<<endl;
	}
	~productC(){};
};

// 简单工厂类
class simpleFactory{
public:
	simpleFactory(){};
	Product* product(const string str){
		if(str == "productA")
			return new productA();
		if(str == "productB")
			return new productB();
			return NULL;
	};
};


int main(){
	simpleFactory obj;
	Product* pro;
	pro = obj.product("productA");
	pro->show();// product A create!
	delete pro;

	pro = obj.product("productB");
	pro->show();// product B create!
	delete pro;
	return 0;
}
2.2 抽象工厂
工厂模式目的就是代码解耦,如果我们不采用工厂模式,如果要创建产品A、B,通常做法采用用swith..case语
句,那么想一想后期添加更多的产品进来,我们不是要添加更多的switch..case吗?这样就很麻烦,而且也不符合设计模式中的开放封闭原则。
为了进一步解耦,在简单工厂的基础上发展出了抽象工厂模式,即连工厂都抽象出来,实现了进一步代码解耦。
#include<iostream>
using namespace std;
// 产品类
class Product{
public:
	Product(){};
	virtual void show()=0;// 纯虚函数
};

class ProductA : public Product{
public:
	productA(){};
	void show(){
		cout<<"product A create!"<<endl;
	}
	~ProductA(){};
};

class ProductB : public Product{
public:
	productB(){};
	void show(){
		cout<<"product B create!"<<endl;
	}
	~ProductB(){};
};

class ProductC : public Product{
public:
	productC(){};
	void show(){
		cout<<"product C create!"<<endl;
	}
	~ProductC(){};
};

// 简单工厂类
class Factor{
public:
	Factor(){};
	virtual Product* CreateProduct() = 0;// 纯虚函数
};
// 工厂类A,只生产A产品
class FactorA:public Factor{
public:
	Product* CreateProduct(){
		Product* product_  = nullptr;
		product_ = new ProductA();
		return product_;
	}
};

class FactorB:public Factor{
public:
	Product* CreateProduct(){
		Product* product_  = nullptr;
		product_ = new ProductB();
		return product_;
	}
};


int main(){
	Product* product = nullptr;
	auto myFactorA = new FactorA();
	product = myFactorA->CreateProduct();
	product->show();
	delete product;

	auto myFactorB = new FactorB();
	product = myFactorB->CreateProduct();
	product->show();
	delete product;
	return 0;
}
3 装饰者模式
借鉴一本书上的例子!这真是我见过写得漂亮的装饰者模式的句子
从中你可以学习到
- 虚函数设计意义
- 智能指针的使用
#include<iostream>
#include<memory>
using namespace std;

class Transform{
public:
	virtual void move() = 0;
};

class Car : public Transform{
public:
	Car(){
		cout<<"我是变形金刚"<<endl;
	}
	void move(){
		cout<<"陆地移动"<<endl;
	}
};

class Change : public Transform{
public:
	Change(shared_ptr<Transform> tran){
		this->transform = tran;
	}
	void move(){
		this->transform->move();
	}
private:
	shared_ptr<Transform> transform;
};

class Robot : public Change{
public:
	Robot(shared_ptr<Transform> tran):Change(tran) {
		cout<<"变身Robot"<<endl;
	}
	void say(){
		cout<<"我是Robot"<<endl;
	}
};

class AirFly : public Change{
public:
	AirFly(shared_ptr<Transform> tran):Change(tran) {
		cout<<"变身AirFly"<<endl;
	}
	void say(){
		cout<<"我在天上飞"<<endl;
	}
};


int main(){
	shared_ptr<Transform> camaro = make_shared<Car>();
	camaro->move();
	cout<<"-------------"<<endl;
	shared_ptr<Robot> rbb = make_shared<Robot>(camaro);
	rbb->move();
	rbb->say();
	cout<<"-------------"<<endl;
	shared_ptr<AirFly> air = make_shared<AirFly>(camaro);
	air->move();
	air->say();
	return 0;
}
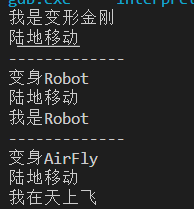
运行结果:
4 观察者模式
相比于前面几种设计模式的代码,观察者模式可能会稍微长一点,但是核心的思想也是比较简单的。
1、我们希望观察一个对象的行为,监听者数量是不确定的,但是被监听者往往是少数。
2、通过列表的形式添加监听者对象
3、 被监听者每次行为都会被发送给监听者进行回调。
如果你接触过QT,那这个设计模式你必须要东,因为信号槽机制的设计原理就是基于此设计而出的,相对于其他图形化桌面设计,这种设计模式也是非常有借鉴意义。
#include <iostream>
#include <string>
#include <list>

// 被观察者基类
class Subject;
// 观察者基类
class Observer
{
protected:
    std::string name;
    Subject *sub;

public:
    Observer(std::string name, Subject *sub)
    {
        this->name = name;
        this->sub = sub;
    }
    virtual void update() = 0;
};

class StockObserver : public Observer
{
public:
    StockObserver(std::string name, Subject *sub) : Observer(name, sub) {}
    void update();
};

class NBAObserve : public Observer
{
public:
    NBAObserve(std::string name, Subject *sub) : Observer(name, sub) {}
    void update();
};

class Subject
{
protected:
    std::list<Observer *> observers;

public:
    std::string action;
    virtual void attach(Observer *) = 0;
    virtual void detach(Observer *) = 0;
    virtual void notify() = 0;
};

class Secretary : public Subject
{
    void attach(Observer *observer)
    {
        observers.push_back(observer);
    }
    void detach(Observer *observer)
    {
        std::list<Observer *>::iterator iter = observers.begin();
        while ((*iter) == observer)
        {
            observers.erase(iter);
            return;
        }
        ++iter;
    }
    void notify()
    {
        std::list<Observer *>::iterator iter = observers.begin();
        while (iter != observers.end())
        {
            (*iter)->update();
            ++iter;
        }
    }
};

void StockObserver::update()
{
    std::cout << name << "收到消息: " << sub->action << std::endl;
    if (sub->action == "老板来了!")
    {
        std::cout << "立马关闭股票,认真工作!" << std::endl;
    }
}
void NBAObserve::update()
{
    std::cout << name << "收到消息: " << sub->action << std::endl;
    if (sub->action == "老板来了!")
    {
        std::cout << "立马关闭NBA节目,认真工作!" << std::endl;
    }
}

int main()
{
    Subject *BOSS = new Secretary();
    Observer *xa = new NBAObserve("xa", BOSS);
    Observer *xb = new NBAObserve("xb", BOSS);
    Observer *xc = new StockObserver("xc", BOSS);

    BOSS->attach(xa);
    BOSS->attach(xb);
    BOSS->attach(xc);

    BOSS->action = "去吃饭了!";
    BOSS->notify();
    std::cout << std::endl;
    BOSS->action = "老板来了!";
    BOSS->notify();
    return 0;
}
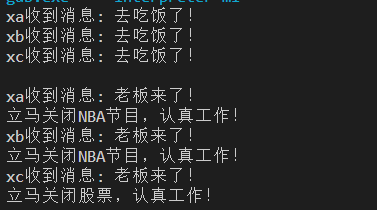
运行结果:
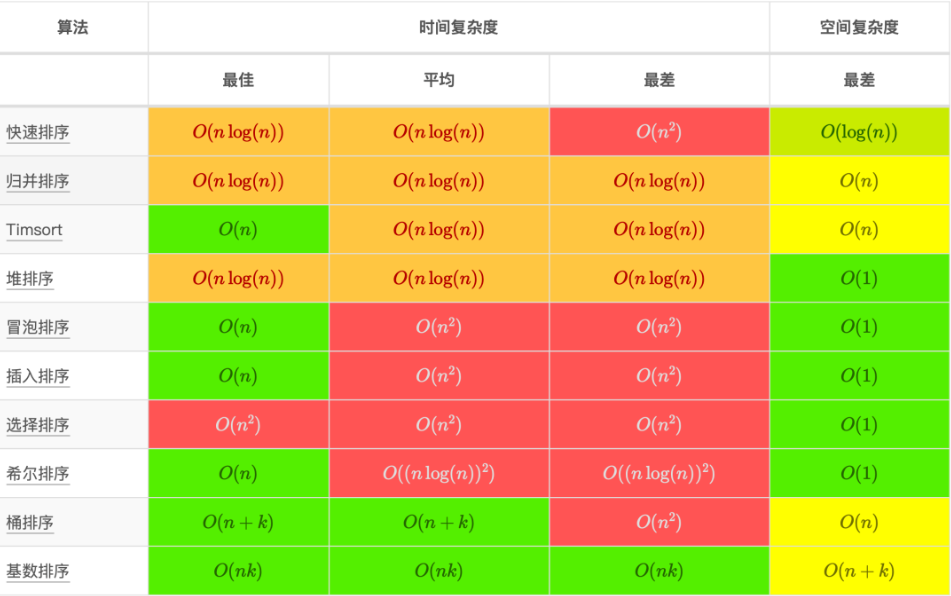
三、排序算法
不单单要会写代码 还需要会分析时间复杂度。
1 快速排序
void quickSort(vector<int> &nums, int begin, int end){
	// 判断是否是有序的 如果有序的话,直接退出
	if(begin >= end) return ;
    // 优化部分
    int p = round(1.0*rand()/RAND_MAX*(end - begin) + begin);
    swap(nums[begin],nums[p]);
	int low = begin, high = end, key = nums[begin];
	while(low < high){
		while(low < high && nums[high] >= key){
			high--;
		}
		if(low < high) nums[low++] = nums[high];
		while(low < high && nums[low] <=key){
			low++;
		}
		if(low < high) nums[high--] = nums[low];

	}
	nums[low] = key;
	print_nums(nums);

	quickSort(nums,begin, low - 1);
	quickSort(nums, low + 1, end);
}
2 归并排序
又称为二路排序。
#include<iostream>
#include<vector>
using namespace std;
void print_nums(vector<int> nums){
	for(auto num : nums){
		cout<<num<<" ";
	}
	cout<<endl;
}

void mergeSort(vector<int>& data, vector<int>& temp, int begin, int end){
	if(begin >= end) return ; // 注意当begin >= end 表示不需要排序了
	// 分成两部分
	int mid = begin + (end - begin) / 2;// 防止溢出
	int low1 = begin, high1 = mid;
	int low2 = mid + 1, high2 = end;
	// 因为到最后一步的时候copy数组是排序好的,因此如下写法视为省去交换
	// num.assign(copyNums.begin(), copyNums.end())
	mergeSort(temp, data, low1, high1);
	mergeSort(temp, data, low2, high2);

	int index = low1;//  此处不能写成0 而应该以每次的左边界
	// 针对左部分或者右边部分进行切分后的排序
	while(low1 <= high1 && low2 <= high2){
		temp[index++] = data[low1] < data[low2] ? data[low1++] :data[low2++];
	}

	// 左边部分赋值给temp
	while(low1 <= high1){
		temp[index++] = data[low1++];
	}

	// 右边部分赋值给temp
	while(low2 <= high2){
		temp[index++] = data[low2++];
	}


	print_nums(temp);
}

// 归并排序
int main(){
	vector<int> nums{8,9,1,4,2,3,6,7,5,5} ;
	vector<int> temp(nums);// 注意temp
	mergeSort(nums, temp , 0 , nums.size() - 1);
	nums.assign(temp.begin(), temp.end());
	print_nums(nums);
	return 0;
}
3 堆排序
思路:基于堆结构,每次将最后一个节点和第一个节点交换,移除掉最后一个节点
堆:
- 完全二叉树(要学会辨识二叉树)
- 从上往下
- 从左往右
- 父节点的值大于子节点

#include<iostream>
#include<vector>
using namespace std;
void heapyfy(vector<int>& nums, int n, int i){
	//对有一定顺序的堆,
	//当前第i个结点取根左右的最大值(这个操作称heapfiy)
	// 从上而下
	if(i>=n) return;
    int c1 = 2*i + 1;// 左子节点
    int c2 = 2*i + 2;// 右子节点
    int max = i;
    if(c1 < n && nums[c1] > nums[max]) max = c1;
    if(c2 < n && nums[c2] > nums[max]) max = c2;
    if(max !=i){
        // 如果当前节点(父节点)不等于i
        swap(nums[i],nums[max]);
        heapyfy(nums, n, max);
    }
}

void build_heap(vector<int>& nums, int n){
	//建立大根堆,从树的倒数第二层第一个结点开始,
	//从最后一个节点的父节点开始做heapfy,直到根节点,就可以将无序数组组织成堆的形式
	int last_node = n - 1;
	int parent_node = (last_node - 1) / 2;
	for(int i = parent_node; i >= 0; i--){
		heapyfy(nums,n, i);
	}
}

void sort_heap(vector<int>& nums, int n){
	/*排序将问题分解成了2个步骤:
先建立一个堆,在依据堆顶为最大值的性质,循环抽出堆顶最大值交换到堆的末尾位置,
有序序列,由于抽出最大值破坏了堆的性质,因此要重新heapify
而在建立堆的过程中,首先面临的是一堆无序的数,
需要从最后一个节点的父节点开始heapify,
才能使得整个数组变成堆,其中heapify的过程就是递归将调整父节点子节点的过程*/

	build_heap(nums,n);
	for(int i = n-1; i >= 0; i--){
		// 跟最后一个节点交换
		swap(nums[0],nums[i]);
		// heapy一下当前的节点
		heapyfy(nums, i, 0);
	}
}

int main(){
	vector<int> nums = {2,5,1,3,10,4};
	sort_heap(nums, nums.size());
	for(auto num:nums) cout<<num<<endl;
	return 0;
}
四、⭕️设计一个LRU缓存算法
力扣链接
设计和构建一个“最近最少使用”缓存,该缓存会删除最近最少使用的项目。缓存应该从键映射到值(允许你插入和检索特定键对应的值),并在初始化时指定最大容量。当缓存被填满时,它应该删除最近最少使用的项目。
它应该支持以下操作: 获取数据 get 和 写入数据 put 。
获取数据 get(key) - 如果密钥 (key) 存在于缓存中,则获取密钥的值(总是正数),否则返回 -1。 写入数据 put(key, value) - 如果密钥不存在,则写入其数据值。当缓存容量达到上限时,它应该在写入新数据之前删除最近最少使用的数据值,从而为新的数据值留出空间。
#include<iostream>
#include<unordered_map>
#include<algorithm>
using namespace std;

//这里放你的代码
struct DKLinkNode{
    int key,value;
    DKLinkNode* next;
    DKLinkNode* pre;
    DKLinkNode():key(0),value(0),pre(nullptr),next(nullptr){}
    DKLinkNode(int _key, int _val):key(_key),value(_val),pre(nullptr),next(nullptr){}
};

class LRUCache {
private:
    // 借助哈希表来查询存储的位置,key value(链表节点)
    unordered_map<int, DKLinkNode*> cache;
    int capacity;
    int size;
    DKLinkNode* head;
    DKLinkNode* tail;
public:
    LRUCache(int _capacity):capacity(_capacity),size(0) {
        // 创建头尾 伪节点 便于定位
        head = new DKLinkNode();
        tail = new DKLinkNode();
        head->next = tail;
        tail->pre = head;
    }

    ~LRUCache(){
    	if(head != nullptr){
    		delete head;
    		head = nullptr;
		}
		if(tail != nullptr){
			delete tail;
			tail = nullptr;
		}
		for(auto& c : cache){
			if(c.second != nullptr){
				delete c.second;
				c.second = nullptr;
			}
		}
	}

    int get(int key) {
        // 如果双向链表中没有这个节点则直接返回
        if(!cache.count(key)){return -1;}
        // 如果有节点 则通过哈希表获取这个节点的地址,将这个节点移到前面
        DKLinkNode* node = cache[key];
        moveToHead(node);
        return node->value;
    }

    void put(int key, int value) {
        // 如果哈希表查找不到这个key 则插入新的值到哈希表中
            // 将新的值插入双向链表的头部
        if(!cache.count(key)){
            DKLinkNode* node = new DKLinkNode(key, value);
            cache[key] = node;
            addHeadNode(node);
            ++size;
            // 如果当前的容量大于缓存的最大容量,则移除某段节点
            if(size > capacity){
                DKLinkNode* rNode = removeTail();
                cache.erase(rNode->key);
                delete rNode;
                --size;
            }
        }else{
            // 如果查找得到key,则将该节点移动到头部
            DKLinkNode* moveNode = cache[key];
            // 更新当前key对应的value 并移动链表
            moveNode->value = value;
            moveToHead(moveNode);
        }
    }

    void addHeadNode(DKLinkNode* node){
        node->pre = head;
        node->next = head->next;
        head->next->pre = node;
        head->next  = node;
    }

    void removeNode(DKLinkNode* rNode){
        rNode->pre->next = rNode->next;
        rNode->next->pre = rNode->pre;
    }

    DKLinkNode* removeTail(){
        DKLinkNode* rNode = tail->pre;
        removeNode(rNode);
        return rNode;
    }

    void moveToHead(DKLinkNode* node){
        // 删除当前节点
        removeNode(node);
        // 在头结点处添加进去
        addHeadNode(node);
    }
};

int main(){
	LRUCache* cache = new LRUCache(2);
	cache->put(1, 1);
	cache->put(2, 2);
	int res = cache->get(1);       // 返回  1
	cout<<res<<endl;
	cache->put(3, 3);    // 该操作会使得密钥 2 作废
	res = cache->get(2);       // 返回 -1 (未找到)
	cache->put(4, 4);    // 该操作会使得密钥 1 作废
	res = cache->get(1);       // 返回 -1 (未找到)
	cout<<res<<endl;
	res = cache->get(3);       // 返回  3
	cout<<res<<endl;
	res = cache->get(4);       // 返回  4
	cout<<res<<endl;
	return 0;
}
五、写三个线程交替打印ABC
#include<iostream>
#include<thread>
#include<mutex>
#include<condition_variable>
using namespace std;

mutex mymutex;
condition_variable cv;
int flag=0;

void printa(){
    unique_lock<mutex> lk(mymutex);
    int count=0;
    while(count<10){
        while(flag!=0) cv.wait(lk);
        cout<<"thread 1: a"<<endl;
        flag=1;
        cv.notify_all();
        count++;
    }
    cout<<"my thread 1 finish"<<endl;
}
void printb(){
    unique_lock<mutex> lk(mymutex);
    for(int i=0;i<10;i++){
        while(flag!=1) cv.wait(lk);
        cout<<"thread 2: b"<<endl;
        flag=2;
        cv.notify_all();
    }
    cout<<"my thread 2 finish"<<endl;
}
void printc(){
    unique_lock<mutex> lk(mymutex);
    for(int i=0;i<10;i++){
        while(flag!=2) cv.wait(lk);
        cout<<"thread 3: c"<<endl;
        flag=0;
        cv.notify_all();
    }
    cout<<"my thread 3 finish"<<endl;
}
int main(){
    thread th1(printa);
    thread th2(printb);
    thread th3(printc);

    th1.join();
    th2.join();
    th3.join();
    cout<<" main thread "<<endl;


}
六、Top K问题
常见的形式 :
给定10000个整数,找第K大(第K小)的数
给定10000个整数,找出最大(最小)的前K个数
给定100000个单词,求前K词频的单词
有效的解决办法:
解决Top K问题若干种方法
- 使用最大最小堆。求最大的数用最小堆,求最小的数用最大堆。
- Quick Select算法。使用类似快排的思路,根据pivot划分数组。
- 将1000…个数分成m组,每组寻找top K个数,得到m×K个数,在这m×k个数里面找top K个数。的
按顺序扫描这10000个数,先取出K个元素构建一个大小为K的最小堆。每扫描到一个元素,如果这个元素大于堆顶的元素(这个堆最小的一个数),就放入堆中,并删除堆顶的元素,同时整理堆。如果这个元素小于堆顶的元素,就直接pass。最后堆中剩下的元素就是最大的前Top K个元素,最右的叶节点就是Top 第K大的元素。
6.1 利用堆
头文件是queue
最小k个数 应该用大根堆来做!!!
因为这样才能减少存储空间,而不是将全部数据存储下来!!!
class Solution {
public:
    vector<int> GetLeastNumbers_Solution(vector<int> input, int k) {
        vector<int> ret;
        if (k==0 || k > input.size()) return ret;
        priority_queue<int, vector<int>> pq;
        for (const int val : input) {
            if (pq.size() < k) {
                pq.push(val);
            }
            else {
                if (val < pq.top()) {
                    pq.pop();
                    pq.push(val);
                }

            }
        }

        while (!pq.empty()) {
            ret.push_back(pq.top());
            pq.pop();
        }
        return ret;
    }
};
自己写一个堆:
class Solution {
public:
    void heapify(vector<int>& nums, int i, int n){
        if(i >= n) return ;
        // 取得左右两个节点,判断这两个节点和根节点哪个最大
        int c1 = 2*i + 1;
        int c2 = 2*i + 2;
        int max = i;
        if(c1 < n && nums[c1] > nums[max]) max = c1;
        if(c2 < n && nums[c2] > nums[max]) max = c2;
        if(max !=i){
            // 调整
            swap(nums[i],nums[max]);
            heapify(nums, max, n);
        }
    }

    void build_heapy(vector<int>& nums, int n){
        int last_node = n-1;
        int parent_node = (last_node - 1)/2;
        // 根据父节点进行调整堆
        for(int i = parent_node; i >=0; i--){
            heapify(nums, i ,n);
        }
    }

    int findKthLargest(vector<int>& nums, int k) {
        int n = nums.size();
        // 创建大根堆
        build_heapy(nums,n);
        for(int i = nums.size()-1; i >= nums.size() - k + 1; i--){
            // 将最后一个节点与第0个节点交换
            swap(nums[0],nums[i]);
            heapify(nums, 0, i);
        }
        return nums[0];
    }
};
快排实现
class Solution {
public:
    int quickSort(vector<int>& nums, int left, int right){
        int pivot = nums[left];
        int idx = left;
        for(int i = left + 1; i <=right; ++i){
            if(nums[i] >= pivot){
                // 比中轴大才交换。
                idx++;
                swap(nums[idx], nums[i]);
            }
        }
        swap(nums[idx], nums[left]);// 最左边的位置和idx 交换
        return idx;
    }

    int findKthLargest(vector<int>& nums, int k) {
        int left = 0;
        int right = nums.size() - 1;
        int idx = 0;
        while(true){
            idx = quickSort(nums, left, right);
            if(idx == k - 1){
                // 注意这里是第k个。
                return nums[idx];
            }else if(idx < k -1){
                left = idx + 1;
            }else{
                right = idx - 1;
            }
        }
        return 0;
    }
};
七、其他
洗牌算法
所谓洗牌算法,就是给你一个1到n的序列,让你随机打乱,保证每个数出现在任意一个位置的概率相同,也就是说在n!个的排列中,每一个排列出现的概率相同。
#include<stdio.h>
#include<time.h>
#include <stdlib.h>
//注意传引用
void swap(int &a,int &b)
{
	int tmp = a;
	a = b;
	b = tmp;
}
void RandomShuffle(int a[], int n)
{
	if(a == NULL)	return;

	for(int i = 0;i < n;i++)
	{
		int index = i + rand()%(n-i);
		swap(a[index],a[i]);
	}
}

int main()
{
	srand((unsigned)time(0));
	int a[54];
	for(int i = 0;i < 54;i++)
	{
		a[i] = i+1;
	}
	RandomShuffle(a,54);
	return 0;
}
八、图数据结构
8.1 最短路径算法
1.Dijkstra算法是计算图中的一个点到其它点的最小路径.
  算法思路: 贪心算法.
    将图中所有点分成 S(已求出解)和U(未求出解)2个点集.dist[i]表示v0到v[i]当前已求得得最短路径.A[n][n]为边集
    1.从剩下的边集合中选出dist最短的边并将边的另一顶点vi从U中加入S.
    2.更新与vi连接的所有且并未在S中的点的dist矩阵值,dist[vk]=min(dist[vk],dist[vi]+A(i,k)).
    3.重复上述操作直到U中无与S中的点相连的点.
2.Floyd算法计算图中任意一对点的最短路径.
  算法思路:  T(n)=O(n^3).
   动态规划法: Dis(i,j) =min(Dis(i,j), Dis(i,k) + Dis(k,j)).
下一篇文章更新:
常见的海量数据算法(带实现例子)
最后 🐶狗头保命
一名喜欢书写博客的研究生在读生
如果觉得有用,麻烦三连支持一下欧,希望这篇文章可以帮到你,你的点赞是我持续更新的动力


![[附源码]Python计算机毕业设计Django云南美食管理系统](https://img-blog.csdnimg.cn/2d3c9ec5b1ba42088bca0b13da62a9bd.png)

![[附源码]Python计算机毕业设计大学生兼职管理系统Django(程序+LW)](https://img-blog.csdnimg.cn/c281eadc32e14349a88ae8e64e2e5c73.png)
![[附源码]Python计算机毕业设计宠物短期寄养平台Django(程序+LW)](https://img-blog.csdnimg.cn/72a10c8a04a64523afe9e020d0df2980.png)
![[附源码]Python计算机毕业设计大学生二手物品交易网站Django(程序+LW)](https://img-blog.csdnimg.cn/167bac4afa164dd799c6b0f7e6770281.png)


![[附源码]Python计算机毕业设计大数据与智能工程系教师档案管理系统Django(程序+LW)](https://img-blog.csdnimg.cn/62f5bac9cd424510829459f1bd850a37.png)