文章目录
- 核心原理
- 代码
- html
- 服务端 (java 为例子)
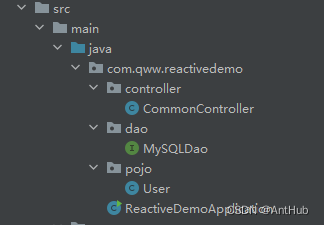
- 服务端目录结构
核心原理
- 前端: 使用js 创建 script 标签,将请求地址,放到其src 中,并将 script 标签追加到文档流;
- 后端:根据约定好的 callback 字段,将 callback中的函数名 拼接成函数调用返回,类似
callback_fun('+ data +'); - 前端认为返回的是js 会立即执行 callback_fun 函数,而此函数参数为数据,函数本身可以完成数据解析和展示的功能;
代码
html
<!DOCTYPE html>
<html lang="en">
<head>
  <meta charset="UTF-8">
  <title>jsonp 实现跨域</title>
</head>
<style>
      body {
        margin: 0;
        padding: 0;
      }
      #wrapper {
        text-align: center;
        padding-top: 100px;
      }
      #searchBar {
        display: inline-block;
      }
      #input {
        width: 300px;
        height: 20px;
        padding: 9px 7px;
        border: 1px solid #b8b8b8;
        border-right: 1px solid #38f;
        outline: none;
        vertical-align: top;
      }
      #btn {
        border: 1px solid #38f;
        margin-left: -5px;
        display: inline-block;
        vertical-align: top;
      }
      #btn input {
        width: 102px;
        height: 38px;
        border: none;
        background: gray;
        cursor: pointer;
        font-size: 14px;
        color: #fff;
      }
      #btn input:hover {
        background-color: #317ef3;
        border-color: #317ef3;
      }
      #title {
        font-size: 12px;
      }
      ul {
        list-style: none;
      }
      li {
        padding: 10px 0;
      }
    </style>
<body>
	<div id="wrapper">
		<div id="searchBar">
			<input type="text" maxlength="50" id="input">
			<span id="btn">
			  <input type="button" value="jsonp_call" onclick="custom()">
			</span>
		</div>
		<p id="title">接口返回数据:</p>
	 </div>
</body>
	<script>

		function custom() {
			var input = document.getElementById('input');
			var inputVal = input.value;
			var url = "http://127.0.0.1:8080/api/jsonp_call?code=utf-8&query="+inputVal+"&callback=commonParse";
			var script = document.createElement('script');
			script.setAttribute('src', url);
			document.getElementsByTagName('head')[0].appendChild(script);
		}


	  function showData(ui_element) {
		var wrapper = document.getElementById('wrapper');
		wrapper.appendChild(ui_element);
	  }

	  var commonParse = function (data) {
		pTag = document.createElement('p');
		pTag.innerHTML = JSON.stringify(data);
		showData(pTag);
	  }
		var input = document.getElementById('input');
		input.addEventListener('keydown', function(e) {
			if (e.key === 'Enter') {
				custom();
			}
		})

	</script>
</html>
服务端 (java 为例子)
package com.qww.reactivedemo.controller;

import com.alibaba.fastjson2.JSON;
import com.qww.reactivedemo.dao.MySQLDao;
import com.qww.reactivedemo.pojo.User;
import org.springframework.http.MediaType;
import org.springframework.util.StopWatch;
import org.springframework.web.bind.annotation.GetMapping;
import org.springframework.web.bind.annotation.RequestMapping;
import org.springframework.web.bind.annotation.RequestParam;
import org.springframework.web.bind.annotation.RestController;
import reactor.core.publisher.Flux;
import reactor.core.publisher.Mono;

import javax.annotation.Resource;
import java.util.HashMap;
import java.util.Map;

@RestController
@RequestMapping("/api")
public class CommonController {

    @Resource
    MySQLDao mySQLDao;

    @RequestMapping(value = "/jsonp_call", produces = MediaType.APPLICATION_JSON_VALUE + ";charset=utf-8")
    public String jsonp(String code, String callback, @RequestParam Map<String,Object> body){
        Map<String,Object> result = new HashMap<>();
        result.put("code", code);
        result.put("callback", callback);
        result.put("body", body);
        return callback + "("+ JSON.toJSONString(result) + ")";
    }

	@GetMapping("/find_all")
    public Flux<User> index(){
        StopWatch find_all = new StopWatch("find_all");
        find_all.start();
        Flux<User> all = mySQLDao.findAll();
        find_all.stop();
        System.out.println(find_all.prettyPrint());
        return all;
    }
}
package com.qww.reactivedemo.dao;

import com.qww.reactivedemo.pojo.User;
import org.reactivestreams.Publisher;
import org.springframework.data.repository.reactive.ReactiveCrudRepository;
import org.springframework.stereotype.Repository;
import reactor.core.publisher.Flux;
import reactor.core.publisher.Mono;

@Repository
public interface MySQLDao  extends ReactiveCrudRepository<User,Integer>{}
package com.qww.reactivedemo.pojo;

public class User {
    private Integer uid;
    private String uname;
    private String pwd;

    public Integer getUid() {
        return uid;
    }

    public void setUid(Integer uid) {
        this.uid = uid;
    }

    public String getUname() {
        return uname;
    }

    public void setUname(String uname) {
        this.uname = uname;
    }

    public String getPwd() {
        return pwd;
    }

    public void setPwd(String pwd) {
        this.pwd = pwd;
    }
}
package com.qww.reactivedemo;

import org.springframework.boot.SpringApplication;
import org.springframework.boot.autoconfigure.SpringBootApplication;

@SpringBootApplication
public class ReactiveDemoApplication {

	public static void main(String[] args) {
		SpringApplication.run(ReactiveDemoApplication.class, args);
	}

}
<?xml version="1.0" encoding="UTF-8"?>
<project xmlns="http://maven.apache.org/POM/4.0.0" xmlns:xsi="http://www.w3.org/2001/XMLSchema-instance"
xsi:schemaLocation="http://maven.apache.org/POM/4.0.0 https://maven.apache.org/xsd/maven-4.0.0.xsd">
<modelVersion>4.0.0</modelVersion>
<groupId>com.qww</groupId>
<artifactId>reactive-demo</artifactId>
<version>0.0.1-SNAPSHOT</version>
<name>reactive-demo</name>
<description>reactive Demo project for Spring Boot</description>
<properties>
<java.version>1.8</java.version>
<spring-boot.version>2.3.7.RELEASE</spring-boot.version>
</properties>
<dependencyManagement>
<dependencies>
<dependency>
<groupId>org.springframework.boot</groupId>
<artifactId>spring-boot-dependencies</artifactId>
<version>${spring-boot.version}</version>
<type>pom</type>
<scope>import</scope>
</dependency>
</dependencies>
</dependencyManagement>
<dependencies>
<dependency>
<groupId>org.springframework.boot</groupId>
<artifactId>spring-boot-starter</artifactId>
</dependency>
<dependency>
<groupId>org.springframework.boot</groupId>
<artifactId>spring-boot-starter-data-r2dbc</artifactId>
</dependency>
<dependency>
<groupId>org.springframework.boot</groupId>
<artifactId>spring-boot-starter-webflux</artifactId>
</dependency>
<dependency>
<groupId>dev.miku</groupId>
<artifactId>r2dbc-mysql</artifactId>
<scope>runtime</scope>
</dependency>
<dependency>
<groupId>mysql</groupId>
<artifactId>mysql-connector-java</artifactId>
<scope>runtime</scope>
</dependency>
<dependency>
<groupId>com.alibaba</groupId>
<artifactId>fastjson</artifactId>
<version>2.0.36</version>
</dependency>
<dependency>
<groupId>org.springframework.boot</groupId>
<artifactId>spring-boot-starter-test</artifactId>
<scope>test</scope>
</dependency>
</dependencies>
<build>
<plugins>
<plugin>
<groupId>org.springframework.boot</groupId>
<artifactId>spring-boot-maven-plugin</artifactId>
</plugin>
<plugin>
<groupId>org.apache.maven.plugins</groupId>
<artifactId>maven-compiler-plugin</artifactId>
<configuration>
<source>8</source>
<target>8</target>
</configuration>
</plugin>
</plugins>
</build>
</project>
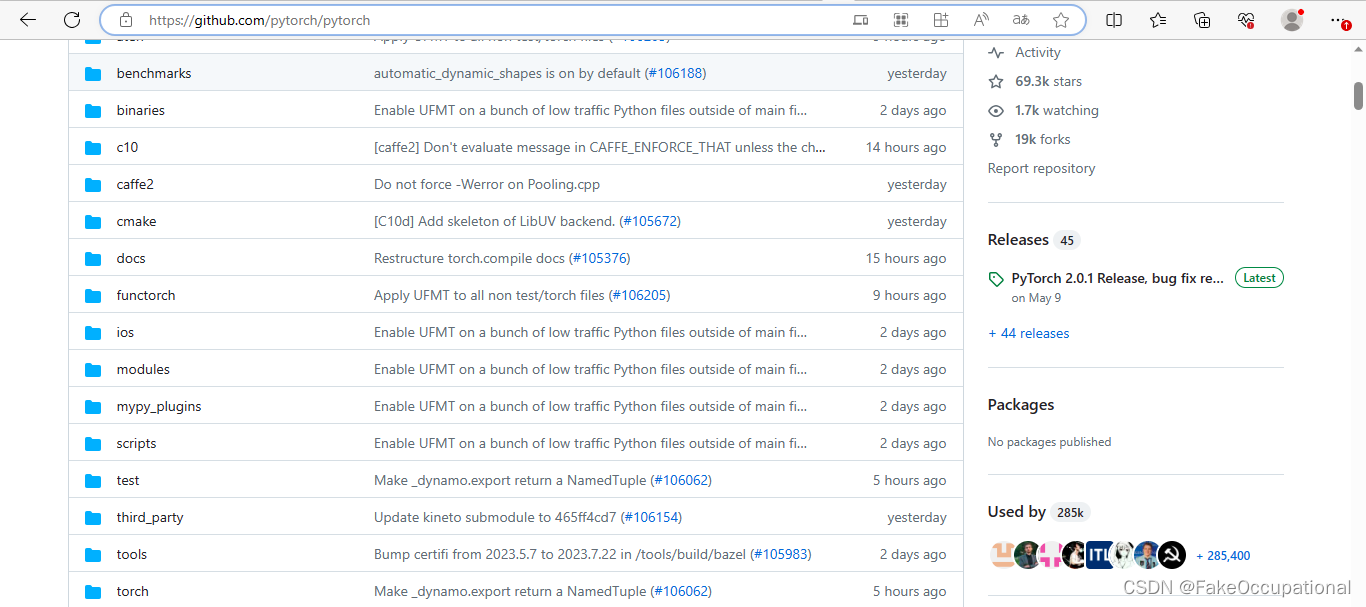
服务端目录结构