信号和槽函数的扩展
- 一个信号连接多个槽函数
- 一个槽函数连接多个信号
- 信号连接信号
一个信号可以连接多个槽函数, 发送一个信号有多个处理动作
- 需要写多个connect()连接
- 槽函数的执行顺序和信号的发射顺序相同(QT5中)
- 信号的接收者可以是一个对象, 也可以是多个对象
一个槽函数可以连接多个信号, 多个不同的信号, 处理动作是相同的
- 需要写多个connect()连接
信号可以连接信号
- 信号接收者可以不处理接收的信号, 而是继续发射新的信号,这相当于传递了数据, 并没有对数据进行处理
一个信号连接多个槽函数
信号函数类
#ifndef ME_H
#define ME_H

#include <QObject>

class me : public QObject
{
    Q_OBJECT
public:
    explicit me(QObject *parent = nullptr);

signals:
    void sendMessage();   //信号函数不需要定义

};

#endif // ME_H
槽函数类:
#ifndef MEPARENT_H
#define MEPARENT_H

#include <QObject>

class meParent : public QObject
{
    Q_OBJECT
public:
    explicit meParent(QObject *parent = nullptr);

public slots:
    void receiveMessage();

};

#endif // MEPARENT_H
#include "meparent.h"
#include "QDebug"

meParent::meParent(QObject *parent) : QObject(parent)
{

}

void meParent::receiveMessage()
{
    qDebug()<<"父母接受到消息";
}
#ifndef MYFRIEND_H
#define MYFRIEND_H

#include <QObject>

class myFriend : public QObject
{
    Q_OBJECT
public:
    explicit myFriend(QObject *parent = nullptr);

public slots:
    void receiveMessage();

};

#endif // MYFRIEND_H
#include "myfriend.h"
#include "QDebug"
myFriend::myFriend(QObject *parent) : QObject(parent)
{

}

void myFriend::receiveMessage()
{
    qDebug()<<"朋友接受到消息";
}
#ifndef MYTEACHER_H
#define MYTEACHER_H

#include <QObject>

class myTeacher : public QObject
{
    Q_OBJECT
public:
    explicit myTeacher(QObject *parent = nullptr);

public slots:
    void receiveMessage();

};

#endif // MYTEACHER_H
#include "myteacher.h"
#include "QDebug"
myTeacher::myTeacher(QObject *parent) : QObject(parent)
{

}

void myTeacher::receiveMessage()
{
    qDebug()<<"老师接受到消息";
}
主窗口中,槽函数和类指针的声明
#ifndef MAINWINDOW_H
#define MAINWINDOW_H

#include <QMainWindow>
#include"me.h"
#include"meparent.h"
#include "myfriend.h"
#include "myteacher.h"
#include "ouyang.h"
#include "shinecoln.h"

QT_BEGIN_NAMESPACE
namespace Ui { class MainWindow; }
QT_END_NAMESPACE

class MainWindow : public QMainWindow
{
    Q_OBJECT

public:
    MainWindow(QWidget *parent = nullptr);
    ~MainWindow();
    me* tom;
    meParent* myparent;
    myFriend* myfriend;
    myTeacher* myteacher;
    ouyang* ou;
    shinecoln* shine;
//接受按钮信号的槽函数
public slots:
    void sendMessage();


private:
    Ui::MainWindow *ui;
};
#endif // MAINWINDOW_H
cpp文件如下:
#include "mainwindow.h"
#include "ui_mainwindow.h"
#include "QDebug"

MainWindow::MainWindow(QWidget *parent)
    : QMainWindow(parent)
    , ui(new Ui::MainWindow)
{
    ui->setupUi(this);
    tom = new me(this);
    myparent = new meParent(this);
    myfriend = new myFriend(this);
    myteacher = new myTeacher(this);
    ou = new ouyang(this);
    shine = new shinecoln(this);
    //按钮绑定mainwindow的槽函数
    connect(ui->myPushButton,&QPushButton::clicked,this,&MainWindow::sendMessage);
    connect(tom,&me::sendMessage,myfriend,&myFriend::receiveMessage);
    connect(tom,&me::sendMessage,myparent,&meParent::receiveMessage);
    connect(tom,&me::sendMessage,myteacher,&myTeacher::receiveMessage);

}

MainWindow::~MainWindow()
{
    delete ui;
}

void MainWindow::sendMessage()
{
    //qDebug()<<"hello";
    tom->sendMessage();
}
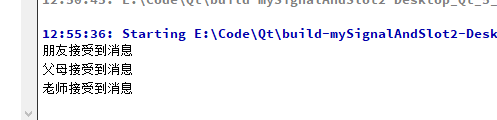
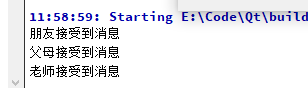
消息传递的流程:点击控件,触发主窗口的槽函数。主窗口槽函数调用tom->sendMessage();信号函数,myfriend,myfriend,myfriend同时捕获到信号,按照顺序调用myFriend::receiveMessage meParent::receiveMessage myTeacher::receiveMessage这三个槽函数。
一个槽函数连接多个信号
信号类:
#ifndef ME_H
#define ME_H

#include <QObject>

class me : public QObject
{
    Q_OBJECT
public:
    explicit me(QObject *parent = nullptr);

signals:
    void sendMessage();   //信号函数不需要定义
    void sendMsg2(QString);

};

#endif // ME_H
#ifndef OUYANG_H
#define OUYANG_H

#include <QObject>

class ouyang : public QObject
{
    Q_OBJECT
public:
    explicit ouyang(QObject *parent = nullptr);

signals:
    void sendMessage();  //信号函数不需要定义
    void sendMsg2(QString);
};

#endif // OUYANG_H
#ifndef SHINECOLN_H
#define SHINECOLN_H

#include <QObject>

class shinecoln : public QObject
{
    Q_OBJECT
public:
    explicit shinecoln(QObject *parent = nullptr);

signals:
    void sendMessage();  //信号函数不需要定义
    void sendMsg2(QString);
};

#endif // SHINECOLN_H
槽函数类:
#ifndef MEPARENT_H
#define MEPARENT_H

#include <QObject>

class meParent : public QObject
{
    Q_OBJECT
public:
    explicit meParent(QObject *parent = nullptr);

public slots:
    void receiveMessage();
    void receiveMsg2(QString msg);

};

#endif // MEPARENT_H
#include "meparent.h"
#include "QDebug"

meParent::meParent(QObject *parent) : QObject(parent)
{

}

void meParent::receiveMessage()
{
    qDebug()<<"父母接受到消息";
}

void meParent::receiveMsg2(QString msg)
{
    qDebug()<<"父母接受到: "<<msg;
}
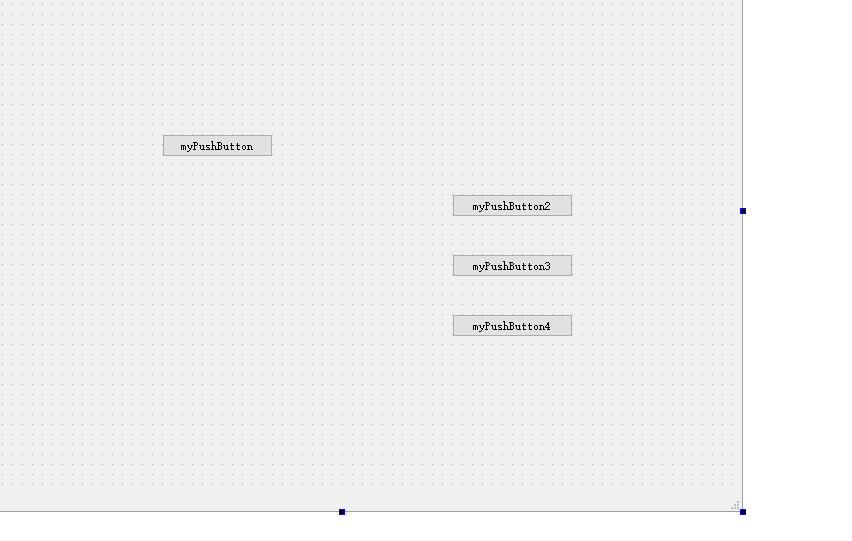
ui页面:
头文件:
#ifndef MAINWINDOW_H
#define MAINWINDOW_H

#include <QMainWindow>
#include"me.h"
#include"meparent.h"
#include "myfriend.h"
#include "myteacher.h"
#include "ouyang.h"
#include "shinecoln.h"

QT_BEGIN_NAMESPACE
namespace Ui { class MainWindow; }
QT_END_NAMESPACE

class MainWindow : public QMainWindow
{
    Q_OBJECT

public:
    MainWindow(QWidget *parent = nullptr);
    ~MainWindow();
    me* tom;
    meParent* myparent;
    myFriend* myfriend;
    myTeacher* myteacher;
    ouyang* ou;
    shinecoln* shine;
//接受按钮信号的槽函数
public slots:
    void sendMessage();
    void sendMsg2();
    void sendMsg3();
    void sendMsg4();


private:
    Ui::MainWindow *ui;
};
#endif // MAINWINDOW_H
cpp文件:
#include "mainwindow.h"
#include "ui_mainwindow.h"
#include "QDebug"
MainWindow::MainWindow(QWidget *parent)
: QMainWindow(parent)
, ui(new Ui::MainWindow)
{
ui->setupUi(this);
tom = new me(this);
myparent = new meParent(this);
myfriend = new myFriend(this);
myteacher = new myTeacher(this);
ou = new ouyang(this);
shine = new shinecoln(this);
//一个信号绑定多个槽函数
//按钮绑定mainwindow的槽函数
connect(ui->myPushButton,&QPushButton::clicked,this,&MainWindow::sendMessage);
connect(tom,&me::sendMessage,myfriend,&myFriend::receiveMessage);
connect(tom,&me::sendMessage,myparent,&meParent::receiveMessage);
connect(tom,&me::sendMessage,myteacher,&myTeacher::receiveMessage);
connect(ui->myPushButton2,&QPushButton::clicked,this,&MainWindow::sendMsg2);
connect(ui->myPushButton3,&QPushButton::clicked,this,&MainWindow::sendMsg3);
connect(ui->myPushButton4,&QPushButton::clicked,this,&MainWindow::sendMsg4);
//一个槽函数绑定多个信号
connect(tom,&me::sendMsg2,myparent,&meParent::receiveMsg2);
connect(ou,&ouyang::sendMsg2,myparent,&meParent::receiveMsg2);
connect(shine,&shinecoln::sendMsg2,myparent,&meParent::receiveMsg2);
}
MainWindow::~MainWindow()
{
delete ui;
}
void MainWindow::sendMessage()
{
//qDebug()<<"hello";
tom->sendMessage();
}
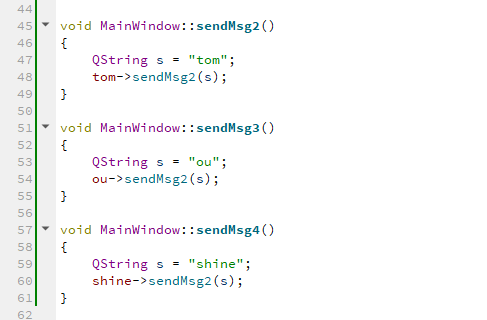
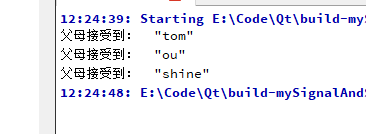
void MainWindow::sendMsg2()
{
QString s = "tom";
tom->sendMsg2(s);
}
void MainWindow::sendMsg3()
{
QString s = "ou";
ou->sendMsg2(s);
}
void MainWindow::sendMsg4()
{
QString s = "shine";
shine->sendMsg2(s);
}
关键代码:

运行:
信号连接信号
信号接收者可以不处理接收的信号, 而是继续发射新的信号,这相当于传递了数据, 并没有对数据进行处理
槽函数的位置不对信号处理,而是对信号的转发。
connect(const QObject *sender, &QObject::signal, const QObject *receiver, &QObject::siganl-new);
例子:
#include "mainwindow.h"
#include "ui_mainwindow.h"
#include "QDebug"

MainWindow::MainWindow(QWidget *parent)
    : QMainWindow(parent)
    , ui(new Ui::MainWindow)
{
    ui->setupUi(this);
    tom = new me(this);
    myparent = new meParent(this);
    myfriend = new myFriend(this);
    myteacher = new myTeacher(this);
    ou = new ouyang(this);
    shine = new shinecoln(this);
    //一个信号绑定多个槽函数
    //按钮绑定mainwindow的槽函数
    connect(ui->myPushButton,&QPushButton::clicked,this,&MainWindow::sendMessage);
    connect(tom,&me::sendMessage,myfriend,&myFriend::receiveMessage);
    connect(tom,&me::sendMessage,myparent,&meParent::receiveMessage);
    connect(tom,&me::sendMessage,myteacher,&myTeacher::receiveMessage);


    connect(ui->myPushButton2,&QPushButton::clicked,this,&MainWindow::sendMsg2);
    connect(ui->myPushButton3,&QPushButton::clicked,this,&MainWindow::sendMsg3);
    connect(ui->myPushButton4,&QPushButton::clicked,this,&MainWindow::sendMsg4);
    //一个槽函数绑定多个信号
    connect(tom,&me::sendMsg2,myparent,&meParent::receiveMsg2);
    connect(ou,&ouyang::sendMsg2,myparent,&meParent::receiveMsg2);
    connect(shine,&shinecoln::sendMsg2,myparent,&meParent::receiveMsg2);

    //信号连接信号
    connect(ui->myPushButton5,&QPushButton::clicked,tom,&me::sendMessage);

}

MainWindow::~MainWindow()
{
    delete ui;
}

void MainWindow::sendMessage()
{
    //qDebug()<<"hello";
    tom->sendMessage();
}

void MainWindow::sendMsg2()
{
    QString s = "tom";
    tom->sendMsg2(s);
}

void MainWindow::sendMsg3()
{
    QString s = "ou";
    ou->sendMsg2(s);
}

void MainWindow::sendMsg4()
{
    QString s = "shine";
    shine->sendMsg2(s);
}
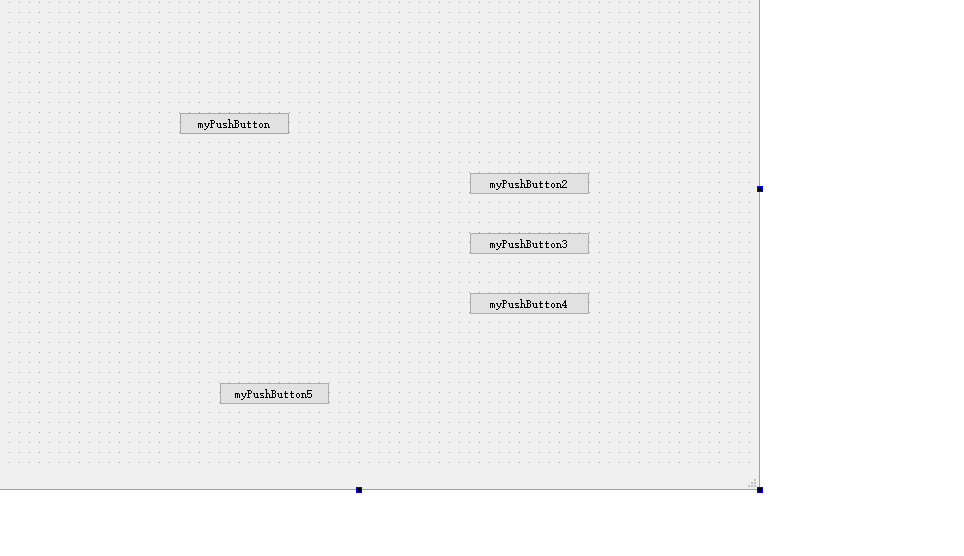
新建的是 myPushButton5 按钮:
    //信号连接信号
    connect(ui->myPushButton5,&QPushButton::clicked,tom,&me::sendMessage);
信号连接信号(之前都是在mainwindow中建立了槽函数,然后槽函数发送信号)
现在就直接点击按钮,发送信号,然后触发第二个信号me::sendMessage
之前的代码捕获到信号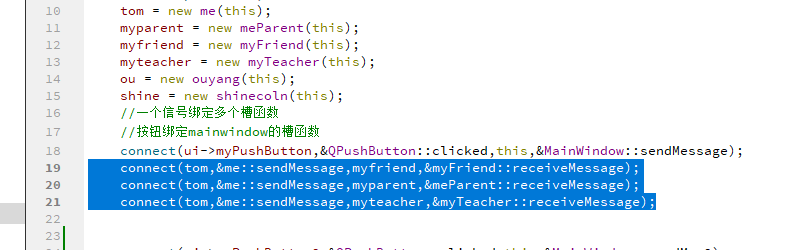
运行结果为: