Rust ESP32C3开发
系统开发逐步使用Rust语言,在嵌入式领域Rust也逐步完善,本着学习Rust和ESP32的目的,搭建了ESP32C3的环境,过程中遇到了不少问题,予以记录。
ESP-IDF开发ESP32
这一部分可跳过,是使用C开发ESP32。直接看Rust 与 ESP32C3
先使用ESP-IDF环境,跑一个Hello world
ESP-IDF安装,选择v5.1
克隆项目
git clone https://github.com/espressif/esp-idf.git
在get-started/hello-world工程中,可以编译项目,编译前连接开发板,可以在设备管理里看到comx,这里为com3

使用IDF-CMD命令行,进入hello-world目录,设置目标
idf.py set-target esp32c3
打开配置界面,
idf.py menuconfig
hello-world项目不进行配置,编译
idf.py build
烧录
idf.py -p PORT flash
idf.py -p COM3 flash
烧录成功
Compressed 168688 bytes to 89398...
Writing at 0x00010000... (16 %)
Writing at 0x0001a548... (33 %)
Writing at 0x00020e66... (50 %)
Writing at 0x00028352... (66 %)
Writing at 0x0002ecae... (83 %)
Writing at 0x00035da9... (100 %)
Wrote 168688 bytes (89398 compressed) at 0x00010000 in 3.1 seconds (effective 441.4 kbit/s)...
Hash of data verified.
Compressed 3072 bytes to 103...
Writing at 0x00008000... (100 %)
Wrote 3072 bytes (103 compressed) at 0x00008000 in 0.1 seconds (effective 438.8 kbit/s)...
Hash of data verified.

Leaving...
Hard resetting via RTS pin...
Done
监视输出
idf.py -p com3 monitor
Rust 与ESP32C3
参考资料
https://esp-rs.github.io/book/introduction.html
https://esp-rs.github.io/std-training/01_intro.html
https://doc.rust-lang.org/nightly/rustc/platform-support/esp-idf.html
https://esp-rs.github.io/book/overview/index.html
Rust工具链
安装
rustup toolchain install nightly-2023-02-28 --component rust-src
espressif 工具链
包含:
- cargo-espflash
- espflash
- ldproxy
安装
cargo install cargo-espflash espflash ldproxy
克隆仓库
克隆代码,并进入
git clone "https://github.com/esp-rs/std-training.git"
cd std-training
hello,board
连接开发板,
进入hardware-check目录
cd intro/hardware-check
配置你的wifi名称与密码,cfg.toml
[hardware-check]
wifi_ssid = "111111"
wifi_psk = "123451111"
编译
cargo build
报错
error: failed to run custom build command for `esp-idf-sys v0.33.0`
 CMake Error at C:/Users/Rao/.espressif/esp-idf/v4.4.4/tools/cmake/component.cmake:300 (message):
    Include directory
    'C:/Users/Rao/.espressif/esp-idf/v4.4.4/components/mbedtls/mbedtls/include'
    is not a directory.
  Call Stack (most recent call first):
    C:/Users/Rao/.espressif/esp-idf/v4.4.4/tools/cmake/component.cmake:473 (__component_add_include_dirs)
    C:/Users/Rao/.espressif/esp-idf/v4.4.4/components/mbedtls/CMakeLists.txt:18 (idf_component_register)
原因是
'C:/Users/Rao/.espressif/esp-idf/v4.4.4/components/mbedtls/mbedtls/include'
    is not a directory.
说明这个目录位于mbedtls的submodule中, 可能没有被checkout出来
解决方法,进入C:/Users/Rao/.espressif/esp-idf/v4.4.4/components/mbedtls/
git submodule update --init --recursive
cargo run
报错
 D:/Workspace/Program/ESP32/std-training/intro/hardware-check/target/riscv32imc-esp-espidf/debug/build/esp-idf-sys-281d3f81b0a0f0ca/out/build/esp-idf/mbedtls/mbedtls/library/CMakeFiles/mbedcrypto.dir/./

    has 201 characters.  The maximum full path to an object file is 250
    characters (see CMAKE_OBJECT_PATH_MAX).  Object file

      d5fa956509b7db88e8eaa02d1680138d/esp_rsa_sign_alt.c.obj

    cannot be safely placed under this directory.  The build may not work
    correctly.
目录太长了,回到std-training目录,将项目映射到r:
 subst r: std-training
 cd r:
进入hardware-check重新编译
 cd intor/hardware-check
 cargo run
成功
I (9229) wifi:set rx beacon pti, rx_bcn_pti: 0, bcn_timeout: 0, mt_pti: 25000, mt_time: 10000
I (9239) wifi: Waiting for DHCP lease...
I (9249) wifi:<ba-add>idx:0 (ifx:0, 62:1e:12:f4:12:61), tid:0, ssn:0, winSize:64
I (9319) wifi:AP's beacon interval = 102400 us, DTIM period = 2
I (10239) esp_netif_handlers: sta ip: 192.168.83.104, mask: 255.255.255.0, gw: 192.168.83.127
I (10239) wifi: Wifi DHCP info: IpInfo { ip: 192.168.83.104, subnet: Subnet { gateway: 192.168.83.127, mask: Mask(24) }, dns: Some(192.168.83.127), secondary_dns: Some(0.0.0.0) }
I (11249) hardware_check: Hello, world!
I (13249) hardware_check: Hello, world!
查看板子运行状态
espflash monitor
创建新项目
为了避免长路径问题,将一个空间映射为短路径
subst z: esp32
cd z:
由cargo-generate配置新项目
安装
cargo install cargo-generate
生成
PS z:\> cargo generate https://github.com/esp-rs/esp-idf-template cargo
⚠️   Favorite `https://github.com/esp-rs/esp-idf-template` not found in config, using it as a git repository: https://github.com/esp-rs/esp-idf-template
🤷   Project Name: hello_world
⚠️   Renaming project called `hello_world` to `hello-world`...
🔧   Destination: z:\hello-world ...
🔧   project-name: hello-world ...
🔧   Generating template ...
✔ 🤷   Which MCU to target? · esp32c3
✔ 🤷   Configure advanced template options? · false
🔧   Moving generated files into: `z:\hello-world`...
Initializing a fresh Git repository
✨   Done! New project created z:\hello-world
用vscode打开项目
code .
加一个死循环
fn main() {
    // It is necessary to call this function once. Otherwise some patches to the runtime
    // implemented by esp-idf-sys might not link properly. See https://github.com/esp-rs/esp-idf-template/issues/71
    esp_idf_sys::link_patches();
    // Bind the log crate to the ESP Logging facilities
    esp_idf_svc::log::EspLogger::initialize_default();

    info!("Hello, world!");

    loop {
        info!("loop ...!");
        std::thread::sleep(std::time::Duration::from_secs(1))
    }
}
编译
cargo run
一般时间会很长
运行起来
I (356) cpu_start: Starting scheduler.
I (362) hello_world: Hello, world!
I (362) hello_world: loop ...!
I (1362) hello_world: loop ...!
I (2362) hello_world: loop ...!
I (3362) hello_world: loop ...!
http客户端
进入espressif-trainnings/intro中的http-client项目,
修改wifi配置,
编译
cargo run --example http_client
完全可以自己写一个服务器,提供http服务,例如go
package main

import "github.com/gin-gonic/gin"

func main() {
	engine := gin.Default()
	engine.GET("/", func(context *gin.Context) {
		context.JSON(200, gin.H{
			"message": "Hello World",
		})
	})
	engine.Run("")
}
该服务端提供了get请求,默认根目录,响应json数据。
在http-client/examples/http_client.rs中,
get("http://192.168.83.79/")?;
注意需要在一个局域网内,并且知道主机的ip地址。
运行
cargo run --example http_client
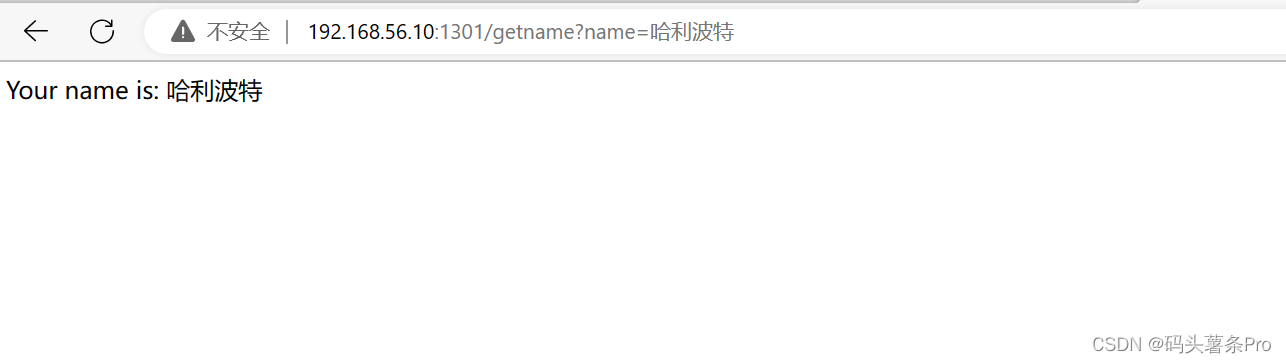
http服务器
提供get服务
编写wifi配置
cd .\http-server\

cargo run --example http_server
我的开发板获取温度有一些异常,注释掉获取温度的代码。
http://192.168.83.104/temperature
MQTT
搭建mqtt服务器,
wsl + ubuntu+docker
https://www.emqx.io/docs/zh/v5.1/deploy/install-docker.html
拉取镜像
docker pull emqx/emqx:5.1.0
启动容器
docker run -d --name emqx -p 1883:1883 -p 8083:8083 -p 8084:8084 -p 8883:8883 -p 18083:18083 emqx/emqx:5.1.0
http://wsl-ubuntu 地址 :18083/
默认用户名及密码
admin
public
通过MQTTfx测试mqtt服务器是否正常,
https://softblade.de/en/download-2/

创建连接

发送消息,需要往某个主题发送

所有订阅了hello主题的客户端,都能收到消息。

cargo run --example solution_publ_rcv
后续局域网还有点问题,后面再做,
ssd1306
https://juejin.cn/post/7096077841023893511
初始化一个项目
cargo generate --git https://github.com/esp-rs/esp-idf-template cargo
PS R:\> cargo generate --git https://github.com/esp-rs/esp-idf-template cargo
 Project Name: ssd1306_esp32c3
 Renaming project called `ssd1306_esp32c3` to `ssd1306-esp32c3`...
 Destination: R:\ssd1306-esp32c3 ...
 project-name: ssd1306-esp32c3 ...
 Generating template ...
✔  Which MCU to target? · esp32c3
✔  Configure advanced template options? · false
 Moving generated files into: `R:\ssd1306-esp32c3`...
Initializing a fresh Git repository
 Done! New project created R:\ssd1306-esp32c3
初始化外设
use esp_idf_sys as _; // If using the `binstart` feature of `esp-idf-sys`, always keep this module imported
use log::*;
use esp_idf_hal::{
    delay::FreeRtos,
    i2c::{I2cConfig, I2cDriver},
    peripherals::Peripherals,
    prelude::*,
};

fn main() {
    // It is necessary to call this function once. Otherwise some patches to the runtime
    // implemented by esp-idf-sys might not link properly. See https://github.com/esp-rs/esp-idf-template/issues/71
    esp_idf_sys::link_patches();
    // Bind the log crate to the ESP Logging facilities
    esp_idf_svc::log::EspLogger::initialize_default();

    let peripherals = Peripherals::take().unwrap();

    let sda = peripherals.pins.gpio10;
    let scl = peripherals.pins.gpio8;

    let config = I2cConfig::new().baudrate(400.kHz().into());
    let i2c = I2cDriver::new(peripherals.i2c0, sda, scl, &config).unwrap();


    info!("Hello, world!");
}
还不太行,留坑
esp_idf_sys::link_patches();
// Bind the log crate to the ESP Logging facilities
esp_idf_svc::log::EspLogger::initialize_default();
let peripherals = Peripherals::take().unwrap();

let sda = peripherals.pins.gpio10;
let scl = peripherals.pins.gpio8;

let config = I2cConfig::new().baudrate(400.kHz().into());
let i2c = I2cDriver::new(peripherals.i2c0, sda, scl, &config).unwrap();


info!("Hello, world!");
}
还不太行,留坑