babylon.js是微软推出的Web3D库,本文写作时版本是6.x,官方介绍如下,

看这意思是6.x系列的版本大大提高了性能,并提供了很多新特性。其Github地址是https://github.com/BabylonJS/Babylon.js
本篇文章讲述使用babylon.js的初次体验和安装操作,为后续学习打下基础。
一 简单例子
首先实现一个简单例子来体验一下babylonjs。新建一个文本文件,名字改成index.html,然后把以下内容拷贝进去,
<!DOCTYPE html>
<html xmlns="http://www.w3.org/1999/xhtml">

    <head>
        <meta http-equiv="Content-Type" content="text/html; charset=utf-8"/>
        <title>Babylon Template</title>

        <style>
            html, body {
                overflow: hidden;
                width: 100%;
                height: 100%;
                margin: 0;
                padding: 0;
            }
            #renderCanvas {
                width: 100%;
                height: 100%;
                touch-action: none;
            }
        </style>

        <script src="https://cdn.babylonjs.com/babylon.js"></script>

    </head>

   <body>

	<canvas id="renderCanvas"></canvas>

	<script>
        const canvas = document.getElementById("renderCanvas"); // Get the canvas element
        const engine = new BABYLON.Engine(canvas, true); // Generate the BABYLON 3D engine
        const createScene = function () {
            // Creates a basic Babylon Scene object
            const scene = new BABYLON.Scene(engine);
            // Creates and positions a free camera
            const camera = new BABYLON.FreeCamera("camera1",
                new BABYLON.Vector3(0, 5, -10), scene);
            // Targets the camera to scene origin
            camera.setTarget(BABYLON.Vector3.Zero());
            // This attaches the camera to the canvas
            camera.attachControl(canvas, true);
            // Creates a light, aiming 0,1,0 - to the sky
            const light = new BABYLON.HemisphericLight("light",
                new BABYLON.Vector3(0, 1, 0), scene);
            // Dim the light a small amount - 0 to 1
            light.intensity = 0.7;
            // Built-in 'sphere' shape.
            const sphere = BABYLON.MeshBuilder.CreateSphere("sphere",
                {diameter: 2, segments: 32}, scene);
            // Move the sphere upward 1/2 its height
            sphere.position.y = 1;
            // Built-in 'ground' shape.
            const ground = BABYLON.MeshBuilder.CreateGround("ground",
                {width: 6, height: 6}, scene);
            return scene;
        };
        const scene = createScene(); //Call the createScene function
        // Register a render loop to repeatedly render the scene
        engine.runRenderLoop(function () {
                scene.render();
        });
        // Watch for browser/canvas resize events
        window.addEventListener("resize", function () {
                engine.resize();
        });
	</script>

   </body>

</html>
然后用浏览器打开这个index.html文件,显示效果如下,

鼠标左键按着不放,然后左右移动,可以看到视角转变的效果。
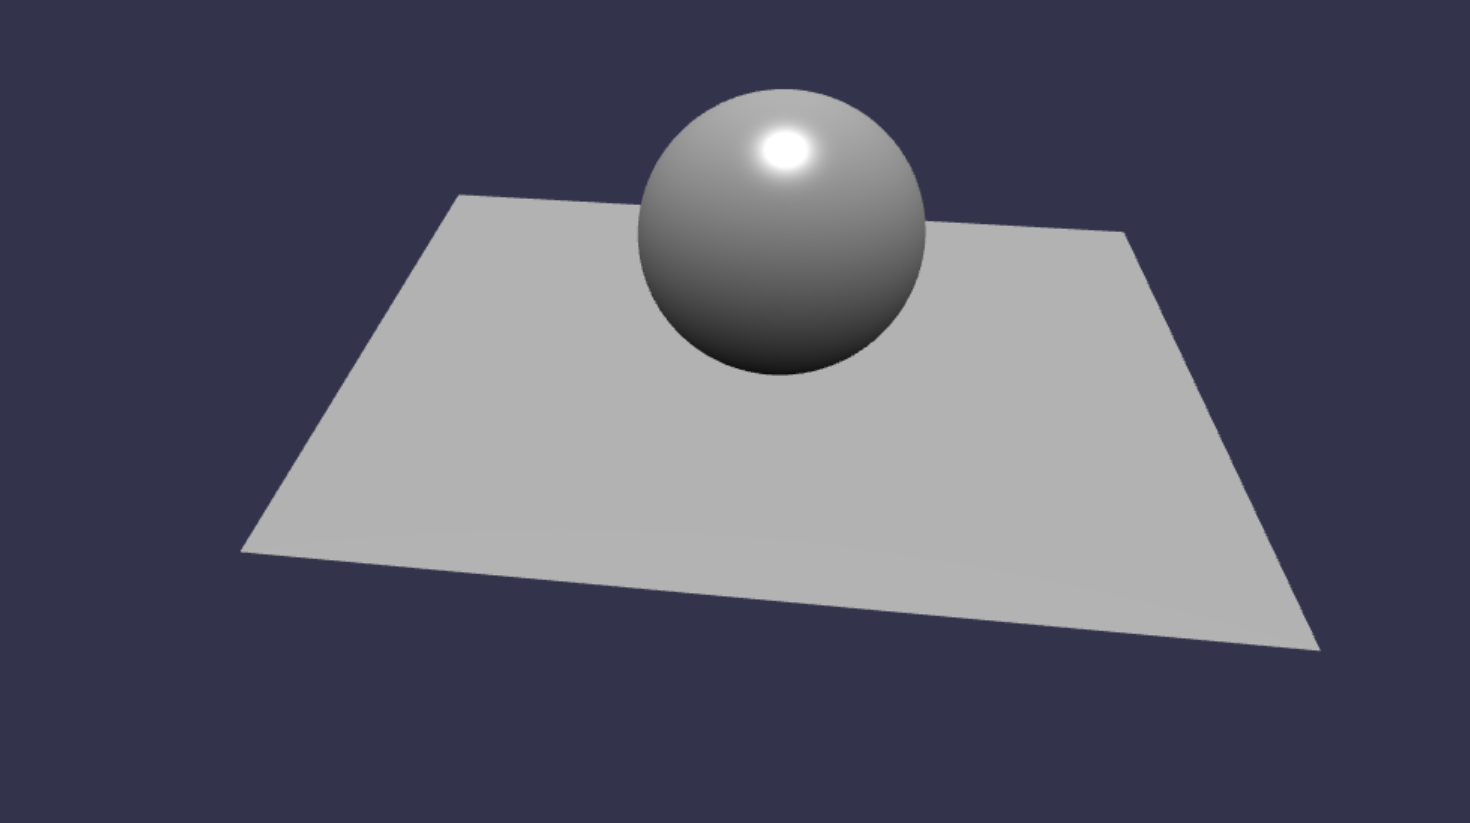
这个例子里是使用了babylon的CDN,这样不用本地去安装babylonjs,但是对于正规项目来说,需要本地去安装这个库,最后打包。。。
二 本地安装babylonjs
首先需要安装Nodejs,安装过程不再赘述,就是去nodejs的官网下载node然后安装。babylonjs支持TypeScript,如果用TypeScript开发就需要安装它,
npm install -g typescript
接着是安装babylonjs,有2种方式,UMD或者ES6,用户选择其中一种就行了,他们的区别可以网上搜下,
1. UMD/NPM方式
UMD是Universal Module Definition的缩写,其github地址是https://github.com/umdjs/umd,介绍如下,

babylon提供的NPM package有以下几个,
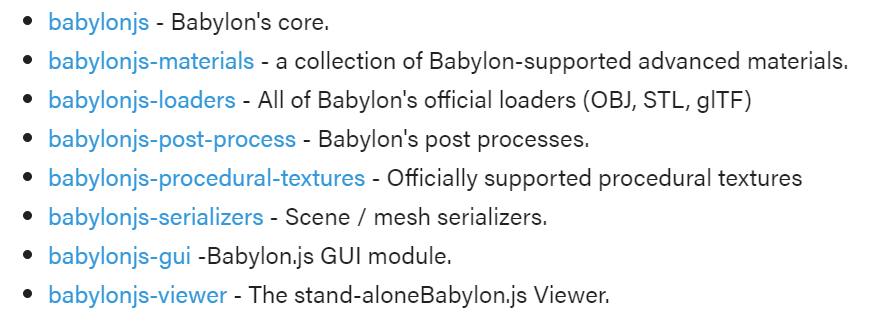
Babylon’s core是必须要安装的,命令如下,
npm install --save babylonjs
安装好之后,在typescript或javascript文件里包含babylonjs可以使用如下语句,
import * as BABYLON from 'babylonjs';
上面这条语句是把core里提供的所有功能都包含了,如果只想引入指定功能,那么可以使用以下语句,
import { Engine, Scene } from 'babylonjs';
其它package可以根据需要进行安装,安装时使用的package名字就是上面介绍的,例如安装materials包就使用如下命令,
npm install --save babylonjs-materials
安装gui包则用如下命令,
npm install --save babylonjs-gui
2. ES6/NPM方式
babylonjs同时也提供npm es6 packages,如下,
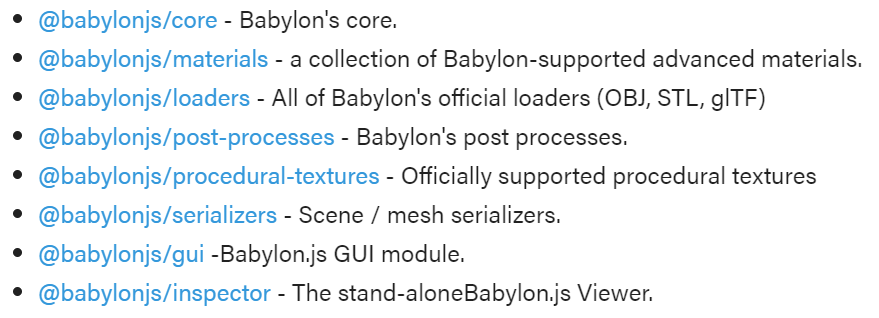
es6 package可以让用户使用“摇树”功能(tree shake)来减少程序大小。
同理,Babylon’s core是必须要安装的,命令如下,
npm install @babylonjs/core
安装好之后,在文件里引入babylonjs可以使用以下语句,
import * as BABYLON from "@babylonjs/core"
上面这条语句是把core里提供的所有功能都包含了,如果只想引入指定功能,那么可以使用以下语句,
import { Engine, Scene } from "@babylonjs/core";
其它package可以根据需要进行安装,安装时使用的package名字就是上面介绍的,例如安装materials包就使用如下命令,
npm install --save @babylonjs/materials
三 总结
本文讲述了如何体验babylonjs以及如何安装babylonjs,这样为后续学习做好准备。
