深入浅出自定义创建spring-boot-starter
https://docs.spring.io/spring-boot/docs/current/reference/html/features.html#features.developing-auto-configuration
快速入手
第一步:新建模块
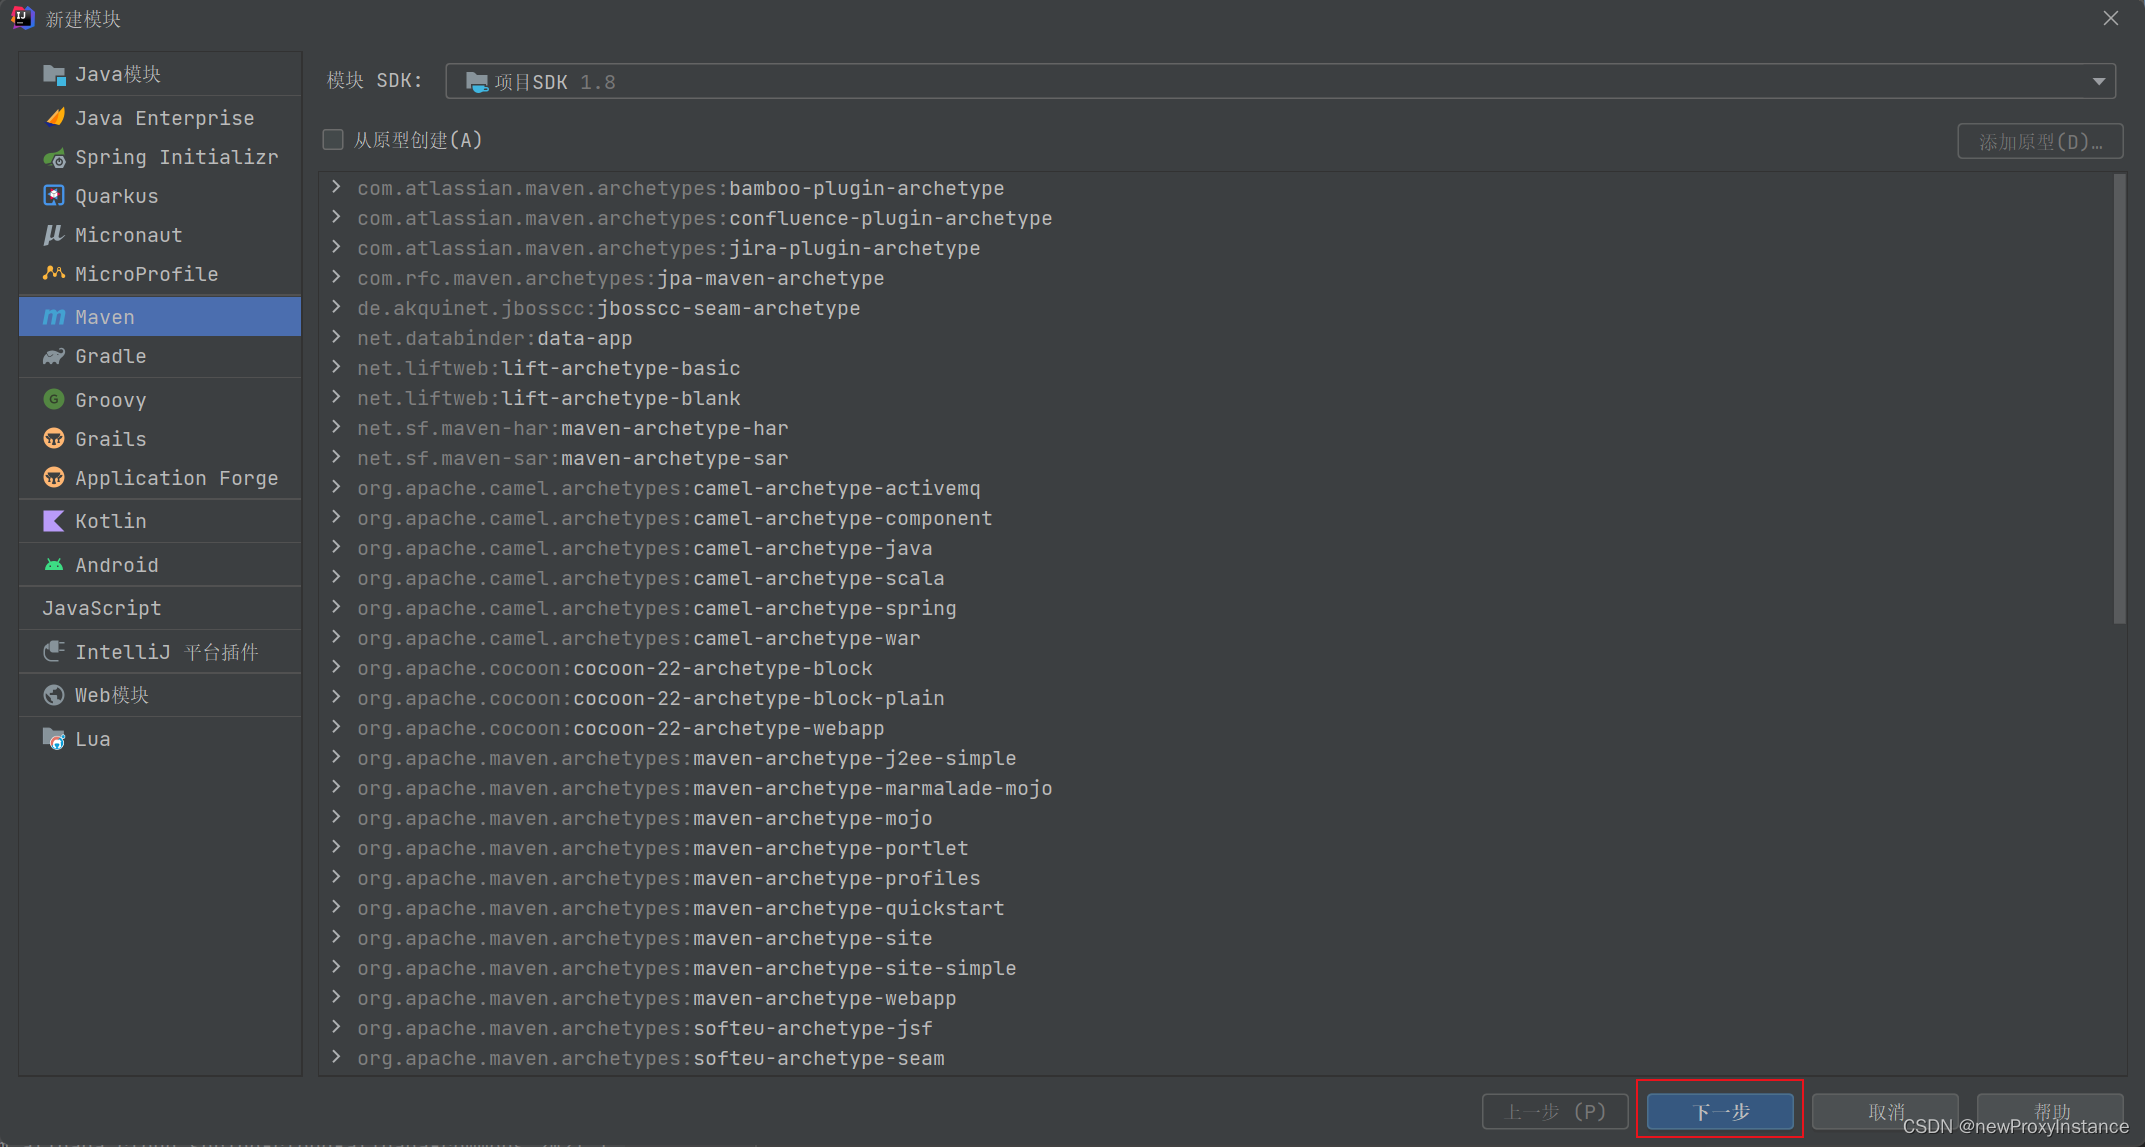
第二步:修改依赖
<?xml version="1.0" encoding="UTF-8"?>
<project xmlns="http://maven.apache.org/POM/4.0.0"
         xmlns:xsi="http://www.w3.org/2001/XMLSchema-instance"
         xsi:schemaLocation="http://maven.apache.org/POM/4.0.0 http://maven.apache.org/xsd/maven-4.0.0.xsd">
    <parent>
        <artifactId>microservices</artifactId>
        <groupId>com.example</groupId>
        <version>0.0.1-SNAPSHOT</version>
    </parent>
    <modelVersion>4.0.0</modelVersion>

    <artifactId>test-spring-boot-starter</artifactId>

    <properties>
        <maven.compiler.source>8</maven.compiler.source>
        <maven.compiler.target>8</maven.compiler.target>
    </properties>

    <dependencies>
        <dependency>
            <groupId>org.springframework.boot</groupId>
            <artifactId>spring-boot-starter</artifactId>
        </dependency>

        <dependency>
            <groupId>org.springframework.boot</groupId>
            <artifactId>spring-boot-configuration-processor</artifactId>
            <optional>true</optional>
        </dependency>
    </dependencies>

</project>
添加spring-boot-starter和spring-boot-configuration-processor这两个依赖。
第三步:新建Properties配置类
@ConfigurationProperties(prefix = "test")
public class TestProperties {

    /**
     * this is name
     */
    private int name;


    /**
     * this is address
     */
    private String address;

    public int getName() {
        return name;
    }

    public void setName(int name) {
        this.name = name;
    }

    public String getAddress() {
        return address;
    }

    public void setAddress(String address) {
        this.address = address;
    }

    @Override
    public String toString() {
        return "TestProperties{" +
                "name=" + name +
                ", address='" + address + '\'' +
                '}';
    }
}
第四步:定义 AutoConfiguration,一个主配置,两个辅配置主要用来验证注解效果。
@Configuration(proxyBeanMethods = false)
@ConditionalOnProperty(prefix = "test", value = "enable", havingValue = "true", matchIfMissing = true)
@AutoConfigureAfter({AfterAutoConfiguration.class})
@AutoConfigureBefore({BeforeAutoConfiguration.class})
@EnableConfigurationProperties(TestProperties.class)
public class TestAutoConfiguration {

    private static final Logger logger = LoggerFactory.getLogger(TestAutoConfiguration.class);

    public TestAutoConfiguration(TestProperties properties) {
        logger.info("TEST INIT ...... " + properties.toString());
    }
}
@Configuration
public class AfterAutoConfiguration {

    private static final Logger logger = LoggerFactory.getLogger(BeforeAutoConfiguration.class);

    public AfterAutoConfiguration() {
        logger.info("After INIT ...... ");
    }
}
@Configuration
public class BeforeAutoConfiguration {

    private static final Logger logger = LoggerFactory.getLogger(BeforeAutoConfiguration.class);

    public BeforeAutoConfiguration() {
        logger.info("Before INIT ...... ");
    }
}
第五步:在resources目录下新建META-INF文件夹和spring.factories文件
org.springframework.boot.autoconfigure.EnableAutoConfiguration=\
com.example.starter.config.TestAutoConfiguration, \
com.example.starter.config.BeforeAutoConfiguration, \
com.example.starter.config.AfterAutoConfiguration
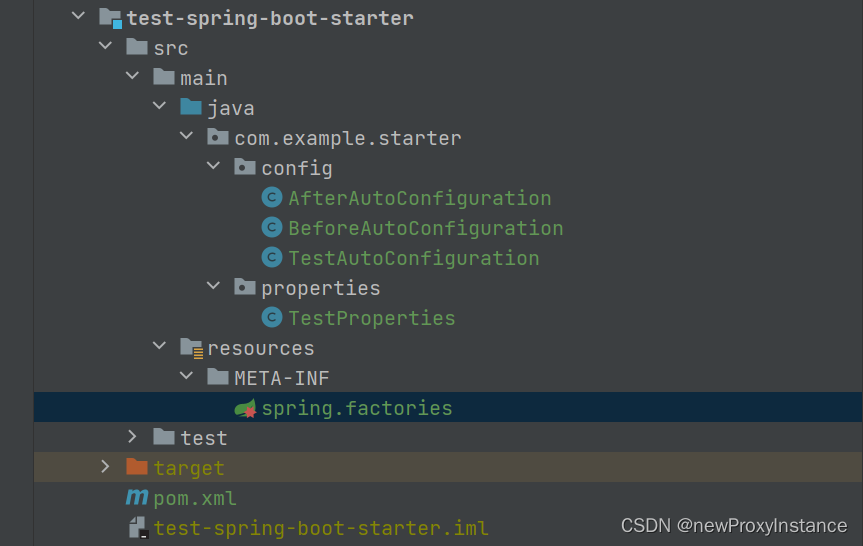
整体结构图
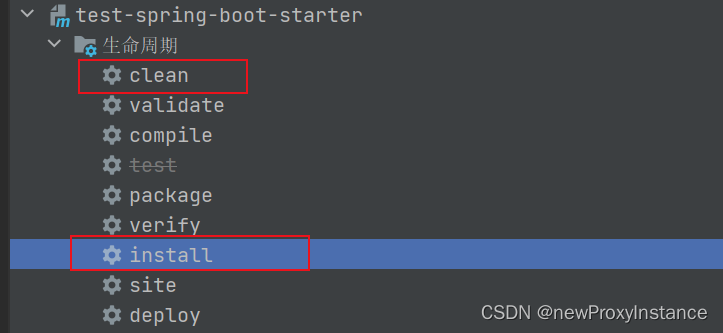
第八步:maven clean install 本地仓库
第九步:在另一个模块使用starter
        <dependency>
            <groupId>com.example</groupId>
            <artifactId>test-spring-boot-starter</artifactId>
            <version>0.0.1-SNAPSHOT</version>
        </dependency>
第十步:配置yml
test:
  address: abcd
  name: 15
最后:查看效果
c.e.s.config.BeforeAutoConfiguration     : After INIT ......
c.e.s.config.TestAutoConfiguration       : TEST INIT ...... TestProperties{name=15, address='abcd'}
c.e.s.config.BeforeAutoConfiguration     : Before INIT ......
AutoConfigureAfter和Before
@AutoConfigureAfter({AfterAutoConfiguration.class})
@AutoConfigureBefore({BeforeAutoConfiguration.class})
TestAutoConfiguration
简称为 A、B、T三个字母。
AutoConfigureAfter 源码注释
Hint for that an auto-configuration should be applied after other specified auto-configuration classes.
当前class 在指定类 后面加载
AutoConfigureBefore源码注释
Hint that an auto-configuration should be applied before other specified auto-configuration classes.
当前class 在指定类 前面加载
根据注释的意思我们得知,T在A后面,T在B前面。所以整个顺序为 A T B。
误区
首先AutoConfigureAfter和AutoConfigureBefore是作用于普通类的,普通的Configure无效。下面我们结合RocketMQAutoConfiguration 的源码来解释这个误区。
@Configuration
@EnableConfigurationProperties(RocketMQProperties.class)
@ConditionalOnClass({MQAdmin.class})
@ConditionalOnProperty(prefix = "rocketmq", value = "name-server", matchIfMissing = true)
@Import({MessageConverterConfiguration.class, ListenerContainerConfiguration.class,
ExtProducerResetConfiguration.class, ExtConsumerResetConfiguration.class,
RocketMQTransactionConfiguration.class})
@AutoConfigureAfter({MessageConverterConfiguration.class})
@AutoConfigureBefore({RocketMQTransactionConfiguration.class})

public class RocketMQAutoConfiguration implements ApplicationContextAware {}
依赖图
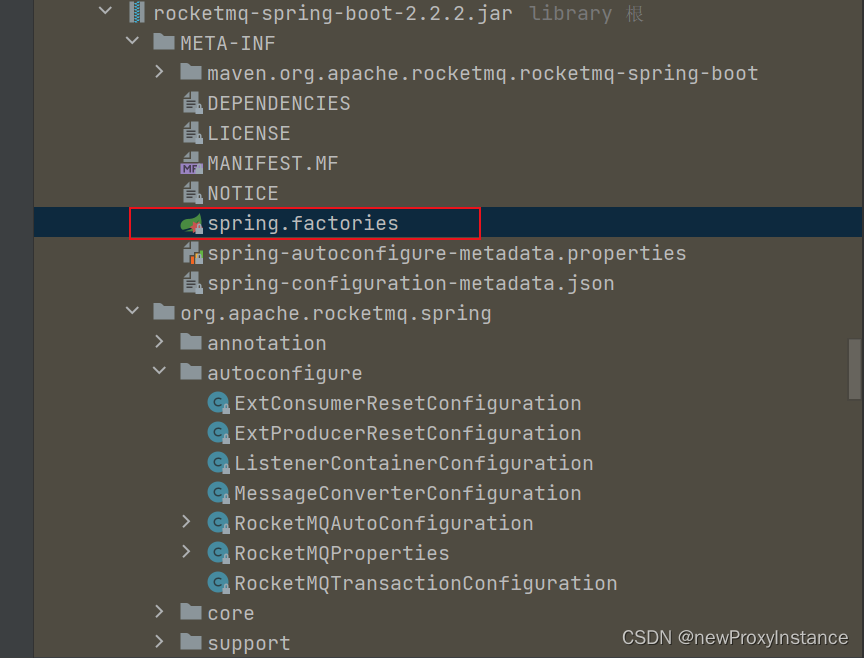
spring.factories内容
org.springframework.boot.autoconfigure.EnableAutoConfiguration=\
org.apache.rocketmq.spring.autoconfigure.RocketMQAutoConfiguration
在RocketMQAutoConfiguration中只有一个自动装配类,MessageConverterConfiguration和RocketMQTransactionConfiguration只是普通的配置类,所以我仿照这种写法实验后,这两个类不会进行加载,源码这里生效的原因是因为@Import(…)这个注解将普通配置类导入,其实这里是没有after和before的效果的,如果不相信可以将spring.factories demo的其余两个自动装配去掉打印控制台输出,然后加入@import注解后在观察输出。

