1.Text组件
Text组件就是原先的TextView组件,用法还是挺简单的,如下就是简单的Text用法:
package com.test.compose

import android.os.Bundle
import androidx.activity.ComponentActivity
import androidx.activity.compose.setContent
import androidx.compose.foundation.layout.fillMaxSize
import androidx.compose.material3.MaterialTheme
import androidx.compose.material3.Surface
import androidx.compose.material3.Text
import androidx.compose.runtime.Composable
import androidx.compose.ui.Modifier
import androidx.compose.ui.tooling.preview.Preview
import com.test.compose.ui.theme.ComposeTestTheme

class MainActivity : ComponentActivity() {
    override fun onCreate(savedInstanceState: Bundle?) {
        super.onCreate(savedInstanceState)
        setContent {
            ComposeTestTheme {
                // A surface container using the 'background' color from the theme
                Surface(
                    modifier = Modifier.fillMaxSize(),
                    color = MaterialTheme.colorScheme.background
                ) {
                    Greeting("Compose")
                }
            }
        }
    }
}

@Composable
fun Greeting(name: String) {
    Text(
        text = "Hello $name!"
    )
}
上述的代码在真机显示效果就是Hello Compose!,如下:

上述就是一个文字简单的使用,如果需要则是将Text中传参:
fun Text(
    text: String,                                        //文本内容
    modifier: Modifier = Modifier,                       //很复杂,参考:https://developer.android.google.cn/jetpack/compose/modifiers-list?hl=zh-cn
    color: Color = Color.Unspecified,                    //文本颜色
    fontSize: TextUnit = TextUnit.Unspecified,           //文本大小
    fontStyle: FontStyle? = null,                        //文本样式
    fontWeight: FontWeight? = null,                      //绘制文本时使用的字体粗细(例如 FontWeight.Bold)
    fontFamily: FontFamily? = null,                      //渲染文本时使用的字体系列。请参阅 TextStyle.fontFamily。
    letterSpacing: TextUnit = TextUnit.Unspecified,      //每个字母之间添加的空格量。请参阅 TextStyle.letterSpacing。
    textDecoration: TextDecoration? = null,              //在文本上绘制的装饰(例如下划线)。请参阅 TextStyle.textDecoration。
    textAlign: TextAlign? = null,                        //段落行内文本的对齐方式。参见文本样式
    lineHeight: TextUnit = TextUnit.Unspecified,         //TextUnit 单位中段落的行高,例如SP 或 EM。请参阅 TextStyle.lineHeight。
    overflow: TextOverflow = TextOverflow.Clip,          //应如何处理视觉溢出。如果多余文字怎么处理,例如多余文字不显示
    softWrap: Boolean = true,                            //softWrap为false只能单行显示
    maxLines: Int = Int.MAX_VALUE,                       //最大行数,如果上面softWrap为false最大行数设置是无作用的
    onTextLayout: (TextLayoutResult) -> Unit = {},       //计算新文本布局时执行的回调。
    style: TextStyle = LocalTextStyle.current            //文本的样式配置,例如颜色、字体、行高等。
)
如上的字段设置后的显示效果:
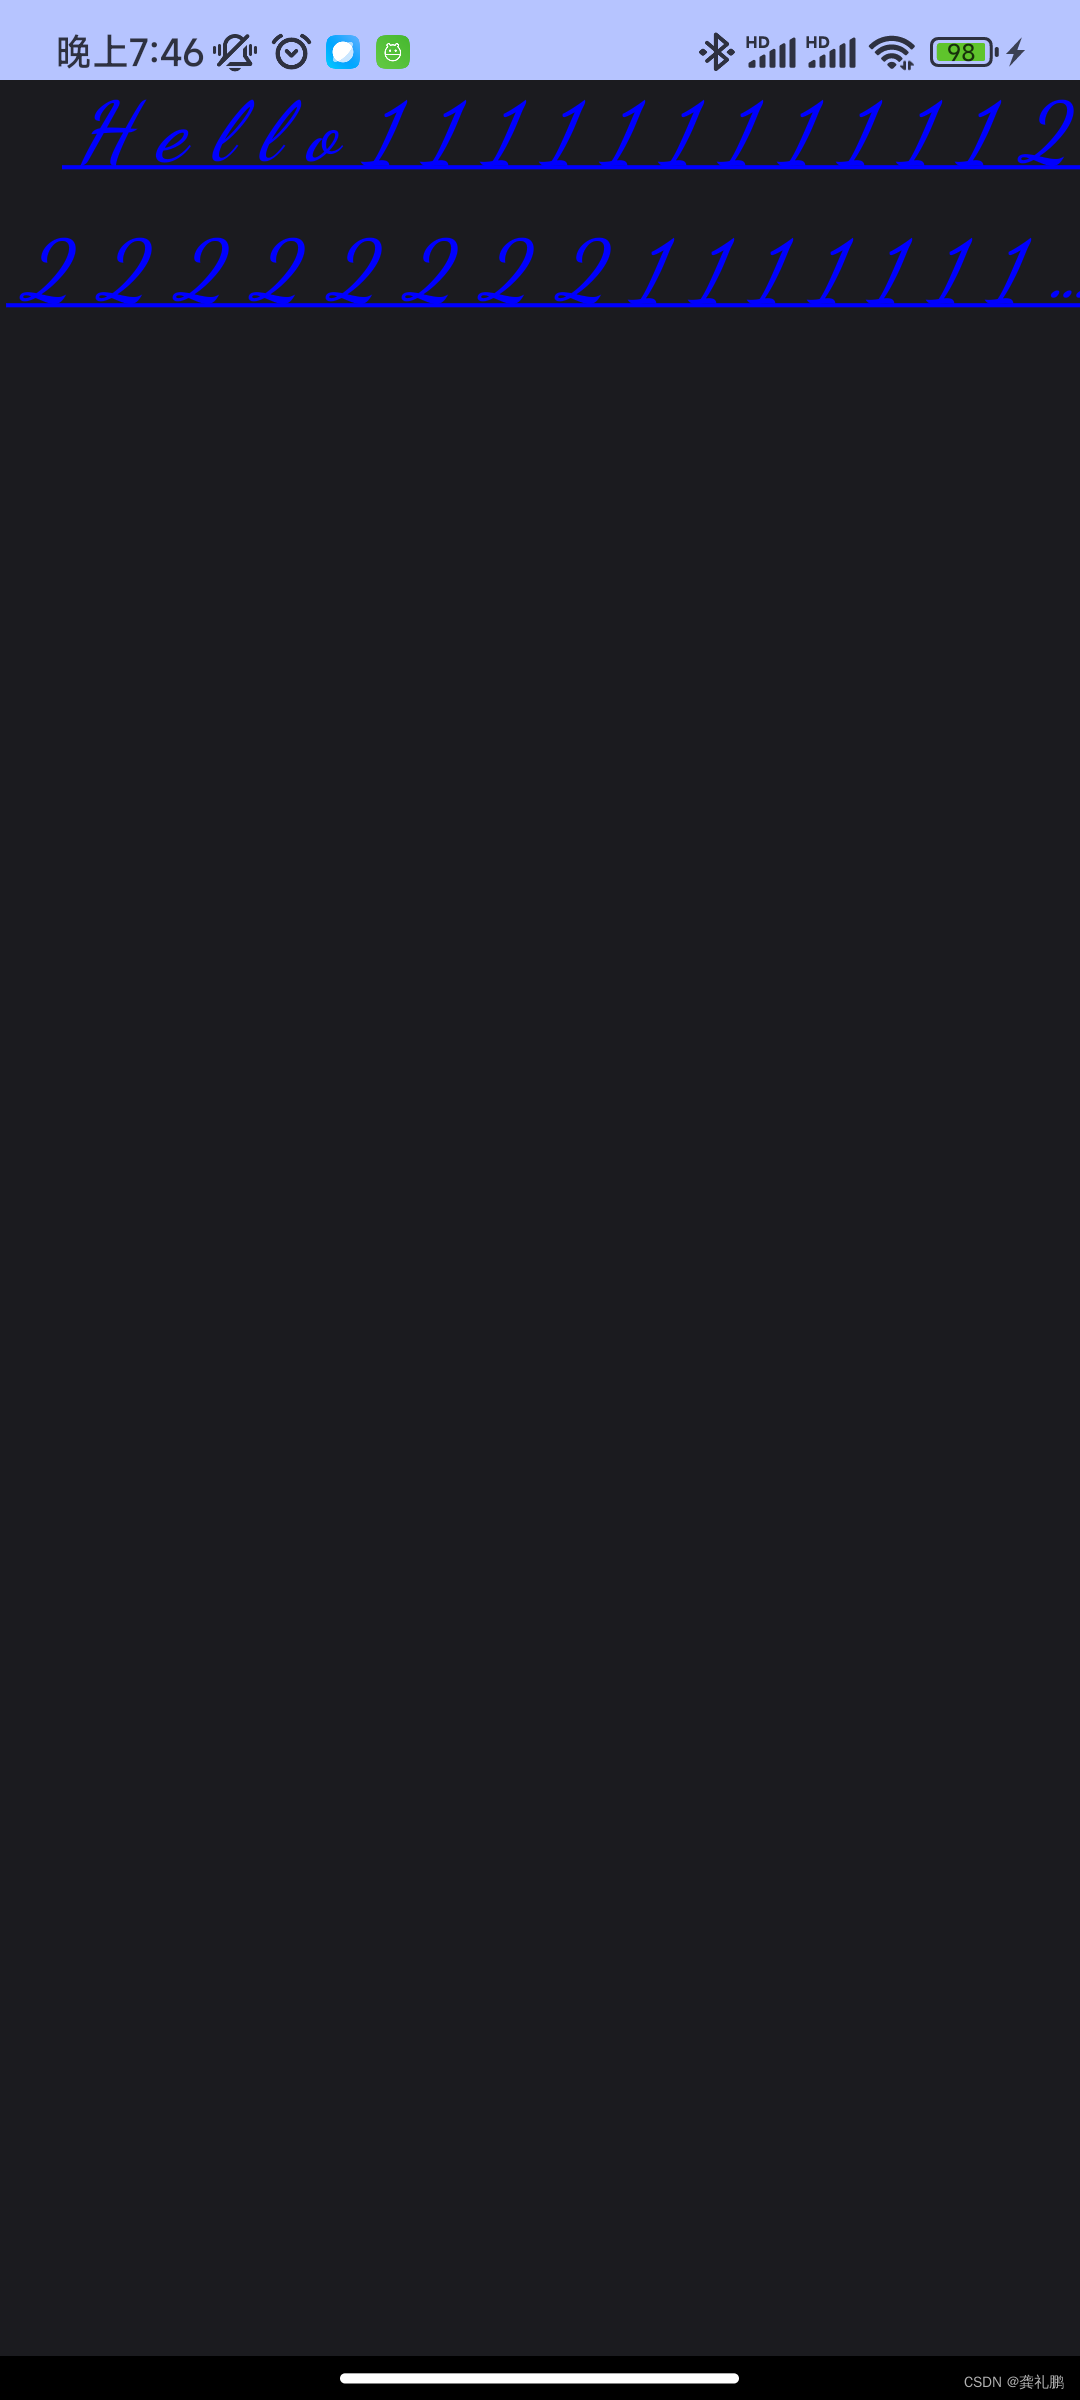
2.Button组件
Button是非常常见的组件,使用也非常简单,就是将Button加进去即可,如下:
    Column() {
        Text(
            text = "Hello11111111111222222222111111111111111111111111111111111111111111111111111111111111 $name!",
            color = Color.Blue,     //字体颜色蓝色
            fontSize = 30.sp,       //字体大小30sp
            fontStyle = FontStyle.Italic,   //字体风格斜体
            fontWeight = FontWeight.Bold,   //字体加粗
            fontFamily = FontFamily.Cursive,//字体系列
            letterSpacing = 10.sp,          //文字间隔10sp
            textDecoration = TextDecoration.Underline,     //文字加下划线
            textAlign = TextAlign.End,       //段落右对齐
            lineHeight = 50.sp,              //每行高度,注意不是文字高度,是文字所在行高度
            overflow = TextOverflow.Ellipsis,    //超过行数多余部分文字截取并用...表示
            softWrap = true,                 //是否单行显示,true不是单行显示
            maxLines = 2                     //显示两行
        )
        Button(onClick = { /*TODO*/ }) {

        }
    }
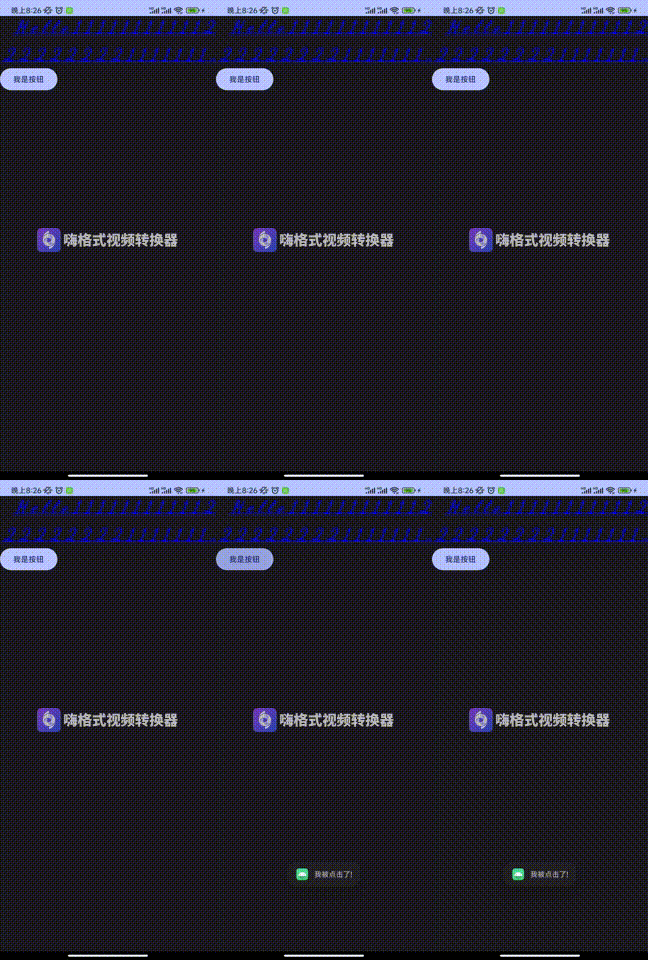
如上代码显示效果:

显示效果可以看出来是只有一个按钮没有文字的,如下是Button的详细传参:
fun Button(
    onClick: () -> Unit,                //点击事件
    modifier: Modifier = Modifier,      //同上,很复杂
    enabled: Boolean = true,            //控制该按钮的启用状态。当为 false 时,该组件将不会响应用户输入,并且它将显示为视觉上禁用并且对辅助服务禁用。
    shape: Shape = ButtonDefaults.shape,//定义此按钮的容器、边框(当边框不为空时)和阴影(当使用高度时)的形状
    colors: ButtonColors = ButtonDefaults.buttonColors(),//ButtonColors 将用于解析此按钮在不同状态下的颜色。请参阅 ButtonDefaults.buttonColors。
    elevation: ButtonElevation? = ButtonDefaults.buttonElevation(),//控制按钮下方阴影的大小
    border: BorderStroke? = null,        //围绕该按钮的容器绘制的边框
    contentPadding: PaddingValues = ButtonDefaults.ContentPadding,    //在容器和内容之间内部应用的间距值
    interactionSource: MutableInteractionSource = remember { MutableInteractionSource() },//MutableInteractionSource 表示此按钮的交互流。您可以创建并传入您自己记住的实例来观察交互并自定义该按钮在不同状态下的外观行为。
    content: @Composable RowScope.() -> Unit
) {
//此处可以包装不同的组件,例如:Text
}
Button(
onClick = {
Toast.makeText(context, "我被点击了!", Toast.LENGTH_SHORT).show()
},
) {
Text(text = "我是按钮")
}如上代码然后在手机上面显示交互过程如下:
