欢迎关注我的CSDN:https://spike.blog.csdn.net/
本文地址:https://spike.blog.csdn.net/article/details/131576762

Prompt:
(masterpiece, top quality, best quality, ((standing in centre)), ((1girl, black hair)), ((upper body, symmetrical composition)), ((wear yellow abstract patterns dress bold lines, geometric shapes)), (pure yellow abstract patterns background), ((studio light)) ((studio portrait)), emotional face, face front, extreme detailed
Negative prompt: (worst quality, low quality:2), monochrome, zombie,overexposure, watermark,text,bad anatomy,bad hand,extra hands,extra fingers,too many fingers,fused fingers,bad arm,distorted arm,extra arms,fused arms,extra legs,missing leg,disembodied leg,extra nipples, detached arm, liquid hand,inverted hand,disembodied limb, small breasts, loli, oversized head,extra body,completely nude, extra navel,easynegative,(hair between eyes),sketch, duplicate, ugly, huge eyes, text, logo, worst face
Steps: 50, Sampler: DDIM, CFG scale: 7, Seed: 2409945005, Face restoration: CodeFormer, Size: 768x512, Model hash: 86aa256dd5, Model: AWPortrait_v1.1, Denoising strength: 0.26, Hires upscale: 2, Hires upscaler: 4x-UltraSharp, Version: v1.4.0
Saved: 00034-2409945005.png
Stable Diffusion 是一种基于扩散模型的AI绘画技术,可以根据文本或图像生成高质量的图像,原理是通过不断去除噪音来逐渐恢复目标图像。Extension是一种扩展功能,可以提供更多的选项和操作性,例如改变风格、扩展画布、修复图像等,通常是由第三方开发者编写的 Python 脚本,可以通过 GitHub 或其他平台下载安装。
stable-diffusion 启动命令:
cd stable-diffusion-webui
conda deactivate
source venv/bin/activate
nohup python -u launch.py --port 9301 --xformers --theme dark > nohup.sd.out &
tail -f nohup.sd.out
1. 配置环境
配置页面为黑色主题,在启动时,增加参数 --theme dark ,即可。访问时,自动增加参数 __theme=dark:
http://127.0.0.1:9302/?__theme=dark
推荐使用 扩展 - 可下载 进行安装,需要替换 扩展列表地址 为国内地址,有助于后续更新,再执行 加载扩展列表,即
- 插件扩展的国内链接:https://gitee.com/akegarasu/sd-webui-extensions/raw/master/index.json
- 参考:https://gitee.com/akegarasu/
即:

注意:在 GitHub 链接之前,加入 https://ghproxy.com/ 可有效提升下载速度,例如
https://ghproxy.com/https://github.com/pkuliyi2015/multidiffusion-upscaler-for-automatic1111.git
删除插件:直接进入扩展文件夹 table-diffusion-webui/extensions ,删除相应的目录,重启即可。
内置的 Extension:
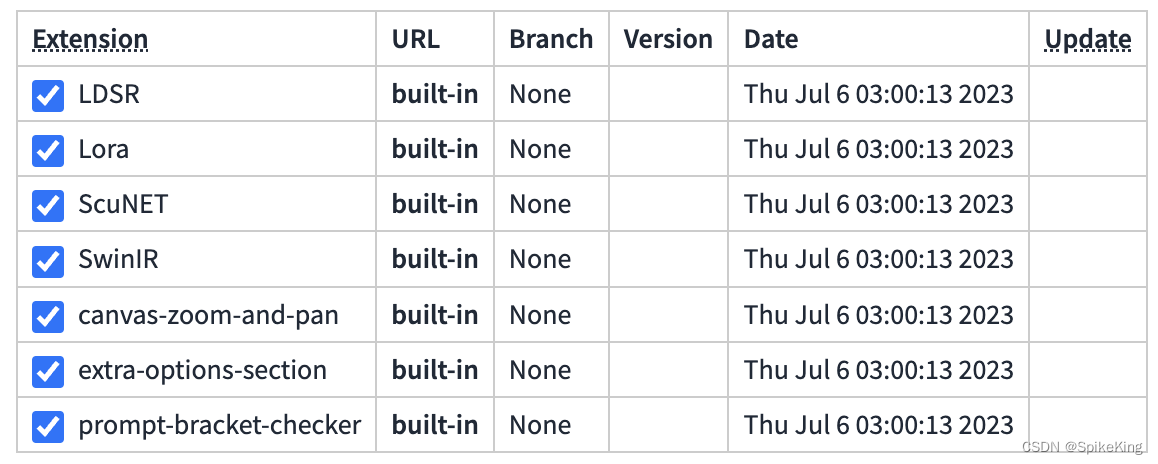
2. 配置插件
待安装的 4 个插件:
stable-diffusion-webui-localization-zh_Hans,汉化插件stable-diffusion-webui-images-browser,图库浏览器a1111-sd-webui-tagcomplete,提示词自动补全stable-diffusion-webui-wd14-tagger,提示词反推
2.1 汉化插件
即 stable-diffusion-webui-localization-zh_Hans,在 Available 页面搜索,取消 Location 勾选,搜索 zh,即可安装。
在 用户界面 (User Interface) - 本地化 (Location) 中,即可修改中文或英文 (None),点击 Apply Setting - Reload UI ,即可:

2.2 图库浏览器
即 stable-diffusion-webui-images-browser,搜索 images browser,选择 图库浏览器。
下载安装完成,重新启动,即可出现 图库浏览器 的Tab,点击 首页,即可刷新。点击图像,即可跳出生成信息,即:
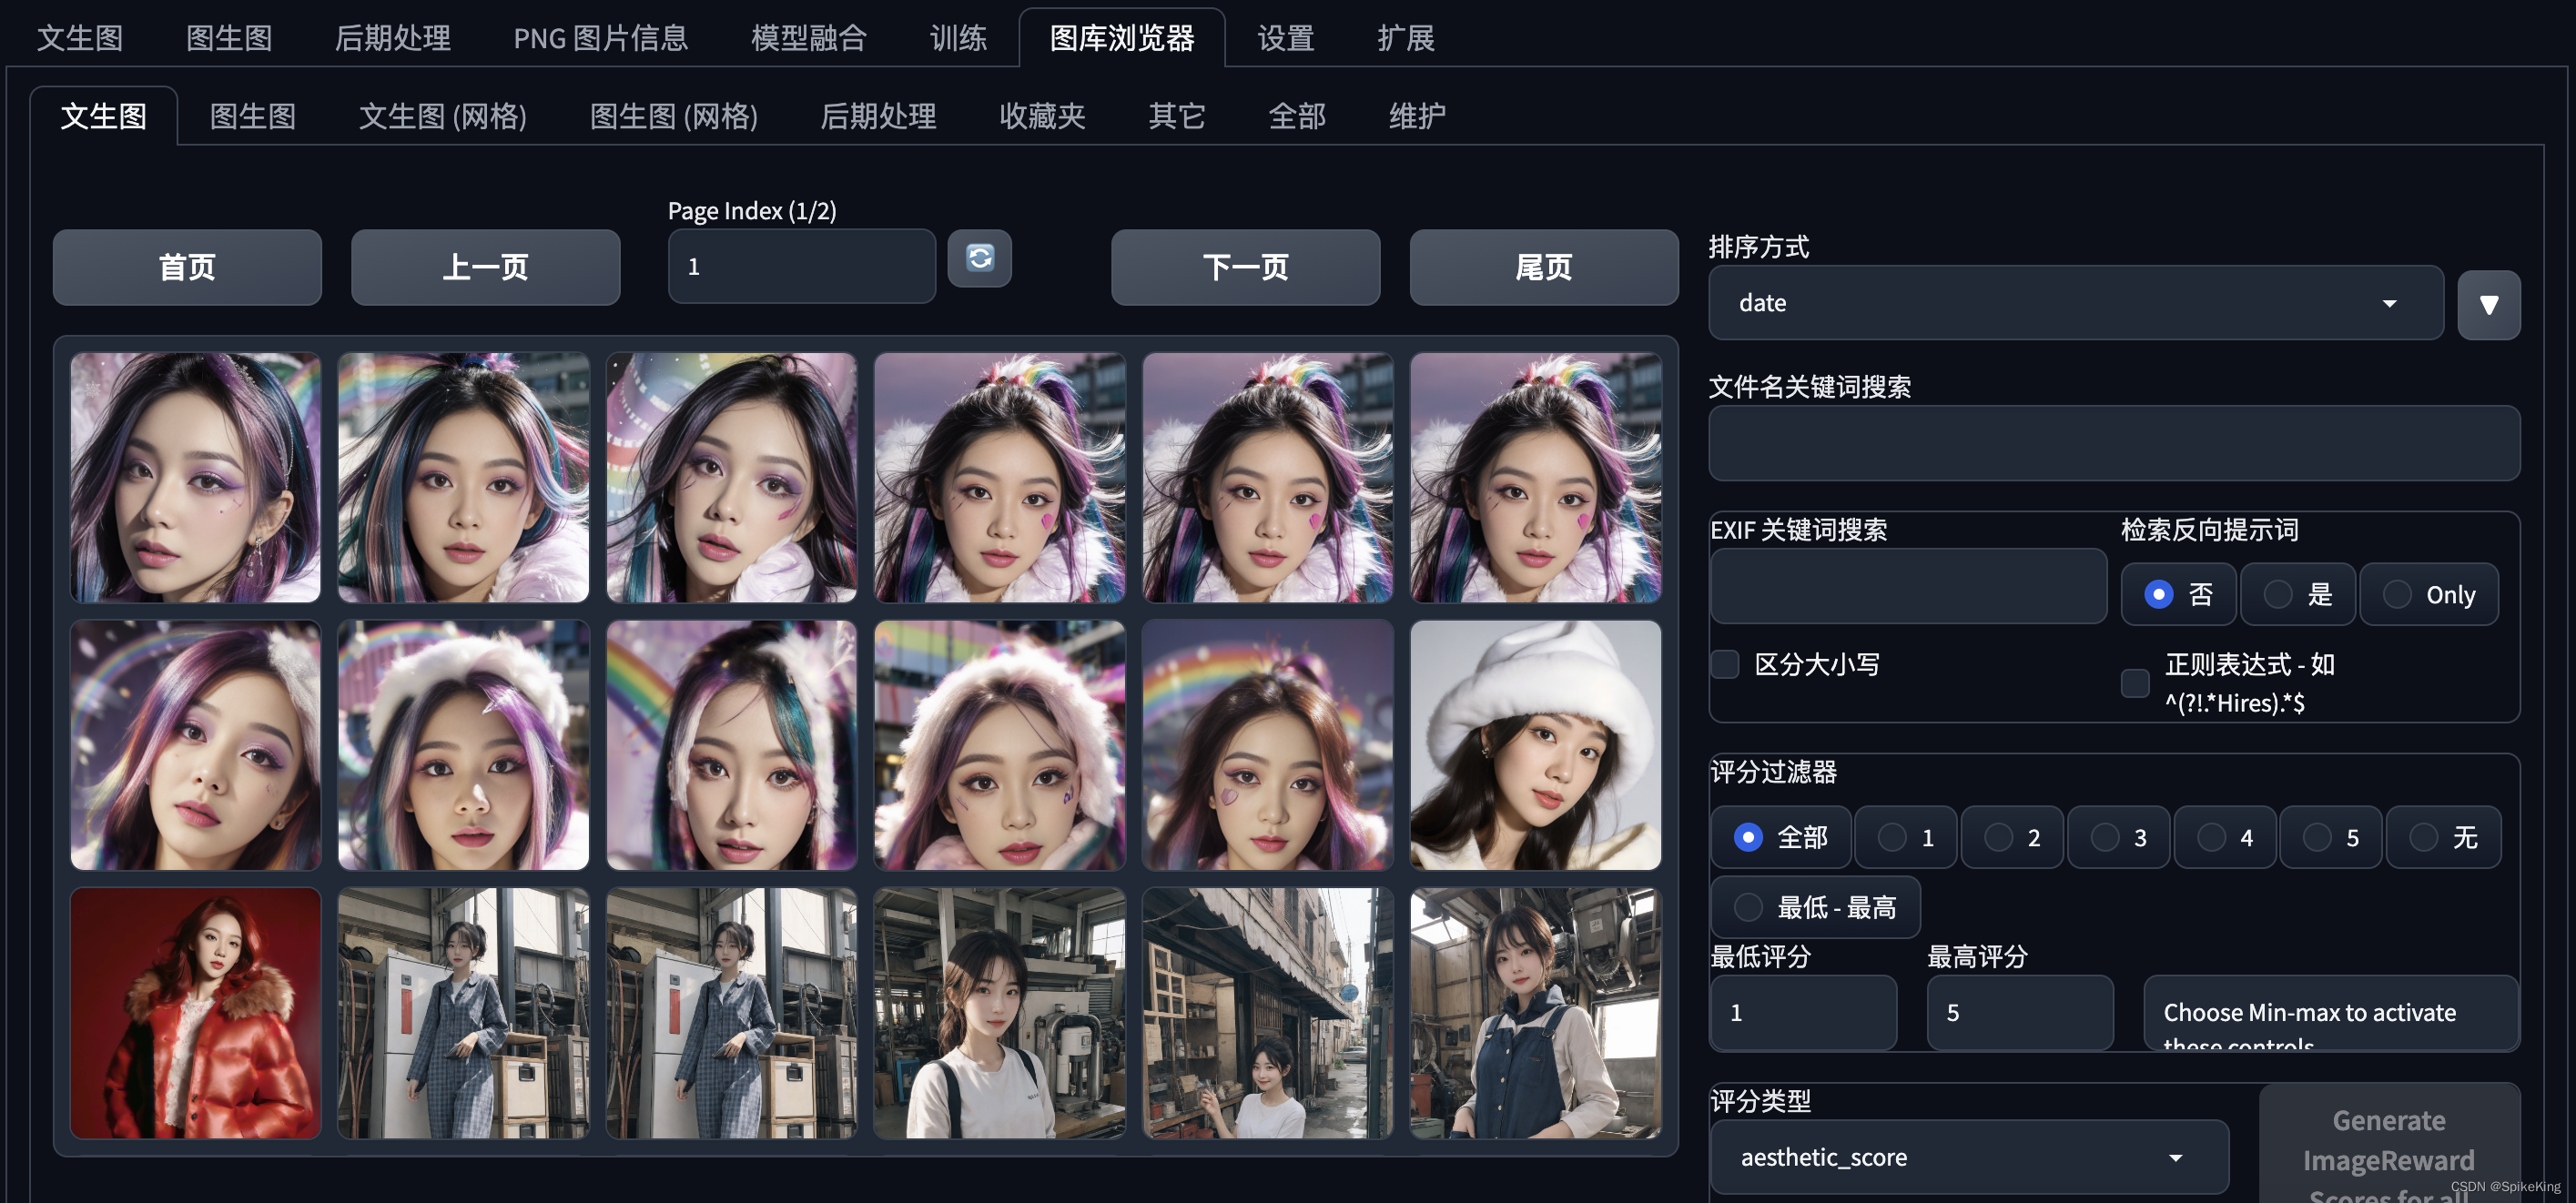
支持删除图像:

2.3 提示词自动补全
即 a1111-sd-webui-tagcomplete,搜索 tag auto,选择 Booru tag autocompletion 即可。基于 Booru 词库进行替换。
安装重启之后,可以自动补全提示词,同时,也可避免提示词与模型之间的差异,即:
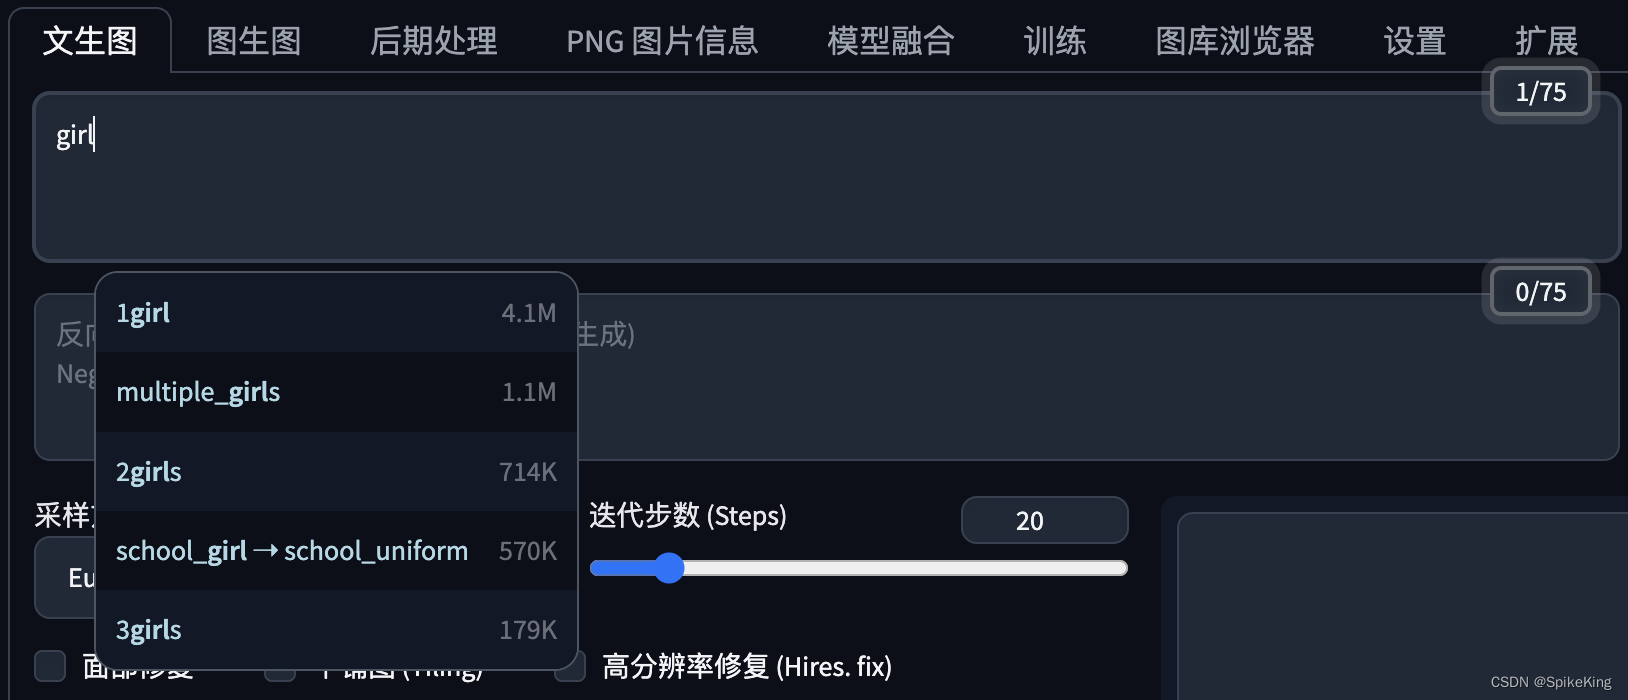
也支持提升词替换:

输入 <e: 或 <l: 自动搜索,已下载的 Embeddings 或 LoRA。
中文词库自动翻译:https://www.bilibili.com/video/BV1Bg4y1H7Tq/
- 下载地址:http://www.123114514.xyz/WebUI/Tag/a1111-sd-webui-tagcomplete.zip
解压之后,在 a1111-sd-webui-tagcomplete/tags 目录之下,包括 csv 文件:
zh_cn_tr.csvzh_cn.csvcolor.json
复制 3 个文件,至 stable-diffusion-webui/extensions/a1111-sd-webui-tagcomplete/tags 中。
进入 设置 - 标签自动补全 插件的设置页面中,刷新
- 将
标签文件名,设置为zh_cn.csv,默认是danbooru.csv - 将
翻译文件名,设置为zh_cn_tr.csv,默认是None
点击 保存设置,即可使用中文输入,自动翻译成英文,即:
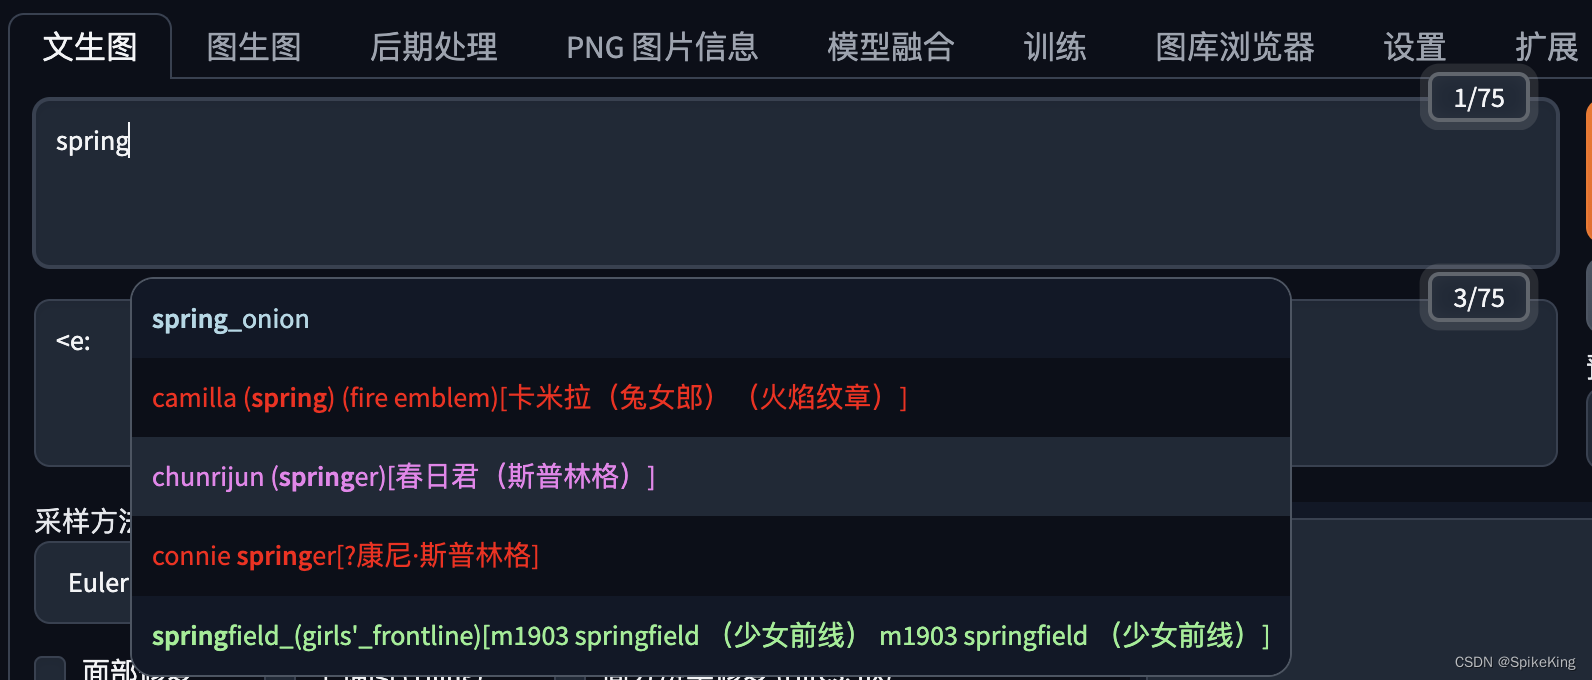
2.4 提示词自动反推
即stable-diffusion-webui-wd14-tagger,搜索 Tagger,选择 WD 1.4 Tagger ,即可,点击安装,重新启动服务。
出现 WD 1.4 标签起 (Tagger),用于反推提示词,即:

首次启动时,需要下载模型:
Loading wd14-vit-v2-git model file from SmilingWolf/wd-v1-4-vit-tagger-v2
Downloading model.onnx: 100%|██████| 373M/373M [00:34<00:00, 10.7MB/s]
Downloading (…)in/selected_tags.csv: 100%|█| 254k/254k [00:00<00:00, 4
Installing onnxruntime
Loaded wd14-vit-v2-git model from .cache/huggingface/hub/models--SmilingWolf--wd-v1-4-vit-tagger-v2/snapshots/1f3f3e8ae769634e31e1ef696df11ec37493e4f2/model.onnx
可以修改阈值,提升标签的细腻度,输入图像,即可生成提示词:

发送到文生图,即 自动生成相似的图像:

3. 配置完成
扩展,已安装,即可显示当前所有插件,即:
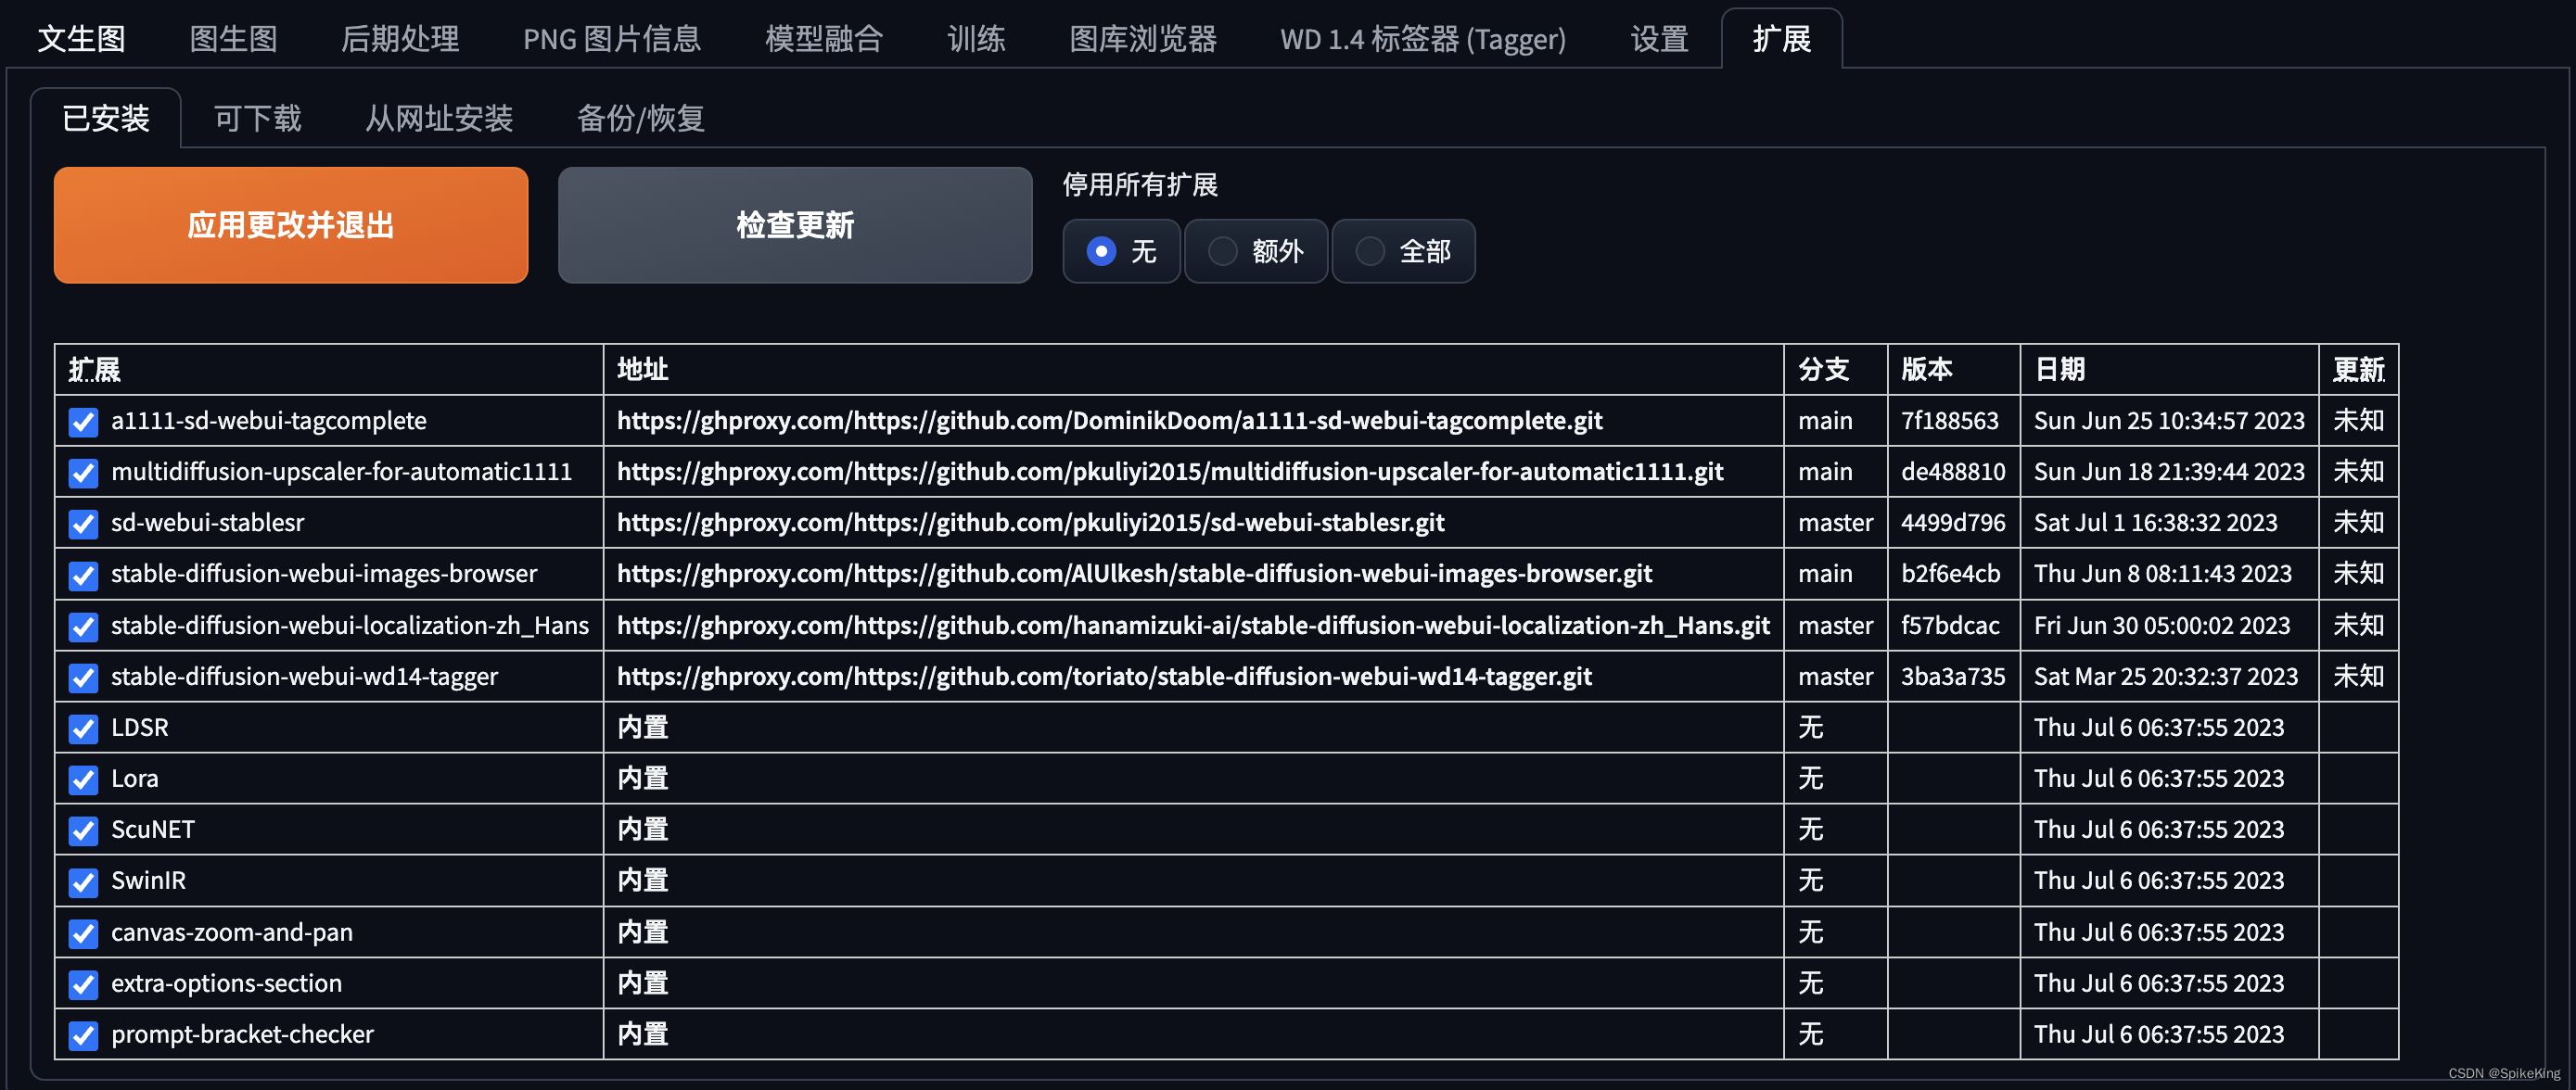
Bug: 遇到 Bug “AssertionError: extension access disabled because of command line flags”
参考:[Bug]: AssertionError: extension access disabed because of commandline flags
原因是,启动服务时,不需要添加参数 --share 和 --listen,即
cd stable-diffusion-webui
conda deactivate
source venv/bin/activate
nohup python -u launch.py --port 9301 --xformers --theme dark > nohup.sd.out &
tail -f nohup.sd.out

![[pyqt5]designer设计界面设计工具栏上图标和文字同时显示](https://img-blog.csdnimg.cn/d14bc2d1a5f44cbda66c57fde2451c55.jpeg)
