文章目录
- 前言
- 项目下载
- 项目运行
- 自定义数据集训练
- 使用LabelImg
- 标注
- 制作数据集
- 划分训练文件
- 生成标签
- 聚合操作
- 辅助脚本
- 需要运行的脚本
- 开始训练
- 总结
前言
没啥意思,很简单,需要实现一个目标检测,但是,不能占用太多运算资源,同时需要保证一定的精度。并且要在移动端部署,要在一台ROS小车上面部署。那么此时常见的选择自然有yolov3-tiny等。但是考虑到onnx部署方案的成熟,目前的加持之下,python也有不错的效率,所以,这里就考虑使用到yolov5-lite版本。
可以看到官方的对比:
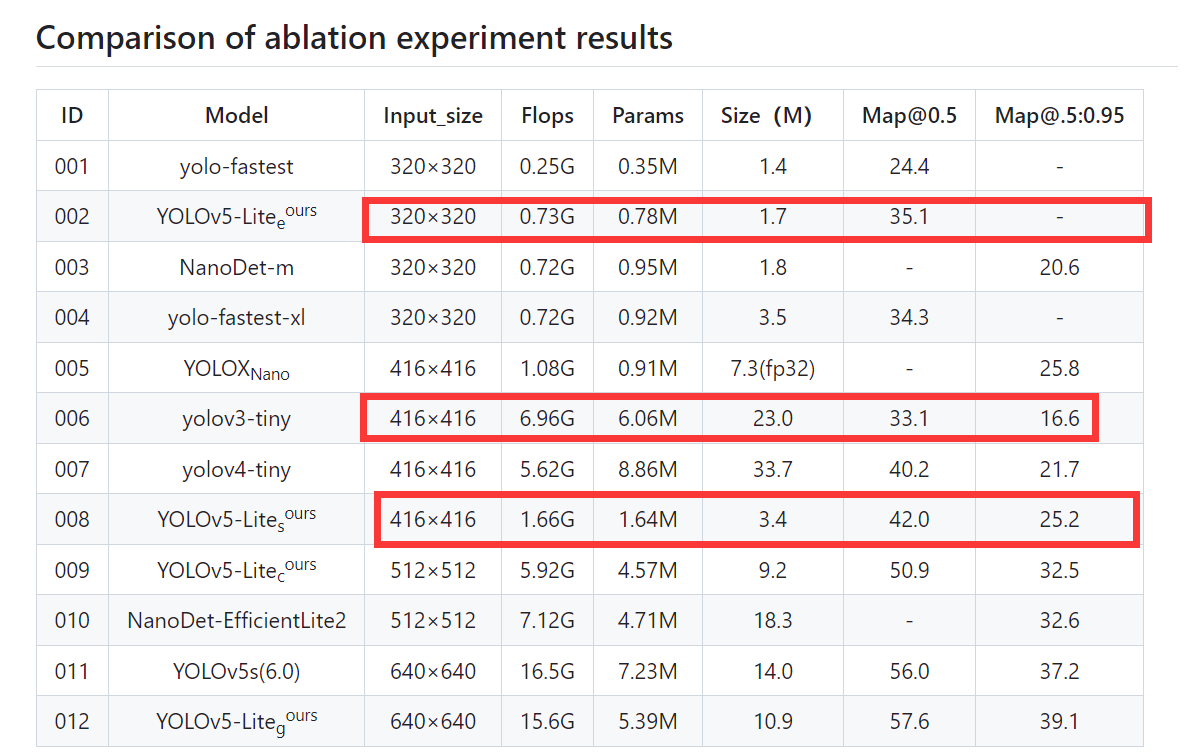
同时在我的本地机器上面也是做了对比。
在使用yolov3-tiny 使用opencv dnn部署的情况下,帧率只有30多,但是使用yolov5-Lite普遍100+。这就意味着,可以在边缘设备进行快部署。同时得益于onnx,俺们也可以很方便地进行部署。
此外的话,由于这玩意是基于yolov5做的,所以在训练的时候,和V5保持高度的一致,包括里面数据增强的方法等等,况且人家精度也比yolov3-tiny高。 在科大讯飞智能小车上实测,极限压缩一下分辨率可以达到80FPS左右,原始模型也可以达到30FPS。这里就很方便后期在整合其他的算法,例如+sort算法做一个目标跟踪。这个部分的话,我后续可能会做到。
项目下载
ok,那么首先第一步的话,还是说去下载项目即可,我们分为两个部分,一个是如何运行项目,一个是如何训练自己的数据集。这个是比较重要的,后面我们还需要定制化的需求。如何整合之类的是吧,那么这里的话不过多叙述。首先进入github下载,这个没啥好说的。
https://github.com/ppogg/YOLOv5-Lite
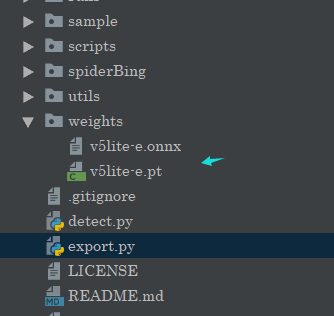
下载完成之后,你将见到这几个文件
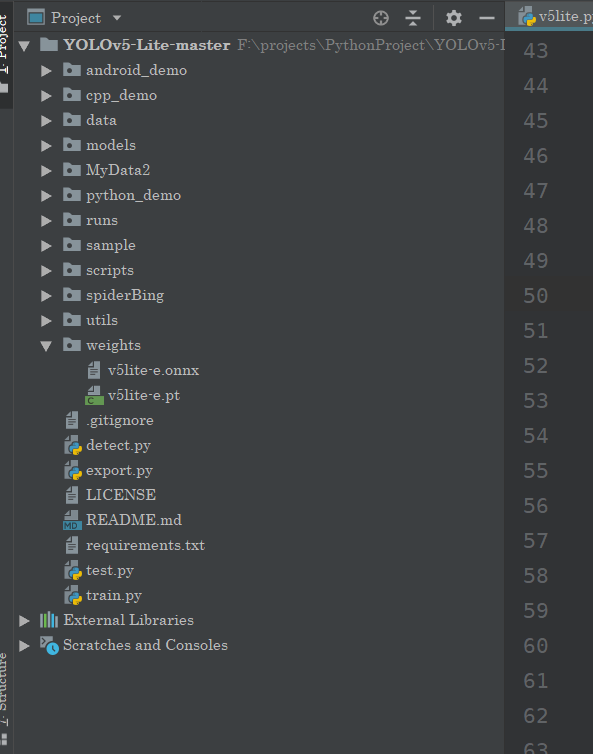
这里的权重文件需要自己去下载~
选择你喜欢的版本即可。
项目运行
之后的话,我们可以运行我们的项目,首先这里也是分为几个部分第一个部分就是模型的转化。首先我们的目的还是为了部署我们的模型。所以的话,这里提供了三个版本:
当然是官方给到的
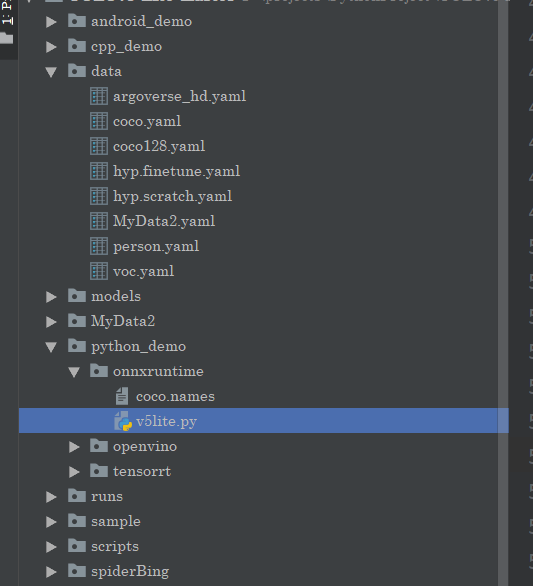
在这里的话,我主要演示Python的,因为我目前的主要认为就是基于Python的。
那么在这里我们的第一步是模型的转化,这里的话是转化到onnx模型,然后运行。
主要进入这里:
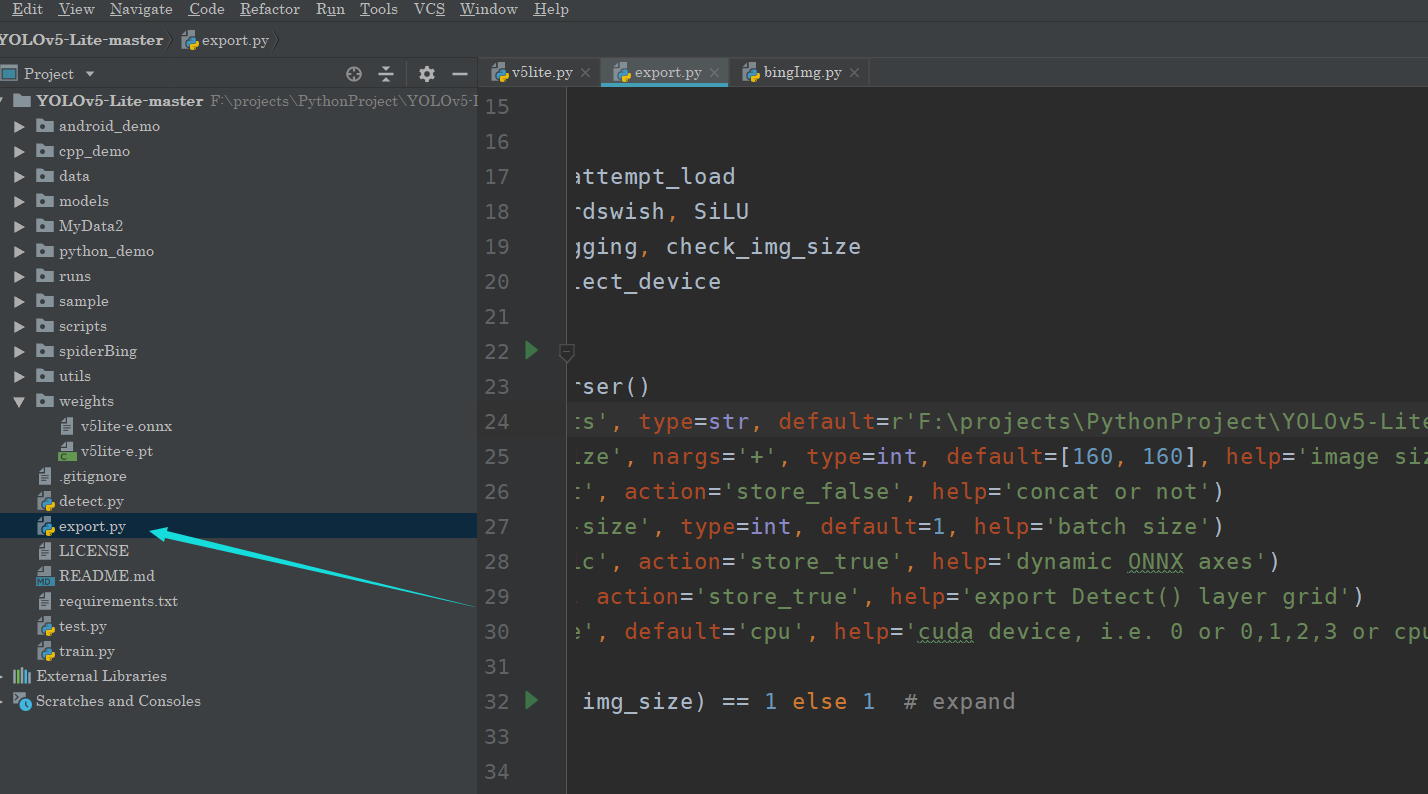
这里调整参数即可:
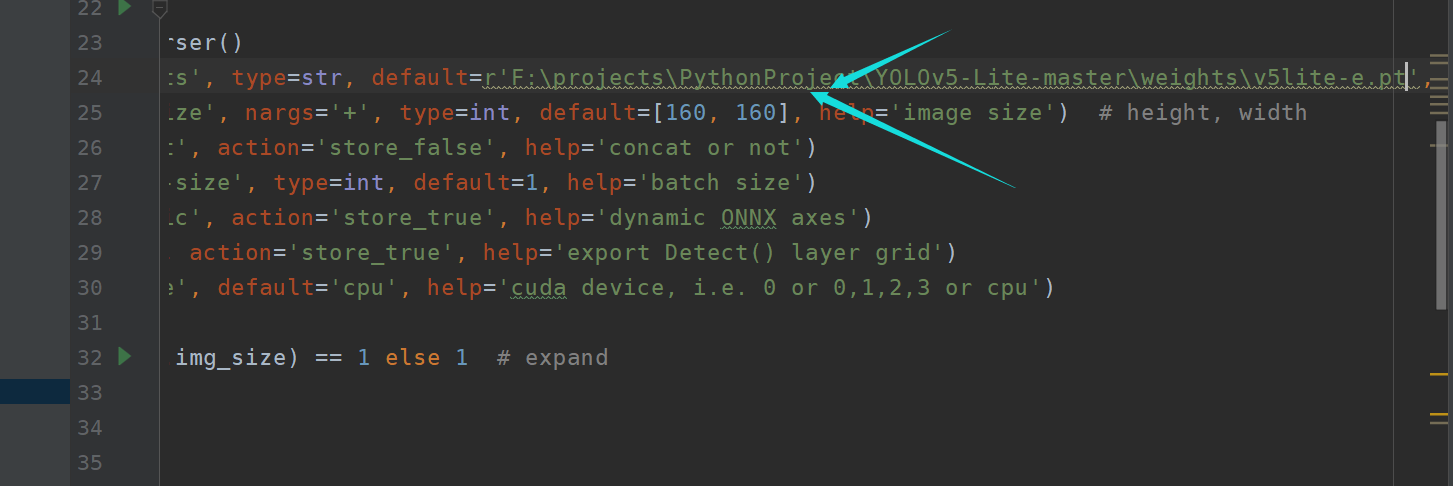
其中主要[160,160]是指输入的图片规格,默认是320 320
然后你将得到这个文件:
然后的话,我们在这里可以看到,部署文件:
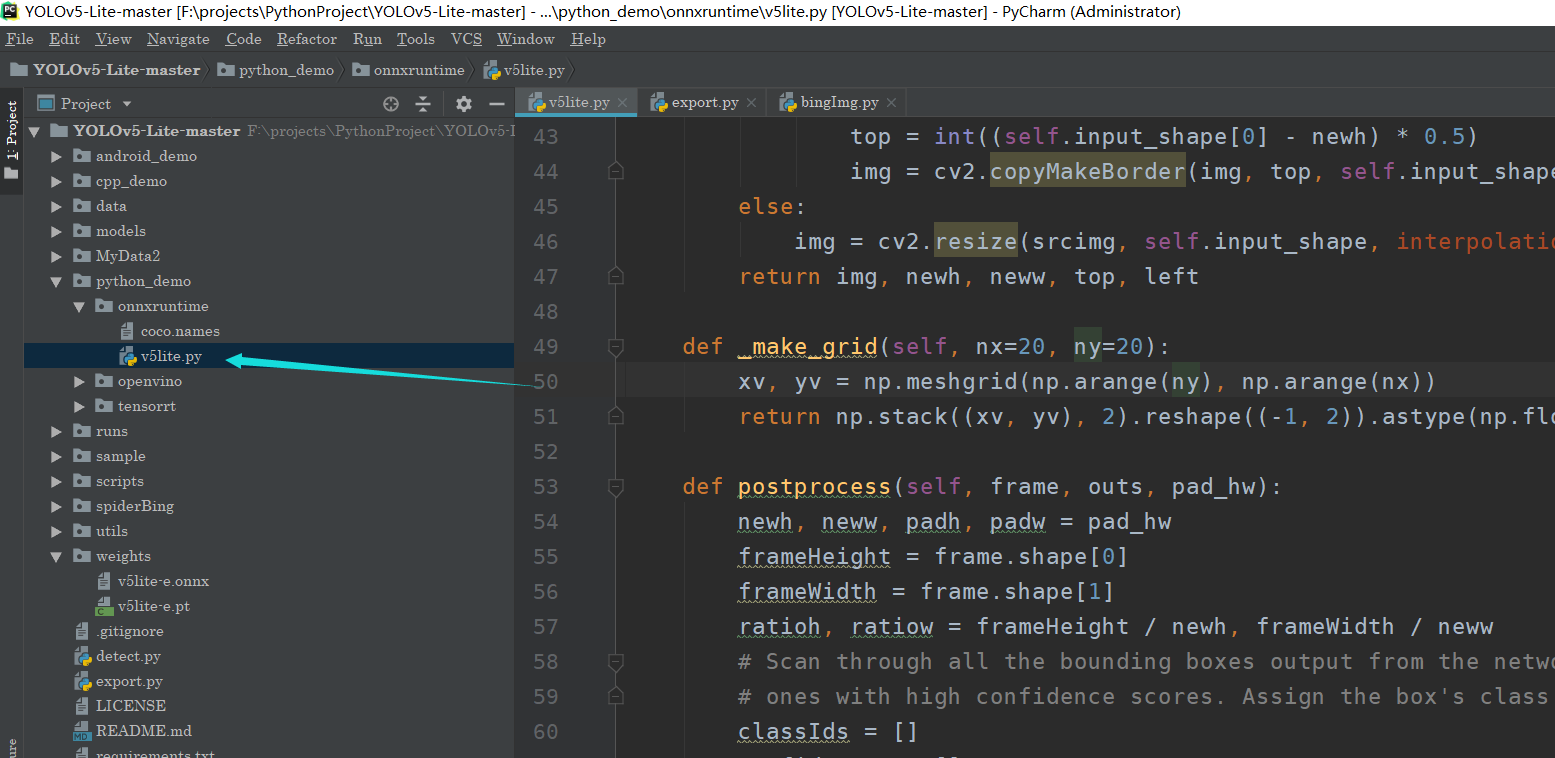
这里我还进行了一点修改,源代码好像还有bug,我改了一下。
import cv2
import time
import numpy as np
import argparse
import onnxruntime as ort

class yolov5_lite():
    def __init__(self, model_pb_path, label_path, confThreshold=0.5, nmsThreshold=0.5, objThreshold=0.5):
        so = ort.SessionOptions()
        so.log_severity_level = 3
        self.net = ort.InferenceSession(model_pb_path, so)
        self.classes = list(map(lambda x: x.strip(), open(label_path, 'r').readlines()))
        self.num_classes = len(self.classes)
        anchors = [[10, 13, 16, 30, 33, 23],
                   [30, 61, 62, 45, 59, 119],
                   [116, 90, 156, 198, 373, 326]
                   ]
        self.nl = len(anchors)
        self.na = len(anchors[0]) // 2
        self.no = self.num_classes + 5
        self.grid = [np.zeros(1)] * self.nl
        self.stride = np.array([8., 16., 32.])
        self.anchor_grid = np.asarray(anchors, dtype=np.float32).reshape(self.nl, -1, 2)

        self.confThreshold = confThreshold
        self.nmsThreshold = nmsThreshold
        self.objThreshold = objThreshold
        self.input_shape = (self.net.get_inputs()[0].shape[2], self.net.get_inputs()[0].shape[3])

    def resize_image(self, srcimg, keep_ratio=True):
        top, left, newh, neww = 0, 0, self.input_shape[0], self.input_shape[1]
        if keep_ratio and srcimg.shape[0] != srcimg.shape[1]:
            hw_scale = srcimg.shape[0] / srcimg.shape[1]
            if hw_scale > 1:
                newh, neww = self.input_shape[0], int(self.input_shape[1] / hw_scale)
                img = cv2.resize(srcimg, (neww, newh), interpolation=cv2.INTER_AREA)
                left = int((self.input_shape[1] - neww) * 0.5)
                img = cv2.copyMakeBorder(img, 0, 0, left, self.input_shape[1] - neww - left, cv2.BORDER_CONSTANT,
                                         value=0)  # add border
            else:
                newh, neww = int(self.input_shape[0] * hw_scale), self.input_shape[1]
                img = cv2.resize(srcimg, (neww, newh), interpolation=cv2.INTER_AREA)
                top = int((self.input_shape[0] - newh) * 0.5)
                img = cv2.copyMakeBorder(img, top, self.input_shape[0] - newh - top, 0, 0, cv2.BORDER_CONSTANT, value=0)
        else:
            img = cv2.resize(srcimg, self.input_shape, interpolation=cv2.INTER_AREA)
        return img, newh, neww, top, left

    def _make_grid(self, nx=20, ny=20):
        xv, yv = np.meshgrid(np.arange(ny), np.arange(nx))
        return np.stack((xv, yv), 2).reshape((-1, 2)).astype(np.float32)

    def postprocess(self, frame, outs, pad_hw):
        newh, neww, padh, padw = pad_hw
        frameHeight = frame.shape[0]
        frameWidth = frame.shape[1]
        ratioh, ratiow = frameHeight / newh, frameWidth / neww
        # Scan through all the bounding boxes output from the network and keep only the
        # ones with high confidence scores. Assign the box's class label as the class with the highest score.
        classIds = []
        confidences = []
        box_index = []
        boxes = []
        outs = outs[outs[:, 4] > self.objThreshold]
        for detection in outs:
            scores = detection[5:]
            classId = np.argmax(scores)
            confidence = scores[classId]
            if confidence > self.confThreshold:  # and detection[4] > self.objThreshold:
                center_x = int((detection[0] - padw) * ratiow)
                center_y = int((detection[1] - padh) * ratioh)
                width = int(detection[2] * ratiow)
                height = int(detection[3] * ratioh)
                left = int(center_x - width / 2)
                top = int(center_y - height / 2)
                classIds.append(classId)
                confidences.append(float(confidence))
                boxes.append([left, top, width, height])

        # Perform non maximum suppression to eliminate redundant overlapping boxes with
        # lower confidences.
        # print(boxes)
        indices = cv2.dnn.NMSBoxes(boxes, confidences, self.confThreshold, self.nmsThreshold)

        for ix in indices:
            box_index.append(ix)

        for i in box_index:
            box = boxes[i]
            left = box[0]
            top = box[1]
            width = box[2]
            height = box[3]
            frame = self.drawPred(frame, classIds[i], confidences[i], left, top, left + width, top + height)
        return frame

    def drawPred(self, frame, classId, conf, left, top, right, bottom):
        # Draw a bounding box.
        cv2.rectangle(frame, (left, top), (right, bottom), (0, 0, 255), thickness=2)

        label = '%.2f' % conf
        label = '%s:%s' % (self.classes[classId], label)

        # Display the label at the top of the bounding box
        labelSize, baseLine = cv2.getTextSize(label, cv2.FONT_HERSHEY_SIMPLEX, 0.5, 1)
        top = max(top, labelSize[1])
        # cv.rectangle(frame, (left, top - round(1.5 * labelSize[1])), (left + round(1.5 * labelSize[0]), top + baseLine), (255,255,255), cv.FILLED)
        cv2.putText(frame, label, (left, top - 10), cv2.FONT_HERSHEY_TRIPLEX, 0.5, (0, 255, 0), thickness=1)

        return frame

    def showFps(self,frame,fps):

        cv2.putText(frame, 'FPS:{}'.format(int(fps)),
                    (50, 50),
                    cv2.FONT_HERSHEY_SIMPLEX,
                    0.6, (255, 0, 255), 2)
        return frame

    def detect(self, srcimg):
        img, newh, neww, top, left = self.resize_image(srcimg)
        img = cv2.cvtColor(img, cv2.COLOR_BGR2RGB)
        img = img.astype(np.float32) / 255.0
        blob = np.expand_dims(np.transpose(img, (2, 0, 1)), axis=0)

        t1 = time.time()
        outs = self.net.run(None, {self.net.get_inputs()[0].name: blob})[0].squeeze(axis=0)
        cost_time = time.time() - t1
        # print(outs.shape)
        row_ind = 0
        for i in range(self.nl):
            h, w = int(self.input_shape[0] / self.stride[i]), int(self.input_shape[1] / self.stride[i])
            length = int(self.na * h * w)
            if self.grid[i].shape[2:4] != (h, w):
                self.grid[i] = self._make_grid(w, h)

            outs[row_ind:row_ind + length, 0:2] = (outs[row_ind:row_ind + length, 0:2] * 2. - 0.5 + np.tile(
                self.grid[i], (self.na, 1))) * int(self.stride[i])
            outs[row_ind:row_ind + length, 2:4] = (outs[row_ind:row_ind + length, 2:4] * 2) ** 2 * np.repeat(
                self.anchor_grid[i], h * w, axis=0)
            row_ind += length
        srcimg = self.postprocess(srcimg, outs, (newh, neww, top, left))
        infer_time = 'Inference Time: ' + str(int(cost_time * 1000)) + 'ms'
        cv2.putText(srcimg, infer_time, (5, 20), cv2.FONT_HERSHEY_TRIPLEX, 0.5, (0, 0, 0), thickness=1)
        return srcimg

class RunTime:
    def __init__(self):
        self.net = yolov5_lite(args.modelpath, args.classfile, confThreshold=args.confThreshold,
                          nmsThreshold=args.nmsThreshold)

    def run(self):
        """
        打开摄像头
        :return:
        """
        cam = cv2.VideoCapture(0)
        if not cam.isOpened():
            raise RuntimeError("无法打开摄像头")
        # 循环读取和处理每一帧图像
        while True:
            ret, frame = cam.read()
            if not ret:
                break
            # 进行目标检测
            start = time.time()
            #进行推理检测,返回的是绘制好的图片
            frame = self.net.detect(frame)
            end = time.time()
            fps = 1 / (end - start)
            # 绘制边界框,也是返回绘制好的图篇,把这个图片进行发布即可
            frame = self.net.showFps(frame,fps)
            # 显示图像
            cv2.imshow("Frame", frame)
            # 检测按键来退出循环
            if cv2.waitKey(1) == ord('q'):
                break
        # 释放摄像头资源
        cam.release()
        # 关闭所有窗口
        cv2.destroyAllWindows()


if __name__ == '__main__':

    parser = argparse.ArgumentParser()
    parser.add_argument('--imgpath', type=str, default=r'F:\projects\PythonProject\YOLOv5-Lite-master\sample\bike.jpg', help="image path")
    #模型地址
    parser.add_argument('--modelpath', type=str, default=r'F:\projects\PythonProject\YOLOv5-Lite-master\weights\v5lite-e.onnx', help="onnx filepath")
    parser.add_argument('--classfile', type=str, default='coco.names', help="classname filepath")
    parser.add_argument('--confThreshold', default=0.5, type=float, help='class confidence')
    parser.add_argument('--nmsThreshold', default=0.6, type=float, help='nms iou thresh')
    args = parser.parse_args()

    runner = RunTime()
    runner.run()

    # srcimg = cv2.imread(args.imgpath)
    # net = yolov5_lite(args.modelpath, args.classfile, confThreshold=args.confThreshold, nmsThreshold=args.nmsThreshold)
    # srcimg = net.detect(srcimg.copy())
    #
    # winName = 'Deep learning object detection in onnxruntime'
    # cv2.namedWindow(winName, cv2.WINDOW_NORMAL)
    # cv2.imshow(winName, srcimg)
    # cv2.waitKey(0)
    # # cv2.imwrite('save.jpg', srcimg )
    # cv2.destroyAllWindows()
自定义数据集训练
之后的话,就是自定义数据集训练了,这个的话和yolov5完全一致。比如自适应anchor,图片增强呀,都有。
不过在此之前,你需要去下载一个打标签的软件。当然你也可以使用在线的,不过需要科学上网,所以我这里就没必要介绍了。
所以咱们这里使用的是LabelImg。
使用LabelImg
关于这个软件呢,使用非常简单,主要是安装使用比较麻烦。
先下载源码。这个我稍后会给出百度云盘链接。
由于我是coda环境,所以我只需要先下载源码,解压
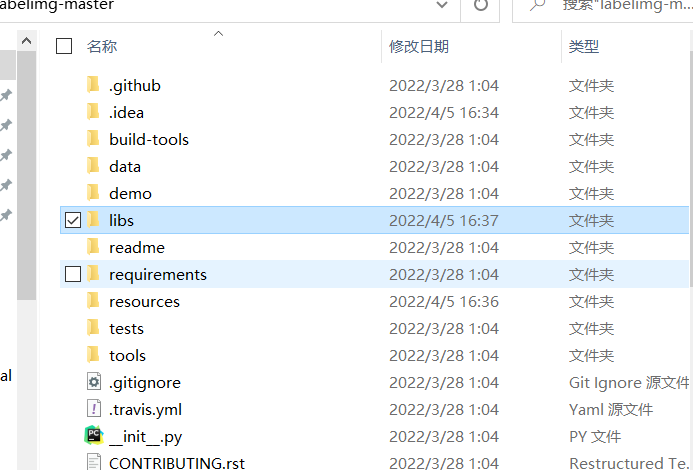
然后进入这个文件夹
安装 pyqt
conda install pyqt=5
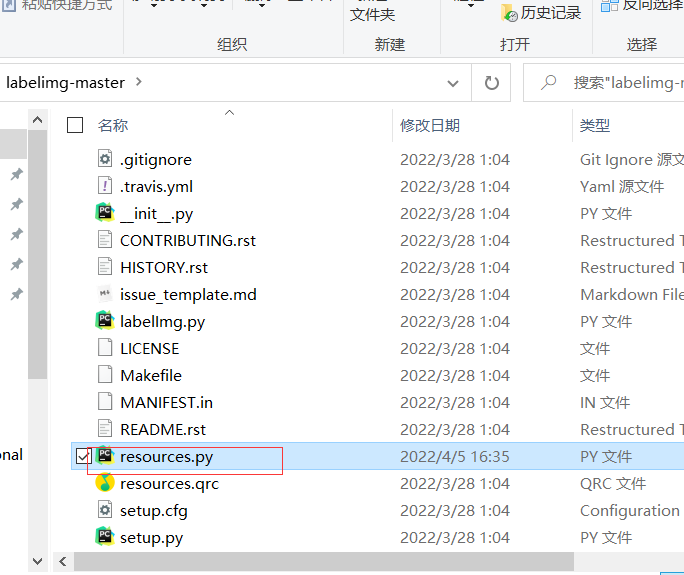
pyrcc5 -o resources.py resources.qrc
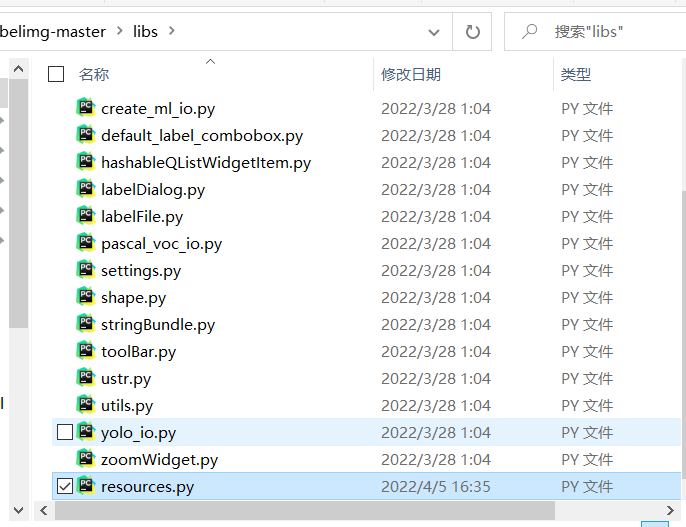
此时还不够,大概率会出问题。所以你需要把
这个生成的文件,移动到libs里面
最后是运行
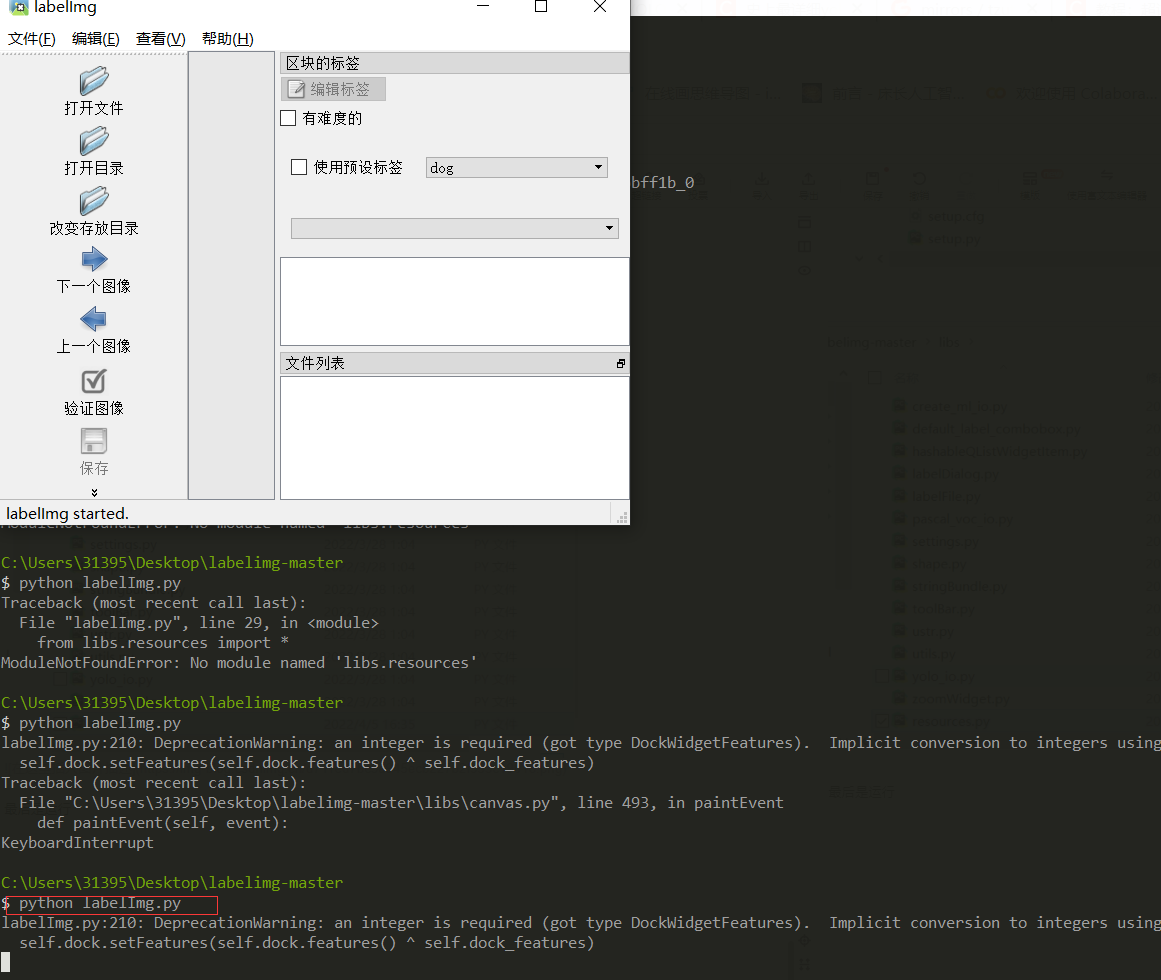
一切正常,接下来是获取这个软件
链接:https://pan.baidu.com/s/14y-0vqU7u9JkDBaAw7Odxg
提取码:6666
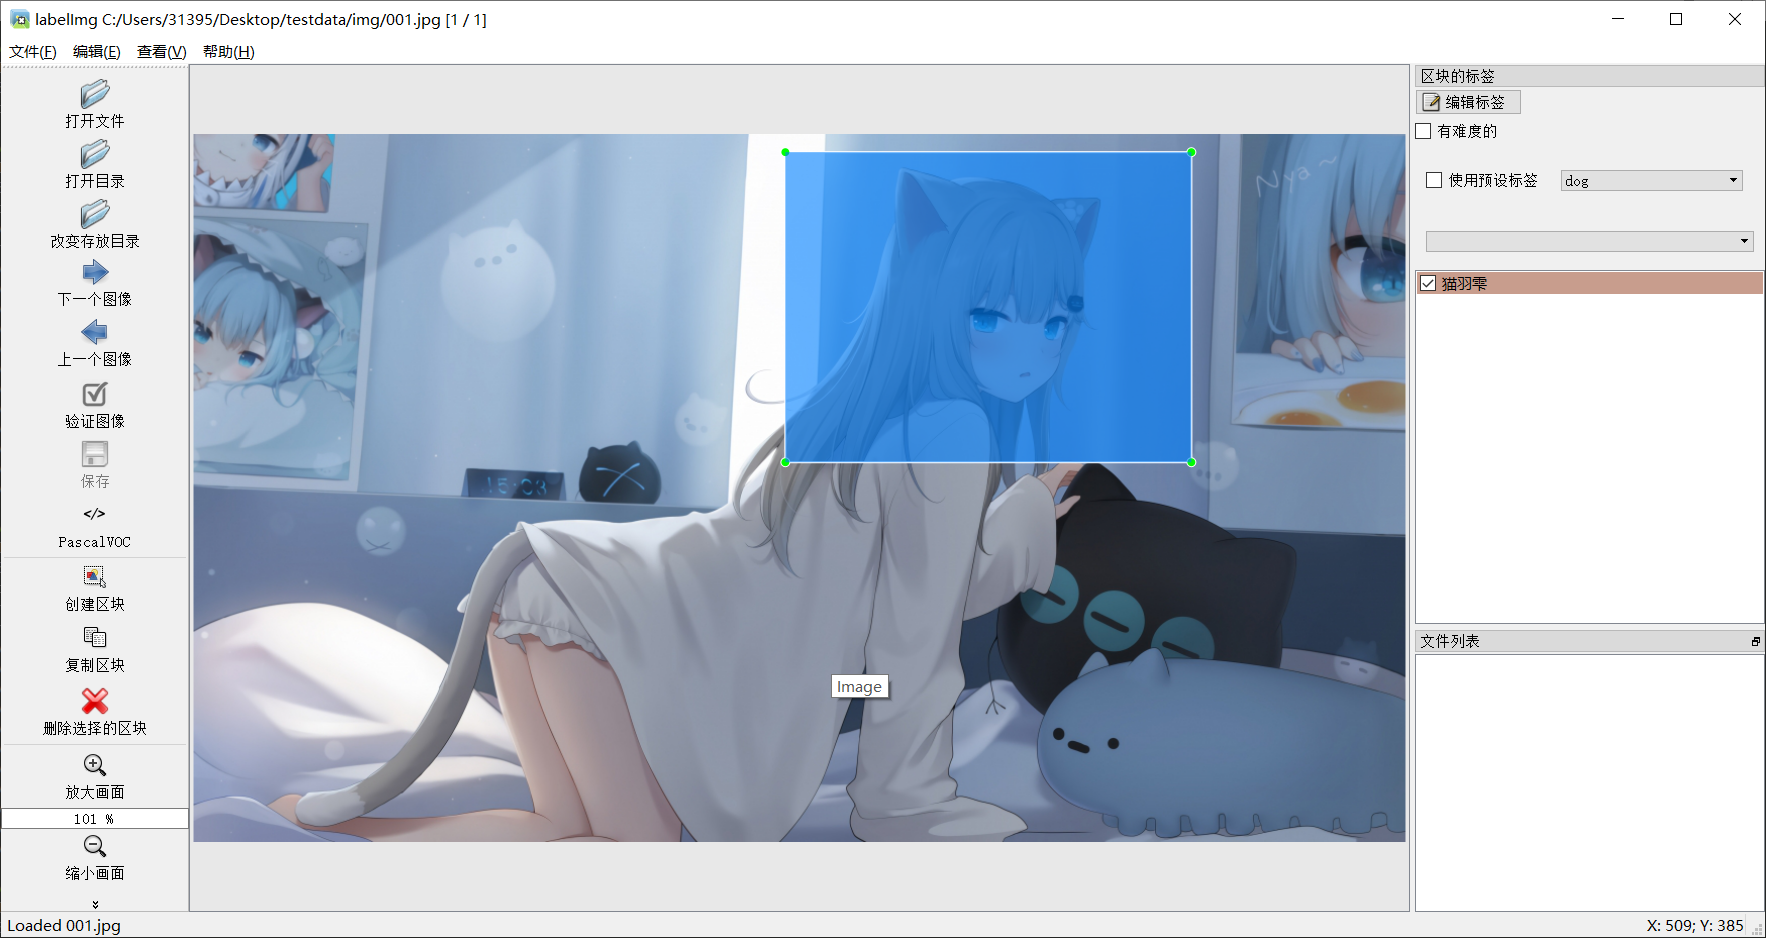
标注
这里的话,我就随便搞几张图片玩玩了。
制作数据集
前面我们其实还只是完成了准备工作,接下来才是比较复杂的点,那就是制作数据集,这个LabelImg打包好之后的数据集的格式其实是VOC格式的,当然那里也可以切换为yolo的格式,不过后面都还是要再转换的。
先来看看我们一开始的数据集的样子
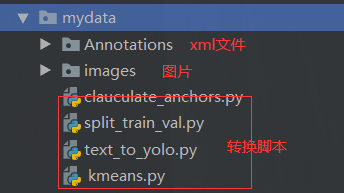
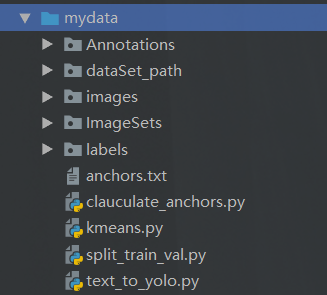
在让我们看看最后的文件长啥样
接下来我依次介绍这些脚本和处理操作。 这些代码都是copy的,目标只有一个制作一个标准的VOC数据集,然后给Yolo识别。
由于只是做演示,所以我的图片的数据集合不会太多。
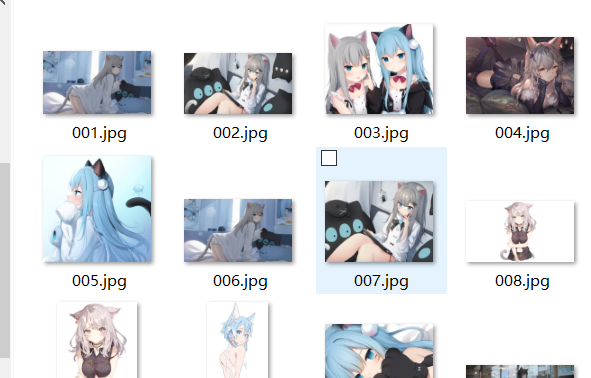
关于图片的获取的话,可以自己写个爬虫是吧。这里一定要注意图片尺寸要一致(我后面翻车了)
划分训练文件
这里的话,我们主要运行这个脚本。

# coding:utf-8

import os
import random
import argparse

parser = argparse.ArgumentParser()
#xml文件的地址,根据自己的数据进行修改 xml一般存放在Annotations下
parser.add_argument('--xml_path', default='Annotations', type=str, help='input xml label path')
#数据集的划分,地址选择自己数据下的ImageSets/Main
parser.add_argument('--txt_path', default='ImageSets/Main', type=str, help='output txt label path')
opt = parser.parse_args()

trainval_percent = 1.0  # 训练集和验证集所占比例。 这里没有划分测试集
train_percent = 0.9     # 训练集所占比例,可自己进行调整
xmlfilepath = opt.xml_path
txtsavepath = opt.txt_path
total_xml = os.listdir(xmlfilepath)
if not os.path.exists(txtsavepath):
    os.makedirs(txtsavepath)

num = len(total_xml)
list_index = range(num)
tv = int(num * trainval_percent)
tr = int(tv * train_percent)
trainval = random.sample(list_index, tv)
train = random.sample(trainval, tr)

file_trainval = open(txtsavepath + '/trainval.txt', 'w')
file_test = open(txtsavepath + '/test.txt', 'w')
file_train = open(txtsavepath + '/train.txt', 'w')
file_val = open(txtsavepath + '/val.txt', 'w')

for i in list_index:
    name = total_xml[i][:-4] + '\n'
    if i in trainval:
        file_trainval.write(name)
        if i in train:
            file_train.write(name)
        else:
            file_val.write(name)
    else:
        file_test.write(name)

file_trainval.close()
file_train.close()
file_val.close()
file_test.close()
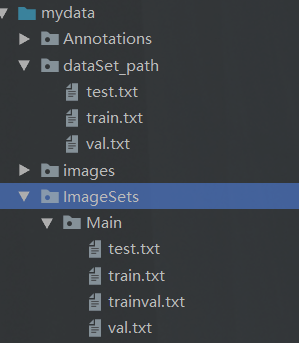
运行完之后,会出现这样的文件
生成标签
之后是生成我们的标签。
下面的路径自己看着改
# -*- coding: utf-8 -*-
import xml.etree.ElementTree as ET
import os
from os import getcwd

sets = ['train', 'val', 'test']
classes = ["猫羽雫", "喵喵~","女孩"]  # 改成自己的类别
abs_path = os.getcwd()
print(abs_path)


def convert(size, box):
    dw = 1. / (size[0])
    dh = 1. / (size[1])
    x = (box[0] + box[1]) / 2.0 - 1
    y = (box[2] + box[3]) / 2.0 - 1
    w = box[1] - box[0]
    h = box[3] - box[2]
    x = x * dw
    w = w * dw
    y = y * dh
    h = h * dh
    return x, y, w, h


def convert_annotation(image_id):
    in_file = open('F:\projects\PythonProject\yolov5-5.0\mydata\Annotations\%s.xml' % (image_id), encoding='UTF-8')
    out_file = open('F:\projects\PythonProject\yolov5-5.0\mydata\labels\%s.txt' % (image_id), 'w')
    tree = ET.parse(in_file)
    root = tree.getroot()
    size = root.find('size')
    w = int(size.find('width').text)
    h = int(size.find('height').text)
    for obj in root.iter('object'):
        difficult = obj.find('difficult').text
        # difficult = obj.find('Difficult').text
        cls = obj.find('name').text
        if cls not in classes or int(difficult) == 1:
            continue
        cls_id = classes.index(cls)
        xmlbox = obj.find('bndbox')
        b = (float(xmlbox.find('xmin').text), float(xmlbox.find('xmax').text), float(xmlbox.find('ymin').text),
             float(xmlbox.find('ymax').text))
        b1, b2, b3, b4 = b
        # 标注越界修正
        if b2 > w:
            b2 = w
        if b4 > h:
            b4 = h
        b = (b1, b2, b3, b4)
        bb = convert((w, h), b)
        out_file.write(str(cls_id) + " " + " ".join([str(a) for a in bb]) + '\n')


wd = getcwd()
for image_set in sets:
    if not os.path.exists('F:\projects\PythonProject\yolov5-5.0\mydata\labels'):
        os.makedirs('F:\projects\PythonProject\yolov5-5.0\mydata\labels')
    image_ids = open('F:\projects\PythonProject\yolov5-5.0\mydata\/ImageSets/Main/%s.txt' % (image_set)).read().strip().split()

    if not os.path.exists('F:\projects\PythonProject\yolov5-5.0\mydata\dataSet_path/'):
        os.makedirs('F:\projects\PythonProject\yolov5-5.0\mydata\dataSet_path/')

    list_file = open('dataSet_path/%s.txt' % (image_set), 'w')
    # 这行路径不需更改,这是相对路径
    for image_id in image_ids:
        list_file.write('F:\projects\PythonProject\yolov5-5.0\mydata/images/%s.jpg\n' % (image_id))
        convert_annotation(image_id)
    list_file.close()
之后会出现两个文件夹
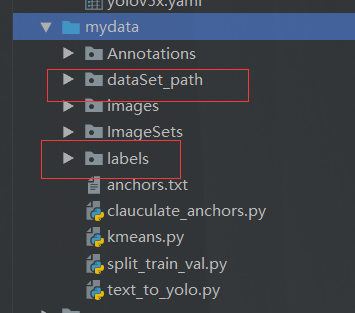
这里里面一个是我们图片的真实存放地址,还有一个是标签文本。
聚合操作
这个呢,主要是用来设置我们的目标框大小的,这里有两个脚本,这两个脚本的目的就是用来计算我们在数据集里面,手动框出来的框的平均大小,目的是为了,在我们得到的训练好后的模型,它给我们框出来的框的大小不会太奇怪,控制在一个合适的范围。
辅助脚本

import numpy as np

def iou(box, clusters):
    """
    Calculates the Intersection over Union (IoU) between a box and k clusters.
    :param box: tuple or array, shifted to the origin (i. e. width and height)
    :param clusters: numpy array of shape (k, 2) where k is the number of clusters
    :return: numpy array of shape (k, 0) where k is the number of clusters
    """
    x = np.minimum(clusters[:, 0], box[0])
    y = np.minimum(clusters[:, 1], box[1])
    if np.count_nonzero(x == 0) > 0 or np.count_nonzero(y == 0) > 0:
        raise ValueError("Box has no area")    # 如果报这个错,可以把这行改成pass即可

    intersection = x * y
    box_area = box[0] * box[1]
    cluster_area = clusters[:, 0] * clusters[:, 1]

    iou_ = intersection / (box_area + cluster_area - intersection)

    return iou_

def avg_iou(boxes, clusters):
    """
    Calculates the average Intersection over Union (IoU) between a numpy array of boxes and k clusters.
    :param boxes: numpy array of shape (r, 2), where r is the number of rows
    :param clusters: numpy array of shape (k, 2) where k is the number of clusters
    :return: average IoU as a single float
    """
    return np.mean([np.max(iou(boxes[i], clusters)) for i in range(boxes.shape[0])])

def translate_boxes(boxes):
    """
    Translates all the boxes to the origin.
    :param boxes: numpy array of shape (r, 4)
    :return: numpy array of shape (r, 2)
    """
    new_boxes = boxes.copy()
    for row in range(new_boxes.shape[0]):
        new_boxes[row][2] = np.abs(new_boxes[row][2] - new_boxes[row][0])
        new_boxes[row][3] = np.abs(new_boxes[row][3] - new_boxes[row][1])
    return np.delete(new_boxes, [0, 1], axis=1)


def kmeans(boxes, k, dist=np.median):
    """
    Calculates k-means clustering with the Intersection over Union (IoU) metric.
    :param boxes: numpy array of shape (r, 2), where r is the number of rows
    :param k: number of clusters
    :param dist: distance function
    :return: numpy array of shape (k, 2)
    """
    rows = boxes.shape[0]

    distances = np.empty((rows, k))
    last_clusters = np.zeros((rows,))

    np.random.seed()

    # the Forgy method will fail if the whole array contains the same rows
    clusters = boxes[np.random.choice(rows, k, replace=False)]

    while True:
        for row in range(rows):
            distances[row] = 1 - iou(boxes[row], clusters)

        nearest_clusters = np.argmin(distances, axis=1)

        if (last_clusters == nearest_clusters).all():
            break

        for cluster in range(k):
            clusters[cluster] = dist(boxes[nearest_clusters == cluster], axis=0)

        last_clusters = nearest_clusters

    return clusters

if __name__ == '__main__':
    a = np.array([[1, 2, 3, 4], [5, 7, 6, 8]])
    print(translate_boxes(a))
这个脚本不用运行,是一个工具类。
需要运行的脚本

这里也是注意路径修改
# -*- coding: utf-8 -*-
# 根据标签文件求先验框

import os
import numpy as np
import xml.etree.cElementTree as et
from kmeans import kmeans, avg_iou

FILE_ROOT = "F:\projects\PythonProject\yolov5-5.0\mydata/"     # 根路径
ANNOTATION_ROOT = "Annotations"   # 数据集标签文件夹路径
ANNOTATION_PATH = FILE_ROOT + ANNOTATION_ROOT

ANCHORS_TXT_PATH = "F:\projects\PythonProject\yolov5-5.0\mydata/anchors.txt"   #anchors文件保存位置

CLUSTERS = 9
CLASS_NAMES = ['猫羽雫', '喵喵~','女孩']   #类别名称

def load_data(anno_dir, class_names):
    xml_names = os.listdir(anno_dir)
    boxes = []
    for xml_name in xml_names:
        xml_pth = os.path.join(anno_dir, xml_name)
        tree = et.parse(xml_pth)

        width = float(tree.findtext("./size/width"))
        height = float(tree.findtext("./size/height"))

        for obj in tree.findall("./object"):
            cls_name = obj.findtext("name")
            if cls_name in class_names:
                xmin = float(obj.findtext("bndbox/xmin")) / width
                ymin = float(obj.findtext("bndbox/ymin")) / height
                xmax = float(obj.findtext("bndbox/xmax")) / width
                ymax = float(obj.findtext("bndbox/ymax")) / height

                box = [xmax - xmin, ymax - ymin]
                boxes.append(box)
            else:
                continue
    return np.array(boxes)

if __name__ == '__main__':

    anchors_txt = open(ANCHORS_TXT_PATH, "w")

    train_boxes = load_data(ANNOTATION_PATH, CLASS_NAMES)
    count = 1
    best_accuracy = 0
    best_anchors = []
    best_ratios = []

    for i in range(10):      ##### 可以修改,不要太大,否则时间很长
        anchors_tmp = []
        clusters = kmeans(train_boxes, k=CLUSTERS)
        idx = clusters[:, 0].argsort()
        clusters = clusters[idx]
        # print(clusters)

        for j in range(CLUSTERS):
            anchor = [round(clusters[j][0] * 640, 2), round(clusters[j][1] * 640, 2)]
            anchors_tmp.append(anchor)
            print(f"Anchors:{anchor}")

        temp_accuracy = avg_iou(train_boxes, clusters) * 100
        print("Train_Accuracy:{:.2f}%".format(temp_accuracy))

        ratios = np.around(clusters[:, 0] / clusters[:, 1], decimals=2).tolist()
        ratios.sort()
        print("Ratios:{}".format(ratios))
        print(20 * "*" + " {} ".format(count) + 20 * "*")

        count += 1

        if temp_accuracy > best_accuracy:
            best_accuracy = temp_accuracy
            best_anchors = anchors_tmp
            best_ratios = ratios

    anchors_txt.write("Best Accuracy = " + str(round(best_accuracy, 2)) + '%' + "\r\n")
    anchors_txt.write("Best Anchors = " + str(best_anchors) + "\r\n")
    anchors_txt.write("Best Ratios = " + str(best_ratios))
    anchors_txt.close()
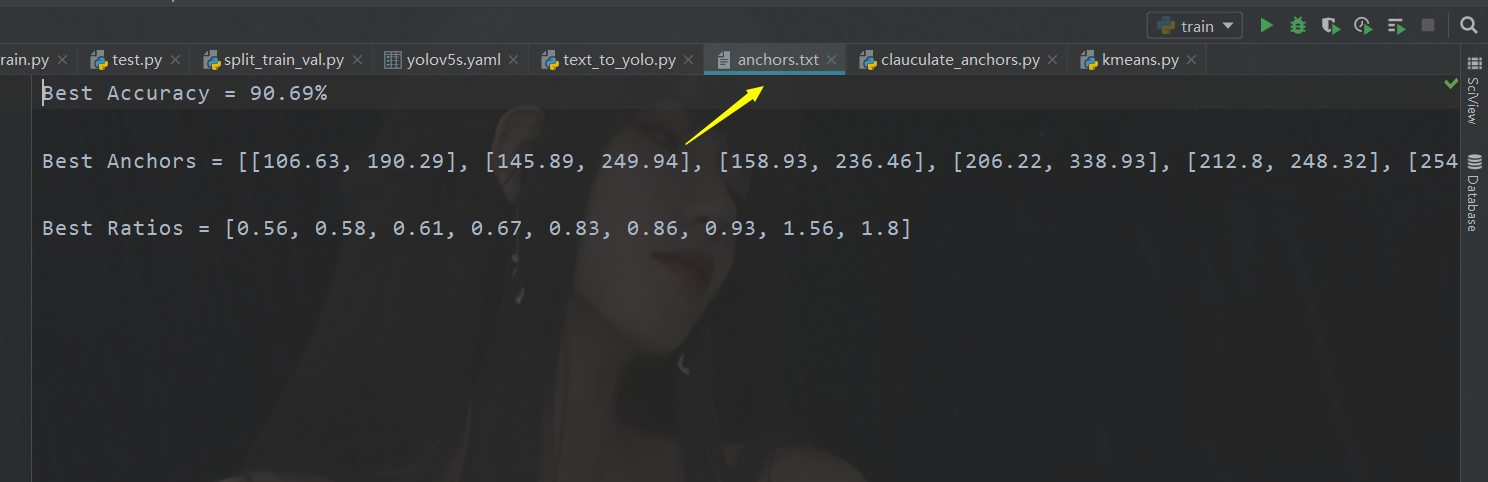
然后会生成这样的文件
开始训练
首先打开咱们的这个文件夹
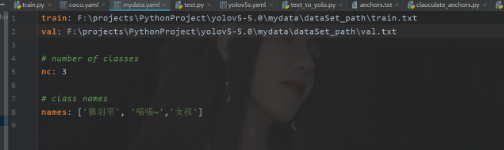
train: F:\projects\PythonProject\yolov5-5.0\mydata\dataSet_path\train.txt
val: F:\projects\PythonProject\yolov5-5.0\mydata\dataSet_path\val.txt

# number of classes
nc: 3

# class names
names: ['猫羽雫', '喵喵~','女孩']
之后是修改我们的模型
我们使用的是 5s
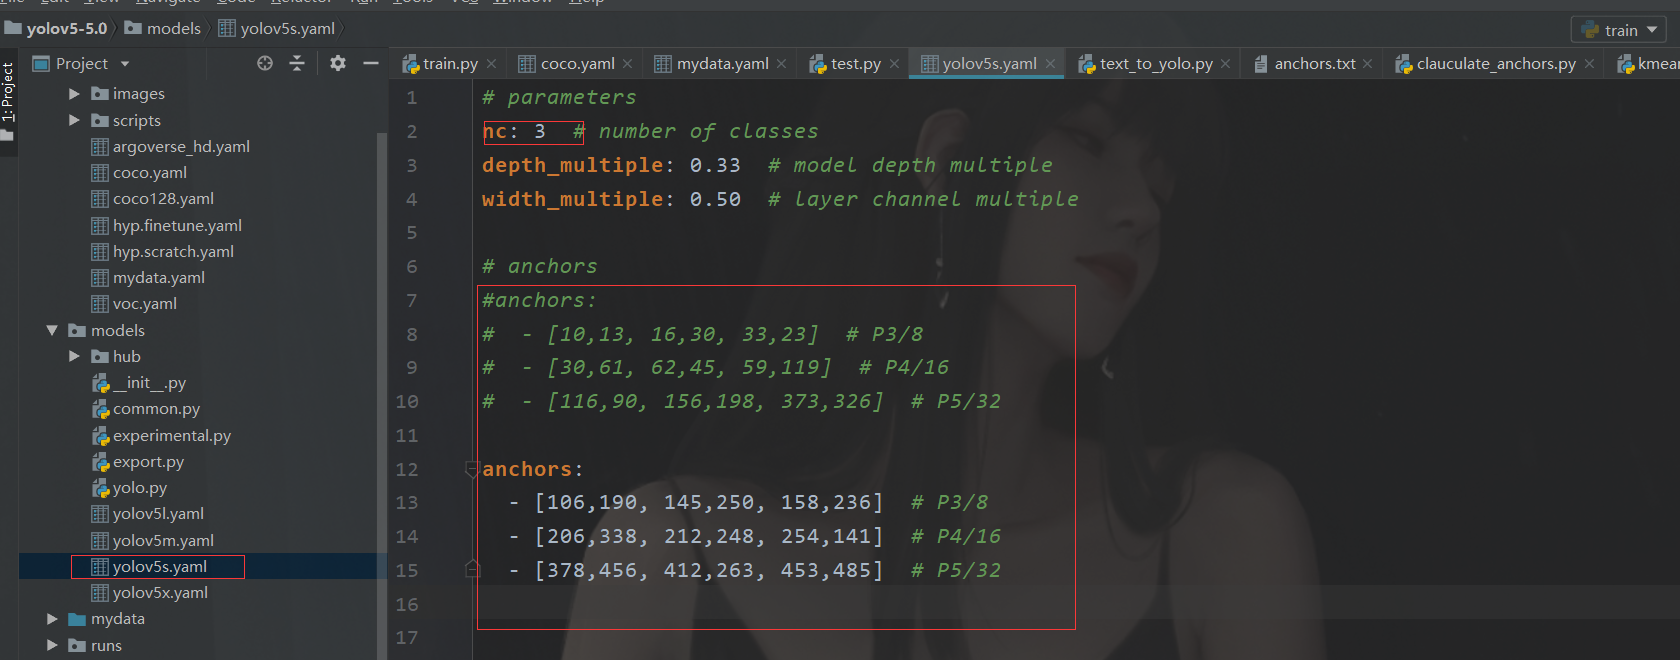
这里注意到那个anchors的参数修改
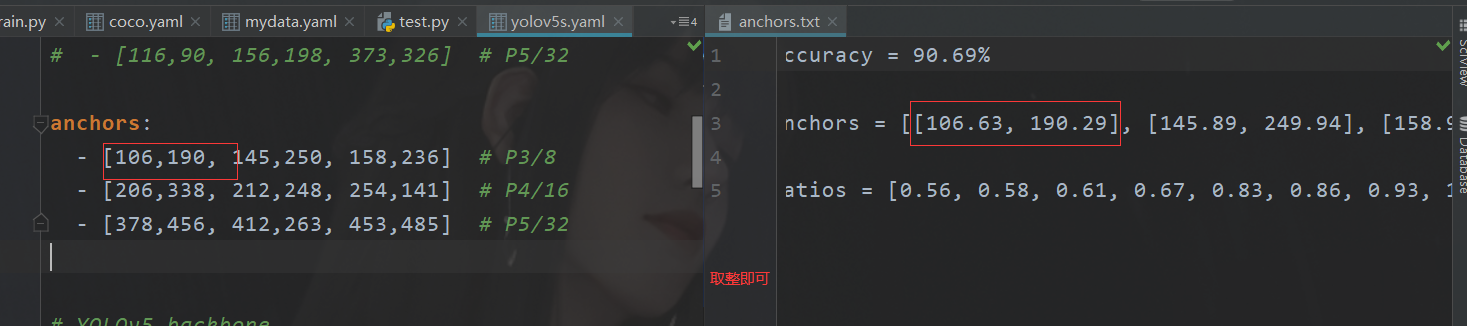
这个其实就是咱们原来聚类生成的玩意儿。
之后其老规矩运行train设置好参数即可。
总结
前人栽树,后人乘凉,只能这么说,后面,我在集成一下sort算法,这样一来就可以实现边缘设备的目标跟踪了,用在,区域内的物体计数里面。