一名脑残程序员的mars-ui心酸使用记录。
通过mars3d的官网我们可以看到,有配套的UI库使用,那么我们如何使用到自己的项目中呢,跟着文章一步一步来吧!
1、引入UI库
① 安装ant-design-vue
cnpm install ant-design-vue --save
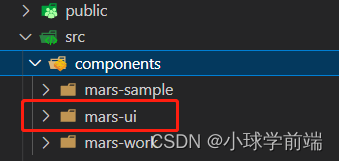
② 下载基于vue开发的mars3d的源码,直通车: git clone https://gitee.com/marsgis/mars3d-vue-project.git,如下图所示,将src/components/mars-ui文件夹复制到我们的项目中,复制到src/components/文件夹下.
第一步完成
2、main.js配置
引入css文件,
- 注意:mars-ui的引入要放到我们使用的UI框架
ant-design-vue下面,以便于我们应用所有的mars-ui的样式(踩坑点)
......
import Antd from 'ant-design-vue'
import 'ant-design-vue/dist/antd.css'

import MarsUIInstall from '@mars/components/mars-ui'
import '@mars/components/mars-ui/common'

const app = createApp(App)
MarsUIInstall(app, {})
......
至此第二步完成
3、vite.config.js配置
① 安装vite-plugin-style-import
cnpm install vite-plugin-style-import --save
② 配置插件
export default defineConfig({
..........
	plugins: [
	    vue(),
	    mars3dPlugin(),
	    createStyleImportPlugin({
	      resolves: [AndDesignVueResolve()]
	  ],
  .......
])
③ 配置less预加载,css与plugins同级
css: {
    preprocessorOptions: {
      less: {
        javascriptEnabled: true,
        additionalData: `@import "${path.resolve(__dirname, 'src/components/mars-ui/base.less')}";`
      }
    }
  }
所以准备工作已经配置完成好了,下边开始使用。
页面使用
为了与其他UI样式做区分,所以mars-ui必须放在类名为mars-main-view下才起作用
① 修改App.vue
 <div id="mars-main-view" class="mars-main-view">
    <router-view />
  </div>
② 修改我们的页面组件
<template>
  <div id="gui-container">
    <mars-dialog :visible="true" right="10" top="100" bottom="50" width="400">
    <div class="ui-container">
      <a-form
        :model="formState"
        :rules="rules"
        :label-col="{ span: 6 }"
        :wrapper-col="{ span: 18 }">
        <a-collapse v-model:activeKey="activeKey" expandIconPosition="right">
          <a-collapse-panel key="1" header="表单控件">
            <a-form-item label="简单文本" name="url">
              <mars-input v-model:value="formState.url" :allowClear="true" @change="onTextChange" />
            </a-form-item>

            <a-form-item label="地图交互" name="extent">
              <a-row :gutter="5">
                <a-col :span="19">
                  <mars-input v-model:value="formState.extent" :allowClear="true"></mars-input>
                </a-col>
                <a-col :span="5">
                  <a-space size="small">
                    <mars-button class="small-btn" @click="onClickDrawExtent">绘制</mars-button>
                  </a-space>
                </a-col>
              </a-row>
            </a-form-item>

            <a-form-item label="数字输入">
              <mars-input-number
                v-model:value="formState.countCar"
                :step="0.1"
                @change="onNumberChange" />
            </a-form-item>

            <a-form-item label="下拉选择">
              <mars-select
                v-model:value="formState.model"
                :options="modelOptions"
                @change="onSelectChange"></mars-select>
            </a-form-item>

            <a-form-item label="日期">
              <mars-date-picker
                v-model:value="formState.date"
                format="YYYY-MM-DD"
                @change="onDateChange" />
            </a-form-item>

            <a-form-item label="滑动条">
              <mars-slider
                v-model:value="formState.brightness"
                :min="-0.5"
                :max="1.5"
                :step="0.05"
                @change="onSliderChange" />
            </a-form-item>

            <a-form-item label="刻度滑动条">
              <mars-slider
                v-model:value="formState.contrast"
                :marks="marks"
                :min="-255"
                :max="255"
                :step="1"
                @change="onMarkSliderChange" />
            </a-form-item>

            <a-form-item label="多选" class="f-push-20-t">
              <a-checkbox-group v-model:value="formState.checkboxVal" @change="onCheckboxChange">
                <a-checkbox value="mars">火星</a-checkbox>
                <a-checkbox value="earth">地球</a-checkbox>
                <a-checkbox value="sun">太阳</a-checkbox>
              </a-checkbox-group>
            </a-form-item>

            <a-form-item label="单选">
              <a-radio-group v-model:value="formState.radioVal">
                <a-radio value="1">2D</a-radio>
                <a-radio value="2">2.5D</a-radio>
                <a-radio value="3">3D</a-radio>
              </a-radio-group>
              <!-- 已选择:{{ formState.radioVal }} -->
            </a-form-item>

            <a-form-item label="鼠标操作">
              <a-space>
                <mars-switch v-model:checked="formState.isScale" @change="onSwitchChange" />
                <span>是否允许</span>
              </a-space>
            </a-form-item>

            <a-form-item label="颜色选择">
              <a-space>
                <mars-color-picker v-model:value="formState.color" />
                <div class="color-state">已选择:{{ formState.color }}</div>
              </a-space>
            </a-form-item>

            <a-form-item label="颜色选择2">
              <a-space>
                <mars-color v-model:value="formState.color" @change="showColor" />
                <div class="color-state">已选择:{{ formState.color }}</div>
              </a-space>
            </a-form-item>

            <div class="f-tac">
              <a-space>
                <mars-button size="middle" @click="onClickMessage">
                  <template #icon><mars-icon icon="alarm" class="icon-vertical-a" /></template>
                  消息
                </mars-button>
                <mars-button size="middle" @click="onClickNotify">
                  <template #icon
                    ><mars-icon icon="download-one" class="icon-vertical-a"
                  /></template>
                  提示
                </mars-button>
                <mars-button size="middle" @click="onClickAlert">
                  <template #icon
                    ><mars-icon icon="download-one" class="icon-vertical-a"
                  /></template>
                  弹窗
                </mars-button>
                <mars-button size="middle" disabled> 禁用 </mars-button>
              </a-space>
            </div>
          </a-collapse-panel>

          <a-collapse-panel key="2" header="表格控件">
            <mars-table
              size="small"
              :customRow="customTableRow"
              :row-selection="rowSelection"
              bordered
              :pagination="{ pageSize: 5 }"
              :columns="columns"
              :dataSource="typhoonList"
              rowKey="id">
              <template #bodyCell="{ column, text }">
                <template v-if="column.dataIndex === 'name'">
                  <a>{{ text }}</a>
                </template>
              </template>
            </mars-table>
          </a-collapse-panel>
          <a-collapse-panel key="3" header="树控件">
            <mars-tree
              checkable
              :tree-data="treeData"
              v-model:expandedKeys="expandedKeys"
              v-model:checkedKeys="checkedKeys"
              @check="onCheckTreeItem">
              <template #title="{ title }">
                <span>{{ title }}</span>
              </template>
            </mars-tree>
          </a-collapse-panel>
        </a-collapse>

        <div class="f-tac">
          <a-space>
            <mars-button size="middle" @click="onClickLoading">
              <template #icon><mars-icon icon="find" class="icon-vertical-a" /></template>
              进度条1
            </mars-button>
            <mars-button size="middle" @click="onClickTopLoading">
              <template #icon><mars-icon icon="planet" class="icon-vertical-a" /></template>
              进度条2
            </mars-button>
          </a-space>
        </div>
      </a-form>
    </div>
  </mars-dialog>
  </div>
</template>

<script setup lang="ts">
import { onMounted, ref, reactive } from 'vue'
import * as mars3d from 'mars3d'
import axios from 'axios'
import { $message } from "@mars/components/mars-ui/index"
import * as mapWork from "./map.js"

const Cesium = mars3d.Cesium
let map

// onMounted(() => {

// })

onMounted(() => {
  initMap()
  // 访问后端接口,取台风列表数据
  const url = '//data.mars3d.cn/file/apidemo/typhoon/list_2020.json'
  axios.get(url).then(function (res: any) {
    const data = res.data
    typhoonList.value = data.typhoonList.map((item: any) => ({
      id: item[0],
      name_en: item[1],
      name_cn: item[2],
      typnumber: item[3],
      state: item[7]
    }))
  })
})


const initMap = () => {
  // 初始化 Cesium.Viewer
  var mapOptions = {
    basemaps: [{ name: '天地图', type: 'tdt', layer: 'img_d', show: true }],
    scene: {
      center: { lat: 31.786828, lng: 117.181704, alt: 3393, heading: 38, pitch: -34 }
    }
  }
  map = new mars3d.Map('gui-container', mapOptions)
}


const formState = reactive({
  url: '',
  extent: '',
  countCar: 1,
  model: '',
  date: null,
  brightness: 0,
  contrast: 128,
  checkboxVal: ['mars'],
  radioVal: '3',
  isScale: true,
  color: '#ffff00'
})

const rules = {
  url: [{ required: true, message: '请输入内容', trigger: 'blur' }]
}

// 数字输入框修改事件
const onNumberChange = () => {
  $message('您修改了数字:' + formState.countCar)
}

// 下拉列表数据
const modelOptions = [
  {
    value: 'jingche',
    label: '警车',
    style: { scale: 1, url: '//data.mars3d.cn/gltf/mars/jingche/jingche.gltf' }
  },
  {
    value: 'qiche',
    label: '小汽车',
    style: { scale: 1, url: '//data.mars3d.cn/gltf/mars/qiche.gltf' }
  },
  {
    value: 'dkc',
    label: '大卡车'
  }
]

// 下拉列表切换事件
const onSelectChange = (value: string, data: any) => {
  $message('您选择了:' + data.label)
  console.log('下拉列表切换事件', data)
}

// 日期切换事件
const onDateChange = (data: any, value: any) => {
  $message('您选择了日期:' + value)
}

// 多选框勾选事件
const onCheckboxChange = () => {
  $message('您勾选了:' + formState.checkboxVal)
  console.log('多选框勾选事件', formState.checkboxVal)
}

// 滑动条修改事件
const onSliderChange = () => {
  mapWork.updateBrightness(formState.brightness)
}

const marks: Record<number, any> = {
  '-255': '-255',
  '-125': '-125',
  0: '0',
  125: '125',
  255: '255'
}
// 带刻度滑动条修改事件
const onMarkSliderChange = () => {
  mapWork.updateContrast(formState.contrast) // 调用地图方法
}

// switch切换了
const onSwitchChange = () => {
  mapWork.enableMapMouseController(formState.isScale) // 调用地图方法
}

// 显示消息提示,自动消失
const onClickMessage = () => {
  $message('Message消息提示演示')
}

// 显示提示窗,不影响地图操作,会出现在页面右下角
const onClickNotify = async () => {
  $notify('Notify提示窗', `该窗口会出现在页面右下角,不影响地图交互操作。`)
}

// 显示遮罩提示窗,需要手动关闭
const onClickAlert = async () => {
  // $alert 返回一个Promise
  await $alert(`该窗口需要单击确定按钮进行关闭,会影响地图交互操作。`, 'Alert提示窗')

  $message('点击了确定按钮') // 异步单击确定后提示
}

// 按钮点击事件,演示loading持续三秒
const onClickLoading = async () => {
  $message('演示遮盖loading 持续三秒')

  window.$showLoading()
  setTimeout(() => {
    // 关闭loading
    window.$hideLoading()

    // 默认的信息提示
    $message('演示加载完成提示')
  }, 3000)
}

// 按钮点击事件,演示顶部不遮盖的loading
const onClickTopLoading = () => {
  $message('演示顶部不遮盖的loaing,看上面', 'warning')

  window.$showLoading('top') // top 调用出现在顶部的加载进度
  setTimeout(() => {
    window.$hideLoading('top')

    $message('演示加载失败提示', 'error')
  }, 3000)
}

// ========================= 表格控件相关处理============================

// 表格列头
const columns: TableColumnType[] = [
  {
    title: '台风编号',
    dataIndex: 'typnumber',
    key: 'typnumber'
  },
  {
    title: '台风名(中文)',
    dataIndex: 'name_cn'
  },
  {
    title: '台风名(英文)',
    dataIndex: 'name_en'
  }
]

interface typhoon {
  id: number
  name_en: string
  name_cn: string
  typnumber: string
  state: string
}
const typhoonList = ref<typhoon[]>([]) // 列表数据
onMounted(() => {
  // 访问后端接口,取台风列表数据
  const url = '//data.mars3d.cn/file/apidemo/typhoon/list_2020.json'
  axios.get(url).then(function (res: any) {
    const data = res.data
    typhoonList.value = data.typhoonList.map((item: any) => ({
      id: item[0],
      name_en: item[1],
      name_cn: item[2],
      typnumber: item[3],
      state: item[7]
    }))
  })
})

// 勾选了表格列表的行
const rowSelection: TableProps['rowSelection'] = {
  onSelect: (selectedRow: any, selectedRows: boolean) => {
    if (selectedRows) {
      $message('勾选了行:' + selectedRow.name_cn)
    } else {
      $message('取消了勾选行:' + selectedRow.name_cn)
    }
  }
}

// 点击表格列表的行
const customTableRow = (selectedRow: any) => {
  return {
    onClick: (row: any) => {
      $message('点击表格的行:' + selectedRow.name_cn)
    }
  }
}

// ========================= 树控件相关处理============================

const layersObj: any = {}
const treeData = ref<any[]>([])
const expandedKeys = ref<string[]>([])
const checkedKeys = ref<string[]>([])

function findChild(parent: any, list: any[]) {
  return list
    .filter((item: any) => item.pid === parent.id)
    .map((item: any) => {
      const node: any = {
        title: item.name,
        key: item.id,
        id: item.id,
        pId: item.pid
      }
      const nodeLayer = mapWork.createLayer(item) // 创建图层
      layersObj[item.id] = nodeLayer
      node.children = findChild(node, list)
      expandedKeys.value.push(node.key)
      if (item.isAdded && item.show) {
        checkedKeys.value.push(node.key)
      }
      return node
    })
}

// 勾选了树节点
const onCheckTreeItem = (keys: string[]) => {
  Object.keys(layersObj).forEach((k) => {
    const newKeys = keys.map((item) => {
      return String(item)
    })
    const show = newKeys.indexOf(k) !== -1
    const layer = layersObj[k]
    layer.show = show
    if (show) {
      if (!layer.isAdded) {
        mapWork.map.addLayer(layer)
      }
      layer.flyTo()
    } else {
      if (layer.isAdded) {
        mapWork.map.removeLayer(layer)
      }
    }
  })
}

</script>

<style scoped>
#gui-container {
  width: 100vw;
  height: 100vh;
}
.ui-container {
  height: 100%;
  overflow-y: scroll;
}
</style>
③ 同文件夹下添加 map.js
import * as mars3d from "mars3d"

export let map // mars3d.Map三维地图对象

// 需要覆盖config.json中地图属性参数(当前示例框架中自动处理合并)
export const mapOptions = {
  scene: {
    center: { lat: 31.823874, lng: 117.223976, alt: 3509, heading: 0, pitch: -90 }
  },
  control: {
    baseLayerPicker: false
  }
}

/**
 * 构造bloom效果对象
 * @type {mars3d.BloomEffect}
 */
let bloomEffect

// 事件对象,用于抛出事件给面板
export const eventTarget = new mars3d.BaseClass()

/**
 * 初始化地图业务,生命周期钩子函数(必须)
 * 框架在地图初始化完成后自动调用该函数
 * @param {mars3d.Map} mapInstance 地图对象
 * @returns {void} 无
 */
export function onMounted(mapInstance) {
  console.log("onMounted执行了")
  map = mapInstance // 记录首次创建的map

  // 构造bloom效果 用于滑动条测试
  bloomEffect = new mars3d.effect.BloomEffect()
  map.addEffect(bloomEffect)

  eventTarget.fire("init", {
    value: 10
  })
  queryTilesetData()
}

/**
 * 释放当前地图业务的生命周期函数
 * @returns {void} 无
 */
export function onUnmounted() {
  console.log("onUnmounted执行了")
  map.graphicLayer.clear()
  map.removeEffect(bloomEffect, true)
  bloomEffect = null
  map = null
}

// 绘制矩形(演示map.js与index.vue的交互)
export function drawExtent() {
  map.graphicLayer.clear()
  // 绘制矩形
  map.graphicLayer.startDraw({
    type: "rectangle",
    style: {
      fill: true,
      color: "rgba(255,255,0,0.2)",
      outline: true,
      outlineWidth: 2,
      outlineColor: "rgba(255,255,0,1)"
    },
    success: function (graphic) {
      const rectangle = mars3d.PolyUtil.formatRectangle(graphic._rectangle_draw)
      eventTarget.fire("drawExtent", { extent: JSON.stringify(rectangle) }) // 抛出事件,可以组件中去监听事件
    }
  })
}

// 是否运行地图鼠标交互
export function enableMapMouseController(value) {
  map.setSceneOptions({
    cameraController: {
      enableZoom: value,
      enableTranslate: value,
      enableRotate: value,
      enableTilt: value
    }
  })
}

// 调整亮度 (演示滑动条)
export function updateBrightness(val) {
  bloomEffect.brightness = val
}

// 调整对比度 (演示滑动条)
export function updateContrast(val) {
  bloomEffect.contrast = val
}

// 创建图层
export function createLayer(layer) {
  return mars3d.LayerUtil.create(layer)
}

// 数据获取
function queryTilesetData() {
  mars3d.Util.fetchJson({ url: "config/tileset.json" })
    .then(function (arr) {
      const modelData = arr.layers
      eventTarget.fire("loadTypeList", { modelData })
    })
    .catch(function (error) {
      console.log("加载JSON出错", error)
    })
}
④ 运行项目,看效果,
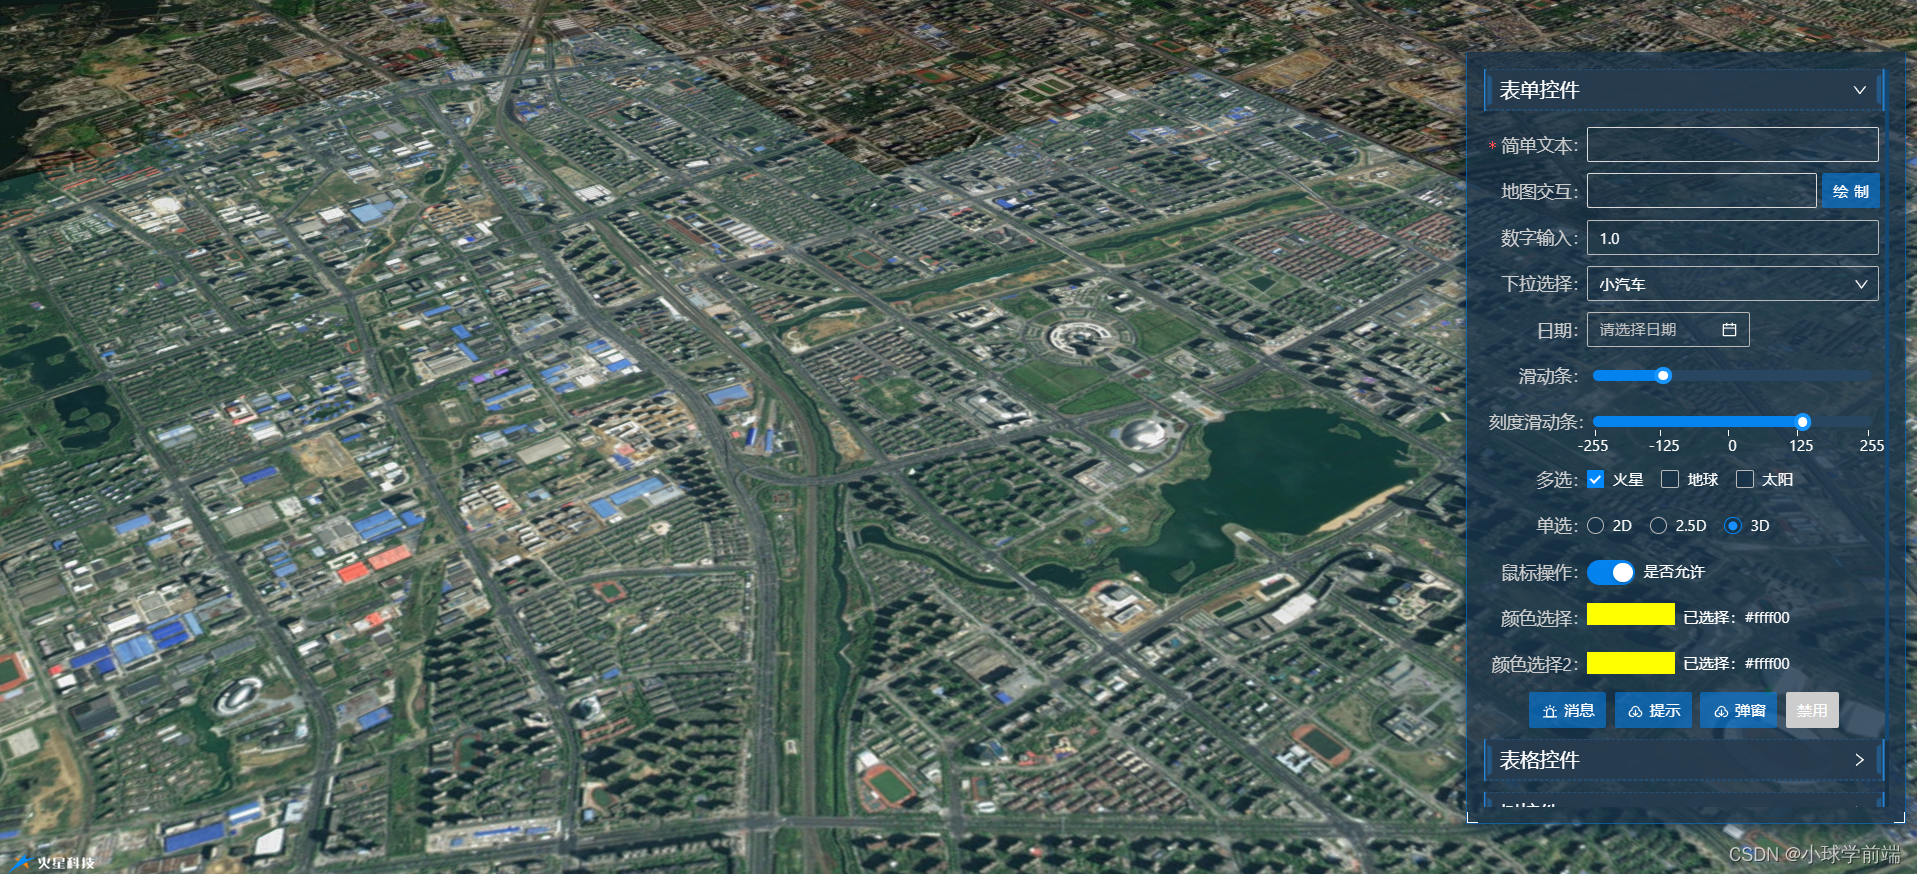
好了,已经完成mars-ui的添加了,可以继续开发了,