uni-chatgpt 一款uniapp+vite4+uview-plus多端ChatGPT模板实例。
全新首发的一款多端仿制chatgpt智能对话实战项目,基于
uniApp+Vue3+Pinia+uViewUI+MarkdownIt等技术开发搭建项目。支持编译到h5+小程序+APP端,支持markdown语法解析及代码高亮。

功能特点
- 全屏沉浸式顶部导航条+底部tabbar
- 支持解析h5+小程序+App端markdown语法及代码高亮
- 使用pinia全局状态管理
- 基于uview-plus跨端vue3组件库
- 支持会话本地缓存


chatgpt-uniapp支持全端编译至H5+小程序端+App端。

实现技术
- 开发工具:HbuilderX 3.8.4
- 框架技术:Uniapp+Vite4+Vue3+Pinia
- UI组件库:uView-plus^3.1.31
- markdown渲染:markdown-it
- 代码高亮:highlight.js
- 本地缓存:pinia-plugin-unistorage
- 支持编译:小程序+H5+APP端

项目结构

整个项目均是采用vue3 setup语法糖编码开发。
如果对uniapp+vue3创建项目模板不熟悉的话,可以去看看之前的分享文章。
https://blog.csdn.net/yanxinyun1990/article/details/131257075


uniapp自定义导航条+tabbar
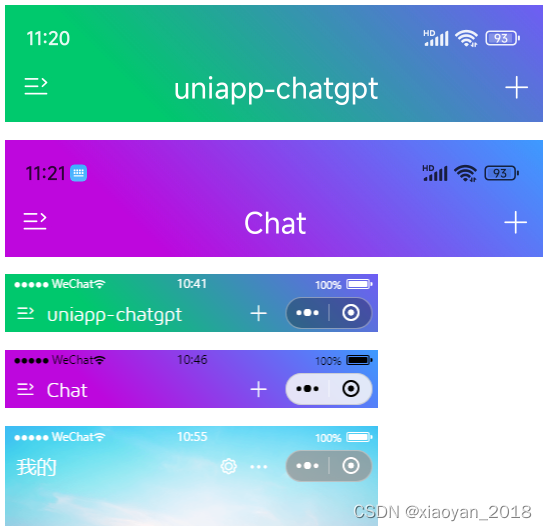
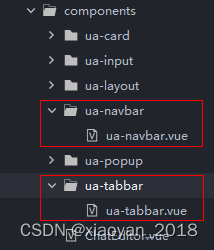
为了保证整体风格一致性,顶部导航栏及底部Tabbar采用自定义组件形式。
<ua-navbar back="false" custom :title="title" size="40rpx" center fixed :bgcolor="bgcolor">
    <template #left>
        <view @click="showSidebar=true"><text class="iconfont ve-icon-menuon"></text></view>
    </template>
    <template #right>
        <text class="iconfont ve-icon-plus fs-36" @click="handleNewChat"></text>
    </template>
</ua-navbar>
目前这两个组件的vue2版本已经发布到了插件市场,如果大家有需要,可以去下载一次性拿走使用。
https://ext.dcloud.net.cn/plugin?id=5592
https://ext.dcloud.net.cn/plugin?id=5593
uniapp解析markdown语法高亮
uni-chatgpt可以完美解决uniapp解析markdown语法功能及代码高亮显示。
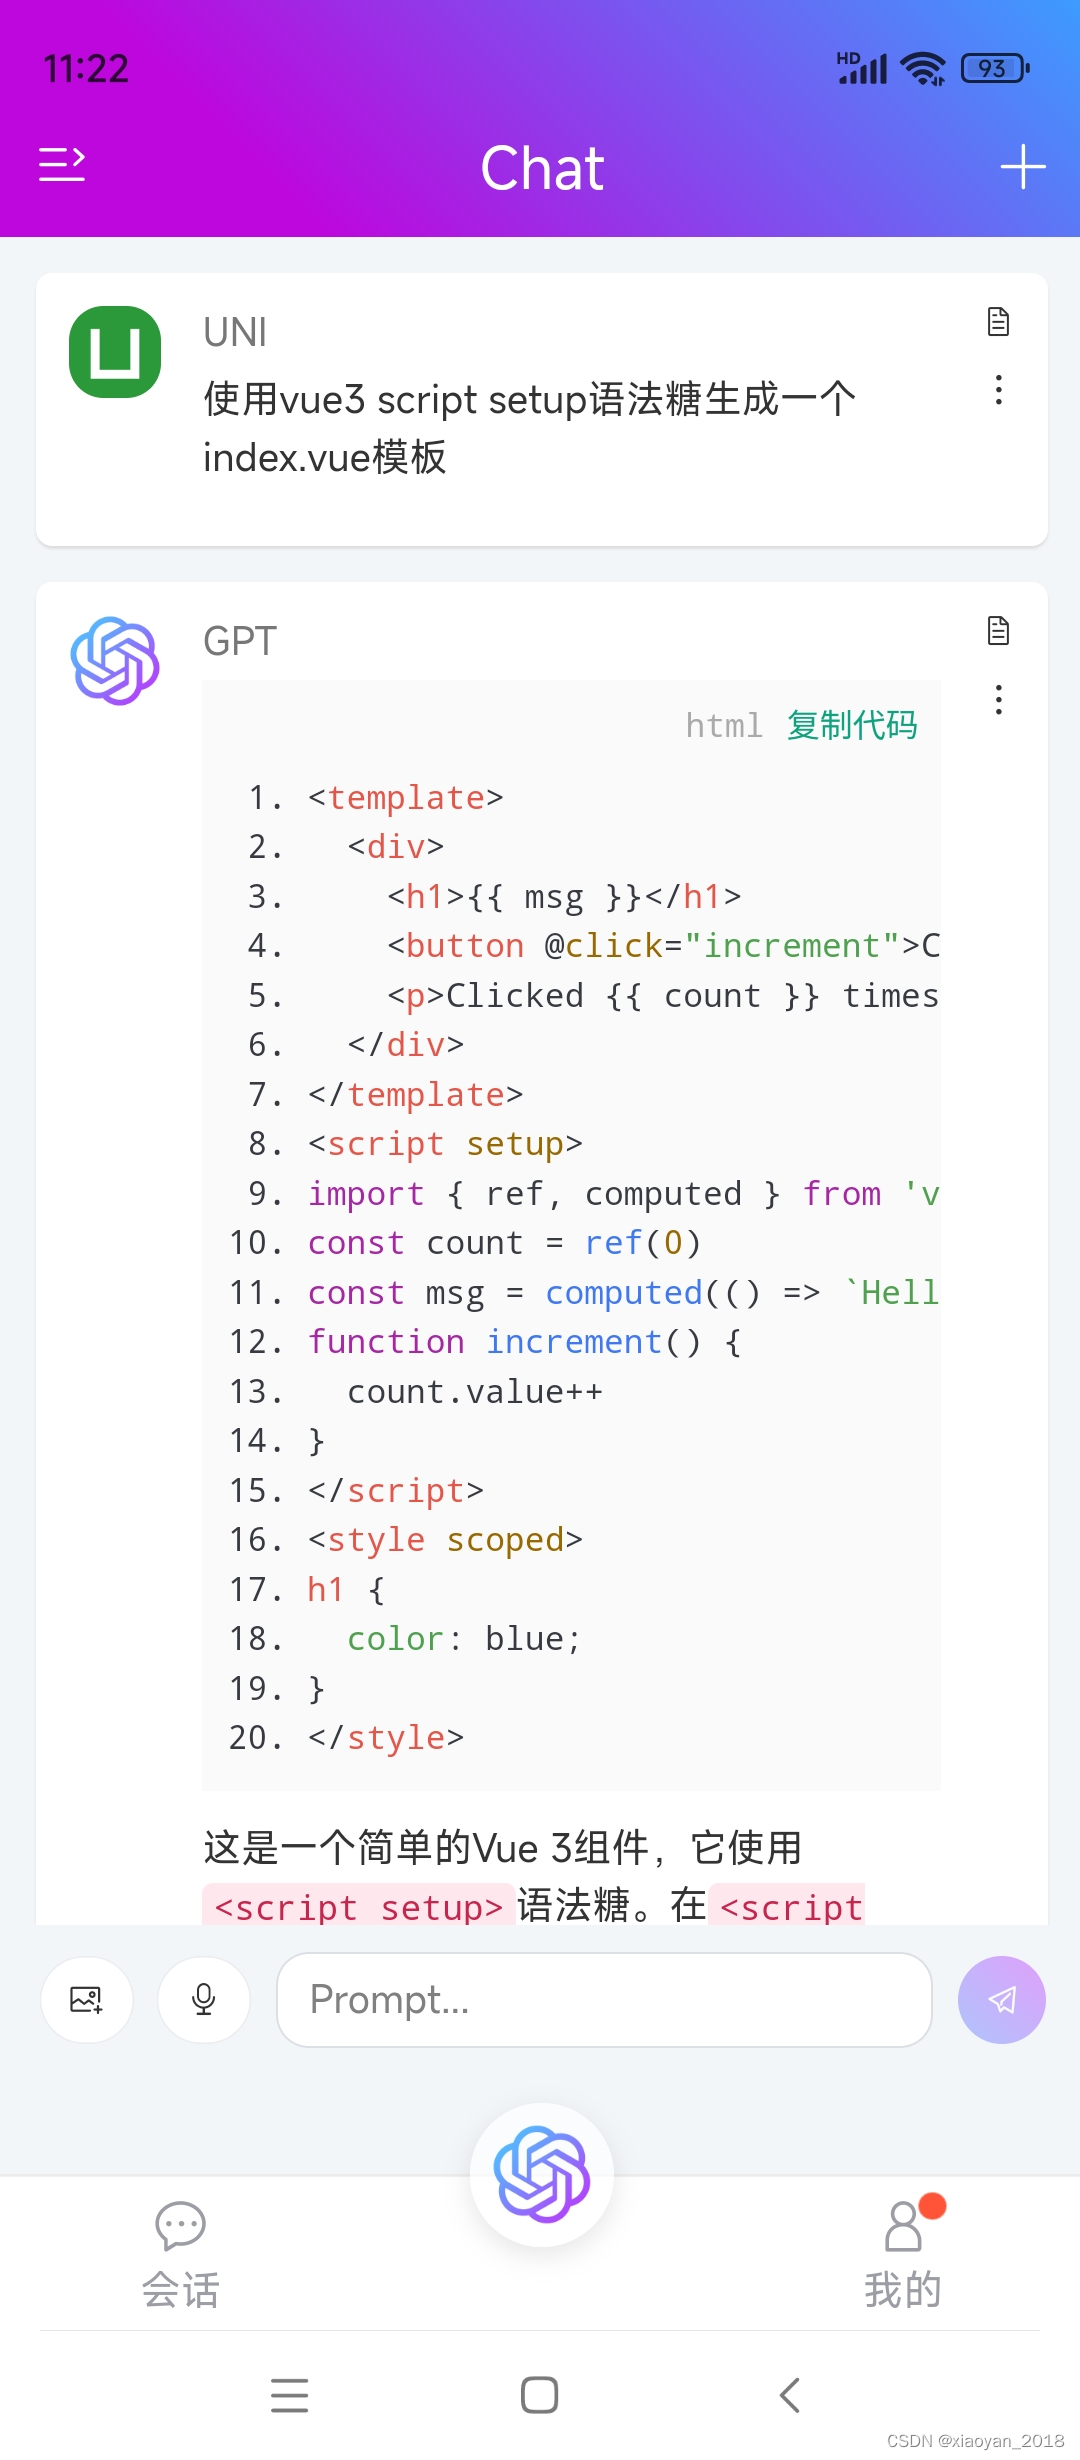
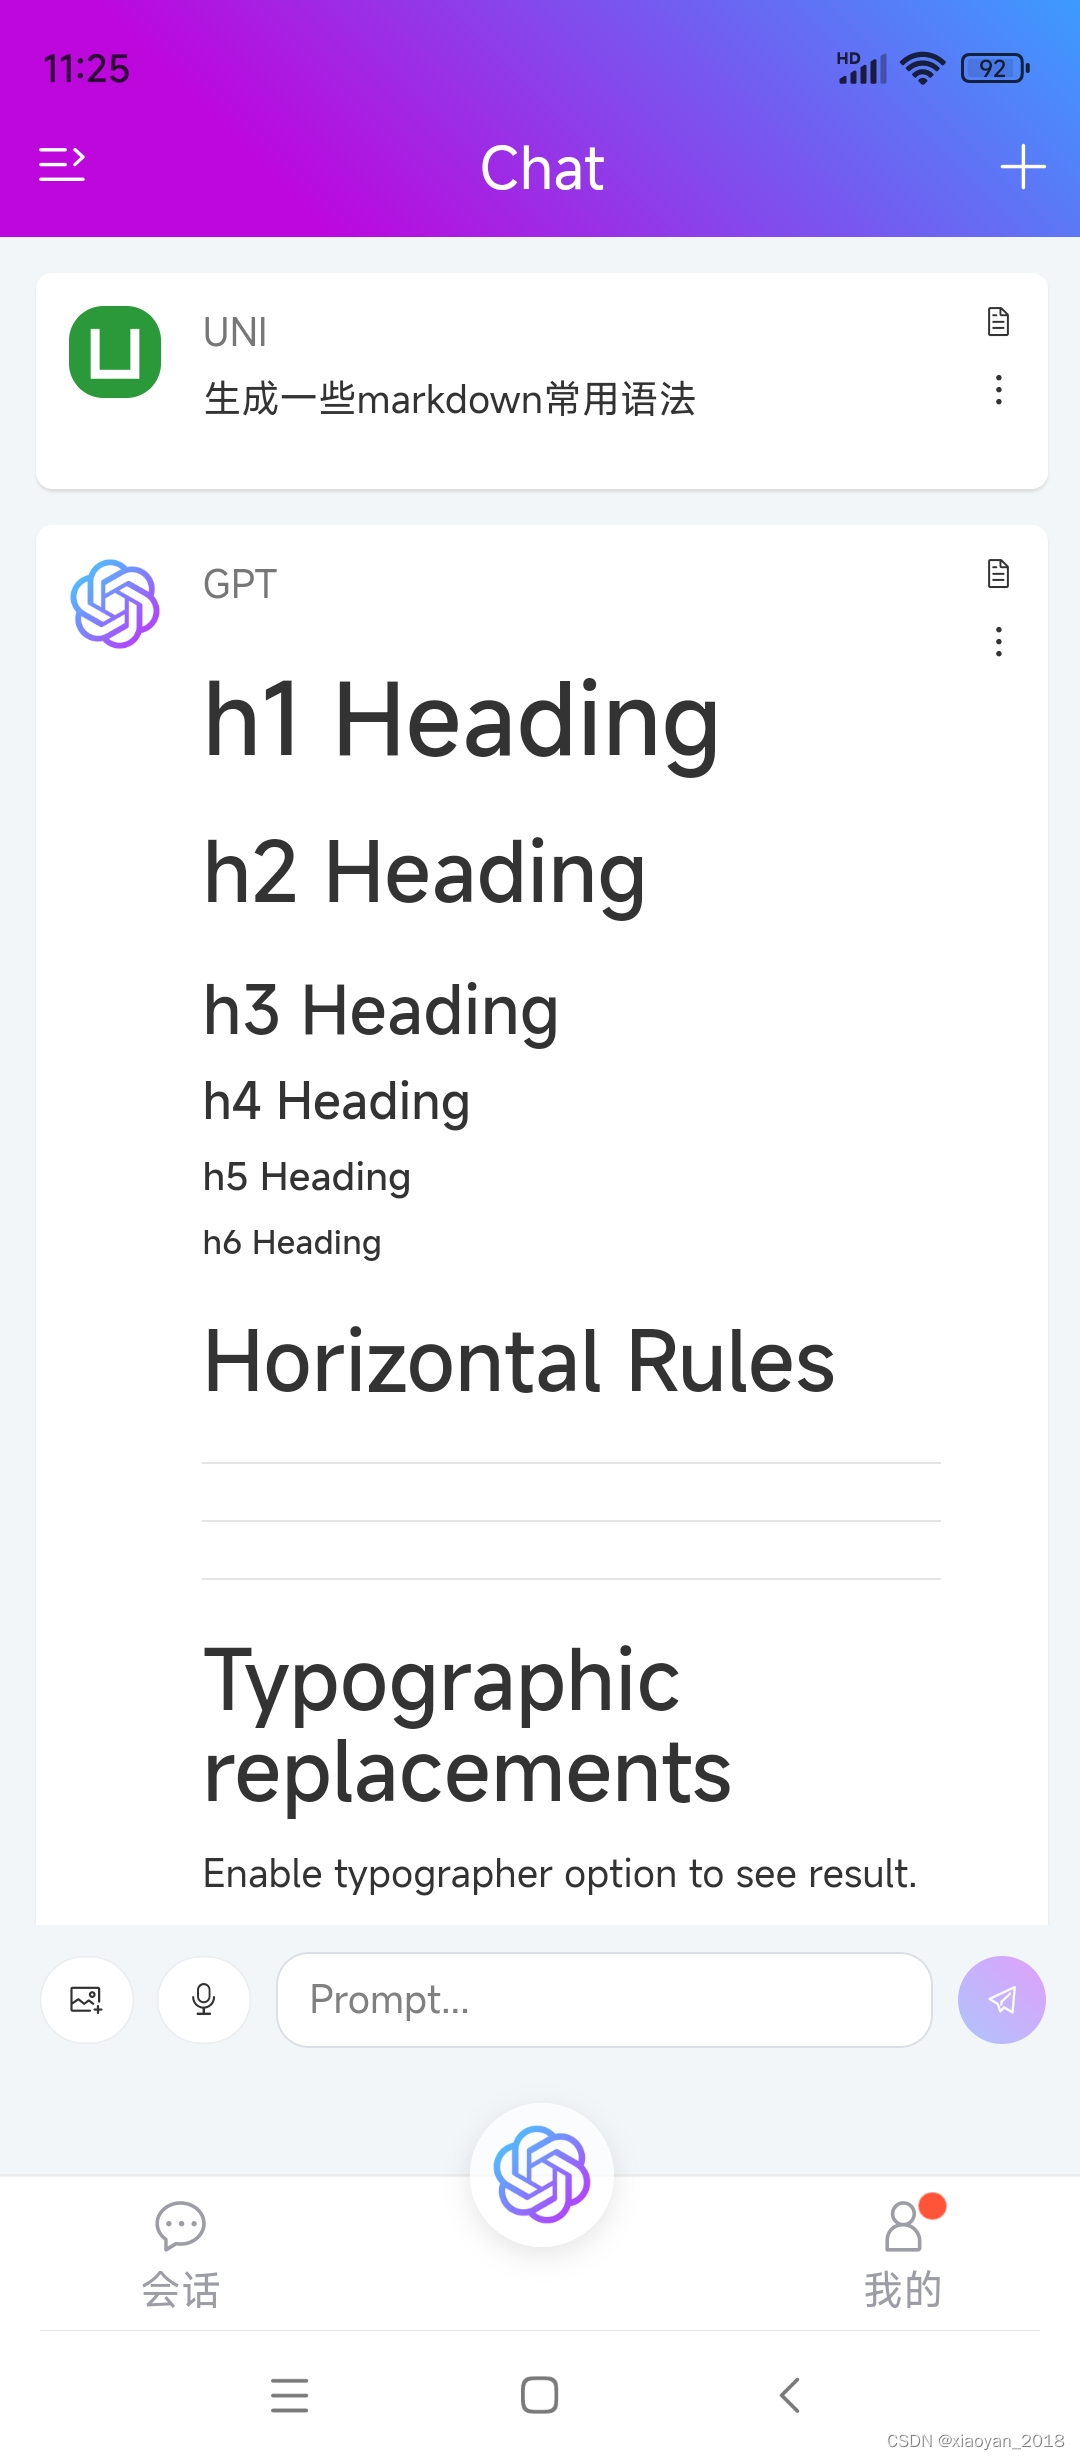
之前有过一篇介绍uniapp解析markdown语法文章,大家可以去看看。
https://blog.csdn.net/yanxinyun1990/article/details/131349705
uniapp自定义Editor编辑框
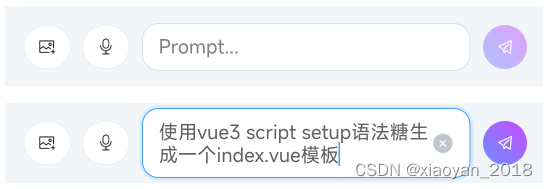
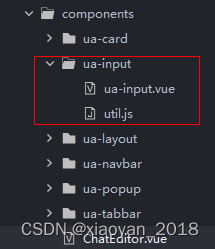
如上图:输入框采用自定义组件实现功能。支持input单行文本、textarea多行文本,可自适应高度,自定义前缀/后缀插槽及密码输入等功能。
<template>
    <div
        class="ve__input"
        :class="[
            preClass,
            isClass,
            sizeClass,
            {'is-disabled': isDisabled},
            {'is-resizable': type == 'textarea' && !autosize},
            {'ve__input--group': $slots.prepend || $slots.append},
            {'ve__input--group__prepend': $slots.prepend},
            {'ve__input--group__append': $slots.append}
        ]"
    >
            <!-- 前置插槽(prepend slot) -->
            <div v-if="$slots.prepend" class="ve__input--prepend"><slot name="prepend" /></div>

            <div class="ve__input-wrapper">
                <!-- 输入框前缀 -->
                <div v-if="$slots.prefix || prefixIcon" class="ve__input--prefix">
                    <span class="ve__input--prefix__inner">
                        <slot name="prefix" />
                        <i v-if="prefixIcon" class="iconfont" :class="prefixIcon"></i>
                    </span>
                </div>

                <template v-if="type != 'textarea'">
                    <input
                        class="ve__input-inner"
                        ref="inputRef"
                        :type="showPassword ? (passwordVisible ? 'text' : 'password') : type"
                        :value="modelValue"
                        :name="name"
                        :maxlength="maxlength"
                        :readonly="readonly"
                        :disabled="isDisabled"
                        :placeholder="placeholder"
                        :cursor-spacing="15"
                        :focus="autofocus"
                        @focus="handleFocus"
                        @blur="handleBlur"
                        @input="handleInput"
                        @change="handleChange"
                        @keydown="handleKeydown"
                    />
                </template>
                <template v-else>
                    <textarea
                        class="ve__input-inner ve__textarea-inner"
                        ref="textareaRef"
                        :value="modelValue"
                        :maxlength="maxlength"
                        :readonly="readonly"
                        :disabled="isDisabled"
                        :placeholder="placeholder"
                        :show-confirm-bar="false"
                        :adjust-position="false"
                        :cursor-spacing="15"
                        :focus="autofocus"
                        :auto-height="isTrue(autosize) || isObject(autosize)"
                        :style="textareaStyle"
                        @focus="handleFocus"
                        @blur="handleBlur"
                        @input="handleInput"
                        @change="handleChange"
                        @keydown="handleKeydown"
                    />
                </template>

                <!-- 输入框后缀 -->
                <div v-if="showSuffixVisible" class="ve__input--suffix" @click="handleSearch" @mousedown.prevent>
                    <span class="ve__input--suffix__inner">
                        <!-- 后缀 -->
                        <template v-if="!showClear || !showPwdVisible">
                            <slot name="suffix" />
                            <i v-if="suffixIcon" class="iconfont" :class="suffixIcon"></i>
                        </template>
                        <!-- 清除 -->
                        <i v-if="showClear" class="iconfont ve-icon-close-circle ve__input-clear" @click="handleClear" @mousedown.prevent></i>
                        <!-- 密码可见 -->
                        <i v-if="showPwdVisible" class="iconfont ve-icon-hide ve__input-password" :class="{'ve-icon-eye1': passwordVisible}" @click="handlePwdVisible" @mousedown.prevent @mouseup.prevent></i>
                        <!-- 限制字数 -->
                        <em v-if="showLimitWordVisible" class="ve__input-limitword">{{inputLength}} / {{maxlength}}</em>
                    </span>
                </div>
            </div>

            <!-- 后置插槽(append slot) -->
            <div v-if="$slots.append" class="ve__input--append" @click="handleSearch" @mousedown.prevent><slot name="append" /></div>
    </div>
</template>
使用方式也比较简单,支持easycom引入,直接使用。
<template>
    <view class="ugpt__editor">
        <view class="ugpt__editor-inner flexbox">
            <u-button class="btn" shape="circle" @click="handleUploadImage"><text class="iconfont ve-icon-image fs-32"></text></u-button>
            <u-button class="btn" shape="circle" @click="showPopover=true"><text class="iconfont ve-icon-yuyin1 fs-32"></text></u-button>
            <ua-input
                class="flex1"
                v-model="editorText"
                type="textarea"
                :autosize="{maxRows: 6}"
                clearable
                placeholder="Prompt..."
                @clear="handleClear"
            />
            <u-button type="success" shape="circle" :disabled="!editorText" @click="handleSubmit" style="transform: scale(.8);width: auto;"><text class="iconfont ve-icon-send-o"></text></u-button>
        </view>
    </view>
</template>
经过测试,已经完美支持h5+小程序+App端,并且解决了键盘撑起布局问题。
App.vue配置
在app.vue中使用vue3语法,使用globalData问题。
<script setup>
    import { provide } from 'vue'
    import { onLaunch, onShow, onHide, onPageNotFound } from '@dcloudio/uni-app'

    onLaunch(() => {
        console.log('App Launch')

        // 隐藏tabBar
        uni.hideTabBar()
        // 初始化
        initSysInfo()
    })

    onShow(() => {
        console.log('App Show')
    })

    onHide(() => {
        console.log('App Hide')
    })

    onPageNotFound((e) => {
        console.warn('Router Error>>', ` No match path "${e.path}" `);
        uni.redirectTo({
            url: '/pages/404/index'
        })
    })

    const initSysInfo = () => {
        uni.getSystemInfo({
            success: (e) => {
                // 获取手机状态栏高度
                let statusBar = e.statusBarHeight
                let customBar

                // #ifndef MP
                customBar = statusBar + (e.platform == 'android' ? 50 : 45)
                // #endif

                // #ifdef MP-WEIXIN
                // 获取胶囊按钮的布局位置信息
                let menu = wx.getMenuButtonBoundingClientRect()
                // 导航栏高度 = 胶囊下距离 + 胶囊上距离 - 状态栏高度
                customBar = menu.bottom + menu.top - statusBar
                // #endif

                // #ifdef MP-ALIPAY
                customBar = statusBar + e.titleBarHeight
                // #endif

                // 目前globalData在vue3 setup支持性不好,改为provide/inject方式
                provide('globalData', {
                    statusBarH: statusBar,
                    customBarH: customBar,
                    platform: e.platform
                })
            }
        })
    }
</script>
由于在vue3 setup中使用globalData有兼容性问题,所以选择provide/inject替代方案。
Ok,以上就是uniapp+vue3跨端开发chatgpt会话模板的一些分享。
最后附上两个最近实例项目
-
Electron25+Vite4桌面端AI会话实例
https://blog.csdn.net/yanxinyun1990/article/details/131148077 -
vite4+vue3中后台管理系统
https://blog.csdn.net/yanxinyun1990/article/details/130144212

