- DevOps CI/CD
- Gitlab(免费版和收费版)
- Jenkins
- 基于GitLab+Jenkins快速实现CI\CD
- 后端项目打包以及部署方式
- spring-boot-maven-plugin
- maven-dependency-plugin
- maven 官网插件
- maven-jar-plugin
- 上传jar包到maven私服
- ELK 日志采集
- 使用FileBeat+Logstash+ES实现分布式日志收集
- 使用 maven(logstash-logback-encoder) + Logstash +ES实现分布式日志收集
DevOps CI/CD
DevOps:
- 即Development (开发) 和Operations(运维)的组合词, 是一组过程、方法与系统的统称, 用于促进开发应用程序或软件工程、技术运营和质量保障QA部门之间的沟通、协作与整合
CI/CD:
- CI指的是持续集成Continuous Integeration,他是开发人员的自动化过程。成功的CI意味
着人员同的新代码变更会定期构建、测试并合并到共享存储库(比如Git或者SVN) - CD指的是持续交付 Continuous Delivery和持续部署Continuous Deployment。成功的CD意味着运维人员可以从共享存储
库中持续获取到最新的产品副本,并确保最新的产品副本可以正确更新到服务器上。
Gitlab(免费版和收费版)
- GitLab是企业中最为常用的私有代码仓库解决方案
- GitLab是一个开源项目,分为免费的ce社区版和收费的ee企业版
- GitLab需要部署非常多的后台服务,通常建议单机内存不要低于4G。如果配置太低的话,会出现很多奇怪的问题
- Linux服务器需要提前安装几个服务
yum install -y curl policycoreutils-python openssh-server。如果已经安装了,这一步可以省略。 - 获取GitLab安装包。社区版的GitLab下载地址
https://packages.gitlab.com/gitlab/gitlab-ce。电商项目中采用的Linux服务器,就可以选择下载gitlab-ce-15.1.0-ce.0.el7.x86_64.rpm - 安装GitLab 执行
rpm -Uvh gitlab-ce-15.1.0-ce.0.el7.x86_64.rpm开始安装 - 安装完成后,第一次运行GitLab前,需要执行一次配置初始化操作。
gitlab-ctl reconfig这个过程耗时比较长 - 使用gitlab-ctl指令来操作gitlab服务
gitlab-ctl reconfigure重新配置gitlab。
gitlab-ctl start启动gitlab
gitlab-ctl stop停止gitlab
gitlab-ctl restart重启gitlab
gitlab-ctl status查看gitlab服务状态
gitlab-ctl tail查看gitlab服务日志。 - 服务启动完成后,就可以访问gitlab服务了。默认的服务端口就是80端口。默认的用户名和密码是
root/123456(通常建议登录后立即修改默认密码) - 可以修改访问的地址和端口(默认本机才可以访问),修改/etc/gitlab/gitlab.rb配置文件,修改其中的 external_url属性即可
Jenkins
Jenkins是企业最常用的一个自动化部署软件。下载地址为https://www.jenkins.io/download/
建议下载LTS(长期支持)版本的war包部署jenkins.war
- 需要安装JDK - Jenkins运行需要JDK环境支持,目前Jenkins建议使用JDK11版本。
- 启动Jenkins - 启动指令
nohup java -jar jenkins.war --httpPort=8080 &端口默认就是8080端口 - 第一次启动的过程中,Jenkins会在日志文件中打印默认的admin用户密码
xxxxxxxxxxxxxxxxxxxxxxx - 启动完成后,就可以访问Jenkins的前台管理页面
http://x.x.x.x:8080/第一次访问时,前端页面会引导进行一些初始化工作。例如,需要输入admin用户的默认密码,这个密码就在启动日志当中。 - 引导安装一些插件,后续也可以再安装插件
- 插件管理页面
Manage Jenkins-> Manage Plugins包括Git 、Git client、NodeJS Plugin、Maven integration plugin、 Localization:Chinese(Simplified)中文插件 - 下载完成后有些插件需要重启才能生效。Jenkins重启的方式是直接在浏览器上访问restart接口
- 要配置几个基础的组件
- 进入Mange Jenkins->Global ToolConfiguration页面需要对Maven、Git和NodeJS组件进行配置
- 用yum -install git 安装git客户端
- Maven和NodeJS插件,可以去官网上下载对应的压缩包,解压后,将bin子目录配置到环境变量中
基于GitLab+Jenkins快速实现CI\CD
- 创建一个Maven项目
- 配置项目构建及部署过程
- 源码管理部分配置对应的git仓库地址、git用户名密码、git分支
- 构建触发器 – 可以选配置Poll SCM选项。这个选项可以定时扫描Git代码仓库
- 构建环境部分建议选择一下JDK版本
- Build部分,就可以选择需要执行的编译脚本
- Root Pom
pom.xml pacakge -Dmaven.test.skip=true类似mvn package -Dmaven.test.skip=true- 如果是前端项目,就需要用Nodejs的
npm run build指令来构建
- Root Pom
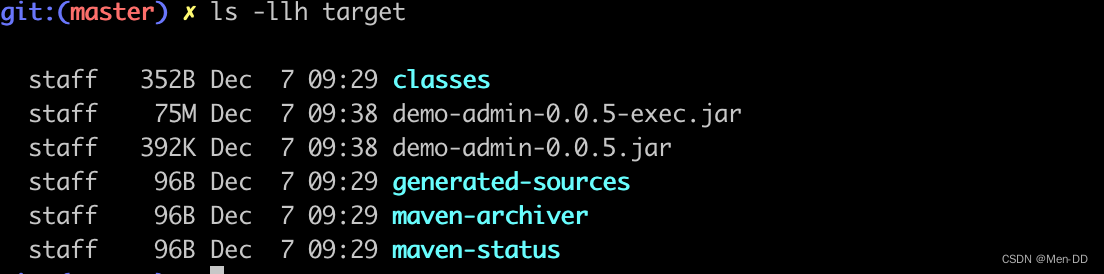
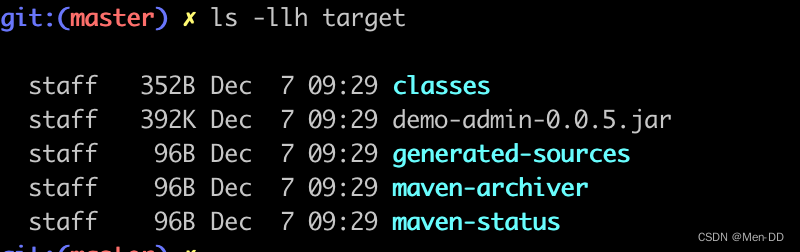
- 构建完成之后,就会在后端项目的各个模块的target目录下生成可执行的包。这时,可以选择用
Jenkins将这些Jar包分发到远程服务器上,并直接运行- ssh server 目标服务器
- transfers set soruce files 执行Jar地址。从目标根路径开始查找
xx/tarter/xx-exec.jar - remove prefix 不要前缀。表示只传对应的jar包
xx/tarter - remove directory 远程服务器的目标地址
/xxx - exec command 在远端服务器执行的启动脚本
- 后端
ps -ef | grep *demo* | grep -v grep | awk '{print $2}' | xargs kill -9 nohup java -jar ../../xx-exec.jar > /app/xxx/xxx.log 2 > &1 % - 前端
nginx -s reload
- 后端
- 代码质量检测 Blue Ocean插件
- 任务流水 Pepeline
- MeterSphere完成自动化接口测试
- 或者搭建SonarQube服务,并通过jenkins集成。这样就可以使用SonarQube服务来进行代码质量检测
- 集成Docker,进行虚拟化部署
后端项目打包以及部署方式
1. spring-boot-maven-plugin 这样打出来的Jar包, 所有的依赖都打在了一个包中, 包太大, 但是可以直接使用Java -jar指令执行 。这么大的Jar包,编译会很耗时,并且在网络中传输非常麻烦, 其实大部分依赖包是不会变的jdbc,mybatis等
<plugin>
	<groupId>org.springframework.boot</groupId>
	<artifactId>spring-boot-maven-plugin</artifactId>
	<version>2.3.12.RELEASE</version>
	<executions>
	    <!-- 不排除repackage, 打包会多大一次 将原始Maven打包的jar重命名为XXX.jar.original作为原始文件
	    包含:类文件和配置文件,还会包含应用所依赖的jar包以及Springboot启动相关类(loader等),以此来满足Springboot独立应用的特性 -->
		<execution>
			<goals>
				<goal>repackage</goal>
			</goals>
		</execution>
	</executions>
	<!-- 解决运行包不能被其他包依赖的问题 -->
	<configuration>
		<classifier>exec</classifier>
	</configuration>
</plugin>
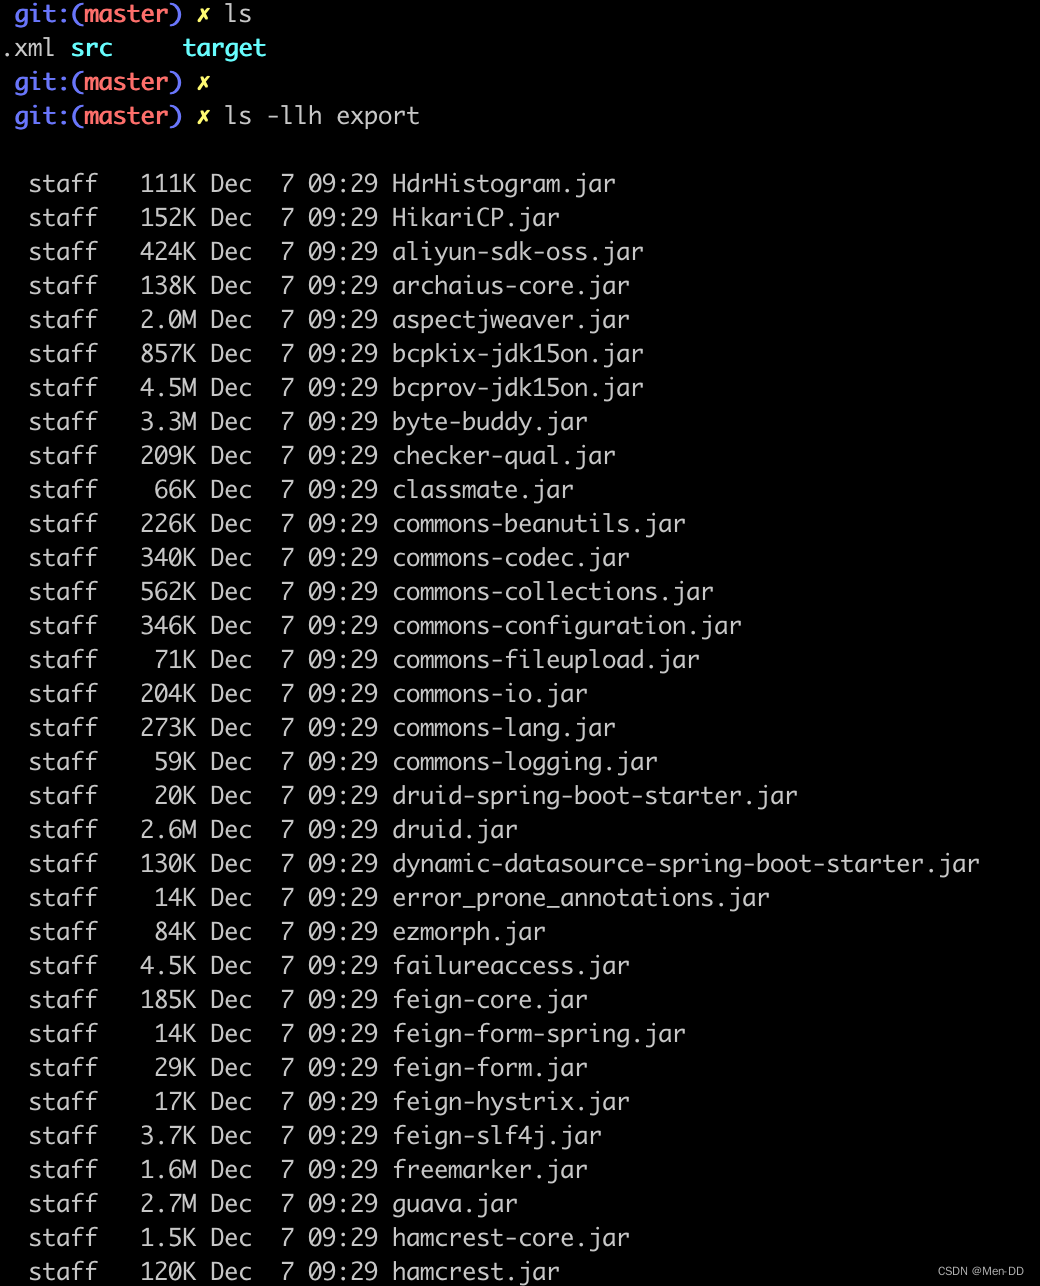
2. maven-dependency-plugin 可以将所有依赖的jar包都放到export文件夹中,target目录下的jar包只包含当前项目的源码,文件大小就会小很多
- 当前项目的源码
- 依赖的jar包
<plugin>
    <groupId>org.apache.maven.plugins</groupId>
    <artifactId>maven-dependency-plugin</artifactId>
     <version>2.10</version>
    <executions>
        <execution>
            <id>copy-dependencies</id>
            <phase>package</phase>
            <goals>
                <goal>copy-dependencies</goal>
            </goals>
            <configuration>
                <!-- 将依赖包放入export文件夹 -->
                <outputDirectory>export</outputDirectory>
                <excludeTransitive>false</excludeTransitive>
                <stripVersion>true</stripVersion>
            </configuration>
        </execution>
    </executions>
</plugin>
- 如何部署
java -cp 指定Classpath 和 启动类& 新增依赖通过工具rsync
#!/bin/sh

#执行jar包
RUN_LIBS=""

#依赖jar包 自行制定目录
SUPPORT_LIBS=""
RUN_LIB_PATH="/app/lib"
SUPPORT_LIB_PATH="/app/support"

#加载程序包
for i in ${RUN_LIB_PATH}/* ; do
  RUN_LIBS=${RUN_LIBS}:$i
done

#加载依赖包
for i in ${SUPPORT_LIB_PATH}/* ; do
  SUPPORT_LIBS=${SUPPORT_LIBS}:$i
done

#整合classpath
CLASSPATH=${RUN_LIBS}:${SUPPORT_LIBS}
export CLASSPATH

#调用java指令执行。-D输入参数 java中可以用 System.getProperties读取。同时指定执行入口类 SpringBootApplication 这是一个典型的Springboot的执行方式。
java -Xdebug -Xnoagent -Djava.compiler=NONE - Xrunjdwp:transport=dt_socket,server=y,address=27899,suspend=n -cp $CLASSPATH - Dspring.profiles.active=prod com.demo.DemoAdminApplication -D user.timezone=GMT+08 1>demo-admin.out 2>demo-admin.err & echo Start App Success!
3. maven 官网插件
https://maven.apache.org/plugins/index.html
- changelog 插件,可以打印出Maven仓库中最近的提交记录
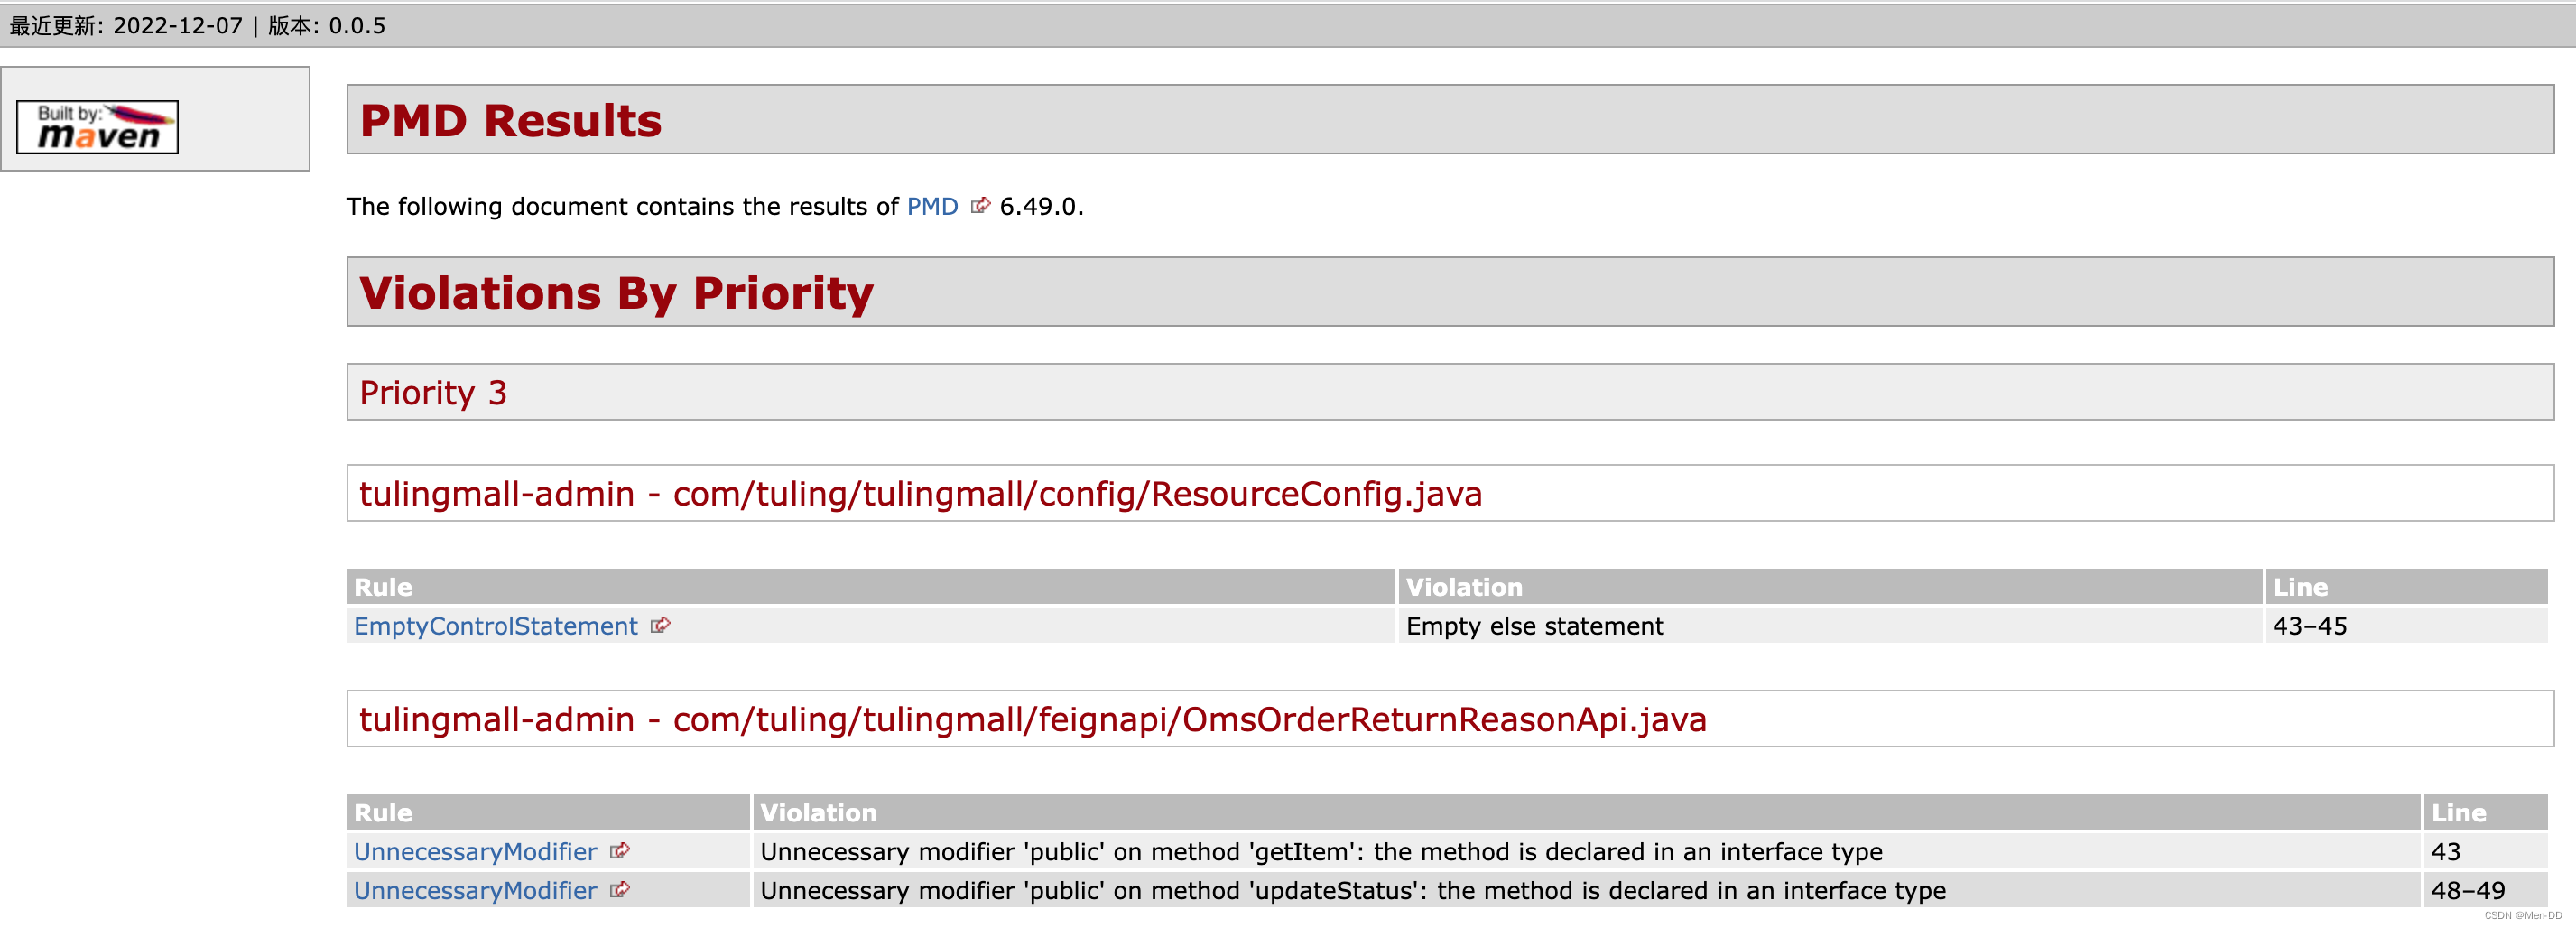
- checkstyle和pmd插件可以对代码进行静态检查
- javadoc插件可以打印出项目文档,你还可以用pdf插件,打印出pdf版本的项目文档
- antrun插件去执行一些ant脚本(老程序员应该对ant很熟悉)
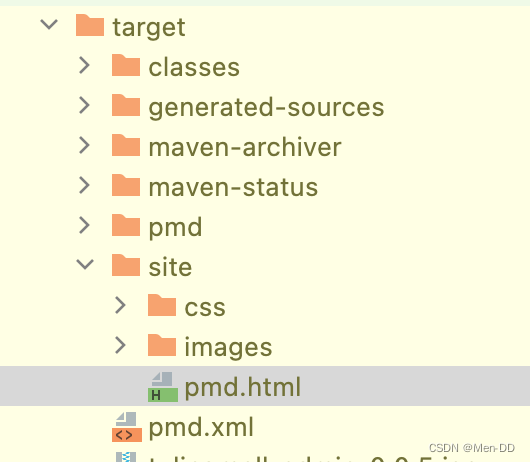
- pmd 静态代码检查工具 https://maven.apache.org/plugins/maven-pmd-plugin/
pmd可以定义自己的规则 https://maven.apache.org/plugins/maven-pmd-plugin/examples/multi-module-config.html
 <plugin>
     <groupId>org.apache.maven.plugins</groupId>
     <artifactId>maven-pmd-plugin</artifactId>
     <version>3.19</version>
     <executions>
         <execution>
             <phase>package</phase>
             <goals>
                 <goal>aggregate-pmd</goal>
             </goals>
         </execution>
     </executions>
 </plugin>
4. maven-jar-plugin 工具包打成一个Jar包 <packaging>jar</packaging>
<modelVersion>4.0.0</modelVersion>
<artifactId>demo-common</artifactId>
<packaging>jar</packaging>

<build>
    <plugins>
        <plugin>
            <groupId>org.apache.maven.plugins</groupId>
            <artifactId>maven-jar-plugin</artifactId>
            <version>2.4</version>
        </plugin>
    </plugins>
</build>
5. maven-jar-plugin 将不同的模块输出到多个不同的jar包当中,而不是所有代码全都输出一个jar包
<plugin>
    <groupId>org.apache.maven.plugins</groupId>
    <artifactId>maven-jar-plugin</artifactId>
    <version>3.2.2</version>
    <configuration>
        <!-- manifest配置信息 主要是可以配置主执行类。有主执行类,可以用java -jar直接执行。没有的话就需要指定执行类 -->
        <archive>
            <manifest>
                <addClasspath>true</addClasspath>
                <classpathPrefix>support/</classpathPrefix>
                <mainClass>com.myapp.MyAppApplication</mainClass>
                <!-- 可以按上面的方式自己配置,也可以指定MF文件打包。 -->
                <manifestFile>${project.build.outputDirectory}/META-INF/MANIFEST.MF</manifestFile>
            </manifest>
        </archive>
    </configuration>
    <executions>
        <execution>
            <id>myapp1-jar</id>
            <phase>package</phase>
            <goals>
                <goal>jar</goal>
            </goals>
            <configuration>
                <classifier>myapp</classifier>
                <includes>
                    <include>com/myapp/**</include>
                    <include>mybatis/**</include>
                    <include>templates/**</include>
                    <include>*.properties</include>
                    <include>dubbo.xml</include>
                </includes>
            </configuration>
        </execution>
        <execution>
            <id>myapp2-jar</id>
            <phase>package</phase>
            <goals>
                <goal>jar</goal>
            </goals>
            <configuration>
                <classifier>myapp2</classifier>
                <includes>
                    <include>com/myapp2/crawler/*</include>
                    <include>com/myapp2/crawler/*</include>
                    <include>com/myapp2/utils/**</include>
                    <include>log4j.properties</include>
                </includes>
            </configuration>
        </execution>
    </executions>
</plugin>
6. 上传jar包到maven私服 mvn deploy -P release
在distributionManagement中配置snapshot快照库和release发布库地址
 <distributionManagement>
     <repository>
         <id>maven-public</id>
         <name>release</name>
         <url>http://x.x.x.x:8081/repository/maven-releases/</url>
     </repository>

     <snapshotRepository>
         <id>maven-public-snapshot</id>
         <name>snapshot</name>
         <url>http://x.x.x.x:8081/repository/maven-snapshots/</url>
     </snapshotRepository>
 </distributionManagement>
maven ~/.m2/settings.xml
<server>
  <id>nexus-releases</id>
  <username>admin</username>
  <password>admin123</password>
</server>

<server>
  <id>nexus-snapshots</id>
  <username>admin</username>
  <password>admin123</password>
</server>
ELK 日志采集
ELK 架构: https://blog.csdn.net/menxu_work/article/details/126032167
自动化监控 Prometheus、Grafana: https://blog.csdn.net/menxu_work/article/details/125776376
使用FileBeat+Logstash+ES实现分布式日志收集
使用 maven(logstash-logback-encoder) + Logstash +ES实现分布式日志收集
logstash-logback-encoder
<!-- apm-toolkit-logback-1.x -->
<dependency>
	<groupId>org.apache.skywalking</groupId>
	<artifactId>apm-toolkit-logback-1.x</artifactId>
	<version>8.9.0</version>
</dependency>

<dependency>
	<groupId>net.logstash.logback</groupId>
	<artifactId>logstash-logback-encoder</artifactId>
	<version>6.3</version>
</dependency>
net.logstash.logback.appender.LogstashTcpSocketAppender <destination>logstash.localhost.com:5055</destination>
<?xml version="1.0" encoding="UTF-8"?>
<configuration>

    <!-- 控制台 Appender -->
    <appender name="console" class="ch.qos.logback.core.ConsoleAppender">
        <!-- 日志的格式化 -->
        <encoder class="ch.qos.logback.core.encoder.LayoutWrappingEncoder">
            <layout class="org.apache.skywalking.apm.toolkit.log.logback.v1.x.TraceIdPatternLogbackLayout">
                <Pattern>%d{yyyy-MM-dd HH:mm:ss.SSS} [%tid] [%thread] %-5level %logger{36} -%msg%n</Pattern>
            </layout>
        </encoder>
    </appender>

    <!-- https://skywalking.apache.org/docs/skywalking-java/latest/en/setup/service-agent/java-agent/application-toolkit-logback-1.x/  -->
    <!-- 通过grpc上报日志到skywalking oap-->
    <appender name="grpc-log" class="org.apache.skywalking.apm.toolkit.log.logback.v1.x.log.GRPCLogClientAppender">
        <encoder class="ch.qos.logback.core.encoder.LayoutWrappingEncoder">
            <layout class="org.apache.skywalking.apm.toolkit.log.logback.v1.x.TraceIdPatternLogbackLayout">
                <Pattern>%d{yyyy-MM-dd HH:mm:ss.SSS} [%tid] [%thread] %-5level %logger{36} -%msg%n</Pattern>
            </layout>
        </encoder>
    </appender>

    <appender name="async" class="ch.qos.logback.classic.AsyncAppender">
        <discardingThreshold>0</discardingThreshold>
        <queueSize>1024</queueSize>
        <neverBlock>true</neverBlock>
        <appender-ref ref="console"/>
    </appender>

    <!-- add converter for %tid -->
    <conversionRule conversionWord="tid" converterClass="org.apache.skywalking.apm.toolkit.log.logback.v1.x.LogbackPatternConverter"/>
    <!-- add converter for %sw_ctx -->
    <conversionRule conversionWord="sw_ctx" converterClass="org.apache.skywalking.apm.toolkit.log.logback.v1.x.LogbackSkyWalkingContextPatternConverter"/>
    <appender name="logstash" class="net.logstash.logback.appender.LogstashTcpSocketAppender">
        <destination>logstash.localhost.com:5055</destination>
        <encoder class="net.logstash.logback.encoder.LoggingEventCompositeJsonEncoder">
            <providers>
                <timestamp>
                    <timeZone>UTC</timeZone>
                </timestamp>
                <pattern>
                    <pattern>
                       {
                        "level": "%level",
                        "tid": "%tid",
                        "skyWalkingContext": "%sw_ctx",
                        "thread": "%thread",
                        "class": "%logger{1.}:%L",
                        "message": "%message",
                        "stackTrace": "%exception{10}"
                        }
                    </pattern>
                </pattern>
            </providers>
        </encoder>
    </appender>

    <!-- 设置 Appender -->
    <root level="INFO">
        <appender-ref ref="console"/>
        <appender-ref ref="grpc-log"/>
        <appender-ref ref="async"/>
        <appender-ref ref="logstash" />
    </root>
</configuration>


![[附源码]JAVA毕业设计时间管理系统(系统+LW)](https://img-blog.csdnimg.cn/8b9636c8fe8b429a874ee3c7b5040ba5.png)


![[python] 基于wordcloud库绘制词云图](https://img-blog.csdnimg.cn/img_convert/15552740f9acc9263dbdfb3ddf2d33dd.png)