第一式:Vicuna模型部署
- 1.环境搭建
- 1.1 构建虚拟环境
- 1.2 安装FastChat
- 1.2.1 利用pip直接安装
- 1.2.2 从github下载repository然后安装
- 2.Vicuna Weights合成
- 2.1 下载vicuna delta weights
- 2.2 下载原始llama weights
- 2.3 合成真正的working weights
- 2.3 填坑手册
- 3. 使用命令行接口进行推理
- 3.1 Single GPU
- 3.2 Multiple GPU
- 3.3 CPU Only
- 4. Reference
1.环境搭建
本人电脑环境:Ubuntu 20.04.5 LTS # 使用cat /etc/issue命令查看
1.1 构建虚拟环境
$ pip install virtualenv
$ virtualenv vicuna # 创建新环境
$ source vicuna/bin/activate # 激活新环境
1.2 安装FastChat
1.2.1 利用pip直接安装
$ pip install fschat
1.2.2 从github下载repository然后安装
第1步:clone repository,然后进入FastChat folder
$ git clone https://github.com/lm-sys/FastChat.git
$ cd FastChat
第2步:安装FastChat包
$ pip install --upgrade pip # enable PEP 660 support
$ pip install -e .
2.Vicuna Weights合成
最终部署模型需要的vicuna weights需要进行合成才能得到:
- 第一步:下载vicuna delta weights。
- 第二步:下载原始llama weights。
- 第三步:上上面两个weights合成为一个weights。
注:合成步骤参考How to Prepare Vicuna Weight
2.1 下载vicuna delta weights
下载7b delta weights:
$ git lfs install
$ git clone https://huggingface.co/lmsys/vicuna-7b-delta-v1.1
下载13b delta weights:
$ git lfs install
$ git clone https://huggingface.co/lmsys/vicuna-13b-delta-v1.1
请注意:这不是直接的 working weight ,而是LLAMA-13B的 working weight 与 original weight 的差值。(由于LLAMA的规则,我们无法提供LLAMA的 weight )
2.2 下载原始llama weights
您需要按照HuggingFace提供的 原始权重 或 从互联网上获取 HuggingFace格式的原始LLAMA-7B或LLAMA-13B 权重。
注:这里直接从HuggingFace下载已转化为HuggingFace格式的原始LLAMA-7B或LLAMA-13B 权重
下载7b 原始 llama weights:
$ git lfs install
$ git clone https://huggingface.co/decapoda-research/llama-7b-hf
下载13b 原始 llama weights:
$ git lfs install
$ git clone https://huggingface.co/decapoda-research/llama-13b-hf
2.3 合成真正的working weights
当这delta weights 和llama原始weights都准备好后,我们可以使用Vicuna团队的工具来创建真正的 working weight 。
执行如下命令创建最终 working weight
$ python -m fastchat.model.apply_delta --base /home/llama/llama-13b-hf --target /home/vicuna/vicuna-13b-delta-v1.1-llama-merged --delta /home/vicuna/vicuna-13b-delta-v1.1 --low-cpu-mem
说明:我在使用上述命令过程中出现了错误,但将–low-cpu-mem参数去掉后能正常工作。
2.3 填坑手册
此节可略过
在使用下述命令合成working weights时报如下错误:
$ python -m fastchat.model.apply_delta --base /home/llama/llama-13b-hf --target /home/vicuna/vicuna-13b-delta-v1.1-llama-merged --delta /home/vicuna/vicuna-13b-delta-v1.1 --low-cpu-mem

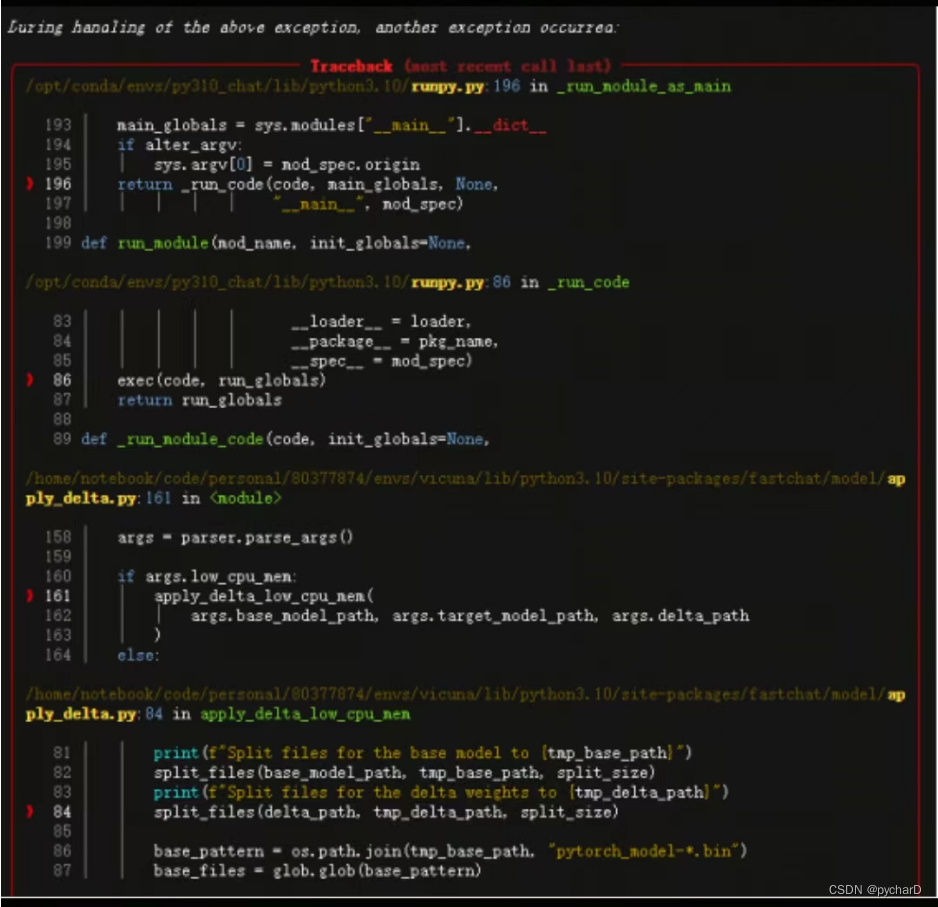

说明:去掉–low-cpu-mem参数后能正常工作。
3. 使用命令行接口进行推理
3.1 Single GPU
下面的命令要求Vicuna-13B大约有28GB的GPU内存,Vicuna-7B大约有14GB的GPU存储器。
$ python -m fastchat.serve.cli --model-path /home/vicuna/vicuna-13b-delta-v1.1-llama-merged
- 参数介绍
usage: cli.py [-h]
[–model-path MODEL_PATH] Vicuna Weights 路径
[–device {cpu,cuda,mps}] 选择 使用 cpu or cuda 运行
[–gpus GPUS] 选择 使用 gpu 型号
[–num-gpus NUM_GPUS] 选择 gpu 数量
[–max-gpu-memory MAX_GPU_MEMORY]
[–load-8bit] 8bit 量化,用于降低显存
[–conv-template CONV_TEMPLATE]
[–temperature TEMPERATURE]
[–max-new-tokens MAX_NEW_TOKENS]
[–style {simple,rich}]
[–debug]
启动后聊天界面如下所示:

3.2 Multiple GPU
python -m fastchat.serve.cli --model-path /home/vicuna/vicuna-13b-delta-v1.1-llama-merged --num-gpus 2
3.3 CPU Only
这只在CPU上运行,不需要GPU。Vicuna-13B需要大约60GB的CPU内存,Vicuna-7B需要大约30GB的CPU存储器。
$ python -m fastchat.serve.cli --model-path /home/vicuna/vicuna-13b-delta-v1.1-llama-merged --device cpu
4. Reference
感谢https://github.com/km1994/LLMsNineStoryDemonTower/tree/main/Vicuna
