目录
- 1 home.json
- 2 goods-list组件
- 3 goods-card组件
- 总结
上一篇我们搭建了底部的导航条,这一篇来拆解一下首页的功能。首页有如下功能
- 可以进行搜索
- 显示轮播图
- 横向可拖动的页签
- 图文卡片列表
1 home.json
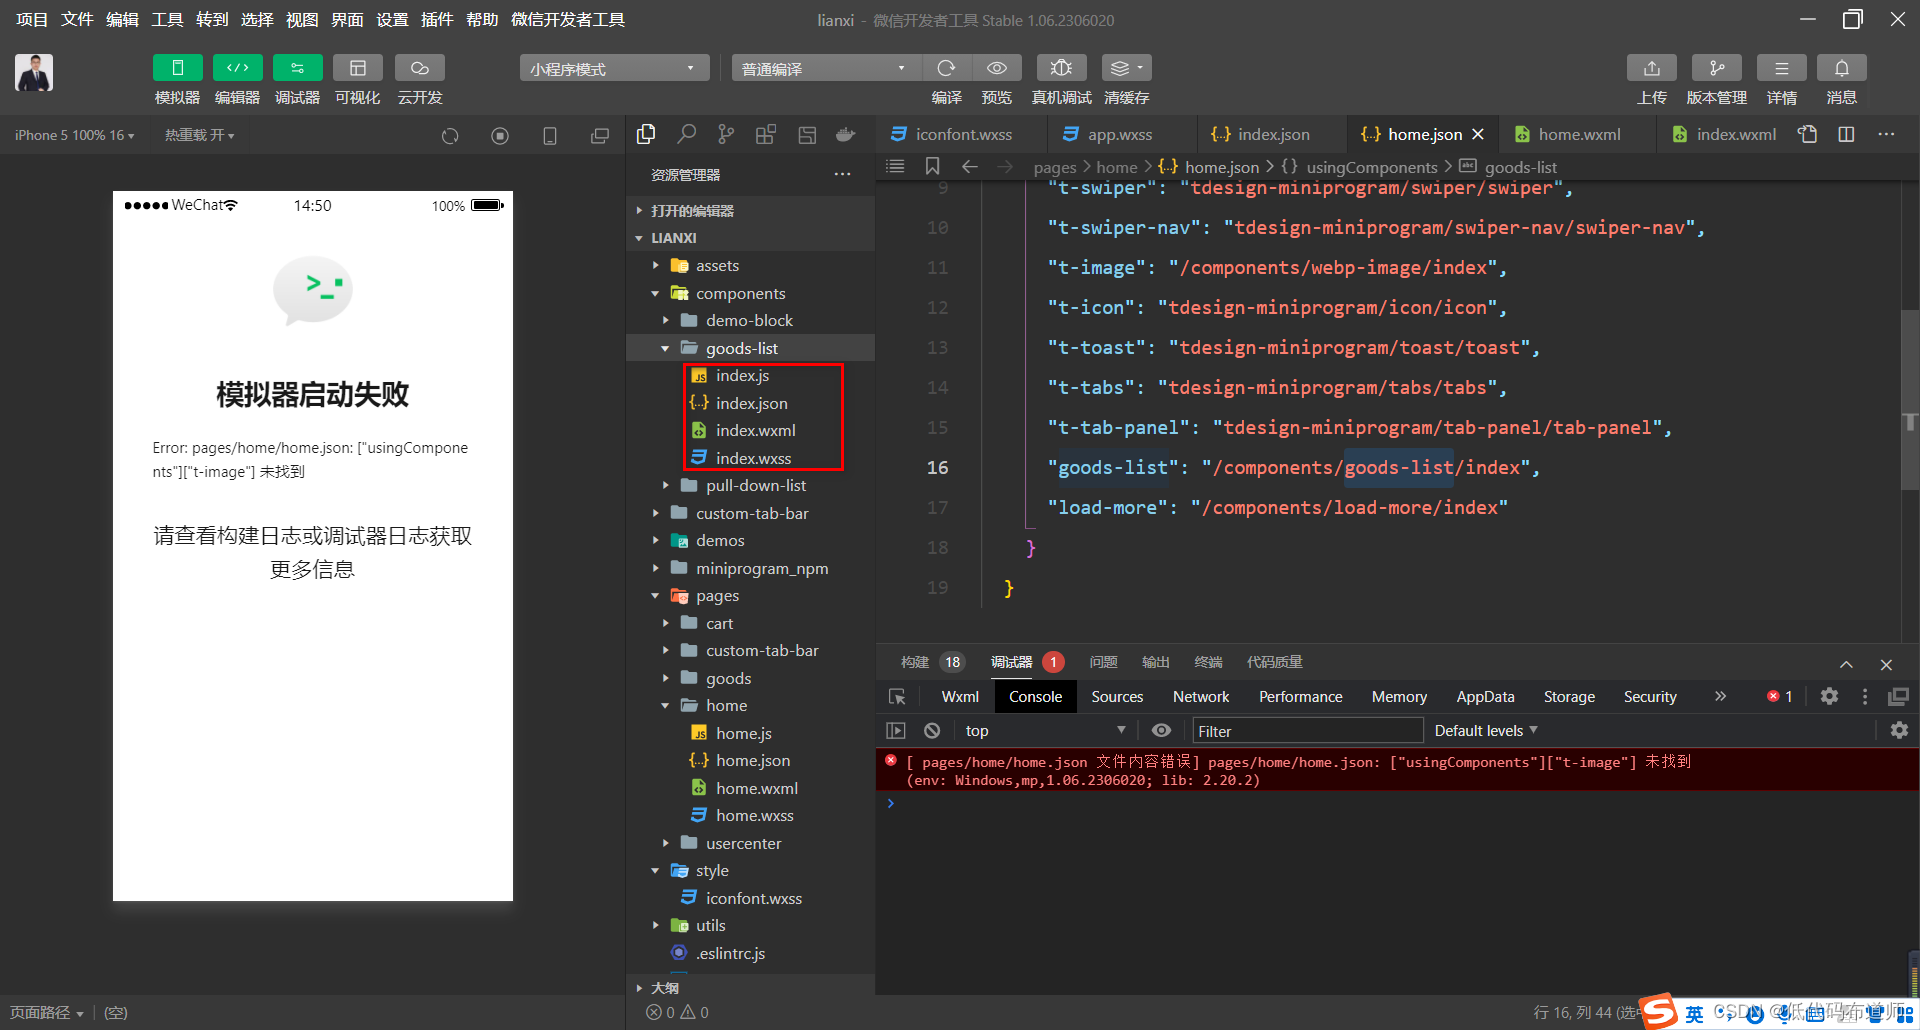
因为是要使用组件库的组件搭建页面,自然是先需要引入自定义组件
{
  "navigationBarTitleText": "首页",
  "onReachBottomDistance": 10,
  "backgroundTextStyle": "light",
  "enablePullDownRefresh": true,
  "usingComponents": {
    "t-search": "tdesign-miniprogram/search/search",
    "t-loading": "tdesign-miniprogram/loading/loading",
    "t-swiper": "tdesign-miniprogram/swiper/swiper",
    "t-swiper-nav": "tdesign-miniprogram/swiper-nav/swiper-nav",
    "t-image": "/components/webp-image/index",
    "t-icon": "tdesign-miniprogram/icon/icon",
    "t-toast": "tdesign-miniprogram/toast/toast",
    "t-tabs": "tdesign-miniprogram/tabs/tabs",
    "t-tab-panel": "tdesign-miniprogram/tab-panel/tab-panel",
    "goods-list": "/components/goods-list/index",
    "load-more": "/components/load-more/index"
  }
}
引入的组件还是不少的,贴入配置后发现控制台报错,因为这里既使用到了TDesign中的组件,也使用到了自定义组件,我们需要将报错的组件,自己搭建一下。
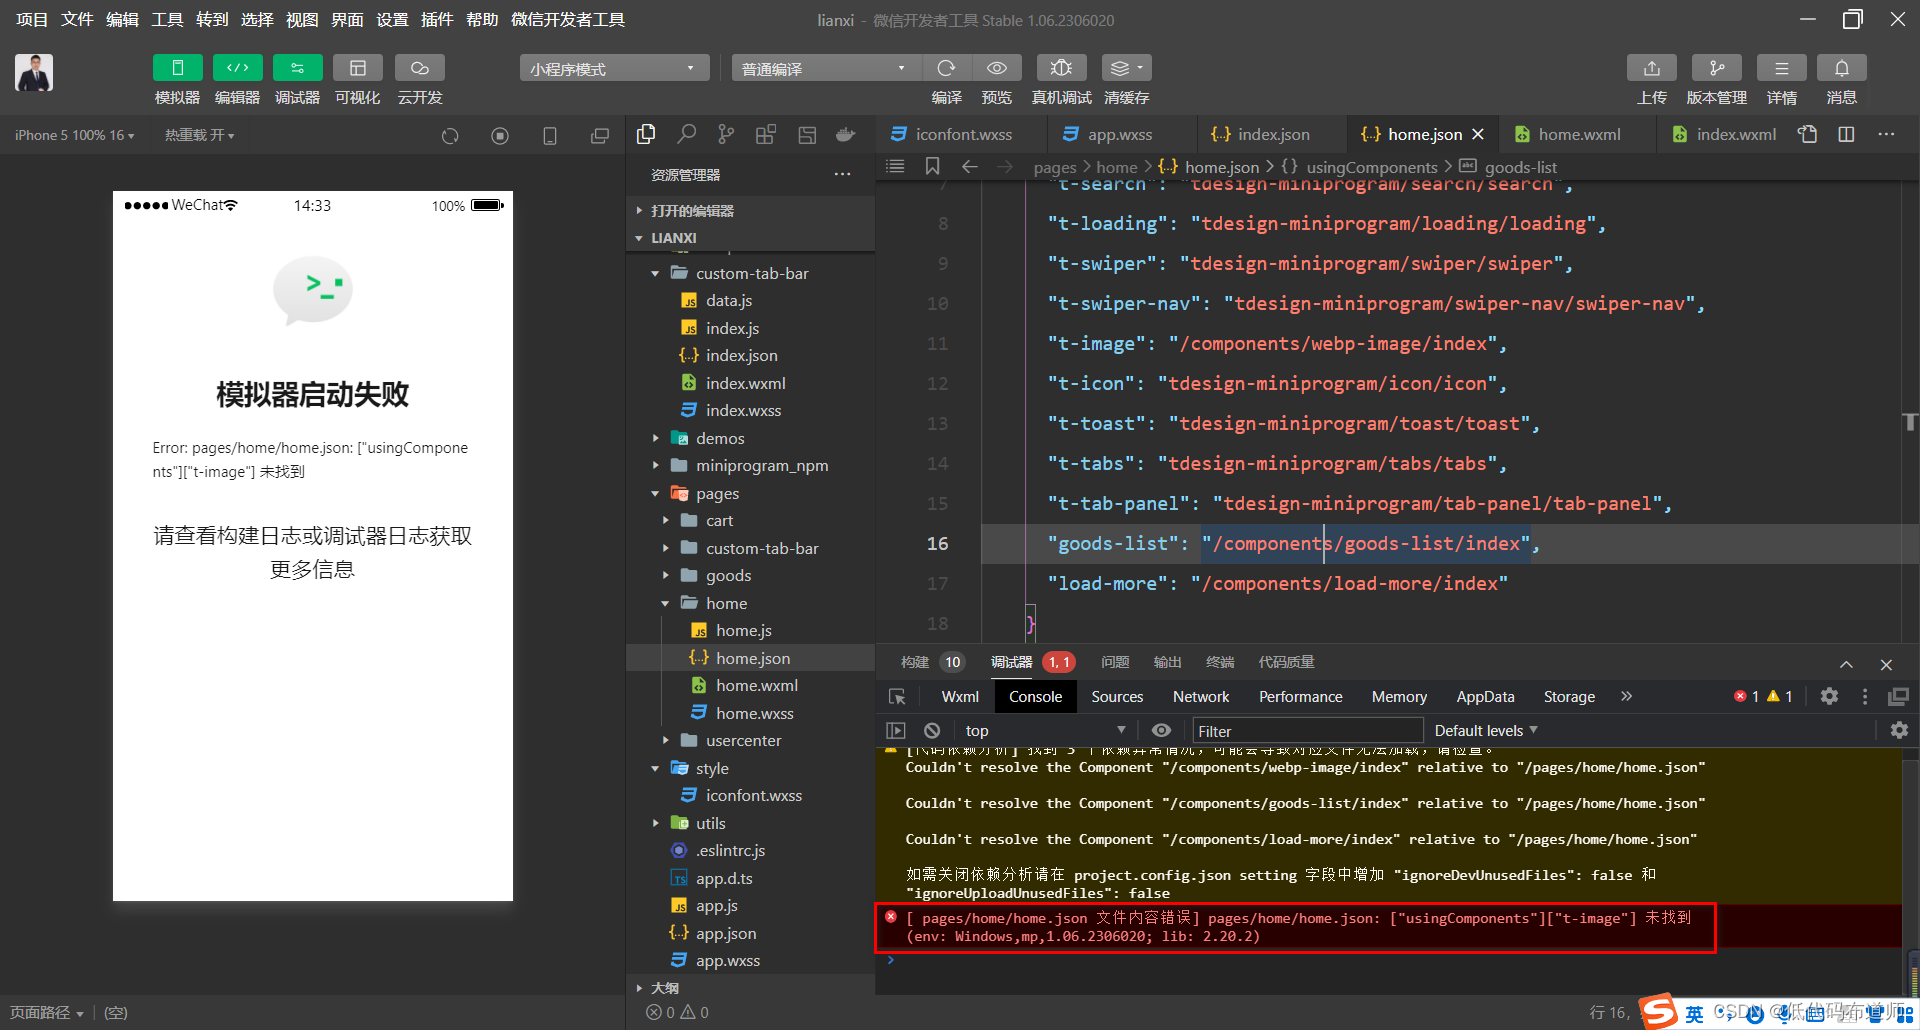
其实解决问题就像俄罗斯套娃一样,拿走一个里边还有一个,直到你拿到最后一个才可以
2 goods-list组件
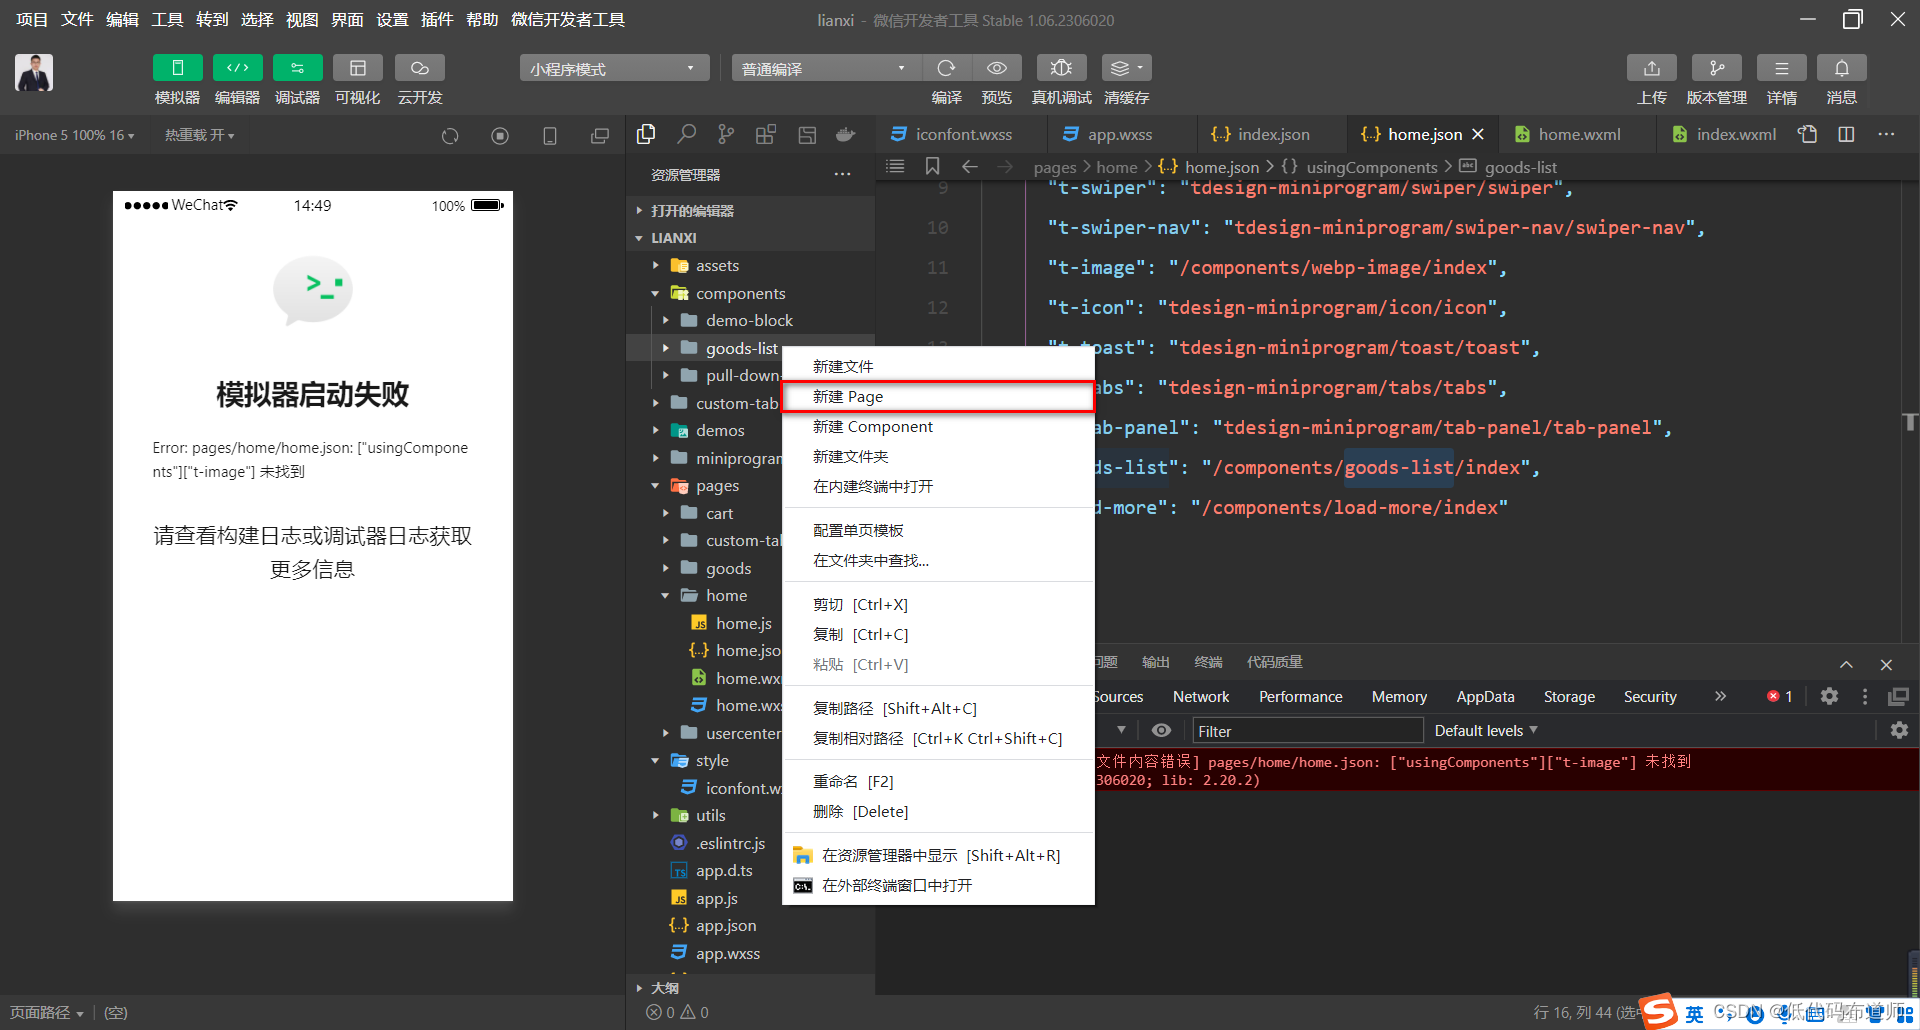
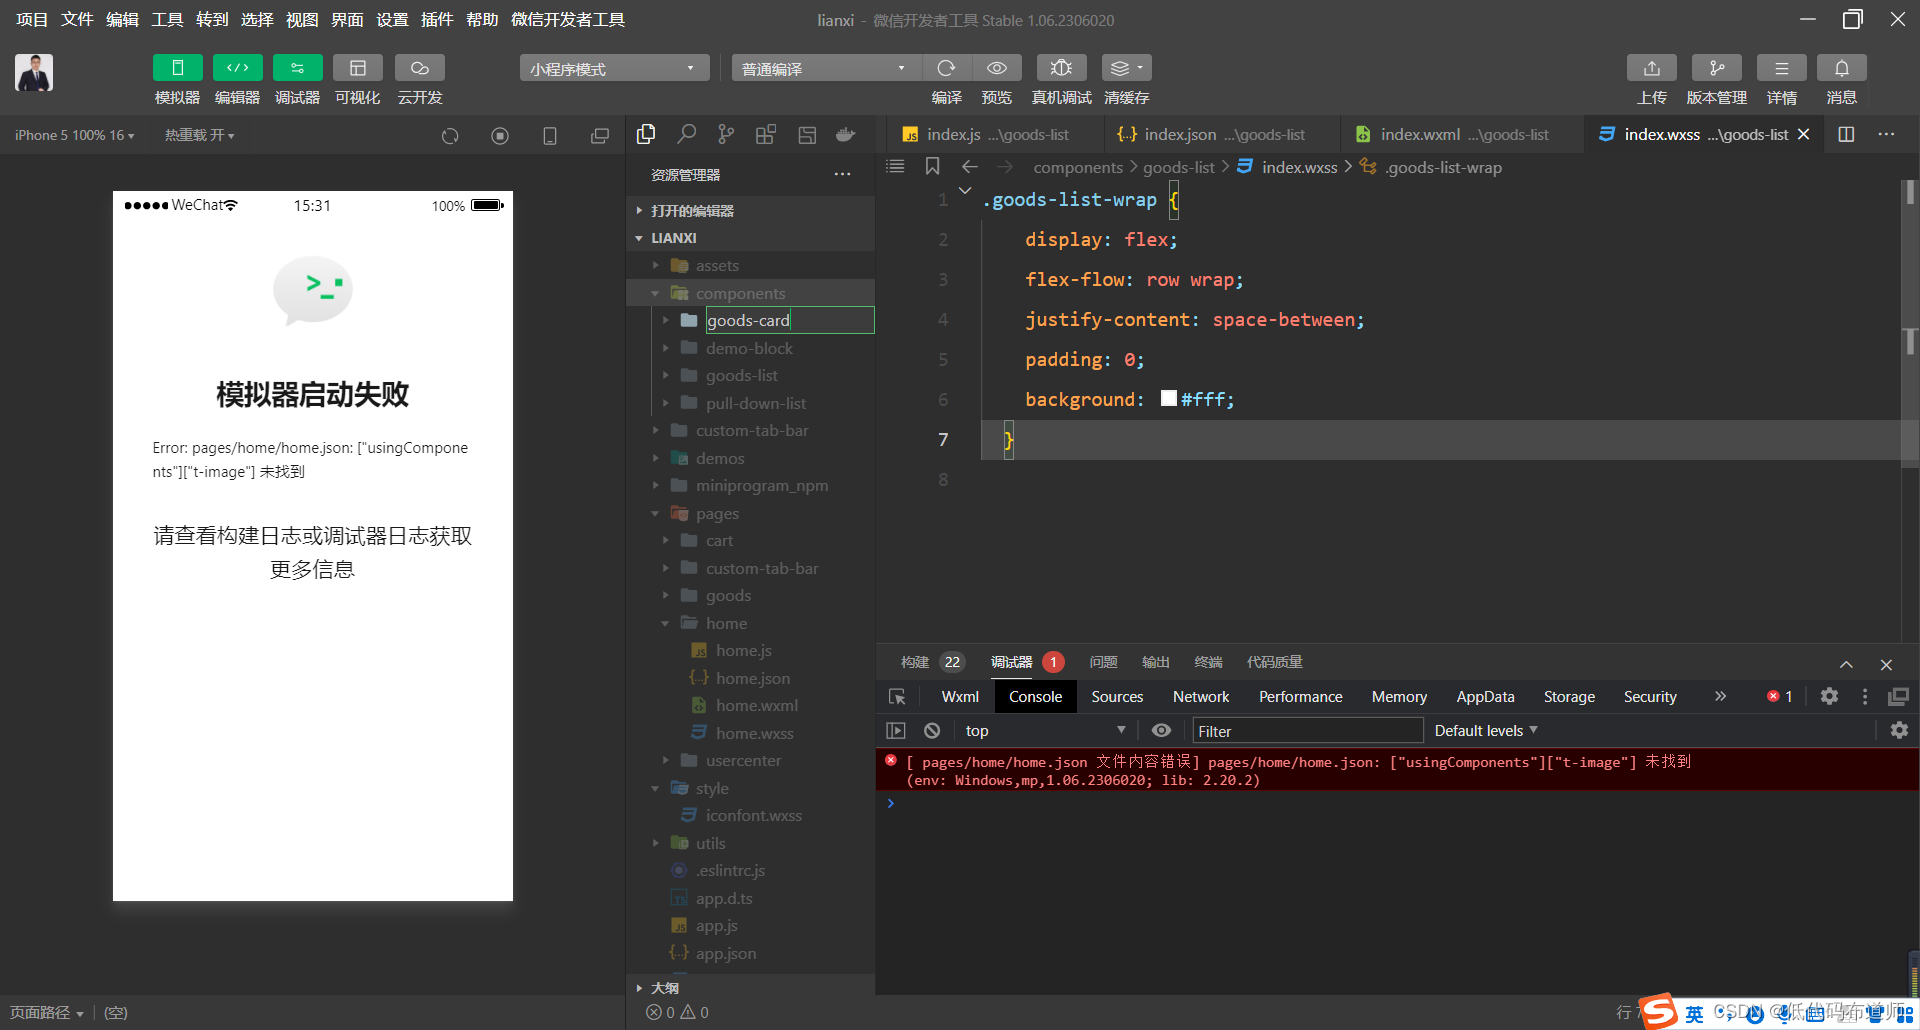
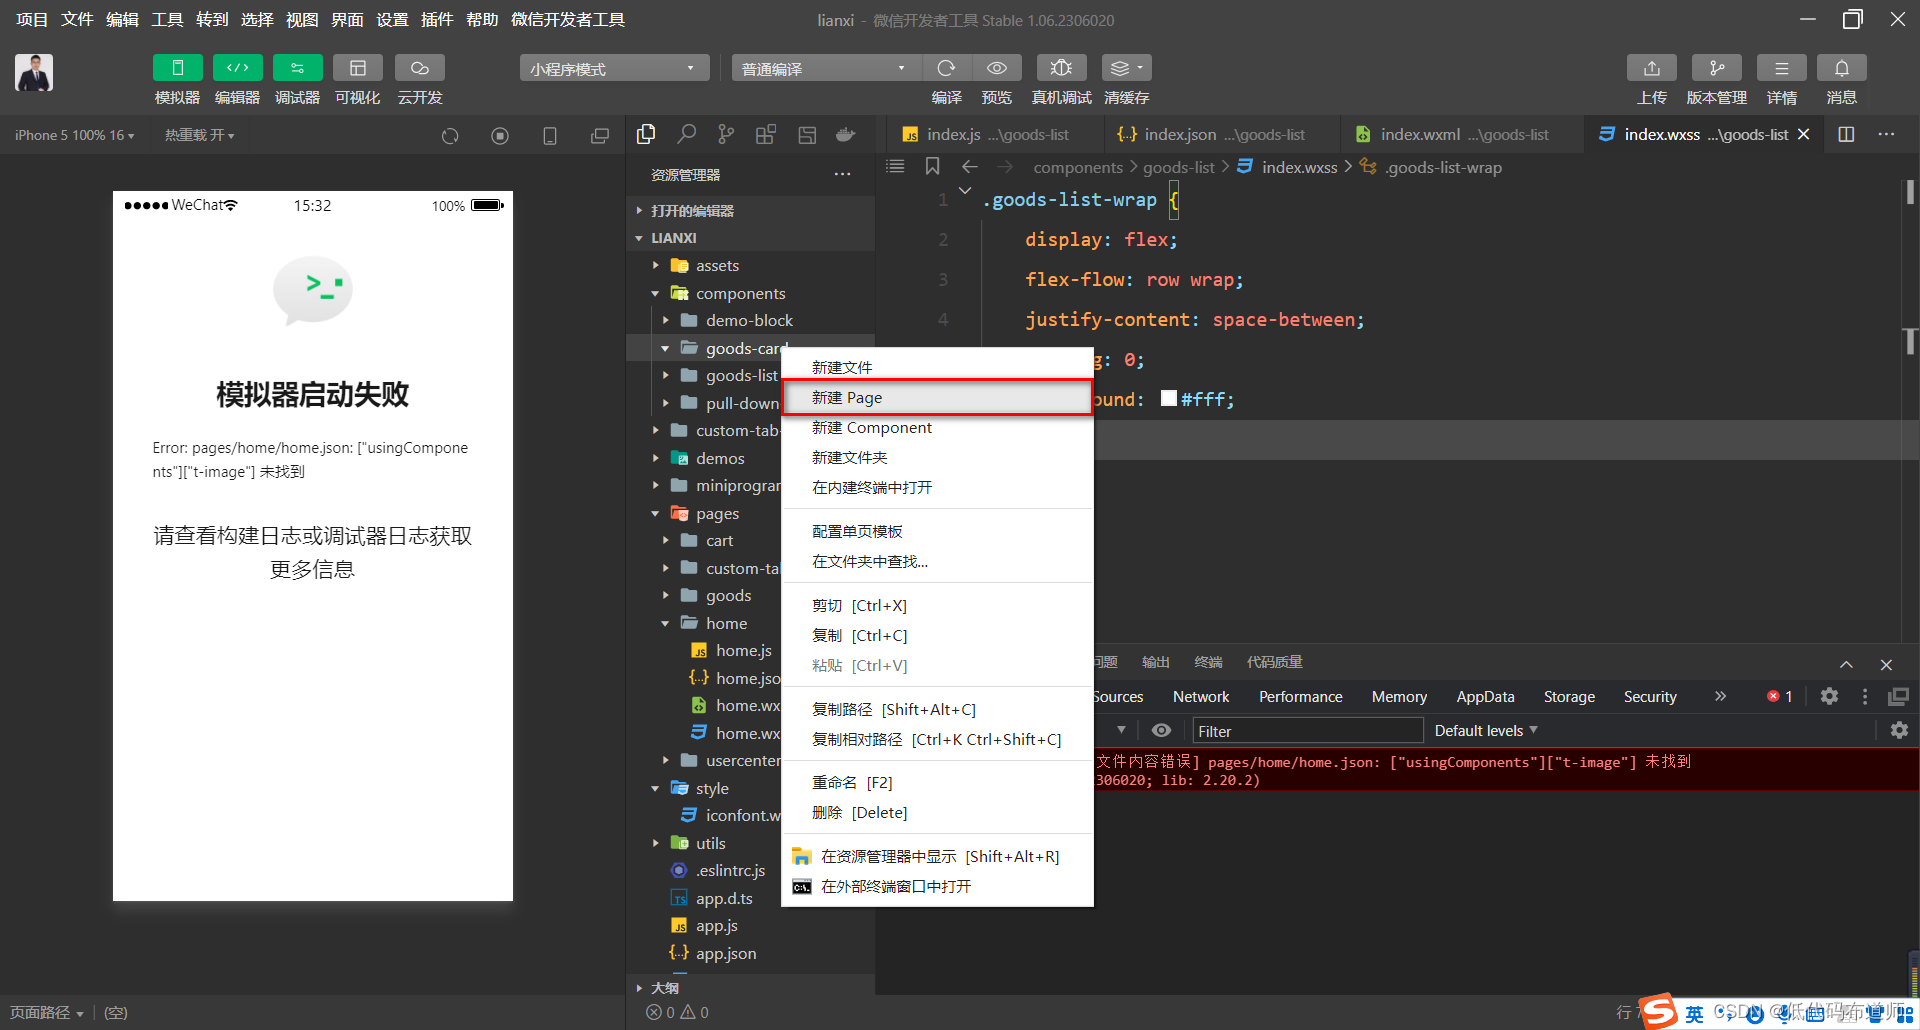
选中components文件夹,右键新建一个文件夹

输入goods-list,然后在goods-list文件夹上右键,点击新建Page
然后输入index,自动生成四个文件,index.wxml、index.wxss、index.json、index.js
自定义组件也是包含四个文件,要依次看模板的代码
index.json
{
    "component": true,
    "usingComponents": {
        "goods-card": "/components/goods-card/index"
    }
}
这里goods-list又继续引用了goods-card组件
index.js
Component({
  externalClasses: ['wr-class'],

  properties: {
    goodsList: {
      type: Array,
      value: [],
    },
    id: {
      type: String,
      value: '',
      observer: (id) => {
        this.genIndependentID(id);
      },
    },
    thresholds: {
      type: Array,
      value: [],
    },
  },

  data: {
    independentID: '',
  },

  lifetimes: {
    ready() {
      this.init();
    },
  },

  methods: {
    onClickGoods(e) {
      const { index } = e.currentTarget.dataset;
      this.triggerEvent('click', { ...e.detail, index });
    },

    onAddCart(e) {
      const { index } = e.currentTarget.dataset;
      this.triggerEvent('addcart', { ...e.detail, index });
    },

    onClickGoodsThumb(e) {
      const { index } = e.currentTarget.dataset;
      this.triggerEvent('thumb', { ...e.detail, index });
    },

    init() {
      this.genIndependentID(this.id || '');
    },

    genIndependentID(id) {
      if (id) {
        this.setData({ independentID: id });
      } else {
        this.setData({
          independentID: `goods-list-${~~(Math.random() * 10 ** 8)}`,
        });
      }
    },
  },
});
自定义组件的externalClasses表示外部样式类,可以在引用的时候传入样式来改变组件的样式。properties表示组件对外暴露的属性,可以根据组件的需要进行设置。method表示组件可以响应的事件,看目前的设置事件是和电商业务相关的,具体是什么含义,我们在调用的时候再分析
index.wxml
<view class="goods-list-wrap wr-class" id="{{independentID}}">
	<block wx:for="{{goodsList}}" wx:for-item="item" wx:key="index">
		<goods-card
		  id="{{independentID}}-gd-{{index}}"
		  data="{{item}}"
		  currency="{{item.currency || '¥'}}"
		  thresholds="{{thresholds}}"
		  class="goods-card-inside"
		  data-index="{{index}}"
		  bind:thumb="onClickGoodsThumb"
		  bind:click="onClickGoods"
		  bind:add-cart="onAddCart"
		/>
	</block>
</view>
这是组件的内容部分,他又使用了一个goods-card组件
index.wxss
.goods-list-wrap {
  display: flex;
  flex-flow: row wrap;
  justify-content: space-between;
  padding: 0;
  background: #fff;
}
样式部分还是很简单的,他是设置了一个流式布局,元素是按行排列,要求自动换行,水平对齐是两端对齐,没有内边距并设置了一定的背景色
3 goods-card组件
在components文件夹下再新建一个goods-card文件夹
然后在goods-card文件夹新建一个Page
index.json
{
    "component": true,
    "usingComponents": {
        "price": "/components/price/index",
        "t-icon": "tdesign-miniprogram/icon/icon",
        "t-image": "/components/webp-image/index"
    }
}
好家伙真还是俄罗斯套娃,这个组件又套了两个组件,需要继续新建
index.js
Component({
  options: {
    addGlobalClass: true,
  },

  properties: {
    id: {
      type: String,
      value: '',
      observer(id) {
        this.genIndependentID(id);
        if (this.properties.thresholds?.length) {
          this.createIntersectionObserverHandle();
        }
      },
    },
    data: {
      type: Object,
      observer(data) {
        if (!data) {
          return;
        }
        let isValidityLinePrice = true;
        if (data.originPrice && data.price && data.originPrice < data.price) {
          isValidityLinePrice = false;
        }
        this.setData({ goods: data, isValidityLinePrice });
      },
    },
    currency: {
      type: String,
      value: '¥',
    },

    thresholds: {
      type: Array,
      value: [],
      observer(thresholds) {
        if (thresholds && thresholds.length) {
          this.createIntersectionObserverHandle();
        } else {
          this.clearIntersectionObserverHandle();
        }
      },
    },
  },

  data: {
    independentID: '',
    goods: { id: '' },
    isValidityLinePrice: false,
  },

  lifetimes: {
    ready() {
      this.init();
    },
    detached() {
      this.clear();
    },
  },

  pageLifeTimes: {},

  methods: {
    clickHandle() {
      this.triggerEvent('click', { goods: this.data.goods });
    },

    clickThumbHandle() {
      this.triggerEvent('thumb', { goods: this.data.goods });
    },

    addCartHandle(e) {
      const { id } = e.currentTarget;
      const { id: cardID } = e.currentTarget.dataset;
      this.triggerEvent('add-cart', {
        ...e.detail,
        id,
        cardID,
        goods: this.data.goods,
      });
    },

    genIndependentID(id) {
      let independentID;
      if (id) {
        independentID = id;
      } else {
        independentID = `goods-card-${~~(Math.random() * 10 ** 8)}`;
      }
      this.setData({ independentID });
    },

    init() {
      const { thresholds, id } = this.properties;
      this.genIndependentID(id);
      if (thresholds && thresholds.length) {
        this.createIntersectionObserverHandle();
      }
    },

    clear() {
      this.clearIntersectionObserverHandle();
    },

    intersectionObserverContext: null,

    createIntersectionObserverHandle() {
      if (this.intersectionObserverContext || !this.data.independentID) {
        return;
      }
      this.intersectionObserverContext = this.createIntersectionObserver({
        thresholds: this.properties.thresholds,
      }).relativeToViewport();

      this.intersectionObserverContext.observe(
        `#${this.data.independentID}`,
        (res) => {
          this.intersectionObserverCB(res);
        },
      );
    },

    intersectionObserverCB() {
      this.triggerEvent('ob', {
        goods: this.data.goods,
        context: this.intersectionObserverContext,
      });
    },

    clearIntersectionObserverHandle() {
      if (this.intersectionObserverContext) {
        try {
          this.intersectionObserverContext.disconnect();
        } catch (e) {}
        this.intersectionObserverContext = null;
      }
    },
  },
});
这个组件里边的代码会更复杂一点
index.wxml
<view
  id="{{independentID}}"
  class="goods-card"
  bind:tap="clickHandle"
  data-goods="{{ goods }}"
>
	<view class="goods-card__main">
		<view class="goods-card__thumb" bind:tap="clickThumbHandle">
			<t-image
			  wx:if="{{ !!goods.thumb }}"
			  t-class="goods-card__img"
			  src="{{ goods.thumb }}"
			  mode="aspectFill"
			  lazy-load
			/>
		</view>
		<view class="goods-card__body">
			<view class="goods-card__upper">
				<view wx:if="{{ goods.title }}" class="goods-card__title">
					{{ goods.title }}
				</view>
				<view wx:if="{{ goods.tags && !!goods.tags.length }}" class="goods-card__tags">
					<view
					  wx:for="{{ goods.tags }}"
					  wx:key="index"
					  wx:for-item="tag"
					  class="goods-card__tag"
					  data-index="{{index}}"
					>
						{{tag}}
					</view>
				</view>
			</view>
			<view class="goods-card__down">
				<price
				  wx:if="{{ goods.price }}"
				  wr-class="spec-for-price"
				  symbol-class="spec-for-symbol"
				  symbol="{{currency}}"
				  price="{{goods.price}}"
				/>
				<price
				  wx:if="{{ goods.originPrice && isValidityLinePrice }}"
				  wr-class="goods-card__origin-price"
				  symbol="{{currency}}"
				  price="{{goods.originPrice}}"
				  type="delthrough"
				/>
				<t-icon
				  class="goods-card__add-cart"
				  prefix="wr"
				  name="cartAdd"
				  id="{{independentID}}-cart"
				  data-id="{{independentID}}"
				  catchtap="addCartHandle"
				  size="48rpx"
				  color="#FA550F"
				/>
			</view>
		</view>
	</view>
</view>
index.wxss
.goods-card {
  box-sizing: border-box;
  font-size: 24rpx;
  border-radius: 0 0 16rpx 16rpx;
  border-bottom: none;
}

.goods-card__main {
  position: relative;
  display: flex;
  line-height: 1;
  padding: 0;
  background: transparent;
  width: 342rpx;
  border-radius: 0 0 16rpx 16rpx;
  align-items: center;
  justify-content: center;
  margin-bottom: 16rpx;
  flex-direction: column;
}

.goods-card__thumb {
  flex-shrink: 0;
  position: relative;
  width: 340rpx;
  height: 340rpx;
}

.goods-card__thumb:empty {
  display: none;
  margin: 0;
}

.goods-card__img {
  display: block;
  width: 100%;
  height: 100%;
  border-radius: 16rpx 16rpx 0 0;
  overflow: hidden;
}

.goods-card__body {
  display: flex;
  flex: 1 1 auto;
  background: #fff;
  border-radius: 0 0 16rpx 16rpx;
  padding: 16rpx 24rpx 18rpx;
  flex-direction: column;
}

.goods-card__upper {
  display: flex;
  flex-direction: column;
  overflow: hidden;
  flex: 1 1 auto;
}

.goods-card__title {
  flex-shrink: 0;
  font-size: 28rpx;
  color: #333;
  font-weight: 400;
  display: -webkit-box;
  height: 72rpx;
  -webkit-box-orient: vertical;
  -webkit-line-clamp: 2;
  overflow: hidden;
  word-break: break-word;
  line-height: 36rpx;
}

.goods-card__tags {
  display: flex;
  flex-direction: row;
  flex-wrap: wrap;
  margin: 8rpx 0 0 0;
}

.goods-card__tag {
  color: #fa4126;
  background: transparent;
  font-size: 20rpx;
  border: 1rpx solid #fa4126;
  padding: 0 8rpx;
  border-radius: 16rpx;
  line-height: 30rpx;
  margin: 0 8rpx 8rpx 0;
  display: block;
  overflow: hidden;
  white-space: nowrap;
  word-break: keep-all;
  text-overflow: ellipsis;
}

.goods-card__down {
  display: flex;
  position: relative;
  flex-direction: row;
  justify-content: flex-start;
  align-items: baseline;
  line-height: 32rpx;
  margin: 8rpx 0 0 0;
}

.goods-card__origin-price {
  white-space: nowrap;
  font-weight: 700;
  order: 2;
  color: #bbbbbb;
  font-size: 24rpx;
  margin: 0 0 0 8rpx;
}

.goods-card__add-cart {
  order: 3;
  margin: auto 0 0 auto;
  position: absolute;
  bottom: 0;
  right: 0;
}

.spec-for-price {
  font-size: 36rpx;
  white-space: nowrap;
  font-weight: 700;
  order: 1;
  color: #fa4126;
  margin: 0;
}

.spec-for-symbol {
  font-size: 24rpx;
}
总结
看首页功能,其实看wxml文件并不复杂,复杂在了既调用了组件库中的组件,又自己封装了很多组件,而且是俄罗斯套娃,一层嵌套一层,这么个看要想用熟练一套模板也不是简单的事情。