我们在上一篇文章中介绍了有关使用纹理的一些基础知识。在本文中,我们将介绍从图像导入纹理。
在上一篇文章中,通过调用 device.createTexture 创建了一个纹理,然后通过调用 device.queue.writeTexture 将数据放入纹理中。 device.queue 上还有另一个名为 device.queue.copyExternalImageToTexture 的函数,可以将图像复制到纹理中。
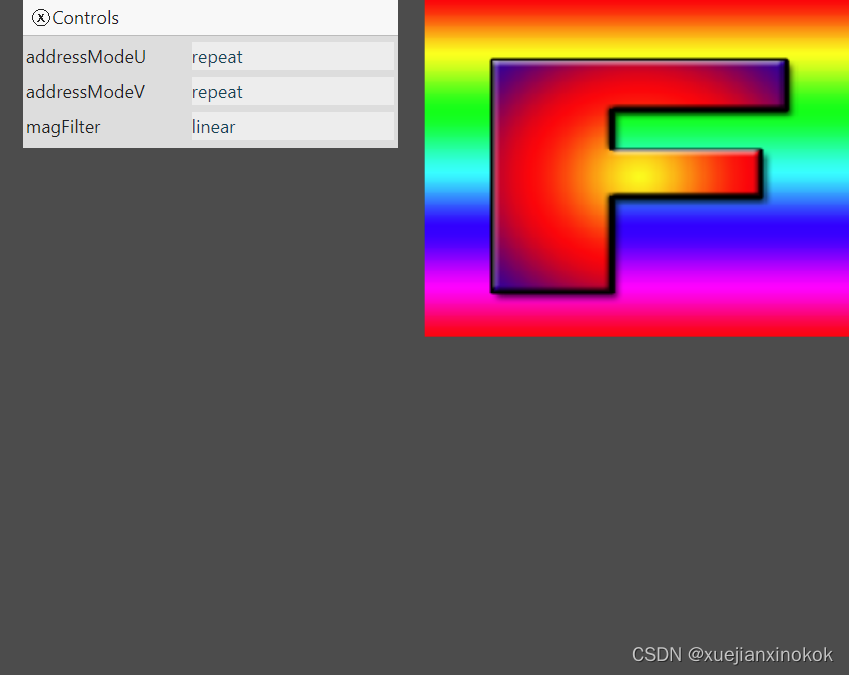
它可以采用 ImageBitmap ,所以让我们采用上一篇文章中的 magFilter 示例并将其更改为导入一些图像。
首先需要一些代码来从图像中获取 ImageBitmap
  async function loadImageBitmap(url) {
    const res = await fetch(url);
    const blob = await res.blob();
    return await createImageBitmap(blob, { colorSpaceConversion: 'none' });
  }
上面的代码传入图像的 url 并调用 fetch 。这将返回一个 Response 。然后使用它来加载一个不透明地表示图像文件数据的 Blob 。然后将它传递给 createImageBitmap ,这是一个标准的浏览器函数来创建一个 ImageBitmap 。我们通过 { colorSpaceConversion: ‘none’ } 告诉浏览器不要应用任何颜色空间。如果您希望浏览器应用颜色空间,则由您决定。通常在 WebGPU 中,可能会加载法线贴图或高度贴图或非颜色数据的图像。在这些情况下,我们绝对不希望浏览器弄乱图像中的数据。
现在我们有了创建 ImageBitmap 的代码,让我们加载并创建一个相同大小的纹理。
我们将加载这张图片
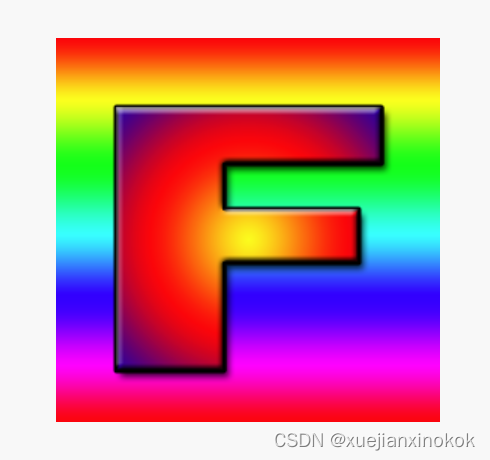
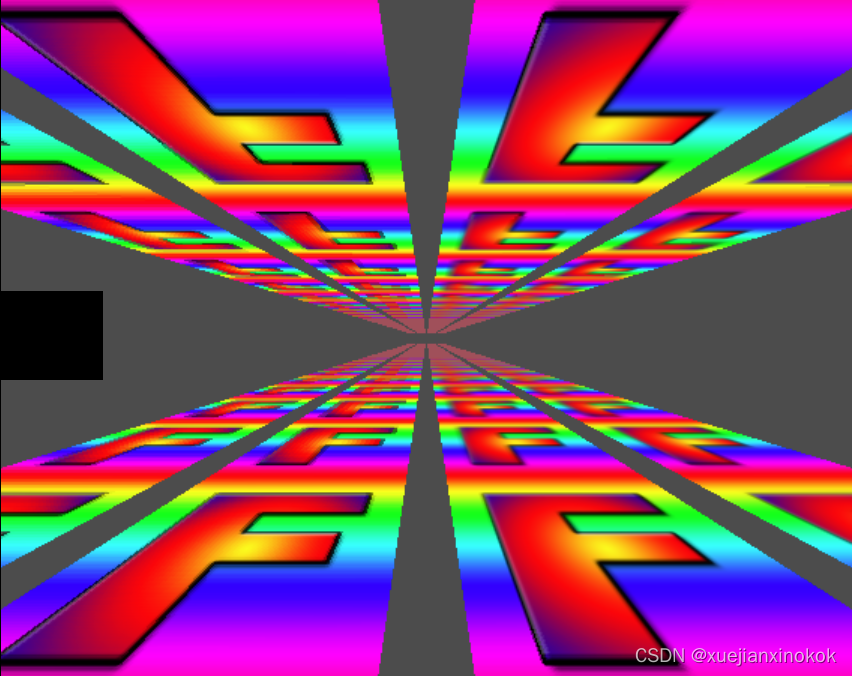
带有 F 的纹理是一个很好的示例纹理,因为我们可以立即看到它的方向。

  //const texture = device.createTexture({
  //  label: 'yellow F on red',
  //  size: [kTextureWidth, kTextureHeight],
  //  format: 'rgba8unorm',
  //  usage:
  //    GPUTextureUsage.TEXTURE_BINDING |
  //    GPUTextureUsage.COPY_DST,
  // });
  const url = 'resources/images/f-texture.png';
  const source = await loadImageBitmap(url);
  const texture = device.createTexture({
    label: url,
    format: 'rgba8unorm',
    size: [source.width, source.height],
    usage: GPUTextureUsage.TEXTURE_BINDING |
           GPUTextureUsage.COPY_DST |
           GPUTextureUsage.RENDER_ATTACHMENT,
  });
请注意, copyExternalImageToTexture 要求我们将 GPUTextureUsage.COPY_DST 和 GPUTextureUsage.RENDER_ATTACHMENT 标志包括在内。
那么我们可以将 ImageBitmap 复制到纹理
 // device.queue.writeTexture(
 //     { texture },
 //     textureData,
 //     { bytesPerRow: kTextureWidth * 4 },
 //     { width: kTextureWidth, height: kTextureHeight },
 // );
  device.queue.copyExternalImageToTexture(
    { source, flipY: true },
    { texture },
    { width: source.width, height: source.height },
  );
copyExternalImageToTexture 的参数是源、目标和大小。对于源,如果我们希望在加载时翻转纹理,我们可以指定 flipY: true 。
这样就可以了!
1. Generating mips on the GPU
在上一篇文章中,我们还生成了一个 mipmap,在那种方法下,可以轻松访问图像数据。导入图片时,我们可以将该图片绘制到二维画布中,调用 getImageData 获取数据,最后生成mips并上传。但那会很慢。它也可能是有损的,因为画布 2D 渲染的方式依赖于底层的实现方式。
当我们生成 mip 级别时,进行了双线性插值,这正是 GPU 使用 minFilter: linear 所做的。我们可以使用该功能在 GPU 上生成 mip 级别。
让我们修改上一篇文章中的 minmapFilter 示例,以使用 GPU 加载图像和生成 mip
首先,让我们更改创建纹理的代码以创建 mip 级别。我们需要知道要创建多少,可以这样计算
  const numMipLevels = (...sizes) => {
    const maxSize = Math.max(...sizes);
    return 1 + Math.log2(maxSize) | 0;
  };
我们可以用 1 个或多个数字调用它,它会返回所需的 mips 数,例如 numMipLevels(123, 456) 返回 9 。
- level 0: 123, 456
- level 1: 61, 228
- level 2: 30, 114
- level 3: 15, 57
- level 4: 7, 28
- level 5: 3, 14
- level 6: 1, 7
- level 7: 1, 3
- level 8: 1, 1
9 mip levels
Math.log2 tells us the power of 2 we need to make our number. In other words, Math.log2(8) = 3 because 23 = 8. Another way to say the same thing is, Math.log2 tells us how many times can we divide this number by 2.
Math.log2 告诉我们 2 的幂是我们需要的数字。换句话说, Math.log2(8) = 3 因为 2的3次方 = 8。另一种说法是, Math.log2 告诉我们可以将这个数字除以 2 多少次。
Math.log2(8)
          8 / 2 = 4
                  4 / 2 = 2
                          2 / 2 = 1
所以我们可以将 8 除以 2 三次。这正是我们需要计算要制作多少 mip 级别的内容。这是 Math.log2(largestSize) + 1 。 1 表示原始大小 mip 级别 0
所以,我们现在可以创建正确数量的 mip 级别
  const texture = device.createTexture({
    label: url,
    format: 'rgba8unorm',
    mipLevelCount: numMipLevels(source.width, source.height),
    size: [source.width, source.height],
    usage: GPUTextureUsage.TEXTURE_BINDING |
           GPUTextureUsage.COPY_DST |
           GPUTextureUsage.RENDER_ATTACHMENT,
  });
  device.queue.copyExternalImageToTexture(
    { source, flipY: true, },
    { texture },
    { width: source.width, height: source.height },
  );
为了生成下一个 mip 级别,我们将绘制一个带纹理的四边形,就像我们一直在做的那样,从现有的 mip 级别到下一个级别, minFilter: linear 。
Here’s the code 这是代码
  const generateMips = (() => {
    let pipeline;
    let sampler;

    return function generateMips(device, texture) {
      if (!pipeline) {
        const module = device.createShaderModule({
          label: 'textured quad shaders for mip level generation',
          code: `
            struct VSOutput {
              @builtin(position) position: vec4f,
              @location(0) texcoord: vec2f,
            };

            @vertex fn vs(
              @builtin(vertex_index) vertexIndex : u32
            ) -> VSOutput {
              var pos = array<vec2f, 6>(

                vec2f( 0.0,  0.0),  // center
                vec2f( 1.0,  0.0),  // right, center
                vec2f( 0.0,  1.0),  // center, top

                // 2st triangle
                vec2f( 0.0,  1.0),  // center, top
                vec2f( 1.0,  0.0),  // right, center
                vec2f( 1.0,  1.0),  // right, top
              );

              var vsOutput: VSOutput;
              let xy = pos[vertexIndex];
              vsOutput.position = vec4f(xy * 2.0 - 1.0, 0.0, 1.0);
              vsOutput.texcoord = vec2f(xy.x, 1.0 - xy.y);
              return vsOutput;
            }

            @group(0) @binding(0) var ourSampler: sampler;
            @group(0) @binding(1) var ourTexture: texture_2d<f32>;

            @fragment fn fs(fsInput: VSOutput) -> @location(0) vec4f {
              return textureSample(ourTexture, ourSampler, fsInput.texcoord);
            }
          `,
        });
        pipeline = device.createRenderPipeline({
          label: 'mip level generator pipeline',
          layout: 'auto',
          vertex: {
            module,
            entryPoint: 'vs',
          },
          fragment: {
            module,
            entryPoint: 'fs',
            targets: [{ format: texture.format }],
          },
        });

        sampler = device.createSampler({
          minFilter: 'linear',
        });
      }

      const encoder = device.createCommandEncoder({
        label: 'mip gen encoder',
      });

      let width = texture.width;
      let height = texture.height;
      let baseMipLevel = 0;
      while (width > 1 || height > 1) {
        width = Math.max(1, width / 2 | 0);
        height = Math.max(1, height / 2 | 0);

        const bindGroup = device.createBindGroup({
          layout: pipeline.getBindGroupLayout(0),
          entries: [
            { binding: 0, resource: sampler },
            { binding: 1, resource: texture.createView({baseMipLevel, mipLevelCount: 1}) },
          ],
        });

        ++baseMipLevel;

        const renderPassDescriptor = {
          label: 'our basic canvas renderPass',
          colorAttachments: [
            {
              view: texture.createView({baseMipLevel, mipLevelCount: 1}),
              clearValue: [0.3, 0.3, 0.3, 1],
              loadOp: 'clear',
              storeOp: 'store',
            },
          ],
        };

        const pass = encoder.beginRenderPass(renderPassDescriptor);
        pass.setPipeline(pipeline);
        pass.setBindGroup(0, bindGroup);
        pass.draw(6);  // call our vertex shader 6 times
        pass.end();
      }

      const commandBuffer = encoder.finish();
      device.queue.submit([commandBuffer]);
    };
  })();
上面的代码看起来很长,但它几乎与我们迄今为止在纹理示例中使用的代码完全相同。
有变化的地方如下:
-
使用了一个闭包来保留 3 个变量。 module 、 sampler 、 pipelineByFormat 。对于 module 和 sampler ,检查它们是否没有被设置,如果没有,就创建一个 GPUSShaderModule 和 GPUSampler ,这样可以保留并在将来使用。
-
有一对与所有示例几乎完全相同的着色器。唯一不同的是这部分
  //vsOutput.position = uni.matrix * vec4f(xy, 0.0, 1.0);
  //vsOutput.texcoord = xy * vec2f(1, 50);
  vsOutput.position = vec4f(xy * 2.0 - 1.0, 0.0, 1.0);
  vsOutput.texcoord = vec2f(xy.x, 1.0 - xy.y);
原先在着色器中的硬编码四边形位置数据从 0.0 到 1.0,因此,按照原样,只会覆盖正在绘制的右上角四分之一纹理,就像示例中一样。但现在需要它覆盖整个区域,因此通过乘以 2 并减去 1,我们得到一个从 -1,-1 到 +1,1 的四边形。
We also flip the Y texture coordinate. This is because when drawing to the texture +1, +1 is at the top right but we want the top right of the texture we are sampling to be there. The top right of the sampled texture is +1, 0
我们还翻转了 Y 纹理坐标。这是因为当绘制到纹理 +1 时,+1 位于右上角,但我们希望采样纹理的右上角在那里。采样纹理的右上角为+1, 0
-
对象pipelineByFormat ,用作将管线映射到纹理格式。这是因为管线需要知道要使用的格式。
-
我们检查是否已经有一个特定格式的管线,如果没有则创建一个
    if (!pipelineByFormat[texture.format]) {
      pipelineByFormat[texture.format] = device.createRenderPipeline({
        label: 'mip level generator pipeline',
        layout: 'auto',
        vertex: {
          module,
          entryPoint: 'vs',
        },
        fragment: {
          module,
          entryPoint: 'fs',
          targets: [{ format: texture.format }],
        },
      });
    }
    const pipeline = pipelineByFormat[texture.format];
这里唯一的主要区别是 targets 是从纹理的格式设置的,而不是我们在渲染到画布时使用的 presentationFormat
- 最后给 texture.createView设置一些参数
遍历每个 mip 级别。为最后一个 mip 创建一个绑定组,其中包含数据,设置 renderPassDescriptor 以绘制到下一个 mip 级别。然后为特定的 mip 级别编码一个 renderPass。当完成时。所有的 mip 都将被填满。
    let width = texture.width;
    let height = texture.height;
    let baseMipLevel = 0;
    while (width > 1 || height > 1) {
      width = Math.max(1, width / 2 | 0);
      height = Math.max(1, height / 2 | 0);

      const bindGroup = device.createBindGroup({
        layout: pipeline.getBindGroupLayout(0),
        entries: [
          { binding: 0, resource: sampler },
          { binding: 1, resource: texture.createView({baseMipLevel, mipLevelCount: 1}) }, //here
        ],
      });

      ++baseMipLevel; //here

      const renderPassDescriptor = {
        label: 'our basic canvas renderPass',
        colorAttachments: [
          {
            view: texture.createView({baseMipLevel, mipLevelCount: 1}), //here
            loadOp: 'clear',
            storeOp: 'store',
          },
        ],
      };

      const pass = encoder.beginRenderPass(renderPassDescriptor);
      pass.setPipeline(pipeline);
      pass.setBindGroup(0, bindGroup);
      pass.draw(6);  // call our vertex shader 6 times
      pass.end();
    }

    const commandBuffer = encoder.finish();
    device.queue.submit([commandBuffer]);
让我们创建一些工具函数,使将图像加载到纹理中并生成 mips 变得简单
这是一个更新第一个 mip 级别并可选择翻转图像的函数。如果图像具有 mip 级别,那么将生成它们。
  function copySourceToTexture(device, texture, source, {flipY} = {}) {
    device.queue.copyExternalImageToTexture(
      { source, flipY, },
      { texture },
      { width: source.width, height: source.height },
    );

    if (texture.mipLevelCount > 1) {
      generateMips(device, texture);
    }
  }
这是另一个函数,给定源(在本例中为 ImageBitmap )将创建匹配大小的纹理,然后调用前一个函数用数据填充它
  function createTextureFromSource(device, source, options = {}) {
    const texture = device.createTexture({
      format: 'rgba8unorm',
      mipLevelCount: options.mips ? numMipLevels(source.width, source.height) : 1,
      size: [source.width, source.height],
      usage: GPUTextureUsage.TEXTURE_BINDING |
             GPUTextureUsage.COPY_DST |
             GPUTextureUsage.RENDER_ATTACHMENT,
    });
    copySourceToTexture(device, texture, source, options);
    return texture;
  }
这是一个给定 url 的函数,它将加载 url 作为 ImageBitmap 调用调用前面的函数来创建纹理并用图像的内容填充它。
  async function createTextureFromImage(device, url, options) {
    const imgBitmap = await loadImageBitmap(url);
    return createTextureFromSource(device, imgBitmap, options);
  }
通过这些设置,mipmapFilter 示例的唯一主要更改是
// const textures = [
// createTextureWithMips(createBlendedMipmap(), 'blended'),
// createTextureWithMips(createCheckedMipmap(), 'checker'),
// ];
const textures = await Promise.all([
await createTextureFromImage(device,
'resources/images/f-texture.png', {mips: true, flipY: false}),
await createTextureFromImage(device,
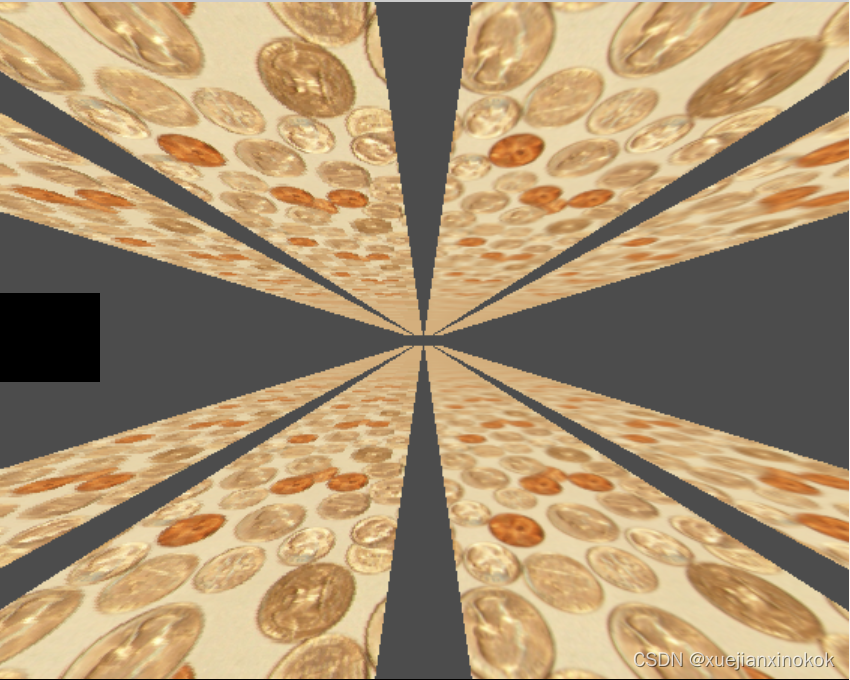
'resources/images/coins.jpg', {mips: true}),
await createTextureFromImage(device,
'resources/images/Granite_paving_tileable_512x512.jpeg', {mips: true}),
]);
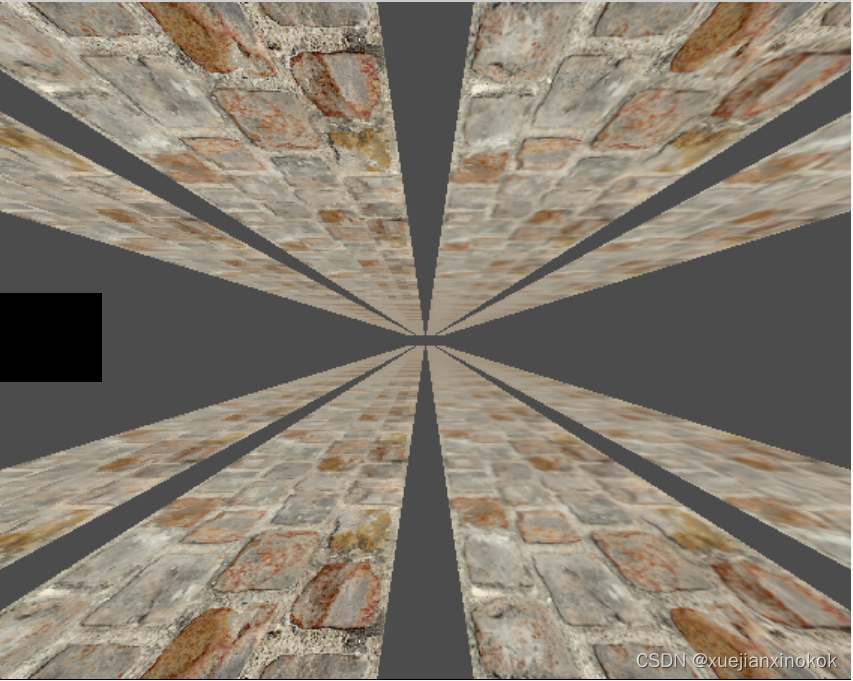
上面的代码从上方加载 F 纹理以及这 2 个平铺纹理
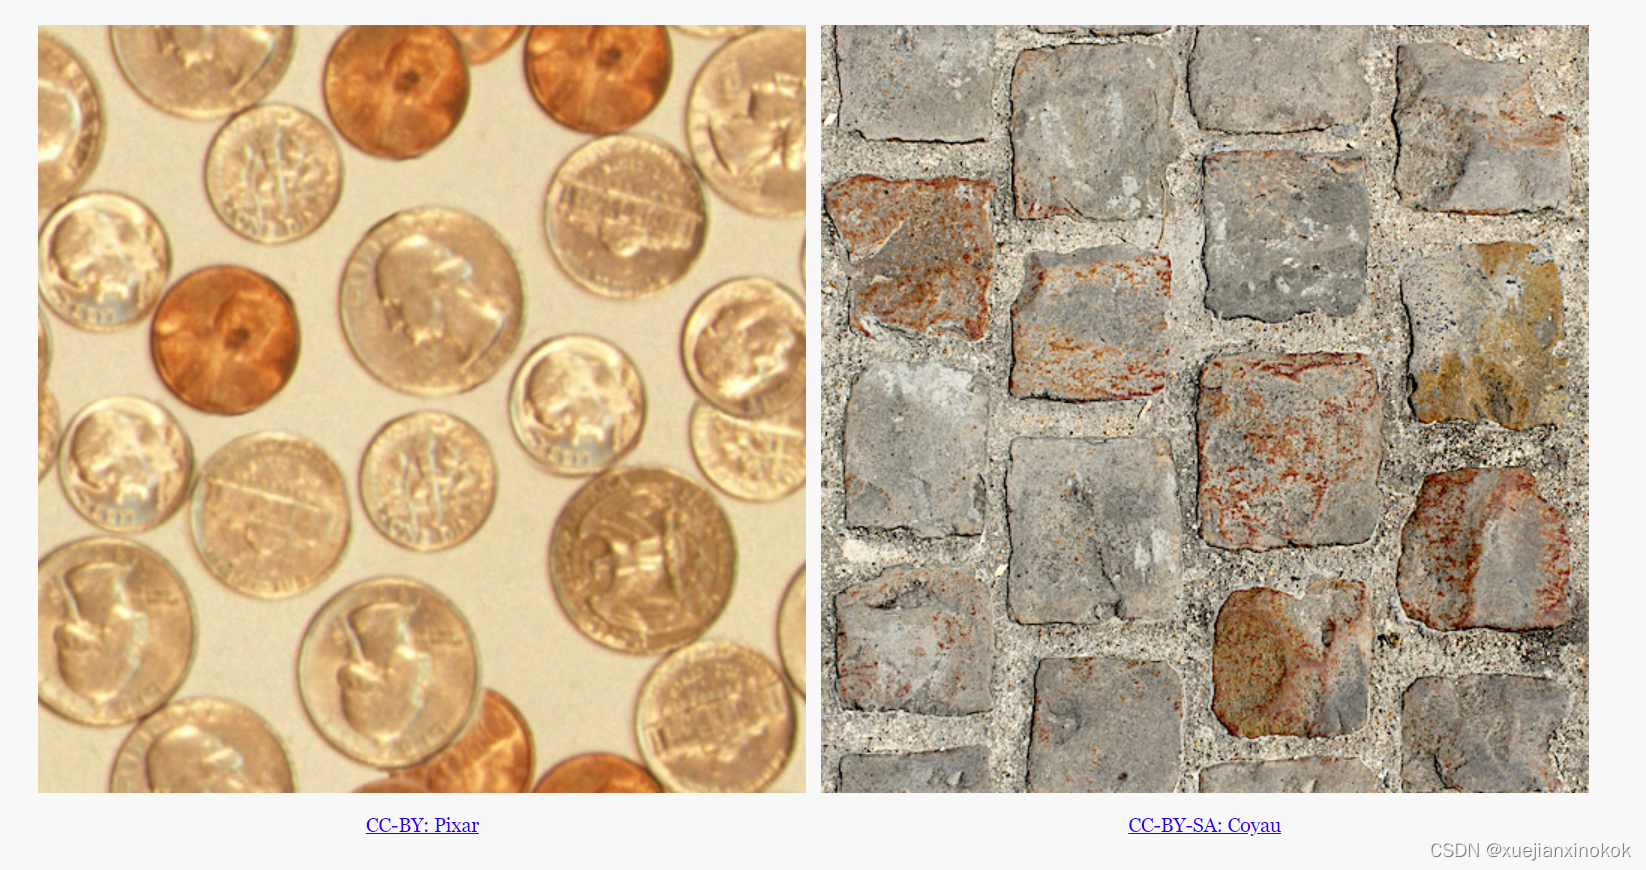
效果图如下:
2. Import Canvas
copyExternalImageToTexture 还有其他来源。另一个是 HTMLCanvasElement 。可以使用它在 2d 画布中绘制东西,然后在 WebGPU 中的纹理中获得结果。当然,您可以使用 WebGPU 绘制纹理,并将您刚刚绘制的纹理也用于您渲染的其他内容。事实上,我们只是这样做了,渲染到一个 mip 级别,然后使用该 mip 级别的纹理附件来渲染到下一个 mip 级别。
但是,有时使用 2d 画布可以使某些事情变得容易。 2d 画布具有相对高级的 API。
所以,首先让我们制作某种canvas 动画。
const size = 256;
const half = size / 2;

const ctx = document.createElement('canvas').getContext('2d');
ctx.canvas.width = size;
ctx.canvas.height = size;

const hsl = (h, s, l) => `hsl(${h * 360 | 0}, ${s * 100}%, ${l * 100 | 0}%)`;

function update2DCanvas(time) {
  time *= 0.0001;
  ctx.clearRect(0, 0, size, size);
  ctx.save();
  ctx.translate(half, half);
  const num = 20;
  for (let i = 0; i < num; ++i) {
    ctx.fillStyle = hsl(i / num * 0.2 + time * 0.1, 1, i % 2 * 0.5);
    ctx.fillRect(-half, -half, size, size);
    ctx.rotate(time * 0.5);
    ctx.scale(0.85, 0.85);
    ctx.translate(size / 16, 0);
  }
  ctx.restore();
}

function render(time) {
  update2DCanvas(time);
  requestAnimationFrame(render);
}
requestAnimationFrame(render);
要将该画布导入 WebGPU,只需对之前的示例进行一些更改。
需要创建一个大小合适的纹理。最简单的方法就是使用上面写的相同代码
  const texture = createTextureFromSource(device, ctx.canvas, {mips: true});

  const textures = await Promise.all([
    //await createTextureFromImage(device,
    //    'resources/images/f-texture.png', {mips: true, flipY: false}),
    //await createTextureFromImage(device,
    //    'resources/images/coins.jpg', {mips: true}),
    //await createTextureFromImage(device,
    //    'resources/images/Granite_paving_tileable_512x512.jpeg', {mips: true}),
    texture,
  ]);
然后我们需要切换到 requestAnimationFrame 循环,更新2D画布,然后上传到WebGPU
  // function render() {
  function render(time) {
    update2DCanvas(time); //here
    copySourceToTexture(device, texture, ctx.canvas); //here

     ...


    requestAnimationFrame(render);
  }
  requestAnimationFrame(render);

  const observer = new ResizeObserver(entries => {
    for (const entry of entries) {
      const canvas = entry.target;
      const width = entry.contentBoxSize[0].inlineSize;
      const height = entry.contentBoxSize[0].blockSize;
      canvas.width = Math.min(width, device.limits.maxTextureDimension2D);
      canvas.height = Math.min(height, device.limits.maxTextureDimension2D);
     // render();
    }
  });
  observer.observe(canvas);

  canvas.addEventListener('click', () => {
    texNdx = (texNdx + 1) % textures.length;
   // render();
  });
With that we’re able to upload a canvas AND generate mips levels for it
这样我们就可以上传画布并为其生成 mips 级别

3. Importing Video 导入视频
以这种方式导入视频也没什么不同。可以创建一个 元素并将其传递给在上一个示例中将画布传递给的相同函数,它应该只需要稍作调整即可
11
ImageBitmap 和 HTMLCanvasElement 的宽度和高度与 width 和 height 属性相同,但 HTMLVideoElement 的宽度和高度在 videoWidth 和 videoHeight 上。所以,让我们更新代码来处理这个差异
  function getSourceSize(source) {   //here
    return [
      source.videoWidth || source.width,
      source.videoHeight || source.height,
    ];
  }

  function copySourceToTexture(device, texture, source, {flipY} = {}) {
    device.queue.copyExternalImageToTexture(
      { source, flipY, },
      { texture },
     // { width: source.width, height: source.height },
      getSourceSize(source), //here
    );

    if (texture.mipLevelCount > 1) {
      generateMips(device, texture);
    }
  }

  function createTextureFromSource(device, source, options = {}) {
    const size = getSourceSize(source); //here
    const texture = device.createTexture({
      format: 'rgba8unorm',
      //mipLevelCount: options.mips ? numMipLevels(source.width, source.height) : 1,
      //size: [source.width, source.height],
      mipLevelCount: options.mips ? numMipLevels(...size) : 1,
      size, //here
      usage: GPUTextureUsage.TEXTURE_BINDING |
             GPUTextureUsage.COPY_DST |
             GPUTextureUsage.RENDER_ATTACHMENT,
    });
    copySourceToTexture(device, texture, source, options);
    return texture;
  }
那么,让我们设置一个视频元素
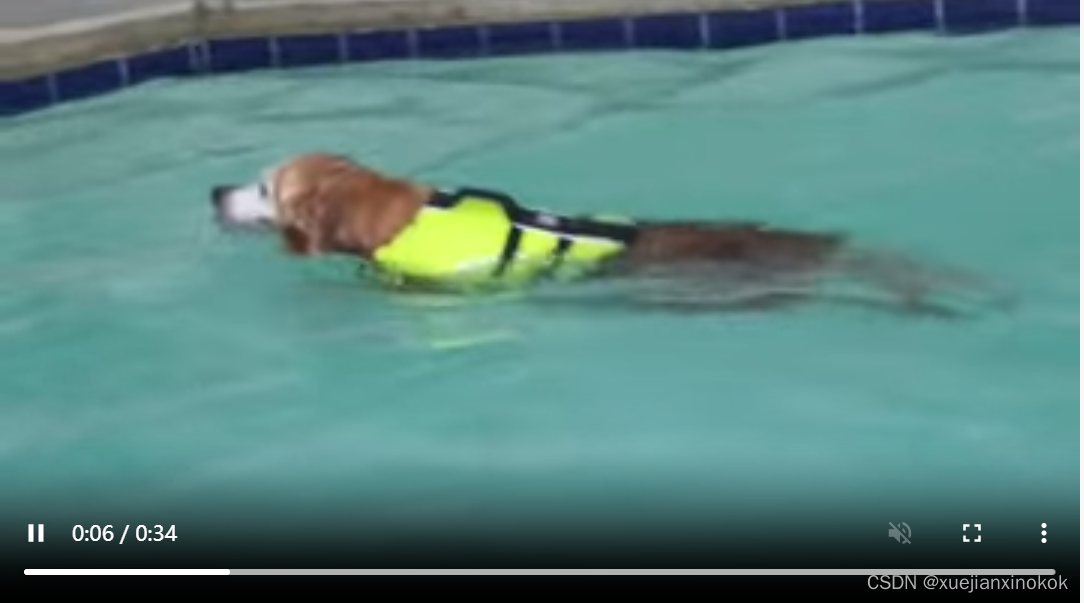
  const video = document.createElement('video');
  video.muted = true;
  video.loop = true;
  video.preload = 'auto';
  video.src = 'resources/videos/Golden_retriever_swimming_the_doggy_paddle-360-no-audio.webm';

  const texture = createTextureFromSource(device, video, {mips: true});
并在渲染时更新它
  //function render(time) {
  //  update2DCanvas(time);
  //  copySourceToTexture(device, texture, ctx.canvas);
  function render() {
    copySourceToTexture(device, texture, video);
视频的一个复杂问题是我们需要等待它们开始播放,然后再将它们传递给 WebGPU。在现代浏览器中,我们可以通过调用 video.requestVideoFrameCallback 来做到这一点。每次有新帧可用时它都会调用我们,因此可以使用它来确定何时至少有一个帧可用。
对于备用方案,我们可以等待时间提前并祈祷🙏因为可悲的是,旧的浏览器很难知道什么时候可以安全地使用视频😀
  function startPlayingAndWaitForVideo(video) {
    return new Promise((resolve, reject) => {
      video.addEventListener('error', reject);
      if ('requestVideoFrameCallback' in video) {
        video.requestVideoFrameCallback(resolve);
      } else {
        const timeWatcher = () => {
          if (video.currentTime > 0) {
            resolve();
          } else {
            requestAnimationFrame(timeWatcher);
          }
        };
        timeWatcher();
      }
      video.play().catch(reject);
    });
  }

  const video = document.createElement('video');
  video.muted = true;
  video.loop = true;
  video.preload = 'auto';
  video.src = 'resources/videos/Golden_retriever_swimming_the_doggy_paddle-360-no-audio.webm';
  await startPlayingAndWaitForVideo(video);

  const texture = createTextureFromSource(device, video, {mips: true});
另一个复杂的问题是我们需要等待用户与页面交互,然后才能开始播放视频 [1] 。让我们添加一些带有播放按钮的 HTML。
  <body>
    <canvas></canvas>
    <div id="start">
      <div>▶️</div>
    </div>
  </body>
还有一些 CSS 让它居中
#start {
  position: fixed;
  left: 0;
  top: 0;
  width: 100%;
  height: 100%;
  display: flex;
  justify-content: center;
  align-items: center;
}
#start>div {
  font-size: 200px;
  cursor: pointer;
}
然后写一个函数等待它被点击并隐藏它。
  function waitForClick() {
    return new Promise(resolve => {
      window.addEventListener(
        'click',
        () => {
          document.querySelector('#start').style.display = 'none';
          resolve();
        },
        { once: true });
    });
  }

  const video = document.createElement('video');
  video.muted = true;
  video.loop = true;
  video.preload = 'auto';
  video.src = 'resources/videos/Golden_retriever_swimming_the_doggy_paddle-360-no-audio.webm';
  await waitForClick();
  await startPlayingAndWaitForVideo(video);

  const texture = createTextureFromSource(device, video, {mips: true});
这样我们就应该得到有纹理的视频
可以进行的一项优化。只能在视频发生变化时更新纹理。
例如
  const video = document.createElement('video');
  video.muted = true;
  video.loop = true;
  video.preload = 'auto';
  video.src = 'resources/videos/Golden_retriever_swimming_the_doggy_paddle-360-no-audio.webm';
  await waitForClick();
  await startPlayingAndWaitForVideo(video);

  let alwaysUpdateVideo = !('requestVideoFrameCallback' in video);
  let haveNewVideoFrame = false;
  if (!alwaysUpdateVideo) {
    function recordHaveNewFrame() {
      haveNewVideoFrame = true;
      video.requestVideoFrameCallback(recordHaveNewFrame);
    }
    video.requestVideoFrameCallback(recordHaveNewFrame);
  }

  ...

  function render() {
    if (alwaysUpdateVideo || haveNewVideoFrame) {
      haveNewVideoFrame = false;
      copySourceToTexture(device, texture, video);
    }

    ...
通过此更改,我们只会为每个新帧更新视频。因此,例如,在显示速率为每秒 120 帧的设备上,我们将以每秒 120 帧的速度绘制,这样动画、相机移动等就会很流畅。但是,纹理只会以其自己的帧速率(例如 30fps)更新。
但! WebGPU 对高效使用视频有特别的支持
我们将在另一篇文章中介绍。上面的方式,使用 device.query.copyExternalImageToTexture 其实就是在复制。制作副本需要时间。例如,4k 视频的分辨率通常为 3840 × 2160,对于 rgba8unorm 来说,每帧需要复制 31meg 的数据。外部纹理让您可以直接使用视频数据(无副本),但需要不同的方法并有一些限制。
4. 注释1
有多种方法可以让视频(通常没有音频)自动播放,而无需等待用户与页面交互。它们似乎会随着时间而改变,因此我们不会在这里讨论解决方案。