文章目录
- 1. 安装
- 2. 完成一个组件开发
- 3. 添加路由
- 3. 引入element-react
- 1. 运行发现报错./node_modules/element-react/dist/npm/es5/src/locale/format.js
- 2. 接着又报错The <Router /> component appears to be a function component that returns a class instance. Change Router to a class that extends React.Component instead. If you can't use a class try assigning the prototype on the function as a workaround. `Router.prototy
- 3. 再次启动发现之前设置的router失效了,没办法只能重新设置
- 4. 报错Warning: Legacy context API has been detected within a strict-mode tree. The old API will be supported in all 16.x releases, but applications using it should migrate to the new version. Please update the following components: Menu, MenuItem, MenuItemGro
- 5. 报错src/reportWebVitals.js Line 0: Parsing error: Cannot find module 'babel-plugin-transform-runtime'
- 6. 使用From组件时候提示“refs”已弃用。
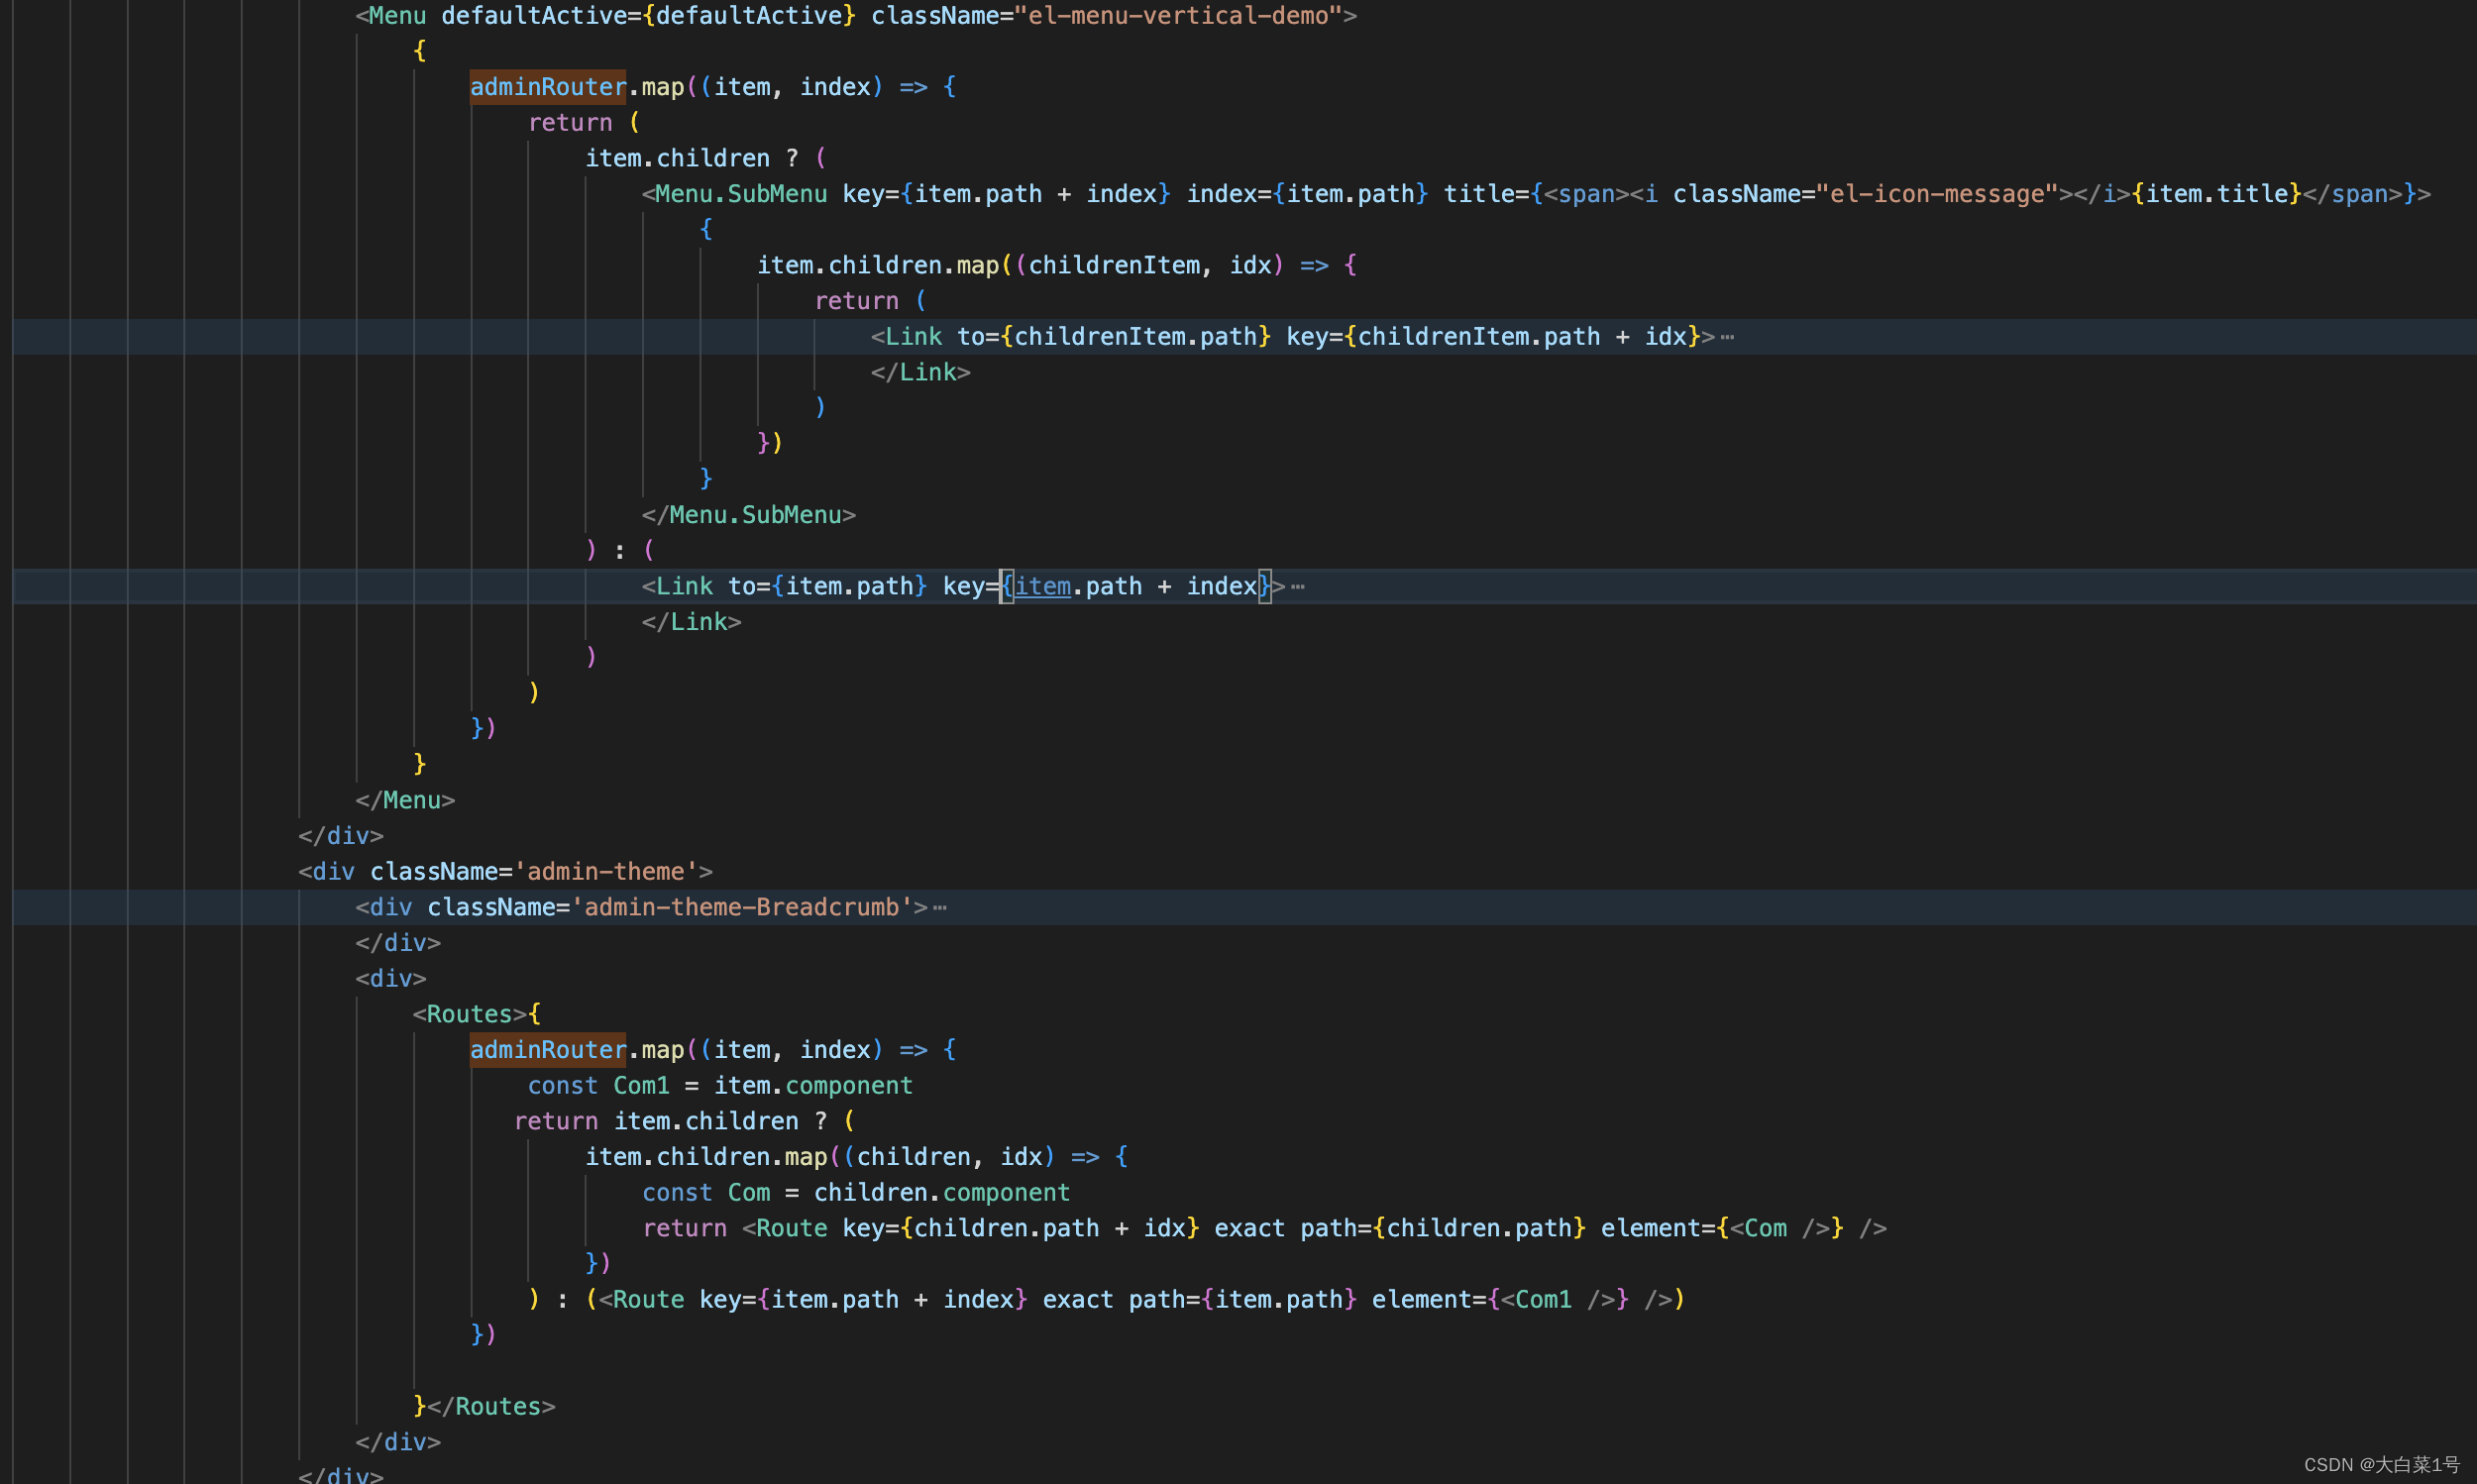
- 1. NavMenu 导航菜单结合react-router-dom使用方式
- 4. react基础知识
- 1. 生命周期: 三阶段分为 挂载,更新,卸载
- 5. 添加axios并做跨域代理设置
- 1. 添加axios
- 2. 使用http-proxy-middleware实现代理
- 待更新。。。。
1. 安装
准备:要求:Node >= 8.10 并且 npm >= 5.6
1.全局安装
npm install -g create-react-app
2. 创建项目
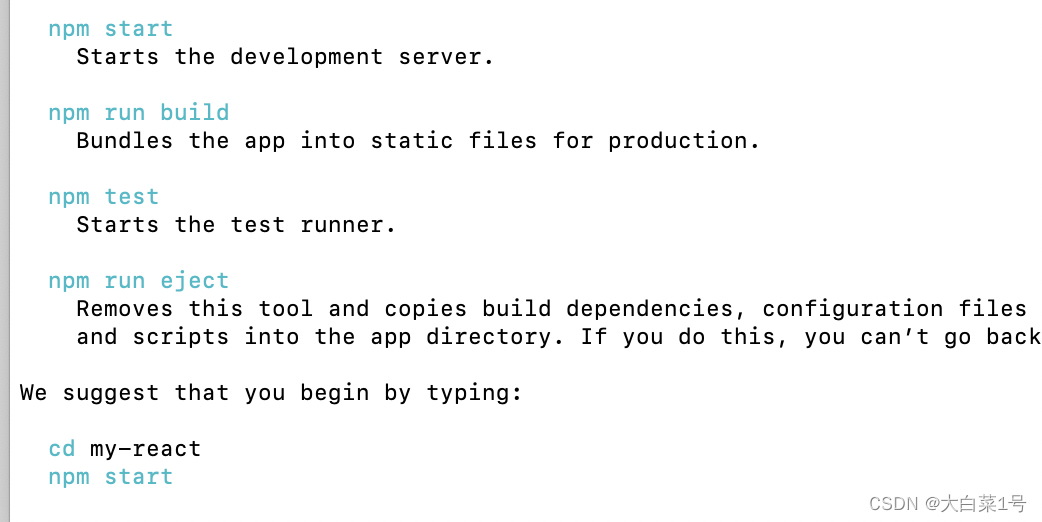
npx create-react-app my-react
成功后
2. 完成一个组件开发
-
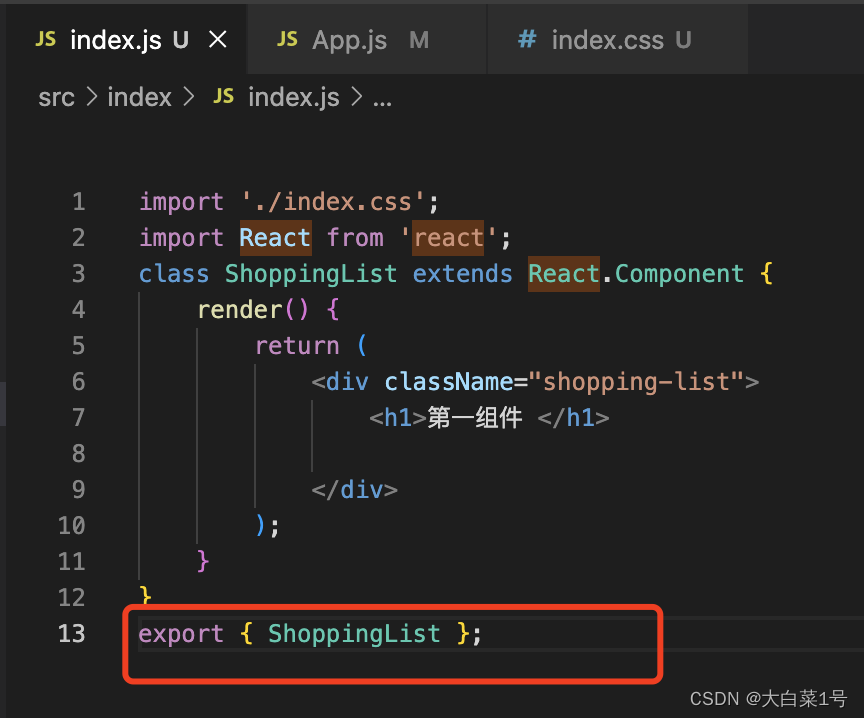
新建组件ShoppingList
-
引入组件
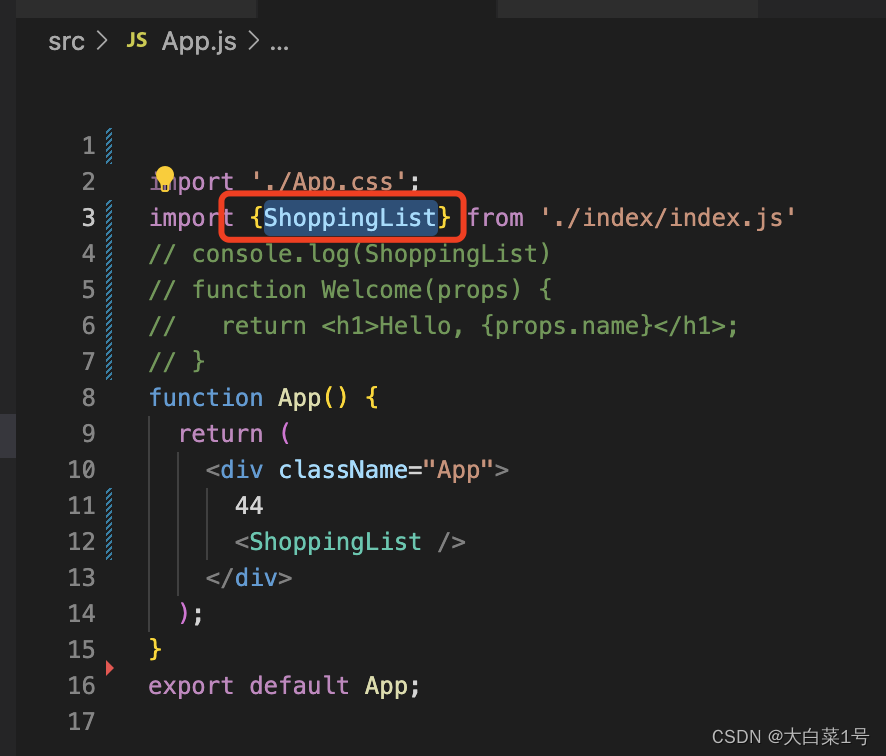
注意:组件导出和引入方式一一对应
1. export { ShoppingList };导出方式,对应import {ShoppingList} from './index/index.js'
2. export default ShoppingList;导出方式,对应import ShoppingList from './index/index.js'
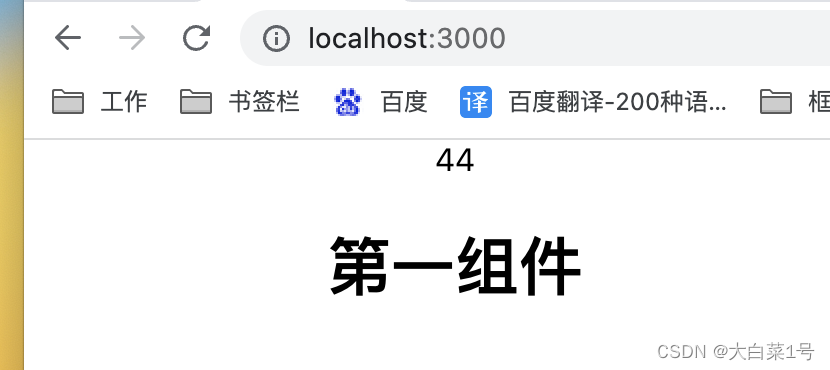
- 运行后
3. 添加路由
- 安装
npm install react-router-dom
报错: 1.
Attempted import error: ‘Switch’ is not exported from ‘react-router-dom’ (imported as ‘Switch’).
ERROR in ./src/App.js 14:37-43
export ‘Switch’ (imported as ‘Switch’) was not found in ‘react-router-dom’ (possible exports:
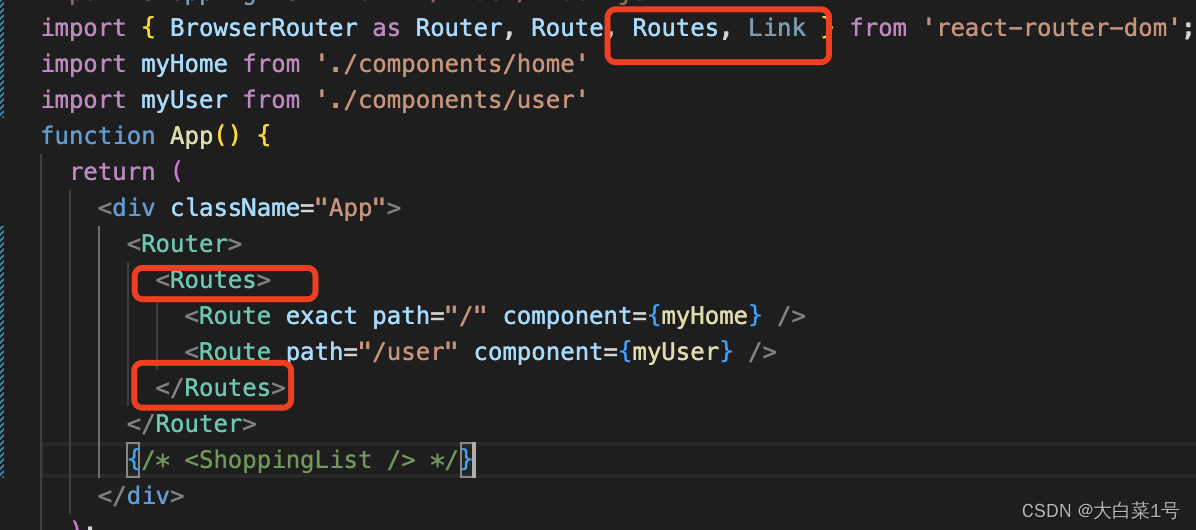
因为react-router-dom 6.0以后 Switch 不能用 我直接安装的最新版本是"^6.11.2"
改成:
3. 引入element-react
- 安装:
npm i element-react --save - 主题包:
npm install element-theme-default --save - 引入:
//element-react-ui
import ReactDOM from 'react-dom';
import 'element-theme-default';
1. 运行发现报错./node_modules/element-react/dist/npm/es5/src/locale/format.js
那就安装依赖npm install react-hot-loader@next --save再次运行就好了
2. 接着又报错The component appears to be a function component that returns a class instance. Change Router to a class that extends React.Component instead. If you can’t use a class try assigning the prototype on the function as a workaround. `Router.prototy
我是先设置好router才安装的element react要重新安装下npm i react-hot-loader -save就好了
3. 再次启动发现之前设置的router失效了,没办法只能重新设置
- app.js中使用
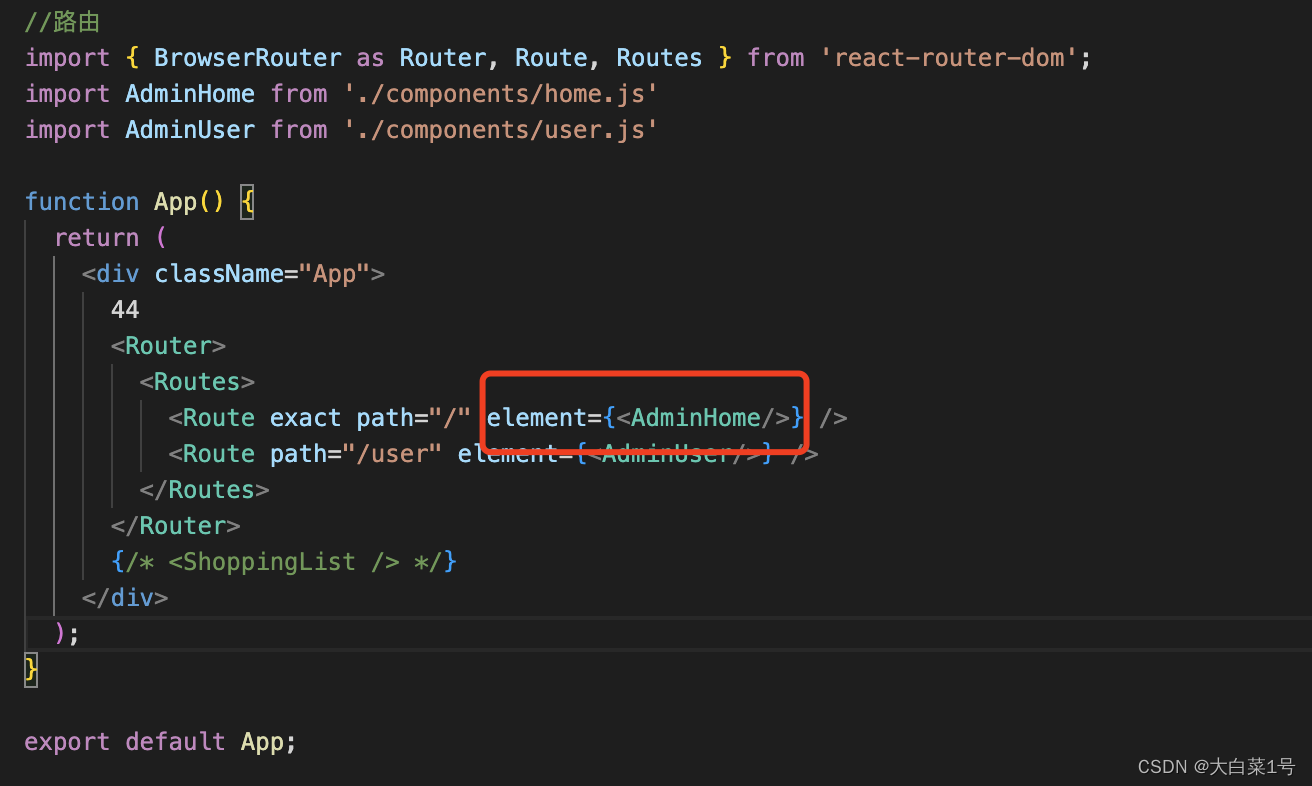
- 两个页面文件内容
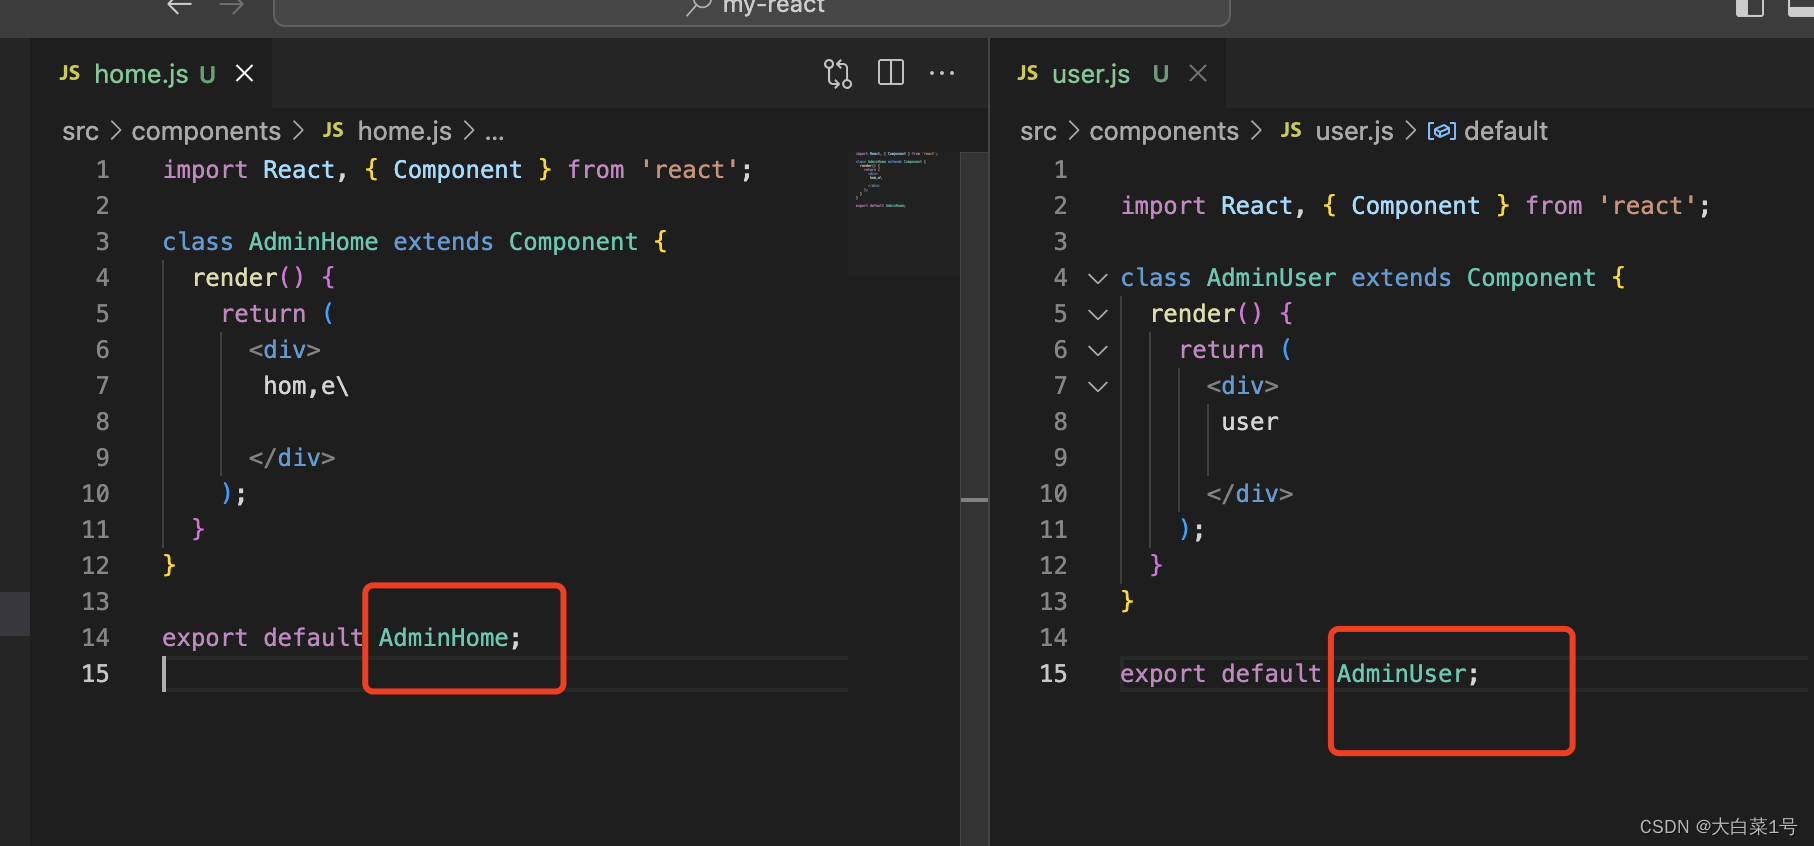
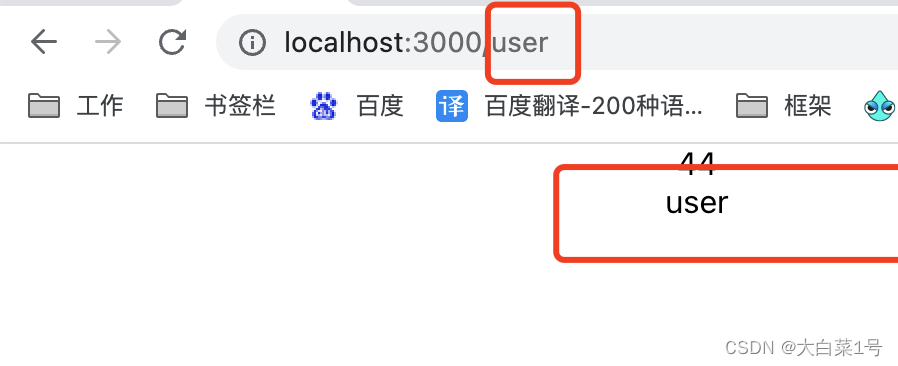
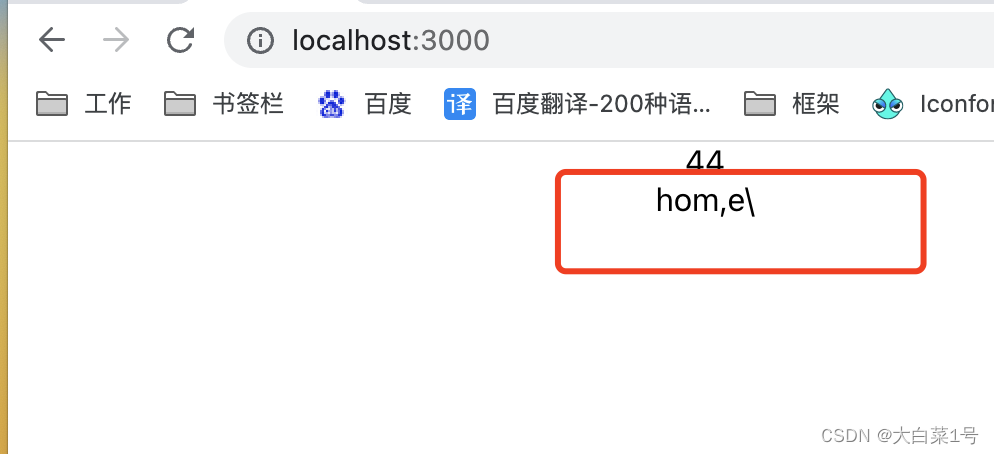
- 运行结果
4. 报错Warning: Legacy context API has been detected within a strict-mode tree. The old API will be supported in all 16.x releases, but applications using it should migrate to the new version. Please update the following components: Menu, MenuItem, MenuItemGro
直接关闭<React.StrictMode></React.StrictMode>标签 ,不要提示
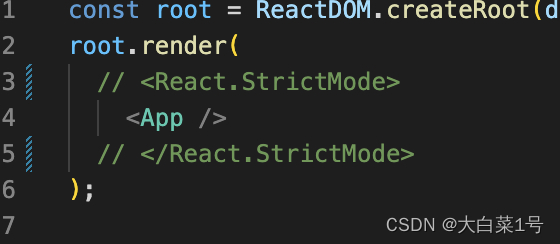
5. 报错src/reportWebVitals.js Line 0: Parsing error: Cannot find module ‘babel-plugin-transform-runtime’
报着缺什么补什么npm install babel-plugin-component -D
之后清理缓存npm cache clean --force
重新npm install
运行就好了
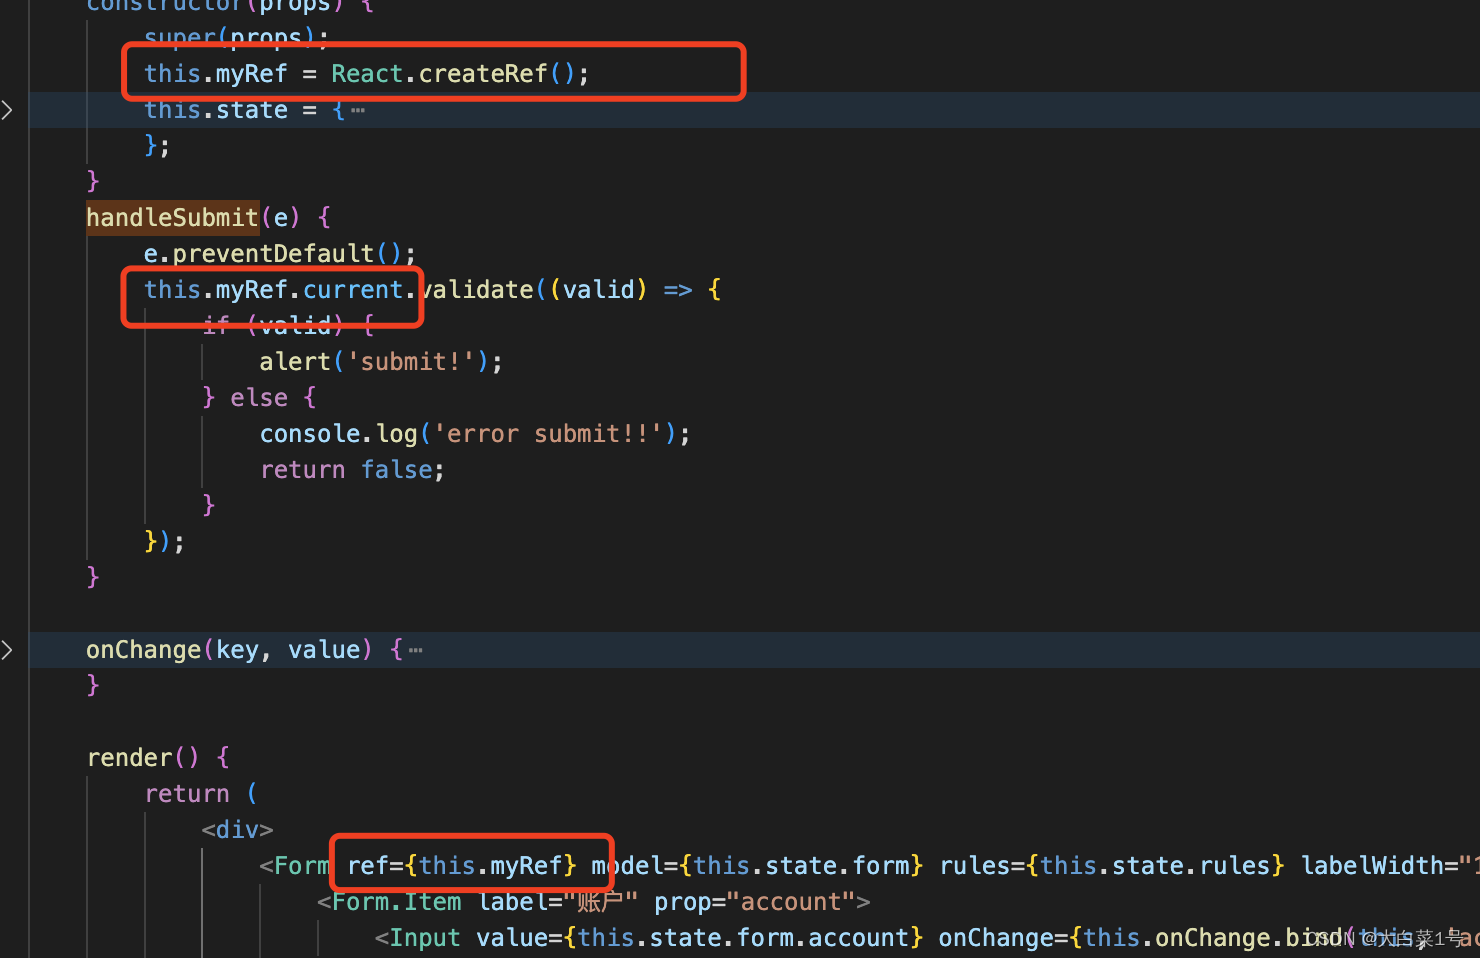
6. 使用From组件时候提示“refs”已弃用。

更换成React.createRef()
1. NavMenu 导航菜单结合react-router-dom使用方式
自己捯饬好久,刚开始分开两个页面写的关联不到一起,引入link就报错,最后写在一个页面就好的,具体原因还没研究
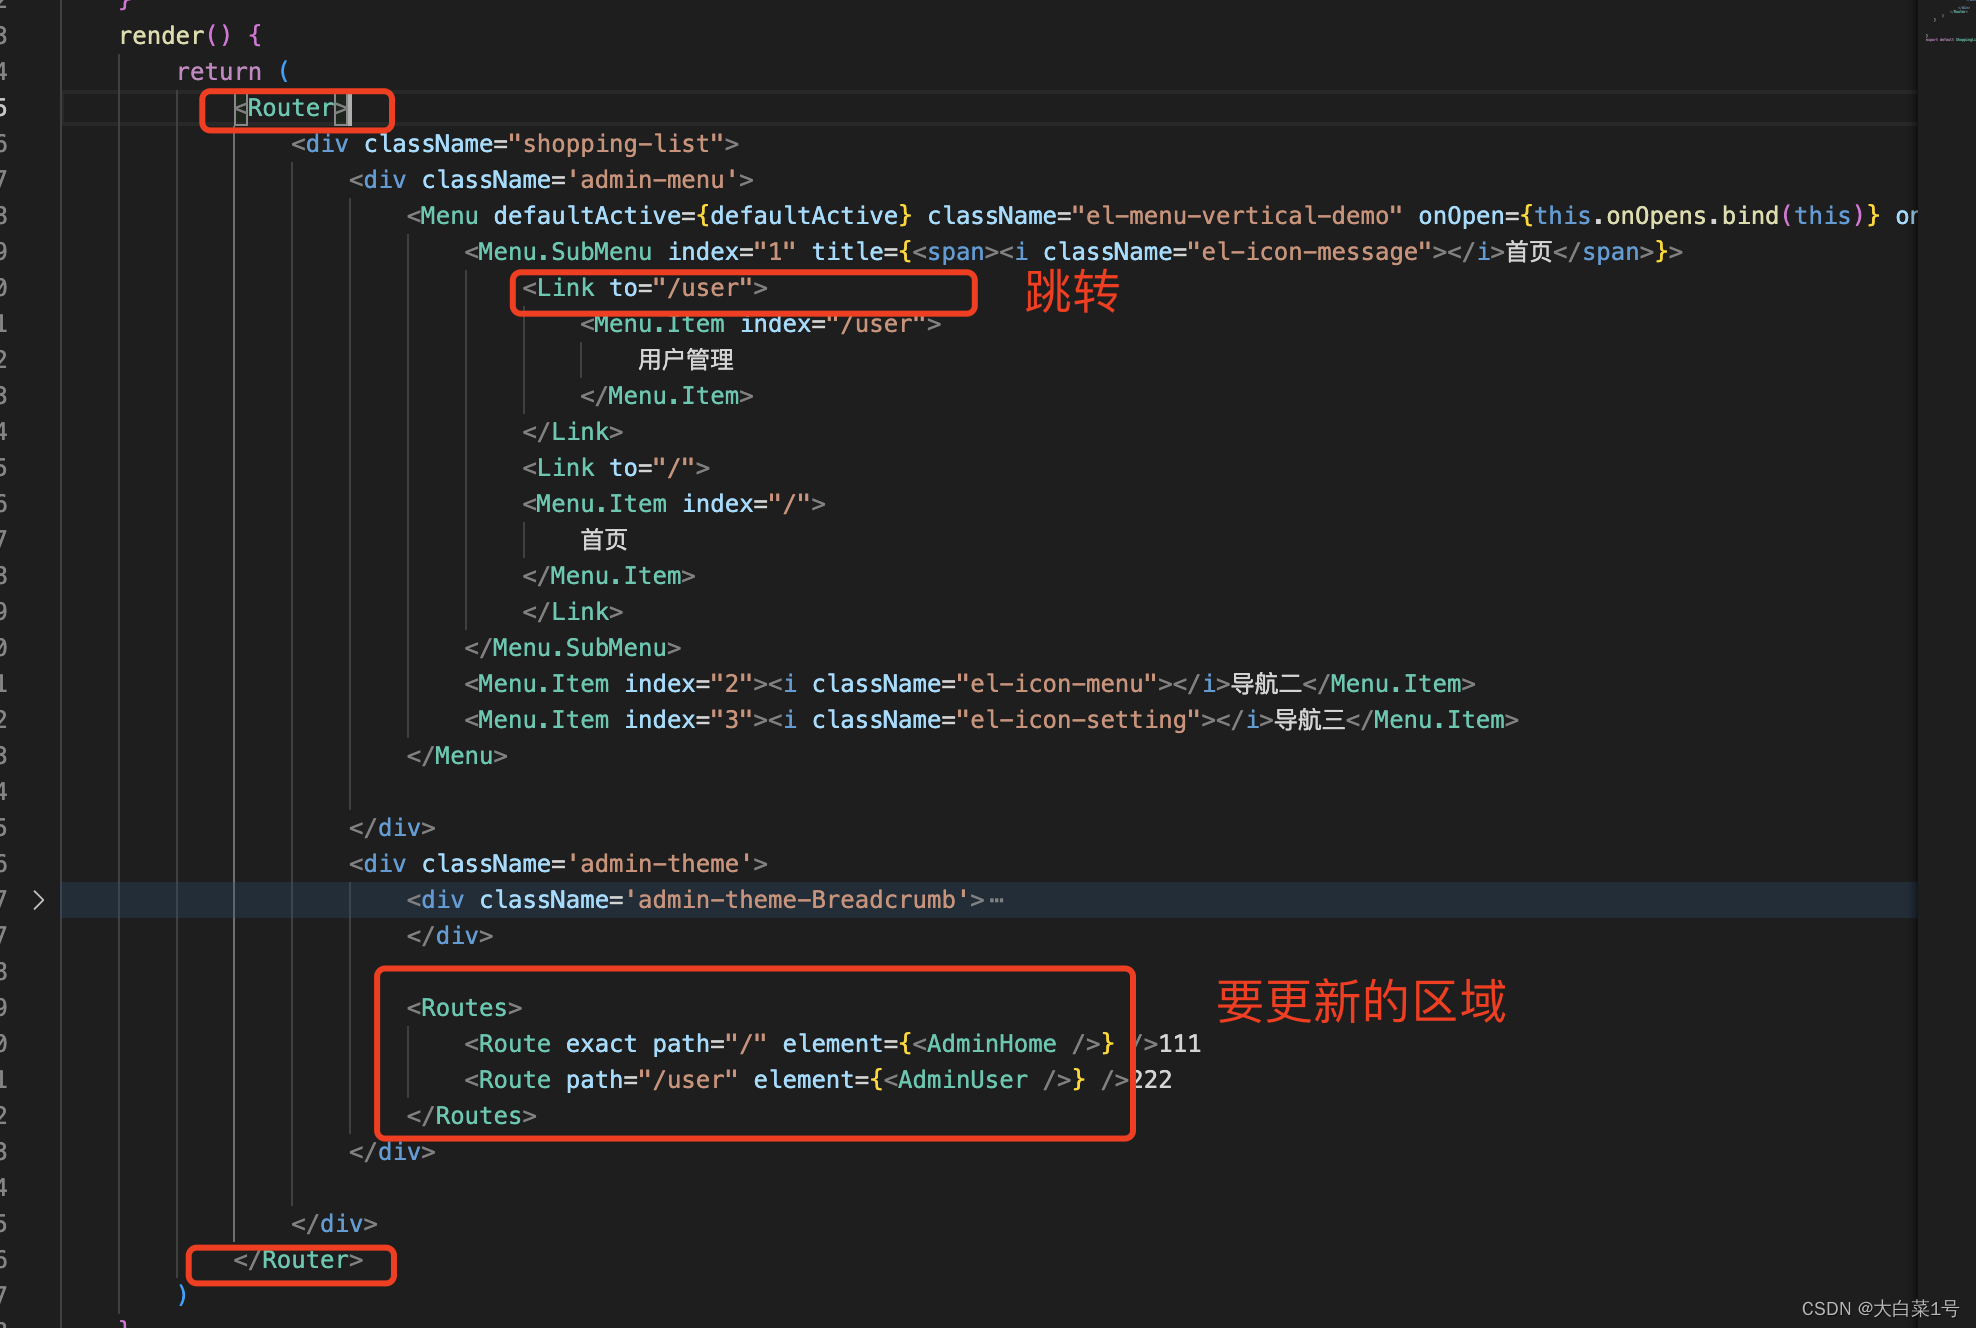
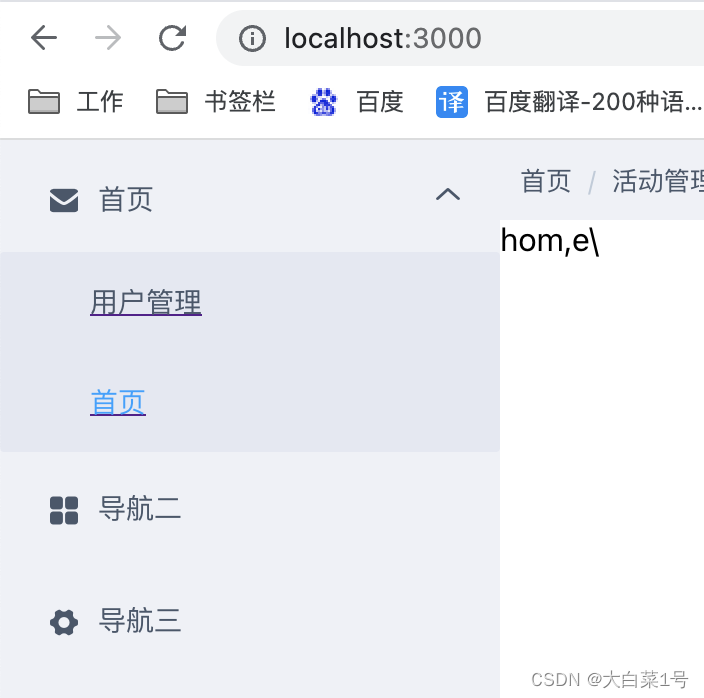
以上还没有完全动态更新,router标签内容还是单独写的。下边是根据router.js文件使用的动态更新方式
4. react基础知识
1. 生命周期: 三阶段分为 挂载,更新,卸载
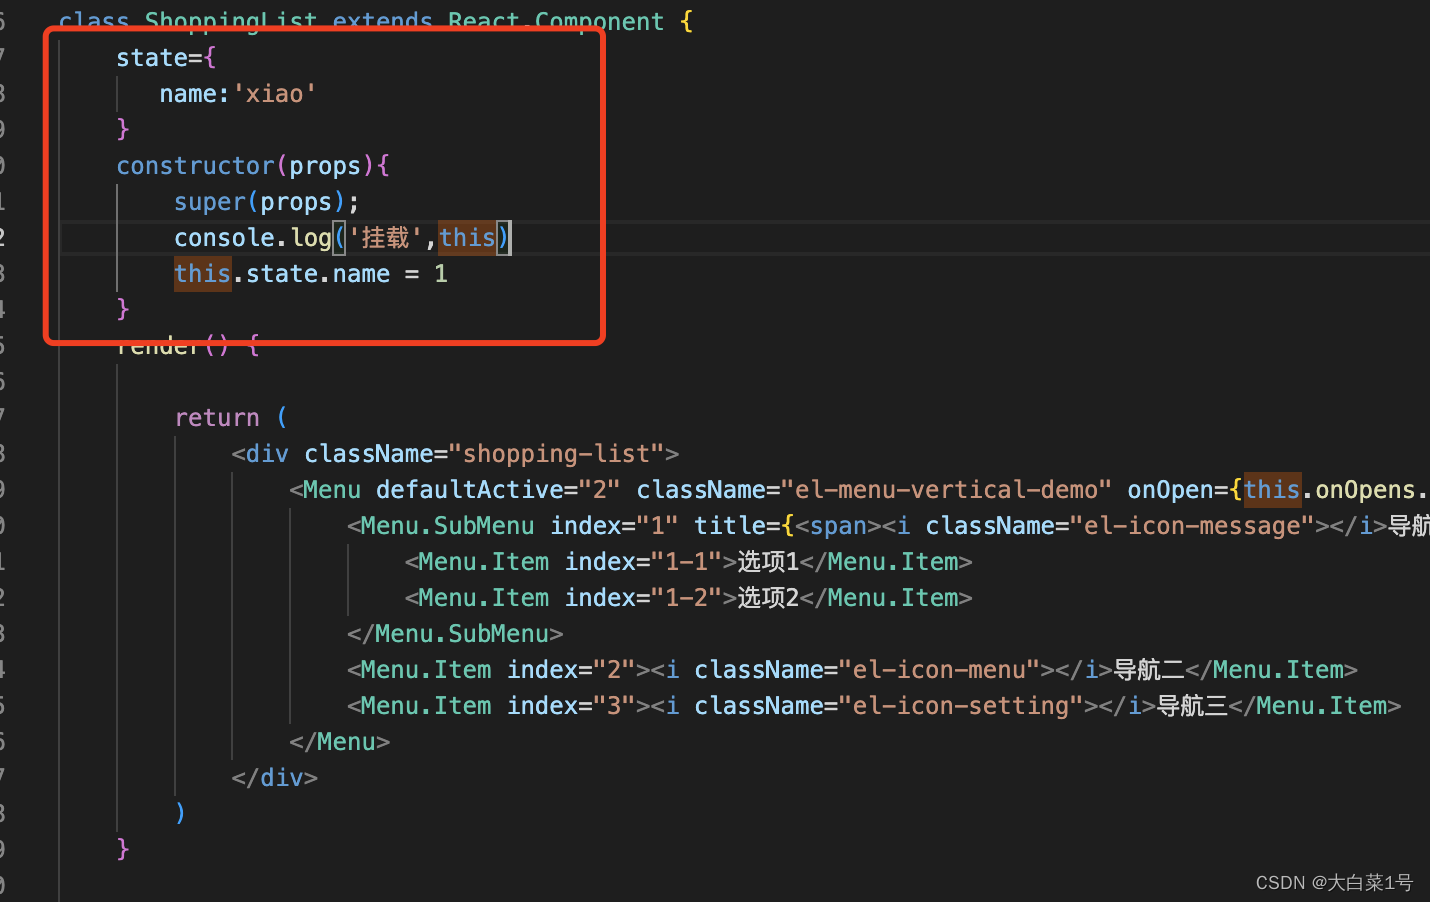
- 挂载:
constructor():组件被创建时调用,用于初始化组件的状态和绑定方法。
static getDerivedStateFromProps(props, state):在组件挂载之前和更新时调用,用于根据 props 计算 state 的值。
render():在组件挂载时调用,用于渲染组件的 UI。
componentDidMount():在组件挂载后调用,用于执行一些副作用操作,例如网络请求或订阅事件。
使用方法:
声明变量的两种方法:1. 直接var let const 变量名字=值。 2. 在constructor方法里边使用this.state.变量名字=值(这种方法获取也要用this.state。。。)
- 更新
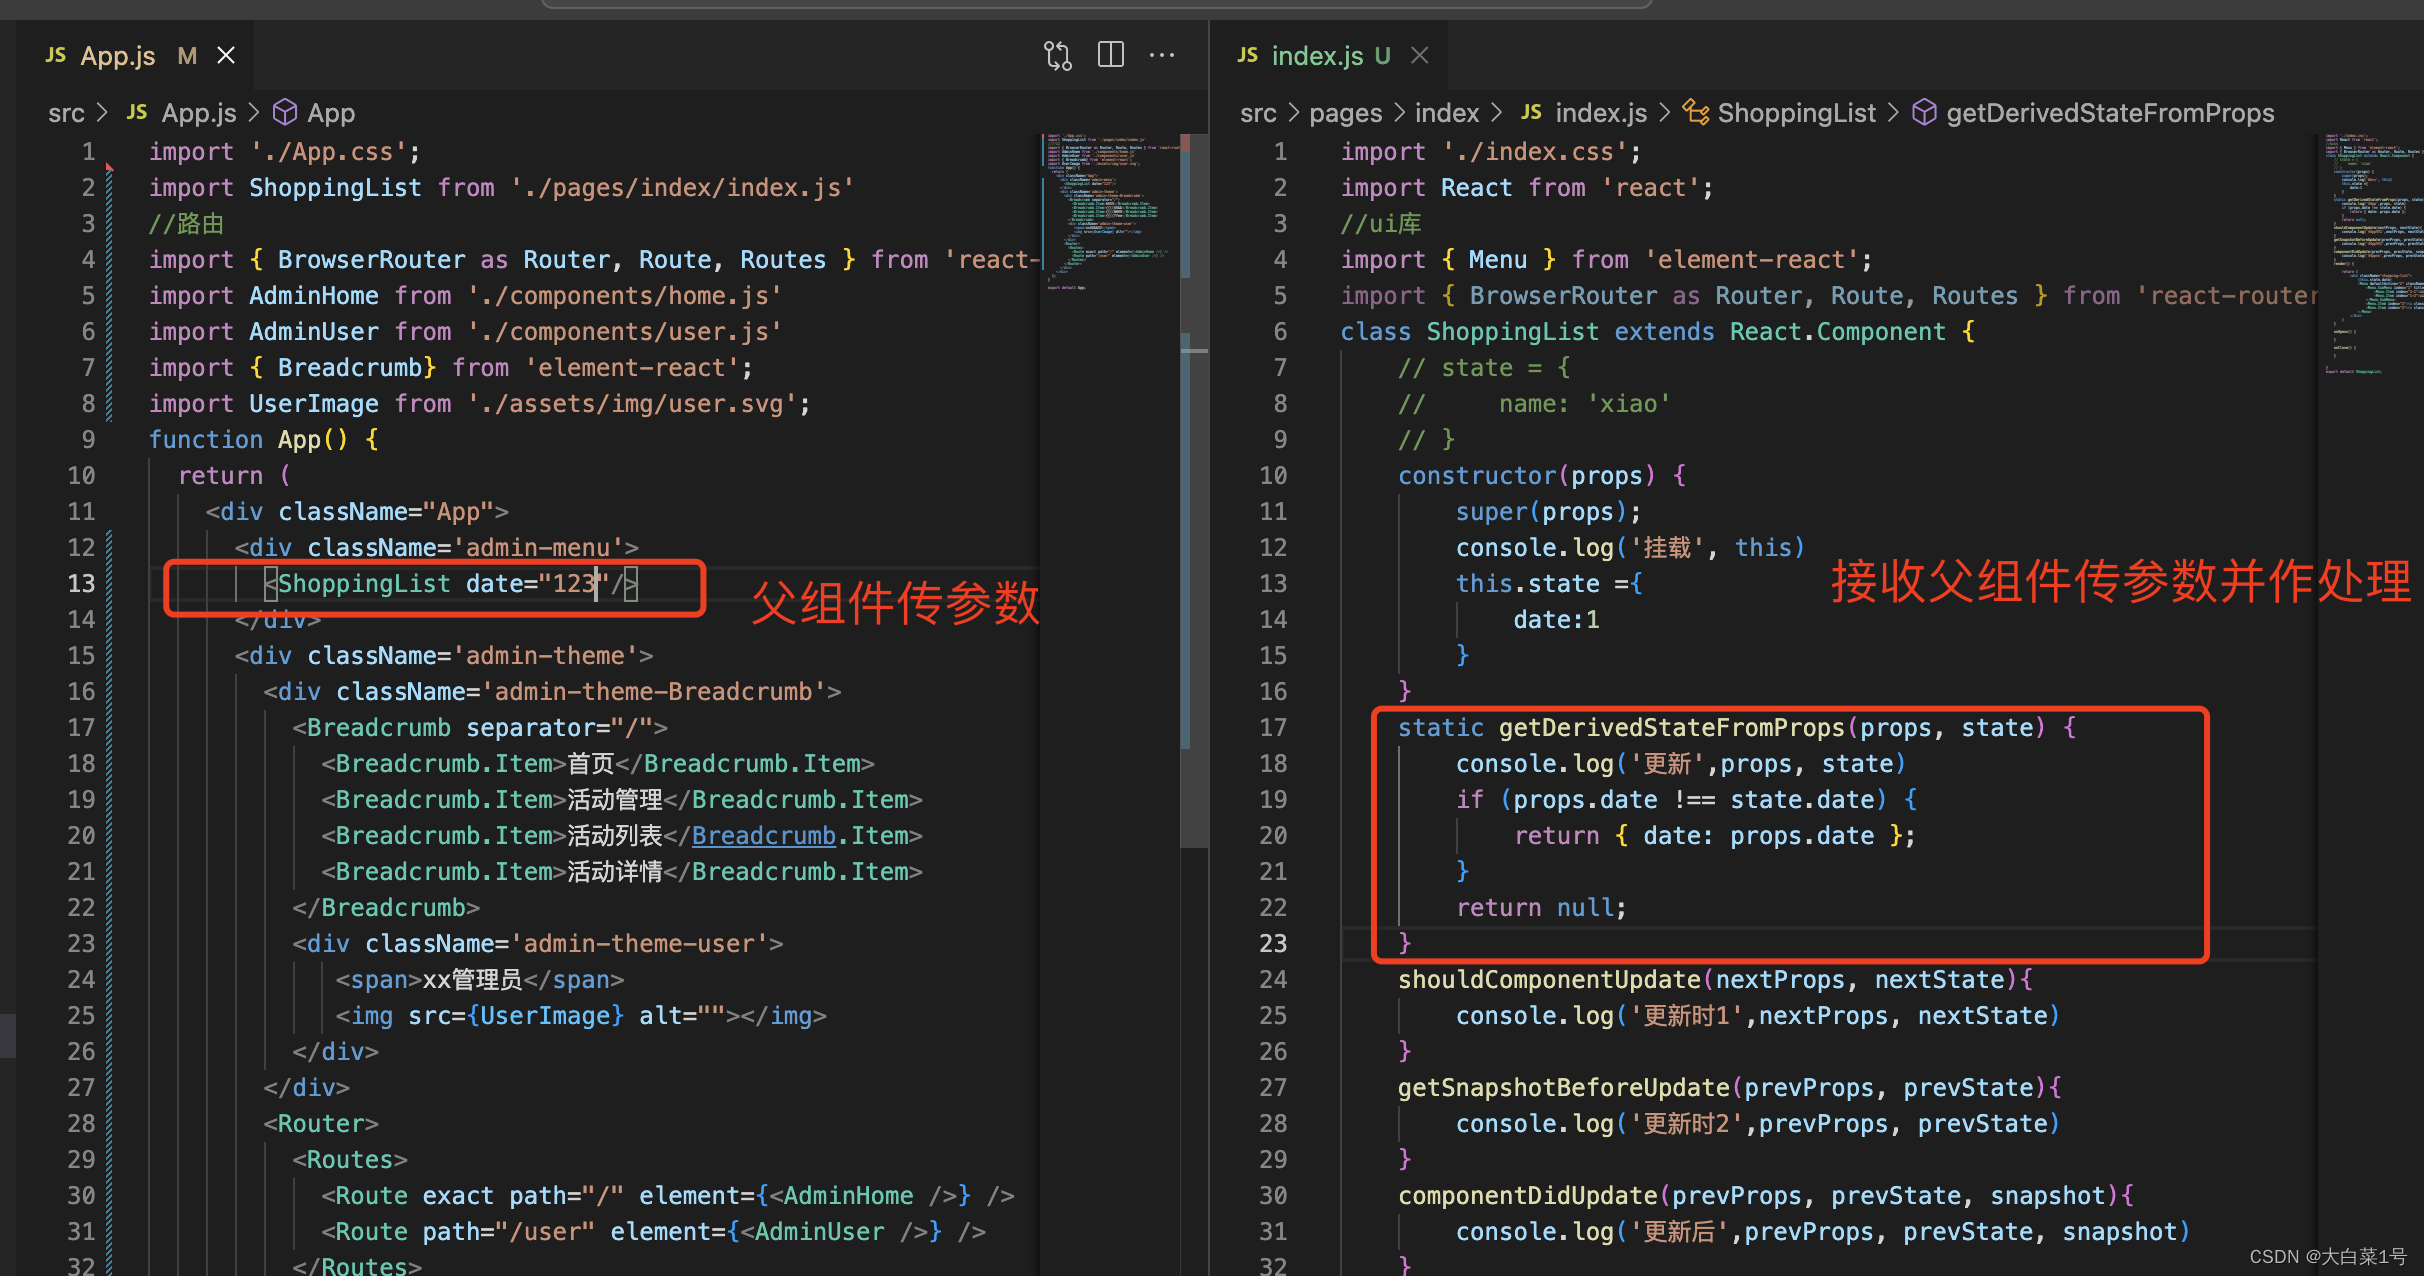
static getDerivedStateFromProps(props, state):在组件挂载之前和更新时调用,用于根据 props 计算 state 的值。
shouldComponentUpdate(nextProps, nextState):在组件更新时调用,用于判断是否需要重新渲染组件。
render():在组件更新时调用,用于渲染组件的 UI。
getSnapshotBeforeUpdate(prevProps, prevState):在组件更新时调用,用于获取更新前的 DOM 状态。
componentDidUpdate(prevProps, prevState, snapshot):在组件更新后调用,用于执行一些副作用操作,例如更新 DOM 或订阅事件。
使用方法:在组件挂载之前和更新时调用,用于根据 props 计算 state 的值。
- 卸载
componentWillUnmount():在组件卸载前调用,用于清理组件的副作用操作,例如取消网络请求或取消订阅事件。
除了上述生命周期方法外,还有一些其他的方法,例如 componentDidCatch() 用于处理组件中的错误,getDerivedStateFromError() 用于根据错误计算组件的状态等。
5. 添加axios并做跨域代理设置
1. 添加axios
- 下载安装
npm install axios
- 引入使用
import axios from 'axios';
axios.get('/api/data')
  .then(response => {
    console.log(response.data);
  })
  .catch(error => {
    console.log(error);
  });
2. 使用http-proxy-middleware实现代理
- 下载安装
npm install http-proxy-middleware --save-dev
- 项目的根目录下创建一个 setupProxy.js 文件
const { createProxyMiddleware } = require('http-proxy-middleware');

module.exports = function(app) {
  app.use(
   "/api",
    createProxyMiddleware( {
      "target": '地址',
      "secure": false,
      "changeOrigin": true,
      "pathRewrite": {
        '^/api': ''
      }
    })
  );
};
- react 使用createProxyMiddleware 多了/api
刚开始请求发送到后端就莫名多了一个api/,是因为代理配置没做好,根据以上配置好之后重新运行就好了
![[SpringBoot]关于Profile配置文件关于Slf4j日志](https://img-blog.csdnimg.cn/f6f5f00238334fe5867e95955c0947e8.png)


