一.简介
这篇文章来学习下security的认证方式其中的Form表单认证
二.Spring Security的认证方式
2.1什么是认证
认证:
就是用来判断系统中是否存在某用户,并判断该用户的身份是否合法的过程,解决的其实是用户登录的问题。认证的存在,是为了保护系统中的隐私数据与资源,只有合法的用户才可以访问系统中的资源。
2.2认证的方式
在Spring Security中,常见的认证方式可以分为HTTP层面和表单层面,常见的认证方式如下:
- HTTP基本认证;
- Form表单认证
- HTTP摘要认证;
这篇文章先讲HTTP基本认证
三. Form表单认证
3.1Form表单认证简介
对于表单认证,其实在SpringBoot开发环境中,只要添加了Spring Security的依赖包,就会自动实现表单认证。先看下源码,在WebSecurityConfigurerAdapter类的config(HttpSecurity http)方法中,可以看到如下实现,截图如下:

所以在SpringBoot环境中,默认支持的就是表单认证方式。
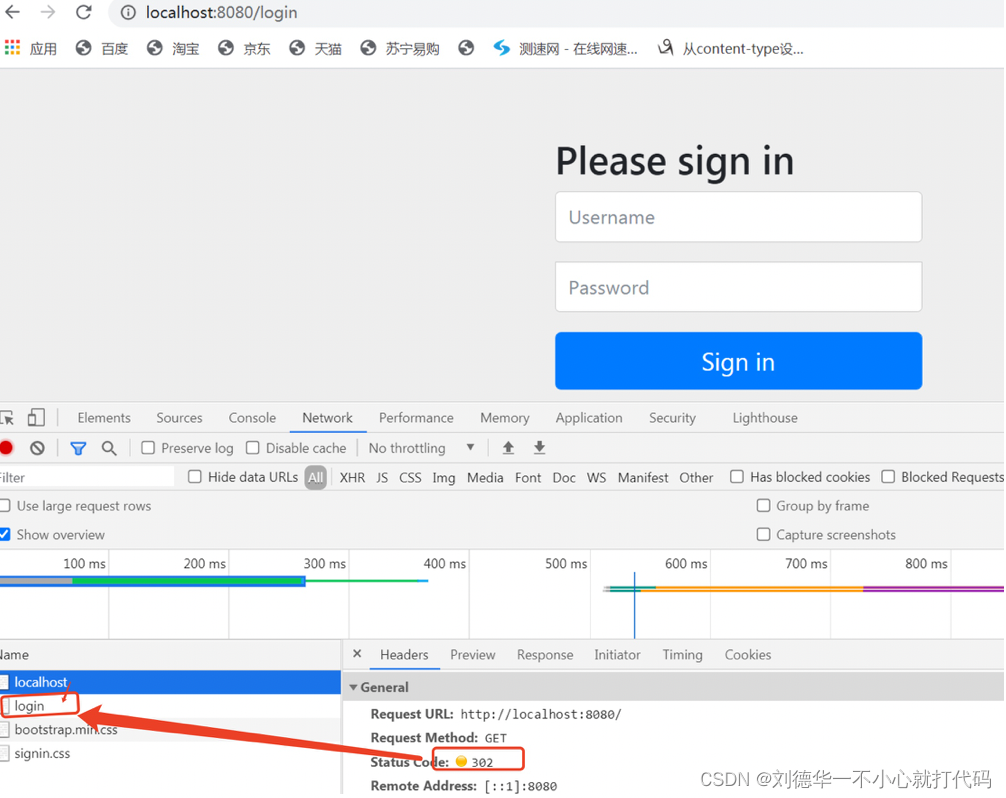
3.2表单认证效果
我们在访问某个Web接口之前,都会重定向到一个Security自带的login登录页面上,这个登录页面,就是表单认证的效果。截图如下:
3.3表单认证中的预置url和页面
为什么表单认证会有以上效果?这是因为在默认的formLogin配置中,自动配置了一些url和页面:
- /login(get): get请求时会跳转到这个页面,只要我们访问任意一个需要认证的请求时,都会跳转到这个登录界面。
- /login(post): post请求时会触发这个接口,在登录页面点击登录时,默认的登录页面表单中的action就是关联这个login接口。
- /login?error: 当用户名或密码错误时,会跳转到该页面。
- /: 登录成功后,默认跳转到该页面,如果配置了index.html页面,则 ”/“ 会重定向到index.html页面,当然这个页面要由我们自己实现。
- /logout: 注销页面。
- /login?logout: 注销成功后跳转到的页面。
由此可见,SpringSecurity默认有两个login,即登录页面和登录接口的地址都是 /login:
- GET http://localhost:8080/login
- POST http://localhost:8080/login
如果是 GET 请求,表示你想访问登录页面;如果是 POST 请求,表示你想提交登录数据。
四. 创建SpringSecurity项目
参考之前的文章,这边不做叙述。
五.代码实现
5.1创建SecurityConfig配置类
创建SecurityConfig类,继承自WebSecurityConfigurerAdapter父类,该类的作用如下:
- 验证所有请求;
- 允许用户使用表达登录进行身份验证;
- 允许用户使用Http基本认证。
代码如下:
import org.springframework.security.config.annotation.web.builders.HttpSecurity;
import org.springframework.security.config.annotation.web.configuration.EnableWebSecurity;
import org.springframework.security.config.annotation.web.configuration.WebSecurityConfigurerAdapter;

@EnableWebSecurity
public class SecurityConfig extends WebSecurityConfigurerAdapter {

    @Override
    protected void configure(HttpSecurity http) throws Exception {
        //super.configure(http);

        //配置表单认证方式
        http.authorizeRequests()
                .anyRequest()
                .authenticated()
                .and()
                //开启表单认证
                .formLogin();
    }
}
我们在SecurityConfig类上添加@EnableWebSecurity注解后,会自动被Spring发现并注册。在configure()方法中,我执行了formLogin()方法,该方法的功能就是开启表单认证。
5.2创建web接口
HelloController类的代码如下:
import org.springframework.web.bind.annotation.GetMapping;
import org.springframework.web.bind.annotation.RestController;

@RestController
public class HelloController {

    @GetMapping("/hello")
    public String hello() {
        return "德玛西亚";
    }

}
5.3yml配置文件
创建一个application.yml配置文件,配置如下:
spring:
  security:
    user:
      name: demaxiya
      password: 123
六.功能验证
6.1启动项目
接下来启动项目,访问我们定义的/hello接口时,首先会重定向到/login页面,截图如下:
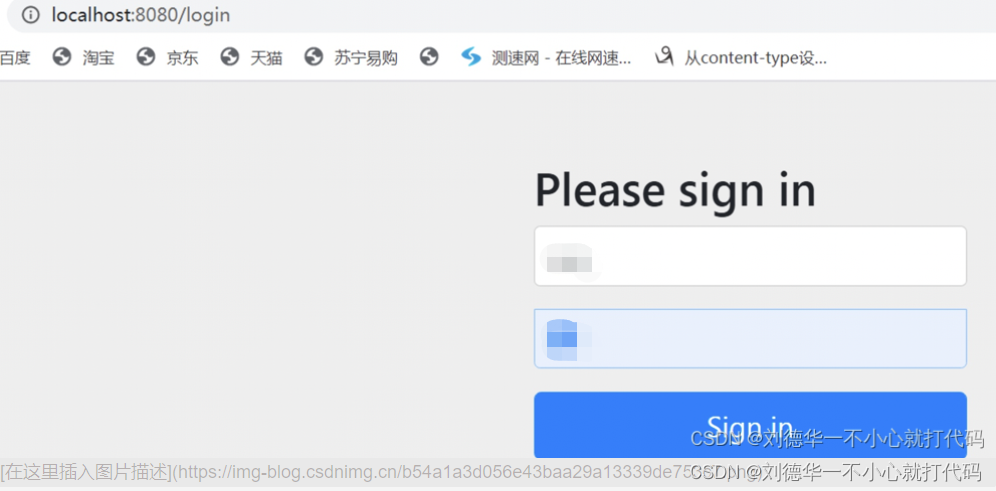
我们只有输入自己配置的用户名和密码后,才可以正常访问/hello接口。
七.自定义表单认证的登录界面
7.1服务端代码定义
如果想实现自定义登录页面,可以在上面定义的SecurityConfig 类中,复写configure(WebSecurity web) 和 configure(HttpSecurity http) 方法,通过loginPage()方法来配置自定义登录页面,代码如下:
import org.springframework.security.config.annotation.web.builders.HttpSecurity;
import org.springframework.security.config.annotation.web.builders.WebSecurity;
import org.springframework.security.config.annotation.web.configuration.EnableWebSecurity;
import org.springframework.security.config.annotation.web.configuration.WebSecurityConfigurerAdapter;

@EnableWebSecurity
public class SecurityConfig extends WebSecurityConfigurerAdapter {

    /**
     * 用来定义哪些请求需要忽略安全控制,哪些请求必须接受安全控制;还可以在合适的时候清除SecurityContext以避免内存泄漏,
     * 同时也可以用来定义请求防火墙和请求拒绝处理器,另外我们开启Spring Security Debug模式也是这里配置的
     */
    @Override
    public void configure(WebSecurity web) throws Exception {
        //super.configure(web);
        web.ignoring()
                .antMatchers("/js/**", "/css/**", "/images/**");
    }

    @Override
    protected void configure(HttpSecurity http) throws Exception {
        //super.configure(http);

        //2.配置自定义的登录页面
        http.authorizeRequests()
                .anyRequest()
                .authenticated()
                .and()
                .formLogin()
            	//加载自定义的登录页面地址
                .loginPage("/myLogin.html")
                .permitAll()
                .and()
                //注意:需禁用crsf防护功能,否则登录不成功
                .csrf()
                .disable();
    }

}
以上这段代码,就是实现自定义登录页面的核心代码了。
你会发现实现自定义表单认证的代码很简单,但是Spring Security内部是如何加载我们自定义的登录页面的呢?有哪些类或方法来负责完成呢?如果想要弄明白这个原理,我们需要先了解2个核心参数:WebSecurity和HttpSecurity,接下来我带各位分别了解一下这2个核心参数。
7.1.1
WebSecurity执行流程,截图如下:
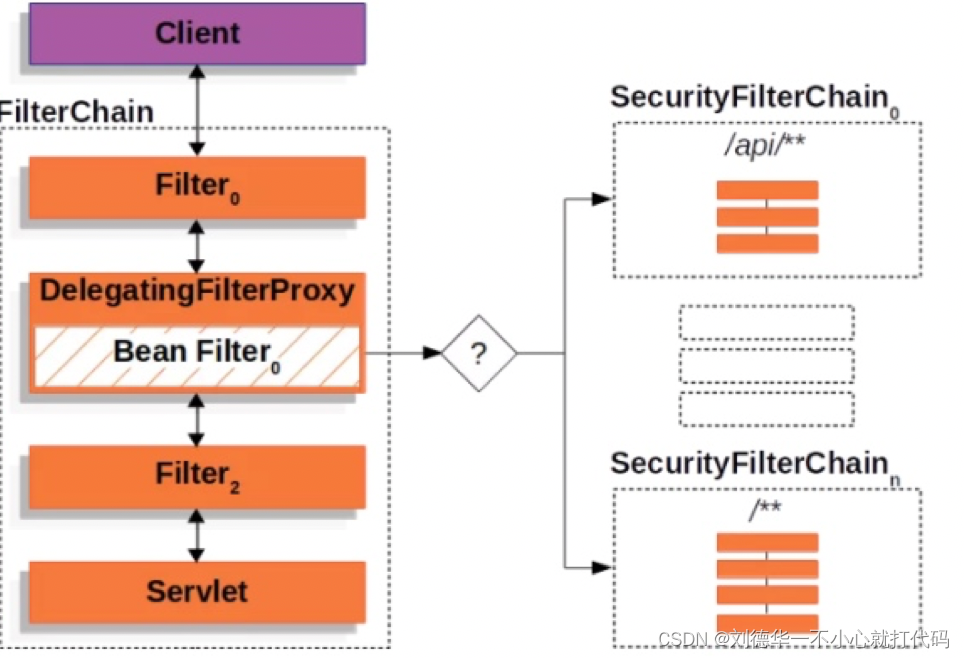
这是我们请求时,WebSecurity的执行流程图。
在configure(WebSecurity web)方法中,有个核心参数:WebSecurity类!在这个类里定义了一个securityFilterChainBuilders集合,可以同时管理多个SecurityFilterChain过滤器链,各位可以回顾我们学习Web基础时,关于过滤器的知识点,这些过滤器的执行是不是比Servlet更早?
当WebSecurity在执行时,会构建出一个名为 ”springSecurityFilterChain“ 的 Spring BeanFilterChainProxy代理类,它的作用是来 定义哪些请求可以忽略安全控制,哪些请求必须接受安全控制;以及在合适的时候 清除SecurityContext 以避免内存泄漏,同时也可以用来 定义请求防火墙和请求拒绝处理器,也可以在这里 开启Spring Security 的Debug模式。
因为有上面这一系列的Filter过滤器,我们就可以利用web.ignoring() 方法来配置想要忽略的静态资源 URL 地址,这样这些静态资源就可以不被拦截,从而可以被识别访问了。
7.1.2HttpSecurity作用
HttpSecurity的作用,截图如下: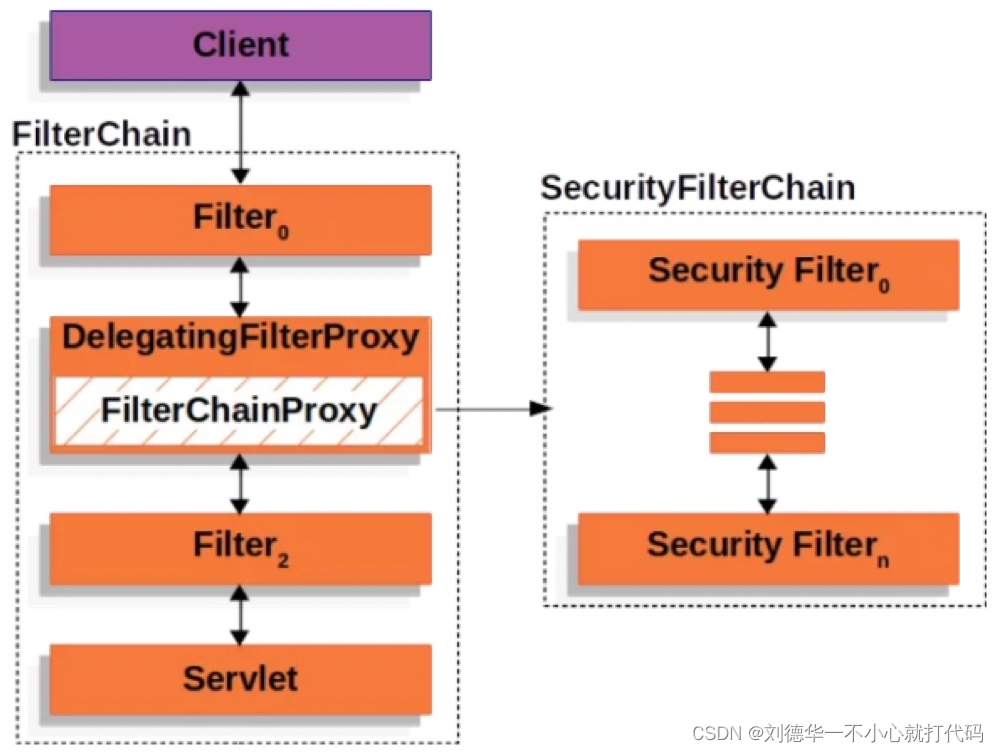
HttpSecurity用来构建包含一系列的过滤器链SecurityFilterChain,平常我们的配置就是围绕着这个SecurityFilterChain进行。
7.2页面定义
html核心代码如下:
<body>
<div class="login">
<h2>Access Form</h2>
<div class="login-top">
<h1>登录验证</h1>
<form action="/myLogin.html" method="post">
<input type="text" name="username" placeholder="username" />
<input type="password" name="password" placeholder="password" />
<div class="forgot">
<a href="#">忘记密码</a>
<input type="submit" value="登录" >
</div>
</form>
</div>
<div class="login-bottom">
<h3>新用户 <a href="#">注 册</a></h3>
</div>
</div>
</body>
注意:
form表单中action的值,暂时先写成”/myLogin.html“。
7.3页面定义
启动项目后,我们访问接口时,就会自动跳转到自己定义的/myLogin.html页面上,输入用户名和密码后,就可以成功访问自己的接口。截图如下:

八.细化表单认证配置
修改表单认证页面中请求参数的名称,定义认证失败时的错误处理页面,处理退出登录时的操作等,这些都可以自定义配置,实现代码如下.
8.1定义SecurityConfig类
SecurityConfig类代码如下:
import org.springframework.security.config.annotation.web.builders.HttpSecurity;
import org.springframework.security.config.annotation.web.builders.WebSecurity;
import org.springframework.security.config.annotation.web.configuration.EnableWebSecurity;
import org.springframework.security.config.annotation.web.configuration.WebSecurityConfigurerAdapter;

@EnableWebSecurity
public class SecurityConfig extends WebSecurityConfigurerAdapter {

    /**
     * 用来定义哪些请求需要忽略安全控制,哪些请求必须接受安全控制;还可以在合适的时候清除SecurityContext以避免内存泄漏,
     * 同时也可以用来定义请求防火墙和请求拒绝处理器,另外我们开启Spring Security Debug模式也是这里配置的
     */
    @Override
    public void configure(WebSecurity web) throws Exception {
        //super.configure(web);
        web.ignoring()
                .antMatchers("/js/**", "/css/**", "/images/**");
    }

    @Override
    protected void configure(HttpSecurity http) throws Exception {
        //super.configure(http);

        //3.进一步配置自定义的登录页面
       //拦截请求,创建FilterSecurityInterceptor
       http.authorizeRequests()
                .anyRequest()
                .authenticated()
                //用and来表示配置过滤器结束,以便进行下一个过滤器的创建和配置
                .and()
                //设置表单登录,创建UsernamePasswordAuthenticationFilter
                .formLogin()
                .loginPage("/myLogin.html")
                .permitAll()
                //指登录成功后,是否始终跳转到登录成功url。它默认为false
                .defaultSuccessUrl("/index.html",true)
                //post登录接口,登录验证由系统实现
                .loginProcessingUrl("/login")
                //用户密码错误跳转接口
                .failureUrl("/error.html")
                //要认证的用户参数名,默认username
                .usernameParameter("username")
                //要认证的密码参数名,默认password
                .passwordParameter("password")
                .and()
                //配置注销
                .logout()
                //注销接口
                .logoutUrl("/logout")
                //注销成功后跳转到的接口
                .logoutSuccessUrl("/myLogin.html")
                .permitAll()
                //删除自定义的cookie
                .deleteCookies("myCookie")
                .and()
                //注意:需禁用crsf防护功能,否则登录不成功
                .csrf()
                .disable();
    }
}
8.2自定义登录页面
这时候把登录页面也跟着修改一下,主要是把form表单中action的值修改掉。前端代码如下:
<body>
<div class="login">
<h2>Access Form</h2>
<div class="login-top">
<h1>登录验证</h1>
<form action="/login" method="post">
<input type="text" name="username" placeholder="username" />
<input type="password" name="password" placeholder="password" />
<div class="forgot">
<a href="#">忘记密码</a>
<input type="submit" value="登录" >
</div>
</form>
</div>
<div class="login-bottom">
<h3>新用户 <a href="#">注 册</a></h3>
</div>
</div>
</body>
注意:
此时form表单中action的值,要写成”/login“,因为我们在配置类中通过“loginProcessingUrl(“/login”)”方法中做了明确的配置。
8.3定义错误处理页面
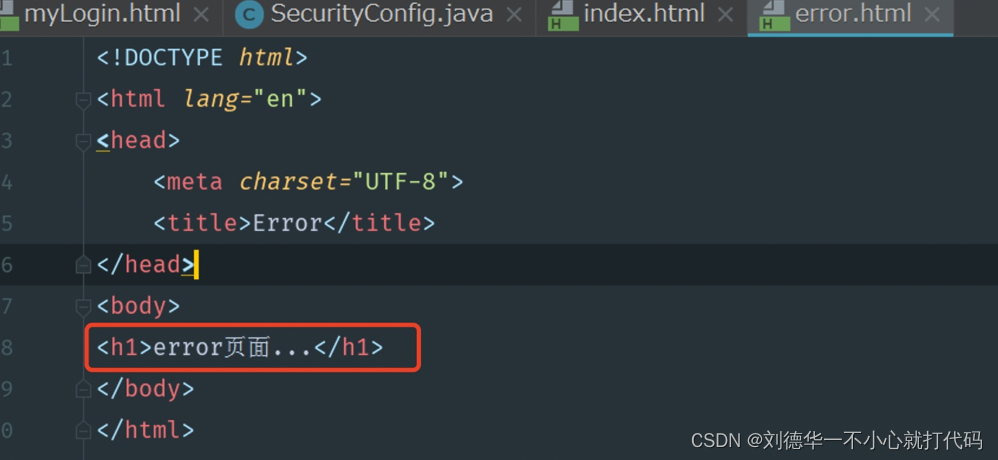
当输入了错误的用户名和密码后,这时候会怎么办呢?这里可以提供一个错误处理页面,当认证失败后跳转到这个页面即可。这里简单实现一下,另外index.html页面与该页面类似。
8.4启动项目
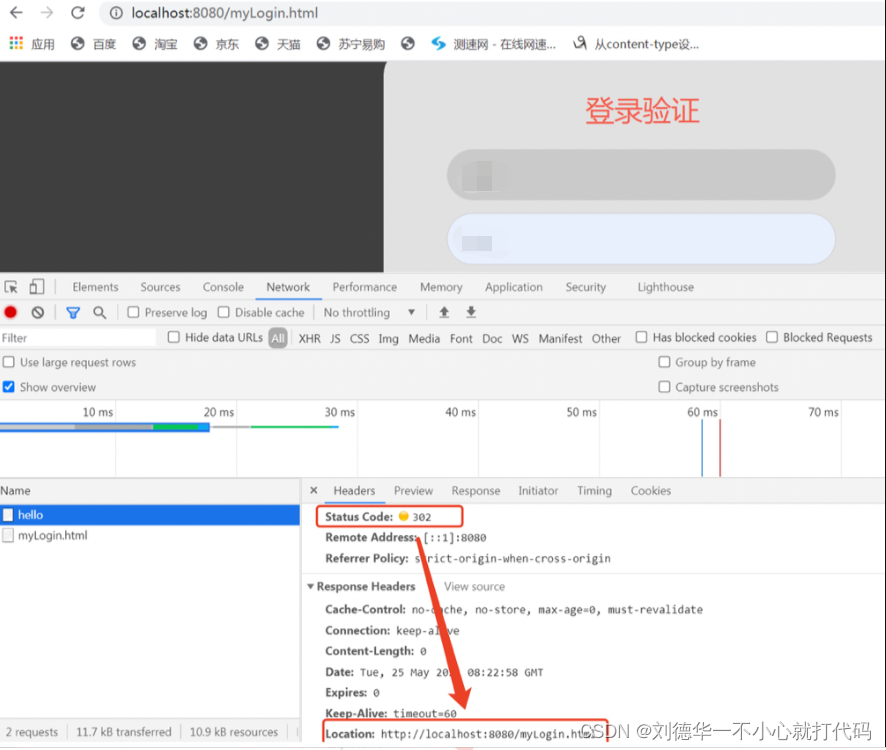
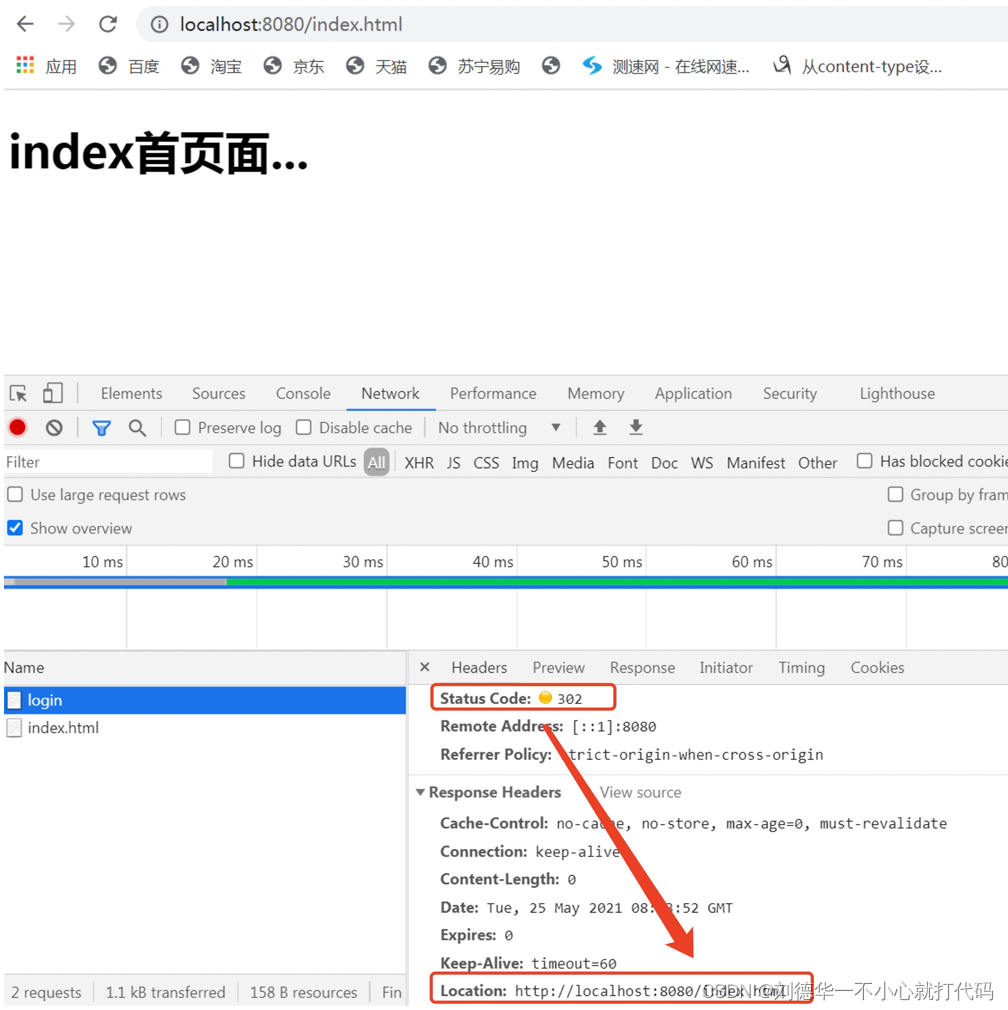
这时候如果访问自己的接口,比如/hello,会先重定向到/myLogin.html页面,输入自己配置的用户名和密码,经过验证后,才会重定向到/index.html页面中,否则会重定向到配置的/error.html页面中。
8.4.1重定向到/myLogin.html
访问资源时,会先重定向到自定义的登录页面。截图如下:
8.4.2重定向到/index.html
认证成功后,会重定向到index.html页面。
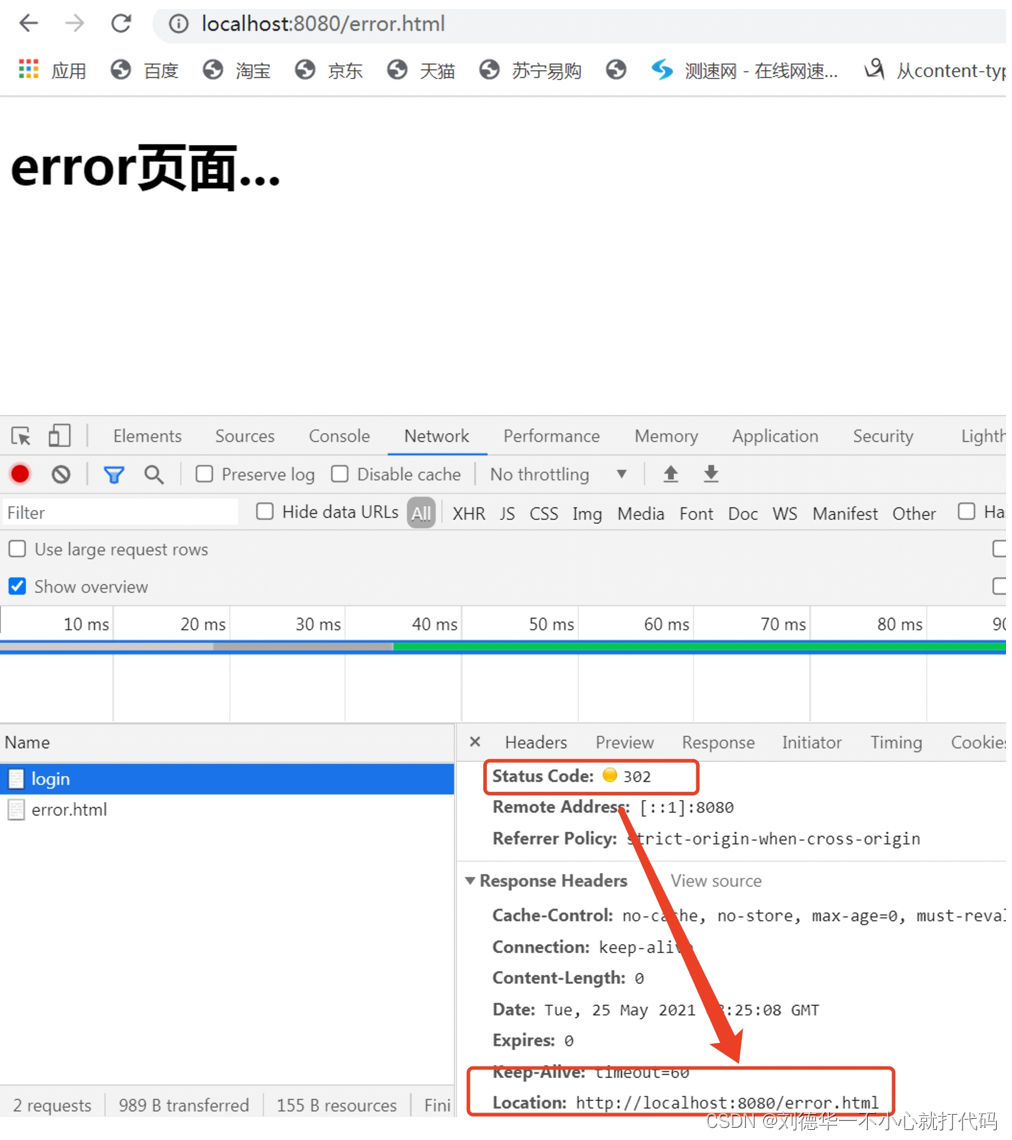
8.4.3重定向到/error.html
认证失败后,会重定向到自定义的错误处理页面。
