本篇重点
什么是变量捕获??
有关线程的操作
 线程创建
 线程中断
 线程等待
 线程休眠
 获取线程实例
目录
- 1. 线程创建
- 2. 线程中断
- 变量捕获
- 线程的六种状态
- NEW 状态
- TERMNATED 状态
- RUNNABLE 就绪状态
- TIMED_WAITING 状态
1. 线程创建
关于线程的创建看上篇博客, 里面为线程的创建提供了5种方法
2. 线程中断
线程的中断, 就是让一个线程停下来
本质上来说, 让一个线程终止, 办法就一种, 让该线程的入口方法执行完毕!! (
return 或者 抛出异常等)
- 给线程规定一个结束标志位
public class ThreadDemo9 {
    public static boolean isQuit = false;
    public static void main(String[] args) {
        Thread t = new Thread(() -> {
            while (!isQuit) {
                System.out.println("hello t");
                try {
                    Thread.sleep(1000);
                } catch (InterruptedException e) {
                    e.printStackTrace();
                }
            }
            System.out.println("t 线程终止");
        });
        t.start();
        try {
            Thread.sleep(3000);
        } catch (InterruptedException e) {
            e.printStackTrace();
        }
        isQuit = true;
    }
}
说白了就是设置一个全局变量, 在三秒的时候, 将isQuit设置成为true, 从而中断线程
变量捕获
一定是要设置成为全局变量, 这里就涉及到了变量捕获的知识点了
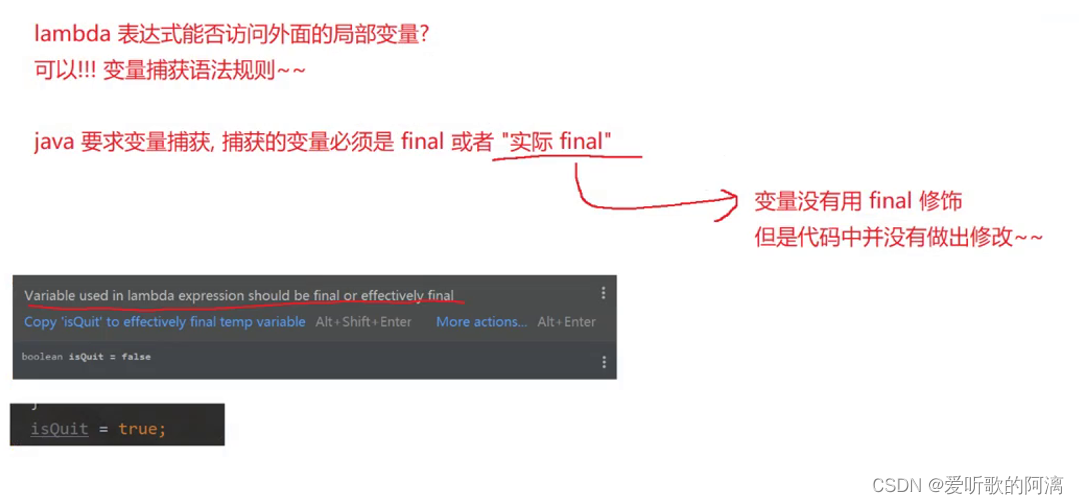
变量只能访问, 常量或者未被修改的量
上述线程中断的方法是 自己创建了一个变量来控制循环
而Thread类内置了;一个标志位, 让我们更加方便的实现上述的效果, 如下
public class ThreadDemo10 {
    public static void main(String[] args) {
        Thread t = new Thread(() -> {
            // currentThread 是获取到当前线程的实例
            // 此处currentThread 得到的对象就是t
            // Thread.currentThread() 等价于 t
            // isInterrupted 就是 t 对象里自带的一个标志位
            while (!Thread.currentThread().isInterrupted()){
                System.out.println("hello t");
                try {
                    Thread.sleep(1000);

                } catch (InterruptedException e) {
                    e.printStackTrace();
                    break;
                }
            }
        });

        t.start();
        try {
            Thread.sleep(3000);
        } catch (InterruptedException e) {
            e.printStackTrace();
        }
        // 把 t 内部的标志位给设置成true
        t.interrupt();
    }
}
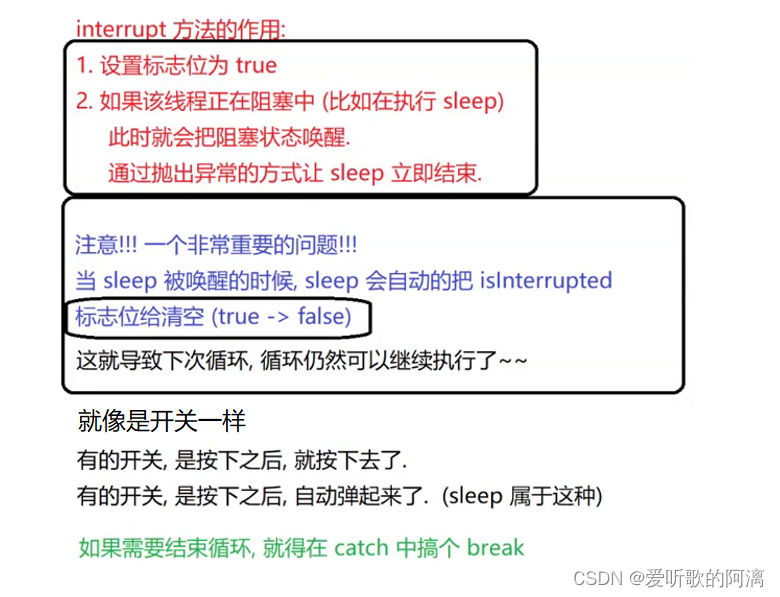
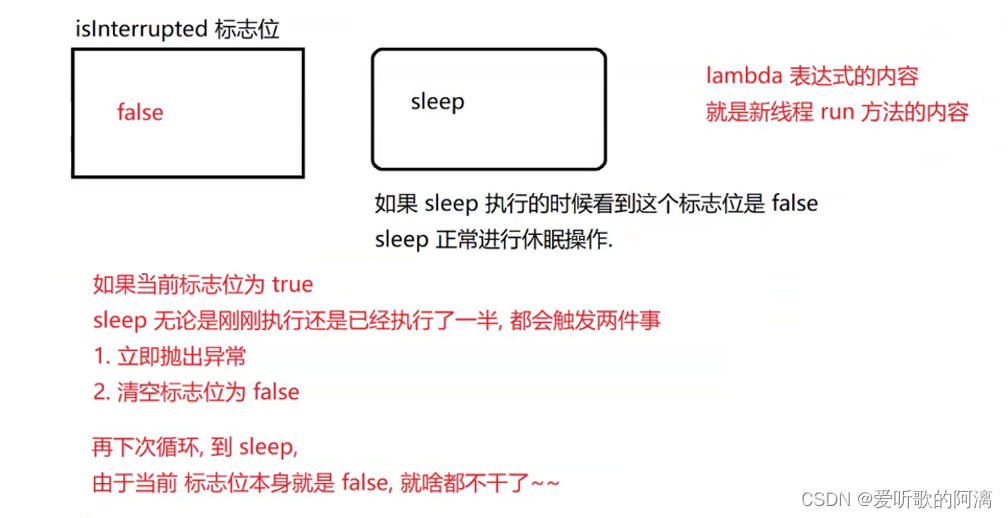

在这里sleep可以有三种操作:
- 忽略中断条件继续执行
	try {
	    Thread.sleep(1000);

	} catch (InterruptedException e) {
//  	e.printStackTrace();
//  	break;
	}
- 立刻中断
	try {
	    Thread.sleep(1000);

	} catch (InterruptedException e) {
		e.printStackTrace();
		break;
	}
- 等待一会再中断
	try {
	    Thread.sleep(1000);

	} catch (InterruptedException e) {
	    e.printStackTrace();
	    try {
	        Thread.sleep(3000);
	    } catch (InterruptedException ex) {
	        e.printStackTrace();
	    }
	    break;
	}
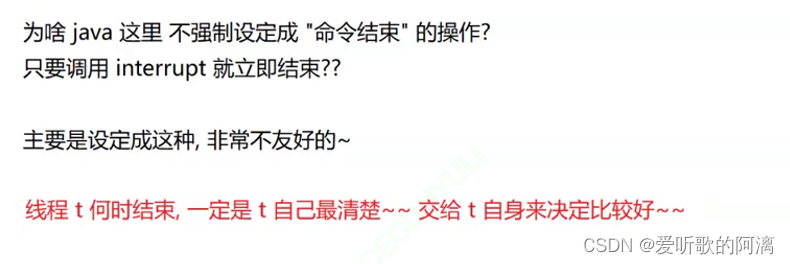
- 线程等待
因为线程之间是并发执行的, 操作系统对于线程的调度, 是无序的.
所以无法判定, 两个线程谁先执行结束, 谁后执行结束

像是上述的不确定情况可能会出现bug
所以可以使用线程等待来实现调度的顺序
join方法
public class ThreadDemo11 {
    public static void main(String[] args) throws InterruptedException {
        Thread t = new Thread(() -> {
            System.out.println("hello t");
        });
        t.start();
        t.join();
        System.out.println("hello main");
    }
}

join()的两个版本
join 的无参数版本, 效果是"死等"(不见不散)
join 的有参数版本, 则是指定最大时间, 如果等待的时间到了上限, 还没等到, 也就不等了
让main方法等待t线程结束, 再执行(简单来说就是.join的先执行)
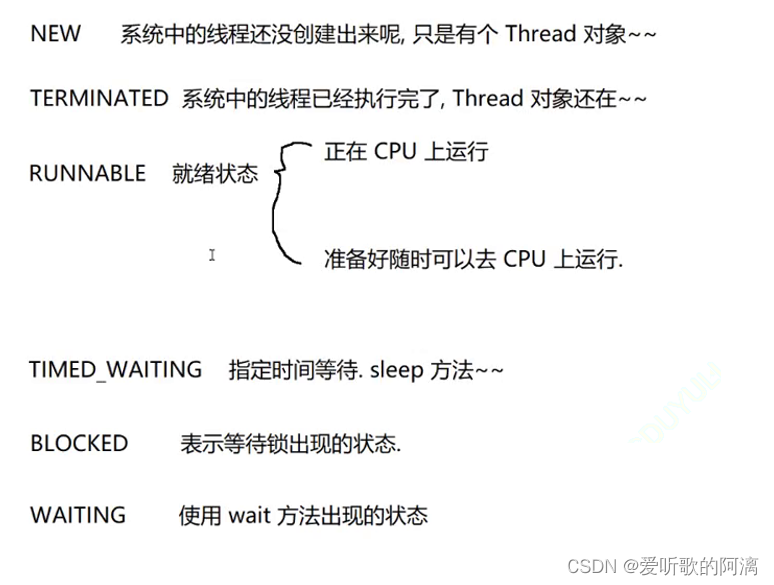
线程的六种状态
操作系统里的线程, 自身是有一个状态的
但是Java Thread是对系统线程的封装, 把这里的状态又进一步的精细化了
NEW 状态
public class ThreadDemo12 {
    public static void main(String[] args) {
        Thread t = new Thread(() -> {
            System.out.println("hello t");
        });
        // 在启动之前, 获取线程状态, NEW
        System.out.println(t.getState());
        t.start();
    }
}
TERMNATED 状态
public class ThreadDemo12 {
    public static void main(String[] args) throws InterruptedException {
        Thread t = new Thread(() -> {
            System.out.println("hello t");
        });
        // 在启动之前, 获取线程状态, NEW
//        System.out.println(t.getState());
        t.start();
        Thread.sleep(2000);
        System.out.println(t.getState());
    }
}
RUNNABLE 就绪状态
有两种情况
- 正在CPU上运行
- 准备好随时可以去CPU上运行
public class ThreadDemo12 {
    public static void main(String[] args) throws InterruptedException {
        Thread t = new Thread(() -> {
            while (true) {
                // 为了防止 hello t 把线程状态冲没了, 先把它注释掉
//            System.out.println("hello t");
            }
        });
        // 在启动之前, 获取线程状态, NEW
//        System.out.println(t.getState());
        t.start();
        Thread.sleep(2000);
        System.out.println(t.getState());
    }
}
TIMED_WAITING 状态
public class ThreadDemo12 {
    public static void main(String[] args) throws InterruptedException {
        Thread t = new Thread(() -> {
            while (true) {
                // 为了防止 hello t 把线程状态冲没了, 先把它注释掉
//            System.out.println("hello t");
                try {
                    Thread.sleep(1000);
                } catch (InterruptedException e) {
                    e.printStackTrace();
                }
            }
        });
        // 在启动之前, 获取线程状态, NEW
//        System.out.println(t.getState());
        t.start();
        Thread.sleep(2000);
        System.out.println(t.getState());
    }
}
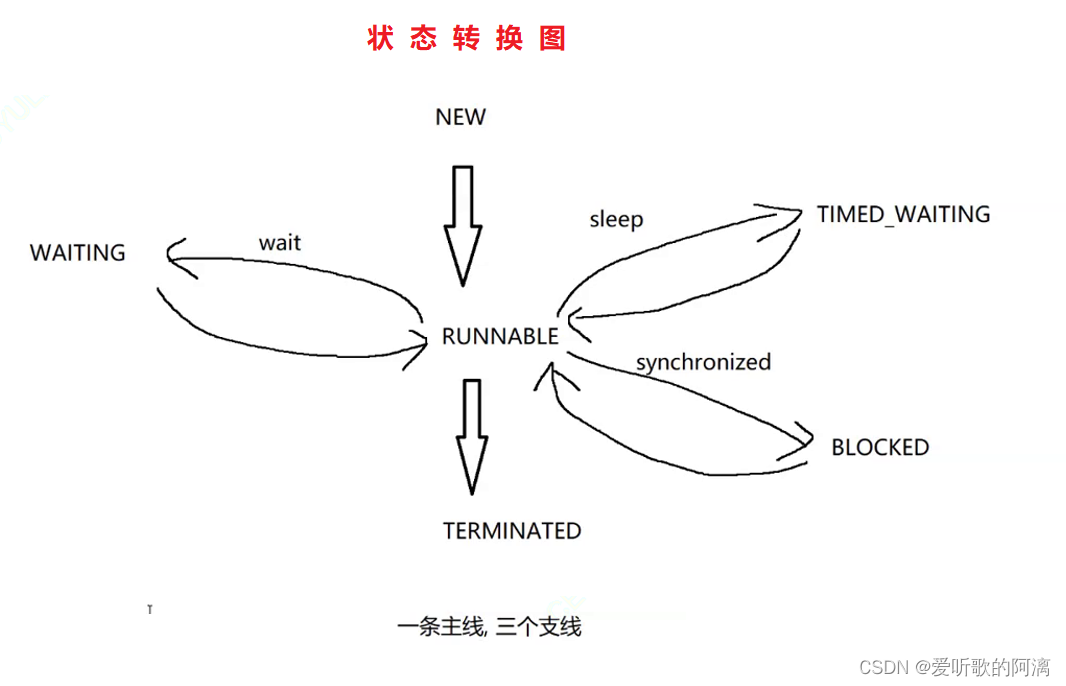
理解线程状态, 意义就是让我们能够更好的进行多线程代码的调试
- 线程休眠
- 获取线程实例


