主题说明
在spice stream 模式下,为了实现流畅的显示,利用gstvideooverlay 接口实现了gstreamer pipeline 的输出直接绑定到gtk 的窗口下。
然而spice客户端采用的是playbin 插件当前只能绑定一个窗口,当需要采用多窗口模式时,当前的流程机制使用不了,需要进一步探索
其他插件来实现overlay 多窗口。本文给出了多屏绑定的本地测试demo。
实现流程
gst pipeline 多路显示
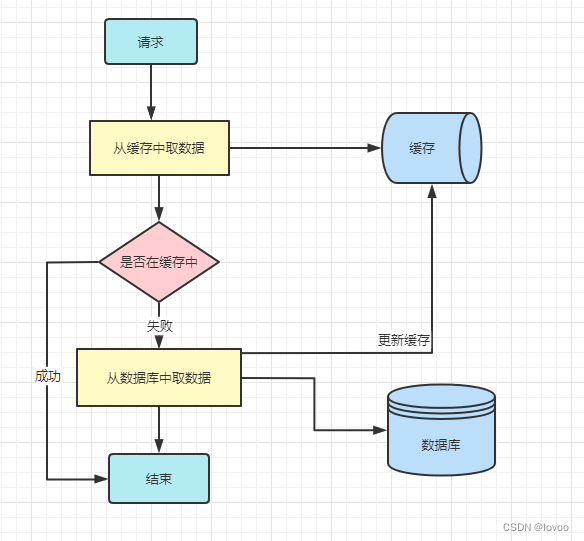
要实现多屏方案,首先需要实现gstreamer pipeline 能够多路输出,并且每一路可以截取图像的一部分送到窗口显示。下图以两路显示说明
gstreamer 组件选择
读取h264数据
测试采用本地读取h264文件的方式,插件采用 filesrc
解析h264
解析h264数据 插件采用 h264parse
h264 解码
h264 解码插件有很多(硬件解码,软件解码), 本次测试选择 avdec_h264, 后续在spice 客户端显示中可以根据不同的硬件采用不同的解码插件。
多路模式
多路流程采用 tee 和 queue 两种插件实现
VideoCrop
从一个图像中crop 出不同的部分送入到不同的窗口,针对 videocrop 和 videobox两种都进行了测试。
play
支持videooverlay 接口的playsink 有两种 ximagesink 和 xvimagesink。 对这两种在pipeline 中都进行了测试。
gstreamer pipeline
gstreamer 测试命令
crop 测试
单路
gst-launch-1.0 -v filesrc location=./h264.h264 ! h264parse ! avdec_h264 ! videocrop top=0 left=0 right=320 bottom=0 ! jpegenc ! filesink location=./img_t1.jpeg #左边一半 gst-launch-1.0 -v filesrc location=./h264.h264 ! h264parse ! avdec_h264 ! videocrop top=0 left=320 right=0 bottom=0 ! jpegenc ! filesink location=./img_t2.jpeg #右边一半 gst-launch-1.0 -v filesrc location=./h264.h264 ! h264parse ! avdec_h264 ! videocrop top=240 left=0 right=0 bottom=0 ! jpegenc ! filesink location=./img_t3.jpeg #下边一半 gst-launch-1.0 -v filesrc location=./h264.h264 ! h264parse ! avdec_h264 ! videocrop top=0 left=0 right=0 bottom=240 ! jpegenc ! filesink location=./img_t3.jpeg #上边一半
多路
gst-launch-1.0 -v filesrc location=./h264.h264 ! h264parse ! avdec_h264 ! tee name=t t. ! queue ! videocrop top=0 left=0 right=320 bottom=0 ! jpegenc ! filesink location=./img_l.jpeg t. ! queue ! videocrop top=0 left=320 right=0 bottom=0 ! jpegenc ! filesink location=./img_r.jpeg #两路同时切分成两个通道
通过以上的命令验证,多路的crop 可以实现。
显示测试
单路
- (videocrop + ximagesink模式)
gst-launch-1.0 -v filesrc location=./h264.h264 ! h264parse ! avdec_h264 ! tee name=t t. ! queue ! videocrop top=0 left=0 right=320 bottom=0 ! videoconvert ! ximagesink
- (videobox + ximagesink模式)
gst-launch-1.0 -v filesrc location=./h264.h264 ! h264parse ! avdec_h264 ! tee name=t t. ! queue ! videobox top=0 left=0 right=320 bottom=0 ! videoconvert ! ximagesink
- (videobox + xvimagesink模式)
gst-launch-1.0 -v filesrc location=./h264.h264 ! h264parse ! avdec_h264 ! tee name=t t. ! queue ! videobox top=0 left=0 right=320 bottom=0 ! xvimagesink
说明: videocrop + xvimagesink 会报错
多路
- (videobox + ximagesink模式)
gst-launch-1.0 -v filesrc location=./h264.h264 ! h264parse ! avdec_h264 ! tee name=t t. ! queue ! videobox top=0 left=0 right=320 bottom=0 ! videoconvert ! ximagesink t. ! queue ! videobox top=0 left=320 right=0 bottom=0 ! videoconvert ! ximagesink
- (videocrop + ximagesink模式)
gst-launch-1.0 -v filesrc location=./h264.h264 ! h264parse ! avdec_h264 ! tee name=t t. ! queue ! videocrop top=0 left=0 right=320 bottom=0 ! videoconvert ! ximagesink t. ! queue ! videocrop top=0 left=320 right=0 bottom=0 ! videoconvert ! ximagesink
- (videobox + xvimagesink模式)
gst-launch-1.0 -v filesrc location=./h264.h264 ! h264parse ! avdec_h264 ! tee name=t t. ! queue ! videobox top=0 left=0 right=320 bottom=0 ! xvimagesink t. ! queue ! videobox top=0 left=320 right=0 bottom=0 ! xvimagesink
通过命令行测试有三种方案pipeline 可以完成多路crop 显示输出。然后需要进一步测试三个方案在绑定两个GTK窗口进行测试(目前以两个窗口进行测试)
gstreamer 加gtk 代码
#include <string.h>
#include <gtk/gtk.h>
#include <gst/gst.h>
#include <gst/video/videooverlay.h>
#include <gdk/gdk.h>
#if defined (GDK_WINDOWING_X11)
#include <gdk/gdkx.h>
#elif defined (GDK_WINDOWING_WIN32)
#include <gdk/gdkwin32.h>
#elif defined (GDK_WINDOWING_QUARTZ)
#include <gdk/gdkquartz.h>
#endif

#define MAX_WINDOWS  8
typedef struct PlayData
{
  GstElement *sink;
  guintptr    video_window_handle;
  GtkWidget *widget;
} PlayData;

typedef struct CustomData
{
    GstElement *pipeline;
    GstState    state;         // Current stat of the pipeline
    int num_monitor;
    PlayData  play_datas[MAX_WINDOWS];
} CustomData;

static void init_custom_data(CustomData *data)
{
  if (NULL == data)
  {
    g_error("CustomData not allocate memory");
  }

  data->pipeline = NULL;
  data->state = GST_STATE_NULL;

  for (int i = 0; i< MAX_WINDOWS; i++)
  {
    data->play_datas[i].sink=NULL;
    data->play_datas[i].video_window_handle = 0;
    data->play_datas[i].widget = NULL;
  }

}

static void realize_cb (GtkWidget *widget,  PlayData *data) {
  GdkWindow *window = gtk_widget_get_window (widget);
  guintptr window_handle;

  if (!gdk_window_ensure_native (window))
    g_error ("Couldn't create native window needed for GstVideoOverlay!");

  /* Retrieve window handler from GDK */
#if defined (GDK_WINDOWING_WIN32)
  window_handle = (guintptr)GDK_WINDOW_HWND (window);
#elif defined (GDK_WINDOWING_QUARTZ)
  window_handle = gdk_quartz_window_get_nsview (window);
#elif defined (GDK_WINDOWING_X11)
  window_handle = GDK_WINDOW_XID (window);
#endif
  /* Pass it to playbin, which implements VideoOverlay and will forward it to the video sink */
  data->video_window_handle = window_handle;
  gst_video_overlay_set_window_handle (GST_VIDEO_OVERLAY (data->sink), data->video_window_handle);

}

static void create_ui(PlayData *data)
{

    GtkWidget *video_window;  // The drawing area where the video will be shown

    video_window = gtk_window_new(GTK_WINDOW_TOPLEVEL);
    // gtk_window_set_title(main_window, "main_window");

    // video_window = gtk_drawing_area_new();
    gtk_window_set_title(video_window, "video_window");
    g_signal_connect(G_OBJECT(video_window), "realize",
                        G_CALLBACK(realize_cb), data);
    gtk_widget_set_double_buffered (video_window, FALSE);

    //   gtk_window_set_default_size(GTK_WINDOW(main_window), 640, 480);
    // gtk_container_add (GTK_CONTAINER (main_window), video_window);

    gtk_widget_show_all(video_window);

    gtk_widget_realize (video_window);

}

int main(int argc, char **argv)
{
  CustomData data = {};
  init_custom_data(&data);
  data.num_monitor = 2;
  GstElement *filesrc;
  GstStateChangeReturn ret;
  GstElement *pipeline, *h264parse ,  *avdec_h264, *tee,  *queue1, *queue2, *videocrop1, *videocrop2, *videoconvert1, *videoconvert2, *sink1, *sink2;
  GstBus *bus, *bus1;
  GstCaps *caps;
  GstMessage *msg;
  /* Initialize GTK */
  gtk_init (&argc, &argv);

  /* Initialize GStreamer */
  gst_init (&argc, &argv);

  pipeline = gst_pipeline_new("pipeline");
  filesrc  = gst_element_factory_make ("filesrc", "filesrc");

  g_object_set (filesrc, "location", "/home/kylin/v2/screenCapture.h264", NULL);

  h264parse = gst_element_factory_make("h264parse", "h264parse");
  avdec_h264 = gst_element_factory_make("avdec_h264", "avdec_h264");

  tee = gst_element_factory_make ("tee", "tee");
  queue1 = gst_element_factory_make ("queue", "queue1");
  queue2 = gst_element_factory_make ("queue", "queue2");

  videocrop1 = gst_element_factory_make ("videobox", "videocrop1");
  videocrop2 = gst_element_factory_make ("videobox", "videocrop2");

//   videoconvert1 = gst_element_factory_make ("videoconvert", "videoconvert1");
//   videoconvert2 = gst_element_factory_make ("videoconvert", "videoconvert2");
  sink1 = gst_element_factory_make("xvimagesink", "sink1");
  sink2 = gst_element_factory_make("xvimagesink", "sink2");

  GstBin *bin = GST_BIN(pipeline);
  gst_bin_add(bin, filesrc);
  gst_bin_add(bin, h264parse);
  gst_bin_add(bin, avdec_h264);
  gst_bin_add(bin, tee);
  gst_bin_add(bin, queue1);
  gst_bin_add(bin, videocrop1);
  gst_bin_add(bin, sink1);
  gst_bin_add(bin, queue2);
  gst_bin_add(bin, videocrop2);
  gst_bin_add(bin, sink2);


  gboolean   link =  gst_element_link_many(filesrc, h264parse, NULL) &&
                     gst_element_link_many(h264parse, avdec_h264, NULL) &&
                     gst_element_link_many(avdec_h264, tee, NULL) &&
                     gst_element_link_many(queue1, videocrop1,NULL) &&
                     gst_element_link_many(videocrop1, sink1, NULL) &&
                     gst_element_link_many(queue2, videocrop2, NULL) &&
                     gst_element_link_many(videocrop2, sink2, NULL) ;

  if (!link)
  {
    g_printerr("link failed");
    return -1;
  }

  GstPadTemplate *templ = gst_element_class_get_pad_template(GST_ELEMENT_GET_CLASS(tee), "src_%u");

  GstPad* tee_pad1 =gst_element_request_pad (tee, templ, NULL, NULL);
  GstPad* queue_pad1 = gst_element_get_static_pad (queue1, "sink");
  GstPad* tee_pad2 = gst_element_request_pad (tee, templ, NULL, NULL);
  GstPad* queue_pad2 =gst_element_get_static_pad (queue2, "sink");

  if (gst_pad_link (tee_pad1, queue_pad1) != GST_PAD_LINK_OK ||
    gst_pad_link (tee_pad2, queue_pad2) != GST_PAD_LINK_OK) {
    g_printerr("pad link failed");
    return -1;
  }
  g_object_set (videocrop1,
    "left", 0,
    "top", 0,
    "right", 512,
    "bottom", 0, NULL);
 g_object_set (videocrop2,
    "left", 512,
    "top", 0,
    "right", 0,
    "bottom", 0, NULL);

   data.pipeline = pipeline;

   data.play_datas[0].sink = sink1;
   data.play_datas[1].sink = sink2;

   create_ui(&data.play_datas[0]);
   create_ui(&data.play_datas[1]);

  ret = gst_element_set_state ( data.pipeline  , GST_STATE_PLAYING);

  if (ret == GST_STATE_CHANGE_FAILURE) {
    g_printerr ("Unable to set the pipeline to the playing state.\n");
    gst_object_unref ( data.pipeline );
    return -1;
  }


  gtk_main ();

  gst_element_set_state ( data.pipeline , GST_STATE_NULL);
  gst_object_unref ( data.pipeline );
  return 0;
}
编译指令
gcc -g test.c `pkg-config --cflags --libs gtk+-3.0` `pkg-config --cflags --libs gstreamer-1.0` `pkg-config --cflags --libs gstreamer-video-1.0` -o test
测试三种方案结果如下:
- (videobox + xvimagesink模式)
 + (videobox + ximagesink模式)
 + (videocrop + ximagesink模式)
 最终videobox + xvimagesink模式可以完成所需的功能。
结论
最终的demo 采用videobox + xvimagesink模式。
参考
https://gstreamer.freedesktop.org/documentation/xvimagesink/index.html?gi-language=c
https://gstreamer.freedesktop.org/documentation/ximagesink/index.html?gi-language=c
https://gstreamer.freedesktop.org/documentation/video/gstvideooverlay.html?gi-language=c
