wpf=windows presentation foundation
官方文档
https://learn.microsoft.com/zh-cn/dotnet/api/?view=net-7.0
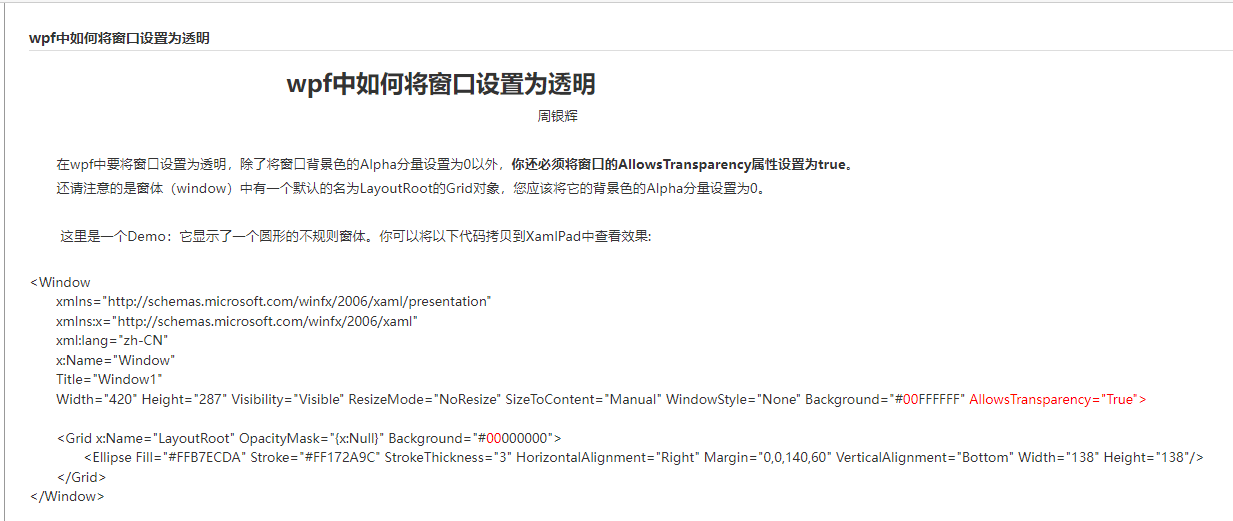
一:WPF窗口设置为透明
在wpf中要将窗口设置为透明,除了将窗口背景色的Alpha分量设置为0以外,你还必须将窗口的AllowsTransparency属性设置为true。
二:WPF xaml注释
<!--注释样式-->
三:WPF 窗口置顶
一般我们这样设置窗口置顶
<Window Topmost="True"></Window>
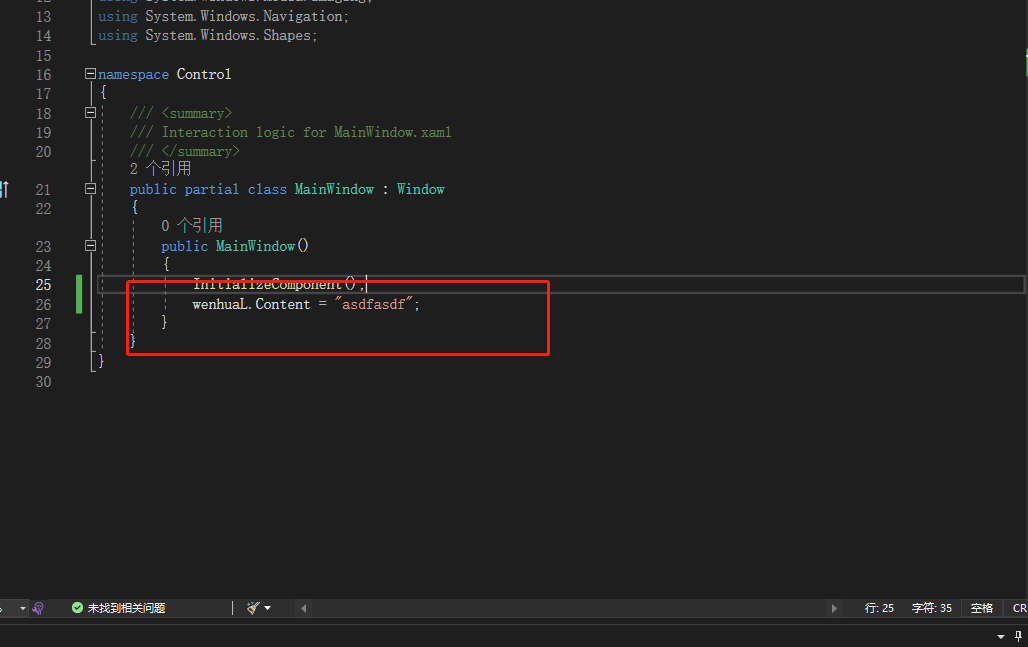
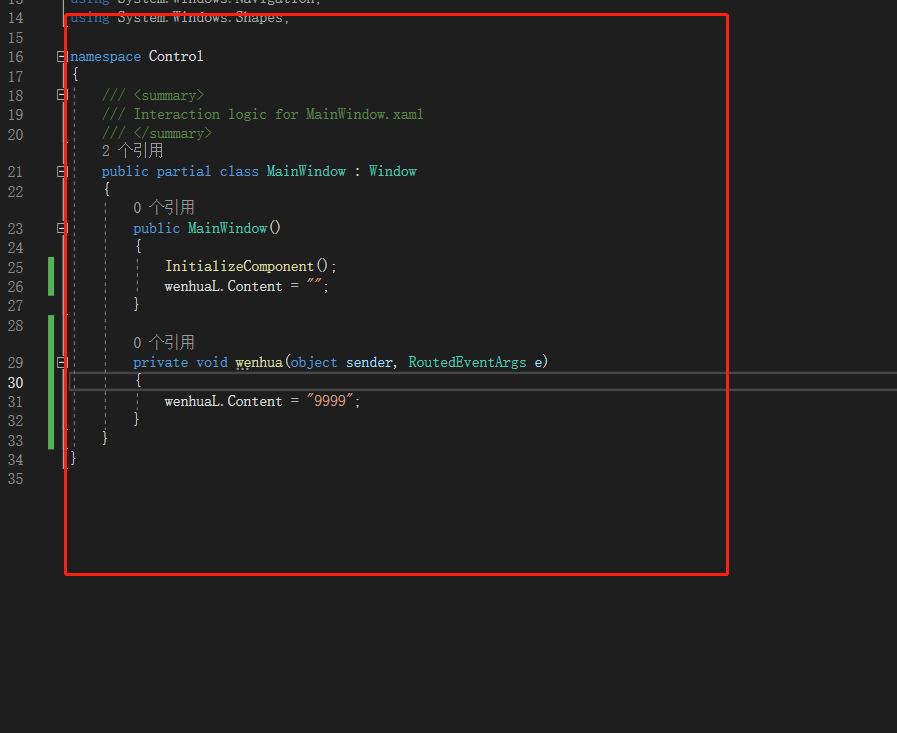
四:修改label Conent的值
1:设置label name属性。
  <!--注释样式-->
    <Grid HorizontalAlignment="Center" VerticalAlignment="Center">
        <Label Name="lbWen" Content="08:00:00" HorizontalAlignment="Center" VerticalAlignment="Center" FontSize="48" FontWeight="Bold" Foreground="Red"/>
    </Grid>
2:cs中设置值。
lbWen.Content= "jajajj";四:使用.net 6.0框架的WPF应用如何引用System.Windows.Forms这个dll(转载)
https://www.cnblogs.com/gisoracle/p/16967203.html
五:控件。
1:Label 标签
a:命名

b:动态修改文本类容。
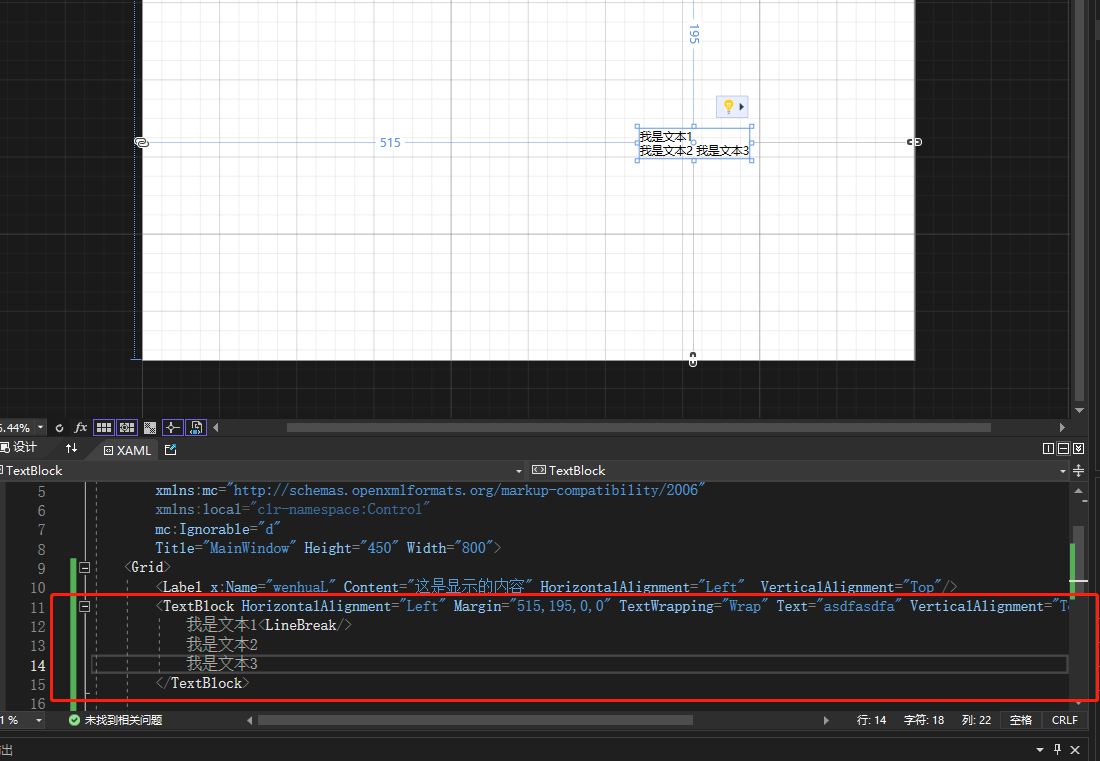
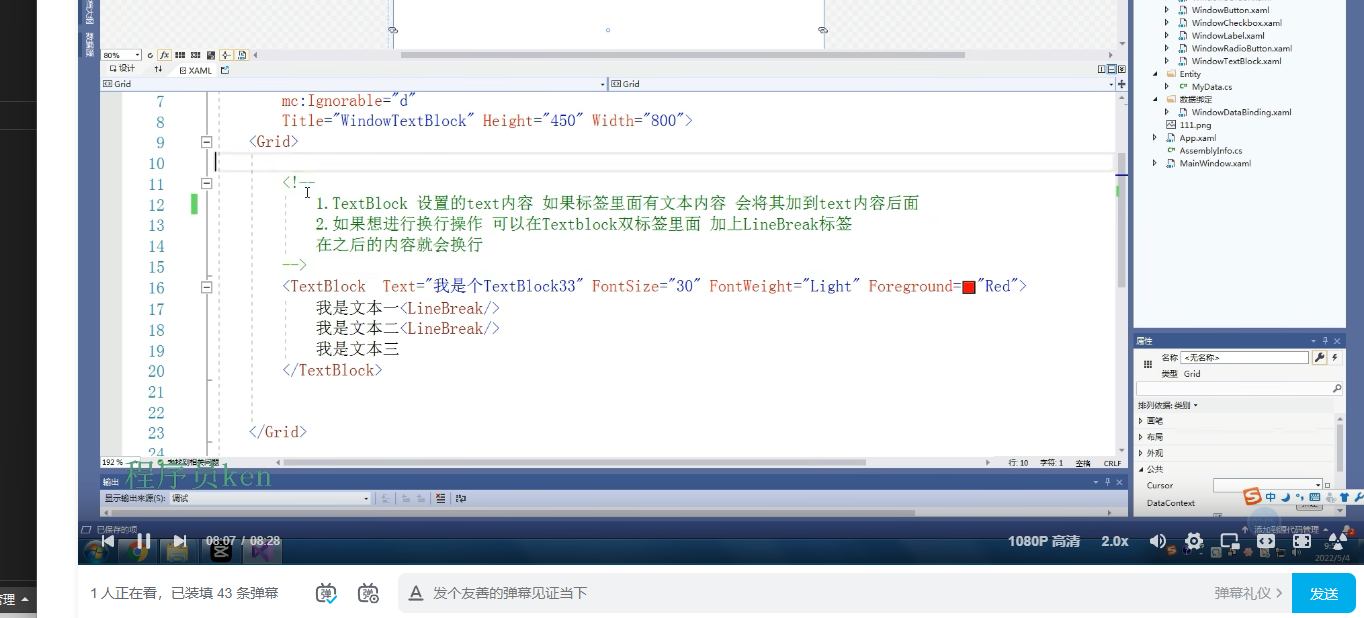
2:TextBlock 文本块
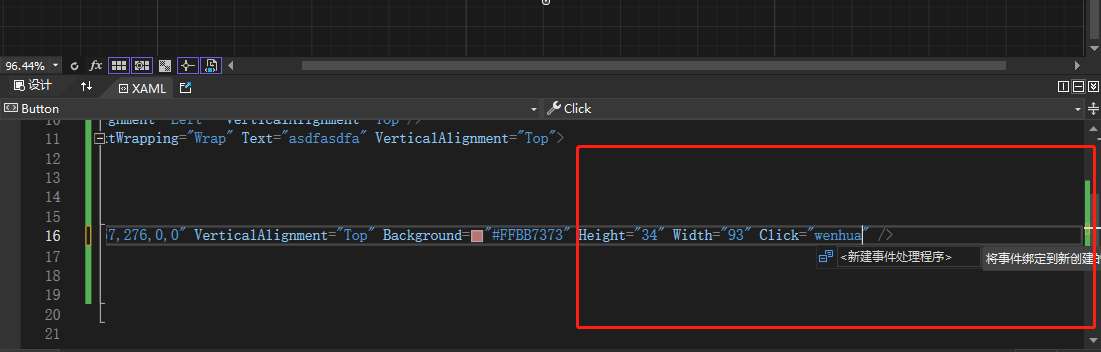
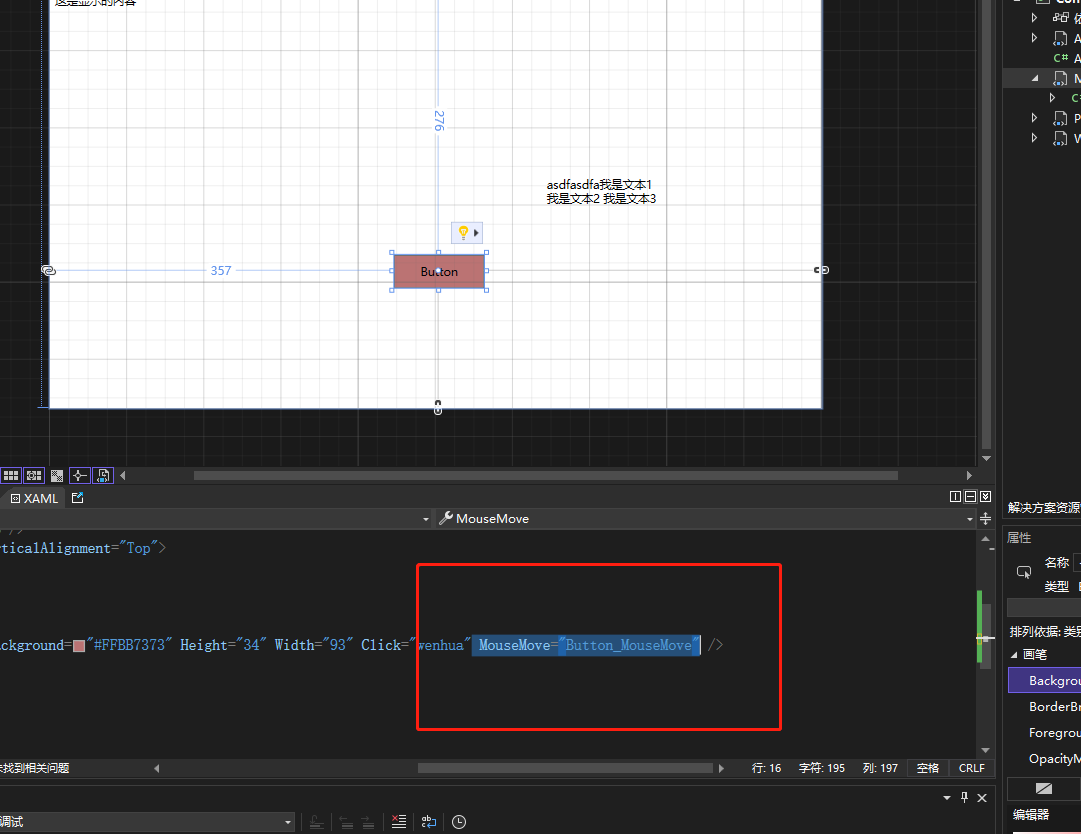
3:Button 按钮
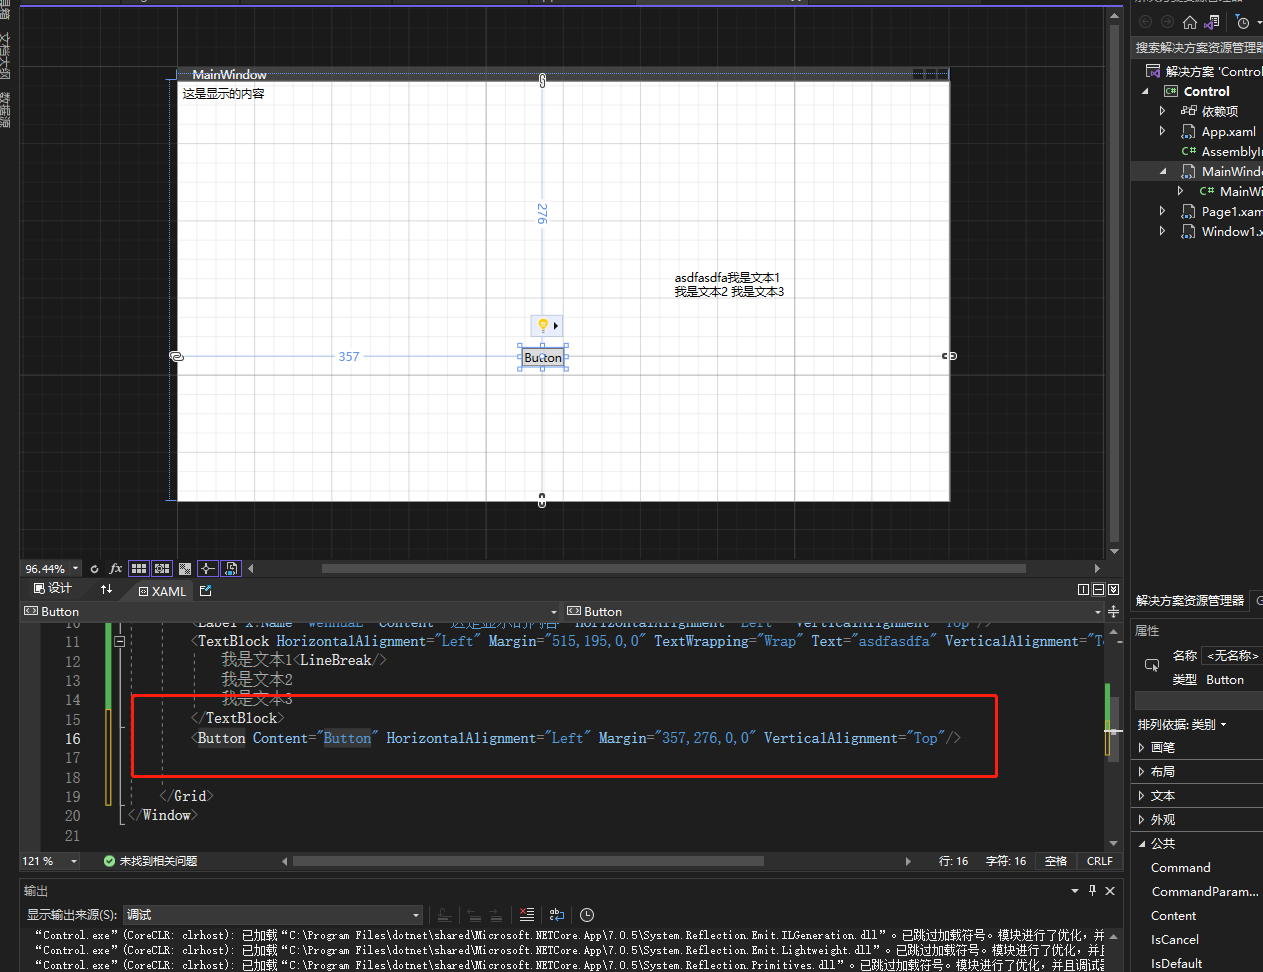
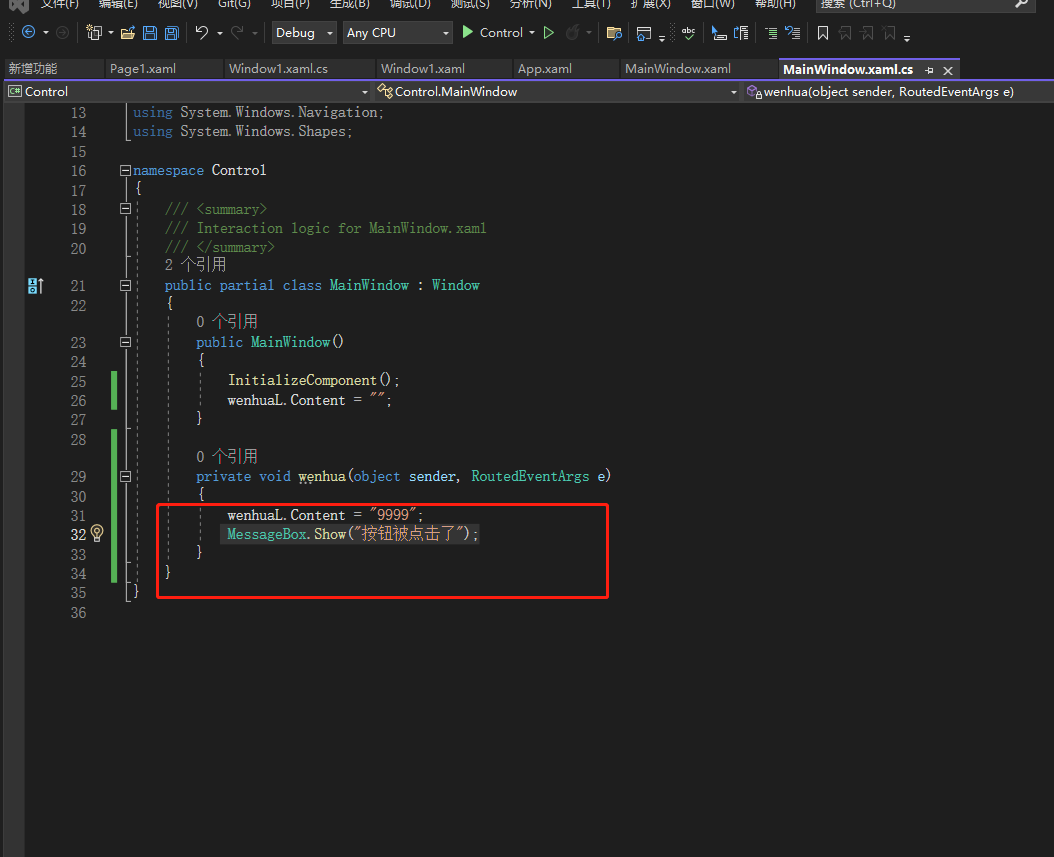
a:button定义点击事件。
先设置Click参数,然后按F12,会自动生成函数。
b:button鼠标移动事件。
MouseMove="Button_MouseMove"
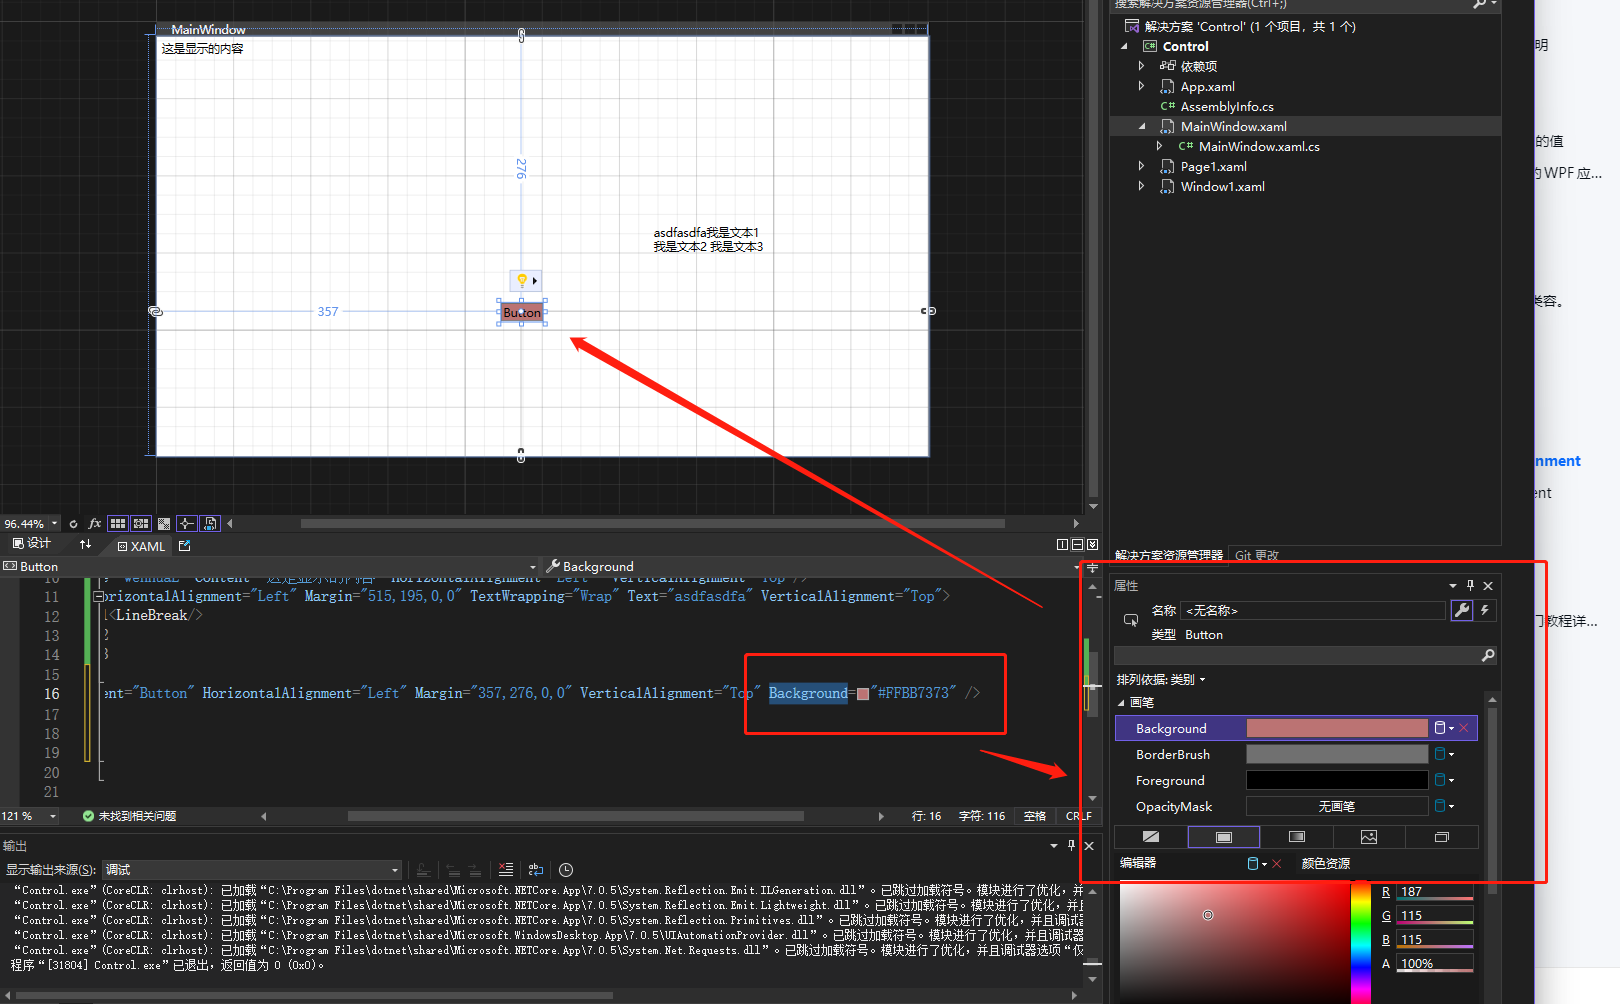
c:button设置背景颜色。
btn1.Background = new SolidColorBrush(Colors.Red);
4:Border 绘制边框
在另外一个元素的四周绘制边框或者背景。

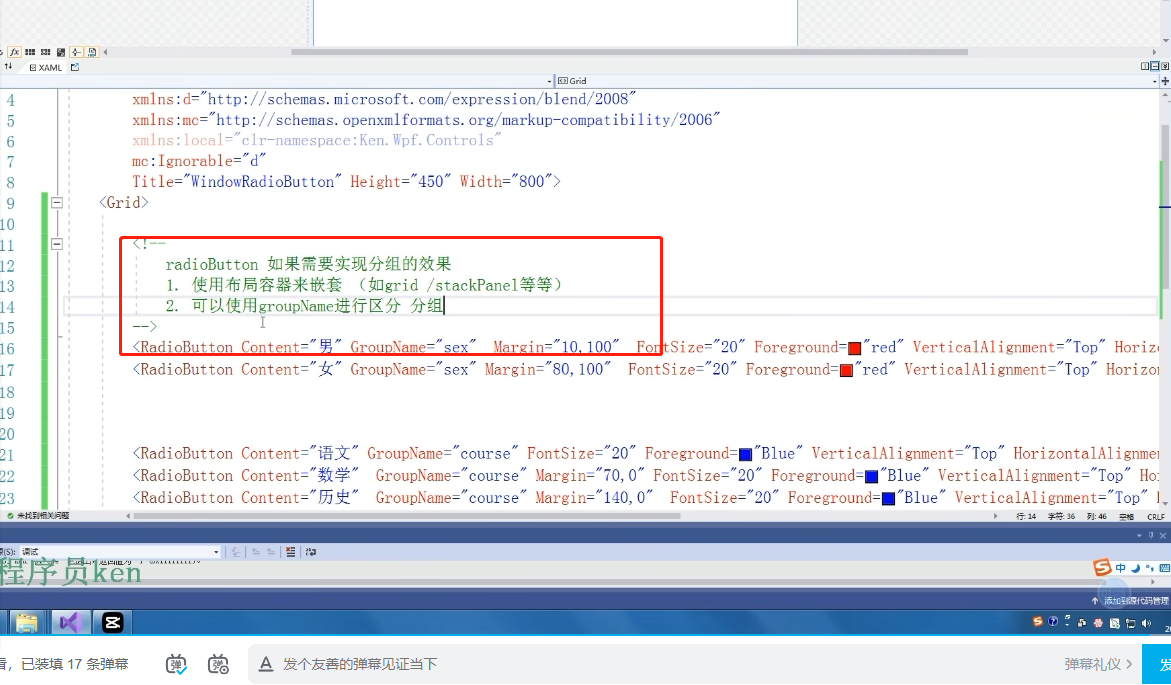
4:RadioButton 单选
<Grid>
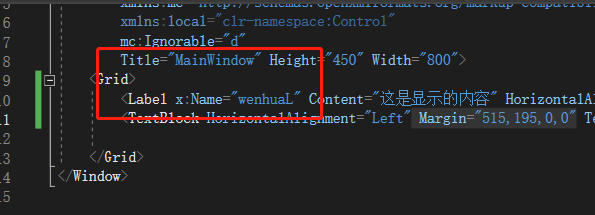
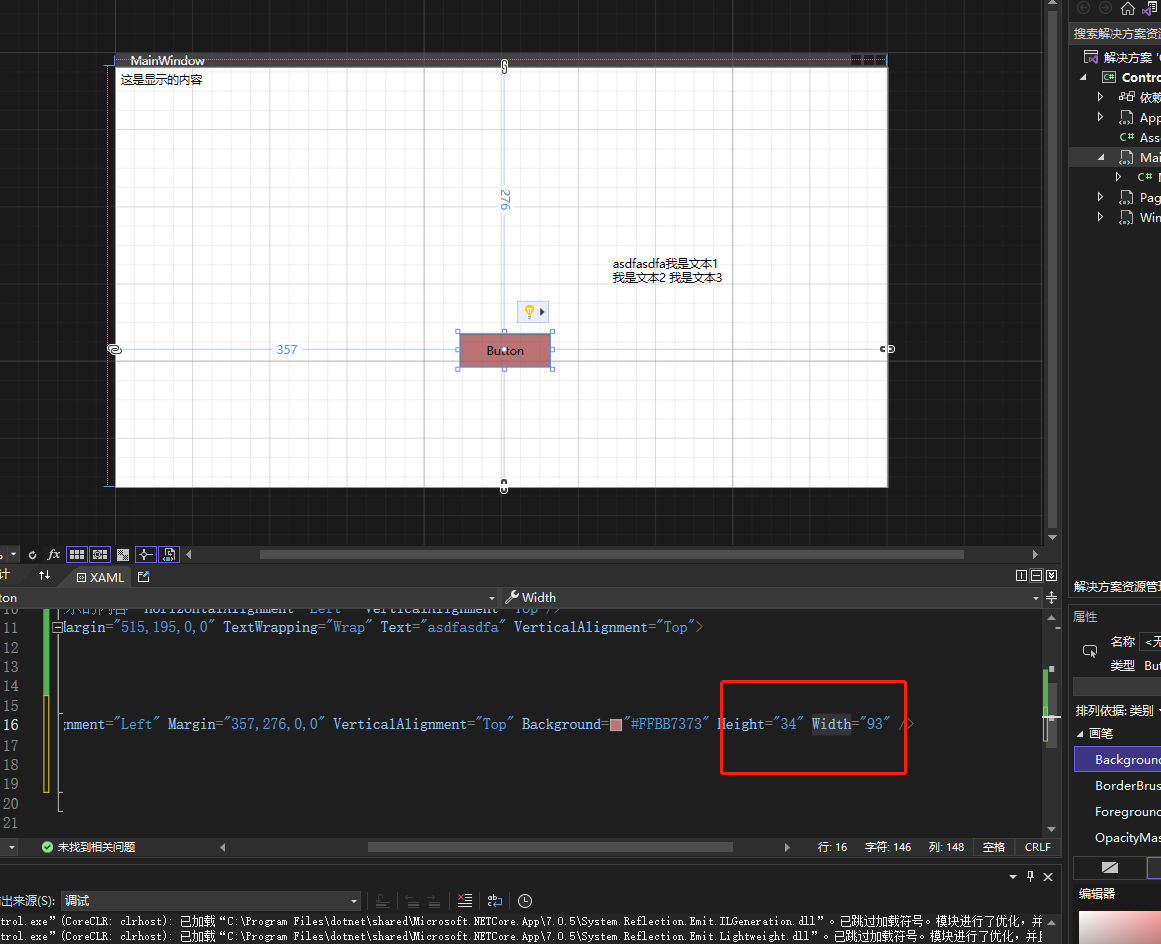
<Label x:Name="wenhuaL" Content="这是显示的内容" HorizontalAlignment="Left" VerticalAlignment="Top"/>
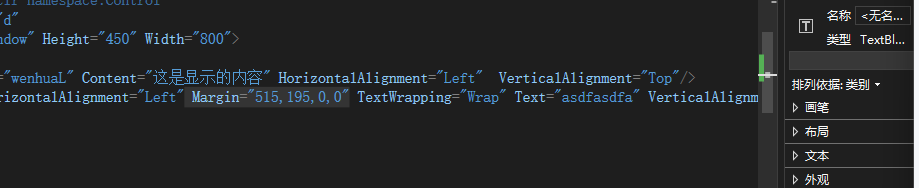
<TextBlock HorizontalAlignment="Left" Margin="515,195,0,0" TextWrapping="Wrap" Text="asdfasdfa" VerticalAlignment="Top">
我是文本1<LineBreak/>
我是文本2
我是文本3
</TextBlock>
<Button Content="Button" x:Name="btn1" HorizontalAlignment="Left" Margin="357,276,0,0" VerticalAlignment="Top" Background="#FFBB7373" Height="34" Width="93" Click="wenhua" MouseMove="Button_MouseMove" />
<Border BorderBrush="#FFC32222" BorderThickness="10">
</Border>
<RadioButton Content="Radio1" Margin="10,25,-10,-25"/>
<RadioButton Content="Radio1" Margin="100,25,-10,-25"/>
<RadioButton Content="Radio1" Margin="200,25,-10,-25"/>
<RadioButton Content="Radio1" Margin="300,25,-10,-25"/>
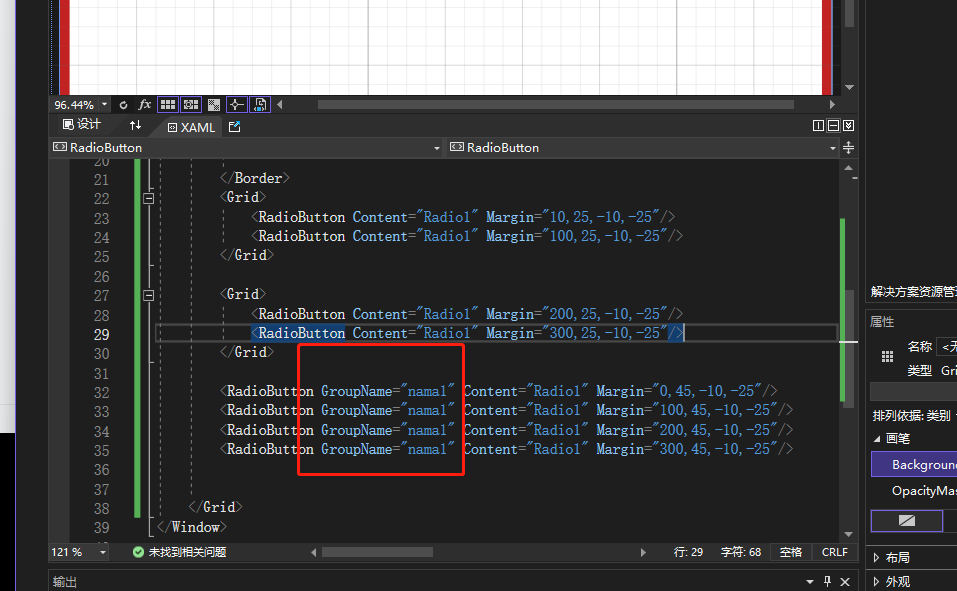
</Grid>四个只能选一个。
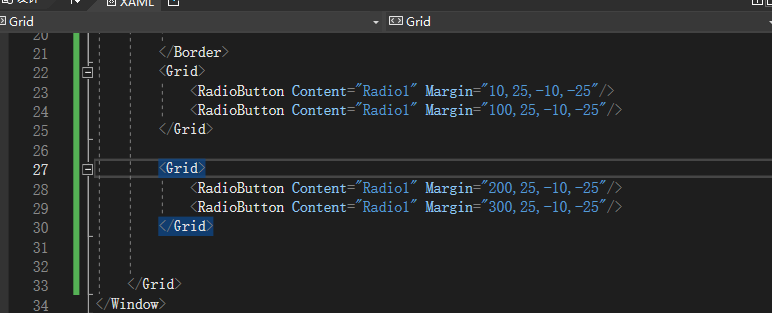
上面前两个为一组,后两个为一组。上级标签为同一组。
 <RadioButton GroupName="nama1" Content="Radio1" Margin="0,45,-10,-25"/>
        <RadioButton GroupName="nama1" Content="Radio1" Margin="100,45,-10,-25"/>
        <RadioButton GroupName="nama1" Content="Radio1" Margin="200,45,-10,-25"/>
        <RadioButton GroupName="nama1" Content="Radio1" Margin="300,45,-10,-25"/>
或者 GroupName为同一组。
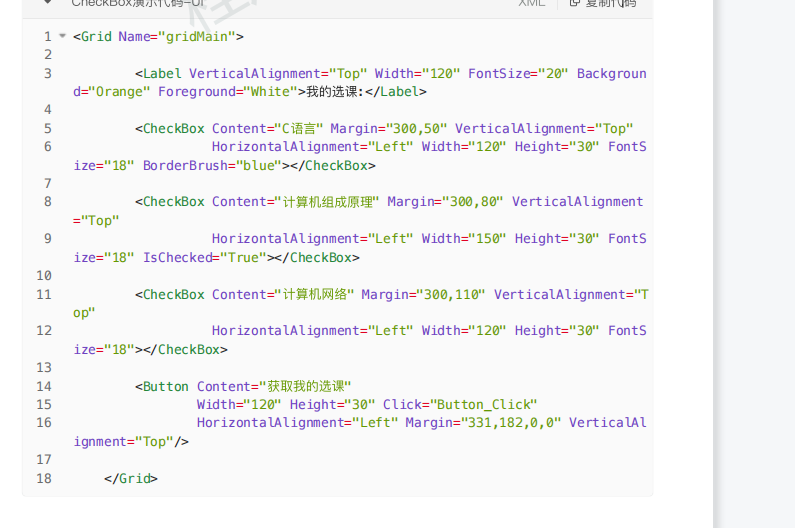
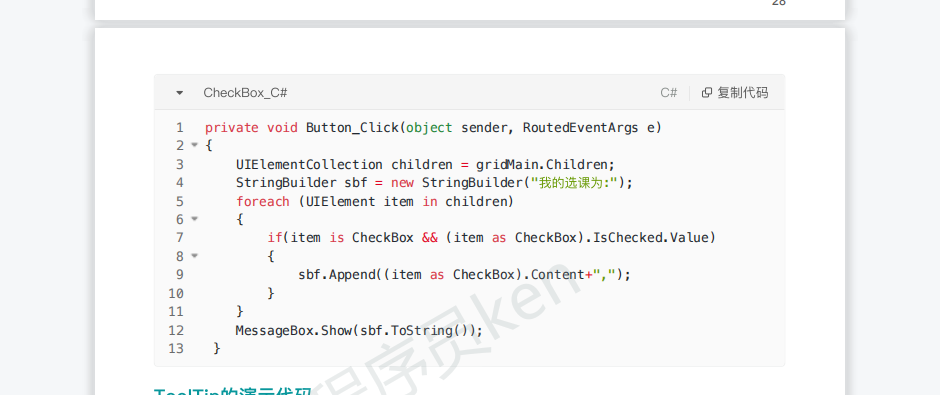
5:CheckBox 多选
六:属性。
1:x:Name
修改空间名字,以便程序中调用。
2:HorizontalAlignment
水平对齐方式
3:VerticalAlignment

垂直对齐方式
4:Margin
边距,四个值为左上右下

5:Background
设置背景
6:Height,Width
设置宽高
七:弹窗。 MessageBox.Show("按钮被点击了");
教程:
1:2022年WPF入门教程详解,适合新手上路
https://www.bilibili.com/video/BV1iY411w7zD/?spm_id_from=333.999.0.0&vd_source=dd4795916fd6c08bb59ae5fea830857f