手把手实现项目中自定义动态数据源?
- 第一步:创建项目,添加POM依赖
- 第二步:添加application.yml配置文件
- 第三步:自定义注解指定使用哪个数据源
- 第四步:创建DynamicDataSourceContextHolder工具类,存储当前线程所使用的数据源名称
- 第五步:定义DataSourceAspect切面类,拦截类或者方法上的注解
- 第六步:DruidProperties类属性注入
- 第七步:LoadDataSource加载数据源
- 第八步:DynamicDataSource 继承 AbstractRoutingDataSource 自动返回数据源名称,并设置数据源
- 第九步:数据库
- 第十步:测试
使用一个小例子演示一下自定义动态数据源的步骤。
第一步:创建项目,添加POM依赖
	<dependencies>
        <dependency>
            <groupId>org.springframework.boot</groupId>
            <artifactId>spring-boot-starter-web</artifactId>
        </dependency>

		<dependency>
            <groupId>org.springframework.boot</groupId>
            <artifactId>spring-boot-starter-aop</artifactId>
        </dependency>

        <dependency>
            <groupId>org.mybatis.spring.boot</groupId>
            <artifactId>mybatis-spring-boot-starter</artifactId>
            <version>3.0.0</version>
        </dependency>

        <dependency>
            <groupId>com.mysql</groupId>
            <artifactId>mysql-connector-j</artifactId>
            <version>8.0.31</version>
            <scope>runtime</scope>
        </dependency>

        <!-- https://mvnrepository.com/artifact/com.alibaba/druid-spring-boot-starter -->
        <dependency>
            <groupId>com.alibaba</groupId>
            <artifactId>druid-spring-boot-starter</artifactId>
            <version>1.2.17</version>
        </dependency>
    </dependencies>
第二步:添加application.yml配置文件
# 数据源配置
spring:
    datasource:
        type: com.alibaba.druid.pool.DruidDataSource
        driverClassName: com.mysql.cj.jdbc.Driver
        ds:
            # 主库数据源
            master:
                url: jdbc:mysql://localhost:3306/test?useUnicode=true&characterEncoding=utf8&zeroDateTimeBehavior=convertToNull&useSSL=true&serverTimezone=GMT%2B8
                username: root
                password: 123456
            # 从库数据源
            slave:
                url: jdbc:mysql://localhost:3306/test_slave?useUnicode=true&characterEncoding=utf8&zeroDateTimeBehavior=convertToNull&useSSL=true&serverTimezone=GMT%2B8
                username: root
                password: 123456
        # 初始连接数
        initialSize: 5
        # 最小连接池数量
        minIdle: 10
        # 最大连接池数量
        maxActive: 20
        # 配置获取连接等待超时的时间
        maxWait: 60000
        # 配置连接超时时间
        connectTimeout: 30000
        # 配置网络超时时间
        socketTimeout: 60000
        # 配置间隔多久才进行一次检测,检测需要关闭的空闲连接,单位是毫秒
        timeBetweenEvictionRunsMillis: 60000
        # 配置一个连接在池中最小生存的时间,单位是毫秒
        minEvictableIdleTimeMillis: 300000
        # 配置一个连接在池中最大生存的时间,单位是毫秒
        maxEvictableIdleTimeMillis: 900000
        # 配置检测连接是否有效
        validationQuery: SELECT 1 FROM DUAL
        testWhileIdle: true
        testOnBorrow: false
        testOnReturn: false
        webStatFilter:
            enabled: true
        statViewServlet:
            enabled: true
            # 设置白名单,不填则允许所有访问
            allow:
            url-pattern: /druid/*
            # 控制台管理用户名和密码
            login-username: valiant
            login-password: 123456
        filter:
            stat:
                enabled: true
                # 慢SQL记录
                log-slow-sql: true
                slow-sql-millis: 1000
                merge-sql: true
            wall:
                config:
                    multi-statement-allow: true
第三步:自定义注解指定使用哪个数据源
/**
 * 自定义注解,可以加在 service 类或者方法上,value指定使用哪个数据源
 */
@Retention(RetentionPolicy.RUNTIME)
@Target({ElementType.TYPE,ElementType.METHOD})
public @interface DataSource {
    String value() default DSType.DEFAULT_DS_NAME;
}
//默认类型,后边也可以用到
public interface DSType {
    String DEFAULT_DS_NAME = "master";
}
第四步:创建DynamicDataSourceContextHolder工具类,存储当前线程所使用的数据源名称
/**
 * 存储当前线程所使用的数据源名称
 */
public class DynamicDataSourceContextHolder {

    private static ThreadLocal<String> CONTEXT_HOLDER = new ThreadLocal<>();

    public static void setDSType(String dsType){
        CONTEXT_HOLDER.set(dsType);
    }

    public static String getDSType(){
        return CONTEXT_HOLDER.get();
    }

    public static void delDSType(){
        CONTEXT_HOLDER.remove();
    }
}
第五步:定义DataSourceAspect切面类,拦截类或者方法上的注解
@Component
@Aspect
public class DataSourceAspect {

    /**
     * @annotation(com.kun.dd.annotation.DataSource) 拦截方法上的DataSource注解
     * @within(com.kun.dd.annotation.DataSource) 如果类上标有注解,就将类中的方法拦截
     */
    @Pointcut("@annotation(com.kun.dd.annotation.DataSource) || @within(com.kun.dd.annotation.DataSource)")
    public void pc(){};

    @Around("pc()")
    public Object around(ProceedingJoinPoint pjp){
        //优先获取方法上的注解,没有在获取类上的
        DataSource dataSource = getDataSource(pjp);
        if (dataSource != null){
            //获取数据源名称
            String value = dataSource.value();
            DynamicDataSourceContextHolder.setDSType(value);
        }

        try {
            return pjp.proceed();
        } catch (Throwable throwable) {
            throwable.printStackTrace();
        }finally {
            DynamicDataSourceContextHolder.delDSType();
        }
        return null;
    }

    private DataSource getDataSource(ProceedingJoinPoint pjp) {
        MethodSignature signature = (MethodSignature) pjp.getSignature();
        //查找方法上的注解
        DataSource annotation = AnnotationUtils.findAnnotation(signature.getMethod(), DataSource.class);
        if (annotation != null){
            return annotation;
        }
        //方法上没有去类上找
        return AnnotationUtils.findAnnotation(signature.getDeclaringType(), DataSource.class);
    }
}
第六步:DruidProperties类属性注入
/**
 * 属性注入
 */
@ConfigurationProperties(prefix = "spring.datasource")
public class DruidProperties {

    private String type;
    private String driverClassName;
    private Map<String,Map<String,String>> ds;
    private Integer initialSize;
    private Integer minIdle;
    private Integer maxActive;
    private Integer maxWait;
    //其他的属性暂时省略......

    /**
     * 传入的DruidDataSource只包含三个核心属性,url,name,password
     * 其他的公共属性在这个类里边设置
     * @param druidDataSource
     * @return
     */
    public DataSource dataSource(DruidDataSource druidDataSource){
        druidDataSource.setInitialSize(initialSize);
        druidDataSource.setMaxActive(maxActive);
        druidDataSource.setMinIdle(minIdle);
        druidDataSource.setMaxWait(maxWait);

        return druidDataSource;
    }

    public String getType() {
        return type;
    }

    public void setType(String type) {
        this.type = type;
    }

    public String getDriverClassName() {
        return driverClassName;
    }

    public void setDriverClassName(String driverClassName) {
        this.driverClassName = driverClassName;
    }

    public Map<String, Map<String, String>> getDs() {
        return ds;
    }

    public void setDs(Map<String, Map<String, String>> ds) {
        this.ds = ds;
    }

    public Integer getInitialSize() {
        return initialSize;
    }

    public void setInitialSize(Integer initialSize) {
        this.initialSize = initialSize;
    }

    public Integer getMinIdle() {
        return minIdle;
    }

    public void setMinIdle(Integer minIdle) {
        this.minIdle = minIdle;
    }

    public Integer getMaxActive() {
        return maxActive;
    }

    public void setMaxActive(Integer maxActive) {
        this.maxActive = maxActive;
    }

    public Integer getMaxWait() {
        return maxWait;
    }

    public void setMaxWait(Integer maxWait) {
        this.maxWait = maxWait;
    }
}
第七步:LoadDataSource加载数据源
@Component
@EnableConfigurationProperties(DruidProperties.class)
public class LoadDataSource {

    @Autowired
    DruidProperties druidProperties;

    public Map<String, DataSource> loadAllDataSource(){
        Map<String,DataSource> map = new HashMap<>();
        Map<String, Map<String, String>> ds = druidProperties.getDs();

        try {
            //创建所有的数据源
            Set<String> keySet = ds.keySet();
            for (String key : keySet){
                map.put(key, druidProperties.dataSource((DruidDataSource) DruidDataSourceFactory.createDataSource(ds.get(key))));
            }

        }catch (Exception e){
            e.printStackTrace();
        }
        return map;
    }

}
第八步:DynamicDataSource 继承 AbstractRoutingDataSource 自动返回数据源名称,并设置数据源
@Component
public class DynamicDataSource extends AbstractRoutingDataSource {

    public DynamicDataSource(LoadDataSource loadDataSource){
        //1.设置所有数据源
        Map<String, DataSource> allDS = loadDataSource.loadAllDataSource();
        super.setTargetDataSources(new HashMap<>(allDS));
        //2.设置默认数据源(有些没有标注解的方法使用)
        super.setDefaultTargetDataSource(allDS.get(DSType.DEFAULT_DS_NAME));
        //3
        super.afterPropertiesSet();
    }

    /**
     * 系统需要获取数据源时,会自动调用该方法返回数据源名称
     * @return
     */
    @Override
    protected Object determineCurrentLookupKey() {
        return DynamicDataSourceContextHolder.getDSType();
    }
}
第九步:数据库
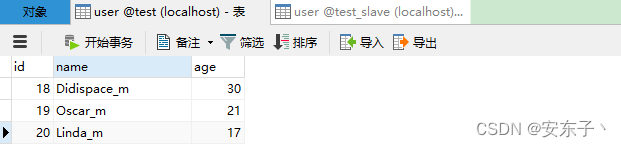
- 主从数据库都有一个user表(id,name,age),主表name后带 _m,从表name后带 _s。
//实体类
public class User {
    private Integer id;
    private String name;
    private Integer age;

    public Integer getId() {
        return id;
    }

    public void setId(Integer id) {
        this.id = id;
    }

    public String getName() {
        return name;
    }

    public void setName(String name) {
        this.name = name;
    }

    public Integer getAge() {
        return age;
    }

    public void setAge(Integer age) {
        this.age = age;
    }

    @Override
    public String toString() {
        return "User{" +
                "id=" + id +
                ", name='" + name + '\'' +
                ", age=" + age +
                '}';
    }
}
第十步:测试
//创建mapper接口
@Mapper
public interface UserMapper {

    @Select("select * from user")
    List<User> getAllUsers();
}
//创建service
@Service
public class UserService {

    @Autowired
    UserMapper userMapper;

    public List<User> getAllUsers(){
        return userMapper.getAllUsers();
    }
}
//单元测试
@SpringBootTest
@RunWith(SpringRunner.class)
public class DynamicSourceApplicationTests {

    @Autowired
    UserService userService;

    @Test
    public void contextLoads() {
        List<User> allUsers = userService.getAllUsers();
        for (User user : allUsers){
            System.out.println(user);
        }
    }
}
没有加注解时:

给方法或者类上加注解时:
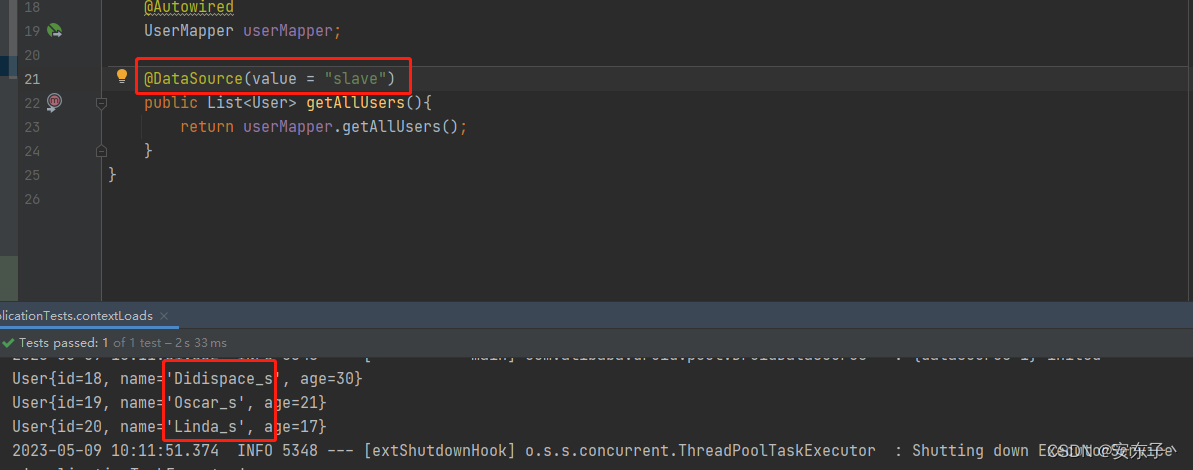
测试完成:源码地址点击跳转