文章目录
- 一、初识Spring Security
- 1. Spring Security简介
- 2. 第一个Spring Security项目(XML文件配置)
- 3. 第一个Spring Security项目(自动配置)
- 4. 配置Security账户
- 二、表单认证
- 1. Web 应用中基于密码的身份认证机制
- 2. 默认表单认证
- 3. 自定义表单登录页
- 三、认证与授权
- 1. 默认数据库模型的认证与授权
- 2. 基于内存的多用户多角色支持
- 3. 基于默认数据库数据库的认证与授权
- 4. 自定义数据库模型的认证与授权
一、初识Spring Security
1. Spring Security简介
应用程序的安全性通常体现在两个方面:认证和授权
认证:确认登录系统的用户在某系统中是否合法、可用的过程。
授权:当主体通过认证之后,是否允许其执行某项操作的过程。
2. 第一个Spring Security项目(XML文件配置)
首先我们为Spring Security专门建立一个Spring的配置文件spring-security.xml,该文件就专门用来作为Spring Security的配置。
spring-security.xml 文件框架
<!--命名空间-->
<beans xmlns="http://www.springframework.org/schema/beans"
  xmlns:security="http://www.springframework.org/schema/security"
  xmlns:xsi="http://www.w3.org/2001/XMLSchema-instance"
  xsi:schemaLocation="http://www.springframework.org/schema/beans
          http://www.springframework.org/schema/beans/spring-beans-3.1.xsd
          http://www.springframework.org/schema/security
          http://www.springframework.org/schema/security/spring-security-3.1.xsd">

	<!--Web/Http安全:当访问受保护的URL时会将用户引入登录界面或者是错误提示界面-->
	<!--业务对象或者方法的安全:控制方法访问权限-->
	<!--AuthenticationManager:处理来自于框架的认证请求-->
	<!--AccessDecisionManager:为Web或方法的安全提供访问决策-->
	<!--AuthenticationProvider:用来认证用户-->
	<!--UserDetailsService:跟AuthenticationProvider关系密切,用来获取用户信息-->
</beans>
Spring Security 初体验
spring-security.xml
<beans xmlns="http://www.springframework.org/schema/beans"
  xmlns:security="http://www.springframework.org/schema/security"
  xmlns:xsi="http://www.w3.org/2001/XMLSchema-instance"
  xsi:schemaLocation="http://www.springframework.org/schema/beans
          http://www.springframework.org/schema/beans/spring-beans-3.1.xsd
          http://www.springframework.org/schema/security
          http://www.springframework.org/schema/security/spring-security-3.1.xsd">

	<!--http元素是用来定义Web相关权限控制的-->
   <security:http auto-config="true">
      <security:intercept-url pattern="/**" access="ROLE_USER"/>
   </security:http>

	<!--有了权限的控制的而规则之后,接下来我们需要定义一个AuthenticationManager用于认证-->
   <security:authentication-manager>
      <security:authentication-provider>
         <security:user-service>
            <security:user name="user" password="user" authorities="ROLE_USER"/>
            <security:user name="admin" password="admin" authorities="ROLE_USER, ROLE_ADMIN"/>
         </security:user-service>
      </security:authentication-provider>
   </security:authentication-manager>

</beans>
Spring核心配置文件Application.xml
之后我们告诉的Spring加载这个配置文件,我们可以在 web.xml 文件中通过 context-param 把它指定为 Spring 的初始配置文件,也可以在对应 Spring 的初始配置文件中引入它。这里我们采用前者。
<!--将Spring配置文件设置为spring-security.xml文件-->
<context-param>
   <param-name>contextConfigLocation</param-name>
   <param-value>/WEB-INF/config/applicationContext.xml,/WEB-INF/config/spring-security.xml</param-value>
</context-param>

<!--通过ContextLoaderListener来加载和初始化Spring配置文件,这里初始化spring-security.xml-->
<listener>
   <listener-class>org.springframework.web.context.ContextLoaderListener</listener-class>
</listener>

<!--定义一个filter用来拦截需要交给Spring Security处理的请求-->
<filter>
   <filter-name>springSecurityFilterChain</filter-name>
   <filter-class>org.springframework.web.filter.DelegatingFilterProxy</filter-class>
</filter>

<filter-mapping>
   <filter-name>springSecurityFilterChain</filter-name>
   <url-pattern>/*</url-pattern>
</filter-mapping>
接下来可以启动我们的应用,然后在浏览器中访问我们的主页。你会看到如下页面。
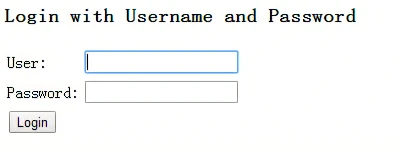
因为我们的 spring-security.xml 文件中配置好了所有的请求都需要 “ROLE_USER” 权限,所以当我们在请求主页的时候,Spring Security 发现我们还没有登录,Spring 会引导我们到登录界面。使用正确的用户名和密码(如上面配置的 user/user 或 admin/admin)登录后,如果符合对应的权限我们就可以访问主页了,否则将出现 403(禁止访问)界面。
3. 第一个Spring Security项目(自动配置)
添加模块中得pom依赖
<dependencies>
   <dependency>
        <groupId>org.springframework.boot</groupId>
        <artifactId>spring-boot-starter-web</artifactId>
    </dependency>

   <!--核心安全依赖-->
    <dependency>
        <groupId>org.springframework.boot</groupId>
        <artifactId>spring-boot-starter-security</artifactId>
    </dependency>

    <dependency>
        <groupId>org.springframework.security</groupId>
        <artifactId>spring-security-test</artifactId>
        <scope>test</scope>
    </dependency>
</dependencies>
创建Web接口
@RestController
public class HelloController {
@GetMapping("/hello")
public String hello() {
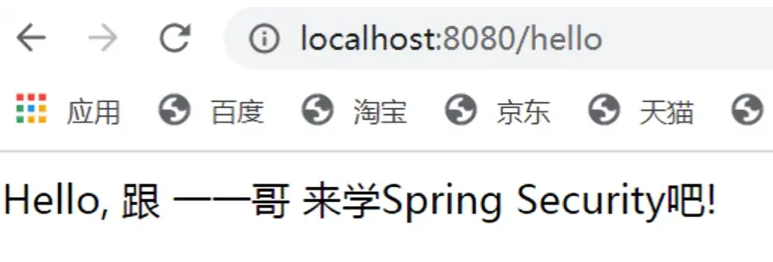
return "Hello, 来跟 一一哥 学习 Spring Security吧!";
}
}
创建项目入口类
package com.yyg.security;

import org.springframework.boot.SpringApplication;
import org.springframework.boot.autoconfigure.SpringBootApplication;

@SpringBootApplication
public class Demo01Application {

    public static void main(String[] args) {

        SpringApplication.run(Demo01Application.class, args);
    }

}
启动项目
在访问/hello接口之前会自动跳转到/login地址,进入到一个登录界面。这是因为Spring Boot中"约定大约配置"的规则,只要我们添加了Spring Security的依赖包,就会自动开启安全限制,在访问Web接口之前会进行安全拦截。只有输入了用户名和密码,才能访问项目中的Web接口/hello。
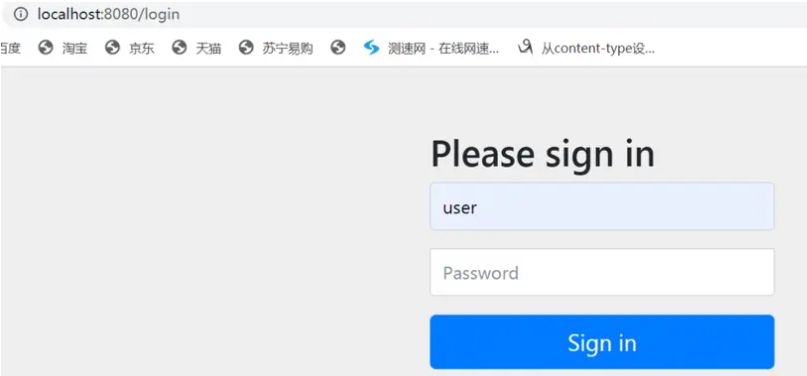
这个默认的用户名是“user”,密码是一个用UUID生成的随机字符串。在每次启动项目时,都可以在控制台中看到生成的随机密码,如下图所示:
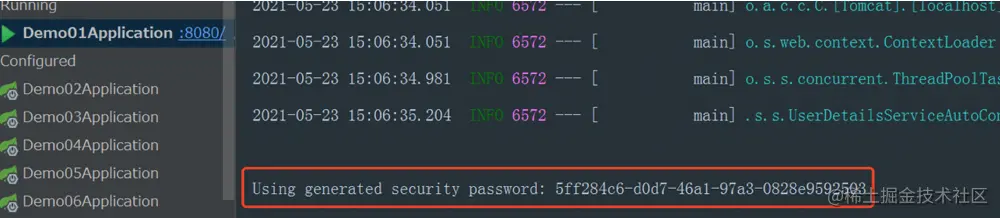
我们只要把这个随机密码,复制粘贴到登录页面的密码框中,就可以访问"/hello"接口了。
4. 配置Security账户
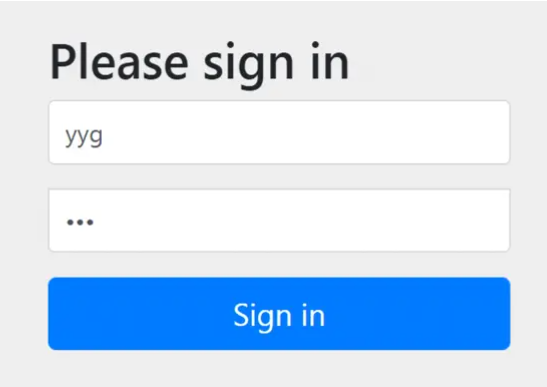
我们在application.yml中配置Spring Security的自定义账户。
spring:
  security:
    user:
      name: yyg
      password: 123
在这里配置了自定义的用户名和密码后,在Spring Security的源码中,会通过调用SecurityProperties的 set()方法 注入到对应的属性中。我们来看下 SecurityProperties.User#setPassword() 方法的源码:
public void setPassword(String password){
	if(!StringUtils.hasLength(password)){
		return;
	}
	this.passwordGenerated = false;
	this.password = password;
}
由此我们可以看到,passwordGenerated属性变成了false,结合上文的源码分析,我们就知道在控制台不会再输出打印密码信息了。
重启项目
接着我们重启项目,这时候利用我们自己配置的用户名和密码,就可以访问"/hello"接口了。
二、表单认证
1. Web 应用中基于密码的身份认证机制
认证(Authentication)
一、基于密码的认账过程
1. 服务器从客户端获取用户账密
2. 服务器将拿到的账密和数据库中保存的账密进行比较,确认正确后生成用户身份信息
3. 客户端从服务器获取用户身份信息

二、存在的两种问题
1. 当提供方与使用方能够共享数据库,不必跨网络和安全边界进行交互时,需要考虑一个问题:按照什么流程、什么格式能够安全可靠地把用户账密从客户端传递给服务器。
2. 当提供方与使用方独立部署,必须跨网络和安全边界进行交互时,不仅仅需要考虑上面问题,还需要考虑:按照什么流程、什么格式能够安全可靠地把用户身份信息从服务器传给客户端。

三、上述两种问题的解决办法
【Question1】的解决办法:表单认证、HTTP Basic认证、HTTP Digest认证、HTTP Mutual认证
【Question2】的解决方法:OIDC、SAML 、WS-Federation、Windows AD
表单认证
1. 客户端请求访问受保护的资源(目标URI:GET localhost/resource)。
2. 目标URI收到请求后,将检查用户是否登录(是否携带了指定cookie,校验cookie值)。如果用户未登录,则返回303,通过浏览器将客户端重定向到登录页面(GET localhost/login.html)。
3. 用户在登录页面的表单中输入账密,提交表单时调用验证账密接口(POST localhost/user_pass/verify),请求体传参为用户名、加密密码、目标URI。
4. 验证账密接口(POST localhost/user_pass/verify)校验收到的传参:
	(1)如果账密正确,则颁发登录凭证(设置指定cookie),返回303,通过浏览器将客户端重定向到目标URI。
	(2)如果账密错误,则返回303,通过浏览器将客户端重定向到错误页面。
5. 目标URI收到请求后,发现用户已登录,则检查用户权限:
	(1)如果有权限,则返回保护资源作为响应。
	(2)如果权限不足,则重定向到无权访问页面。
HTTP基本认证
1、客户端请求访问受保护的资源(目标URI:GET localhost/resource)。
2、目标URI收到请求后,检查请求头是否包含Authorization字段。如果不包含,则服务器将发起质询,即返回401 Unauthorized响应,响应头带有WWW-Authenticate字段,
- Basic:表明认证方式为HTTP基本认证。
- realm:保护空间标识名称,告知客户端自动应用账密的范围
HTTP/1.1 401 Unauthorized
WWW-Authenticate: Basic realm="example_space_name"
3、客户端收到401的质询响应,要求用户提供账密。客户端按照Basic的规定格式(username:password)对账密进行base64编码,放在请求头Authorization字段中,重新请求目标URI,将账密提交给服务器。
GET /resource HTTP/1.1
Host: localhost
Authorization: Basic cUZFeFZtQlE4blBZOjVjNWVkYjA2OTA2MTZjZGJkNGNmOWMwYjBlMjg3MWVkNjM2MzE2ZTliNjI1NWQzMDA2MDg3NGJm
4、目标URI再次收到请求后,根据realm="example_space_name"这一保护空间采用的认证机制来校验收到的账密。
1. 如果账密正确,则检查用户权限。如果用户有权限,则返回保护资源作为响应。如果没有权限,则返回403 Forbidden作为响应。
2. 如果账密错误,则重复步骤2,即返回401 Unauthorized响应,带有响应头WWW-Authenticate: Basic realm="example_space_name"。
2. 默认表单认证
【Question 1】Security怎么知道我们需要对所有的接口进行验证?Security又是怎么知道我们需要支持基于表单的验证?
【Answer 1】原因是WebSecurityConfigurerAdapter在configure(HttpSecurity http)方法中提供了一个默认的配置,代码如下:
protected void configure(HttpSecurity http) throws Exception {
    ((HttpSecurity)
    	((HttpSecurity)
    		((AuthorizedUrl)http
    			.authorizeRequests()
    			.anyRequest())
    		.authenticated()	// 请求都需要被认证
    		.and())
    	.formLogin()	// 基于表单认证
		.and())
	.httpBasic();	// 配置basic登录
}
3. 自定义表单登录页
但是大多数应用程序都有自己的登录页面,登录接口,接口请求参数名称。
比如不想使用 Security 提供的登录页面,不想调用 login 接口,想改名为 /auth/login,表单参数不想使用 username、password,而是想使用 account、pwd,要做到这一点,只需要配置如下代码:
@Configuration
// @EnableWebSecurity  如果你的项目是 SpringBoot 项目,该注解就没必要写
public class SecurityConfig extends WebSecurityConfigurerAdapter {
	@Override
	protected void configure(HttpSecurity http) throws Exception {
	    http.authorizeRequests()  //开启配置
	    	.antMatchers("/hello2", "/hello4").permitAll()	//hello2、hello4接口可以直接访问
    	    .anyRequest().authenticated()// 其他请求都要验证:需要登录才能访问
            	.and()	// 还要添加以下要求
            	.formLogin()	// 使用表单认证方式
            	.loginPage("/login.html") //登录页面
            	.loginProcessingUrl("/auth/login") //登录接口,此地址可以不真实存在
            	.usernameParameter("account") //用户名字段
            	.passwordParameter("pwd") //密码字段
            	.defaultSuccessUrl("/hello")  //登录成功的回调
            	.successForwardUrl("/hello3")	//登录成功的回调
            	.permitAll() // 上述 login.html 页面、/auth/login接口放行
            	.and()
            	.csrf().disable();  // 禁用 csrf 保护
	}
}
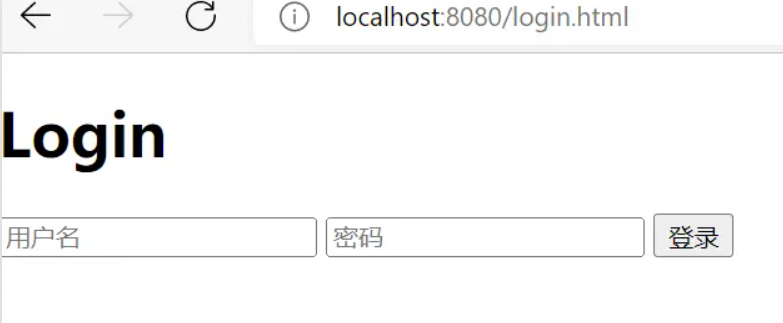
我们来设置一下/login.html页面,内容如下,并将其配置在 resources/static 目录下。
<!DOCTYPE html>
<html lang="en">
<head>
    <meta charset="UTF-8">
    <title>Login</title>
</head>
<body>
<div id="login">
    <h1>Login</h1>
    <form method="post" action="/auth/login">
        <input type="text" required="required" placeholder="用户名" name="account"></input>
        <input type="password" required="required" placeholder="密码" name="pwd"></input>
        <button class="but" type="submit">登录</button>
    </form>
</div>
</body>
</html>
配置完成之后,重启项目。请求 /hello 接口,跳转到指定的页面,如下:
三、认证与授权
在初始Spring Security中默认的安全机制:仅有一个用户,仅有一种角色。在实际开发中,这自然是无法满足需求的,我们可以通过以下不同的方式来增加用户角色。
1. 默认数据库模型的认证与授权
默认controller包下新建三个控制器AdminController、AppController、UserController
@RestController
@RequestMapping("/admin/api")
public class AdminController{
	@GetMapping("/hello")
	public String hello(){
		return "hello, admin";
	}
}

@RestController
@RequestMapping("/app/api")
public class AppController{
	@GetMapping("/hello")
	public String hello(){
		return "hello, app";
	}
}

@RestController
@RequestMapping("/user/api")
public class AdminController{
	@GetMapping("/hello")
	public String hello(){
		return "hello, user";
	}
}
为了能正常访问前面的路由,我们需要进一步地配置Spring Security。
@EnableWebSecurity
public class WebSecurityConfig extends WebSecurityConfigurerAdapter{
	@Override
	protected void configure(HttpSecurity http) throws Exception{
		http.authorizeRequests()
			.antMatchers("/admin/api/**").hasRole("ADMIN")	// admin才能访问这个接口
			.antMatchers("/user/api/**").hasRole("USER")	// 开发者才能访问这个接口
			.antMatchers("/app/api/**").permitAll()			// 所有人能够访问这个接口
			.and()
			.formLogin();
	}
}
重启服务,尝试访问localhost:8080/app/api/hello,页面打印hello,app,验证了/app/api下的服务确实是权限公开的。接着访问localhost:8080/user/api/hello,这次需要登陆了,我们尝试输入前面在application.properties中定义的用户名和密码,登录之后,页面打印hello,user。然而,我们并没user用户的,为什么可以成功访问路由呢?为了验证不是授权环节出了问题,我们尝试访问localhost:8080/admin/api/hello,出现如下图所示。
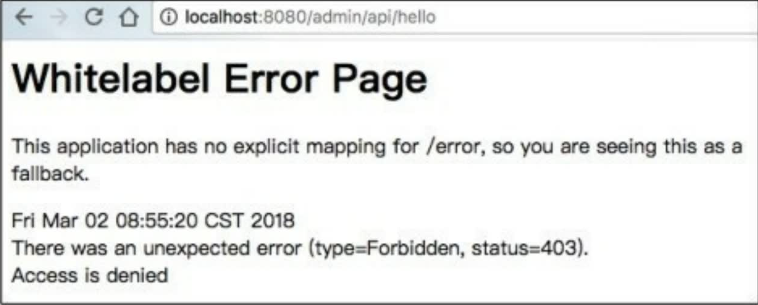
页面显示403错误,表示该用户授权失败(401代表该用户认证失败)。也就是说,本次访问已经通过了认证环节,只是在授权的时候被驳回了。认证环节没有问题,是因为Spring Security将所有账户的角色默认为user。
2. 基于内存的多用户多角色支持
到目前为止,我们仍然只有一个可登录的用户,怎样引入多用户的呢?非常简单,我们只需要实现一个自定义的UserDetailsService即可,并且为其添加一个@Bean注解,便可被Spring Security发现并使用。
这是因为Spring Security支持各种来源的用户数据,包括内存、数据库等,它们被抽象为一个UserDetailsService接口。任何实现了UserDetailsService接口的对象都可以作为认证数据源。
@Bean
public UserDetailsService userDetailsService(){
	// InMemoryUserDetailsManager是UserDetailsService接口的实现类
	InMemoryUserDetailsManager manager = new InMemoryUserDetailsManager();
	manager.createUser(User.withUsername("user").password("123").roles("USER").build());
	manager.createUser(User.withUsername("admin").password("123").roles("ADMIN").build());
	return manager;
}
3. 基于默认数据库数据库的认证与授权
除了上述使用到的I你Memory User DetailsManager,Spring Security还提供了另一个UserDetailsService实现类JdbcUserDetailsManager,这个类可以帮助我们以JDBC方式对接数据库和Spring Security,它设定了一个默认的数据库模型。
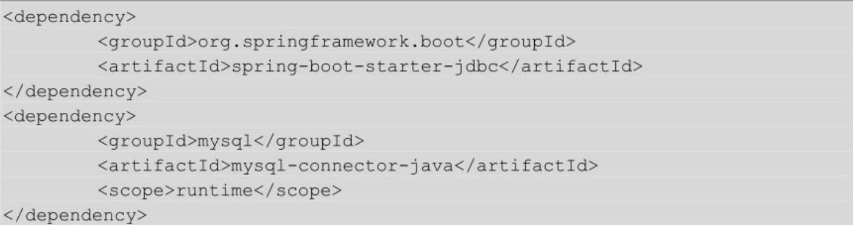
首先在工程中引入JDBC和MySQL两个必要依赖
接着在application.properties中配置数据库连接参数。

JdbcUserDetailsManager设定了一个默认的数据库模型,Spring Security将该模型定义在了/org/springframework/security/core/userdetails/jdbc/users.ddl
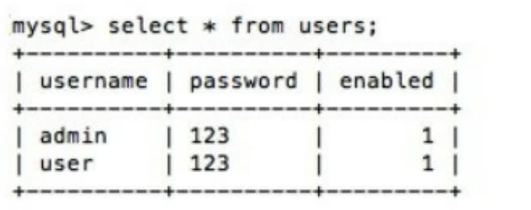
JdbcUserDetailsManager需要两个表,其中users表用来存放用户名、密码和是否可用三个信息。
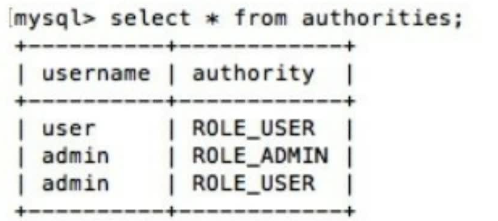
authorities表用来的存放用户名、权限两个信息。
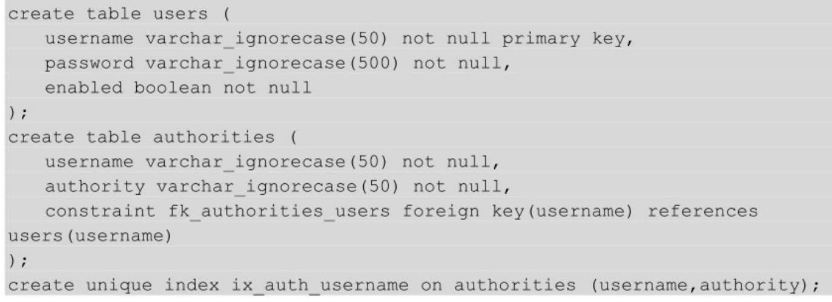
但是不能直接将上述语句执行,会报错,因为上述语句是hsqldb创建的,而MySQL不支持varchar_ignorecase这种类型,需要将它变成varchar即可。
下面构建一个JdbcUserDetailsManager实例,让Spring Security使用数据库来管理用户。
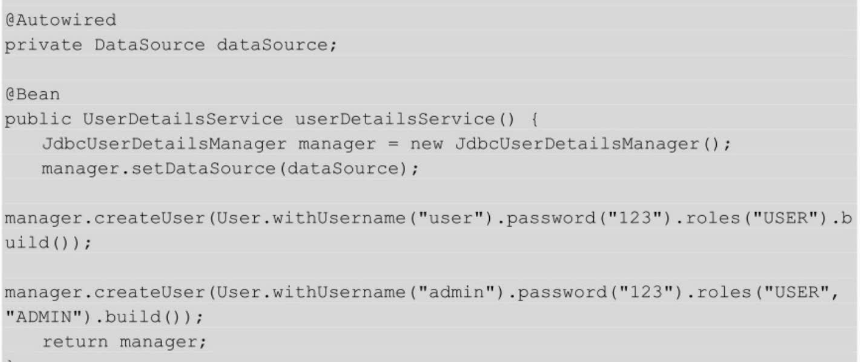
Spring Security通过DataSource执行设定好的命令,例如createUser函数实际上就是执行insert的SQL语句。
现在重启服务,看看在数据库中Spring Security生成了哪些数据。
4. 自定义数据库模型的认证与授权
当使用Spring Security默认数据库模型应对各种用户系统时,难免灵活性欠佳,因为已经规定好了数据表及其表的字段。如果对现有的系统做Spring Security嵌入时,原本的用户数据就要做出大的修改来适配Spring Security,这样显然得不偿失,那么强大而灵活的Spring Security对这方面进行了改进。
UserDetailsService仅定义了一个loadUserByUsername方法,用于获取一个UserDetails对象。UserDetails对象包含了的一系列在验证时会用到的信息,Spring Security会根据这些信息判定验证是否成功。
public interface UserDetails extends Serializable{

	Collection<? extends GrantedAuthority> getAuthorities();

	String getPassword();

	String getUsername();

	boolean isAccountNonExpired();

	boolean isAccount NonLocked();

	boolean is CredentialsNonExpired();

	boolean isEnable();
}
也就是说,不管数据库结构如何变化,只要能构造一个UserDetails即可,下面就来实现这个过程。
1. 数据库准备
设计一个自定义的数据库结构。

2. 编写对应的User实体类,并且实现UserDetails
isAccountNonExpired、isAccountNonLocked、isCredentialsNonExpired暂且用不到,所以统一返回true,否则Spring Security会认为账号异常。
@Data
public class User implements UserDetails{

	private Long id;
	private String username;
	private String password;
	private String roles;
	private boolean enable;

	// 每种角色对应一个GrantedAuthority
	private List<GrantedAuthority>	authorities;

	@Override
	public boolean isAccountNonExpired(){
		return true;
	}

	@Override
	public boolean isAccountNonLocked(){
		return true;
	}

	@Override
	public boolean isCredentialsNonExpired(){
		return true;
	}

	@Override
	public boolean isEnabled(){
		return this.enable;
	}

	public void setAuthorities(List<GrantedAuthority> authorities){
		this.authorities = authorities;
	}

	@Override
	public Collection<? extends GrantedAuthority> getAuthorities(){
		return this.authorities;
	}
}
3. 实现User DetailsService
当准备好UserDetails之后,使用数据库持久层框架读取数据并填充对象。
首先编写持久层Mapper。
@Component
public interface UserMapper{
	@Select("SELECT * FROM users WHERE username = #{username}")
	User findByUserName(@Param("username") String username);
}
其次编写UserDetailsService。
@Service	// 一定要加上@Service注解,以便被Spring Security自动发现
public class MyUserDetailsService implementsUserDetailsService{

	@Autowired
	private UserMapper userMapper;

	@Override
	public UserDetails loadUserByUsername(String username) throws UsernameNotFoundException{
		// 从数据库尝试读取该用户
		User user = userMapper.findByUserName(username);
		// 用户不存在,抛出异常
		if(user == null)
			throw new UsernameNotFoundException("用户不存在")
		// 将数据库形式的roles解析为UserDetails的权限集
		user.setAuthorities(AuthorityUtils.commaSeparatedStringToAuthorityList(user.getRoles()));
		return user;
	}

	// 自行实现权限的转换
	private List<GrantedAuthority> generatedAuthorities(String roles){
		List<GrantedAuthority> authorities = new ArrayList<>();
		String roleArray = roles.split(";");
		if(roles != null && !"".equals(roles))
			for(String role:roleArray)
				authorities.add(new SimpleGrantedAuthority(role));
		return authorities;
	}
}