带你深入分析Spring所提供的缓存Cache功能的开发实战指南
- CacheManager管理器的扩展支持
- 缓存技术类型与CacheManger
- 缓存依赖
- application配置
- 缓存注解
- @EnableCaching
- @Cacheable
- @CachePut
- @CacheEvict
- @CacheConfig
- SpEL上下文数据
- 注意
- SpEL提供了多种运算符
- 不同Cache的实现机制
- ConcurrentMap Cache的实现方案
- Caffeine Cache
- Caffeine参数说明
- 注意:
- 导入依赖
- 通过yaml配置
- 通过bean装配
- 配置文件结合Bean装配
- 实现CacheLoader
- EhCache
- 导入依赖
- 加入配置:
- ehcache配置文件
- 装配
- Redis Cache
- Redis 优势
- 导入依赖
- 配置Redis
- 装配
- 装配序列化类型
- 装配过期时间
- 自定义缓存配置文件,继承 CachingConfigurerSupport
CacheManager管理器的扩展支持
Spring的抽象控制机制,即允许绑定不同的缓存解决方案(如Caffeine、Ehcache等),但本身不直接提供缓存功能的实现。它支持注解方式使用缓存,非常方便。
SpringBoot在Annotation的层面实现了数据缓存的功能,基于Spring的AOP技术。所有的缓存配置只是在Annotation层面配置,像声明式事务一样。
Spring定义了CacheManager和Cache接口统一不同的缓存技术。其中CacheManager是Spring提供的各种缓存技术的抽象接口。而Cache接口包含缓存的各种操作。
Cache接口下Spring提供了各种xxxCache的实现,如RedisCache,EhCacheCache ,ConcurrentMapCache等;
缓存技术类型与CacheManger
针对不同的缓存技术,需要实现不同的cacheManager,Spring定义了如下的cacheManger实现。
| CacheManger | 描述 |
|---|---|
| SimpleCacheManager | 使用简单Collection来存储缓存,主要用于测试 |
| ConcurrentMapCacheManager | 使用ConcurrentMap作为缓存技术(默认),需要显式的删除缓存,无过期机制 |
| NoOpCacheManager | 仅测试用途,不会实际存储缓存 |
| EhCacheCacheManager | 使用EhCache作为缓存技术,以前在hibernate的时候经常用 |
| GuavaCacheManager | 使用google guava的GuavaCache作为缓存技术(1.5版本已不建议使用) |
| CaffeineCacheManager | 是使用Java8对Guava缓存的重写,spring5(springboot2)开始用Caffeine取代guava |
| HazelcastCacheManager | 使用Hazelcast作为缓存技术 |
| JCacheCacheManager | 使用JCache标准的实现作为缓存技术,如Apache Commons JCS |
| RedisCacheManager | 使用Redis作为缓存技术 |
常规的SpringBoot已经为我们自动配置了EhCache、Collection、Guava、ConcurrentMap等缓存,默认使用ConcurrentMapCacheManager。
SpringBoot的application.properties配置文件,使用spring.cache前缀的属性进行配置。
缓存依赖
开始使用前需要导入依赖spring-boot-starter-cache为基础依赖,其他依赖根据使用不同的缓存技术选择加入,默认情况下使用ConcurrentMapCache不需要引用任何依赖。
<!-- 基础依赖 -->
<dependency>
   <groupId>org.springframework.boot</groupId>
   <artifactId>spring-boot-starter-cache</artifactId>
</dependency>
<!-- 使用 ehcache -->
<dependency>
   <groupId>net.sf.ehcache</groupId>
   <artifactId>ehcache</artifactId>
</dependency>
<!-- 使用  caffeine https://mvnrepository.com/artifact/com.github.ben-manes.caffeine/caffeine -->
<dependency>
   <groupId>com.github.ben-manes.caffeine</groupId>
   <artifactId>caffeine</artifactId>
   <version>2.6.0</version>
</dependency>
<!-- 使用  redis  -->
<dependency>
   <groupId>org.springframework.boot</groupId>
   <artifactId>spring-boot-starter-data-redis</artifactId>
</dependency>
application配置
spring.cache.type= #缓存的技术类型,可选 generic,ehcache,hazelcast,infinispan,jcache,redis,guava,simple,none
spring.cache.cache-names= #应用程序启动创建缓存的名称,必须将所有注释为@Cacheable缓存name(或value)罗列在这里,否者:Cannot find cache named 'xxx' for Builder[xx] caches=[sysItem] | key='' | keyGenerator='' | cacheManager='' | cacheResolver='' | condition='' | unless='' | sync='false'
#以下根据不同缓存技术选择配置
spring.cache.ehcache.config= #EHCache的配置文件位置
spring.caffeine.spec= #caffeine类型创建缓存的规范。查看CaffeineSpec了解更多关于规格格式的细节
spring.cache.infinispan.config= #infinispan的配置文件位置
spring.cache.jcache.config= #jcache配置文件位置
spring.cache.jcache.provider= #当多个jcache实现类时,指定选择jcache的实现类
缓存注解
下面是缓存公用接口注释,适用于任何缓存类型。
@EnableCaching
在启动类注解@EnableCaching开启缓存。
@SpringBootApplication
@EnableCaching  //开启缓存
public class DemoApplication{
   public static void main(String[] args) {
      SpringApplication.run(DemoApplication.class, args);
   }
}
@Cacheable
配置findByName函数的返回值将被加入缓存。同时在查询时,会先从缓存中获取,若不存在才再发起对数据库的访问。
该注解主要有下面几个参数:
-
value、cacheNames:两个等同的参数(cacheNames为Spring4新增,作为value的别名),用于指定缓存存储的集合名。
- 由于Spring4中新增了@CacheConfig,因此在Spring3中原本必须有的value属性,也成为非必需项了。
-
key:缓存对象存储在Map集合中的key值,非必需,缺省按照函数的所有参数组合作为key值,若自己配置需使用SpEL表达式,比如:
@Cacheable(key = “#p0”):使用函数第一个参数作为缓存的key值。 -
condition:缓存对象的条件,非必需,也需使用SpEL表达式,只有满足表达式条件的内容才会被缓存,比如:
@Cacheable(key = “#p0”, condition = “#p0.length() < 3”),表示只有当第一个参数的长度小于3的时候才会被缓存 -
unless:另外一个缓存条件参数,非必需,需使用SpEL表达式。它不同于condition参数的地方在于它的判断时机,该条件是在函数被调用之后才做判断的,所以它可以通过对result进行判断。
-
keyGenerator:用于指定key生成器,非必需。若需要指定一个自定义的key生成器,我们需要去实现
org.springframework.cache.interceptor.KeyGenerator接口,并使用该参数来指定。- 需要注意的是:该参数与key是互斥的。
-
cacheManager:用于指定使用哪个缓存管理器,非必需。只有当有多个时才需要使用
-
cacheResolver:用于指定使用那个缓存解析器,非必需。需通过
org.springframework.cache.interceptor.CacheResolver接口来实现自己的缓存解析器,并用该参数指定。
public class SampleServiceImpl implements SampleService {
     @Override
     @Cacheable(value = {"newJob"},key = "#p0")
     public List<NewJob> findAllLimit(int num) {
         return botRelationRepository.findAllLimit(num);
     }
        .....
}
@CachePut
针对方法配置,能够根据方法的请求参数对其结果进行缓存,和 @Cacheable不同的是,它每次都会触发真实方法的调用 。
简单来说就是用户更新缓存数据。但需要注意的是该注解的value 和key必须与要更新的缓存相同,也就是与@Cacheable 相同。
示例:
 //按条件更新缓存
@CachePut(value = "newJob", key = "#p0")
public NewJob updata(NewJob job) {
     NewJob newJob = newJobDao.findAllById(job.getId());
     newJob.updata(job);
     return job;
}
@CacheEvict
配置于函数上,通常用在删除方法上,用来从缓存中移除相应数据。除了同@Cacheable一样的参数之外,它还有下面两个参数:
-
allEntries:非必需,默认为false。当为true时,会移除所有数据。如:
@CachEvict(value=”testcache”,allEntries=true) -
beforeInvocation:非必需,默认为false,会在调用方法之后移除数据。当为true时,会在调用方法之前移除数据。 如:
@CachEvict(value=”testcache”,beforeInvocation=true)
        @Cacheable(value = "emp",key = "#p0.id")
        public NewJob save(NewJob job) {
            newJobDao.save(job);
            return job;
        }
        //清除一条缓存,key为要清空的数据
        @CacheEvict(value="emp",key="#id")
        public void delect(int id) {
            newJobDao.deleteAllById(id);
        }
        //方法调用后清空所有缓存
        @CacheEvict(value="accountCache",allEntries=true)
        public void delectAll() {
            newJobDao.deleteAll();
        }
        //方法调用前清空所有缓存
        @CacheEvict(value="accountCache",beforeInvocation=true)
        public void delectAll() {
            newJobDao.deleteAll();
        }
@CacheConfig
统一配置本类的缓存注解的属性,在类上面统一定义缓存的名字,方法上面就不用标注了,当标记在一个类上时则表示该类所有的方法都是支持缓存的
    @CacheConfig(cacheNames = {"myCache"})
    public class SampleServiceImpl implements SampleService {
        @Override
        @Cacheable(key = "targetClass + methodName +#p0")
        //此处没写value
        public List<BotRelation> findAllLimit(int num) {
            return botRelationRepository.findAllLimit(num);
        }
        .....
    }
SpEL上下文数据
Spring Cache提供了一些供我们使用的SpEL上下文数据,直接摘自Spring官方文档:
| 名称 | 位置 | 描述 | 示例 |
|---|---|---|---|
| methodName | root对象 | 当前被调用的方法名 | #root.methodname |
| method | root对象 | 当前被调用的方法 | #root.method.name |
| target | root对象 | 当前被调用的目标对象实例 | #root.target |
| targetClass | root对象 | 当前被调用的目标对象的类 | #root.targetClass |
| args | root对象 | 当前被调用的方法的参数列表 | #root.args[0] |
| caches | root对象 | 当前方法调用使用的缓存列表 | #root.caches[0].name |
| Argument Name | 执行上下文 | 当前被调用的方法的参数,如findArtisan(Artisan artisan),可以通过#artsian.id获得参数 | #artsian.id |
| result | 执行上下文 | 方法执行后的返回值(仅当方法执行后的判断有效,如 unless cacheEvict的beforeInvocation=false) | #result |
注意
当我们要使用root对象的属性作为key时,我们也可以将“#root”省略,因为Spring默认使用的就是root对象的属性。 如
@Cacheable(key = "targetClass + methodName +#p0")
使用方法参数时,可以直接使用“#参数名”或者“#p参数index”。 如:
@Cacheable(value="users", key="#id")
@Cacheable(value="users", key="#p0")
SpEL提供了多种运算符
| 类型 | 运算符 |
|---|---|
| 关系 | <,>,<=,>=,==,!=,lt,gt,le,ge,eq,ne |
| 算术 | +,- ,* ,/,%,^ |
| 逻辑 | &&, |
| 条件 | ?: (ternary),?: (elvis) |
| 正则表达式 | matches |
| 其他类型 | ?.,?[…],![…],1,$[…] |
不同Cache的实现机制

ConcurrentMap Cache的实现方案
SpringBoot默认使用的是SimpleCacheConfiguration,使用ConcurrentMapCacheManager来实现缓存,ConcurrentMapCache实质是一个ConcurrentHashMap集合对象java内置,所以无需引入其他依赖,也没有额外的配置
ConcurrentMapCache的自动装配声明在SimpleCacheConfiguration中,如果需要也可对它进行额外的装配
//注册id为cacheManager,类型为ConcurrentMapCacheManager的bean
@Bean
public ConcurrentMapCacheManager cacheManager() {
    ConcurrentMapCacheManager cacheManager = new ConcurrentMapCacheManager(); //实例化ConcurrentMapCacheManager
    List<String> cacheNames = this.cacheProperties.getCacheNames(); //读取配置文件,如果配置有spring.cache.cache-names=xx,xx,则进行配置cacheNames,默认是没有配置的
    if (!cacheNames.isEmpty()) {
       cacheManager.setCacheNames(cacheNames);
    }
    return this.customizerInvoker.customize(cacheManager);
    }
调用CacheManagerCustomizers#customize 进行个性化设置,在该方法中是遍历其持有的List。
Caffeine Cache
Caffeine是使用Java8对Guava缓存的重写版本,在Spring Boot 2.0中将取代,基于LRU算法实现,支持多种缓存过期策略。具体查看这里。
Caffeine参数说明
initialCapacity=[integer]: 初始的缓存空间大小
maximumSize=[long]: 缓存的最大条数
maximumWeight=[long]: 缓存的最大权重
expireAfterAccess=[duration]: 最后一次写入或访问后经过固定时间过期
expireAfterWrite=[duration]: 最后一次写入后经过固定时间过期
refreshAfterWrite=[duration]: 创建缓存或者最近一次更新缓存后经过固定的时间间隔,刷新缓存 refreshAfterWrite requires a LoadingCache
weakKeys: 打开key的弱引用
weakValues:打开value的弱引用
softValues:打开value的软引用
recordStats:开发统计功能
注意:
refreshAfterWrite必须实现LoadingCache,跟expire的区别是,指定时间过后,expire是remove该key,下次访问是同步去获取返回新值,而refresh则是指定时间后,不会remove该key,下次访问会触发刷新,新值没有回来时返回旧值
- expireAfterWrite和expireAfterAccess同时存在时,以expireAfterWrite为准。
- maximumSize和maximumWeight不可以同时使用
- weakValues和softValues不可以同时使用
导入依赖
<!-- 使用  caffeine https://mvnrepository.com/artifact/com.github.ben-manes.caffeine/caffeine -->
<dependency>
   <groupId>com.github.ben-manes.caffeine</groupId>
   <artifactId>caffeine</artifactId>
   <version>2.6.0</version>
</dependency>
通过yaml配置
通过配置文件来设置Caffeine
spring:
  cache:
    cache-names: outLimit,notOutLimit
    caffeine:
      spec: initialCapacity=50,maximumSize=500,expireAfterWrite=5s,refreshAfterWrite=7s #
      type: caffeine
通过bean装配
@Bean
@Primary
public CacheManager cacheManagerWithCaffeine() {
        CaffeineCacheManager cacheManager = new CaffeineCacheManager();
        Caffeine caffeine = Caffeine.newBuilder()
                .initialCapacity() //cache的初始容量值
                .maximumSize() //maximumSize用来控制cache的最大缓存数量,maximumSize和maximumWeight不可以同时使用,
                .maximumWeight() //控制最大权重
                .expireAfter(customExpireAfter) //自定义过期
                .refreshAfterWrite(, TimeUnit.SECONDS);  //使用refreshAfterWrite必须要设置cacheLoader
        cacheManager.setCaffeine(caffeine);
        cacheManager.setCacheLoader(cacheLoader); //缓存加载方案
        cacheManager.setCacheNames(getNames());   //缓存名称列表
        cacheManager.setAllowNullValues(false);
        return cacheManager;
    }
配置文件结合Bean装配
    @Value("${caffeine.spec}")
    private String caffeineSpec;
    @Bean(name = "caffeineSpec")
    public CacheManager cacheManagerWithCaffeineFromSpec(){
      CaffeineSpec spec = CaffeineSpec.parse(caffeineSpec);
      Caffeine caffeine = Caffeine.from(spec);  // 或使用 Caffeine caffeine = Caffeine.from(caffeineSpec);
      CaffeineCacheManager cacheManager = new CaffeineCacheManager();
      cacheManager.setCaffeine(caffeine);
      cacheManager.setCacheNames(getNames());
      return cacheManager;
    }
实现CacheLoader
CacheLoader是cache的一种加载策略,key不存在或者key过期之类的都可以通过CacheLoader来自定义获得/重新获得数据。使用refreshAfterWrite必须要设置cacheLoader
    @Configuration
    public class CacheConfig {
        @Bean
        public CacheLoader<Object, Object> cacheLoader() {
            CacheLoader<Object, Object> cacheLoader = new CacheLoader<Object, Object>() {
                @Override
                public Object load(Object key) throws Exception {
                    return null;
                }
                // 达到配置文件中的refreshAfterWrite所指定的时候回处罚这个事件方法
                @Override
                public Object reload(Object key, Object oldValue) throws Exception {
                    return oldValue; //可以在这里处理重新加载策略,本例子,没有处理重新加载,只是返回旧值。
                }
            };
            return cacheLoader;
        }
    }
CacheLoader实质是一个监听,处上述load与reload还包含,expireAfterCreate,expireAfterUpdate,expireAfterRead等可以很灵活的配置CacheLoader。
EhCache
EhCache 是一个纯Java的进程内缓存框架,具有快速、精干等特点,是Hibernate中默认CacheProvider。Ehcache是一种广泛使用的开源Java分布式缓存。主要面向通用缓存,Java EE和轻量级容器。它具有内存和磁盘存储,缓存加载器,缓存扩展,缓存异常处理程序,一个gzip缓存servlet过滤器,支持REST和SOAP api等特点。
导入依赖
引入springboot-cache和ehcache。需要注意,EhCache不需要配置version,SpringBoot的根pom已经集成了。
<dependency>
   <groupId>net.sf.ehcache</groupId>
   <artifactId>ehcache</artifactId>
</dependency>
加入配置:
spring.cache.type=ehcache # 配置ehcache缓存
spring.cache.ehcache.config=classpath:/ehcache.xml # 指定ehcache配置文件路径 ,可以不用写,因为默认就是这个路径,SpringBoot会自动扫描
ehcache配置文件
EhCache的配置文件ehcache.xml只需要放到类路径下面,SpringBoot会自动扫描。
    <ehcache>

        <!--
            磁盘存储:指定一个文件目录,当EHCache把数据写到硬盘上时,将把数据写到这个文件目录下
            path:指定在硬盘上存储对象的路径
            path可以配置的目录有:
                user.home(用户的家目录)
                user.dir(用户当前的工作目录)
                java.io.tmpdir(默认的临时目录)
                ehcache.disk.store.dir(ehcache的配置目录)
                绝对路径(如:d:\\ehcache)
            查看路径方法:String tmpDir = System.getProperty("java.io.tmpdir");
         -->
        <diskStore path="java.io.tmpdir" />
        <!--
            defaultCache:默认的缓存配置信息,如果不加特殊说明,则所有对象按照此配置项处理
            maxElementsInMemory:设置了缓存的上限,最多存储多少个记录对象
            eternal:代表对象是否永不过期 (指定true则下面两项配置需为0无限期)
            timeToIdleSeconds:最大的发呆时间 /秒
            timeToLiveSeconds:最大的存活时间 /秒
            overflowToDisk:是否允许对象被写入到磁盘
            说明:下列配置自缓存建立起600秒(10分钟)有效 。
            在有效的600秒(10分钟)内,如果连续120秒(2分钟)未访问缓存,则缓存失效。
            就算有访问,也只会存活600秒。
         -->
        <defaultCache maxElementsInMemory="10000" eternal="false"
                      timeToIdleSeconds="600" timeToLiveSeconds="600" overflowToDisk="true" />
        <!-- 按缓存名称的不同管理策略 -->
        <cache name="myCache" maxElementsInMemory="10000" eternal="false"
                      timeToIdleSeconds="120" timeToLiveSeconds="600" overflowToDisk="true" />

    </ehcache>
装配
SpringBoot会为我们自动配置 EhCacheCacheManager 这个Bean,如果想自定义设置一些个性化参数时,通过Java Config形式配置。
    @Configuration
    @EnableCaching
    public class CacheConfig {

        @Bean
        public CacheManager cacheManager() {
            return new EhCacheCacheManager(ehCacheCacheManager().getObject());
        }
        @Bean
        public EhCacheManagerFactoryBean ehCacheCacheManager() {
            EhCacheManagerFactoryBean cmfb = new EhCacheManagerFactoryBean();
            cmfb.setConfigLocation(new ClassPathResource("ehcache.xml"));
            cmfb.setShared(true);
            return cmfb;
        }

    }
Redis Cache
Redis 优势
- 性能极高 – Redis能读的速度是110000次/s,写的速度是81000次/s 。
- 丰富的数据类型 – Redis支持二进制案例的 Strings, Lists, Hashes, Sets 及 Ordered Sets 数据类型操作。
- 原子 – Redis的所有操作都是原子性的,意思就是要么成功执行要么失败完全不执行。单个操作是原子性的。多个操作也支持事务,即原子性,通过MULTI和EXEC指令包起来。
- 丰富的特性 – Redis还支持 publish/subscribe, 通知, key 过期等等特性
- 分布式横向扩展
导入依赖
不需要spring-boot-starter-cache
    <dependency>
        <groupId>org.springframework.boot</groupId>
        <artifactId>spring-boot-starter-data-redis</artifactId>
      </dependency>
当你导入这一个依赖时,SpringBoot的CacheManager就会使用RedisCache。
Redis使用模式使用pool2连接池,在需要时引用下面的依赖
    <!-- https://mvnrepository.com/artifact/org.apache.commons/commons-pool2 -->
    <dependency>
        <groupId>org.apache.commons</groupId>
        <artifactId>commons-pool2</artifactId>
        <version>2.6.2</version>
    </dependency>
配置Redis
    spring.redis.database=1 # Redis数据库索引(默认为0)
    spring.redis.host=127.0.0.1 # Redis服务器地址
    spring.redis.port=6379 # Redis服务器连接端口
    spring.redis.password= # Redis服务器连接密码(默认为空)
    spring.redis.pool.max-active=1000 # 连接池最大连接数(使用负值表示没有限制)
    spring.redis.pool.max-wait=-1 # 连接池最大阻塞等待时间(使用负值表示没有限制)
    spring.redis.pool.max-idle=10 # 连接池中的最大空闲连接
    spring.redis.pool.min-idle=2 # 连接池中的最小空闲连接
    spring.redis.timeout=0 # 连接超时时间(毫秒)
如果你的Redis这时候已经可以启动程序了。
装配
如果需要自定义缓存配置可以通过,继承CachingConfigurerSupport类,手动装配,如果一切使用默认配置可不必
装配序列化类型
        @Bean
        public RedisTemplate<String, Object> redisTemplate(LettuceConnectionFactory connectionFactory) {
            // 配置redisTemplate
            RedisTemplate<String, Object> redisTemplate = new RedisTemplate<>();
            redisTemplate.setConnectionFactory(connectionFactory);
            redisTemplate.setKeySerializer(new StringRedisSerializer());//key序列化
            redisTemplate.setValueSerializer(new GenericJackson2JsonRedisSerializer());//value序列化
            redisTemplate.afterPropertiesSet();
            return redisTemplate;
        }
装配过期时间
     /**
         * 通过RedisCacheManager配置过期时间
         *
         * @param redisConnectionFactory
         * @return
         */
        @Bean
        public RedisCacheManager cacheManager(RedisConnectionFactory redisConnectionFactory) {
            RedisCacheConfiguration redisCacheConfiguration = RedisCacheConfiguration.defaultCacheConfig()
                    .entryTtl(Duration.ofHours()); // 设置缓存有效期一小时
            return RedisCacheManager
                    .builder(RedisCacheWriter.nonLockingRedisCacheWriter(redisConnectionFactory))
                    .cacheDefaults(redisCacheConfiguration).build();
        }
自定义缓存配置文件,继承 CachingConfigurerSupport
    /**
     *
     * Created by huanl on 2017/8/22.
     */
    @Configuration
    @EnableCaching
    public class RedisConfig extends CachingConfigurerSupport{
        public RedisConfig() {
            super();
        }

        /**
         * 指定使用哪一种缓存
         * @param redisTemplate
         * @return
         */
        @Bean
        public CacheManager cacheManager(RedisTemplate<?,?> redisTemplate) {
            RedisCacheManager rcm = new RedisCacheManager(redisTemplate);
            return rcm;
        }

        /**
         * 指定默认的key生成方式
         * @return
         */
        @Override
        public KeyGenerator keyGenerator() {
           KeyGenerator keyGenerator = new KeyGenerator() {
               @Override
               public Object generate(Object o, Method method, Object... objects) {
                   StringBuilder sb = new StringBuilder();
                   sb.append(o.getClass().getName());
                   sb.append(method.getName());
                   for (Object obj : objects) {
                       sb.append(obj.toString());
                   }
                   return sb.toString();
               }
           };
           return keyGenerator;
        }

        @Override
        public CacheResolver cacheResolver() {
            return super.cacheResolver();
        }

        @Override
        public CacheErrorHandler errorHandler() {
            return super.errorHandler();
        }

        /**
         * redis 序列化策略 ,通常情况下key值采用String序列化策略
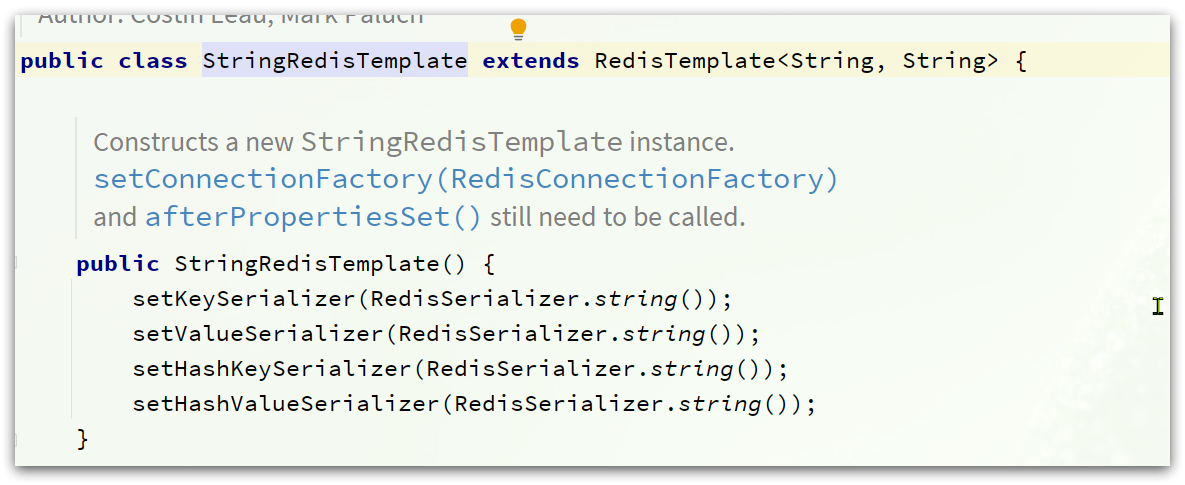
         * StringRedisTemplate默认采用的是String的序列化策略,保存的key和value都是采用此策略序列化保存的。StringRedisSerializer
         * RedisTemplate默认采用的是JDK的序列化策略,保存的key和value都是采用此策略序列化保存的。JdkSerializationRedisSerializer
         * @param factory
         * @return
         */
        @Bean
        public RedisTemplate<Object, Object> redisTemplate(RedisConnectionFactory factory){
            RedisTemplate<Object, Object> redisTemplate = new RedisTemplate<>();
            redisTemplate.setConnectionFactory(factory);

    //        // 使用Jackson2JsonRedisSerialize 替换默认序列化
    //        Jackson2JsonRedisSerializer jackson2JsonRedisSerializer = new Jackson2JsonRedisSerializer(Object.class);
    //        ObjectMapper om = new ObjectMapper();
    //        om.setVisibility(PropertyAccessor.ALL, JsonAutoDetect.Visibility.ANY);
    //        om.enableDefaultTyping(ObjectMapper.DefaultTyping.NON_FINAL);
    //        jackson2JsonRedisSerializer.setObjectMapper(om);
    //
    //
    //        //设置value的序列化方式
    //        redisTemplate.setValueSerializer(jackson2JsonRedisSerializer);
    //        //设置key的序列化方式
    //        redisTemplate.setKeySerializer(new StringRedisSerializer());
    //        redisTemplate.setHashKeySerializer(new StringRedisSerializer());
    //        redisTemplate.setHashValueSerializer(jackson2JsonRedisSerializer);

            //使用fastJson作为默认的序列化方式
            GenericFastJsonRedisSerializer genericFastJsonRedisSerializer = new GenericFastJsonRedisSerializer();
            redisTemplate.setDefaultSerializer(genericFastJsonRedisSerializer);
            redisTemplate.setValueSerializer(genericFastJsonRedisSerializer);
            redisTemplate.setKeySerializer(new StringRedisSerializer());
            redisTemplate.setHashValueSerializer(genericFastJsonRedisSerializer);
            redisTemplate.setHashKeySerializer(new StringRedisSerializer());
            redisTemplate.afterPropertiesSet();

            return redisTemplate;

        }

        /**
         * 转换返回的object为json
         * @return
         */
        @Bean
        public HttpMessageConverters fastJsonHttpMessageConverters(){
            // 1、需要先定义一个converter 转换器
            FastJsonHttpMessageConverter fastConverter = new FastJsonHttpMessageConverter();
            // 2、添加fastJson 的配置信息,比如:是否要格式化返回的json数据
            FastJsonConfig fastJsonConfig = new FastJsonConfig();
            fastJsonConfig.setSerializerFeatures(SerializerFeature.PrettyFormat);
            // 3、在convert 中添加配置信息
            fastConverter.setFastJsonConfig(fastJsonConfig);
            // 4、将convert 添加到converters当中
            HttpMessageConverter<?> converter = fastConverter;
            return new HttpMessageConverters(converter);
        }

    }
… ↩︎

